Advertise with Googlier.comChef Gordon Ramsay Recipes
https://chefgordonramsayrecipe.com/
Best cooking recipes, introduction into Healthy DinningThu, 12 Feb 2026 11:48:49 +0000en-US
hourly
1 https://wordpress.org/?v=7.1.3https://chefgordonramsayrecipe.com/wp-content/uploads/2022/11/cropped-fav-32x32.pngChef Gordon Ramsay Recipes
https://chefgordonramsayrecipe.com/
3232Gordon Ramsay Steak Doneness Guide (With Temperatures)
https://chefgordonramsayrecipe.com/steak-doneness-chart/
Fri, 06 Feb 2026 06:23:46 +0000https://chefgordonramsayrecipe.com/?p=7910Read more at Gordon Ramsay Steak Doneness Guide (With Temperatures)
Steak Doneness Chart (Internal Temperature Guide) Steak doneness chart showing internal temperatures from rare to well done in both Fahrenheit and Celsius. Steak doneness is determined by internal temperature and texture, not just cooking time. Use the chart below to identify the correct steak doneness from rare to well done, with temperatures shown in both [...]
Steak doneness chart showing internal temperatures from rare to well done in both
Fahrenheit and Celsius.
Steak doneness is determined by internal temperature and texture, not just cooking time.
Use the chart below to identify the correct steak doneness from rare to well done, with
temperatures shown in both Fahrenheit and Celsius. Professional chefs like Gordon Ramsay rely on high heat, touch, and proper resting to achieve perfectly cooked steak.
Doneness Level
Internal Temp (°F)
Internal Temp (°C)
Center Color
Texture
Rare
120–125°F
49–52°C
Bright red, cool center
Very soft
Medium Rare
130–135°F
54–57°C
Warm red center
Soft, springy
Medium
140–145°F
60–63°C
Pink center
Firm with slight give
Medium Well
150–155°F
66–68°C
Faint pink
Firm
Well Done
160°F+
71°C+
Brown throughout
Very firm
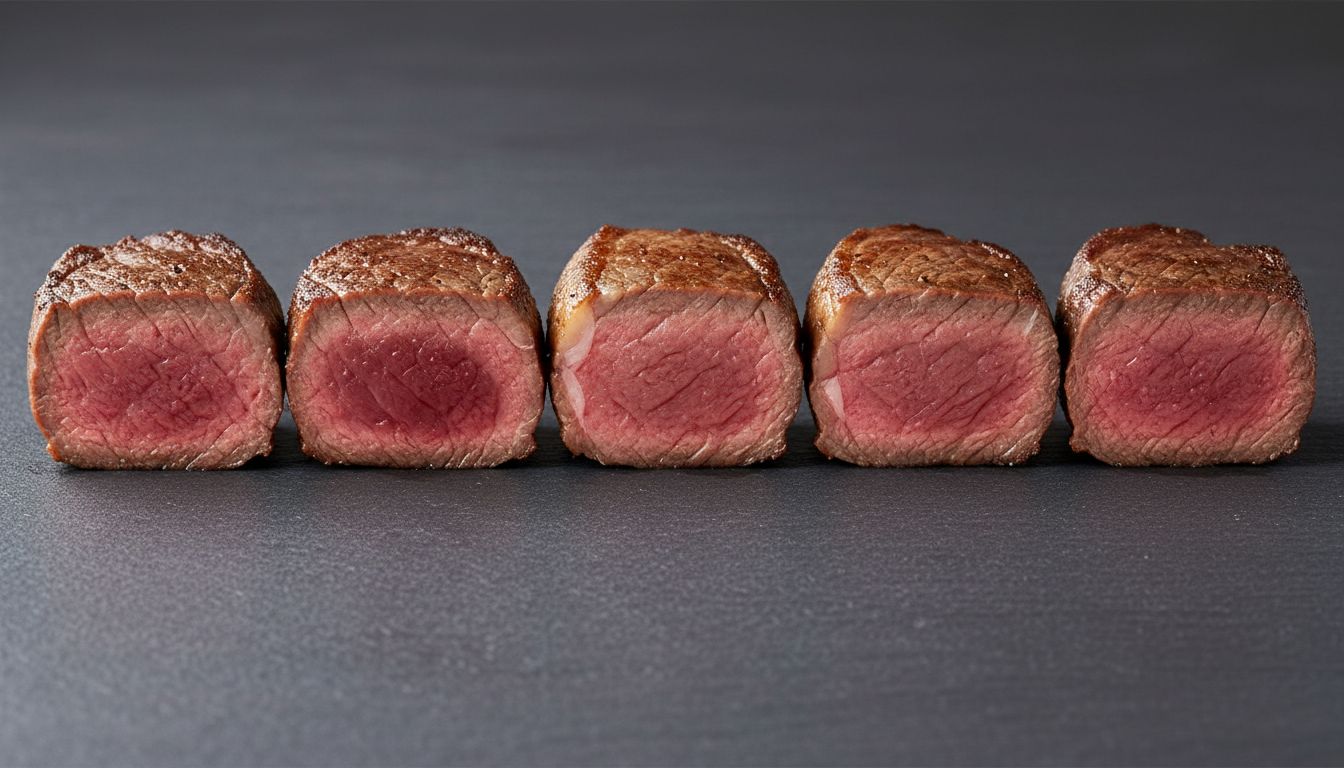
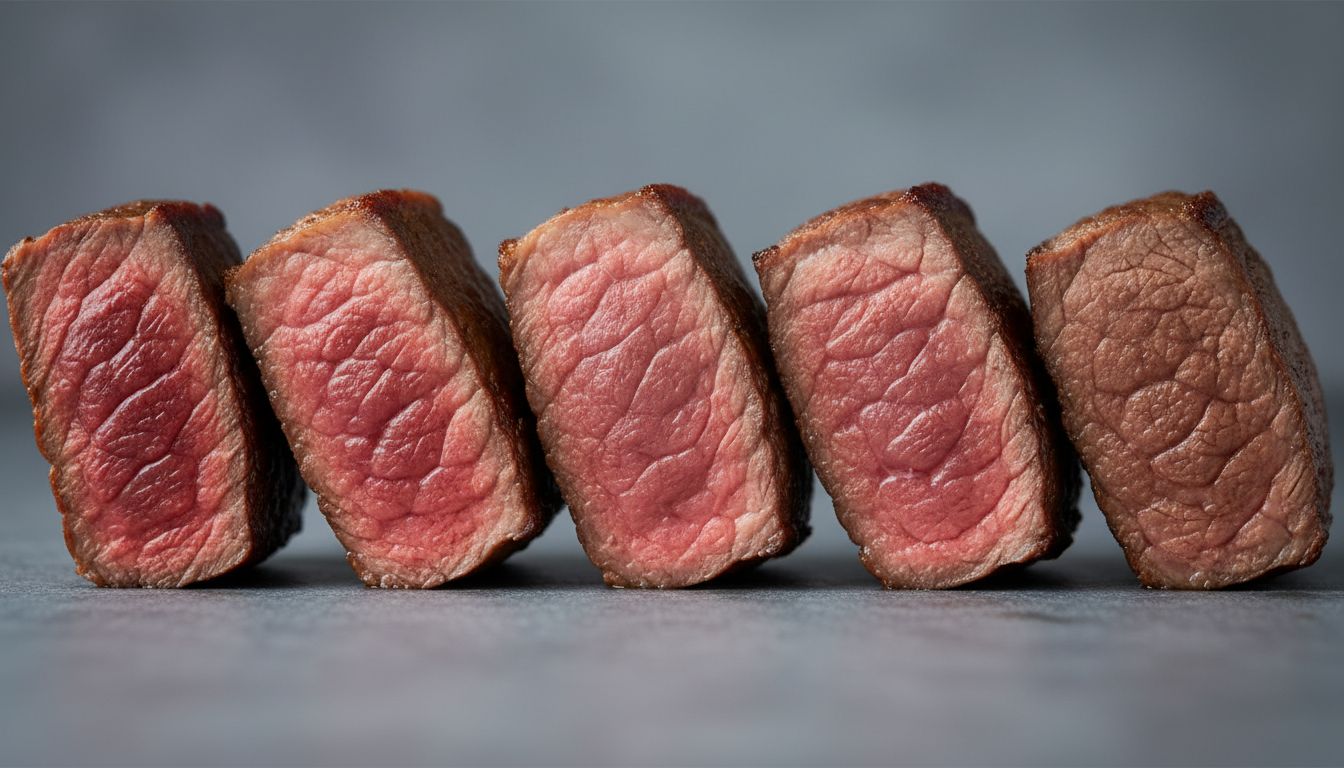
Cross-section comparison showing how steak color and texture change at each doneness
level.
Note: Steak continues cooking by approximately 5–10°F (2–5°C) while
resting. Remove it from heat slightly before reaching your target temperature to avoid
overcooking.
How Gordon Ramsay Tests Steak Doneness (Without a Thermometer)
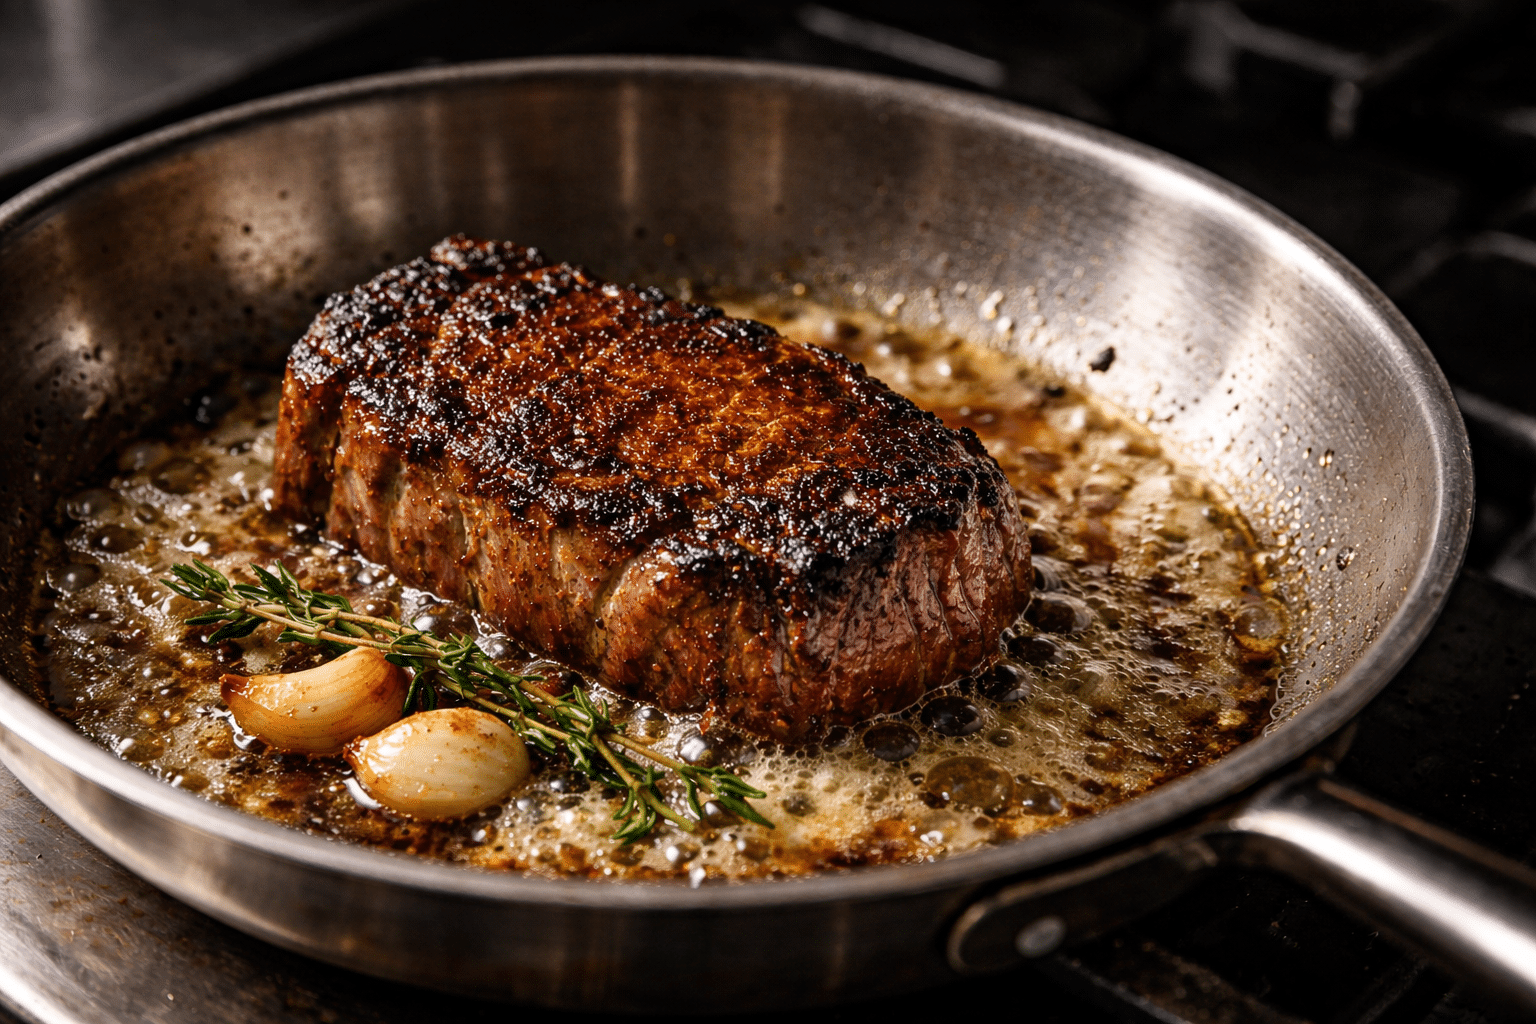
High heat pan searing with butter and herbs creates a flavorful crust before steak
reaches the desired doneness.
Professional chefs like Gordon Ramsay don’t rely on thermometers alone
to judge steak doneness. Instead, they use a combination of touch, resistance, heat
awareness, and timing to determine when a steak is perfectly cooked.
The Finger Test (Touch & Resistance)
Press the center of the steak gently with your finger or tongs. A rare steak will feel
very soft and spongy, while a medium-rare steak springs back slightly when pressed.
As doneness increases, the steak becomes firmer with less give.
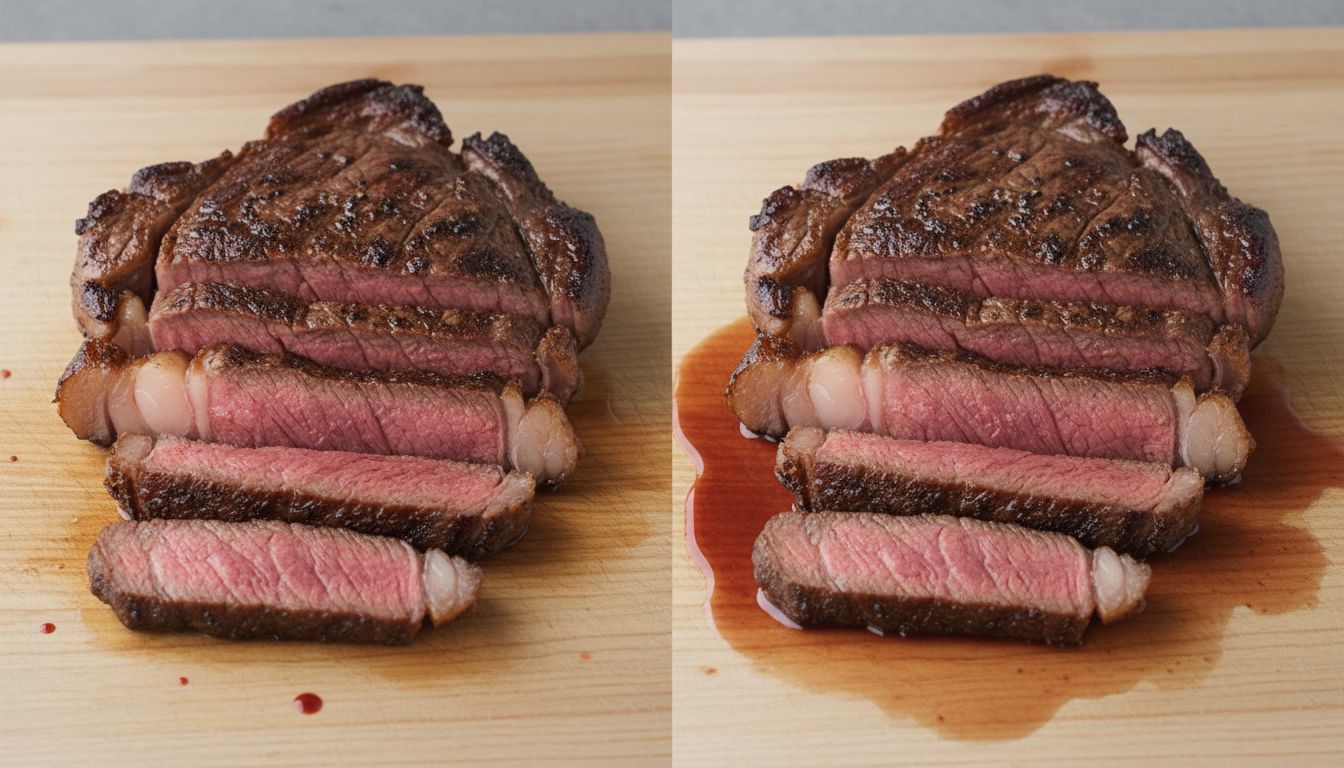
Steak continues to cook after leaving the pan. Resting allows juices to redistribute
and internal temperature to stabilize. Cutting too early can make even a perfectly
cooked steak lose moisture and appear overdone.
Resting steak allows juices to redistribute and prevents moisture loss when sliced.
Medium Rare Steak
A medium-rare steak is cooked to an internal temperature of 130–135°F (54–57°C). It has a warm red center, a well-developed crust,
and is widely considered the ideal doneness for most steak cuts.
Internal Temperature: 130–135°F (54–57°C)
Visual Cue: Deep brown crust with a red, warm center
]]>Gordon Ramsay Olive, Tomato and Rosemary Focaccia Recipe
https://chefgordonramsayrecipe.com/olive-tomato-and-rosemary-focaccia/
Sun, 14 Dec 2025 09:48:14 +0000https://chefgordonramsayrecipe.com/?p=7897Read more at Gordon Ramsay Olive, Tomato and Rosemary Focaccia Recipe
Gordon Ramsay Olive, Tomato and Rosemary Focaccia Recipe This Gordon Ramsay focaccia recipe delivers a light, airy crumb with a crisp olive-oil crust, topped generously with olives, cherry tomatoes, and fresh rosemary. The dough is gently proofed, dimpled by hand, and baked hot to achieve classic Italian focaccia texture and flavor. Gordon Ramsay Olive, [...]
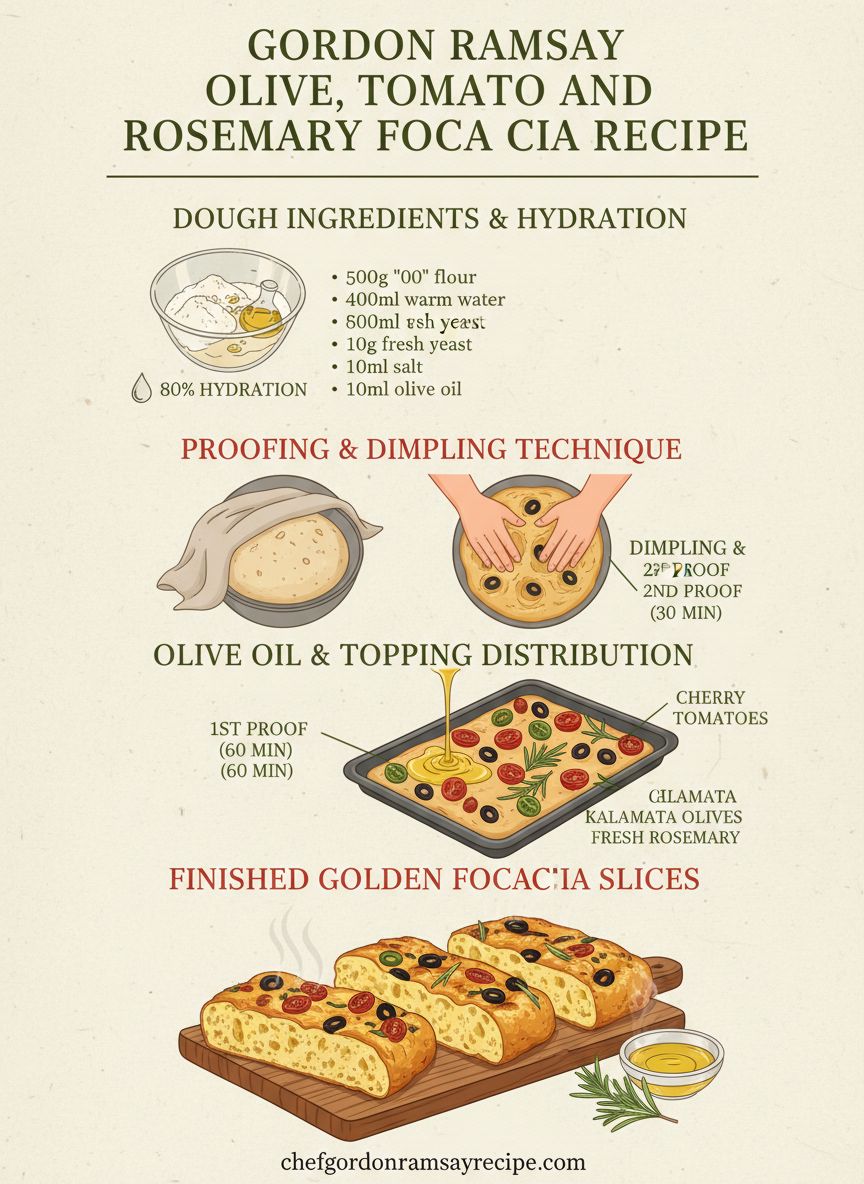
Gordon Ramsay Olive, Tomato and Rosemary Focaccia Recipe
This Gordon Ramsay focaccia recipe delivers a light, airy crumb with a crisp olive-oil crust, topped generously with olives, cherry tomatoes, and fresh rosemary. The dough is gently proofed, dimpled by hand, and baked hot to achieve classic Italian focaccia texture and flavor.
Gordon Ramsay Olive, Tomato and Rosemary Focaccia Recipe
A classic Italian-style focaccia with a soft interior, crisp base, and fragrant toppings of rosemary, olives, and roasted tomatoes—finished with good olive oil and sea salt.
Ingredients
500 g strong white bread flour
7 g fast-action dried yeast
1½ tsp fine sea salt
325 ml warm water
4 tbsp extra-virgin olive oil (plus more for baking)
Cherry tomatoes, halved
Black or green olives, pitted
Fresh rosemary sprigs
Flaky sea salt, for finishing
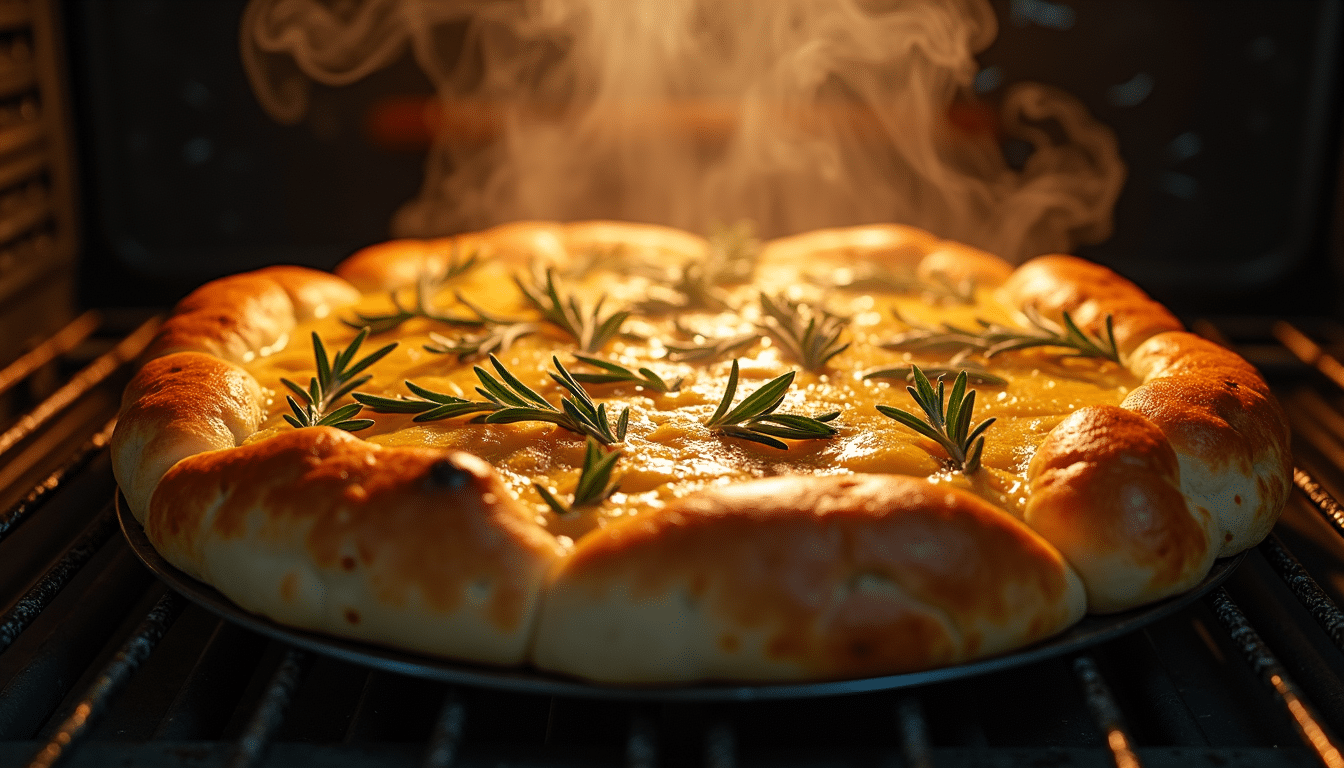
High heat ensures crisp edges and soft crumb.
Method
Combine flour, yeast, and salt in a large bowl. Add warm water and olive oil, then mix until a sticky dough forms.
Knead on a lightly oiled surface for 8–10 minutes until smooth and elastic. Place in an oiled bowl, cover, and let rise until doubled in size.
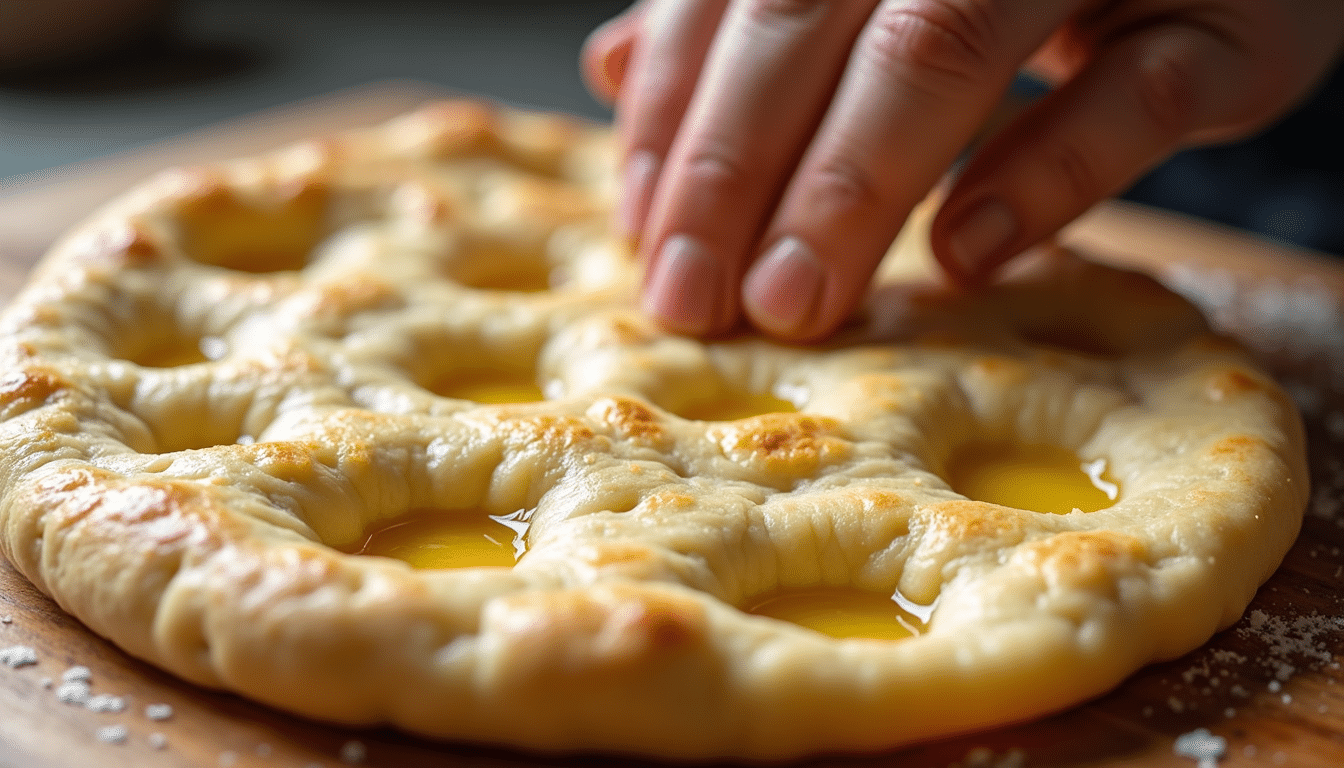
Lightly oil a baking tray. Tip the dough onto it and gently stretch to fill the tray without knocking out too much air.
Use your fingertips to dimple the dough all over. Scatter olives, tomatoes, and rosemary evenly across the surface.
Drizzle generously with olive oil and sprinkle with flaky sea salt. Leave to prove again until slightly puffed.
Bake in a preheated oven at 220°C / 425°F for 20–25 minutes until golden and crisp underneath.
Remove from the oven, drizzle with a little more olive oil, and cool slightly before slicing.
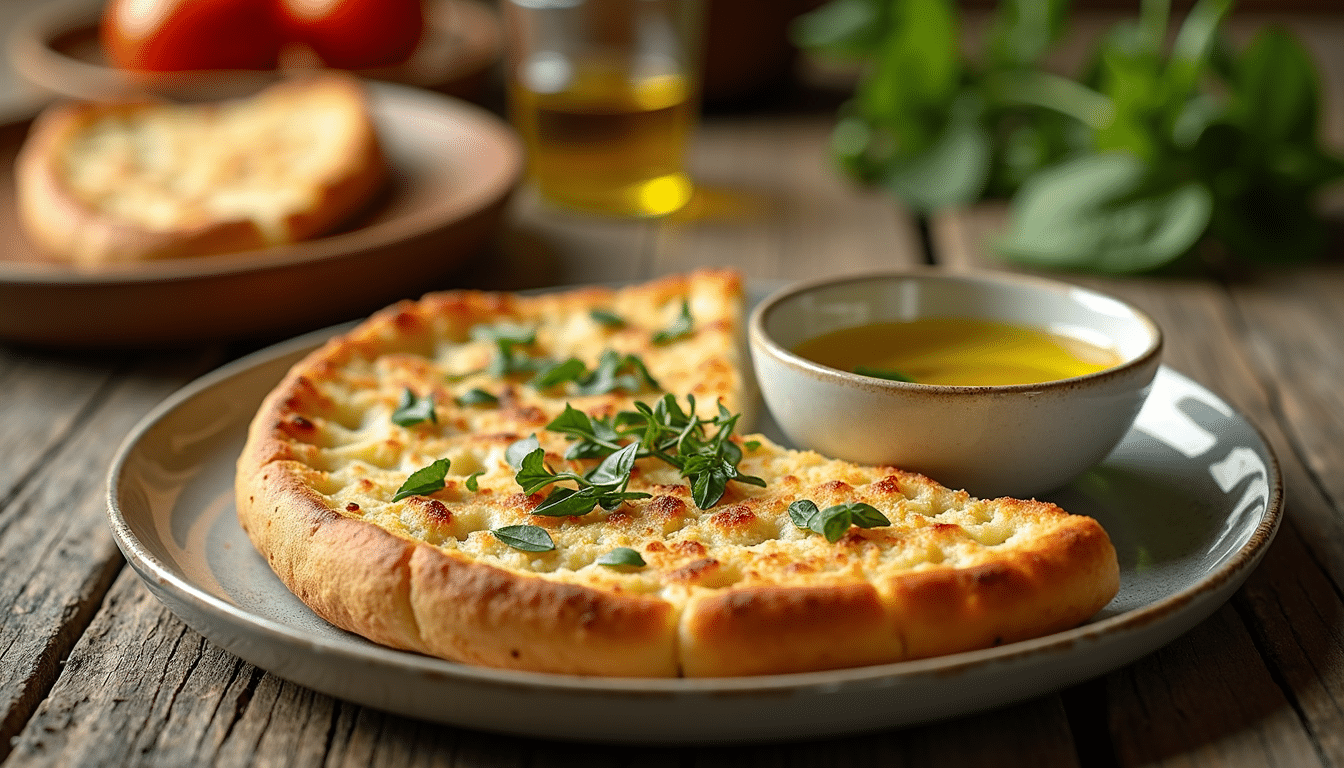
Serve warm with extra olive oil.
Frequently Asked Questions
Why is focaccia dough wetter than regular bread dough?
Focaccia uses a higher hydration dough to create larger air pockets and a lighter, more open crumb. This moisture also helps achieve a soft interior with a crisp olive-oil crust.
Do I need strong bread flour for focaccia?
Yes. Strong bread flour provides enough gluten strength to support fermentation and hold air, giving focaccia its structure without becoming dense.
Why is olive oil used so generously in focaccia?
Olive oil prevents sticking, enhances flavor, and helps create focaccia’s signature golden, crisp exterior while keeping the inside tender.
Can focaccia dough be cold-proofed?
Absolutely. Cold-proofing the dough overnight in the refrigerator improves flavor development and can result in a more complex, aromatic bread.
How should focaccia be stored after baking?
Focaccia is best eaten fresh but can be stored at room temperature for up to 24 hours. For longer storage, freeze once fully cooled and reheat before serving.
Gordon Ramsay Olive, Tomato and Rosemary Focaccia Recipe
]]>Gordon Ramsay Tortilla Soup Recipe (with Chicken Quesadillas)
https://chefgordonramsayrecipe.com/tortilla-soup-recipe-with-chicken-quesadillas/
Sun, 14 Dec 2025 08:17:06 +0000https://chefgordonramsayrecipe.com/?p=7881Read more at Gordon Ramsay Tortilla Soup Recipe (with Chicken Quesadillas)
Gordon Ramsay Tortilla Soup Recipe (Chicken Quesadillas + Spicy Pickles) This Gordon Ramsay Tortilla Soup Recipe builds serious flavor by charring tomatoes, onion, and garlic, blending them with toasted guajillo chiles and tortilla pieces, then simmering the soup with homemade chicken stock. Finish with crunchy fried tortilla strips, queso fresco, cilantro, lime, and serve with [...]
Gordon Ramsay Tortilla Soup Recipe (Chicken Quesadillas + Spicy Pickles)
This Gordon Ramsay Tortilla Soup Recipe builds serious flavor by charring tomatoes, onion, and garlic, blending them with toasted guajillo chiles and tortilla pieces, then simmering the soup with homemade chicken stock. Finish with crunchy fried tortilla strips, queso fresco, cilantro, lime, and serve with cheesy chicken quesadillas and tangy jalapeños en escabeche for heat and bite.
Charring the vegetables builds the deep, smoky backbone of the soup.
Gordon Ramsay Tortilla Soup Recipe (with Chicken Quesadillas)
A bold, charred-tomato tortilla soup with guajillo chiles, crispy tortilla strips, homemade chicken stock, and cheesy chicken quesadillas—plus spicy pickles for a sharp, bright kick.
Ingredients
Chicken stock
~2 lb raw chicken bones (backs/necks/feet, etc.)
1 yellow onion, quartered (root kept intact)
2 large carrots, washed and cut into ~2-inch chunks
4 garlic cloves
2 tsp dried Mexican oregano
1/2 tsp cumin seeds
2 boneless, skinless chicken breasts
Spicy pickles (jalapeños en escabeche)
1 tbsp neutral oil (e.g., canola)
~1 lb jalapeños, sliced into long strips (seeds removed if desired)
~1 lb carrots, peeled and sliced diagonally (~1/4-inch)
1/2 white onion, sliced (~1/4-inch)
6 garlic cloves, peeled
1 tsp kosher salt
2 bay leaves
1 tsp black peppercorns
1 tsp dried oregano (preferably Mexican)
1/2 tsp cumin seeds
2 cups distilled white vinegar
2 cups water
Tortilla soup
5 Roma tomatoes
5 garlic cloves (leave skins on for charring)
1 small white onion (or half large), quartered with root attached
2 dried guajillo chiles, stemmed/seeded and torn (use 3 for more heat)
3 corn tortillas (6-inch), torn into pieces
6–8 cups homemade chicken stock (divided)
Kosher salt, to taste
Crispy tortilla strips
6 corn tortillas, cut into 1/2-inch strips
Vegetable oil (for frying)
Kosher salt
Chicken quesadillas
Shredded chicken (reserved from stock)
Good-quality corn tortillas
1/2 cup shredded Oaxaca cheese
1/2 cup shredded cheddar or low-moisture mozzarella
Chopped spicy pickled veg (optional)
To serve
Quesadillas
Crumbled queso fresco
Cilantro leaves
Hot sauce (optional)
Lime wedges
(Optional) avocado, if you like
Fry in batches and salt immediately for maximum crunch.
Method
Roast for stock: Heat oven to 450°F / 232°C. Roast chicken bones and the stock vegetables until well browned and caramelized (about 45–60 minutes).
Simmer stock + poach chicken: Add roasted bones/veg to a large pot with oregano and cumin. Add about 12 cups water. Bring to a boil, then reduce to a steady simmer.
Add chicken breasts and cook until done (about 10–15 minutes; target 165°F / 74°C). Remove, cool slightly, then shred; reserve for quesadillas.
Finish stock: Keep the stock gently simmering at least 1 hour (longer if possible), skimming any foam/impurities. Strain. Cool and refrigerate (up to 5 days) or freeze (up to ~3 months).
Make spicy pickles (escabeche): In a heavy pot over medium heat, warm oil. Add jalapeños, carrots, onion, garlic, and salt. Cook until starting to soften.
Add bay leaves, peppercorns, oregano, and cumin; cook until veg is tender and onion turns translucent. Add vinegar + water and simmer until jalapeños turn a muted green. Cool and store airtight.
Build the soup base: Under a broiler (high) or in a hot cast iron skillet, char tomatoes, garlic (in skins), and onion until deeply browned.
Toast guajillo chiles briefly—do not burn them. Peel the charred garlic once cool enough.
Blend: Add charred veg, chiles, 2 cups chicken stock, and torn tortilla pieces to a blender. Blend until very smooth.
Simmer soup: Pour into a pot. Add 4–6 more cups stock (adjust for your preferred thickness; it thickens slightly as it cooks). Salt to taste. Bring to a boil, then simmer about 30 minutes.
Crispy tortilla strips: Heat oil in a high-walled skillet to about 1/2-inch depth. Fry tortilla strips in batches until golden and crisp.
Drain on paper towels and season generously with salt.
Chicken quesadillas: Warm a tortilla in a dry skillet, flip, add a handful of cheeses, then add shredded chicken (and chopped pickles if using) to one side.
Fold and cook until melted and hot, turning as needed. Slice into wedges if desired.
Serve: Taste and adjust seasoning. Ladle soup into bowls and top with queso fresco, cilantro, hot sauce (optional), and a big squeeze of lime.
Add tortilla strips on top and serve with quesadillas alongside.
Frequently Asked Questions
Why does this tortilla soup start with charred tomatoes and onion?
Charring builds smoky depth and a richer “roasted” backbone before you even simmer. Blending the charred veg with stock creates a fuller, more restaurant-style broth.
What do the tortilla pieces in the blender actually do?
They thicken the soup naturally and add subtle corn flavor. Use less stock if you want it spoon-coating; add more if you prefer a lighter broth.
Can I use store-bought stock?
Yes, but choose a low-sodium stock so you control seasoning. Homemade stock will taste cleaner and more gelatin-rich, which improves body and mouthfeel.
How do I keep tortilla strips crispy?
Fry in small batches, salt immediately, and store uncovered until serving. Add them at the last moment so they stay crunchy instead of soaking.
Are the spicy pickles necessary?
They’re optional, but they sharpen the dish with acidity and heat. Even a spoonful on the side wakes up the soup and balances the richness of cheese and stock.
Cheesy chicken quesadillas make this tortilla soup a full meal.
]]>Puerto Rican Crispy Rice (Pegao-Style) Recipe – Gordon Ramsay Inspired
https://chefgordonramsayrecipe.com/puerto-rican-crispy-rice-pegao-recipe-chef-ramsay/
Sat, 13 Dec 2025 17:44:38 +0000https://chefgordonramsayrecipe.com/?p=7867Read more at Puerto Rican Crispy Rice (Pegao-Style) Recipe – Gordon Ramsay Inspired
Puerto Rican Crispy Rice (Pegao-Style) This pegao-style crispy rice is built for leftovers: crisp chicken skin, render spicy chorizo with onion and garlic, then press arroz con gandules into a hot pan until the bottom turns deeply golden. Flip it onto a platter, top with buttery garlic-pepper eggs, and finish with cilantro for a punchy, [...]
This pegao-style crispy rice is built for leftovers: crisp chicken skin, render spicy chorizo with onion and garlic, then press arroz con gandules into a hot pan until the bottom turns deeply golden. Flip it onto a platter, top with buttery garlic-pepper eggs, and finish with cilantro for a punchy, crunchy, savory plate.
Firm pressure and high heat are the secrets to building a proper pegao-style crust.
Puerto Rican Crispy Rice (Pegao-Style)
A bold, crispy, cast-iron rice dish made from leftovers—chicken, chorizo, and arroz con gandules—finished with garlicky pepper eggs and fresh cilantro.
Puerto Rican chorizo (or another raw spicy sausage), casing removed
Kosher salt
2 cups leftover arroz con gandules (rice with pigeon peas)
1 Puerto Rican yellow pepper (or any hot pepper), finely diced
Unsalted butter
2 eggs
1/2 cup cilantro, chopped
The signature pegao crust — deeply caramelized, crunchy, and packed with flavor.
Method
Heat a cast-iron skillet over high heat until properly hot. Season the chicken with salt and lay it skin-side down to crisp.
Once the skin is deeply golden, lift the chicken out and reserve. Scrape up the browned bits from the pan.
Add about 1 tablespoon olive oil. Tip in the onion, most of the sliced garlic (save 1 clove), and the sausage meat.
Stir and press it into the pan so it cooks as a flavorful base. Season lightly with salt; add a touch more oil if needed.
Pull the chicken meat (and crispy skin) off the bones in big chunks. When the onions start to caramelize and the sausage is cooked through,
fold the chicken back in. Warm through, then scrape the whole mixture into a bowl and keep it ready.
Return the cast iron to high heat. Add a few tablespoons of olive oil and let it shimmer. Spread the leftover rice in an even layer and press it down firmly
(this is how you build that crackly, golden bottom). Spoon the chicken–chorizo mixture over the top and flatten it to cover the rice.
In a separate nonstick pan, add ~2 tablespoons olive oil, the reserved sliced garlic clove, and the diced hot pepper. Season lightly and cook over medium heat
until softened, then add a few knobs of butter.
Dot a little butter around the edges of the rice in the cast iron to boost browning and caramelization. Keep the heat assertive, but don’t burn it—aim for deep golden.
Once the butter melts in the nonstick pan, crack in the eggs over the garlicky pepper mix. Reduce to medium-low and cook until the whites are set.
Sprinkle half the cilantro over the eggs. Add the remaining cilantro over the rice-and-chicken skillet.
To serve: remove the cast iron from heat. Place a large plate/platter on top, then carefully invert so the crispy rice releases onto the plate.
Give it a firm tap if needed. Top with the eggs and spoon over any garlicky peppers from the pan. Serve immediately while the crust is loud and crisp.
The moment of truth — flipping the pegao to reveal its golden, crackling base.
Frequently Asked Questions
Is “pegao” a whole dish or the crispy rice layer?
Traditionally, “pegao” refers to the prized crispy rice that sticks to the bottom/edges of the pot. This recipe uses that idea—pressing rice hard into a hot pan—to create a bold, pegao-style crunchy base.
What rice works best if I don’t have arroz con gandules?
Use cold, cooked medium/long-grain rice. Day-old rice crisps better because it’s drier, which helps you get that golden crust without turning mushy.
How do I avoid burning the crust?
Use enough oil, press the rice into an even layer, and listen for a steady sizzle—not smoking. If it smells sharp or acrid, drop the heat slightly and give it time to brown gradually.
Can I make it without cast iron?
Yes—use a heavy, wide pan that holds heat well. The key is sustained heat and firm pressure on the rice so the bottom browns evenly.
What’s the best way to flip it cleanly?
Rest the pan off heat briefly, place a large plate tightly over the skillet, then invert confidently. Tap the pan firmly to release the rice. If it sticks, give it another decisive tap—don’t pry and shatter the crust.
]]>Beet Cappelletti With Meyer Lemon-Zested Goat Cheese & Beet Green Pesto by Gordon Ramsay
https://chefgordonramsayrecipe.com/beet-cappelletti-with-meyer-lemon-zested-goat-cheese-beet-green-pesto/
Wed, 23 Jul 2025 07:42:24 +0000https://chefgordonramsayrecipe.com/?p=7846Read more at Beet Cappelletti With Meyer Lemon-Zested Goat Cheese & Beet Green Pesto by Gordon Ramsay
A stunning spring dish that elevates homemade pasta with vibrant pink beet cappelletti stuffed with tangy Meyer lemon‑zested goat cheese Chef Gordon Ramsay style. Topped with a fresh beet-green pesto and drizzles of olive oil, this recipe is as easy as it is show‑stopping—and perfect for impressive dinner parties or vegetarian celebrations. Achieving the ideal [...]
A stunning spring dish that elevates homemade pasta with vibrant pink beet cappelletti stuffed with tangy Meyer lemon‑zested goat cheese Chef Gordon Ramsay style. Topped with a fresh beet-green pesto and drizzles of olive oil, this recipe is as easy as it is show‑stopping—and perfect for impressive dinner parties or vegetarian celebrations.
Achieving the ideal texture relies heavily on your dough’s elasticity—measuring ingredients precisely ensures a balance that’s tender yet resilient under boiling water. Using exactly 3 ounces (84g) of beet puree adds vibrant color without compromising structure. When rolling out, lightly flour your surface and hands to prevent sticking, but avoid excess to keep the dough supple. Cutting shapes with a 3-inch round or fluted pastry cutter guarantees uniformity, promoting even cooking and tight seals around the Meyer lemon-zested goat cheese filling. Resting your dough in the fridge for up to three days improves pliability, allowing you to assemble cappelletti with confidence and finesse.
How do you make beet cappelletti with lemon goat cheese? To make beet cappelletti, mix roasted beet purée with flour and eggs to form the pasta dough. Fill with lemon-zested goat cheese and shape into cappelletti. Cook until al dente and serve with a fresh pesto made from beet greens, olive oil, garlic, pine nuts, and Parmesan.
Unveiling the Ingredients
Each element in this beet cappelletti recipe serves a purpose, combining vibrant flavors and textures that elevate every bite. From the earthiness of beet-infused pasta to the brightness of Meyer lemon in the goat cheese filling, and the rich nuttiness of pistachio in the pesto, these components create a harmonious balance. Precise measurements and thoughtful preparation ensure you’ll achieve a dish that’s as visually stunning as it is delicious, inviting you to explore layers of color, aroma, and taste.
Essential Components of Beet Pasta
The beet pasta dough starts with 3 ounces (84g) of beet puree, ideally from pre-roasted beets blended smooth with a splash of red wine vinegar to enhance flavor and workability. The beet’s natural sugars deepen both color and taste while contributing subtle earthy sweetness. Lightly flour your workspace and hands to get the dough rolling paper-thin without drying it out. Weighing your ingredients precisely helps maintain dough elasticity, preventing it from tearing during shaping and cooking.
The Art of Meyer Lemon-Zested Goat Cheese Filling
This filling marries tangy goat cheese with the bright zest of Meyer lemon, offering a refreshing citrus note that cuts through the richness. The lemon zest isn’t just for aroma—it adds subtle acidity that enhances the creamy texture while balancing the earthiness of the beet pasta. You’ll find the vibrant flavors in every spoonful a perfect foil to the mildly sweet pasta exterior.
By grating fresh Meyer lemon zest directly into the goat cheese, you infuse the filling with crucial oils that lift the overall palate experience. The choice of Meyer lemon, sweeter and less acidic than standard lemons, ensures the citrus flavor is gentle yet pronounced, providing an elegant burst that complements rather than overpowers the delicate goat cheese. To intensify this synergy, lightly chilling the filling helps it firm up for easier scooping and even distribution inside each cappelletti.
Exploring Beet Green Pistachio Pesto
Beet green pistachio pesto turns often-overlooked beet leaves into a vibrant, flavorful sauce packed with texture and nutrition. The pistachios lend a buttery crunch while the beet greens contribute subtle bitterness and deep color. This pesto acts as a lively counterpoint, adding depth without overwhelming the delicate pasta and filling.
Blending tender beet greens with toasted pistachios, garlic, olive oil, and a sprinkle of Parmesan creates a pesto that’s both fresh and satisfying. The nuts add healthy fats and a creamy mouthfeel, while the slight bitterness of beet greens brightens the dish with an earthy complexity. Using fresh beet greens not only reduces waste but introduces a unique twist that elevates this cappelletti beyond traditional preparations.
Beet Cappelletti With Meyer Lemon-Zested Goat Cheese & Beet Green Pesto
]]>Ricotta Gnudi Al Limone With Spring Vegetables – Gordon Ramsay Recipe
https://chefgordonramsayrecipe.com/ricotta-gnudi-al-limone-with-spring-vegetables/
Wed, 23 Jul 2025 05:29:53 +0000https://chefgordonramsayrecipe.com/?p=7826Read more at Ricotta Gnudi Al Limone With Spring Vegetables – Gordon Ramsay Recipe
This delightful recipe guides you through making light and tender ricotta gnudi infused with bright lemon flavors, perfectly complemented by fresh spring vegetables. As you prepare this dish, you’ll learn how to balance textures and vibrant tastes while avoiding common pitfalls like overly wet dough, which can make the gnudi fall apart. By following each step carefully, you’ll create a fresh, elegant meal that showcases your culinary skills and celebrates seasonal ingredients in a healthy and delicious way.
How to Make Ricotta Gnudi al Limone With Spring Vegetables
Drain ricotta:
Wrap 2 cups of ricotta in cheesecloth and let it drain in the fridge for 1–2 hours to remove excess moisture.
Make gnudi dough:
In a bowl, mix the drained ricotta, egg, yolk, Parmesan, lemon zest, salt, pepper, and flour until just combined.
Shape and chill:
Scoop the dough, roll into small balls, and place on a semolina-dusted tray. Chill for at least 30 minutes.
Cook the gnudi:
Boil salted water and cook the gnudi for 3–4 minutes until they float to the top. Remove gently with a slotted spoon.
Prepare wilted greens:
Sauté shallots in olive oil, then add spinach or spigarello and cook until just wilted. Set aside.
Cook spring vegetables:
In butter, sauté asparagus, snap peas, and radish slices for 3–4 minutes. Add lemon juice and remove from heat.
Make the sauce:
Melt butter with garlic and chili flakes. Deglaze with white wine and reduce slightly to create a light sauce.
Assemble and serve:
Toss cooked gnudi in the butter sauce. Plate over wilted greens, top with spring vegetables, lemon zest, pine nuts, and basil.
Unveiling Ricotta Gnudi: A Culinary Delight
Ricotta gnudi embody a delicate balance of simplicity and sophistication, offering a lighter, ethereal alternative to traditional gnocchi. The pillowy texture melts effortlessly on your palate, elevated by subtle lemon zest that brightens each bite. Infused with spring vegetables, this dish captures seasonal freshness while maintaining a classic Italian charm that you can appreciate with every forkful.
The Art of Crafting Gnudi
Crafting gnudi requires a gentle touch: mixing ricotta with just enough flour and eggs to bind without overwhelming the lightness is key. You shape the dough into small, rustic pillows and briefly boil them until they float, a sign that you’ve achieved the perfect tender consistency. Each step demands precision, ensuring your gnudi remain supple yet hold their form through cooking.
Choosing the Right Ricotta and Ingredients
Select ricotta with high moisture content and fresh, mild flavor for ideal gnudi texture. Whole milk ricotta provides creaminess that low-fat versions can’t match. Incorporating aged Parmesan adds depth, while fresh herbs like sage or chives introduce vibrant accents that complement the lemon’s brightness. Season your mixture with just enough salt to enhance, avoiding overpowering the delicate base.
Diving deeper, fresh ricotta made within 24 hours of purchase significantly improves the outcome, offering a silkier texture that holds together without excess flour. Opting for artisanal ricotta from small producers often ensures superior quality and flavor nuances compared to mass-market options. Meanwhile, pairing your gnudi with tender spring vegetables like asparagus tips or fava beans enhances both taste and visual appeal, making your dish memorable on every level.
The Symphony of Spring Vegetables
The vibrant medley of spring vegetables elevates the delicate ricotta gnudi with fresh, lively textures and bright, natural flavors. Young peas, asparagus tips, fava beans, and baby carrots each bring a distinctive crispness and subtle sweetness, creating a balanced foundation for the lemon-infused sauce. Integrating these seasonal gems involves mindful timing to preserve their freshness and accentuate their natural vibrancy, transforming your dish into a vivid celebration of spring’s bounty.
Spotlight on Seasonal Choices
Selecting vegetables at their peak ripeness makes a remarkable difference in both taste and nutrition. Tender ramp leaves add a subtle garlicky note, while thinly sliced sugar snap peas introduce a satisfying crunch. Fava beans, when freshly shelled and blanched, offer a creamy texture that contrasts beautifully with sharper-flavored asparagus tips. Prioritize locally sourced, organic options whenever possible to maximize both flavor and environmental impact, ensuring your dish sings with authenticity.
Preparing and Cooking Techniques for Freshness
To maintain vibrant color and texture, blanching your spring vegetables briefly in salted boiling water before shocking them in ice water halts the cooking process instantly. This technique locks in nutrients and prevents over-softening, which is vital for preserving their natural bite. Techniques like gentle sautéing over medium heat with minimal oil allow you to bring out subtle sweetness without overpowering delicate flavors.
Blanching not only keeps the vegetables crisp but also enhances their visual appeal by preserving their bright green hues. You can time the blanching process precisely—typically 1–2 minutes for peas and asparagus tips, a bit longer for slightly denser carrots—to match each vegetable’s texture. Following with an ice bath stops residual cooking, giving you full control over doneness. Then, when sautéed briefly with fresh herbs or a splash of lemon juice, those vegetables maintain a perfect balance of tenderness and snap, contributing to the dish’s dynamic contrast.
Creating the Perfect White Wine Sauce
White wine sauce enhances the lightness of ricotta gnudi by adding a bright, acidic note that complements spring vegetables beautifully. Balancing acidity with richness requires attention to detail—too much wine can overpower, while too little leaves the sauce flat. Incorporating butter and a splash of cream softens the sharpness without masking the delicate flavors. A few minced shallots sautéed gently in olive oil introduce subtle sweetness and depth. Finish with a squeeze of fresh lemon juice and chopped herbs like tarragon or parsley to elevate the complexity and tie all components together seamlessly.
Selecting the Ideal Wine
Opt for a dry, crisp white wine such as Sauvignon Blanc, Pinot Grigio, or Vermentino, all known for their bright acidity and fresh fruit notes. These varietals won’t overpower the sauce’s subtle flavors or clash with the delicate ricotta gnudi. Avoid oaked wines like Chardonnay, as their buttery, vanilla-forward profiles can dominate. Using a wine you would enjoy drinking ensures the sauce will have a balanced, pleasant character. Keep around ¼ cup for the recipe to maintain the right intensity without becoming too tart.
Steps to Achieve the Perfect Sauce Balance
Start by gently sweating finely chopped shallots in olive oil or butter until translucent, then deglaze with white wine, letting it reduce by at least half to concentrate flavors and cook off harsh alcohol. Adding a small amount of vegetable or chicken stock helps build body without heaviness. Swirl in cold butter off heat to emulsify and bring a glossy finish. Finally, adjust seasoning with salt, freshly ground black pepper, and a splash of lemon juice to brighten and balance acidity. Every stage builds layers, so patience during reduction is key.
In greater detail, keeping the wine reduction controlled is imperative—you want a syrupy consistency that clings lightly to the gnudi, not a watery broth. Maintain medium-low heat to prevent burning the shallots while allowing the wine’s fruity aromas to deepen. Incorporating cold butter piece by piece off direct heat stabilizes the sauce’s texture, preventing it from breaking. The lemon juice added last lifts the flavor profile, ensuring the sauce complements rather than competes with your gnudi and vegetables. Adjust seasoning gradually, tasting frequently for precise harmony.
Plating Like a Pro: Elevating Your Dish
Laying out ricotta gnudi al limone with spring vegetables invites you to blend colors and textures thoughtfully. Position the tender gnudi centrally, nestling them against the vibrant array of wilted greens and crisp vegetables. Use height and spacing to avoid overcrowding; a minimalist approach accentuates the dish’s elegant simplicity. Drizzling the glossy white wine sauce with deliberate streaks or small pools adds movement and shine to the plate. Your plating can transform humble components into a refined presentation that whets the appetite before the first bite.
Garnishing Techniques for Visual Appeal
Small herb sprigs like micro basil or chervil deliver freshness and a pop of green, enhancing the spring theme visually and aromatically. Finely grated lemon zest sprinkled sparingly across the gnudi highlights the lemon accent and adds vibrant flecks. Toasted pine nuts bring golden hues and subtle texture contrast. Avoid overdecorating; choose garnish that complements flavors and colors, creating a harmonious and inviting plate that signals the dish’s bright, delicate character.
Suggested Pairings and Enhancements
Pair ricotta gnudi al limone with a crisp, mineral-driven white wine like a Sauvignon Blanc or dry Vermentino to echo the dish’s acidity and freshness. A light drizzle of high-quality extra virgin olive oil just before serving can deepen flavor richness without overpowering the subtle gnudi. For an extra pop, consider finishing with a few shavings of aged Pecorino Romano, which adds umami depth and complexity, lifting the dish into a fuller, more indulgent experience.
Choosing a well-balanced wine such as Sauvignon Blanc enhances the citrus and herbaceous notes intrinsic to the dish, reinforcing its springtime vibrancy. High-quality olive oil introduces a fruity, peppery layer that weaves through the gnudi and vegetables, harmonizing the components. The salty sharpness of Pecorino Romano not only complements the creamy ricotta but also adds a luxurious texture contrast, subtly enriching every bite. Each pairing and enhancement carefully supports the dish’s delicate flavors, ensuring your serving feels thoughtfully complete and satisfying.
Conclusion
With this in mind, Ricotta Gnudi al Limone with Spring Vegetables offers you a light and refreshing dish that beautifully balances creamy gnudi with the fresh flavors of seasonal produce. By preparing this recipe, you showcase your ability to combine simple ingredients into an elegant meal that highlights both texture and taste. Whether for a special occasion or a wholesome weeknight dinner, this dish allows you to enjoy the vibrant essence of spring while nourishing your body with wholesome ingredients.
Frequently Asked Questions about Ricotta Gnudi Al Limone With Spring Vegetables Recipe
What are gnudi?
Gnudi are Italian dumplings made primarily from ricotta cheese, lighter and fluffier than gnocchi.
Can I make gnudi ahead of time?
Yes. You can shape them and refrigerate up to 24 hours. You can also freeze them uncooked for up to 3 months.
How do I stop gnudi from falling apart?
Drain the ricotta well, chill the dough, and cook in gently simmering—not boiling—water.
Can I use low-fat ricotta?
No. Use full-fat ricotta for best texture and binding. Low-fat versions are too watery and crumbly.
What vegetables go best with gnudi?
Asparagus, snap peas, spinach, spigarello, and thinly sliced radishes pair beautifully with lemon gnudi.
Can I freeze cooked gnudi?
You can, but the texture may suffer. It’s better to freeze them raw and cook them fresh.
Looking for a luxurious breakfast that’s as indulgent as it is simple? This Gordon Ramsay Truffle Scrambled Eggs Recipe takes your morning routine to a whole new level. Inspired by the world-renowned chef’s signature style, these eggs are slow-cooked to creamy perfection and elevated with the earthy richness of shaved black truffle. Paired with warm toasted sourdough and delicate goat cheese, it’s a dish worthy of a five-star brunch — and yes, you can absolutely make it at home. Whether you’re treating yourself or impressing guests, this recipe delivers refined flavor with effortless elegance.
What is Gordon Ramsay’s Truffle Scrambled Eggs Recipe?
Gordon Ramsay’s Truffle Scrambled Eggs Recipe is a luxurious breakfast dish made with softly scrambled eggs cooked over low heat with butter, folded with crème fraîche, and topped with shaved black truffle and goat cheese. Served over toasted sourdough, it delivers creamy, earthy flavor with a gourmet twist.
Heat a large skillet over medium-high heat and drizzle in a tablespoon of olive oil. Sprinkle in a pinch of sea salt. Place the cut sides of your bread slices face-down in the skillet, letting them soak up the warm oil. Toast until golden and slightly crisp around the edges — about 1 to 2 minutes.
Transfer the toasts to a plate, toasted-side up, and while they’re still hot, shave fresh goat cheese generously over the surface. Top with a few delicate slices of black truffle to let the aroma begin to release from the residual heat.
Crack the eggs into a mixing bowl and give them a light whisk — just enough to combine the yolks and whites. Add a few tablespoons of cold butter, cut into small cubes, directly into the eggs. This will melt slowly during cooking and create a luxurious, velvety texture.
Wipe the skillet clean and add a small drizzle of olive oil. Pour in the egg mixture and immediately begin stirring gently with a rubber spatula, folding the mixture continuously to distribute the melting butter. Keep the heat low to medium — the goal is soft, creamy curds, not dry scrambled eggs.
When the eggs are almost set but still slightly runny, stir in a spoonful of crème fraîche to stop the cooking and add tangy richness. Shave fresh black truffle directly into the pan and fold gently to infuse the eggs with their deep, earthy flavor. Taste and season with a pinch of salt and cracked black pepper.
Spoon the creamy truffled eggs generously over the toasted bread with goat cheese. Finish with a final flourish of goat cheese shavings and paper-thin slices of black truffle on top. Serve immediately while warm and aromatic — a breakfast that’s simple yet decadently unforgettable.
2. Black Truffles: The Diamond of the Kitchen Black truffles, often sourced from France or Italy, are considered one of the most luxurious ingredients in the world. A small amount goes a long way, infusing dishes with an intense, earthy aroma that chefs (and food lovers) obsess over.
3. Slow Cooking Makes All the Difference
Unlike typical scrambled eggs that are quickly cooked over high heat, Ramsay’s version is stirred continuously over low heat. This method creates ultra-creamy, almost custard-like eggs — a hallmark of refined European cooking.
4. A Protein-Packed, Gourmet Start
Despite its indulgence, this dish packs nearly 20 grams of protein per serving, making it a satisfying and energy-boosting breakfast — with flair.
5. It’s Served in Michelin-Star Restaurants
Variations of truffle scrambled eggs appear on breakfast menus in many Michelin-starred establishments. Now, with this recipe, you can enjoy the same level of flavor in your own kitchen.
Frequently Asked Questions
What makes Gordon Ramsay’s scrambled eggs different from traditional scrambled eggs?
Gordon Ramsay’s scrambled eggs are cooked slow and low, using continuous stirring over gentle heat. Unlike traditional scrambled eggs that are quickly cooked and often overdone, Ramsay’s method creates a silky, custard-like texture. He also adds cold butter early and stirs in crème fraîche at the end, which halts cooking and adds richness and tang.
Can I use truffle oil instead of fresh truffle?
Yes, but with caution. Truffle oil can be a budget-friendly alternative, but it’s often made with synthetic flavoring rather than real truffles. If you use it, choose a high-quality truffle oil and add just a few drops to the eggs at the end — heat can diminish its aroma. It won’t fully replicate the experience of fresh shaved truffle, but it still adds an earthy depth.
What type of bread pairs best with truffle scrambled eggs?
A thick-cut sourdough, country loaf, or toasted brioche works beautifully. You want something sturdy enough to support the soft scrambled eggs without getting soggy. Ramsay often uses grilled or pan-toasted bread brushed with olive oil, which adds both flavor and texture contrast.
Is crème fraîche necessary in this recipe, or can I substitute it?
Crème fraîche plays a key role — it cools the eggs, stops overcooking, and adds a light tang. If you don’t have crème fraîche, you can use a spoonful of Greek yogurt, sour cream, or even heavy cream as a substitute. Just add it gently at the end to preserve the smooth consistency of the eggs.
Are truffle scrambled eggs healthy or indulgent?
They’re more on the indulgent side — rich in healthy fats and protein, but also higher in calories due to the butter, goat cheese, and truffle. However, they’re incredibly satisfying, and a small portion goes a long way. As an occasional brunch treat, this recipe offers a balanced blend of decadence and nutrition.
]]>Gordon Ramsay 4th of July Festive Summer Berry Trifle Recipe
https://chefgordonramsayrecipe.com/4th-of-july-festive-summer-berry-trifle/
Thu, 29 May 2025 08:52:42 +0000https://chefgordonramsayrecipe.com/?p=7787Read more at Gordon Ramsay 4th of July Festive Summer Berry Trifle Recipe
Gordon Ramsay 4th of July Festive Summer Berry Trifle Recipe is the answer to your search for an unforgettable dessert. Struggling to impress guests at your celebration?
This vibrant, easy-to-make dessert combines a rich, festive flavor with a burst of summer berries and a light, indulgent texture. Our recipe delivers quick results so you can dazzle your friends and family. Let’s dive into the details for a party treat that truly wows!
Gordon Ramsay Summer Berry Trifle – 4th of July Dessert
Ingredients
Macerated Berries
3 cups blueberries, divided
3 cups blackberries, divided
3 cups strawberries
3 cups raspberries
¼ cup sugar
1 large orange
Cream Cheese Whipped Cream
8 ounces cream cheese, softened
1 cup heavy cream
Pinch of salt
1 teaspoon vanilla extrac
Powdered sugar, if desired
Instructions
Macerate the Berries (Red and Blue Separately)
Start by placing ½ cup each of strawberries and raspberries into one large mixing bowl — this is your red berry bowl. In a second large bowl, combine ½ cup each of blueberries and blackberries — your blue berry bowl.
Sprinkle about 2½ tablespoons of sugar over the red berries, and the remaining 1½ tablespoons over the blue berries. Zest an orange, dividing the zest evenly between both bowls, and then squeeze in all the juice from the orange.
Use a potato masher to lightly crush the red berries, just enough to release their juices without turning them to mush. Gently fold in the remaining 4 cups of red berries using a spatula
Rinse the masher and repeat the process with the blue berry bowl: mash lightly, then fold in about 1½ cups each of blueberries and blackberries. Reserve the last 1 cup of each blue and black berry — they’ll be your fresh topping later. Set both bowls aside to macerate and become syrupy and flavorful.
Whip the Cream Cheese Filling
In a large bowl, whip room-temperature cream cheese with a hand mixer until smooth. Slowly stream in heavy cream and a splash of vanilla extract, mixing gently at first to combine. Once incorporated, increase the speed and whip until the mixture is fluffy and light.
Taste it — if you’d like it sweeter, sift in a little powdered sugar and whip again to blend. Set aside, or refrigerate if you’re not using it right away (especially if it’s a warm day).
Prepare Your Trifle Dish (or Springform Pan)
If using an 8” springform pan, line the bottom with parchment paper and the sides with acetate (or parchment), allowing the liner to rise at least 6 inches above the edge. For a more traditional look, you can also use a deep trifle bowl or tall clear glass dish.
Layer the Trifle
Start with about ⅓ of the pound cake pieces, loosely filling the bottom to form a soft but stable base layer. Spoon in half of the red macerated berries, letting that vibrant syrup soak into the cake. Add a generous ¼ of the whipped cream mixture, spreading it gently across the berries.
Now, build your second layer with more pound cake, followed by the blue and black berry mix, and another scoop of the whipped cream mixture. Repeat the process again using the remaining red berries, another layer of pound cake, and one final swirl of cream on top.
Finish with the reserved fresh blueberries and blackberries, gently arranged over the cream for a striking, festive presentation.
Chill and Serve
Cover your trifle and refrigerate overnight to let the flavors meld beautifully. Before serving, let it sit out at room temperature for 20–30 minutes to soften slightly. For extra fun and flair, top it with festive sprinkles or even sparkler candles — light them up as you bring it to the table and watch everyone’s faces light up too.
Recipe Notes:
Make-ahead friendly: This dessert tastes even better after chilling overnight.
Festive tip: Sparkler candles make this a true Independence Day showstopper.
Flavor booster: A splash of orange liqueur or berry syrup can be drizzled into the pound cake layers for adults.
Merging British Culinary Traditions with 4th of July Spirit
Gordon Ramsay’s 4th of July berry trifle transforms the quintessential British dessert into an American celebration centerpiece. Traditional English trifles date back to the 16th century, featuring layers of sponge cake, custard, and seasonal fruit. This patriotic adaptation maintains those classic elements while embracing red, white, and blue ingredients.
The genius lies in preserving authentic British techniques while celebrating American flavors. Whereas traditional trifles might feature sherry-soaked ladyfingers and English strawberries, this festive version incorporates bourbon-infused cake layers and a medley of blueberries, raspberries, and strawberries. The result creates visual drama that screams independence.
What makes this fusion so compelling for holiday entertaining? The answer rests in Ramsay’s masterful balance of familiar comfort with patriotic presentation. According to food historians, trifles gained popularity in America during the colonial period, making this dessert historically appropriate for Independence Day celebrations. Each spoonful delivers creamy vanilla custard, wine-soaked cake, and bursts of summer berries—creating a dessert that honors both culinary heritages while delivering Instagram-worthy layers perfect for backyard barbecues.
Assembly Techniques for a Show-Stopping Presentation
Professional trifle assembly transforms Gordon Ramsay’s 4th of July berry trifle from simple dessert into stunning centerpiece. Layer transparency creates visual drama that guests notice immediately. Start with your glass trifle bowl positioned at eye level, ensuring each colorful stripe remains distinct and purposeful throughout the building process.
Begin assembly by spreading a thin layer of custard across the bottom, followed by cake pieces that fit snugly without gaps. Press berries against the glass walls first—this creates the signature striped effect that makes trifles so photogenic. Add remaining berries to the center, then repeat with custard and whipped cream layers. Each layer should measure approximately one inch thick for optimal visual balance.
The final presentation technique separates amateur attempts from restaurant-quality results. Unlike rushed assembly, allow each layer to settle for 2-3 minutes before adding the next component. Top with carefully arranged star-shaped strawberry slices and blueberry clusters that echo the patriotic theme. This methodical approach ensures clean lines and prevents color bleeding between layers.
People Also Ask
What is the optimal temperature for storing a summer berry trifle to maintain food safety?
To keep your trifle both fresh and safe, store it at or below 40°F (4°C) — the sweet spot for preventing bacterial growth. Since this dessert contains whipped cream and fresh fruit (both highly perishable), refrigeration is essential. After assembling your trifle, cover it tightly and refrigerate immediately, especially in summer. If you're serving it outdoors, try to keep it on ice or return it to the fridge within 2 hours — or just 1 hour if the temperature exceeds 90°F (32°C). Safety first, even with sweet things!
How do the antioxidant properties of different berries affect the nutritional value of the trifle?
Berries are nutritional powerhouses. Blueberries, strawberries, raspberries, and blackberries all contain high levels of anthocyanins, flavonoids, and vitamin C, which help reduce oxidative stress in the body. While this trifle is definitely a treat, using fresh berries instead of sugary syrups adds a real nutritional boost. The darker and deeper the color of the berry, the higher the antioxidant content — so your red, white, and blue trifle actually delivers more than just patriotic flair!
What is the science behind layering ingredients in a trifle to prevent soggy textures?
Great trifle layering is all about strategic moisture control. Start with sponge or cake on the bottom, which acts like a soft sponge, soaking up berry juices without turning to mush. Then add whipped cream or custard, which acts as a barrier, separating the wetter berry layer from the next sponge tier. Keeping your berries lightly macerated (not too syrupy) also helps prevent oversaturation. The goal? Flavors that meld beautifully, but textures that stay distinct until the last spoonful.
How does the pH level of berries interact with dairy components in the trifle?
Berries are naturally acidic (typically with a pH around 3–4), while dairy ingredients like cream and mascarpone are closer to neutral to slightly acidic (around pH 6–6.5). This acidity can enhance flavor contrast, making the cream taste richer and more luxurious. However, too much acidity — like from overly sour berries or lemon juice — can cause dairy to curdle if not handled correctly. That’s why it's important to fold everything gently and avoid combining acidic fruit directly into the cream until serving.
What are the food safety guidelines for preparing and serving a berry trifle during summer outdoor events?
Outdoor summer events and creamy desserts can be tricky. Follow the “2-hour rule” (or 1 hour if it’s scorching outside) — any perishable food, including trifle, should not sit out unrefrigerated beyond this. Store the trifle in a cooler with ice packs or nest the trifle bowl in a larger bowl filled with ice. Use clean utensils, cover the dessert between servings, and avoid direct sun exposure. And if it’s been left out too long, don’t risk it — chill a new batch instead. Safety never takes a holiday!
What drinks pair well with this dessert?
A chilled glass of Prosecco, Moscato, or a berry-infused iced tea pairs wonderfully with the fresh, fruity notes of this trifle. Keep it light, sweet, and celebratory!
Can I make this trifle in advance?
Yes! In fact, it tastes even better after a few hours in the fridge. Just wait to add any delicate toppings like mint leaves or flags until just before serving.
Any fun presentation ideas for parties?
Individual trifles in mason jars or clear cups make for stunning personal servings. Add little flags, sparklers, or color-coordinated spoons for a truly Instagram-worthy finish.
]]>Gordon Ramsay Melted Brie Toast with Macerated Berries Recipe
https://chefgordonramsayrecipe.com/melted-brie-toast-with-macerated-berries/
Thu, 29 May 2025 08:31:38 +0000https://chefgordonramsayrecipe.com/?p=7774Read more at Gordon Ramsay Melted Brie Toast with Macerated Berries Recipe
You can easily elevate your appetizer game with Gordon Ramsay’s Melted Brie Toast with Macerated Berries Recipe, which perfectly blends creamy, warm brie with a sweet-tart berry topping. This recipe guides you through macerating fresh berries 30 minutes in advance to release juicy flavors that complement the melted cheese beautifully. By following these simple steps, you’ll create a gourmet dish that looks and tastes like it belongs in a fine restaurant, all from the comfort of your kitchen. Your guests will be impressed by this elegant, yet effortless, treat.
Melted Brie Toast with Macerated Berries Recipe by Gordon Ramsay
Ingredients
3 cups mixed berries, divided
¼ cup (50g) sugar
Zest of ½ lemon
1 tablespoon lemon juice (Meyer if you can find)
Instructions
n a medium bowl, gently crush 1 cup of mixed berries using the back of a wooden spoon or a potato masher — just enough to release their juices without turning them into jam. Sprinkle in the sugar, fresh lemon zest, and a splash of lemon juice. Give it a stir until you see a glossy syrup forming at the bottom. Fold in the remaining 2 cups of whole berries so they’re beautifully coated. Let the mixture rest at room temperature for 1 to 2 hours to soak up all that flavor magic.
When the berries are bursting with syrupy goodness, crank your broiler to high. Move the oven rack as close to the top as you safely can. Lay thick slices of rustic bread on a baking sheet, and crown each with generous slices of Brie — let them spill slightly over the edges for that irresistible melt. Slide the tray under the broiler for about 30 seconds to 1 minute. Watch it like a hawk — you’re aiming for soft, bubbly Brie, not a kitchen fire!
Once the Brie is gooey and just starting to ooze, remove the toasts and transfer them to serving plates. Spoon a generous heap of the macerated berries (and that luscious syrup!) over the top. Serve immediately while everything is warm and melty — and yes, you’ll need extra napkins.
Visual Feast: Presentation, Pairing, and Pro Tips
The magic of Gordon Ramsay melted brie toast with macerated berries extends beyond taste into compelling presentation and thoughtful accompaniments. Achieving that elegant look calls for layering textures and colors with precision. Consider these approaches:
Strategically place vibrant macerated berries to highlight their juicy freshness
Use fresh thyme sprigs as a vivid green contrast to creamy white brie and ruby reds
Drizzle berry juices thoughtfully, not excessively, for a polished finish
After refining your plating skills, pairing the dish with complementary beverages elevates the overall experience dramatically.
Stunning Plating and Garnishing Techniques
Sculpt a gourmet appearance by spooning macerated berries gently, preserving their whole shape for visual interest. Scatter fresh thyme leaves individually to avoid clumping, creating elegant specks of green across the melted brie. A delicate drizzle of reserved berry juice adds a glossy finish without overpowering the toast. Serving on minimalist white plates enhances colors, allowing the vibrant berries and creamy cheese to pop, making your brie cheese toast irresistible at first glance.
Curating the Perfect Wine and Beverage Pairings
Complement the sweet-tart profile of macerated berries and rich brie cheese with wines that balance acidity and creaminess. A crisp Sauvignon Blanc or a lightly oaked Chardonnay amplifies the fruit’s brightness while matching the cheese’s texture. For red options, a Pinot Noir offers subtle earthiness without overwhelming the toast. Non-alcoholic choices like sparkling elderflower or tart cranberry soda provide refreshing contrasts that enhance every bite.
Delving deeper, Sauvignon Blanc’s vibrant citrus notes resonate with the berry’s natural acidity, cleansing your palate between bites. Chardonnay’s buttery undertones mirror the creamy brie, creating harmony on the tongue. Pinot Noir’s lighter tannins and red fruit complexities echo the berries’ sweetness while adding an elegant dimension. Exploring sparkling beverages, elderflower’s floral sweetness complements the honeyed glaze, whereas cranberry soda’s zest lifts the balsamic tang, rounding out your tasting adventure with nuanced layers.
To wrap up
With this in mind, Gordon Ramsay’s Melted Brie Toast with Macerated Berries recipe offers you an effortless way to impress with a refined appetizer. By combining creamy, melted brie with vibrant, sweet-tart berries, you create a harmonious flavor profile that elevates simple ingredients. Following the technique ensures your toast achieves that perfect balance of warmth, freshness, and visual appeal. Whether for casual gatherings or special occasions, this recipe empowers you to bring a touch of gourmet sophistication to your kitchen with ease and confidence.
People Also Ask
How do I properly macerate the berries for this dish?
To macerate berries like a pro, start by lightly crushing about one-third of them — this helps release their natural juices. Then stir in sugar, fresh lemon zest, and a bit of lemon juice. That combination not only sweetens but also brightens the berries. Fold in the remaining whole berries to keep some texture and let everything sit at room temperature for 1–2 hours. You’ll end up with beautifully softened fruit bathed in a glossy, syrupy sauce that’s perfect for drizzling over warm, melted Brie.
What type of bread is best for making melted brie toast?
The best bread for this dish is thick-cut, rustic, and sturdy — think sourdough, country loaf, or a crusty French baguette sliced on the diagonal. You want a slice that can hold the weight of the melted Brie and juicy berries without turning soggy. Avoid overly soft sandwich bread, as it tends to collapse under all the delicious toppings.
Can I substitute any ingredients in this recipe, and if so, what would work best?
Absolutely! This recipe is quite forgiving. If Brie isn’t your favorite, try Camembert, triple-cream cheese, or even a slice of goat cheese for a tangier twist. For the berries, go with what’s in season — cherries, blackberries, or even sliced figs can be stunning. No lemon? Use orange zest and juice for a slightly different citrus note. Want to tone down the sugar? A drizzle of maple syrup or honey can work beautifully for maceration.
What is the ideal cooking time and temperature for the perfect melted brie?
You’ll want to broil the Brie-topped toast for 30 seconds to 1 minute on high heat — just until the cheese softens and begins to bubble at the edges. Keep your eyes glued to the oven during this step; Brie goes from perfect to puddle in a flash. Position your oven rack as close to the broiler as safely possible for that golden, gooey finish.
Are there any tips for plating and serving this dish attractively?
Definitely — presentation makes this dish even more irresistible. Start with a large wooden board or stoneware plate for that rustic, elegant vibe. Stack the toasts slightly overlapping, let the Brie ooze naturally, and spoon berries generously across the top. Let the syrup drizzle down the sides. Garnish with a few mint or thyme sprigs and maybe a dusting of powdered sugar or lemon zest for a pop of color. Serve with a napkin and a smile — it’s a showstopper.
How can I adjust the recipe for dietary restrictions, such as gluten-free or vegan?
To make it gluten-free, simply swap the bread for a good-quality gluten-free artisan loaf — many hold up well when toasted. For a vegan version, use a plant-based Brie alternative (there are great cashew-based versions on the market) and macerate the berries with agave or maple syrup instead of honey or refined sugar. The key is keeping the balance of creaminess, tartness, and sweetness alive — and that’s absolutely doable.
What are some suggested pairings or sides to serve with melted brie toast?
This dish works beautifully as a brunch centerpiece, appetizer, or light dessert. Pair it with a crisp sparkling wine or dry rosé to cut through the richness. On the side, serve light greens tossed with lemon vinaigrette or a toasted nut and arugula salad. For a cozy touch, add a small bowl of warm spiced nuts or even a side of herbed olives. Sweet meets savory — and it works every time.
]]>Gordon Ramsay Finnish Root Vegetable Hash with Pork Sausages from Scrambled Recipe
https://chefgordonramsayrecipe.com/finnish-root-vegetable-hash-with-pork-sausages-from-scrambled/
Tue, 29 Apr 2025 21:10:42 +0000https://chefgordonramsayrecipe.com/?p=7738Read more at Gordon Ramsay Finnish Root Vegetable Hash with Pork Sausages from Scrambled Recipe
Gordon Ramsay’s Rustic Root Veg Hash with Fried Egg
Looking for a breakfast (or brunch) that’s hearty, colorful, and bursting with flavor? This rustic root vegetable hash with sausage and a perfectly fried egg delivers on all fronts. It’s comforting, satisfying, and just fancy enough to feel special—because hey, you deserve it.
Ingredients
1 small red onion, sliced
3 pork breakfast sausage, sliced into rounds
Olive oil
2 new potatoes (or other medium waxy potato), sliced thinly into half moons
Kosher salt
3 small beets (preferably both golden and red), cooked, sliced into ½-inch rounds
Unsalted butter
Freshly cracked black pepper
1 tablespoon finely chopped dill
1 tablespoon finely chopped chives
2 eggs
Step-by-Step Instructions
Step 1: Build the Base of Flavor
Start by heating a large skillet over medium-high heat. Once it’s nice and hot, drizzle in about 1 tablespoon of olive oil—you want the pan glistening.
Toss in thinly sliced onion and crumbled sausage, letting them sizzle and start to brown. Stir occasionally to make sure everything cooks evenly and begins to develop that deep, caramelized color.
After about a minute, throw in your parboiled or diced potatoes. Add a pinch of salt and another small drizzle of olive oil. Let the mixture cook undisturbed for a bit—this helps the potatoes develop that beautiful golden crust we all crave.
Step 2: Add Color and Sweetness
Once the sausage and potatoes are starting to brown, stir in the diced beets. Season with a little more salt, give everything a good toss, and let it all fry together. The beets add an earthy sweetness and stunning color that turns this into a dish that looks as good as it tastes.
Step 3: Fry the Perfect Egg
While your hash is finishing up, heat a second skillet over medium-high heat. Add ½ tablespoon of olive oil and 1 tablespoon of butter. Season the butter with a pinch of salt and pepper—yes, season your fat!
Once the butter melts and starts to bubble, crack in your fresh egg. Let it fry until the edges are golden and crispy but the yolk remains runny. Swirl the pan gently to help cook the top of the egg without flipping it. This technique gives you that picture-perfect fried egg Gordon Ramsay swears by.
Step 4: Fresh Herbs & Final Touches
Back to the hash—sprinkle a generous handful of chopped dill and chives over the vegetable mix and give it one final toss. These fresh herbs bring brightness and balance to the richness of the sausage and potatoes.
Step 5: Plate & Serve
Divide the hash between two plates. Make it rustic—it doesn’t need to be fussy. Then, gently slide one fried egg on top of each mound of hash. A pinch of flaky salt over the yolk wouldn’t hurt either.
Serve immediately, while everything is hot and the egg is perfectly runny. This is a satisfying, soul-warming dish that feels right any time of day.


 Fun Facts About Truffle Scrambled Eggs

 Recipe Notes:
