There are two main challenges: moving the char out of the kiln, and getting it to the desired size.
One option for moving the char is to use a kiln vessel, off the ground, that can be tipped to pour its contents out. This isn’t an option for those of us using pits or rings, or much larger metal vessels. For these, the main options are shoveling the char out, or sucking it up with a large vacuum.
It might be possible to find a grinder that you can shovel char directly into, which would grind it to the desired size (such as 1/2″-) without clogging or jamming or letting larger chunks through. It could then drop directly into the wheelbarrow, supersack or wherever you want the char to go. However, I have not yet found such a grinder to exist. Small shredders (leaf shredders, sink grinders) jam easily, have to be tended carefully, and are slow. Big hammer mills don’t readily jam, but pulverize the char to fine dust. In both cases, the moisture level has to be just right, or you get dust clouds (too dry) or a sticky slurry (too wet).
One option, that accomplishes both moving and crushing, is mentioned in the following video, from a farm in 2013:
https://youtube.com/clip/Ugkxk1v48cfHk11YydSC-zOSjTUwFHFxekec?si=O7zONl9wjCjbr7Sp
“About scale, a better way to crush the char, well we operate on such a big scale that we can afford to use one of these, basically its a leaf vacuum, we jump in there and we vacuum it out, and it grinds it on the way out, and we capture it in those giant super sacks. We vacuum it through a chopper.”
Further clarified, this farm uses a complete set of machinery:
Bob Wells: “The unloader that we build for the retort that you are referring to is run on a 14 HP gas engine and it is basically a slightly overbuilt centrifugal fan/blower/vacuum. The biochar is sucked right through the stainless impeller and smashed as it goes through. It is immediately blown from there to a cyclone separator that drops the char into a container. There is also an adjustable water jet built into the housing of the blower just before the impeller,so that we can add just enough water to knock down the dust. It only takes 10 minutes to unload the retort. […] it doesn’t crush the biochar to a uniform or controlled particle size. That requires another step. We use a hopper fed trommel to sort out the size fractions. Any oversize particles go into a finger type crusher that gives us perfectly sized biochar”
This sounds very powerful and convenient, but requires a long chain of equipment – huge vacuum, separator, water jet, hopper-fed trommel, finger-type crusher. Some of these can be bought (certainly large debris loaders exist, and cyclonic separators are common) but some parts have to be custom built, experimentation and welding is required, and the whole chain adds up to a major commitment of time and money – certainly tens of thousands, if not hundreds of thousands of dollars.
What can be done on a more moderate budget? Or closer to turnkey, instead of years of experimentation?
I bought a powerful leaf blower, which can function as a vacuum, with a force of “up to 473 CFM” (Makita XBU04ZV, $276 on sale via Amazon.com, usually ~$400) and a cyclonic separator (Oneida Dust Deputy 2.5 Deluxe, $140 plus shipping). I took them to my kiln pit, and tried to suck up biochar. This is what I learned.
- Charcoal in pit -> hose -> separator -> vacuum. This kinda worked at first. The separator did a good job of separating, with the char getting sucked up the hose, then dropped by the separator into a bucket. However,
- It soon jammed, because large chunks got sucked up and stuck in the hose.
- It was fairly slow. Might work better with a more powerful vacuum.
- Lots of the chunks getting sucked up are bigger than desirable.
- Charcoal in pit -> sieve -> hose -> separator ->vacuum. This solved the problem of large chunks coming up the tube, but it was even slower, because I had to continuously move the hose with sieve around in the charpit. This was disappointing, because I had high hopes for this approach.
- Charcoal in pit -> hose -> vacuum -> bucket. This uses the vacuum’s own impeller to break up the char, and spit it out the back into a bucket. However,
- Again, the hose jams with larger chunks.
- It comes flying out the back at such high speed, it’s basically blowing out dust. The impeller is doing too good a job at breaking up the char. Maybe a large dust bag would work for catching the output without reducing airflow too much.
To be fair to this Makita vacuum, it’s made to suck up leaves, and it expects to suck them up the included straight tube, so they’d be much less likely to get jammed. However, to use it that way, I’d have to wear the vacuum, aiming the straight tube down into the pit. That seemed too awkward, which is why I tried using a vacuum hose instead, only to find the curves in the hose jammed far too easily. These vacuum hoses are made for wet/dry shop vacs, which usually only suck up dust, not 1″ lumps of charcoal. In the video above with a farm using a vacuum, there are two key differences, their hose is much larger diameter (probably 8″ vs. 2.5″), and the suction is much higher (a 14 HP gas engine vs. the Makita’s motor which is probably ~1 HP).
Things I could still try:
- Using a bigger hose. 4″ diameter hose is available and that matches the in/out ports of the Makita. It’s not a cheap experiment, though. It would also involve a bigger cyclonic separator, a 4″ is available for a few hundred bucks. I suspect it would work better and jam less, but still suffer from overall slow throughput.
- Using the straight hard tube, wearing the vacuum. I’m not optimistic about the ergonomic usability of that approach.
- Try a bigger vacuum – like a gas-powered debris loader. A good one costs at least $2k. A reasonable cost, if it works well, or an expensive experiment if it doesn’t.
- Give up on vacuums completely, and just shovel it out of the pit, into a hopper, where it drops through an appropriate grinder. The search for such a grinder continues.
| Makita | Milwaukee | Metabo | Flex | Bosch | DeWalt | Worx | Toro | Skil | Kobalt | Ryobi | Husq | Stihl | Echo | Ego | Greenworks | ||||||||||||||
| 18V | 40V | 12V | 18V | 18V | 36V | 24V | 18V | 20/60V | 20V | 60V | 20V | 40V | 24V | 40V | 80V | 18V | 40V | 80V | 40V | 36V | 56V | 56V | 24V | 40V | 60V | 80V | 82V | ||
| drills/drivers | Y | Y | Y | Y | Y | Y | Y | Y | Y | Y | – | Y | – | Y | – | – | Y | – | – | – | – | – | – | Y | – | – | – | – | |
| circular saw | Y | Y | Y | Y | Y | Y | Y | Y | Y | Y | – | Y | – | Y | – | – | Y | – | – | – | – | – | – | Y | – | – | – | – | |
| recipro saw | Y | Y | Y | Y | Y | Y | Y | Y | Y | Y | – | Y | – | Y | – | – | Y | – | – | – | – | – | – | Y | – | – | – | – | |
| jigsaw | Y | – | Y | Y | Y | Y | Y | Y | Y | Y | – | Y | – | Y | – | – | Y | – | – | – | – | – | – | Y | – | – | – | – | |
| router | Y | Y | ? | Y | Y | Y | Y | Y | Y | Y | – | – | – | Y | – | – | Y | – | – | – | – | – | – | Y | – | – | – | – | |
| angle grinder | Y | Y | – | Y | Y | Y | Y | Y | Y | Y | – | Y | – | Y | – | – | Y | – | – | – | – | – | – | Y | – | – | – | – | |
| power cutter | Y | Y | – | Y | – | – | – | – | Y | – | – | – | – | – | – | – | – | – | – | ? | Y | – | – | – | – | – | – | Y | |
| pole saw | Y | Y | – | Y | Y | – | – | – | Y | Y | Y | Y | Y | Y | Y | Y | Y | Y | – | Y | Y | – | Y | Y | Y | Y | Y | Y | |
| leaf blower | Y | Y | – | Y | Y | – | Y | Y | Y | Y | Y | Y | Y | Y | Y | Y | Y | Y | – | Y | Y | Y | Y | Y | Y | Y | Y | Y | |
| string trimmer | Y | Y | – | Y | Y | – | – | – | Y | Y | Y | Y | Y | Y | Y | Y | Y | Y | – | Y | Y | Y | Y | Y | Y | Y | Y | Y | |
| hedge trimmer | Y | Y | – | Y | Y | – | – | – | Y | Y | Y | Y | Y | Y | Y | Y | Y | Y | – | Y | Y | Y | Y | Y | Y | Y | Y | Y | |
| lawnmower | Y | Y | – | – | Y | – | – | – | Y | Y | Y | Y | Y | Y | Y | Y | Y | Y | Y | Y | Y | Y | Y | – | Y | Y | Y | Y | |
| riding mower | – | – | – | – | – | – | – | – | – | – | – | – | – | – | – | – | – | – | Y | – | – | – | Y | – | – | Y | Y | Y | |
| wheelbarrow | Y | – | – | – | – | – | – | – | – | – | – | – | – | – | – | – | – | – | – | – | – | – | – | – | Y | Y | Y | – | |
| chainsaw low | Y | – | Y | Y | – | Y | – | – | Y | Y | Y | Y | Y | Y | – | – | Y | Y | – | Y | Y | Y | – | Y | Y | – | – | – | |
| chainsaw med | – | Y | – | – | – | Y | – | – | Y | ? | – | – | – | – | Y | Y | – | Y | – | Y | Y | Y | Y | – | Y | Y | Y | Y | |
| chainsaw high | – | – | – | – | – | – | – | – | Y | – | – | – | – | – | – | – | – | – | – | – | Y | – | – | – | – | Y | – | Y | |
There are other common battery tools (snowblowers, vacuum cleaners, paint sprayers…) which I didn’t include, mostly because I don’t need them. If there’s a tool you feel should be here, let me know and I’ll add it.
You can see how some companies’ focus is construction, others landscaping, and some try to do it all
There are good reasons for many of the gaps – a 24V battery wouldn’t make sense to power a riding mower, and a big 80V battery wouldn’t make sense for a hand-held drill. But, a lot of the gaps just represent where a company hasn’t managed to make one yet, or has decided not to compete there.
You can see that powered wheelbarrows are rare, only Makita and Greenworks make them, and it’s possible that the Greenworks ones are discontinued.
Also rare is being able to share your batteries between a riding mower and other tools, only Ego and Greenworks let you do that. Ryobi shares, but only with their lawnmower.
Chainsaws are divided by motor power (under 1.5 kW, 1.5-2.5 kW, and 3.0 kW and up). As you saw in my blog post of last year, high-power battery chainsaws remain rare, only made by DeWalt, Stihl and Greenworks. Stihl’s MSA300 is finally available in the USA as of 2023, but still hard to find. Greenworks added a powerful saw on their 60V line (the CS60L810) which is an amazing deal, if you’re already on that platform.
Overall, the Makita 18V and Dewalt 20/60V lines have the best coverage / largest number of tools for the low-to-mid power range, and Greenworks 60V has the best coverage in the mid-to-high power range.
]]>First of all, some people will dismiss it completely, saying that chainsaw milling is too tedious, too slow, too limited. They point out a proper bandsaw mill is more efficient, faster, better, etc. No doubt they are right, but many of us already own a chainsaw and want to mill, and don’t have thousands of dollars for a “real” mill, or just aren’t going to mill often enough to justify buying one.
There are four kinds of chainsaw mill, from most serious/expensive to least serious/cheapest:
- “Alaskan” horizontal milling rigs, which attach to your chainsaw bar in two places
- “Alaskan small log” horizontal milling rig, which attaches in one place
- “Edging” mill rigs, which cut vertically with the saw in a fixed orientation
- Cheap vertical rigs which slide down a 2×4 with the saw able to rotate
Type 1: “Alaskan” Horizontal Mill
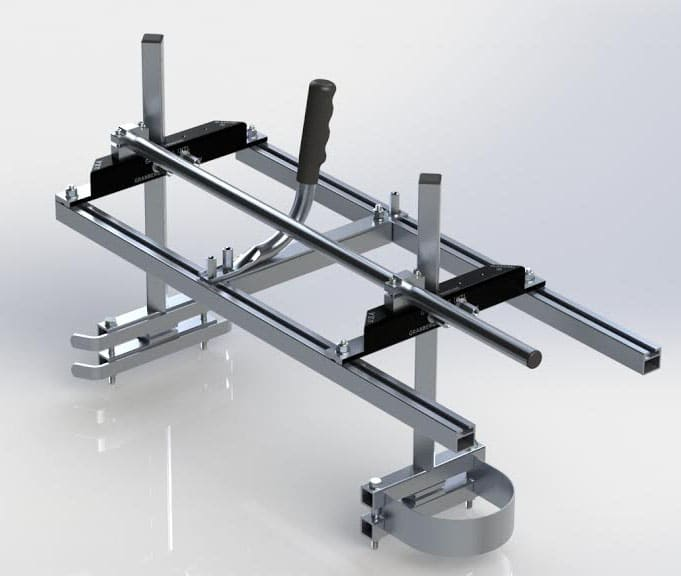
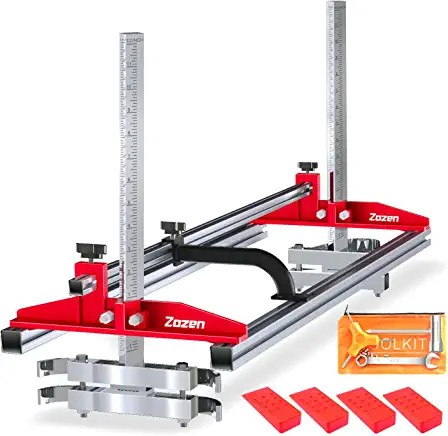
The quality models are made in the USA by Granberg, and cost around $300. There are many Chinese imitations on Amazon which can cost more like $100 and look like this:
By all accounts, this type of mill works well enough, as long as you have a powerful chainsaw, and are patient enough for the many steps, slow cutting, a lot of gas and chain sharpening, etc. Many people say you shouldn’t even attempt this with a battery chainsaw, because the saw isn’t powerful enough, but there is another major issue: bar length. I borrowed my neighbor’s 36″ Granberg rig, attached it to my battery saw with 18″ bar, and this is what it looked like:
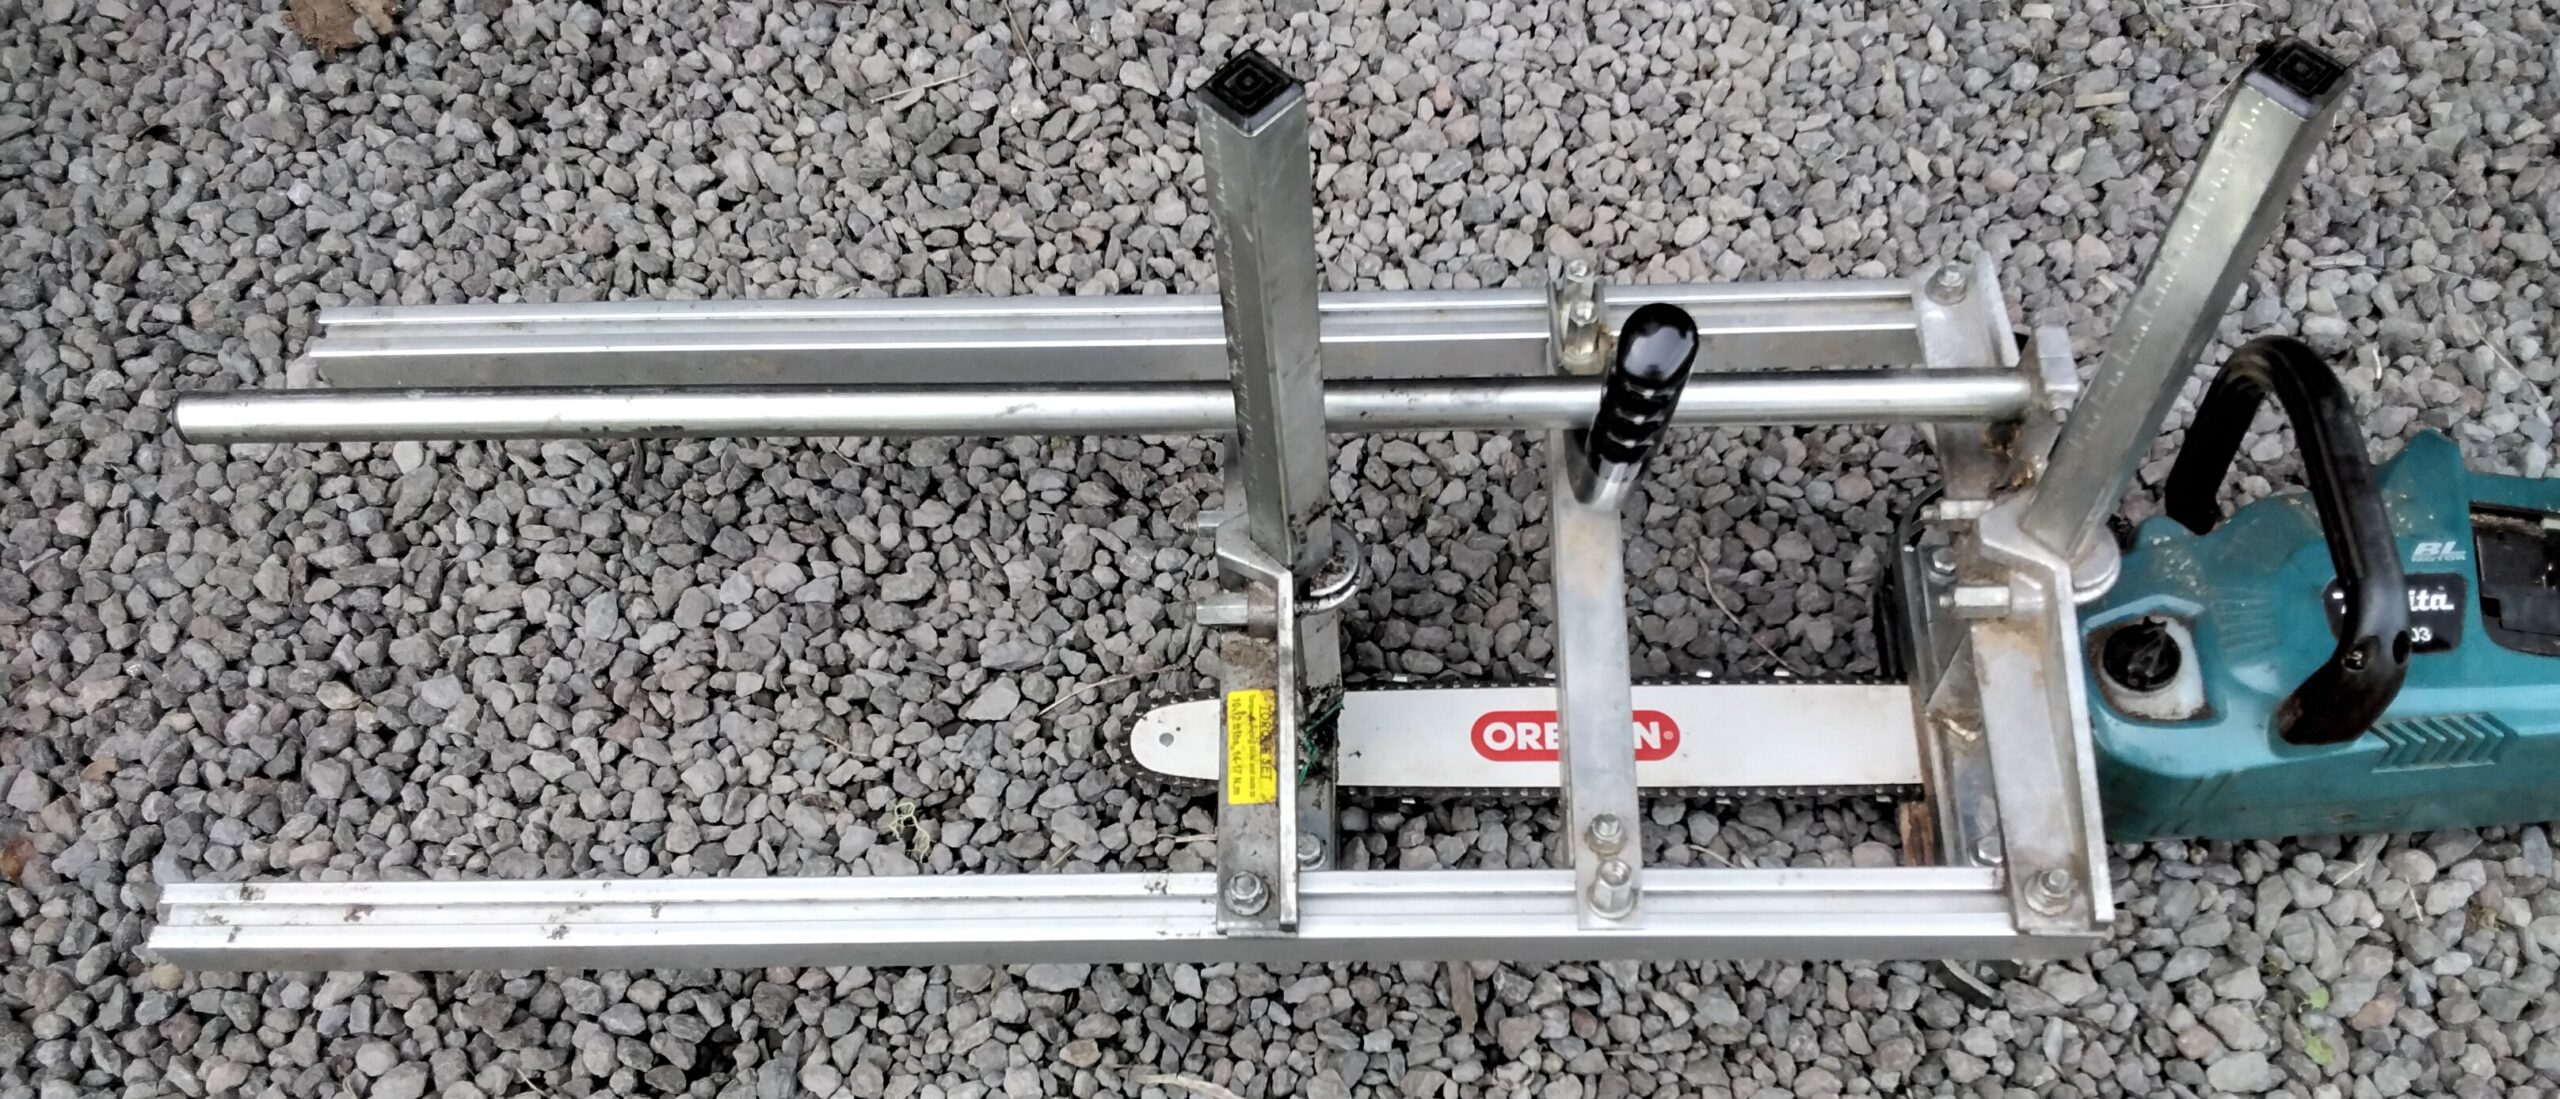
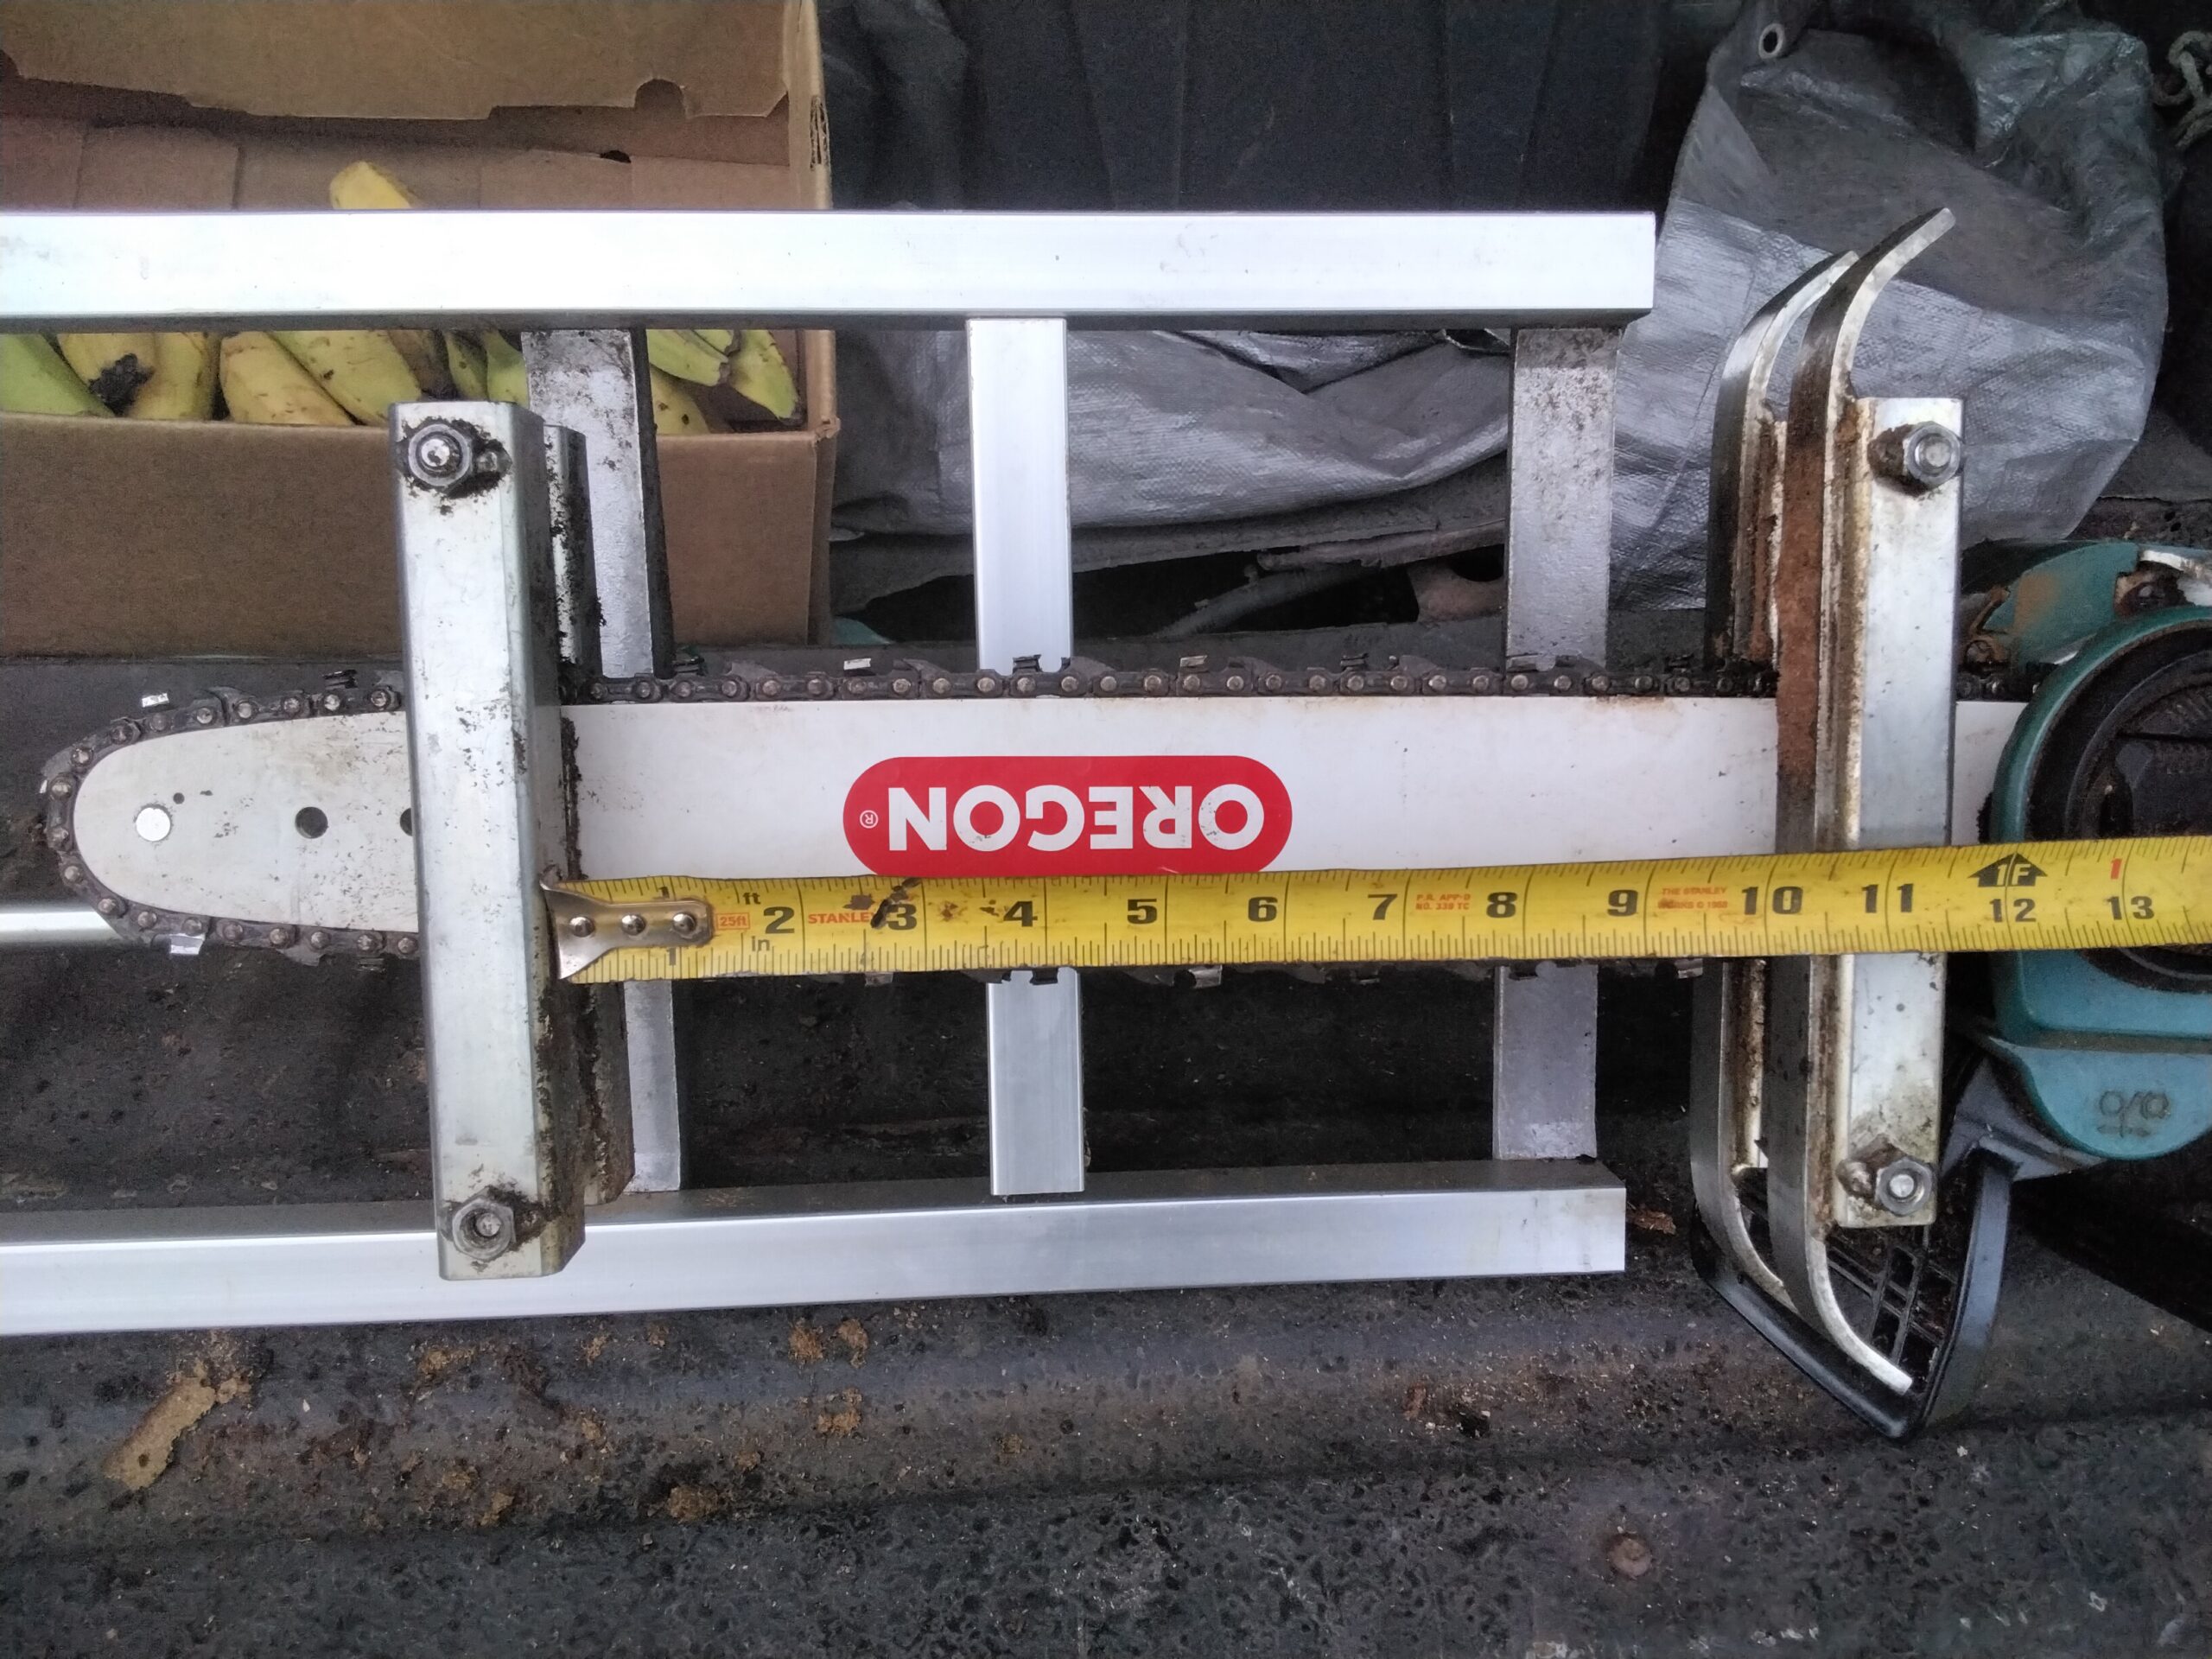
As you can see, this rig is just too big for the 14-18″ bar typical of a battery chainsaw, and worse, the metal parts that clamp onto the bar are as wide as the bar, which pinches the chain. By attaching in two places on an 18″ bar, there is less than 11″ of bar left to mill with:
Type 2: The Granberg “Small Log” Mill (G777)
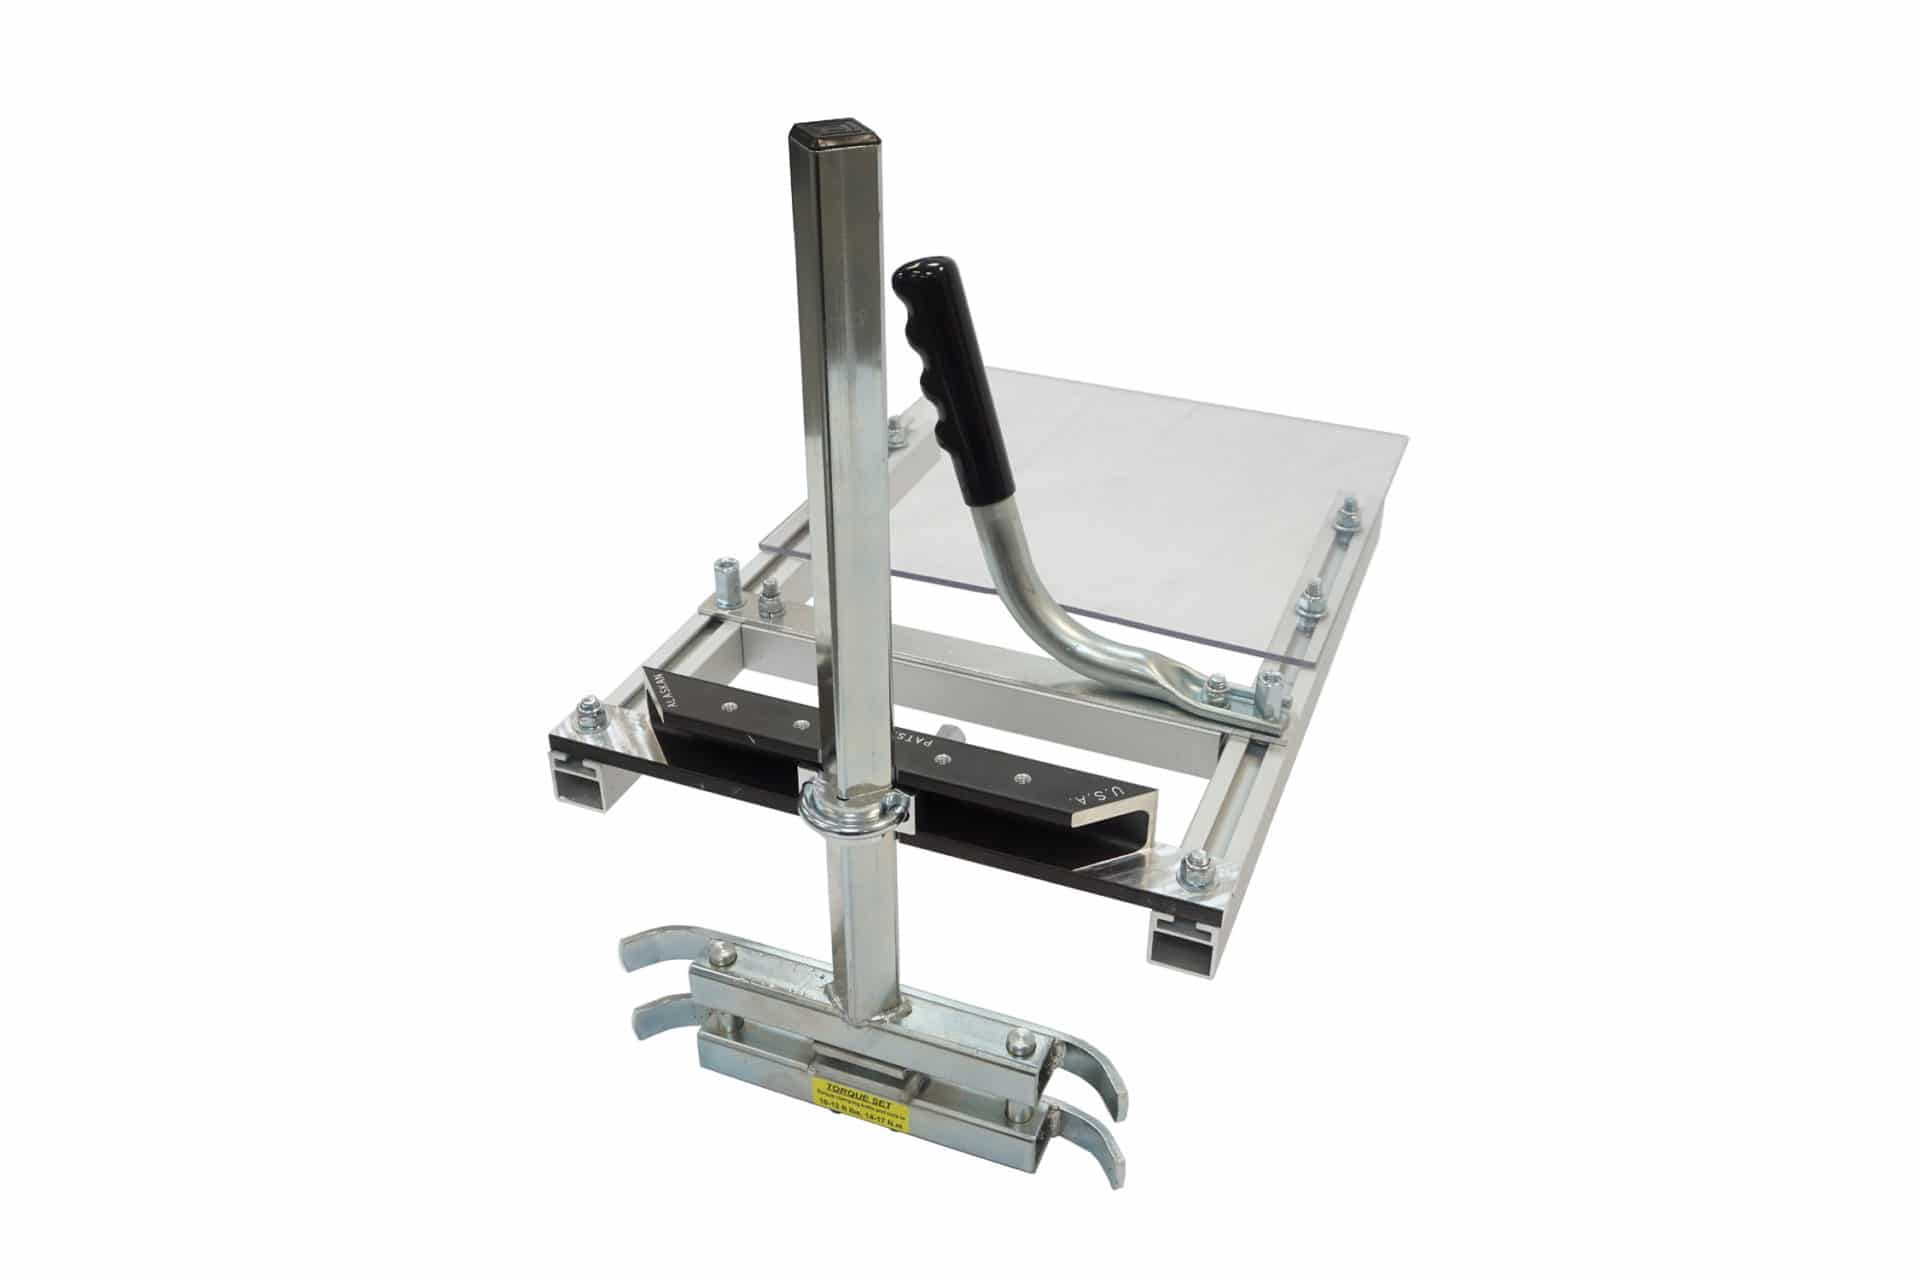
It costs around $170-$270 depending on shipping and where you buy it. Surprisingly, there don’t seem to be Chinese knock-off versions of it (yet?) It’s specifically made for saws with short bars up to 20″, which means this is the one to use with a battery chainsaw. By clamping to the bar in just one place, it’s a little less stable, but you get much more of your bar as usable cutting length.
Type 3: Vertical Granberg “Edging” Rig (G555B)
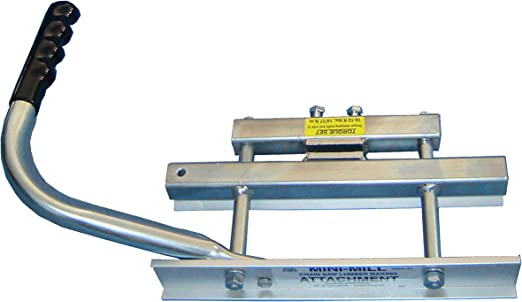
This Granberg unit costs around $125-$200, again depending on shipping and where it’s purchased. There are a few Chinese knockoffs on Amazon from $75-$100, but they have very poor reviews. To use this mill, you lock the saw at a fixed angle (nearly vertical) and push it thru the log, along a metal track:
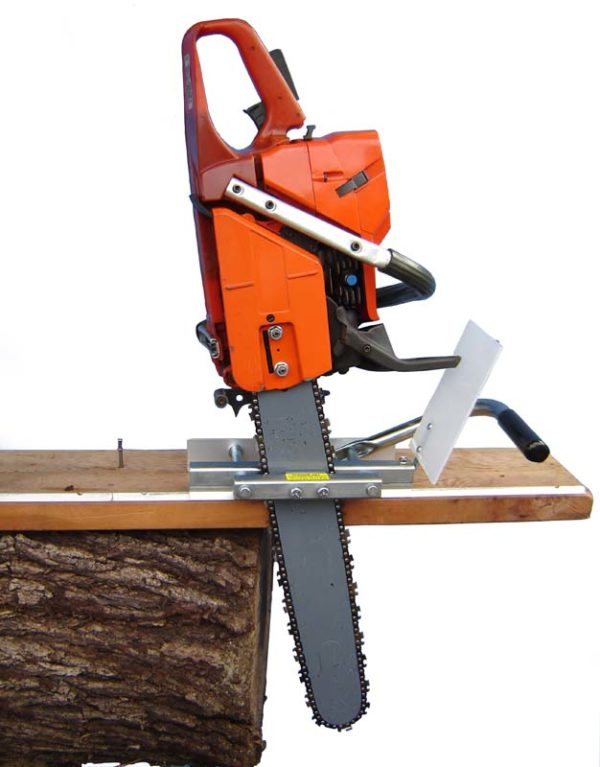
As the name implies, Granberg suggests you use this to cut the edges off logs to make beams, not to cut slabs, altho with patience you totally could cut boards this way. Many online videos show real people successfully milling with this rig.
Type 4: The Cheap Vertical Rigs
Some say the original mill of this type was the “Haddon Lumbermaker”, others claim it was a Canadian “Quadra Beam Machine”. Regardless of origin, amazon.com is now full of dozens of nearly-identical models, all from China, and all with significant quality and usability issues. A typical unit looks like this:
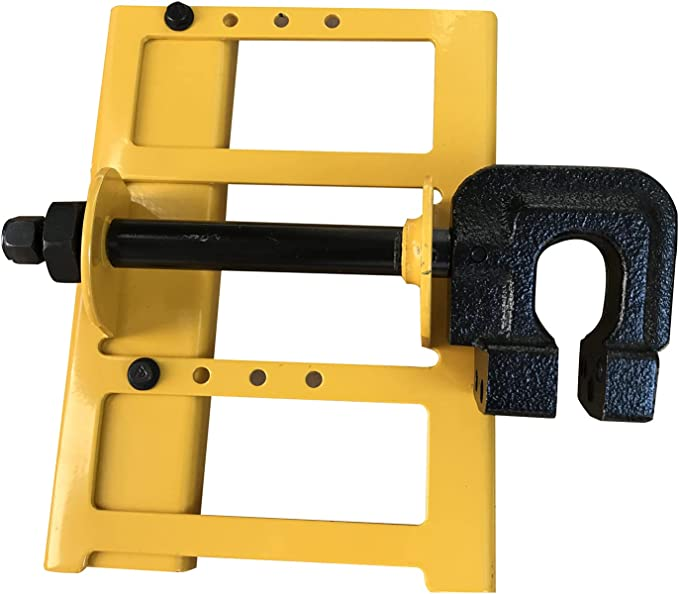
This is super simple, the rig slides down a 2×4 or 2×6, the clamp holds your bar for vertical milling, while allowing it to rotate, as you pull it down the log. They are very affordable, typically $30 but can range from $22-$38. The Chinese brand names range from generic to comical (ZeroPone, Kweetle, HVUE, Wood-CNL, YEFA, TTF, TAUSOM, AGS, SurmountWay, Farmertec, Zchoutrade, TimberTuff). I was initially attracted to them based on simplicity and low cost, so I spent some hours trying to figure out if one was higher quality than the rest? Ultimately I had to conclude: no, they are all bad. Even if you get a unit without obvious manufacturing defects, you have issues:
- The metal guide inevitably has some “wiggle room” on the 2×4, so your bar will wobble and cuts won’t be straight.
- Getting your bar precisely perpendicular to the rig (to cut at a right angle, i.e. square) can be a real challenge.
- Clamping the guide to your bar is likely to be either too loose (saw vibration will shake it loose and destroy your chain) or too tight (which will either shred your bolt threads, or even snap the cast metal). The solution many people arrive at is using stronger bolts and drilling a hole through your chainsaw’s bar (!)
There are YouTube videos showing unfortunate people using these rigs to produce rough, uneven boards with considerable difficulty. There are some people that claim it works “just fine” for them. There is even one fellow who, through luck, skill and determination, manages to mill slabs of hard Hawaiian trees using one of these rigs and a small, low-power Ryobi 14″ battery chainsaw. So, it can work.
A note on chains
Most people recommend using a special “ripping” chain for cutting down the length of any log. There are even some amazing videos of hard-core chainsaw guys evaluating different kinds of chains for milling, for their effect on cutting time, smoothness of resulting cuts, and how frequently you have to sharpen. It’s a potentially deep subject, but “use a ripping chain” is probably good enough advice for most of us.
Beams vs. Slabs
Videos like this one (https://youtu.be/zw_hq_yJX-Y) show that cutting slabs with a vertical mill is possible but fussy, difficult, and error-prone – it involves a lot of fudging and shimming and tuning your rig to try to keep your log stable and your cut perpendicular. The vertical mills seem just fine, however, for just cutting off 4 sides to make a beam. So, for those of us who want nice slabs, not just beams, it’s an argument for spending the $200 for the type 2 (Granberg G777), not the types 3 or 4.
Conclusion
Based on everything I’ve learned, I wouldn’t get one of the cheapest rigs. The type 1 is too large, but either the type 2 or 3 (Granberg G777 or G555B) seem worth the investment – or both, because edging before slabbing is potentially better/easier than attempting to do all cuts vertically (or all horizontally, then needing to clean up each slab later with a track saw).
]]>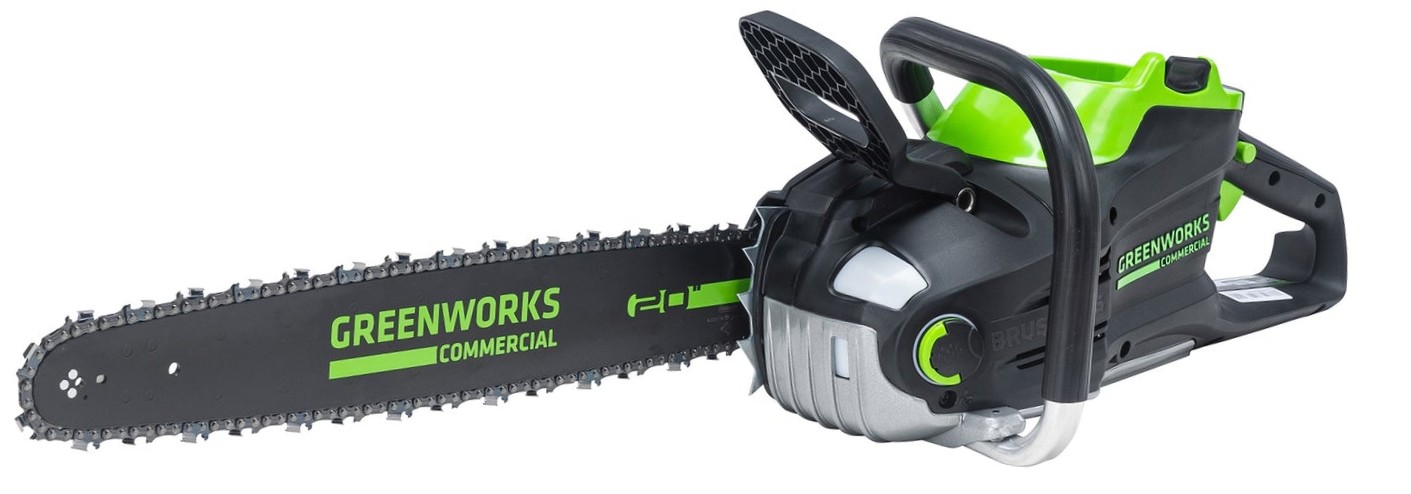
For context, battery chainsaws have not been considered “serious” in the past compared to gasoline models, but now (as of Summer 2022) there are abundant powerful options, for up to a 20″ bar. For nearly 4 years, I’ve been happily using a 14″ Makita XCU03 (LXTx2), and I’ve been delighted with the quality and reliability, but now I need something bigger and more powerful.
Here’s what I found about the power of chainsaws now available:
| Bar | Volts | Max Power (kW) | HP (kW*1.34) | Chain speed (m/s) | Gas engine cc equiv | Battery Wh | |
|---|---|---|---|---|---|---|---|
| Makita LXT x2 chainsaw | 16″ | 36 | 0.9-1.0 ? | 1.2-1.3 ? | 20 | 32 | 2x5Ah=180 |
| Makita XGT chainsaw (*) | 18″ | 40 | 1.6 | 2.15 ? | 25.5 | ? | 4Ah=144 5Ah=180 |
| Ego CS1804 | 18″ | 56 | 2.1 ? | 2.8 | 20 | 45 or 42 | 5Ah=270 |
| Kobalt KCS 4080-06 | 18″ | 80 | 2.5 | 3.35 | 20 | 50 | 5Ah=360 |
| Greenworks GS181 | 18″ | 80 | 2.5 | 3.35 | 21 | 50 | 5Ah=360 |
| Stihl MSA 300 C-O with AP500s (*) | 20″ | 36 | 3.0 | 4.0 ? | 20-30 variable | ? | 9.4Ah=337 |
| DeWalt DCCS677 with DCB615 | 20″ | 60 | 3.1 | 4.0 | 13.5 ? | “around 60” | 5Ah=270 |
| Greenworks Commercial 82CS34 | 20″ | 82 | 3.4 | 4.5 ? | 24 | “more than 60” | 4Ah=288? 5Ah=360? |
The two saws marked with a (*) are, as far as I can tell, not yet released in the USA.
My first impulse was to buy a more powerful Makita chainsaw, but it’s not sold in my country, and also, as you can see in the table, it’s surprisingly underpowered.
The next saws (Ego, Kobalt, Greenworks) are just three examples of affordable 18″ saws under 3 HP that are sold under dozens of brand names by many companies. They appear fine, but…
The last three saws are all new this year, and are the first three to reach 4 HP and directly support a 20″ bar. Stihl is a major German chainsaw manufacturer, and their MSA 300 looks amazing, but, once again, it’s not sold in the USA yet, and will certainly be very expensive when it does (probably $900 for saw, $400 for battery)
That leaves a choice between the last two, the DeWalt and Greenworks Commercial. From online reviews, both are impressive. Both are affordable. The DeWalt saw seems to sell for around $390, the battery for another $390, but bundled together for only $550. The Greenworks Commercial is $600 for a similar bundle. The final points I considered, in favor of the DeWalt saw:
- DeWalt is a much bigger company with a much bigger user base.
- DeWalt has a better reputation for support.
Some points against the DeWalt, in favor of the Greenworks saw:
- Some claim that the DeWalt might overheat more easily than other saws, or that the bar retention mechanism is a little better on other saws.
- Subjectively, to me the DeWalt looks clunky and blocky.
- The DeWalt has a strange low chain speed, which some YouTube videos indicate produces a rougher cut surface when doing chainsaw milling.
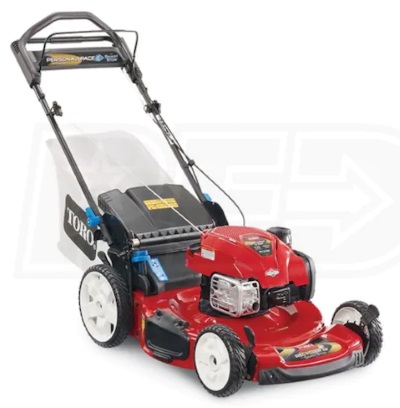
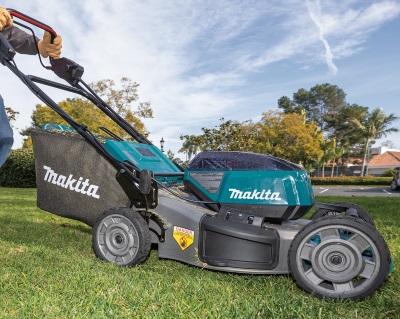
| Toro model 20340 (“Toro Recycler® SmartStow (22”) 163cc Personal Pace® “) | Makita XML08 (“36V (18V X2) LXT® Brushless 21″ Self-Propelled Commercial”) | |
 |  | |
| Typical cost: | $450 | $700 (includes 4 5Ah batteries) |
Caveats: I can really only compare these two mowers, so this is not a general review of electric mowers. This is just one data point with my own experience. Also, our farm is in the wet subtropics so grass is typically wetter and taller than typical lawns, and the whole farm is sloped (no flat ground). I always use the bagger to catch all grass, which feeds our compost system (and hence the gardens).
As gas mowers go, this Toro is reasonably quiet, reliable and affordable. It’s survived years of heavy use without any engine issues, and only minor repairs (like the starter cord). On our farm, it does struggle to fill the bagger. Unless I am (rarely) cutting a very small height of dry grass, it jams and requires me to stop the mower, lift the bag and manually clear the grass into the bag. The bag is not very large. This means I am re-starting the mower very frequently (no doubt contributing to the starter cord wearing out).
Buying the Makita was influenced by the dozen other great Makita products we own that use the same LXT batteries. After a week of use, here are some key differences I experienced:
- Power. The Makita is actually a bit more powerful, and the batteries last well enough for my long mowing sessions.
- Bag. The Makita’s grass bag is a little larger, and (possibly because it is angled closer to the ground) the grass goes into it more reliably, which saves significant work.
- Noise and fumes: Electric is wonderful.
- Handling: The Makita is a little larger, a little heavier, and has more traction and rolling resistance. That means it’s significantly more effort to maneuver it, and it’s harder to push through grass, level or uphill. It does roll fairly easily backwards, or downhill. Thankfully, it is self-propelled, but:
- Self-propulsion. The Makita’s powerful drive has a speed knob, but the handle to engage it is either on or off, and pressing the bar requires waiting a second for the drive to engage. That also means when you ease off the handle, it abruptly halts. The Toro has what it calls “personal pace”, which is a variable speed that responds instantly to how hard you push the handle. This makes the Toro much easier to maneuver. Part of my struggle is surely due to the years I’ve spent with the Toro, my reflexes and habits have grown on it, so some of this will improve as I spent more time with the Makita. However, the lack of responsively variable drive on the Makita is undeniably more awkward. If another brand of electric mower has it, that would be a big deal.
- Height adjustment. The Makita has a single easy level to raise and lower the entire mower, the Toro has one stiff difficult level per wheel.
To summarize: I give the Makita +1 for power, +1 for better bag, +2 for being electric, -2 for being harder to maneuver, and +1 for easy height adjustment. Overall, the pros outweigh the cons.
]]>
I did the harvest today, and here are the results, in terms of grams of potato per plant:
| Yukon Gold | 144 |
| Dark Red Norland | 113 |
| Kennebec | 283 |
| Red Gold | 244 |
| Kattahdin | 75 |
| La Ratte | 13 |
| Papa Cacho | 27 |
This is pretty awful. For comparison, just planting random store-bought yellow potatoes gives around 250 g/plant, while better-performing varieties (Island Sunshine and Yukon Gem) on my farm have produced 400-800 g on average or even well over 1 kg in lucky cases.
The one promising bit here is the Kennebec:

Kennebec did the best in this trial, basically due to surviving a few days longer before dying back. I might try this variety again, starting from fresh imported seed potato, on newer garden beds.
All the other varieties died back before producing any substantial potatoes. As I’m not a botanist with a laboratory, I have no way to determine what causes the die-back – presumably some fungal blight, but which one? From looking at online images, I would say that the die-back looks somewhat like late blight, but not really at all like early blight. There are also dozens of other potential fungal and viral potato issues, and no way to know which I’m encountering, which is frustrating.
]]>2020.07.20: planting day
2020.08.16 (day 16): all the potatoes have emerged and are growing nicely, except for the smallest varieties (Laratte and Papa Cacho), which are barely emerged and tiny plants.
2020.09.03 (day 38): The plants have been mounded (hilled) with regular garden soil. Nearly all plants are showing early signs of some kind of blight, starting with brown spots on the leaves:

One of the yukon golds is already completely blighted, down to bare stems:
: Almost all the plants are completely blighted to the point of losing almost all their leaves: <img decoding=)
2020.09.12 (day 47): Almost all the plants are completely blighted to the point of losing almost all their leaves:

The only exception is three plants in the middle of the bed, I believe they are the Kennebec, which appears almost unaffected by any blight:

This is a good result. It is difficult to find details on Kennebec, but one reference did suggest it has “good field resistance to late blight”. The little “Papa Cacho” variety at the end of the bed also appears to be relatively unblighted, but since the plants are so small, it’s not as promising for yield.
]]>A round pit with a flat bottom is basically a truncated cone, which is like this but upside down:
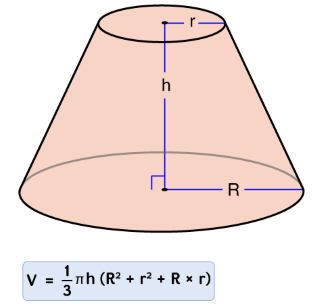
5 cubic yards is 135 cubic feet. To be able to step down into the pit, I don’t imagine it being much deeper than 3′ deep (my current pits are around 2′ deep, and it’s quite a step to get in/out of them). Considering a truncated cone 3′ deep, with 4′ diameter at the bottom, and a 7′ diameter at the top, that’s only 73 ft3. That isn’t even considering compaction (char settles, so that as you walk on it and unload, it packs down, so the entire pit is not full of char). To get to 5 yd3 = 135 ft3, you’d need a pit 3′ deep, 5′ bottom diameter, and 10′ top diameter! That’s a huge area to build a fire in.
What if we kept the current approach of a lined pit, but allow for sloped sides, and deeper, and wider? The sloped sides would allow for better aeration, allowing us to go deeper. The shape would be like this, upside down:
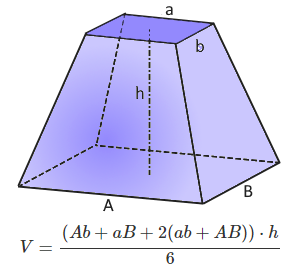
With a depth of 2.5′, a bottom of 3×3′, and a top of 5×5′, that’s… only around 31 ft3, and considering compaction, probably more like 25 ft3. That’s not much better than my current “big” pit of 20 ft3, while being deeper to step into, and a much larger area to have to cover with soil.
There’s just no way around it. To get a lot of char, you need a really massive pit, regardless of shape, or whether it’s dirt or bricks.
Meanwhile, concerning price, I haven’t actually found anyone on the Island of Hawaii selling bulk char. Retail, all I’ve found is at Farm Supply Coop in Hilo, as of July, they were carrying cubic-foot bags of Black Owl biochar for $42 (!) The price is similar on Black Owl’s website. At this price, the 34.6 ft3 of char that my pits are producing would be $1453, which is crazy. I don’t think there are many people willing/able to pay so much. Currently, I’m only charging $30 for a 10-gallon (1.33 ft3) bag for the 1/2″-minus char that I screen by hand. This screened char is around 2/3 of the total output, but our own farm needs a lot, so it’s more like 1/3 leftover to sell (11.5 ft3), which is only around 8 bags per burn.
]]>
I planted them in one of our typical well-drained raised garden beds, 3 x 21 feet, with enough room for 38 plants. All our beds are similar in regards to soil makeup: the base is Hamakua clay soil, highly improved with organic matter over the years (mostly compost), and a few percent biochar. These beds have grown a long series of crop rotations, including brassicas and alliums and legumes, but almost never other solanaceous crops. The ground was damp due to the recent hurricane dropping around 4 inches of rain yesterday. I made little holes and set in the potatoes, then covered.

Total planting was 14 yukon gold, 3 dark red norland, 3 kennebec, 12 red gold, 1 kattahdin, 2 laratte, 3 papa cacho. We’ll see how they do!
Besides variety, one variable I added to this test is that of the 14 Yukon Gold, 8 of them got fertilizer (organic biocrumbles 6-6-5) in their planting holes. I have never used fertilizer with potatoes before, but perhaps we’ll see a difference in these 8 vs. the other 6. Then again, if my theory is correct regarding dieback as the single largest factor in yield, perhaps it won’t make much difference. As noted in the last post, from what info I could find, none of these varieties are strongly resistant to the soil fungal issues which appear to be the limit here. For example, this trial has Yukon Gold, instead of the Yukon Gem which has much better blight resistance.
]]>Background: We used to just use organic potatoes from the health food store. Some would start to sprout before we got around to eating them, and they got planted in the garden. The yield was never very good, but at least it made a few small potatoes per plant, so it was worthwhile. We had no idea what we were doing, but it was OK.
In 2019, I ordered sample packs from Wood Prarie Family Farm (“Certified Organic Maine Certified Seed Potatoes”). It included four varieties – Fingerling, All blue, Caribe, Yukon. The yield was (what I now know is) dismal: under 300 g/plant, except for one set of All Blue which almost managed 600 g/plant.
I continued to plant our rotating set of unknown varieties as well (saved over the years from those store potatoes). These “misc yellow” and “misc red” varieties also produced poorly, the yellows never exceeded 300 g/plant and the reds were lucky to reach 300-600 g/plant.
I eventually did a lot of reading on potatoes online, and a textbook on potatoes from the library. I learned a lot about potato history, genetics, and diseases. I learned that by re-planting our own potatoes year after year, we were probably accumulating an increasing number of potato diseases. The only way around that is to order seed potatoes from a very cold place (like Maine) where the winter kills most pathogens.
From observation, the overwhelming factor that determines yield, in our gardens, is how long the plants live before dying back (from unknown blights or diseases). Nearly everything we plant dies back prematurely, when the potatoes are still small, and that completely explains the low yields. It doesn’t appear to be insects, or rot, or anything visible. Just plants dying back too soon.
So, in 2020 we ordered a more serious amount of Maine potatoes. We are at 2500′ in Ahualoa, 80-200 inches of rain/year, so we knew we need something that tolerated wet conditions. We chose these cultivars, which Wood Prarie described like this:
- Red Norland. Yield medium-heavy, Late Blight Tolerance Medium.
- Yukon Gem. Yield medium-heavy, Late Blight Tolerance Medium-high.
- Island Sunshine. Yield medium, Late Blight Tolerance Very High.
As the spreadsheet shows, the yield has corresponded loosely with the “blight tolerance”. Red Norlands did the worst (264 g/plant), Yukon Gem significantly better (692 g/plant). The Island Sunshine did something fascinating! I planted a long 21-foot bed of 30 plants. Most of the bed died back early, and averaged a poor 350 g/plant. But 4 plants – all next to each other, in the middle of the bed – somehow escaped the dieback. They continued to grow huge, and produced an astonishing 1294 g/plant.
My theory, at this point, is that our garden soils, from years of growing a large variety of random vegetables including potatoes, have accumulated a load of potato pathogens, and that somehow those four plants (in a relatively newly expanded area of the garden) got lucky and grew in a patch of soil that had none of the (fungal? blight?) pathogen.
I’d love to believe that it might be genetic, that those 4 Island Sunshine plants might have some genetic variation that caused them to overcome whatever issue our soil has. But, what I’ve read about potato genetics says that’s highly unlikely. Of course, I’ll be re-planting just the potatoes from those four plants, but chances are, they will be limited by the soil I plant them in, not their genes.
Today, UH-CTAHR did a small distribution of seed potatoes for citizen science experimentation. I am delighted they are doing this. I picked up my seed potatoes today. These are the varieties I got, along with what I could find on their supposed disease resistance:
- Yukon Gold – “medium tolerance of late blight”
- Papa Cacho -“robust plants with obvious resistance to late blight”
- Red Gold – “resistant to potato leafroll virus and potato virus Y and moderately resistant to common scab, but is susceptible to potato virus a and potato virus s.”
- La Ratte – “resistant to scab and viruses”, “low yield”
- Dark Red Norland – “resistant to scab, growth cracks, hollow heart, early blight, and rhizoctonia (black scurf)”, “medium tolerance of late blight”
- Katahdin – “consistent performance”, “moderate resistance to scab”
- Kennebec – “good field resistance to late blight”
Of these, I’ve already grown the Yukon Gold and Red Norland, and seen very low yields. The Kennebec and Red Gold might do OK? It’s hard to guess; we’ll find out. The problem with doing a trial like this, though, is that there are only 3 spuds in my Kennebec bag, with cutting, enough for probably 5-6 plants. What if those few plants get lucky or unlucky with a particular part of a garden bed, like the Island Sunshines seemed to? In that case, any variety-specific traits are overwhelmed by the variation in the soil issues, and we won’t know if the variety is good or not.
]]>