The post How to Get Rid of Clover in Lawn: Expert Tips That Work appeared first on Allen Outdoor.
]]>After 15+ years maintaining lawns across the St. Louis area, I’ve seen clover take over more yards than I can count. Just last month, I helped a client in Chesterfield whose beautiful fescue lawn had become 40% clover practically overnight. The frustration in his voice was all too familiar – clover seems to appear from nowhere and spread like wildfire.
Here’s the truth: clover isn’t just unsightly; it’s a symptom of deeper lawn health issues. But the good news? With the right approach, you can eliminate it completely and prevent it from coming back. I’m going to share the exact methods we use at Allen Outdoor Solutions that have helped hundreds of homeowners reclaim their lawns.
Why Clover Invades Your Lawn in the First Place
Understanding why clover shows up is half the battle. In my experience working with Missouri lawns, I’ve noticed that clover invasions almost always point to one of four underlying issues.
Nitrogen-Poor Soil This is the big one. Clover has a superpower – it can pull nitrogen from the air through its roots. Your grass can’t do this, so when soil nitrogen levels drop, clover gets a huge competitive advantage. I’ve tested countless lawns where clover dominated, and nearly every time, the soil test revealed nitrogen deficiency.
Compacted Soil Clover thrives in compacted soil where grass struggles. Those high-traffic areas where kids play or where you park occasionally? That’s where I typically see clover first establish itself. The compacted soil makes it harder for grass roots to spread, but clover’s shallow root system doesn’t mind.
Thin Grass Coverage Nature abhors a vacuum, and your lawn is no exception. Wherever grass is thin or missing, clover will move in. I often see this in shaded areas under trees or in spots where grubs damaged the turf the previous season.
Soil pH Issues Clover prefers slightly acidic to neutral soil (pH 6.0-7.0), which happens to be the same range most grasses prefer. However, when soil becomes too alkaline or acidic, grass suffers while clover adapts better to these conditions.
5 Proven Methods to Eliminate Clover
Method 1: Targeted Herbicide Treatment
For established clover patches, selective herbicides remain the most effective solution. I recommend broadleaf herbicides containing 2,4-D, dicamba, or MCPP – these target clover while leaving grass unharmed.
Application Timing: Apply when temperatures are between 60-80°F and clover is actively growing. In our St. Louis climate, this means late April through early June and again in September. Avoid treating during hot summer stress periods.
Pro Tip: Apply herbicide when clover leaves are dry but soil is moist. This gives you maximum absorption without washing away the treatment.
For organic-minded homeowners, corn gluten meal works as a pre-emergent, but you’ll need patience – it prevents new clover seeds from germinating rather than killing existing plants.
Method 2: Manual Removal for Small Patches
When dealing with isolated clover patches smaller than a dinner plate, hand removal can be surprisingly effective. I’ve taught dozens of clients this technique, and it works well for maintaining clover-free lawns long-term.
The Proper Technique:
- Water the area thoroughly the day before removal
- Use a dandelion weeder or similar tool to get under the entire root system
- Pull when soil is moist but not soggy
- Remove the entire plant, including roots
- Fill bare spots immediately with grass seed and compost
The key is getting the entire root system. Miss even a small piece, and the clover will regrow within weeks.
Method 3: Crowd Out Clover with Thick Grass
This is my favorite long-term strategy because it addresses the root cause while creating a naturally clover-resistant lawn. Thick, healthy grass simply doesn’t give clover room to establish.
Overseeding Strategy:
- Choose grass varieties suited to your specific conditions (sun/shade, traffic level)
- Overseed in early fall when conditions favor grass over clover
- Apply starter fertilizer to give new grass a competitive advantage
- Maintain consistent moisture for 3-4 weeks after seeding
For comprehensive overseeding and lawn renovation, our professional lawn care services can help establish the thick, healthy turf that naturally resists clover invasion.
Method 4: Fix the Underlying Soil Issues
According to research from the University of Missouri Extension, addressing soil nutrition and structure provides the most lasting clover control. Here’s what actually works:
Soil Testing First: Never guess at soil needs. A proper soil test reveals exactly what your lawn lacks. I’ve seen homeowners spend hundreds on fertilizer for phosphorus-rich soil that actually needed nitrogen and potassium.
Nitrogen Management: Most established lawns need 2-4 pounds of nitrogen per 1,000 square feet annually. Split this into 3-4 applications rather than one heavy feeding. This sustained nutrition gives grass the advantage over clover.
Aeration for Compacted Areas: Core aeration in fall helps grass roots penetrate deeper while improving water and nutrient absorption. I recommend this for any lawn with clover in high-traffic areas.
Method 5: Complete Lawn Renovation
Sometimes clover infestation is so severe that starting over makes more sense than battling it section by section. I typically recommend this when clover covers more than 30% of the lawn area.
The Process:
- Kill existing vegetation with non-selective herbicide
- Wait 2-3 weeks for complete die-back
- Remove thatch and debris
- Amend soil based on test results
- Seed with appropriate grass varieties
- Maintain intensive care schedule for 8-12 weeks
Timeline-wise, plan for a full season of establishment. Start in late August or early September in our area for best results.

Prevention: Keep Clover from Coming Back
The best clover control happens before clover arrives. After working with hundreds of clover-plagued lawns, I’ve identified the maintenance practices that keep properties clover-free year after year.
Maintain Proper Soil Nutrition Follow a consistent fertilization schedule based on your soil test results. Most cool-season grasses in our area benefit from fertilization in early spring, late spring, early fall, and late fall. The National Association of Landscape Professionals provides excellent guidelines for timing and application rates.
Keep Grass Thick and Healthy Overseed thin areas every fall before they become clover opportunities. I tell clients to think of overseeding as insurance – it’s much cheaper than clover removal.
Water Deeply but Infrequently Shallow, frequent watering favors clover’s shallow root system. Instead, water deeply 1-2 times per week, encouraging deeper grass roots that compete better with clover.
Monitor pH Levels Test soil pH every 2-3 years and adjust as needed. Most grasses prefer slightly acidic soil (6.0-6.8), while keeping pH in this range gives grass an advantage over clover.
When to Call Professional Help
Some clover situations require professional intervention. After years in this business, I can spot these scenarios immediately:
Widespread Infestation: When clover covers more than 20% of your lawn, professional treatment often proves more cost-effective than DIY approaches.
Recurring Problems: If clover keeps returning despite your best efforts, underlying soil issues likely need professional diagnosis and correction.
Time Constraints: Effective clover control requires precise timing and multiple treatments. Busy homeowners often get better results with professional programs.
Complex Soil Issues: Problems like severe compaction, drainage issues, or multiple nutrient deficiencies benefit from professional assessment and treatment.
For a personalized assessment of your clover situation and customized treatment plan, contact our team for a consultation. We’ve successfully eliminated clover from properties throughout the St. Louis area and can develop a strategy specific to your lawn’s needs.
Seasonal Timeline for Clover Control
Timing makes all the difference in clover control. Here’s the schedule I follow for Missouri lawns:
Spring (March-May):
- Apply pre-emergent herbicide in early March
- Spot-treat emerging clover in late April
- Begin regular fertilization program
- Overseed thin areas if needed
Summer (June-August):
- Monitor for new clover growth
- Maintain consistent watering schedule
- Avoid herbicide applications during heat stress
- Focus on lawn health maintenance
Fall (September-November):
- Peak time for overseeding and renovation
- Apply broadleaf herbicide for persistent clover
- Core aerate compacted areas
- Apply fall fertilizer for root development
Winter (December-February):
- Plan next year’s lawn care strategy
- Order seeds and amendments
- Prepare equipment for spring applications

Common Mistakes That Make Clover Worse
In my experience, these mistakes actually encourage clover growth:
Over-Fertilizing with Phosphorus: Many homeowners apply “complete” fertilizers high in phosphorus without testing soil first. Excess phosphorus can actually favor clover over grass.
Cutting Grass Too Short: Scalping grass weakens it and creates opportunities for clover establishment. Maintain grass at 3+ inches for best competition against weeds.
Inconsistent Treatment: Clover control requires patience and consistency. Spot-treating here and there won’t solve widespread problems.
Ignoring Soil Health: Treating symptoms (clover) without addressing causes (poor soil conditions) leads to recurring problems.
Your Path to a Clover-Free Lawn
Eliminating clover from your lawn isn’t complicated, but it does require the right approach for your specific situation. Whether you choose targeted herbicide treatment, overseeding, soil improvement, or complete renovation, success comes from addressing the underlying conditions that allowed clover to establish in the first place.
Remember that patience pays off. Most effective clover control strategies take 6-12 months to show full results, but the payoff is a thick, healthy lawn that naturally resists future clover invasions.
The methods I’ve shared here have helped hundreds of St. Louis area homeowners reclaim their lawns from clover. With consistent application and attention to soil health, you can achieve the same results. Your lawn – and your neighbors – will thank you for the effort.
The post How to Get Rid of Clover in Lawn: Expert Tips That Work appeared first on Allen Outdoor.
]]>The post Sprinkler Irrigation Systems Guide appeared first on Allen Outdoor.
]]>After watching your neighbor’s lush, green lawn flourish while yours struggles through another St. Louis summer drought, you’ve probably wondered what their secret is. The answer isn’t a magic fertilizer or a green thumb—it’s likely a professionally installed sprinkler irrigation system working behind the scenes, delivering precisely the right amount of water at exactly the right times.
At Allen Outdoor Solutions, we’ve spent over 15 years transforming Missouri lawns through expert irrigation system installations. From the clay-heavy soils of St. Charles County to the challenging terrain of Jefferson County, we’ve seen firsthand how a properly designed sprinkler irrigation system can turn a struggling landscape into the neighborhood’s crown jewel. But here’s what most homeowners don’t realize: the difference between a system that saves you time and money versus one that becomes a costly headache all comes down to understanding what you’re investing in.
Whether you’re tired of dragging hoses around your property, frustrated with brown patches that never seem to recover, or simply want to increase your home’s value while reducing your water bill, this comprehensive guide will walk you through everything you need to know about sprinkler irrigation systems. We’ll share real insights from hundreds of installations across the St. Louis metro area, including the common mistakes we help homeowners avoid and the solutions that actually work in our unique Midwest climate.
What is a Sprinkler Irrigation System?
A sprinkler irrigation system is an automated network of underground pipes, valves, and strategically placed sprinkler heads designed to deliver water efficiently across your landscape. Unlike the basic oscillating sprinkler you might drag out on weekends, a professional irrigation system operates on programmed schedules, divides your property into optimal watering zones, and adapts to your landscape’s specific needs.
The core components work together like a well-orchestrated team: a main water line connects to a series of control valves that regulate water flow to different zones, while buried PVC pipes carry water to sprinkler heads positioned for maximum coverage. A central controller acts as the brain, automatically activating each zone according to your programmed schedule. Modern systems even include rain sensors that prevent unnecessary watering during storms and soil moisture sensors that adjust watering based on actual ground conditions.
What sets today’s sprinkler irrigation systems apart from basic sprinklers is precision and intelligence. Instead of flooding your entire yard with the same amount of water, professional systems create customized zones that recognize the different watering needs across your property. Your sun-baked front lawn receives different treatment than the shaded areas under your oak trees, while flower beds get gentle drip irrigation rather than heavy spray.
In our installations across St. Charles and Jefferson counties, we’ve seen how this targeted approach transforms not just the appearance of lawns, but also reduces water waste by 20-40% compared to manual watering methods. The system learns your landscape’s unique requirements and delivers exactly what each area needs, when it needs it.

Signs You Need a Professional Irrigation System
The telltale signs that your current watering method isn’t cutting it are usually obvious once you know what to look for. Brown patches that persist despite your best efforts often indicate inconsistent watering patterns—areas that receive too much water one day and not enough the next. These dry spots typically appear first in high-traffic areas or slopes where water runs off before soaking in, a common problem we address in many St. Louis area installations.
If your water bill has you questioning whether you’re irrigating your lawn or filling a swimming pool, you’re likely overwatering in some areas while underwatering in others. Manual sprinklers and hose watering tend to be incredibly inefficient, often running longer than necessary because homeowners forget to move them or simply aren’t sure when enough is enough. We’ve worked with clients whose water bills dropped by hundreds of dollars annually after switching to an automated sprinkler irrigation system with smart scheduling.
Time constraints represent another major factor driving homeowners toward professional irrigation solutions. Between work, family commitments, and weekend activities, finding time to properly water your landscape becomes increasingly difficult. The result is often sporadic watering that stresses your grass and plants, creating the very problems you’re trying to prevent. A properly programmed irrigation system handles this responsibility automatically, maintaining your landscape even when you’re traveling or simply too busy to think about it.
Property value considerations also play a significant role in irrigation decisions. Real estate professionals consistently report that well-maintained landscapes contribute significantly to curb appeal and overall home value. An automated sprinkler irrigation system not only maintains your landscape’s appearance but also signals to potential buyers that the property has been professionally maintained and upgraded.
Missouri’s unpredictable climate adds another layer of complexity to landscape maintenance. Our hot, humid summers followed by sporadic drought periods create challenging conditions for maintaining healthy grass and plants. Municipal water restrictions during dry spells can leave homeowners scrambling to keep their landscapes alive, while sudden storms can oversaturate areas that were just watered manually.
Types of Sprinkler Irrigation Systems
Understanding the different types of sprinkler irrigation systems helps you make informed decisions about what will work best for your specific landscape and budget. Each system type serves different purposes and excels in particular applications.
In-Ground Spray Head Systems
Spray head irrigation systems work best for smaller areas and spaces requiring precise water control. These systems use stationary sprinkler heads that distribute water in fixed patterns, typically covering areas from 8 to 15 feet in radius. The heads pop up from ground level when activated, then retract flush with the soil when the watering cycle completes, maintaining a clean appearance and preventing damage from mowing.
In our experience installing systems throughout the St. Louis metro area, spray heads excel in front yard areas, parkways, and smaller back lawn sections. They provide excellent coverage for areas with specific watering requirements, such as newly seeded sections or areas with different grass types. The precision control makes them ideal for properties with varied landscaping where different zones require different watering approaches.
Rotary Sprinkler Systems
For larger lawn areas, rotary sprinkler systems provide superior coverage and efficiency. These systems use rotating heads that distribute water in slow, steady streams across distances of 25 to 50 feet or more. The rotating action ensures even distribution while allowing water time to soak into the soil rather than running off.
Rotary systems prove particularly effective in Missouri’s clay-heavy soils, which are common throughout St. Charles and Jefferson counties. The slower application rate prevents surface runoff and allows better penetration, addressing one of the most common watering challenges we encounter in local installations. Large back yards and open lawn areas benefit most from rotary coverage, providing the efficient watering that keeps extensive grass areas healthy throughout our demanding summer months.
Drip Irrigation Zones
Drip irrigation represents the most water-efficient option for flower beds, vegetable gardens, and shrub areas. Instead of spraying water through the air, drip systems deliver water directly to plant root zones through a network of tubes and emitters. This targeted approach minimizes water loss through evaporation and eliminates water waste on non-planted areas.
We typically incorporate drip zones into comprehensive irrigation designs for clients who want to maintain both lawn areas and cultivated garden spaces. The precision watering helps established plants thrive while preventing overwatering that can lead to fungal problems and root rot in garden beds.
Smart Controllers and Advanced Technology
Modern sprinkler irrigation systems increasingly incorporate intelligent technology that optimizes watering schedules based on real-time conditions. WiFi-enabled controllers allow homeowners to monitor and adjust their systems remotely through smartphone apps, providing convenient control whether they’re at home or traveling.
Weather sensors and soil moisture detection represent game-changing additions to contemporary systems. Rain sensors automatically postpone scheduled watering when natural precipitation provides adequate moisture, while soil moisture sensors monitor actual ground conditions and adjust watering duration accordingly. These smart features prevent overwatering while ensuring your landscape receives optimal care regardless of changing weather patterns.
We recently completed an installation for a client in Chesterfield that demonstrates the effectiveness of smart irrigation technology. Their previous manual watering routine consumed approximately 15,000 gallons monthly during summer months, while their new smart sprinkler irrigation system with weather monitoring uses roughly 10,500 gallons for superior results. The 30% water savings, combined with dramatically improved lawn health, paid for a significant portion of the installation cost in the first year alone.
Professional Installation Process
Understanding what goes into professional sprinkler irrigation system installation helps homeowners make informed decisions and set appropriate expectations for their projects. Our systematic approach, refined through hundreds of installations across the St. Louis metro area, ensures reliable performance and long-term satisfaction.
Initial Property Assessment and Design
Every successful irrigation project begins with a comprehensive property evaluation that goes far beyond simply measuring square footage. We analyze your landscape’s unique characteristics, including soil composition, drainage patterns, sun and shade areas, plant types, and existing plumbing infrastructure. Slope variations across your property significantly impact sprinkler placement and water pressure requirements, particularly important in areas like West County where terrain changes can be dramatic.
Water pressure testing determines the optimal number of zones and head placement for your specific property. Insufficient water pressure spread across too many heads results in poor coverage and weak performance, while too few zones can create inefficient watering patterns. We map out the most effective zone configuration during this initial assessment, ensuring each area of your landscape receives appropriate coverage without compromising system performance.
Local soil conditions play a crucial role in system design decisions. The clay-heavy soils common throughout much of St. Louis County require different approaches than the sandier compositions found in some areas. Clay soils benefit from slower application rates and longer watering cycles to prevent runoff, while sandy soils require more frequent, shorter cycles to maintain adequate moisture levels.
Permits and Local Requirements
St. Louis County and surrounding municipalities have specific requirements for irrigation system installations that professional contractors handle on your behalf. These regulations ensure proper connections to municipal water systems and prevent cross-contamination issues that could affect public water supplies.
Backflow prevention devices are mandatory components that prevent irrigation water from flowing back into your home’s potable water supply. Professional installation includes proper backflow preventer selection and testing, ensuring compliance with local codes and protecting your family’s water quality.
Underground Installation and Infrastructure
The physical installation process begins with precise marking of underground utilities to prevent damage to existing gas, electric, and telecommunications lines. Professional crews use specialized trenching equipment to create narrow channels for pipe installation, minimizing disruption to your existing landscape while ensuring proper depth and slope for optimal water flow.
PVC pipe installation requires careful attention to connection quality and proper burial depth to prevent freeze damage during Missouri winters. We bury supply lines below the frost line and install drain valves at low points to prevent water accumulation that could cause pipe damage during freezing weather. Proper pipe sizing ensures adequate water pressure reaches every sprinkler head, maintaining consistent performance across all zones.
Sprinkler Head Placement and Configuration
Strategic sprinkler head placement maximizes coverage while minimizing water waste and avoiding obstacles like trees, walkways, and structures. Head-to-head coverage ensures every area receives adequate water without creating dry spots or overwatered zones that can lead to disease problems.
Different head types serve specific purposes within the overall system design. Spray heads with various nozzle configurations handle smaller areas and provide precise coverage for shaped beds and narrow strips, while rotary heads cover larger open areas efficiently. Stream rotor technology works particularly well in windy conditions common across the St. Louis area, maintaining coverage accuracy when traditional spray patterns might be disrupted.
Controller Programming and System Testing
The final installation phase involves programming your irrigation controller for optimal watering schedules based on your landscape’s specific needs and local watering restrictions. We establish different programs for various seasons, accounting for changing daylight hours, temperature variations, and plant growth cycles throughout the year.
Comprehensive system testing ensures every zone operates correctly and provides proper coverage. We verify water pressure at each head, check for proper spray patterns, and confirm that all zones activate and shut off according to the programmed schedule. This testing phase often reveals minor adjustments needed for optimal performance, which we complete before considering the installation finished.
One common challenge we address during installation involves working around existing landscape features that homeowners want to preserve. Recent projects have required creative solutions for maintaining mature tree root systems while installing irrigation lines, and designing around established garden beds that needed continued access for seasonal planting changes.

Maintenance and Seasonal Care
A well-maintained sprinkler irrigation system can operate reliably for decades, but neglecting routine care often leads to costly repairs and poor performance. Understanding the seasonal maintenance requirements helps you protect your investment while ensuring consistent landscape results throughout the year.
Spring Startup and System Inspection
Spring activation represents the most critical maintenance period for irrigation systems in Missouri. After months of winter shutdown, systems require careful inspection and testing before resuming regular operation. We recommend professional spring startup service for the first few years after installation, allowing homeowners to learn proper procedures while ensuring no damage occurred during the dormant period.
The startup process begins with slowly restoring water pressure to the system, checking for leaks or damage that may have occurred during freezing weather. Sprinkler heads often require cleaning and adjustment after winter, as debris and settling can affect spray patterns and coverage. Pop-up heads sometimes stick in the retracted position due to dirt accumulation, requiring cleaning and lubrication to restore proper operation.
Controller programming typically needs updates for the new growing season, adjusting watering schedules for longer daylight hours and changing temperature patterns. Battery replacement in controllers and rain sensors ensures reliable operation throughout the active season, preventing system failures that could damage your landscape during critical growing periods.
Summer Monitoring and Performance Optimization
Summer operation requires ongoing attention to ensure your sprinkler irrigation system adapts to changing conditions and maintains optimal performance. Regular visual inspections help identify problems before they become serious issues, saving both water and money while protecting your landscape investment.
Watch for signs of uneven watering, such as brown patches developing in areas that should receive adequate coverage, or overly wet spots that might indicate broken heads or misaligned spray patterns. Clogged nozzles often cause irregular spray patterns that leave gaps in coverage, while damaged heads might spray in unintended directions, wasting water on sidewalks, driveways, or structures.
During extended hot periods common in St. Louis summers, you may need to adjust watering schedules to provide additional moisture without overwatering. Smart controllers with weather monitoring automatically make these adjustments, while traditional controllers require manual programming changes to account for increased evaporation rates and plant stress during heat waves.
Municipal watering restrictions sometimes require temporary schedule modifications during drought conditions. Understanding your system’s flexibility helps you comply with local ordinances while maintaining your landscape’s health through challenging periods.
Fall Preparation and Winterization
Proper winterization protects your sprinkler irrigation system from freeze damage that can result in expensive repairs and spring startup delays. Missouri’s unpredictable winter weather, with temperatures that can fluctuate dramatically, makes thorough winterization particularly important for system longevity.
The winterization process involves completely removing water from all system components that could be damaged by freezing. Professional winterization typically uses compressed air to blow water from supply lines, valve boxes, and sprinkler heads, ensuring no water remains that could expand and crack pipes or components during winter freezes.
Controller adjustments for winter include shutting down automatic programs while maintaining power to prevent internal component damage from temperature extremes. Rain sensors and soil moisture monitors often require protection or removal during winter months to prevent damage from ice accumulation.
We typically schedule winterization services in late October or early November, depending on weather forecasts and the likelihood of sustained freezing temperatures. Waiting too long risks surprise freeze events that can damage unprepared systems, while winterizing too early unnecessarily shortens the watering season during mild autumn weather.
Many homeowners ask about do-it-yourself winterization, and while some basic maintenance is possible, proper system blowout requires specialized equipment and experience. Inadequate winterization often results in hidden damage that doesn’t become apparent until spring startup, potentially causing expensive repairs that professional winterization would have prevented.
Cost Factors and Investment Value
Understanding the financial aspects of sprinkler irrigation system installation helps homeowners make informed decisions about this significant landscape investment. While costs vary based on property size and system complexity, the long-term value often justifies the initial expense through water savings, reduced maintenance time, and increased property value.
Installation costs in the St. Louis metro area typically range from $3,000 to $8,000 for most residential properties, with factors like property size, terrain complexity, and system features affecting the final price. Smaller properties with simple layouts and good water pressure fall toward the lower end of this range, while larger lots with challenging terrain, extensive landscaping, or premium smart technology components approach the higher end.
Several factors significantly impact installation pricing beyond basic property size. Difficult soil conditions, such as the rocky terrain found in some Jefferson County areas, require additional labor and specialized equipment for trenching and installation. Properties with extensive hardscaping, mature landscaping, or challenging access for installation equipment often require more time and careful work, affecting overall project costs.
System complexity plays a major role in pricing decisions. Basic timer-controlled systems with standard spray and rotary heads cost significantly less than smart irrigation systems with weather monitoring, soil moisture sensors, and smartphone control capabilities. However, the advanced features often pay for themselves through water savings and improved landscape health over time.
Long-term water savings represent one of the most compelling financial benefits of professional irrigation systems. Clients consistently report 20-40% reductions in water usage compared to manual watering methods, translating to substantial savings on utility bills. During typical St. Louis summers, these savings often amount to $500-$1,000 annually for average-sized properties, helping offset installation costs within the first few years.
Property value considerations add another dimension to the investment equation. Real estate professionals note that well-maintained landscapes contribute significantly to curb appeal and overall home value, with automated irrigation systems signaling to potential buyers that the property has been professionally maintained and upgraded. While individual results vary, comprehensive landscape improvements including irrigation often return 70-100% of their investment in increased property value.
Maintenance costs for properly installed systems remain relatively low compared to the ongoing expenses of manual watering and landscape replacement. Annual maintenance, including spring startup and fall winterization, typically costs $200-$400 annually, while avoiding the need to replace drought-damaged landscaping saves thousands of dollars over time.
When evaluating irrigation system investment, consider the total cost of landscape maintenance over time. Manual watering often leads to inconsistent results that require expensive replanting, overseeding, and plant replacement. Professional irrigation systems maintain consistent landscape health that reduces these replacement costs while providing the convenience of automated care.
Choosing the Right Irrigation Professional
Selecting the right contractor for your sprinkler irrigation system installation significantly impacts both the immediate project experience and long-term system performance. Understanding what distinguishes quality professionals from less experienced installers helps ensure your investment provides years of reliable service.
Proper licensing and insurance represent fundamental requirements for any irrigation contractor. In Missouri, irrigation system installation requires appropriate contractor licensing, and reputable companies carry comprehensive liability insurance to protect both their workers and your property during installation. Always verify licensing status and insurance coverage before allowing work to begin on your property.
Experience with local soil and climate conditions proves invaluable for irrigation system design and installation. Contractors familiar with St. Louis area clay soils, drainage challenges, and municipal water pressure variations can anticipate and address potential issues before they become problems. Ask potential contractors about their experience with properties similar to yours and their familiarity with local watering restrictions and requirements.
Quality irrigation professionals provide detailed written estimates that break down costs for materials, labor, and specific system components. Vague estimates or reluctance to explain system design choices often indicate inexperience or cost-cutting measures that may compromise system performance. Reputable contractors welcome questions about their design recommendations and can explain how their proposed system addresses your property’s specific challenges.
References from recent local installations offer valuable insights into contractor reliability and quality. Established irrigation companies should readily provide references from clients with similar projects, allowing you to verify their work quality and customer service standards. Drive by recent installations if possible to observe the quality of workmanship and landscape restoration after completion.
Warranty coverage and ongoing service availability distinguish professional irrigation companies from installers who disappear after completing projects. Comprehensive warranties should cover both materials and workmanship for reasonable periods, while established companies offer ongoing maintenance services and emergency repairs when needed.
Red flags include unusually low bids that may indicate substandard materials or corner-cutting installation methods, high-pressure sales tactics, or reluctance to provide detailed system information and references. Door-to-door sales approaches and requirements for immediate decisions often signal inexperienced or unreliable contractors.
Quality irrigation professionals take time to understand your landscape goals and provide education about system operation and maintenance. They should explain controller programming, basic troubleshooting procedures, and seasonal adjustment recommendations, ensuring you can operate your system effectively after installation completion.

Conclusion and Next Steps
A professionally designed and installed sprinkler irrigation system transforms landscape maintenance from a time-consuming chore into an automated process that delivers superior results while conserving water and protecting your property investment. The precision watering, intelligent scheduling, and adaptive technology available in modern irrigation systems provide benefits that extend far beyond simple convenience.
The decision to install an irrigation system represents an investment in your property’s long-term value and your quality of life. Consistent, appropriate watering maintains healthy landscapes that enhance curb appeal, reduce maintenance requirements, and provide the outdoor environment you envisioned when you chose your home. The water savings, reduced labor, and improved plant health typically justify the installation investment within a few years while providing decades of reliable service.
Timing considerations can affect both installation scheduling and first-year results. Spring installations allow new systems to support landscapes through the challenging summer months, while fall installations provide time for system settling and early season adjustments before peak demand periods. However, quality irrigation contractors can successfully complete installations throughout most of the year, weather permitting.
If you’re ready to transform your landscape maintenance routine while enhancing your property’s beauty and value, contact Allen Outdoor Solutions for a comprehensive irrigation consultation. Our team will evaluate your property’s unique characteristics, discuss your landscape goals, and design a sprinkler irrigation system that delivers optimal results for your specific needs and budget.
For more information about our complete range of outdoor services and to explore our landscaping portfolio, visit our website or call us directly to schedule your free consultation. Let us show you how professional irrigation system installation can revolutionize your landscape care while providing the lush, healthy outdoor spaces you’ve always wanted.
The investment in a quality sprinkler irrigation system pays dividends in time saved, water conservation, and landscape beauty for years to come. Don’t let another season pass struggling with inconsistent watering results when automated precision is within reach.
The post Sprinkler Irrigation Systems Guide appeared first on Allen Outdoor.
]]>The post Popular Plants for Landscaping: St. Louis Expert Guide appeared first on Allen Outdoor.
]]>After 15+ years of creating outdoor spaces throughout the St. Louis area, we’ve learned that successful landscaping isn’t about following trends or choosing the most exotic specimens. It’s about selecting plants that deliver consistent beauty, adapt to our unique Missouri climate, and create the outdoor living experience you’re dreaming of.
The difference between a landscape that thrives and one that merely survives often comes down to choosing plants that have proven themselves over time. We’re talking about varieties that can handle our humid summers, unpredictable spring weather, and those occasional late freezes that catch everyone off guard. These are the plants that keep our clients calling to say how much they love spending time in their transformed yards.
Through hundreds of installations and countless follow-up visits, we’ve identified the plants that consistently deliver stunning results while requiring reasonable maintenance. Whether you’re starting from scratch or refreshing existing beds, these proven performers will give you the foundation for a landscape you’ll actually want to spend time in.

Foundation Plants: The Backbone of Great Landscaping
Every successful landscape starts with solid foundation plantings, and we’ve learned which varieties truly earn their place in Missouri gardens. These aren’t just pretty plants—they’re the workhorses that provide structure, year-round interest, and the backdrop that makes everything else shine.
Boxwood: The Reliable Performer
Boxwood remains one of our most requested foundation plants, and for good reason. We’ve watched boxwood plantings we installed a decade ago maintain their crisp, professional appearance with minimal intervention. The key is selecting the right variety for your specific location. Green Velvet boxwood has proven exceptional in our climate, staying compact and maintaining that rich green color even during harsh winters.
One Ladue project showcased boxwood’s versatility beautifully. We used varying heights to create layered interest around the front entrance, and three years later, these plants still look like they were just installed. The homeowner mentions every time we visit for seasonal maintenance how many compliments she receives from neighbors.
Arborvitae: Privacy with Purpose
When clients need privacy screening that looks intentional rather than fortress-like, we often recommend arborvitae. Emerald Green arborvitae has been our go-to choice because it maintains a naturally narrow profile without constant trimming. We’ve installed hundreds of these over the years, and they consistently provide that coveted “living wall” effect.
A recent Kirkwood installation demonstrates their effectiveness perfectly. The homeowners wanted to screen their deck from neighboring windows without creating a claustrophobic feeling. Six-foot Emerald Green arborvitae, properly spaced, created exactly the privacy they needed while maintaining an open, welcoming atmosphere.
Hydrangeas: The Client Favorite
No plant generates more excitement from clients than hydrangeas, particularly when they see established specimens in full bloom during our summer consultations. We’ve found that Incrediball and Limelight hydrangeas perform exceptionally well in our area, offering reliable blooms and manageable growth habits.
The secret we’ve learned through experience is proper placement. Hydrangeas need morning sun but afternoon protection, especially during our brutal July and August heat waves. A Clayton installation where we positioned Limelight hydrangeas on the east side of the house has been blooming spectacularly for five years running. The homeowner credits these plants with transforming her previously unremarkable side yard into the favorite gathering spot for family barbecues.
Spirea: Low-Maintenance Beauty
For clients who want maximum impact with minimal fuss, spirea varieties like Goldflame and Little Princess have proven invaluable. These compact shrubs offer seasonal interest—spring flowers, summer foliage color, and attractive winter structure—without demanding constant attention.
We installed Goldflame spirea three years ago for busy professionals in Des Peres who wanted beautiful landscaping but realistic maintenance requirements. These plants have delivered exactly what we promised: spring flowers, summer color changes, and autumn interest, all while requiring only annual pruning.

Show-Stopping Perennials That Keep Clients Coming Back
The difference between good landscaping and great landscaping often lies in the perennial selections. These are the plants that create those “wow” moments throughout the growing season while establishing your yard as a place that changes and evolves beautifully over time.
Hostas: The Shade Solution
Hostas have solved more challenging shade situations than any other plant in our arsenal. From tiny courtyard gardens in Central West End to sprawling estate properties in Ladue, we’ve used hostas to transform difficult areas into landscape highlights.
Sum and Substance hostas, with their massive chartreuse leaves, create dramatic focal points that clients consistently mention as conversation starters. We installed a grouping around an old oak tree in Webster Groves five years ago, and the homeowner still contacts us each spring to share photos of the emerging leaves. The key insight we’ve gained is that larger hosta varieties often perform better than smaller ones in our climate—they seem more resilient to both drought stress and slug damage.
Blue-leafed varieties like Halcyon provide sophisticated color contrast that photographs beautifully. One Town and Country client specifically requested our recommendations for plants that would look stunning in her social media posts, and the combination of Halcyon hostas with white astilbe has delivered exactly that visual impact.
Daylilies: Heat-Tolerant Champions
Daylilies have earned their reputation as nearly indestructible perennials, but we’ve learned which varieties truly excel in our specific growing conditions. Stella de Oro remains popular for good reason—reliable reblooming performance that extends the flower show from spring through fall.
For dramatic height and statement-making blooms, we often recommend Autumn Red or Chicago Apache daylilies. A recent Chesterfield installation featured mass plantings of these taller varieties along a property border, creating a stunning display visible from the street. The homeowners report that neighbors regularly slow down during evening walks to admire the blooms.
The practical advantage we’ve observed with daylilies is their drought tolerance once established. During the particularly dry summer two years ago, while many landscapes struggled, our daylily plantings continued performing admirably with minimal supplemental watering.
Coneflowers: Pollinator Magnets with Staying Power
Purple coneflowers (Echinacea) have become essential components in our designs, partly for their proven performance and partly for clients’ increasing interest in supporting local wildlife. We’ve watched these plantings become hubs of butterfly and bee activity, adding movement and life to static landscape designs.
White Swan and Magnus varieties have shown exceptional longevity in our installations. A University City project from seven years ago still features the original coneflower plantings, now naturalized into impressive clumps that provide months of continuous blooms. The homeowner mentions how much she enjoys watching goldfinches feed on the seed heads during fall and winter.
Ornamental Grasses: Texture and Movement
Ornamental grasses add an element that’s difficult to achieve with other plant types—graceful movement that brings landscapes to life. Fountain grass and miscanthus varieties have proven particularly effective in our area.
Little Bunny fountain grass works beautifully in smaller spaces, while larger miscanthus varieties like Morning Light create dramatic focal points. A recent Clayton installation used Morning Light miscanthus to soften the transition between formal planting beds and a more naturalized back area. The four-season interest these grasses provide—spring emergence, summer texture, fall color, and winter structure—gives clients year-round value from their landscaping investment.

Trees That Define Your Landscape’s Character
Tree selection requires long-term thinking, and our years of experience have taught us which varieties consistently deliver the mature characteristics clients envision. These aren’t just plants—they’re investments in your property’s future character and value.
Sugar Maples: The Classic Choice
Sugar maples remain one of our most recommended shade trees, primarily because we’ve observed their performance over multiple decades in local landscapes. The fall color display alone justifies their inclusion, but their summer shade provision and attractive winter silhouette make them four-season performers.
We planted several sugar maples in a Kirkwood neighborhood eight years ago, and they’re now approaching the size where they’re beginning to define the character of their respective properties. The homeowners regularly comment on how the trees have transformed their outdoor spaces from sunny, somewhat stark areas into comfortable, naturally air-conditioned gathering spots.
Japanese Maples: Sculptural Elements
For clients seeking distinctive focal points, Japanese maples offer unmatched elegance and seasonal interest. Bloodgood and Emperor I varieties have proven most reliable in our climate, maintaining their color intensity even during challenging growing seasons.
A recent Clayton project featured a single Emperor I Japanese maple positioned where it’s visible from both the kitchen window and front entrance. This single tree has become the landscape’s defining element, providing spring color, summer structure, and spectacular autumn display. The placement strategy we employed—positioning it against an evergreen background—maximizes its visual impact throughout the year.
Redbud: Native Beauty
As a Missouri native, redbud trees offer both ecological benefits and spectacular spring display. The Missouri Botanical Garden recognizes redbud as one of our state’s most valuable native trees for residential landscapes. We’ve incorporated redbuds into dozens of projects, often using them to create natural transitions between more formal planting areas and naturalized spaces.
The early spring bloom period provides color when most other trees are still dormant, and the heart-shaped leaves create attractive summer texture. A Webster Groves installation featuring multiple redbuds has become a neighborhood highlight each April, with the homeowner reporting that people regularly stop to photograph the blooming trees.
Regional Considerations: What 15+ Years in St. Louis Has Taught Us
Understanding our local growing conditions isn’t just helpful—it’s essential for creating landscapes that thrive rather than merely survive. Through countless installations and seasonal observations, we’ve learned to work with Missouri’s unique challenges rather than fighting against them.
Climate Reality Check
St. Louis weather tests plants in ways that catalog descriptions never mention. Our zone 6b classification doesn’t capture the reality of 95-degree days followed by surprise late freezes, or the humidity levels that can stress plants adapted to drier climates.
We’ve learned to select plant varieties specifically tested for Midwest conditions. Many popular coastal or mountain plants that look appealing in magazines simply don’t perform reliably here. Instead, we focus on varieties that have proven themselves through our region’s weather extremes.
Soil Challenges and Solutions
The clay soil prevalent throughout much of the St. Louis area presents both challenges and opportunities. While drainage can be problematic, clay soil actually provides excellent nutrient retention once properly amended. The University of Missouri Extension provides excellent resources for understanding local soil conditions and amendment strategies. We’ve developed reliable strategies for working with heavy clay, often incorporating organic matter and selecting plants that actually prefer these conditions.
Plants like daylilies, hostas, and many ornamental grasses have evolved to handle clay soil situations that would stress other varieties. Rather than fighting against soil conditions, we’ve learned to embrace them as selection criteria that actually simplifies plant choices.
Seasonal Performance Expectations
Realistic expectations about seasonal performance have proven crucial for client satisfaction. Spring in Missouri can be spectacular but brief, while summer heat tests plant resilience. We’ve learned to design for summer performance first, treating spring and fall displays as bonuses rather than primary considerations.
This approach has consistently delivered landscapes that look their best during the months when clients spend most time outdoors, while still providing interest during cooler seasons.
Design Principles That Make Popular Plants Shine
Plant selection is only part of creating successful landscapes. How you combine and position these plants determines whether your landscape becomes a cohesive, beautiful outdoor space or simply a collection of nice plants.
Layering for Maximum Impact
Successful plant combinations consider mature sizes, bloom times, and seasonal characteristics. We typically design in layers—tall background plants, medium-height focal points, and low-growing ground coverage that ties everything together.
A recent Chesterfield project demonstrates this approach perfectly. Sugar maples provide canopy coverage, understory dogwoods create mid-level interest, and mass plantings of hostas and astilbe provide ground-level texture and seasonal color. Each layer contributes to the overall composition while serving specific functional purposes.
Color Coordination Strategies
Color combinations that look sophisticated rather than chaotic require careful planning. We’ve found that limiting color palettes while varying textures and forms creates more visually appealing results than trying to include every possible flower color.
White, blue, and purple flowering plants with varied green foliage tones have proven particularly effective in our climate. This palette photographs beautifully, provides calm sophistication, and allows seasonal color changes to create natural variation without overwhelming the overall design.
Maintenance Reality
Honest conversations about maintenance requirements have improved client satisfaction dramatically. Every plant requires some care, but we focus on combinations that provide maximum impact for reasonable maintenance investment.
Low-maintenance doesn’t mean no-maintenance, but it does mean choosing plants that don’t require weekly intervention to look presentable. The popular plants we recommend typically need seasonal pruning, occasional fertilizing, and regular watering during establishment, but they don’t demand constant attention to maintain their appearance.
Getting Started: Your Next Steps
Creating the landscape you envision requires thoughtful planning, proper plant selection, and realistic implementation strategies. Whether you’re starting with a blank slate or refreshing existing plantings, success comes from understanding your specific site conditions and choosing plants that match your lifestyle and aesthetic goals.
Site Assessment First
Every successful landscape project begins with understanding what you’re working with. Soil conditions, sun exposure patterns, drainage characteristics, and existing vegetation all influence which popular plants will perform best in your specific situation.
We typically spend considerable time during initial consultations simply observing how sunlight moves across properties throughout the day, noting areas that stay consistently moist or tend toward dryness, and understanding how existing structures influence growing conditions.
Phased Installation Benefits
Large-scale landscape transformations can feel overwhelming, both financially and logistically. We often recommend phased approaches that allow clients to spread costs over multiple seasons while ensuring each phase creates immediate impact.
Starting with foundation plantings around the house typically provides the most dramatic improvement for initial investment. Adding perennial beds and specimen trees in subsequent phases allows budgets to recover while building toward the complete vision.
Professional Consultation Value
While many popular landscaping plants are relatively forgiving, proper placement, soil preparation, and establishment care significantly influence long-term success. Professional consultation can help avoid costly mistakes while ensuring your plant investments thrive rather than merely survive.
The most common errors we observe in DIY landscapes involve improper spacing, inadequate soil preparation, and plant selections that don’t match site conditions. These issues often don’t become apparent until plants have been in place for several growing seasons, making corrections more expensive and time-consuming.
Seasonal Timing Considerations
Planting timing influences establishment success, particularly for trees and larger shrubs that represent significant investments. Spring and fall planting windows offer optimal conditions for root development before weather extremes stress new installations.
We typically recommend spring installation for most perennials and summer-blooming plants, while trees and shrubs often establish more successfully with fall planting. This allows root development during mild weather before facing either summer heat stress or winter cold.
The popular plants we’ve discussed represent time-tested choices that consistently deliver beautiful results in St. Louis area landscapes. Their proven performance, combined with thoughtful design and proper installation, creates outdoor spaces that enhance both daily living and property values.
Whether you’re dreaming of dramatic curb appeal, comfortable outdoor entertaining areas, or simply a more beautiful view from your windows, these plant selections provide the foundation for achieving those goals. The key is matching your specific vision with plants that will thrive in your particular growing conditions while fitting your maintenance preferences and lifestyle requirements.
At Allen Outdoor Solutions, we’ve seen how the right plant choices transform not just landscapes, but how families use and enjoy their outdoor spaces. The popular plants for landscaping we’ve shared represent our most reliable recommendations based on real-world performance and client satisfaction over more than 15 years of creating beautiful Missouri gardens.
Ready to start planning your landscape transformation? Contact us to discuss how these proven plant selections can create the outdoor space you’ve been envisioning for your property.
The post Popular Plants for Landscaping: St. Louis Expert Guide appeared first on Allen Outdoor.
]]>The post Types of Patio Paving Stone: Complete Guide appeared first on Allen Outdoor.
]]>Picture this: You’re standing in a stone yard on a Saturday morning, staring at what feels like an endless sea of patio paving stones. Gray ones, tan ones, smooth ones, textured ones – and every salesperson has a different “best” recommendation.
After installing over 800 patios across the greater St. Louis area since 2009, we’ve had this exact conversation with homeowners countless times. The truth is, there’s no single “best” paving stone – but there’s definitely a perfect one for your specific needs, budget, and lifestyle.
Natural Stone Pavers: Timeless Beauty with Character
Flagstone: The Rustic Favorite
In our 15+ years of installations, flagstone remains our most requested natural stone option. This sedimentary stone brings an organic, irregular beauty that seems to improve with age.
We typically source our flagstone from Oklahoma and Pennsylvania quarries. Oklahoma flagstone tends toward warm buffs and browns, while Pennsylvania offers cooler grays and blues. Both develop a beautiful patina over time.
From a practical standpoint, flagstone’s irregular shapes mean every installation is unique, but they also require skilled installation. We’ve found that properly installed flagstone using stones 1.5 to 2 inches thick will last decades with minimal maintenance.
Cost-wise, expect flagstone to run $12-18 per square foot installed. While pricier than manufactured options, clients consistently tell us years later that it was worth the investment.
Bluestone: The Modern Classic
When clients show us photos of sleek, contemporary outdoor spaces, bluestone is often the star. This dense, fine-grained sandstone offers the perfect balance of natural beauty and clean lines.
We’ve installed bluestone patios that are now over a decade old, and they still look remarkably fresh. Unlike some natural stones that fade or discolor, quality bluestone maintains its rich blue-gray color beautifully.
Bluestone runs $15-22 per square foot installed. For clients prioritizing longevity and timeless appeal, it’s often worth the investment.
Limestone: Warm and Welcoming
Indiana limestone has been a go-to material for clients who want natural stone character without the premium price of bluestone. Its warm, cream-colored tones complement traditional and transitional home styles beautifully.
Here’s what we’ve learned: limestone requires sealing every 2-3 years to maintain appearance and prevent staining. Clients who stay on top of this maintenance report excellent long-term satisfaction.
Limestone is one of the more budget-friendly natural stone options, typically running $10-15 per square foot installed.

Manufactured and Concrete Pavers: Versatility Meets Value
Interlocking Concrete Pavers: The Practical Choice
Roughly 60% of our patio installations use interlocking concrete pavers. Why? They offer an unbeatable combination of affordability, durability, and design flexibility.
Modern concrete pavers include realistic stone textures, rich color blends, and sophisticated patterns that can mimic high-end natural materials at a fraction of the cost.
One major advantage is reparability. When tree roots shift a section or settling causes issues, individual concrete pavers can be lifted, the base corrected, and the same pavers reinstalled.
Concrete pavers typically run $8-14 per square foot installed, making them accessible for most budgets.
Permeable Pavers: Smart Water Management
We’ve seen growing demand for permeable paver solutions, driven by environmental consciousness and practical drainage needs. These specialized pavers allow water to filter through rather than creating runoff.
Local municipalities increasingly encourage permeable surfaces for new construction. While initial cost runs about 20% higher than standard pavers ($10-16 per square foot), long-term benefits often justify the investment.

Specialty Options: Premium Choices
Travertine: Mediterranean Elegance
Some of our most stunning installations have featured travertine pavers. This limestone-based material brings sophisticated, resort-like appearance that complements both traditional and contemporary architecture.
However, travertine requires honest conversation about maintenance. In our climate, annual sealing is essential to prevent freeze-thaw damage. For clients who commit to proper maintenance, travertine delivers exceptional beauty at $16-24 per square foot installed.
Slate Pavers: Sophisticated and Slip-Resistant
We’ve completed several high-end projects using slate pavers, particularly around pool areas. Slate’s natural texture provides excellent slip resistance even when wet.
The unique character and practical benefits justify slate’s premium pricing of $15-22 per square foot installed.
Choosing the Right Paving Stone: Our Decision Framework
Budget Considerations
For a typical 400-square-foot patio:
- Budget-conscious: $3,200-$5,600 (standard concrete pavers)
- Mid-range: $4,800-$7,200 (premium concrete or basic natural stone)
- Premium: $6,400-$9,600+ (high-end natural stones)
Climate and Durability Factors
Our region’s freeze-thaw cycles are particularly hard on materials. Dense materials like granite and quality concrete pavers handle temperature swings best. The key is always proper drainage – standing water is the enemy of any patio material.
Maintenance Reality Check
Low-maintenance: Quality concrete pavers and granite require little beyond occasional cleaning.
Moderate maintenance: Limestone, sandstone, and bluestone benefit from sealing every 2-3 years.
Higher maintenance: Travertine and softer natural stones require annual attention but reward proper care with exceptional beauty.
According to the Natural Stone Institute, proper maintenance can extend the life of natural stone installations by decades when done correctly.

Installation Considerations
Base Preparation: The Foundation of Success
For most applications, we excavate 8-10 inches deep, install 4-6 inches of compacted gravel base, and add 1-2 inches of leveling sand. Natural stone installations often require concrete setting beds for stability.
Professional vs. DIY Installation
Natural stone installations almost always benefit from professional expertise. Complex patterns, steep slopes, and drainage integration typically exceed most homeowners’ skill levels.
The Interlocking Concrete Pavement Institute provides excellent resources for understanding proper installation techniques and standards.
Finding Your Perfect Solution
Choosing the right patio paving stone comes down to balancing aesthetic preferences, maintenance expectations, and budget realities. Whether you choose budget-friendly concrete pavers or premium natural stone, proper installation and maintenance ensure your outdoor space enhances your home for decades.
Ready to explore your options? Contact Allen Outdoor Solutions today for a free consultation and estimate. Let’s create an outdoor space you’ll love for years to come.
The post Types of Patio Paving Stone: Complete Guide appeared first on Allen Outdoor.
]]>The post 5 Landscape Fabric Alternatives That Actually Work appeared first on Allen Outdoor.
]]>If you’ve ever pulled back landscape fabric to find weeds growing happily on top of it—or worse, roots tangled impossibly through the deteriorating mesh—you know the frustration. We’ve removed enough failed landscape fabric installations to write a book about it.
After years of installing, maintaining, and ultimately replacing landscape fabric in gardens across the St. Louis area, we’ve learned something important: there are better ways to control weeds. Much better ways. Some cost less, some work longer, and nearly all of them leave your soil healthier than suffocating it under plastic sheeting.
In this guide, we’re sharing the landscape fabric alternatives we actually recommend to our clients at Allen Outdoor Solutions—including our honest experience using cardboard as a weed barrier, along with four other methods we’ve tested extensively in real-world conditions.
Why We Rarely Recommend Landscape Fabric Anymore
Let’s be clear: landscape fabric isn’t always terrible. But after installing and maintaining hundreds of landscapes, we’ve seen the same problems repeat themselves:
Weeds still find a way. Once organic matter accumulates on top of the fabric—and it always does—weed seeds blow in and germinate in that layer. Within two to three years, you often have as many weeds as you would without fabric, except now they’re harder to pull because their roots tangle in the mesh.
It breaks down at the worst time. Quality fabric might last five to seven years, but cheaper versions start deteriorating in three. The problem? It breaks down into stubborn fragments that mix into your soil, creating a nightmare if you ever want to plant something new or renovate the bed.
Your soil suffers. Even “permeable” fabric restricts water flow and air exchange. We’ve dug into beds after five years and found compacted, lifeless soil beneath the fabric compared to thriving, rich soil in areas that used organic mulch alone.
Planting becomes a surgical procedure. Want to add a new shrub or perennial? You’ll need to cut through the fabric, and that cut becomes an expressway for weeds.
There are specific situations where fabric still makes sense—under gravel in commercial parking lots, for example. But for most residential gardens? We’ve found better alternatives.
Using Cardboard as a Weed Barrier: What Actually Happens
This is the method that surprises people most, and honestly, it’s become our go-to recommendation for new garden beds and vegetable gardens. Using cardboard as a weed barrier isn’t a trendy Pinterest hack—it’s a time-tested technique that works because it addresses weed control and soil health simultaneously.
Why Cardboard Works
Cardboard blocks sunlight completely, which kills existing weeds and prevents new seeds from germinating. Unlike plastic fabric, cardboard breathes—water and air move through it, especially as it begins to break down. The real magic happens over the next 12 to 18 months as the cardboard decomposes, adding organic matter to your soil and creating habitat for beneficial earthworms and microorganisms.
We’ve seen dramatic improvements in soil quality in beds where we used the cardboard method. The soil underneath becomes noticeably darker, richer, and easier to work with.
How to Apply Cardboard Properly
Here’s the process we follow, refined through plenty of trial and error:
Start with plain corrugated cardboard. Moving boxes are perfect. Avoid anything glossy, wax-coated, or heavily printed. Remove all tape, labels, and staples—these don’t break down and become annoying later.
Prepare the area. Cut down existing weeds (no need to dig them out), but leave the roots. Water the area thoroughly the day before. Moist soil is critical—cardboard applied over dry soil doesn’t make good contact and leaves air pockets where weeds survive.
Layer generously. Lay cardboard pieces flat, overlapping by at least six inches on all sides. Don’t leave gaps. For particularly aggressive weeds like Bermuda grass or bindweed, we go two layers thick.
Wet it down immediately. Soak the cardboard thoroughly as you lay it. This helps it conform to the ground and kickstarts decomposition.
Cover with mulch. This is non-negotiable. Apply 3-4 inches of organic mulch (wood chips, shredded bark, or compost) over the cardboard immediately. The mulch holds the cardboard in place, keeps it moist, provides weight to prevent wind disruption, and makes everything look finished and intentional.
The Reality Check: What to Expect
First three months: Near-perfect weed suppression. The cardboard is still intact and doing its job. You might see a few weeds pop up in the mulch layer itself, but they’re easy to pull.
Months 4-8: The cardboard starts breaking down, especially in areas that stay moist. This is normal and good—it’s enriching your soil. Weed suppression remains strong.
Months 9-15: Visible decomposition. In some spots, the cardboard has essentially disappeared into the soil. You may see more weeds emerging, but far fewer than you’d see without any barrier, and the soil quality has improved so much that they pull easily.
Beyond 18 months: The cardboard is gone, fully integrated into the soil. At this point, the thick mulch layer and improved soil biology are your primary weed controls. You’ll need to refresh the mulch or consider reapplying cardboard in high-weed-pressure areas.
Pros and Cons from Real Projects
The Good:
- Costs almost nothing if you source free boxes
- Dramatically improves soil over time
- Completely safe for vegetable gardens and edible landscapes
- Easy to plant through—just cut an X and dig
- Suppresses even aggressive weeds when applied correctly
The Challenges:
- Labor-intensive for large areas (collecting and laying cardboard takes time)
- Doesn’t look great during the breakdown phase unless well-covered with mulch
- Needs reapplication after 12-18 months in high-maintenance areas
- Not ideal for formal landscapes where appearance is critical year-round
Where it excels: Vegetable gardens, new perennial bed establishment, naturalized areas, around trees, and anywhere you’re prioritizing soil health alongside weed control.

Other Proven Landscape Fabric Alternatives
Deep Wood Chip Mulch (Our Most Common Recommendation)
This is the alternative we install most often, and for good reason: it works beautifully with minimal maintenance. According to university extension research on mulching, organic mulches not only suppress weeds but also moderate soil temperature and conserve moisture—benefits that synthetic fabrics can’t provide
The key is thickness. A 1-2 inch layer of mulch isn’t a weed barrier—it’s decoration that weeds easily penetrate. A 4-6 inch layer of quality wood chips, however, suppresses weeds effectively while improving soil structure as the bottom layer decomposes.
What we’ve learned about wood chips:
- Hardwood chips work better than pine or cedar for weed suppression
- Larger, chunkier chips last longer but smaller chips look more refined
- Avoid dyed mulch—it offers no soil benefits and the dye can leach
- Fresh chips are fine, despite myths about nitrogen depletion (only an issue if you mix them into soil)
Longevity and maintenance: In our experience, a 6-inch layer provides 18-24 months of excellent weed control. After that, the bottom layer has decomposed into the soil (a good thing), and you’ll need to refresh with 2-3 inches of new chips annually.
Cost reality: For a 200-square-foot bed, expect to spend $60-100 on initial installation, then $30-50 annually for refreshing. Some tree services offer free wood chips if you’re willing to take a full truckload.
Best for: Established shrub beds, around trees, naturalized areas, pathways, and anywhere you want a natural look with low maintenance.
Newspaper Layers (Cardboard’s Smaller Cousin)
Newspaper works on the same principle as cardboard but breaks down faster—usually within 6-12 months. We use it when we want temporary weed suppression or in annual vegetable gardens that get tilled each season.
Application: Layer 10-12 sheets thick (not just one section—overlap multiple sections). Wet thoroughly as you go, then cover with 3-4 inches of mulch.
The advantage over cardboard: It’s easier to work with in small spaces and around existing plants. You can tuck it into tight corners and irregular shapes more easily than rigid cardboard.
When we choose newspaper: Small beds, annual vegetable gardens where we want the barrier completely gone by next season, and quick temporary installations.
Important note: Use only black and white newsprint. Glossy inserts and colored sections may contain inks you don’t want in your soil.
Living Ground Covers (The Long Game)
This approach flips the script: instead of blocking weeds with a physical barrier, you plant something intentional that outcompetes weeds for light, water, and space.
Why it works: A well-established ground cover creates a living mulch that shades out weed seeds while stabilizing soil and preventing erosion.
Reality check: This isn’t a quick fix. You’ll need to manage weeds aggressively for the first 1-2 growing seasons while your ground cover establishes. But once mature, many ground covers become nearly self-maintaining.
What we plant in the St. Louis area:
- For full sun: Creeping thyme, sedum varieties, creeping phlox
- Part shade: Ajuga, sweet woodruff, epimedium
- Full shade: Pachysandra, vinca minor, wild ginger
- High traffic tolerance: Mazus reptans, creeping Jenny (contained areas)
Investment: Expect $3-8 per plant, and you’ll need one plant per 1-2 square feet depending on species. For a 100-square-foot area, that’s $150-400 initially, but virtually no cost afterward.
Best for: Large areas where you want year-round beauty, slopes prone to erosion, established landscapes, and anywhere you can wait 1-2 years for full coverage.
Thick Organic Compost Mulch (Double Duty)
High-quality compost serves as both weed barrier and soil amendment—a true two-for-one solution.
How thick is thick enough? We apply 4-5 inches. At this depth, compost effectively blocks light while providing nutrients every time it rains. The weed seeds that do germinate in the top layer pull easily because the soil is so rich and loose.
What makes it work: Unlike wood chips that sit on top of the soil as a separate layer, compost gradually integrates into the topsoil, continuously improving structure and fertility. Weeds that do emerge are growing in such ideal conditions that their roots don’t grip tightly.
The maintenance trade-off: Compost breaks down faster than wood chips—it’s doing its job of feeding your soil. You’ll need to reapply 2-3 inches twice per season to maintain weed suppression.
Cost consideration: Quality compost costs $30-60 per cubic yard. For a 100-square-foot bed at 4 inches deep, you’ll need about 1 cubic yard initially, then half that twice per season.
Best for: Vegetable gardens, rose beds, perennial gardens, anywhere you’re actively cultivating plants that need rich soil and regular feeding.
Stone or Rock Mulch (Done Right)
We need to address this because stone mulch is everywhere—often installed incorrectly over landscape fabric (the worst of both worlds).
The right way: Proper soil preparation and edging are everything. Remove existing weeds and roots thoroughly, grade for drainage, create solid edging to contain the stone, then install 3-4 inches of stone.
Why this works without fabric: The depth and weight of stone prevent most weed seeds from germinating. The few weeds that do appear sit on top of the stone and are incredibly easy to pull or spray—their roots don’t penetrate the stone layer.
What about weeds? You’ll still see some, especially after a few years when organic matter accumulates between stones. But maintenance is easier: a quick sweep, occasional rinsing with a hose, or spot treatment with weeds that haven’t rooted into soil.
When stone makes sense: Modern or desert-themed landscapes, high-traffic areas, drainage zones, fire-wise landscaping, and anywhere you want a permanent, low-organic-maintenance solution.
When it doesn’t: Near trees that drop leaves (nightmare to clean), around plants that need organic matter, anywhere you might want to change the planting scheme in a few years.

Quick Comparison: Finding Your Best Alternative
| Method | Initial Cost | Lifespan | Maintenance | Weed Control | Soil Health | Best Use |
|---|---|---|---|---|---|---|
| Cardboard | $ (nearly free) | 12-18 months | Moderate | Excellent | Excellent (improves) | New beds, vegetable gardens |
| Deep Wood Chips | $$ | 18-24 months | Low | Very Good | Good (improves gradually) | Established beds, trees |
| Newspaper | $ (free) | 6-12 months | Moderate | Very Good | Good (improves) | Small beds, annual gardens |
| Ground Covers | $$$ | Permanent | Low (after establishment) | Excellent | Excellent | Large areas, slopes |
| Compost Mulch | $$$ | 3-6 months | High | Good | Excellent (improves rapidly) | Vegetable gardens, perennials |
| Stone | $$$$ | Permanent | Low | Good | Neutral | Modern landscapes, drainage areas |
Choosing the Right Alternative for Your Project
The best weed barrier depends on your specific situation. Here’s how we guide clients through the decision:
For vegetable gardens and edible landscapes: Cardboard or compost mulch, hands down. Both improve soil health, which directly impacts your harvest. Cardboard wins if budget is tight; compost wins if you want maximum plant nutrition.
For established ornamental beds: Deep wood chip mulch offers the best balance of appearance, effectiveness, and reasonable maintenance. It looks professional, lasts nearly two years, and improves soil gradually.
For new bed installation: Start with cardboard to kill existing grass and weeds, let it work for 6-12 months, then transition to wood chips or plant ground covers. This combination gives you immediate suppression plus long-term solution.
For large areas or slopes: Ground covers are worth the initial investment and patience. Once established, they’re nearly maintenance-free and prevent erosion better than any other method.
For modern or low-water landscapes: Stone mulch with proper installation provides a permanent solution that fits the aesthetic.
For areas you might change later: Avoid stone. Use cardboard, newspaper, or wood chips—all easy to remove or plant through when you want to modify the landscape.
St. Louis-Specific Considerations
Our clay-heavy soil and humid summers create specific challenges. Heavy clay benefits tremendously from the organic matter that cardboard, wood chips, and compost add over time. Our wet springs mean cardboard breaks down faster than it might in drier climates, so plan for the shorter end of the lifespan range.
We also deal with aggressive weeds like henbit, chickweed, and crabgrass that love our conditions. This makes the 4-6 inch depth critical for mulch-based methods—don’t skimp thinking 2-3 inches will suffice.
When to Call in Professional Help
Most of these methods are completely DIY-friendly, especially cardboard and newspaper applications in smaller gardens. But there are times when professional installation makes sense:
Large-scale projects: Installing 4-6 inches of wood chips across 1,000+ square feet requires equipment for moving and spreading material efficiently.
Proper grading needed: If your beds have drainage issues or require regrading, professional expertise prevents costly mistakes that lead to water pooling or erosion.
Stone installation: This requires proper edging installation, precise grading, and often geotextile fabric (yes, we use fabric under stone, but never under organic mulch).
When you need it done right, once: If you’re investing in ground covers or permanent solutions, professional spacing, plant selection, and installation ensure success rather than costly replanting.
At Allen Outdoor Solutions, our weed barrier installations include proper bed preparation, soil amendment when needed, precise material application, and a maintenance plan customized to your landscape goals. We’ve found that doing it right the first time costs less than fixing a failed DIY attempt.

The Bottom Line
After testing all these landscape fabric alternatives across dozens of properties, here’s what we’ve concluded: the best weed barrier is the one that fits your specific needs, budget, and maintenance commitment.
For most homeowners who want effective, affordable weed control that improves rather than degrades their soil, we recommend starting with cardboard topped with wood chips. This combination gives you immediate results, costs very little, and leaves your soil healthier than you found it.
But we’ve also seen beautiful, nearly weed-free landscapes using every method on this list. The key is proper installation—adequate depth, good coverage, and honest maintenance follow-through.
Whatever alternative you choose, you’re making a better decision than installing landscape fabric. Your soil will thank you, your plants will thrive, and you’ll spend less time wrestling with deteriorating fabric and tangled roots.
Frequently Asked Questions
Does cardboard work as a weed barrier?
Yes, cardboard is highly effective as a weed barrier when installed correctly. It blocks sunlight completely, preventing weed seed germination and killing existing weeds underneath. Applied in overlapping layers and covered with 3-4 inches of mulch, cardboard provides 12-18 months of excellent weed suppression while gradually decomposing and enriching your soil with organic matter. We’ve used cardboard successfully in hundreds of installations across the St. Louis area.
How long does cardboard last under mulch?
Cardboard typically lasts 12-18 months under mulch before fully decomposing into the soil. The breakdown speed depends on moisture levels, cardboard thickness, and climate conditions. In our humid Missouri summers, expect cardboard to start visibly decomposing around month 6-8, with complete integration into the soil by 15-18 months. This isn’t a drawback—as it decomposes, it’s improving your soil structure and feeding beneficial organisms.
What is better than landscape fabric for weed control?
Several alternatives outperform landscape fabric: thick wood chip mulch (4-6 inches) provides long-lasting weed control while improving soil; cardboard covered with mulch offers excellent suppression plus soil enrichment; living ground covers create permanent weed barriers once established; and deep compost mulch controls weeds while feeding plants. Unlike landscape fabric, these alternatives don’t restrict water and air flow, don’t create planting obstacles, and they actually improve soil health over time rather than degrading it.
Can I use cardboard instead of landscape fabric?
Absolutely—cardboard is often a superior choice to landscape fabric. It provides equally effective (often better) initial weed suppression, costs virtually nothing, allows water and air to reach the soil, breaks down into beneficial organic matter, and makes future planting easy. The main difference is longevity: landscape fabric might last 5-7 years (while creating problems), whereas cardboard lasts 12-18 months before enriching your soil. For most residential gardens, cardboard’s temporary nature is actually an advantage, not a limitation.
How thick should wood chip mulch be for weed control?
For effective weed control, apply wood chip mulch 4-6 inches thick. This depth blocks sufficient light to prevent most weed seed germination while creating a physical barrier that’s difficult for existing weeds to penetrate. Thinner layers (1-2 inches) provide minimal weed suppression and are really just decorative. The bottom layer will decompose into your soil over 18-24 months, so plan to refresh with 2-3 inches of new chips annually to maintain effectiveness.
Do I need to remove grass before laying cardboard?
No, you don’t need to remove grass before laying cardboard—that’s one of its major advantages. Simply mow the grass or cut down weeds as short as possible, water the area thoroughly, then lay overlapping cardboard directly on top. The cardboard will smother the grass and weeds, which will decompose underneath and add organic matter to your soil. This no-till approach is easier on your back and better for soil structure than digging everything out.
What kind of cardboard should I avoid for garden use?
Avoid cardboard with glossy coatings, wax treatments (like produce boxes), heavy colored printing, or synthetic labels that won’t decompose. Also skip cardboard with tape, staples, or plastic windows—remove these before laying the cardboard. Stick with plain corrugated moving boxes or shipping boxes with minimal printing. These break down cleanly without introducing unwanted materials into your soil.
Are ground covers really effective at preventing weeds?
Yes, but with an important caveat: ground covers are highly effective at preventing weeds once fully established, which typically takes 1-2 growing seasons. During establishment, you’ll need to manage weeds actively around young plants. Once mature, dense ground covers like ajuga, pachysandra, or creeping thyme shade out weed seeds and outcompete most weeds for resources. We’ve maintained ground cover areas that require virtually no weeding after year three—but you need patience and consistent care in those early years.
The post 5 Landscape Fabric Alternatives That Actually Work appeared first on Allen Outdoor.
]]>The post Privacy Landscaping Guide: Design Your Outdoor Sanctuary appeared first on Allen Outdoor.
]]>Nothing beats the feeling of stepping into your backyard and finding complete privacy—a space where you can relax, entertain, and unwind without worrying about prying eyes or street noise. Yet many homeowners struggle with creating that sense of seclusion in their outdoor spaces. Whether you’re dealing with overlooking neighbors, busy street visibility, or simply want to create intimate gathering areas around your pool or patio, privacy landscaping offers beautiful, natural solutions that enhance both your property’s value and your quality of life.
At Allen Outdoor Solutions, we’ve spent over 15 years helping St. Louis area families transform their yards into private retreats through thoughtful landscape design privacy solutions. In this comprehensive guide, we’ll share proven strategies, plant selections, and design principles that actually work in our Missouri climate—based on hundreds of successful installations we’ve completed throughout the region.
Why Privacy Landscaping Matters More Than Ever
The past few years have fundamentally changed how we use our outdoor spaces. With more time spent at home, homeowners are investing in creating comfortable, private environments where they can truly relax. A well-executed privacy landscape doesn’t just provide screening—it can increase your property value by 15-20% while offering significant mental health benefits through the creation of peaceful, secluded spaces.
Common privacy challenges we encounter in the St. Louis area include:
- Overlooking neighbors with second-story windows or elevated decks
- Street noise and visibility from busy roads
- Pool and patio areas lacking adequate screening for family activities
- Small lot limitations that make traditional fencing impractical
- Seasonal variations where summer privacy disappears in winter
The key to successful privacy landscaping lies in understanding that effective screening requires more than just planting a row of shrubs. It demands a strategic approach that considers sight lines, seasonal changes, maintenance requirements, and integration with your existing landscape.
The Foundation of Effective Privacy Landscaping
Assessing Your Privacy Needs
Before selecting plants or design elements, conduct a thorough assessment of your specific privacy requirements. Walk your property at different times of day and seasons, noting where you feel exposed and from which directions visibility issues arise. Consider whether you need year-round screening or if seasonal privacy from deciduous plants will suffice.
Height requirements vary significantly based on what you’re screening from. Ground-level privacy from neighboring patios might only require 6-8 feet of screening, while blocking views from second-story windows could demand 15-20 feet of mature plant height. Don’t forget about noise considerations—dense plantings can reduce street noise by 6-10 decibels, creating a noticeably quieter outdoor environment.
Professional Site Analysis: Real-World Experience
In our years serving the St. Louis region, we’ve learned that successful landscape design privacy projects start with understanding your site’s unique conditions. Soil drainage, sun exposure patterns, and existing vegetation all impact plant selection and placement decisions.
Take the Henderson family’s recent project in Chesterfield as an example. Their backyard pool area was completely visible from three neighboring homes, making family gatherings uncomfortable. Our site analysis revealed clay soil with poor drainage in the area where they wanted screening, along with morning sun and afternoon shade. These conditions ruled out many popular privacy plants but made it perfect for specific varieties that actually prefer these challenging conditions.
We installed a layered planting of Eastern Red Cedar, Serviceberry, and Spicebush that provided immediate partial screening and will offer complete privacy within three seasons. The key was selecting plants adapted to local conditions rather than forcing inappropriate species into unsuitable locations. Find more options for native plants here.

Top Privacy Landscaping Plants That Actually Work
Evergreen Privacy Champions
Arborvitae varieties remain the gold standard for privacy landscaping in our region. ‘Green Giant’ Arborvitae grows 3-4 feet annually, reaching 15-20 feet in just five years, making it ideal for quick screening. For smaller spaces, ‘Emerald Green’ Arborvitae provides dense screening in a narrower profile, perfect for property line plantings where space is limited.
Eastern Red Cedar deserves special mention as Missouri’s native evergreen champion. These hardy trees thrive in our clay soils and weather extremes while providing excellent year-round screening. They grow 12-18 inches annually and adapt to both wet and dry conditions—perfect for homeowners wanting low-maintenance privacy solutions.
Holly varieties, particularly ‘Nellie Stevens’ and ‘Oakland’ hollies, offer dense evergreen screening with the bonus of attractive berries. These plants excel in partial shade conditions and provide excellent screening at the 8-12 foot range, making them perfect for under-story plantings beneath larger trees.
Deciduous Options for Seasonal Beauty
While evergreens provide year-round screening, don’t overlook deciduous plants for landscape design privacy solutions. American Hornbeam creates dense summer screening while offering attractive fall color and interesting winter bark texture. Serviceberry combines privacy screening with beautiful spring flowers and edible berries, adding multi-season interest to privacy plantings.
Redbud, our beloved native tree, works wonderfully for high-screening needs while providing spectacular spring color. While it won’t offer winter privacy, the dramatic seasonal display often makes it worth including in layered privacy designs.
Fast-Growing vs. Long-Term Solutions
The temptation with privacy projects is to choose the fastest-growing options available, but this often leads to maintenance headaches down the road. Bamboo can provide quick screening but requires careful variety selection—stick to clumping types like ‘Bambusa multiplex’ rather than running varieties that can become invasive.
Hybrid poplars grow incredibly fast (4-6 feet annually) but have shorter lifespans and brittle wood prone to storm damage. We typically recommend these only as temporary screening while slower, more permanent plantings establish.
Professional Tip: Our most successful privacy installations combine 2-3 plant varieties at different heights for layered screening. This approach provides immediate partial privacy while ensuring long-term success as plants mature at different rates. The Arbor Day Foundation has a tree finder that can be helpful.

Creative Privacy Solutions Beyond Plants
Hardscape Privacy Elements
Effective privacy landscaping often incorporates hardscape elements that provide immediate screening while plants establish. Natural stone walls and borders create beautiful, permanent privacy barriers that integrate seamlessly with plant materials. These work particularly well for pool areas where immediate screening is essential.
Privacy fencing integration with landscaping creates more attractive and effective screening than either element alone. By planting evergreen shrubs in front of fencing, you can use shorter, less expensive fencing while achieving greater privacy through the layered approach.
Pergolas and arbor structures provide vertical elements for climbing vines while creating defined outdoor rooms. When combined with fast-growing climbers like hardy kiwi or climbing hydrangea, these structures offer relatively quick privacy solutions with significant visual appeal.
Multi-Functional Privacy Design
Raised garden beds serve double duty as natural barriers while providing space for vegetables or flowers. These work particularly well for screening ground-level sight lines while adding productive garden space to your landscape design privacy plan.
Outdoor kitchen screening has become increasingly important as more families invest in outdoor cooking spaces. Strategic plantings can provide privacy for food preparation areas while creating defined spaces for entertaining.
Water features for noise masking address privacy concerns beyond just visual screening. A well-placed fountain or waterfall can mask neighborhood noise while creating a focal point for your private outdoor space.
Case Study: The Johnson Family Transformation
The Johnson family’s Kirkwood property illustrates how comprehensive privacy landscaping can transform outdoor living. Their original backyard offered no privacy from surrounding homes, making their deck and play area feel exposed and uncomfortable.
We designed a three-phase installation that provided immediate impact while working within their budget. Phase one included fast-growing ‘Green Giant’ Arborvitae along the most problematic sight lines, combined with attractive cedar fencing sections. Phase two added understory plantings of holly and spicebush for layered screening. The final phase incorporated a pergola with climbing vines to create a private dining area.
Total investment was $12,000 spread over two seasons, and the family now enjoys complete privacy while entertaining, with their children playing freely in what feels like a secluded backyard retreat.
Designing Your Privacy Landscape: A Step-by-Step Approach
Phase 1: Planning and Design
Start by measuring and mapping your space, noting problem areas and existing landscape features worth preserving. Understanding sun and shade patterns throughout the day helps determine appropriate plant selections—many privacy plants require full sun for optimal density.
Budget for phased installations if needed. Effective landscape design privacy projects often work better when completed in stages, allowing you to spread costs while giving earlier plantings time to establish before adding additional elements.
Phase 2: Installation Timing
Best planting seasons for privacy plants in the St. Louis area are early fall (September-October) and early spring (March-April). Fall planting allows root establishment during cool, moist conditions, leading to better survival rates and faster growth the following season.
Coordinate hardscape and softscape elements carefully. Install permanent structures like walls or fencing first, followed by major plantings, and finish with smaller accent plants and mulching.
Phase 3: Long-term Success
Maintenance schedules vary significantly between plant types. Arborvitae and other evergreens typically need annual light pruning to maintain density, while deciduous privacy plants may require more intensive seasonal care.
Pruning timing affects screening effectiveness—prune evergreens in late spring after new growth emerges, and deciduous plants during dormancy to maintain maximum seasonal screening.
Plan for replacement plantings. Even with proper care, some plants may fail to establish or suffer storm damage. Having a replacement plan ensures your privacy screening remains effective long-term.
Common Privacy Landscaping Mistakes (And How to Avoid Them)
In our 15 years serving the St. Louis area, we’ve seen several mistakes that consistently undermine privacy landscaping projects:
Planting too close to property lines can create neighborly disputes and limit plant development. Check local ordinances—most areas require plantings to be set back 3-5 feet from property boundaries at mature size.
Ignoring mature plant sizes leads to overcrowding and poor plant health. That cute 3-foot arborvitae will eventually reach 15-20 feet in width—plan accordingly.
Choosing plants unsuitable for local climate results in poor performance or complete failure. Stick with varieties proven successful in Missouri’s challenging weather conditions.
Forgetting about winter screening needs leaves families exposed during months when they might actually spend more time looking out at their yards. If year-round privacy matters, prioritize evergreen options.
Not considering maintenance requirements—some privacy plants require significant annual care to maintain effectiveness. Be realistic about your maintenance capabilities when selecting plants.

Working with Professionals vs. DIY: What You Need to Know
When to hire professionals for privacy landscaping: complex drainage issues, large mature plant installations, coordination with hardscape elements, or when you want guaranteed results within a specific timeframe.
A professional consultation should include site analysis, plant recommendations specific to your conditions, installation timeline, and maintenance requirements. Expect to discuss both immediate and long-term privacy goals along with budget considerations.
Cost considerations vary widely, but budget $3,000-$8,000 for comprehensive privacy screening of a typical suburban backyard. This investment typically returns 15-20% of the cost in increased property value while providing immediate lifestyle benefits.
Questions to ask potential landscape designers: How many privacy projects have you completed in the St. Louis area? Can you provide references from recent clients? What guarantees do you offer on plant materials and installation work?
Red flags when choosing contractors: Extremely low bids (often indicating poor plant quality), door-to-door sales approaches, demands for full payment upfront, or inability to provide local references.
At Allen Outdoor Solutions, our consultation process begins with an on-site evaluation of your privacy needs and site conditions. We provide detailed proposals showing plant selections, mature sizes, installation timeline, and maintenance requirements, ensuring you understand exactly what to expect from your landscape design privacy investment.
Creating Your Private Paradise
Effective privacy landscaping transforms your outdoor space into a true extension of your home—a place where you can relax, entertain, and enjoy nature without feeling exposed or uncomfortable. The key lies in thoughtful planning that considers your specific site conditions, privacy needs, and maintenance preferences.
Remember that the best privacy solutions develop over time. While some screening can be achieved immediately through strategic hardscape elements and fast-growing plants, the most beautiful and effective privacy landscapes mature and improve over several seasons.
Whether you choose to tackle privacy landscaping as a DIY project or work with professionals, focus on creating solutions that address your specific needs while enhancing your property’s overall beauty and value. Your private outdoor sanctuary awaits—it just takes the right combination of planning, plant selection, and patience to achieve.
Ready to transform your outdoor space into the private retreat you’ve always wanted? Contact Allen Outdoor Solutions today for a free consultation. We’ll assess your property’s unique conditions and develop a customized privacy landscaping plan that delivers beautiful, effective screening tailored to your family’s needs and budget. Creating private outdoor sanctuaries for St. Louis families since 2008—let us help you discover what your backyard could become.
The post Privacy Landscaping Guide: Design Your Outdoor Sanctuary appeared first on Allen Outdoor.
]]>Clover Lawn vs Grass: The Complete St. Louis Homeowner’s Guide
After 15 years of installing and maintaining lawns across the St. Louis metro area, I’ve witnessed a quiet revolution happening in suburban yards. The clover lawn vs grass debate is no longer theoretical for my clients – it’s a practical decision that’s transforming how families approach yard care.
Whether you’re considering making the switch or simply curious about this growing trend, I’ll share everything I’ve learned from dozens of real installations, maintenance seasons, and long-term client relationships. By the end of this guide, you’ll understand exactly how clover lawn vs grass stacks up in terms of cost, maintenance, and long-term satisfaction.
Clover Lawn Benefits: Real Results
Drought Resistance That Actually Works
The 2023 Heat Test Results:
During last summer’s extreme conditions, I conducted informal observations across 20 client properties comparing clover lawn vs grass performance. The results were dramatic:
- Traditional grass lawns showed stress after 5-7 days without water
- White clover lawns remained healthy for 10-14 days without irrigation
- Clover grass seed mix lawns performed better than pure grass, with clover supporting struggling grass areas
The Morrison property in Ballwin became my benchmark example. During a three-week stretch with only 0.2 inches of rainfall, their clover lawn required watering just twice while neighboring grass lawns needed daily attention.
Real Water Bill Impact: The Patterson family installed flow meters to track their irrigation usage:
- Previous grass lawn: 1,200 gallons per week during peak season
- New white clover lawn: 450 gallons per week during the same period
- Annual savings: approximately $280 on water bills
Natural Fertilization: The Living Fertilizer Factory
One of the most significant clover lawn benefits is the natural nitrogen fixation that eliminates most fertilizer needs. This legume naturally converts atmospheric nitrogen into soil-available nutrients, essentially feeding itself and surrounding plants.
Documented Soil Improvements: I’ve coordinated soil tests for clients before and after clover establishment:
- Nitrogen levels increase by 30-50% within two growing seasons
- Organic matter content improves significantly
- pH levels naturally balance toward optimal ranges
The Kim family’s soil went from requiring 4 fertilizer applications per year to needing virtually no supplemental nutrition. Their annual soil test showed nitrogen levels went from “deficient” to “optimal” in just 18 months.
Superior Foot Traffic Tolerance
Parents often worry about durability when considering clover lawn vs grass for active families. My observations from families with clover lawns have been overwhelmingly positive.
The Soccer Test Results: The Taylor family has three boys who play soccer daily in their backyard. After two seasons with their white clover lawn:
- High-traffic areas show minimal wear compared to previous grass lawn
- Recovery time from damage is 50% faster than traditional grass
- No bare patches or erosion issues despite intensive use
Pest and Disease Resistance Benefits
Traditional grass lawns face numerous pest and disease pressures throughout the growing season. Among the key clover lawn benefits is natural resistance that has eliminated many common problems for my clients.
Measurable Pesticide Reduction: The Anderson family previously spent $400-500 annually on various pest and disease treatments. Since switching to a clover grass seed mix three years ago, they’ve used zero pesticides while maintaining a healthier, more attractive lawn.
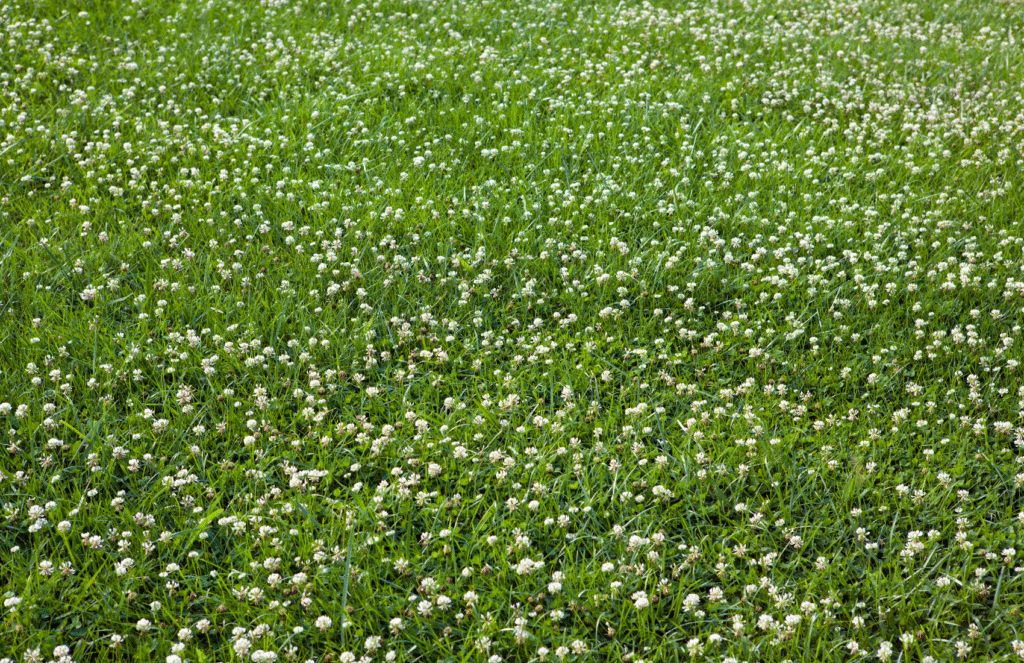
Clover Lawn vs Grass: Complete Cost and Maintenance Comparison
After maintaining both types of lawns for over a decade, I can provide you with real data on how clover lawn vs grass compares in the areas that matter most to homeowners.
Installation Costs Breakdown
| Lawn Type | Cost per 1,000 sq ft | Establishment Time |
|---|---|---|
| Premium grass seed | $1,200-$1,800 | 6-8 weeks |
| White clover lawn | $800-$1,200 | 4-6 weeks |
| Clover grass seed mix | $900-$1,400 | 5-7 weeks |
5-Year Maintenance Cost Analysis
Traditional Grass Lawn Annual Costs:
- Fertilization: $300-$450
- Weed control: $200-$350
- Additional watering: $150-$250
- Replacement/overseeding: $200-$400
- Total 5-year maintenance: $4,250-$7,250
White Clover Lawn Annual Costs:
- Minimal fertilization: $50-$100
- Natural weed suppression: $0-$50
- Reduced watering: $50-$100
- Occasional overseeding: $75-$150
- Total 5-year maintenance: $875-$1,500
The Thompson family in University City documented a 70% reduction in lawn-related expenses over three years. Their biggest surprise? The eliminated costs they hadn’t considered: fewer mower repairs, reduced fuel consumption, and no emergency treatments for lawn diseases.
Weekly Maintenance Time Comparison
When comparing clover lawn vs grass for busy families:
Traditional Grass Requirements:
- Weekly mowing: 1.5-2 hours
- Edging and trimming: 30-45 minutes
- Spot treatments: 15-30 minutes
- Total weekly time: 2-3 hours
White Clover Lawn Requirements:
- Bi-weekly mowing: 45 minutes
- Minimal edging: 10-15 minutes
- Spot maintenance: 5-10 minutes
- Total weekly time: 30-45 minutes
Environmental Impact Comparison
Water Usage Reduction: Smart irrigation system data from client properties consistently shows:
- 40-60% reduction in irrigation needs
- Better water retention during dry periods
- Reduced runoff during heavy rain events
Wildlife and Ecosystem Benefits: Properties with eco-friendly lawn alternatives like clover consistently show:
- 300% increase in beneficial pollinator activity
- Natural pest control from increased bird activity
- Improved soil microbiome diversity
When Clover Lawns Aren’t Right for Your Property
Honesty is crucial in my business, so I always discuss situations where clover lawn vs grass analysis might favor traditional grass. Understanding these limitations helps clients make informed decisions.
HOA and Neighborhood Restrictions
Unfortunately, many St. Louis area HOAs still have outdated landscaping requirements:
- Some specifically prohibit clover or require “traditional turf grass only”
- Suburban developments in West County tend to have stricter requirements
- Older neighborhoods often have more flexibility for eco-friendly lawn alternatives
Solution Options:
- Review specific HOA documents before installation
- Consider clover grass seed mix for compliance
- Approach HOA boards with education about low maintenance lawn options
Aesthetic Preferences That Favor Grass
Some clients have particular visual preferences that traditional grass better satisfies:
- Formal, manicured appearance (clover has a more natural, cottage-style look)
- Uniform color and texture throughout growing season
- Preference for very short, golf-course-style cutting heights
High-Traffic Commercial Applications
While white clover lawns handle residential foot traffic beautifully, certain applications present challenges:
- Heavy vehicle traffic areas
- Sports fields requiring specific playing characteristics
- Areas needing frequent overseeding for instant repair
St. Louis Clover Lawn Installation Guide
Through dozens of installations across different soil types, slopes, and sun exposures in the St. Louis metro area, I’ve developed specific strategies that ensure successful establishment.
Optimal Planting Times for Missouri Climate
Best Time to Plant Clover Lawn in St. Louis:
Early Spring (March 15 – April 30):
- Soil temperatures reach ideal germination range (50-65°F)
- Spring moisture supports establishment
- Full growing season for development
- Reduced competition from summer weeds
Early Fall (August 15 – September 30):
- Cooler temperatures reduce establishment stress
- Less weed competition than spring
- Winter allows root development before spring growth
- Ideal for clover grass seed mix installations
Why Mid-Summer Installations Fail: Through early mistakes, I’ve learned mid-summer plantings face:
- Excessive heat stress during germination
- Increased watering requirements
- Competition from heat-loving weeds
- Lower establishment success rates
Soil Preparation for Success
Step-by-Step Soil Prep Process:
- Soil Testing and Amendment
- pH testing (white clover prefers 6.0-7.0)
- Organic matter assessment
- Compaction evaluation using penetrometer
- Drainage analysis
- Physical Preparation
- Remove existing grass (for full conversion)
- Gentle tilling to 2-3 inches depth
- Grade correction for proper drainage
- Final smoothing and debris removal
Case Study – The Martinez Family: Their initial DIY attempt failed because they skipped soil testing. The pH was 5.2 (too acidic for clover). After lime amendment and proper pH adjustment, their second attempt created the beautiful low maintenance lawn they enjoy today.
Seeding Strategy Selection
Pure White Clover Installation:
- Complete grass removal for uniform establishment
- Seeding rate: 8-12 lbs per 1,000 sq ft
- More dramatic transformation but longer establishment period
Clover Grass Seed Mix Approach:
- 60% clover, 40% fine fescue for balanced benefits
- Seeding rate: 6-8 lbs clover + 2-3 lbs grass per 1,000 sq ft
- Combines clover advantages with familiar grass appearance
- Excellent option for HOA compliance
Overseeding Strategy:
- Gradual transition maintaining some existing grass
- Lower initial investment
- Easier maintenance during establishment
- Popular choice for clients hesitant about dramatic change
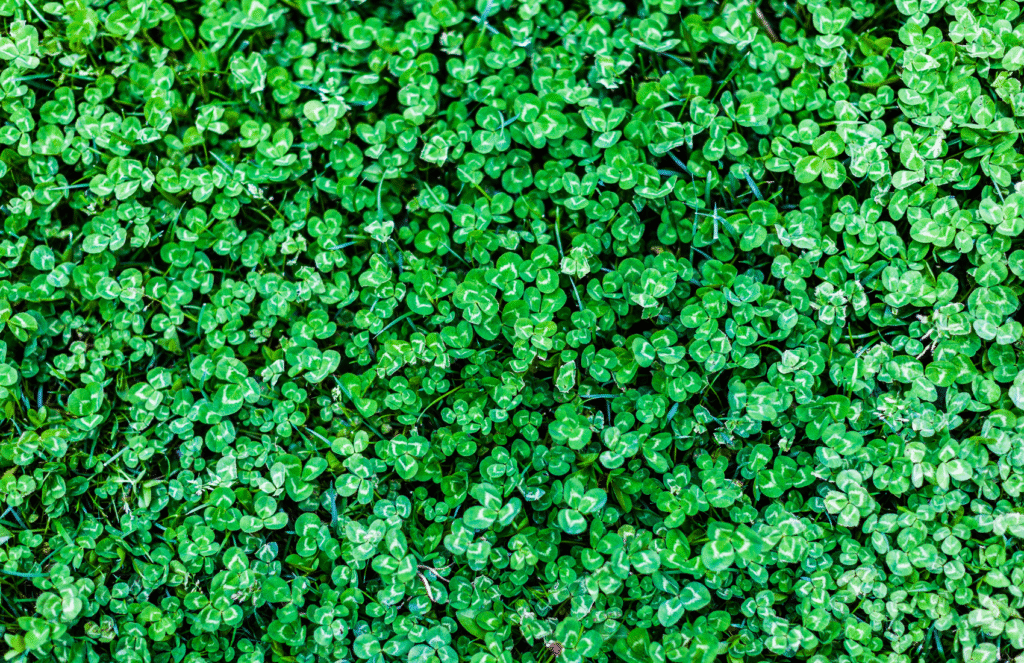
Professional Maintenance Tips for Clover Lawns
After years of seasonal maintenance across various white clover lawn installations, I’ve developed specific strategies that keep these eco-friendly lawn alternatives looking their best while minimizing client effort.
Seasonal Care Schedule for St. Louis Climate
Spring Awakening (March – May):
- Light overseeding of thin areas if needed
- Gentle dethatching only if excessive buildup exists
- First mowing when growth reaches 4-5 inches
- Spot treatment of any winter damage
Summer Maintenance (June – August):
- Mowing every 2-3 weeks at 3-4 inch height
- Deep, infrequent watering during extended dry periods
- Enjoy the natural drought tolerance
- Monitor for any pest issues (rare but possible)
Fall Preparation (September – November):
- Final mowing before winter at 2-3 inches
- Allow some areas to flower for late-season pollinators
- Minimal leaf removal (clover benefits from some leaf cover)
- Assess areas needing spring attention
Winter Rest (December – February):
- Avoid foot traffic on frozen clover
- Plan any spring improvements or expansions
- No maintenance required during dormancy
Common Maintenance Mistakes to Avoid
Over-Mowing Error: The biggest mistake homeowners make is applying grass-cutting mentality to clover. Cutting below 2.5 inches stresses clover plants and reduces their natural advantages.
Over-Watering Issues: Established clover lawns need much less water than grass. The Johnson family initially watered their new white clover lawn like their previous grass, causing root rot in some areas.
Chemical Application Problems: Standard lawn chemicals often harm clover. Always check product labels and inform any lawn service providers about your low maintenance lawn choice.
When to Call Professionals vs. DIY
DIY-Friendly Tasks:
- Regular mowing and basic maintenance
- Light overseeding of small areas
- Basic watering adjustments
- Simple spot treatments
Professional Consultation Recommended:
- Large bare spot repair
- Soil pH adjustment issues
- Drainage or grading problems
- Integration with existing landscaping
- Major renovation or expansion projects
Frequently Asked Questions About Clover Lawns
How long does it take for clover lawn to establish?
White clover lawns typically show initial coverage in 4-6 weeks and reach full establishment within 4-6 months when planted during optimal seasons (spring or early fall in St. Louis). Full maturity and maximum benefits are realized in the second growing season.
Is clover lawn cheaper than grass?
Yes, clover lawns cost 60-70% less to maintain annually compared to traditional grass lawns. While installation costs are similar, the long-term savings from reduced fertilizer, pesticide, and watering needs make clover significantly more economical.
What are the main clover lawn benefits?
The primary clover lawn benefits include:
- 40-60% reduction in watering needs
- Natural nitrogen fixation eliminates most fertilizer requirements
- Superior drought resistance
- Natural pest and disease resistance
- Improved foot traffic tolerance
- Beneficial pollinator habitat
Can I mix clover with grass?
Absolutely! A clover grass seed mix (typically 60% clover, 40% fine fescue) combines the benefits of both. This approach provides the low maintenance advantages of clover while maintaining a more traditional lawn appearance.
When is the best time to plant clover lawn in Missouri?
The optimal planting windows for St. Louis area are early spring (March 15-April 30) and early fall (August 15-September 30). These periods provide ideal soil temperatures and moisture conditions for establishment.
Will clover lawn attract bees?
Yes, flowering clover attracts beneficial pollinators including bees. However, regular mowing (every 2-3 weeks) prevents most flowering, significantly reducing bee activity while maintaining all other clover lawn benefits.
How often do I need to mow a clover lawn?
Clover lawns require mowing every 2-3 weeks during growing season, compared to weekly mowing for traditional grass. The reduced mowing frequency is one of the key time-saving benefits.
Is clover lawn good for dogs and pets?
Yes, clover lawns are excellent for pets. The softer texture is gentler on paws, it handles “dog spots” better than grass, and natural pest-deterrent properties can reduce flea issues in your yard.
Can clover lawn survive St. Louis winters?
White clover is extremely winter hardy and well-suited to Missouri’s climate. It goes dormant in winter but returns vigorously each spring, often greening up 2-3 weeks earlier than cool-season grasses.
How much does clover lawn installation cost?
White clover lawn installation typically costs $800-$1,200 per 1,000 square feet, similar to premium grass seed installation. The significant savings come from reduced long-term maintenance costs.
The Bottom Line: Why St. Louis Families Choose Clover
After 15 years in lawn care and hundreds of satisfied clients across the St. Louis metro area, I can confidently say that when comparing clover lawn vs grass, clover represents one of the most significant improvements in residential landscaping. The combination of reduced maintenance, environmental benefits, and long-term cost savings creates value that goes far beyond the initial installation.
The Documented Results:
- 70% reduction in maintenance time and costs
- 40-60% decrease in water usage
- Elimination of most fertilizer and pesticide needs
- Increased property appeal and neighborhood interest
- Significant contribution to local ecosystem health
What My Clients Consistently Tell Me: “I wish we had done this years ago” remains the most common feedback I receive during maintenance visits. The Martinez family summed up the clover lawn benefits perfectly: “We thought we were just changing our lawn, but we actually changed our entire relationship with our yard.”
The Future of Lawn Care in St. Louis: As more area homeowners discover these eco-friendly lawn alternatives, I expect white clover lawns and clover grass seed mix installations to become increasingly common. The environmental advantages, combined with practical benefits for busy families, create a compelling case for making the switch to these low maintenance lawn options.
Ready to Explore Clover for Your Property? Every property and family situation is unique. The best way to determine if a clover lawn makes sense for your specific needs is through a personalized consultation where we can assess your soil conditions, sun exposure, usage patterns, and aesthetic preferences.
If you’re ready to explore how clover lawn benefits could transform your property maintenance routine while creating a beautiful, sustainable landscape, I’d be happy to discuss your specific situation. After all, the best lawn is one that works for your lifestyle, not against it.
Ready to learn more about white clover lawn installation for your St. Louis area property? Contact Allen Outdoor Solutions for a personalized consultation and discover how clover lawn benefits could transform your yard maintenance routine. Call us today to schedule your free assessment and join the growing number of satisfied homeowners who’ve made the switch to low maintenance, eco-friendly lawn alternatives.
The post Clover Lawn vs Grass: Benefits, Costs & Maintenance appeared first on Allen Outdoor.
]]>The post Sand for Grass and Lawn: Complete Guide for Better Results appeared first on Allen Outdoor.
]]>If you’ve ever wondered whether sand can help your struggling lawn, you’re not alone. Many St. Louis homeowners have heard conflicting advice about using sand for grass – some swear by it, while others warn it’s a lawn killer. The truth? Both can be right, depending on how you use it.
After fifteen years of transforming lawns across the St. Louis metro area, I’ve seen sand work miracles for some properties and create disasters for others. The difference comes down to understanding when sand for lawn applications makes sense, choosing the right type, and applying it correctly.
In this comprehensive guide, you’ll discover the science behind sand and grass growth, learn proper application techniques, and avoid the costly mistakes that can set your lawn back for years. Whether you’re dealing with clay soil, drainage issues, or planning an overseeding project, this guide will help you make informed decisions about using sand in your lawn care routine.
Understanding Sand for Grass: The Basics Every Homeowner Should Know
What Types of Sand Work Best for Lawn Applications
Not all sand is created equal, and choosing the wrong type can spell disaster for your lawn. Here’s what you need to know about sand selection:
Coarse Sand: Your Best Friend Coarse sand with particles ranging from 0.5 to 2 millimeters works best for most lawn applications. These larger particles create the drainage benefits you want without compacting like fine sand. When mixed properly with existing soil, coarse sand improves air circulation around grass roots and prevents waterlogging.
River Sand: The Gold Standard River sand, naturally tumbled and rounded by water action, provides excellent drainage while integrating well with soil. Its smooth edges won’t create sharp interfaces that can impede root growth. In the St. Louis area, river sand from Missouri River sources typically offers the best performance for lawn applications.
Masonry Sand: Sometimes Suitable Clean masonry sand can work for specific applications, but it’s often finer than ideal. If you choose masonry sand, ensure it’s been washed and contains minimal dust or fine particles that could create drainage problems.
What to Avoid at All Costs Never use beach sand (too much salt), playground sand (too fine), or any sand containing clay particles. Fine sand smaller than 0.1 millimeters can actually reduce drainage and create concrete-like conditions when mixed with clay soil – a common problem in our area.

When Sand Can Actually Help Your Grass Thrive
Understanding when sand for grass makes sense requires recognizing specific lawn conditions where sand provides genuine benefits:
Clay Soil Amendment in Missouri St. Louis area soils are notorious for their clay content. Heavy clay soil prevents proper drainage, limits oxygen to grass roots, and makes it difficult for new grass to establish. When properly integrated, coarse sand can break up clay particles and improve soil structure over time.
Improving Drainage in Problem Areas If you have areas where water pools after rain or irrigation, strategic sand application can help. However, this only works when sand is thoroughly mixed with existing soil – simply adding sand on top won’t solve drainage issues.
Leveling Minor Lawn Imperfections Small dips, settling areas, or slight grade issues can be addressed with sand-based leveling mixtures. The key is keeping applications thin (no more than half an inch) and ensuring proper integration with existing grass and soil.
Creating Ideal Seed Beds Sand mixed with quality topsoil creates excellent conditions for grass seed germination. The improved drainage prevents seeds from rotting, while the stable structure provides good seed-to-soil contact for establishment.
Common Scenarios Where Sand for Lawn Makes Sense
Overseeding and Establishment Projects
Step-by-Step Sand Application for Overseeding:
- Soil Testing and Preparation: We tested the existing soil pH and compaction levels. The clay soil was testing at 7.2 pH with severe compaction in the top 3 inches.
- Sand Selection and Mixing: We chose coarse river sand and mixed it with quality topsoil at a 1:2 ratio (one part sand to two parts soil). This mixture provides drainage benefits without creating an abrupt transition layer.
- Application Technique: After loosening the existing soil with a dethatcher, we applied a thin layer (about 1/4 inch) of our sand-soil mixture across the area.
- Seeding and Integration: We broadcast the fescue seed directly into the mixture, then lightly raked to ensure good seed contact. Light watering helped settle everything into place.
The result? The homeowner achieved 85% grass coverage within six weeks – a dramatic improvement over previous attempts that barely reached 30% establishment.
Drainage Issues and Clay Soil Amendment
One of our most challenging projects involved a Webster Groves backyard that stayed soggy for days after any significant rain. The homeowner had tried everything from different grass types to increased fertilization, but nothing worked because the underlying clay soil simply wouldn’t drain.
Our Clay Soil Amendment Approach:
Rather than simply adding sand on top, we created a comprehensive soil improvement plan. We used a core aerator to create thousands of holes throughout the affected area, then filled these holes with our coarse sand mixture. This technique, called “profile modification,” gradually improves soil structure without creating impermeable layers.
Over the following growing season, the homeowner reported dramatic improvements in grass health and significantly reduced water pooling. The key was patience – soil structure improvements happen gradually, not overnight.
Minor Lawn Leveling Applications
Small dips and uneven areas can make mowing difficult and create scalping problems. Sand-based leveling mixtures work well for minor corrections, but proper technique is crucial.
When Sand Leveling Works:
- Depressions less than 1 inch deep
- Gradual settling areas around trees or structures
- Minor grade adjustments for improved drainage
When to Choose Other Options:
- Major grade problems requiring more than 2 inches of material
- Areas with poor underlying drainage
- Spots where the existing grass is healthy and thick
The Science Behind Sand and Grass Growth
Soil Structure and Drainage Fundamentals
Understanding how sand affects soil structure helps explain why it works in some situations and fails in others. Soil consists of solid particles, air spaces, and water-filled pores. Healthy grass roots need access to both air and water, which requires proper balance between these components.
How Sand Particles Affect Soil Porosity Clay particles are microscopic and pack tightly together, creating poor drainage and limited air circulation. Sand particles are much larger and create bigger spaces between them. When properly mixed with clay soil, sand particles act like tiny drainage tiles, allowing water to move through the soil profile while maintaining air spaces for root respiration.
The pH Factor Most sands are pH neutral, which can be beneficial in our area where clay soils often trend alkaline. However, some construction sands may contain lime or other additives that can affect soil chemistry. Always test both your existing soil and any sand you plan to use.
Nutrient Retention Considerations Sand particles don’t hold nutrients like clay and organic matter do. This means sand-amended soils may require more frequent fertilization, but they also reduce the risk of nutrient buildup and salt accumulation that can damage grass roots.
Grass Type Considerations
Different grass types respond differently to sand amendments, and understanding these differences is crucial for success in the St. Louis area.
Cool-Season Grasses (Fescue, Bluegrass) Our most common grass types – tall fescue and Kentucky bluegrass – generally benefit from improved drainage that sand can provide. Fescue, in particular, performs well in sand-amended soils because of its deep root system and drought tolerance.
Warm-Season Options (Zoysia, Bermuda) Zoysia grass, increasingly popular in our area, thrives in well-draining soils. Sand amendments can help create ideal conditions for zoysia establishment, particularly in areas with heavy clay soil. Bermuda grass also responds well to sand amendments, though it’s less common in our climate zone.
Step-by-Step Application Guide: How to Use Sand for Grass
Pre-Application Assessment
Before adding any sand to your lawn, conduct a thorough assessment to determine if it’s the right solution for your specific situation.
Soil Testing Checklist:
- Perform a simple drainage test by digging a hole 12 inches deep and filling it with water. If water remains after 24 hours, you likely have drainage issues that sand might help address.
- Test soil pH using a reliable home test kit or professional soil analysis
- Check for compaction by pushing a screwdriver into the soil – it should penetrate at least 6 inches with moderate pressure
- Identify clay content by performing a “jar test” – mix soil with water and let it settle to see the proportion of sand, silt, and clay
Measuring Your Lawn Area Accurately Calculate the square footage of treatment areas using length × width measurements. For irregular shapes, break them into smaller rectangles and triangles. Remember that sand applications should be thin, so a little goes a long way.
Calculating Sand Quantities For most applications, you’ll need about 1-2 cubic yards of sand per 1,000 square feet for a 1/4-inch application. However, remember that pure sand applications are rarely recommended – you’ll typically want to mix sand with topsoil or compost.
Proper Application Techniques
Equipment You’ll Need:
- Broadcast spreader or drop spreader for even distribution
- Rake for integration and leveling
- Garden hose with spray nozzle for watering
- Wheelbarrow for mixing materials
- Soil thermometer to check temperature conditions
Application Depth Guidelines Never apply more than 1/2 inch of sand mixture at one time. Most successful applications use 1/4 inch or less. Thicker applications can smother existing grass and create drainage problems rather than solving them.
Distribution and Integration Spread your sand mixture evenly using a broadcast spreader, then rake lightly to integrate it with the existing soil and grass. The goal is to fill low spots and create a smooth, even surface without burying healthy grass.
Post-Application Care Water the area lightly to help settle the sand mixture and reduce dust. Avoid heavy watering that could wash away your carefully applied material. Monitor the area for the next few weeks and add more mixture to any areas that settle significantly.
Seasonal Timing for Best Results
Fall Applications: Usually Your Best Bet September through early October typically provides ideal conditions for sand applications in the St. Louis area. Cooler temperatures reduce stress on existing grass, and fall rains help integrate the sand with existing soil. This timing also allows for overseeding cool-season grasses.
Spring Considerations Early spring applications (March-April) can work well, but avoid applying sand during the rapid growth period when grass is actively growing. Late spring applications may stress grass during hot weather.
Summer and Winter: Generally Avoid Hot summer weather makes sand applications risky for existing grass, while winter applications provide no immediate benefit and may wash away before spring growth begins.

Common Mistakes to Avoid When Using Sand for Lawn Care
The “Pure Sand” Trap
The biggest mistake homeowners make is applying pure sand directly to clay soil. This seems logical – if clay doesn’t drain, add sand to improve drainage. Unfortunately, this approach often creates concrete-like conditions that are worse than the original problem.
Why Pure Sand Backfires When fine sand mixes with clay particles and water, it can create an impermeable layer similar to concrete. This happens because clay particles fill the spaces between sand grains, eliminating the drainage benefits you were trying to achieve.
The Right Mixing Approach Always mix sand with organic matter like compost or quality topsoil. A typical mixture might be 40% sand, 40% topsoil, and 20% compost. This combination provides drainage benefits while maintaining soil structure and nutrient availability.
Real-World Example A homeowner in Kirkwood applied 3 inches of fine sand directly to their clay soil front yard, hoping to improve drainage. Instead, they created a surface so hard that water ran off instead of soaking in. Recovery required removing the sand layer and starting over with proper soil amendments – a costly lesson in the importance of proper technique.
Wrong Sand Type Selection
Fine Sand Problems Fine sand (like playground sand) compacts easily and provides little drainage benefit. It can also create a concrete-like surface when mixed with clay soil and water.
Contaminated Sand Concerns Construction sand may contain concrete dust, salt, or other contaminants that can harm grass. Beach sand contains salt that will kill grass. Always source sand from reputable suppliers who can provide clean, washed sand suitable for landscaping.
Organic Matter Balance Sand alone doesn’t provide the nutrients grass needs to thrive. Successful sand applications almost always include organic matter like compost or aged manure to maintain soil fertility.
Application Timing and Technique Errors
Over-Application Consequences More is not better when it comes to sand applications. Thick sand layers can smother existing grass, create drainage problems, and establish conditions where weeds thrive while grass struggles.
Uneven Distribution Issues Patchy sand application creates uneven growing conditions and can lead to irregular grass growth patterns. Use proper spreader equipment and take time to ensure even coverage.
Skipping Integration Steps Simply spreading sand on top of grass rarely works. Proper integration through raking, light watering, and sometimes aeration is essential for success.
Alternatives to Sand for Common Lawn Problems
Organic Matter Solutions
Before considering sand, evaluate whether organic amendments might better address your lawn’s issues.
Compost Applications High-quality compost improves soil structure, provides nutrients, and enhances water retention. For many St. Louis area lawns, compost topdressing provides better results than sand applications.
Aged Manure Benefits Well-aged manure (at least one year old) provides nutrients while improving soil structure. It’s particularly effective for thin lawns that need both fertility and organic matter.
Cost-Benefit Analysis Quality compost typically costs more per cubic yard than sand, but it provides multiple benefits: improved soil structure, nutrient content, and enhanced microbial activity. For most lawns, compost offers better long-term value.
Professional Lawn Renovation Options
Some lawn problems require more comprehensive solutions than sand applications can provide.
When to Call Professionals Consider professional help if your lawn has severe drainage issues, extensive dead areas, or if previous DIY attempts have failed. Professional lawn renovation often provides better long-term results than repeated small fixes.
Comprehensive Soil Analysis Professional soil testing goes beyond basic pH and nutrient tests to include compaction levels, organic matter content, and detailed recommendations for improvement.
Full Renovation vs. Targeted Treatment Sometimes complete lawn renovation with proper soil preparation provides better results than trying to fix problems with surface applications. A professional assessment can help determine the most cost-effective approach.
Regional Considerations for St. Louis Area Homeowners
Local Soil Conditions
Understanding our unique soil conditions helps explain why sand applications work differently here than in other regions.
Clay Soil Prevalence Much of the St. Louis metro area sits on clay-rich soils that were deposited by ancient rivers and glacial activity. These soils are fertile but often poorly drained, making them challenging for grass growth.
Drainage Challenges Our clay soils, combined with periodic heavy rains, create drainage challenges that sand can sometimes help address. However, the solution must be tailored to our specific soil conditions.
Climate Considerations Hot, humid summers and variable spring weather create specific timing windows for sand applications. Understanding these patterns helps ensure successful results.
Local Sand Sources and Quality
Recommended Regional Suppliers Missouri River sand sources typically provide the best quality for lawn applications. Look for suppliers who can provide clean, washed sand with verified particle size distribution.
Quality Indicators Good sand for lawn applications should be uniform in color, free of clay lumps or organic debris, and have a gritty feel rather than smooth or dusty texture.
Seasonal Availability and Pricing Sand prices typically remain stable throughout the year, but availability can be limited during peak construction seasons. Plan ahead for spring applications by ordering materials in late winter.
Measuring Success: What to Expect After Sand Application
Short-Term Changes (First 30-60 Days)
Visual Improvements Properly applied sand mixtures should integrate with existing grass within 2-3 weeks. You may notice improved water infiltration during rain events and less standing water in previously problematic areas.
Grass Response Timeline Existing grass may show stress immediately after application but should recover within 10-14 days if the application was done correctly. New grass from overseeding should begin germinating within 7-21 days, depending on conditions.
Potential Temporary Issues Some yellowing of existing grass is normal immediately after application. Dusty conditions may persist for a few days until the first rain or watering settles the materials.
Long-Term Benefits and Maintenance
Soil Structure Improvements Real soil structure improvements from sand applications develop over 1-2 growing seasons. Be patient – the benefits compound over time as rain and root activity integrate the materials.
Ongoing Maintenance Requirements Sand-amended soils may require more frequent fertilization due to increased drainage. Monitor grass color and growth patterns to adjust your fertilization schedule accordingly.
When to Reapply Most sand applications provide benefits for 3-5 years. Consider reapplication if drainage problems return or if soil testing indicates the need for additional amendments.
Frequently Asked Questions About Sand for Grass
“Will sand kill my grass?” Sand won’t kill grass if applied correctly, but improper application can definitely harm your lawn. The key is using the right type of sand, proper mixing ratios, and appropriate application techniques. Pure sand or overly thick applications can create problems.
“How much sand do I need for my lawn?” For most applications, plan on 1-2 cubic yards of sand mixture per 1,000 square feet. Remember that you’re rarely applying pure sand – most successful applications use sand mixed with topsoil and compost.
“Can I do this myself or should I hire professionals?” Simple sand applications for small areas are often manageable DIY projects. However, large areas, severe drainage problems, or situations where previous attempts have failed may benefit from professional expertise.
“What if the sand application doesn’t work?” If properly applied sand doesn’t provide the expected benefits within one growing season, the issue may be more complex than surface drainage. Consider soil testing, different grass varieties, or professional consultation to identify underlying problems.
“Is sand better than other soil amendments?” Sand excels at improving drainage but doesn’t provide nutrients like compost or aged manure. The best approach often combines sand with organic matter to address both drainage and fertility needs.
Making the Right Choice for Your Lawn
Using sand for grass and lawn improvement can provide excellent results when done correctly, but it’s not a universal solution. Success depends on understanding your specific soil conditions, choosing appropriate materials, and applying them with proper technique.
The key takeaways for St. Louis area homeowners:
- Assess before you apply: Understand your soil conditions and drainage issues before choosing sand as a solution
- Mix, don’t just add: Pure sand applications rarely work well with our clay soils
- Choose quality materials: Coarse, clean sand provides the best results for lawn applications
- Time it right: Fall applications typically provide the best conditions for success
- Be patient: Soil improvements happen gradually, not overnight
Remember that every lawn is unique, and what works for your neighbor may not be the best solution for your property. When in doubt, professional soil testing and expert consultation can save you time, money, and frustration.
At Allen Outdoor Solutions, we’ve helped hundreds of St. Louis area homeowners create healthier, more beautiful lawns through proper soil management and targeted improvements. Whether you’re dealing with drainage issues, planning a renovation project, or simply want to improve your grass’s performance, we’re here to help you make informed decisions about your lawn care investments.
If you’re considering sand applications for your lawn, we offer comprehensive soil assessments and customized improvement plans designed specifically for our local conditions. Contact us today to schedule a consultation and discover the best approach for your unique lawn care needs.
Allen Outdoor Solutions has been serving the St. Louis metro area for over 15 years, helping homeowners create and maintain beautiful, healthy lawns. Our experienced team understands the unique challenges of local soil conditions and climate, providing customized solutions that deliver lasting results. Contact us at (314) 555-0123 or visit allenoutdoorstl.com to learn more about our comprehensive lawn care services.
The post Sand for Grass and Lawn: Complete Guide for Better Results appeared first on Allen Outdoor.
]]>The post How to Improve Clay Soil for Lawns & Drainage appeared first on Allen Outdoor.
]]>If you’ve ever tried to plant anything in your St. Louis yard only to hit what feels like concrete a few inches down, you’re not alone. Much of the soil in the St. Louis region is a compacted silt topsoil or exposed clay subsoil that may need amending and aeration. At Allen Outdoor Solutions, we’ve helped countless homeowners transform their challenging clay soil into thriving, beautiful lawns.
The good news? While clay soil presents unique challenges, it’s actually nutrient-rich and can support stunning landscapes once you know how to work with it. In this comprehensive guide, we’ll show you exactly how to improve clay soil for lawns and solve those frustrating drainage problems that leave your yard looking more like a swamp than a sanctuary.
Understanding Your Clay Soil Challenge
Clay soils contain more than 30% fine clay particles, which impacts the drainage of your soil and affects existing plants! These microscopic particles are the root of both clay soil’s benefits and its biggest challenges.
Clay soil has incredible water and nutrient-holding capacity thanks to all those tiny particles, but this same characteristic creates problems when water can’t move through the soil effectively. The small size of clay particles means they fit closely together, leaving less room for air, water and nutrients to move—especially when pressure compacts them.
How to Identify Clay Soil Problems
You likely have clay soil drainage issues if you notice:
- Water pooling on the surface for more than 24 hours after rain
- Muddy, waterlogged areas that never seem to dry out completely
- Grass that appears yellow or dies in patches
- Difficulty pushing a shovel into the ground when the soil is dry
- A hard, concrete-like surface when the soil dries out
- Clay particles are flat, like plates, instead of rounded like grains of sand, which you can feel when you rub soil between your fingers
The simple “jar test” can confirm your soil type: mix soil with water in a clear jar, shake it, and let it settle. Clay particles will form the bottom layer and should make up less than 30% for healthy drainage.
The Science Behind Clay Soil Drainage Problems
Understanding why clay soil struggles with drainage helps you choose the most effective solutions. Heavy clay soil tends to lack the aggregated structure that promotes good drainage and without the formation of clumps or “aggregates,” excess water struggles to find channels and air pockets through which it can drain away.
Several factors compound drainage problems in clay soil:
Compaction: Walking on your lawn or garden when its wet is a common cause. Heavy, beating rains also drive clay particles together. Each footstep or heavy rain further compresses those tiny particles.
Lack of Organic Matter: Clay soil naturally contains fewer organic materials that create soil structure and provide pathways for water movement.
Poor Soil Biology: Compacted clay provides little habitat for beneficial earthworms and microorganisms that naturally improve soil structure through their activities.
Chemical Buildup: Salts from fertilizers and winter de-icing solutions build up in heavy clay as well.

How to Improve Clay Soil for Lawns: The Complete Action Plan
Transforming clay soil requires a multi-faceted approach combining immediate fixes with long-term soil building strategies. Here’s your step-by-step plan:
Step 1: Test and Adjust Soil pH
Before making any amendments, test your soil’s pH level. Clay soil has acidic tendencies, meaning you should spend this time balancing out the pH and finding the best fertilizer for clay soil to make this happen. Try to achieve a pH between 5.5 and 7 as this is the optimum level for grass to grow.
Most clay soils in the St. Louis area tend to be slightly acidic, so you may need to add lime to raise the pH. A soil test will tell you exactly how much lime to apply and when.
Step 2: Strategic Aeration
Compacted clay lawns benefit from annual aeration. Core aeration cuts into clay and removes a small core of thatch and soil that gradually disintegrates on the surface. This creates immediate pathways for water, air, and nutrients.
For clay soil lawns, consider:
- Core aeration twice yearly: Spring and fall provide the best results
- Deep aeration: A pitchfork goes deeper in the clay soil, making this more effective for drainage but takes a lot longer to complete.
- Professional equipment: Renting or hiring professionals with heavy-duty aerators designed for clay soil
- Timing: Never aerate when soil is wet, as this can worsen compaction
Pro tip: You can use a grass plug tool to function as an aerator—dig holes as deep as possible, starting at one end of your lawn and working backward to avoid compacting the soil.
Step 3: Add the Right Organic Matter
Organic matter is the best way to amend clay soil: It lightens the soil texture, discourages compaction, adds nutrients, improves drainage and aeration, moderates soil temperature, and provides pore space, essential to plant growth.
The best organic amendments for clay soil include:
Compost: Adding organic matter such as compost into clay soil can significantly improve soil structure. Organic material introduces beneficial microorganisms and valuable nutrients creating a more friable soil texture, improving pore space for better water movement.
Well-rotted manure: Provides nutrients while improving soil structure. Avoid fresh manure which can burn grass and contain weed seeds.
Leaf mold: Whether it’s leaves, pine needles, hulls, or seaweed, it’s all useful for soil improvement. Don’t believe the old garden myth that pine needles or oak leaves make soil acidic; it’s not true.
Application method: As a general rule, when possible, add a layer of 3 to 6 inches of organic matter on your soil before planting, and work it down into the top 10 to 12 inches—where most roots grow.
Step 4: Apply Gypsum for Immediate Improvement
Gypsum (calcium sulfate) is known for its ability to break up compacted clay soil. It works by replacing sodium with calcium, which helps clay particles clump together into larger aggregates, thus creating channels within the soil and improving drainage.
Gypsum offers several advantages:
- Gypsum is easily applied to the soil surface with a regular lawn spreader.
- Won’t alter soil pH like lime does
- Starts working immediately starts working immediately to help loosen compacted clay soil, increase water penetration and improve drainage
- Provides calcium for stronger grass growth
Apply gypsum in early spring and again in fall, following package directions for clay soil applications.
How to Improve Drainage in Clay Soil Lawn: Advanced Strategies
For severe drainage problems, you may need to implement additional drainage solutions:
Create Proper Grading and Contouring
Contouring your lawn is a practical solution for managing water and improving drainage, particularly in clay soils prone to water retention. For example, raised beds can effectively reduce drainage issues by encouraging water runoff.
Professional grading can:
- Direct water away from low-lying areas
- Create gentle slopes that encourage drainage
- Eliminate standing water without major construction
Install Drainage Systems
For persistent problems, professional drainage solutions may be necessary:
- French drains: Redirect water away from problem areas
- Catch basins: Collect excess water from low spots
- Dry creek beds: Provide attractive water management while enhancing landscape design
Strategic Plant Selection
Deep rooted plants such as trees and shrubs can break up compacted clay soil and create channels for water to drain through, which reduces the chance of flooding. Some of these plants will also absorb the excess water and release it into the atmosphere, reducing how waterlogged the soil will become.
Consider drought-tolerant grasses that handle clay soil well, such as tall fescue or buffalograss for St. Louis conditions.

Seasonal Clay Soil Management Calendar
Spring (March-May)
- Conduct soil tests and apply lime if needed
- In the spring, you can also take the time to begin applying products to raise the soil pH, if it was not fully completed in the winter or different organic composts.
- Core aerate when soil is workable but not wet
- Apply first round of gypsum
- Overseed thin areas with appropriate grass varieties
Summer (June-August)
- In the summer, your grass should be well on their way to thrive in the sunlight. It is now time to begin applying soil conditioner to your clay soil.
- Maintain consistent (but not excessive) watering
- Avoid walking on wet lawn areas
- Monitor drainage during summer storms
Fall (September-November)
- Second aeration if needed
- Apply organic matter as top dressing
- Autumn is an important month for the maintenance of clay soil.
- Plant cover crops in unused areas
- Apply second gypsum application
Winter (December-February)
- Plan drainage improvements for spring implementation
- In winter, this is the prime time to begin checking your soil pH levels and ensure they are at optimum levels.
- Avoid traffic on frozen clay soil
What NOT to Do with Clay Soil
Avoid these common mistakes that can worsen clay soil problems:
Don’t add sand alone: Adding lesser amounts of sand can compound aeration and drainage problems. Sand mixed with clay can set up into a bricklike mixture. You’d need to add at least 75% sand by volume to see improvement—an expensive and impractical solution.
Don’t work wet clay: Only walk on, or work clay soil when it’s dry. If worked or walked on when wet, clay soils lose their structure and become puddled and compacted.
Don’t till excessively: While one-time tilling can help incorporate amendments, repeated tilling can destroy soil structure you’re trying to build.
Avoid peat moss: Avoid adding sand or peat moss to clay; they can make those problems worse.
Long-Term Success: Building Soil Biology
The key to permanent clay soil improvement lies in building a thriving soil ecosystem. Encourage beneficial microorganisms through:
- Regular organic matter additions: In following years, build on your efforts by adding 1 to 3 inches of organic mulch as a topdressing each year. As it decomposes, it continues to gradually improve clay soil.
- Minimize chemical inputs: Excessive fertilizers and pesticides can harm beneficial soil organisms
- Plant diversity: Different root systems create varied soil channels and feed different beneficial organisms
- Mulching: By mulching with organic materials like grass clippings, shredded leaves, or compost, you can protect your soil from compaction and erosion, and consequently suppress weed growth.
Budget-Friendly Clay Soil Improvements
You don’t need to spend a fortune to improve clay soil. Start with these cost-effective approaches:
- Collect leaves from your neighborhood each fall for free organic matter
- Contact local stables for aged horse manure (often free)
- Compost your kitchen scraps and yard waste
- Use coffee grounds from local coffee shops
- Focus on the most problematic areas first rather than treating the entire lawn at once
Improving the drainage of clay soil involves both short-term fixes and long-term strategies to amend clay soil structure and composition, so it may feel like nothing is working, but over time it will work.
When to Call the Professionals
While many clay soil improvements can be DIY projects, consider professional help for:
- Severe drainage problems requiring grading or drainage systems
- Large areas needing professional aeration equipment
- Soil testing and custom amendment recommendations
- Installation of permanent drainage solutions
Conclusion: Your Clay Soil Success Story Starts Now
The experts agree that the start of spring, as well as the beginning of autumn, are the best times of year to improve clay soil lawn drainage. With patience, the right techniques, and consistent effort, your challenging clay soil can become the foundation for a beautiful, healthy lawn.
Remember that healthy, well-maintained clay soil translates to less work for you and less stress on your lawn and garden. Once improved, clay soil actually provides excellent water and nutrient retention, often requiring less fertilizer and irrigation than other soil types.
At Allen Outdoor Solutions, we’ve seen firsthand how proper clay soil management transforms St. Louis landscapes from drainage nightmares into stunning outdoor spaces. Whether you need professional drainage solutions, soil testing, or a comprehensive lawn improvement plan, our team has the expertise to help you succeed.
Ready to transform your clay soil challenge into a thriving lawn? Contact Allen Outdoor Solutions today for a personalized consultation and let us help you create the beautiful, well-draining lawn you’ve always wanted.
Frequently Asked Questions
Q: How long does it take to improve clay soil drainage? A: You’ll see some immediate improvement from aeration and gypsum application, but significant structural changes typically take 2-3 years of consistent organic matter additions and proper management.
Q: Can I plant grass seed directly in clay soil? A: It’s better to improve the soil first. Clay soil often prevents seed germination due to poor drainage and compaction. Consider overseeding after core aeration and organic matter application.
Q: Should I use a clay soil conditioner product? A: While some commercial conditioners can help, organic matter and gypsum are typically more cost-effective and provide longer-lasting results.
Q: How often should I aerate clay soil? A: Clay soil benefits from aeration 1-2 times per year—ideally in spring and fall. Severely compacted areas may need more frequent treatment initially.
Q: Will improving clay soil help with my basement water problems? A: Better soil drainage can reduce water issues around your foundation, but persistent basement problems may require professional waterproofing solutions in addition to soil improvements.
The post How to Improve Clay Soil for Lawns & Drainage appeared first on Allen Outdoor.
]]>The post Pet Safe Landscaping: Creating a Dog-Friendly Yard appeared first on Allen Outdoor.
]]>As St. Louis homeowners who love both beautiful yards and their four-legged family members know, finding the balance between stunning landscaping and pet safety can feel like an impossible challenge. At Allen Outdoor Solutions, we’ve spent years helping local pet owners create outdoor spaces that are both gorgeous and safe for their furry companions.
Whether you’re dealing with a curious pup who samples every plant or an energetic dog who turns your yard into a racetrack, this guide will help you create pet safe landscaping that satisfies both your aesthetic desires and your dog’s natural instincts.
Why Pet Safe Landscaping Matters
The statistics are sobering: according to the ASPCA Animal Poison Control Center, they receive thousands of calls annually about pets potentially exposed to toxic plants. Many of these exposures happen right in our own backyards, where we least expect danger to lurk.
In our years of creating custom landscapes across St. Louis, we’ve seen firsthand the worry pet owners experience when designing outdoor spaces. Many discover too late that common plants like azaleas, rhododendrons, and certain varieties of lilies can cause serious health issues for dogs. See ASPA’s list of poisonous plants for more.
Beyond plants, traditional landscaping elements like cocoa mulch (which contains compounds similar to chocolate), certain fertilizers, and insecticides pose significant risks to curious canines who might dig, chew, or roll in these materials.
Creating intentionally pet-friendly landscaping isn’t just about avoiding emergencies—it’s about creating an environment where both you and your pets can thrive. When designed thoughtfully, pet safe landscaping can:
- Eliminate anxiety about your pet exploring the yard
- Reduce the likelihood of expensive emergency vet visits
- Create designated spaces for pet activities like running and digging
- Maintain beautiful aesthetics that enhance your property value

Dog Safe Plants for St. Louis Gardens
Dog-Safe Flowers
Contrary to popular belief, you don’t need to sacrifice beautiful blooms to create a pet-friendly yard. These flowering plants thrive in the St. Louis climate while posing no threat to your four-legged friends:
- Coneflowers (Echinacea): These native perennials offer dramatic purple, pink, or white blooms that attract butterflies while being completely safe for dogs. Their hardy nature makes them perfect for St. Louis’s variable climate.
- Sunflowers: These summer favorites not only create dramatic visual impact but are completely non-toxic to pets. Plant them along fences for added height and cheerful color.
- Snapdragons: With their whimsical shapes and variety of colors, snapdragons add personality to borders and containers while remaining dog-friendly.
- Petunias: These versatile annuals provide abundant color from spring through fall and pose no risk to curious pups who might take an exploratory nibble.
- Zinnias: Drought-tolerant and available in a rainbow of colors, zinnias are perfect for our hot St. Louis summers and won’t harm your pets.
When selecting flowers, remember that native varieties generally require less water and chemical intervention, making them doubly safe for pets who might ingest water runoff.
Dog-Safe Shrubs and Trees
The backbone of any landscape, these larger plants create structure, privacy, and shade while remaining safe for your pets:
- Dogwood Trees: Beyond the poetic connection to their name, these Missouri natives produce beautiful spring blossoms and fall color while being non-toxic to canines.
- Magnolias: These stunning flowering trees create dramatic focal points and are completely safe around pets.
- Serviceberry: This four-season shrub offers spring flowers, summer berries (safe for both humans and dogs to eat), fall color, and interesting winter bark.
- Rose of Sharon: This hardy hibiscus relative blooms throughout summer’s heat and is non-toxic to dogs.
- Crape Myrtle: These low-maintenance shrubs offer spectacular summer blooms and interesting bark in winter without posing any risk to pets.
When incorporating these larger elements, consider your dog’s patterns of movement through the yard. Create paths that accommodate their regular routes rather than forcing them to navigate through delicate plantings.
Dog-Safe Herbs and Edibles
Many culinary plants pull double-duty as both pet-safe additions to your landscape and useful ingredients for your kitchen:
- Basil: This aromatic herb repels mosquitoes naturally while being completely safe for dogs.
- Rosemary: This woody perennial adds structure to gardens and flavor to recipes without pet toxicity concerns.
- Mint: While you’ll want to contain this vigorous grower in pots, mint is safe for dogs and can even help freshen their breath if they take the occasional nibble.
- Blueberries: These shrubs offer spring flowers, summer fruit, and fall color while being perfectly safe for dogs to sample (though you might have competition for the harvest!).
Consider raising edibles in elevated beds or designated garden areas with decorative, pet-friendly fencing to maintain boundaries while adding design interest.
Landscaping Materials and Features for Pet-Friendly Yards
The plants are just one component of pet safe landscaping. The materials you choose for pathways, mulch, and other elements matter just as much:
Safe Mulch Options
NEVER use cocoa mulch in pet-friendly landscapes. This popular material contains theobromine—the same compound that makes chocolate toxic to dogs. Instead, consider:
- Cedar mulch: Naturally resistant to pests and pleasant-smelling, cedar mulch is safe for pets and deters fleas and ticks.
- Pine straw: This lightweight option won’t cling to fur and is non-toxic if ingested in small amounts.
- River rock: For areas where dogs frequently travel, smooth river rocks provide drainage while standing up to traffic (ensure they’re large enough not to be swallowed).
Pet-Friendly Hardscaping
The materials underfoot matter tremendously to your dog’s comfort and safety:
- Flagstone: These natural stones stay cooler than concrete in summer heat and provide secure footing for paws.
- Decomposed granite: This natural material creates firm but slightly cushioned pathways that are gentle on joints—perfect for older dogs.
- Paw-friendly deck materials: If incorporating elevated decking, choose splinter-resistant materials like composite decking or thoroughly sealed wood.
Thoughtful Fencing Solutions
The right containment system keeps pets safe while enhancing your landscape design:
- Aluminum ornamental fencing: Provides security without blocking views or feeling imposing.
- Living fences: Strategic plantings of dog-safe shrubs can create natural boundaries while adding privacy and habitat for birds.
- Invisible boundaries: For some properties, underground fencing systems offer containment without visual barriers.
Drainage Solutions
Few things create indoor-outdoor headaches faster than muddy paws. Consider:
- Rain gardens: These planted depressions capture runoff while adding beauty.
- Gravel trenches: Strategic placement diverts water away from high-traffic areas.
- Permeable paving: Allows water to filter through rather than creating puddles.
Dedicated Pet Areas
Working with, rather than against, your dog’s natural behaviors creates harmony in the landscape:
- Digging zones: Designate a specific area with looser soil or sand where digging is permitted.
- Bathroom spots: Create a designated area with materials that resist urine damage and are easy to rinse.
- Running tracks: Many dogs create their own patrol perimeters—acknowledge these with appropriate pathways.

Potential Hazards to Avoid
While we’ve covered dog-safe options, it’s equally important to know what to avoid in your St. Louis landscape:
Toxic Plants Common in St. Louis Landscapes
These popular plants should be avoided in yards where dogs have access:
- Azaleas and Rhododendrons
- Lilies (many varieties)
- Autumn Crocus
- Foxglove
- Hydrangeas
- Daffodils and Tulips (especially the bulbs)
- Lily of the Valley
- Oleander
- Sago Palm
- Yew
Dangerous Landscaping Products
Beyond plants, be cautious with:
- Chemical fertilizers (opt for organic alternatives)
- Pesticides and herbicides (use integrated pest management instead)
- Treated lumber for raised beds or borders
- Snail/slug bait (highly toxic to dogs)
- Certain types of mulch (avoid cocoa and those treated with dyes or chemicals)
Seasonal Hazards
Be aware of changing risks throughout the year:
- Spring: Emerging toxic bulbs and lawn treatments
- Summer: Overheating on hot surfaces, toxic mushrooms after rain
- Fall: Certain seed heads can cause problems if inhaled or ingested
- Winter: Anti-freeze runoff, ice-melting chemicals, holiday plants like poinsettias
Warning Signs of Plant Poisoning
Know when to seek veterinary help immediately:
- Vomiting or diarrhea
- Drooling or pawing at the mouth
- Difficulty breathing
- Unusual lethargy or agitation
- Loss of coordination
- Seizures
Keep your veterinarian’s number and the ASPCA Animal Poison Control Center number (888-426-4435) readily available.

DIY Pet Safe Landscaping Tips
Ready to transform your yard into a pet paradise? Start with these practical steps:
Assess Your Current Landscape
Take inventory of what’s already growing in your yard, and research each plant’s safety. Apps like “Picture This” can help identify unknown plants, which you can then cross-reference with the ASPCA’s toxic plant database.
Create a Transition Plan
Rather than removing everything at once, prioritize:
- Remove the most toxic plants immediately
- Replace seasonal plantings with pet-safe alternatives
- Plan for gradual replacement of larger toxic specimens
- Add new pet-friendly features in phases
Budget-Friendly Approaches
Pet safe landscaping doesn’t have to break the bank:
- Divide existing safe plants to fill new areas
- Join local garden swaps to trade unsafe plants for safe ones
- Focus on native plants that thrive with minimal intervention
- Create simple DIY features like designated digging areas
Training Tips
Even the safest landscape benefits from some basic training:
- Use positive reinforcement to teach boundaries
- Create clear pathways that indicate where dogs should travel
- Use temporary fencing during establishment periods
- Consider barrier sprays with pet-safe bitter apple around new plantings
Conclusion: Beautiful Landscapes for People and Pets
Creating pet safe landscaping isn’t about compromising on beauty—it’s about thoughtful design that acknowledges all family members, including those with four legs. The right combination of dog safe plants, appropriate materials, and thoughtful features creates an outdoor environment that enhances your property value while keeping pets healthy and happy.
At Allen Outdoor Solutions, we specialize in creating custom landscapes that work for St. Louis families and their pets. Whether you’re starting from scratch or modifying an existing yard, our team understands the unique challenges and opportunities of pet-friendly design.
Ready to create your own pet paradise? Contact Allen Outdoor Solutions today for a consultation to discuss how we can transform your outdoor space into a safe haven for the entire family.
Frequently Asked Questions About Pet Safe Landscaping
Q: Can I still have a beautiful lawn with dogs? A: Absolutely! Choose hardy grass varieties like tall fescue or Bermuda grass, provide designated paths for high-traffic areas, and consider lawn alternatives like clover for areas that receive heavy use.
Q: What’s the best way to keep my dog from digging up my plants? A: Create a designated digging area with loose soil and buried treasures, use physical barriers around prized plants, and ensure your dog gets plenty of exercise and mental stimulation.
Q: Are raised beds safer for vegetable gardens in homes with pets? A: Yes, raised beds create a clear boundary while keeping plants away from leg-lifting and curious digging. They also allow you to control soil quality more effectively.
Q: How can I keep my dog cool in the St. Louis summer heat? A: Incorporate shaded areas with dog-safe trees, consider a shallow wading pool, and ensure fresh water is always available in multiple locations around your yard.
Q: Can I use artificial turf in a pet-friendly yard? A: Modern pet-friendly artificial turf can work well for some areas, especially when paired with proper drainage systems and regular cleaning. Look for varieties specifically designed for pets.
The post Pet Safe Landscaping: Creating a Dog-Friendly Yard appeared first on Allen Outdoor.
]]>