

Every year I look forward to the blooming of the peonies in my yard. Not just beautiful, they are sentimental. We have hot pink and white peonies that are descendants of the farm I grew up on in North Dakota. My husband has planted them in the several places we have lived in the Philadelphia area, and they have luckily always done well. They are a little piece of my childhood that allows me to enjoy tripping down memory lane every May.
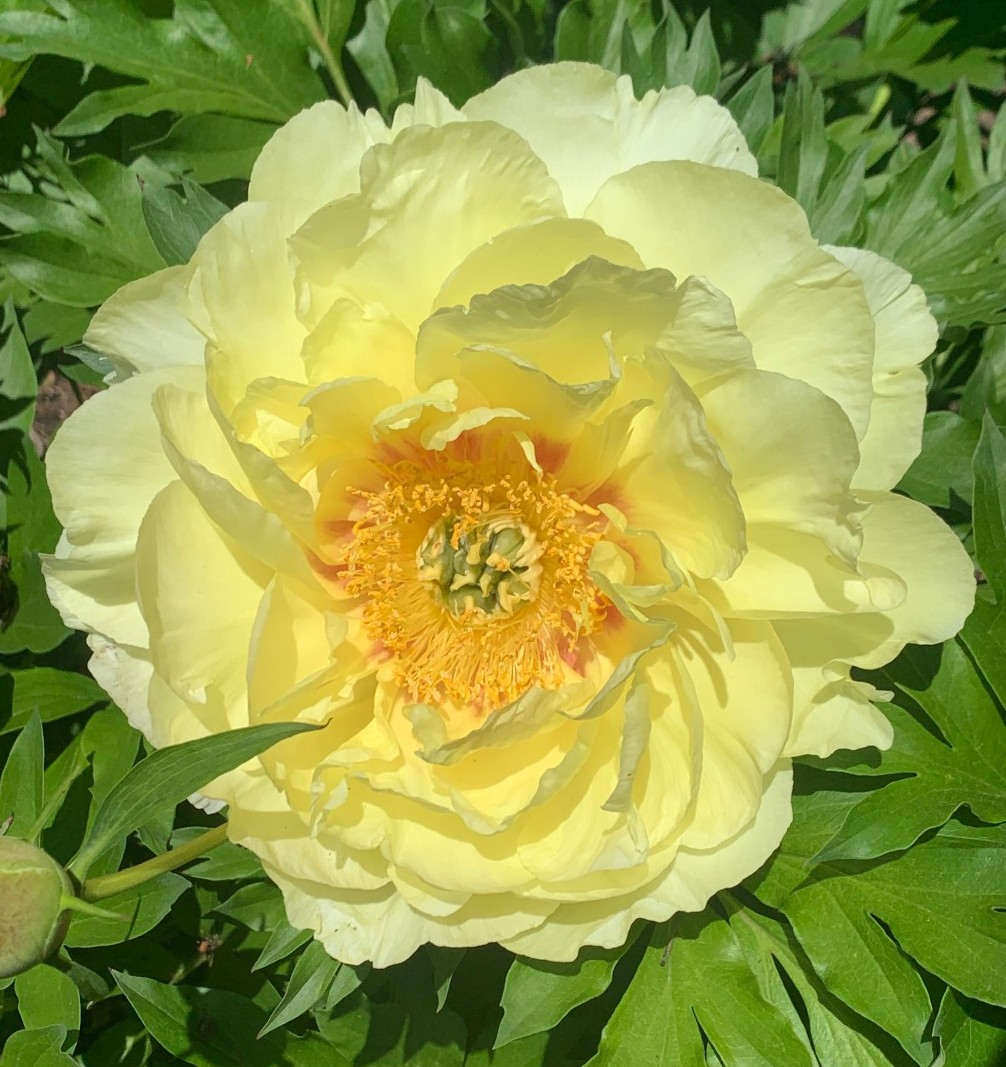
We also have a giant dinnerplate yellow peony that came from Costco and is quite amazing, as well as a newer planting of blush pink peonies that are just a little bit behind the others and allow us to extend our peony appreciation for a few additional weeks. We have but a few of the over 6,500 varieties available in the world!
But every year, they bloom and are absolutely brilliant for a week or so, but we inevitably get powerful rainstorms in May.......almost notoriously Memorial Day weekend to the frustration of the BBQ/camping crowd. Following those rains, we are inundated by soggy peony petals on the ground.......hoping the few remaining buds stay dry and give us a few more weeks.
But this year, I'm determined to get a little more out of my peony plants.

I collected petals for drying as soon as the bloom started to turn in order to enjoy them beyond the season. As a result, I went down a rabbit hole of discovering all the potential uses of dried peonies. Come along with me to learn about all their uses and the tidbits of interesting learnings from all my wanderings!
The name "peony" comes from Greek mythology. It is derived from Paeon, who was a student under Asclepius, the god of medicine. In one legend, Paeon used a peony to heal a wound on Zeus. Asclepius then became jealous of his clever pupil and wanted to kill him, but Zeus rescued the student by changing him into a peony flower.

The peony has been associated with healing properties since ancient times. Over 200 compounds have been identified from the peony, and it has been found to have a number of medicinal effects. The most studied compound is Paeoniflorin - a monoterpene glycoside with anti-inflammatory, antispasmodic, analgesic, and neuroprotective properties. But peonies also contains flavonoids, tannins, and anthraquinones that are bioactive.
In Europe, medieval monks grew them in their healing herb gardens, and the peony was used to ward off evil forces. The seeds steeped in hot wine were believed to prevent nightmares or strung onto necklaces to ward off either evil spirits or madness. The plants were often grown near the door of cottages to protect the home from any curses or bad energy.
Remember the English herbalist Culpepper from my last post on Herbal Salves, the author of The Complete Herbal? He stated the ‘male’ peony could cure falling sickness (old terminology for epilepsy) and the ‘female’ peony could help prevent 'melancholy dreams'. It's highly entertaining to read his entries as they sound like a scene from Harry Potter where Hermione might be reading a recipe for class. An example for Syrup of Peony:
Take of the Roots of both sorts of Peony taken up at the full Moon, cut in slices, and steeped in white Wine a whole day, of each an ounce and an half, Contra Yerva half an ounce, Siler Mountain six drams, Elk’s Claws an ounce, Rosemary with the flowers on, one handful, Bettony, Hyssop, Origanum, Chamepitys, Rue, of each three drams, Wood of Aloes, Cloves, Cardamoms the less, of each two drams, Ginger, Spikenard, of each a dram, Stœchas, Nutmegs, of each two drams and an half, boil them after one day’s warm digestion, in a sufficient quantity of distilled water of Peony roots, to four pounds, in which (being strained through Hippocrates’ sleeve) put four pounds and an half of white sugar, and boil it to a Syrup.
Quite a complicated concoction for back in the day!
They're edible
The blossoms, roots, and seeds of peonies are all edible, but the blossoms are most commonly used and have been so since medieval times. They can be used to either garnish a meat dish or salad or to add color and flavor to a summertime drink.
Or just add freeze some petals in ice cubes for a pretty cocktail garnish. You can also make jelly with the petals - I found a strawberry peony jelly that sounds delicious!

Brew for tea
Peony petals can also be brewed for tea, either alone or in a tea blend for a pop of color.
I did try the peony leaves tea on their own - it definitely needed a bit of honey for taste purposes. Can't say I would drink this alone unless aiming for a specific medicinal effect. But since it wasn't distasteful and the petals are beautiful and safe for tea, I decided to use mine to just create a more aesthetically pleasing tea mix. I blended with lemon balm and my mint blend but obviously any tea would benefit from a little colorful cosmetic lift. Mint blend, by the way, is my fancy way of saying I didn't label my mint when I dried it, so all unlabeled mint gets thrown together =). This mixture now tastes great AND looks pretty!


Body Products
Another easy way to use peony petals is within a bath salt or sugar scrub. I made a peony bath salt, mixing Himalayan course and fine pink salts, epsom salts, and peony petals in relatively equal parts. After combining the mixture, I put ~1/2 cup into a small mesh bag and packaged it with a couple more 'doses' for refills. This would make an easy project for kids or Christmas gifts.


You could also incorporate in a salve or lotion. I added peony petals to olive oil to make a herbal infusion ready for salve or lip balm. Peonies have become a trendy ingredient in commercial products due to the compound paeoniflorin mentioned earlier, which has been suggested to reduce wrinkles.


So I'm very happy with the various ways to be able to extend the use and enjoyment of our peonies beyond the season. It eased the disappointment with their short bloom time and their susceptibility to dropping with big rainstorms.
It was really satisfying to just collect all the silky petals and enjoy their beauty inside as they were drying for the various projects, occasionally mixing and redistributing the petals to ensure no moisture so they dried completely.

One last bit of fun lore about the peony. They are said to attract fairies. There is both Celtic and Japanese lore about peonies attracting good spirits to your garden, which is then likely related to the common belief that peonies can protect the home from bad spirits. The woodpecker is said to be the peony's guardian, so if there is one in the area, you are instructed to seek permission to harvest from both the bird and plant. If using for magical purposes, you must gather them at night. Pliny the Elder, the ancient Roman naturalist who wrote on various medical topics, apparently said, “that of necessity it must be gathered in the night for if any man shall pluck the fruit in the daytime being seen of the woodpecker he be in danger of to lose his eyes“.
You have been forewarned people.
And one more super fun fact, as I just returned from my first trip to Alaska visiting the magnificent beauty of glaciers and the Denali and Kenai Fjords National Parks. The state is known for another source of magnificent beauty....did you know that Alaska has become an extremely successful and prolific producer of cut peonies thanks to its cool temperatures and extended hours of sunlight? Makes sense as we enjoyed essentially 21 hours of daylight during vacation, being able to take a little hike in what felt like early afternoon light at 10 pm one night. As peonies love exposure to the sun, Alaska is able to cultivate and harvest these flowers for longer periods of time, and the growing season runs all the way from late June to September. The things you learn when traveling down rabbit holes!
]]>
Hi all - it's been some time since my last post. But I'm excited to say I recently retired from a wonderful 28-year career as a pharmacist working for a large drug company. I'm now thoroughly enjoying spending more time on my beekeeping and gardening hobbies and hope to share my new musings more often in future posts now that the day job no longer interferes!
As a perpetual curiosity cat, my posts will continue to be a blend of whatever I happen to be doing in my Dakota Pharmgirl-related activities combined with a bit of side-wanderings into historical fun facts.
In this post, I'll share how to make herbal salves. I've enjoyed making them for years from plants from our garden and sharing them with family and friends.
Not only are they easy to make, they're gentle, effective, and very portable!

Even if you don't want to make them for yourself, hopefully you'll find it interesting to understand how they're made and what they're good for as well as enjoy a bit of fun history along the way!
What are Herbal Salves?
Herbal salves or balms are essentially a mixture of beeswax combined with herbal or flower infusions in a carrier oil that has drawn out the fat-soluble healing compounds of the plant. The term 'salve' and 'balm' are commonly used interchangeably as they are generally the same thing. Technically, a balm is a little bit harder as it has a higher wax-to-oil ratio than a salve, but we'll just refer to them all as salves today.
Many different kinds of plants or flowers can be used in salves and each has it's own healing properties while beeswax is naturally antimicrobial, anti-fungal, and anti-inflammatory with the ability to both soothe skin and lock in moisture. Together they are a great combination and can be used as chapstick or to treat minor skin irritations, wounds or bruises, or muscle aches.


The use of salves as homemade remedies represents a blend of traditional knowledge from Indigenous, European, Asian, and African practices. Our use in the United States likely came primarily from Europe. In 1652, Nicholas Culpeper, an English physician and botanist, published The English Physician. Later called The Complete Herbal, the book provided recipes for personal herbal remedies, bringing trusted medical knowledge about herbs and traditional folklore treatments to ordinary people. While seemingly simple in concept, it was actually quite controversial and considered a direct insult to the College of Physicians. And apparently, old Nick had quite the attitude about his colleagues!
"This not being pleasing, and less profitable to me, I consulted with my two brothers, Dr. Reason and Dr. Experience, and took a voyage to visit my mother Nature, by whose advice, together with the help of Dr. Diligence, I at last obtained my desire; and, being warned by Mr. Honesty, a stranger in our days, to publish it to the world, I have done it."
He was truly a radical in his time - arguing against bloodletting, toxic remedies that were in use, and hidden medical knowledge only published in Latin. At one point, he was even accused of witchcraft (more on that topic later) and the Society of Apothecaries tried to curtail his medical practice. His book, written in plain English and intended to help the poor, was widely popular and was most certainly brought over by colonial settlers of the U.S. This combined with knowledge obtained from the Native American populations on plants commonly found in our country likely formed the basis of many common herbal salve remedies used here in the States. In the late 1800's, salves were a driving force in the patented medicine industry in the U.S. where an explosion of 'cure alls' were marketed. Those that didn't overpromise and worked well were able to stay clear of the coming regulatory crackdowns. Anyone use Mentholatum? That's been around since then!

However, before we get too caught up in gratitude for Culpeper, there's a bit more history here. It was discovered that much of the content of The Complete Herbal was actually taken from apothecary John Parkinson's Theatrum Botanicum of 1640.
So......did Culpeper create something very useful and easier to read for the underserved public? Yes. But was his reputation as a physician for the common people based on knowledge first published by a pharmacist? Also yes. If we're gonna give praise, let's appreciate the long-standing effective partnerships of physicians and pharmacists =).
One other funny I came across emphasized this tension between traditional medicine and alternative home remedies and how circular this history has been. Below is "A Short History of Medicine for a Headache":
- 2000 B.C. — Here, eat this herb.
- 1000 A.D. — That herb is heathen. Here, say this prayer.
- 1850 A.D. — That prayer is superstition. Here, drink this potion.
- 1940 A.D. — That potion is snake oil. Here, swallow this pill.
- 1985 A.D. — That pill is ineffective. Here, take this antibiotic.
- 2000 A.D. — That antibiotic is artificial. Here, eat this herb.
Natural remedies are certainly back in popularity as a reasonable alternative to traditional medicine for certain conditions. Hopefully we can now better appreciate that there is a place for both and where each can be used most effectively. Ok, let's talk about making salves!

Collecting and Preparing Herbs
The first step to making a salve is collecting or sourcing herbs or flowers to create an herbal infusion. It's important that collected plants are free from pesticides or debris. They should be carefully inspected and ensured they are appropriately dried before putting in oil to prevent common causes of spoilage. It's also possible to buy organic herbs or flowers online.

I've dried herbs/flowers by either hanging them in a bright window or using a food dehydrator. If using a food dehydrator, be careful as it can sometimes get too hot for more fragile blooms if used too long. Once dried, it's best to crumble your plant material into smaller pieces to increase the surface area that can interact with the carrier oil.


To understand which herbs do what, I would recommend Medicinal Herbs: A Beginner's Guide: 33 Healing Herbs to Know, Grow, and Use by Rosemary Gladstar. Another good source is The Herbal Apothecary: 100 Medicinal Herbs and How to Use Them by Dr. JJ Pursell. Or go old school with The Complete Herbal by Culpeper - it's still out there and now in modern formats.
At the end of this post, I've provided an Appendix that lists common plants and their uses.
For the next steps, you'll need the following equipment and supplies:
- clean glass jars
- a carrier oil (e.g. olive, jojoba, or almond oil)
- beeswax (or alternative wax like soy wax)
- heat safe pitcher or glass pouring cup (or double boiler with pouring spout)
- fine mesh strainer and cheesecloth
- measuring cups and a kitchen scale
- 1 to 2 oz aluminum tins or glass jars
Making the Herbal Infused Oil

There are essentially 2 ways to make herbal-infused oil - a slow method and a quick method.
For the slow method, you simply put the dried herbs in a glass jar and combine 1 part herb or dried flower to 2 to 3 parts oil, making sure the oil completely covers the plant material. Seal and let sit in a cool dark place for 4 to 6 weeks, shaking it occasionally.
For the quick method, you combine the herb and oil as above but put inside a water bath or a double boiler on low setting. Heat it gently (95-120°F) for 4 to 8 hours, stirring occasionally.
Either way, the carrier oil will extract the beneficial compounds from the herb or flower.

Once ready, you will need to strain the mixture to remove the plant material from the oil. I have used either a mesh strainer with cheesecloth or a fine mesh stainless-steel strainer that I have. I have also seen people use a reusable/washable nut milk bag. It's fun to see all the beautiful colors of the different plant infusions!


Making Salves
To make a salve or balm, you generally combine 1 part beeswax with 4 parts oil. Melt in a double boiler or use a heat safe aluminum pitcher or Pyrex measuring cup set in a larger pot with an inch or two of water. Use medium heat and stir until melted and well mixed.

I use the following recipe to make enough for 8 tins.
- 1 cup infused oil
- 1 oz beeswax (~1/4 cup)
- 20 drops essential oil
Once off the heat, you can add essential oils (20 to 40 drops) or Vitamin E.
Then just pour into tins and let harden.
The recipe can be adjusted depending on how firm you want the end result (a 1:3 wax-to-oil ratio will create a firm balm, a 1:4 ratio will create a standard salve, and a 1:5 ratio will create a very soft, spreadable salve). If you add other ingredients like shea butter or cocoa butter (such as for a chapstick), understand that will soften the mixture a bit, so you may need more beeswax. Some people like to add vitamin E for its healing and preservative effects.
A good way to test if you have the desired consistency is to pour a couple drops onto a plate and put the plate in the freezer for a few minutes to harden. Remove and rub the salve between your fingers to see if it's the texture you want.
For clean-up, it's easier if you wipe out the pouring jar with a paper towel to remove most of the material before washing with soap and water.

Once cooled and solidified completely, put the lids on and they are ready to use! Apply a small amount to affected areas as needed. They will usually keep for about 6 months. If Vitamin E has been added, this extends to about 12 months.
And that's it! They are easy peasy.
One Final Salve Story
Okay earlier I promised more on salves and witches - so before we close, let's take a little side journey into that history. You know witches are commonly depicted as flying on broomsticks? Have you ever wondered why that is? There are a couple different stories in folklore, but one actually has to do with the pharmacologic properties of particular herbal ointments.
During the Middle Ages, aconite, belladonna, hyoscine (scopolamine) or henbane ointments were considered 'witches ointments'. At some point, people had learned these substances could be absorbed through sweat glands in the armpits (or via the mucus membranes in their nether regions) to avoid the GI symptoms that came with eating or drinking formulations containing them. In pharmacist language, this alternate administration avoided the 'first pass effect' of metabolism thru the liver. The reason for wanting to use these powerful ointments could have been for ritual or spiritual experience or purely recreational - history is not really clear. But reports of 'feeling like flying' or visions of flying were part of the hallucinogenic effects reported with the ointments. From the 15th century onwards, accounts of "flying ointments" being used by witches were out there. The French witch hunter Jean Bodin wrote of a woman who used an ointment to leave her bedroom by flying through the air, and during the 18th century, Swedish stories of flying ointment attributed even stronger powers to it, claiming it would even lift items with which it came into contact. A boy at one witch trial said that “If one drop was to hit an animal or object it would immediately fly up into the air”. Of course, most of these reports were suspect and occurred during the height of the witch trials and the actual evidence that these ointments were ever used is pretty scanty. Makes for a great story though!
Cheers and Happy Spring everyone!

Appendix: Different Herbs and Their Uses

Plantain: The First Aid Herb
Best for: Bug bites, stings, poison ivy, wounds
Properties: Anti-inflammatory, antimicrobial, draws out toxins
Plantain is often found growing in backyards and along sidewalks, but it’s a powerful medicinal herb. It’s great for drawing out toxins, venom, and irritants from the skin, making it useful for bee stings, mosquito bites, and poison ivy rashes. It also helps speed up wound healing and reduces irritation.
Lavender: The Soothing Antiseptic
Best for: Burns, bug bites, minor cuts, relaxation
Properties: Antiseptic, anti-inflammatory, calming, promotes wound healing
Lavender is well known for its calming aroma, but it’s also a powerful antiseptic and anti-inflammatory herb. It’s particularly useful in salves for treating minor burns, insect bites, and cuts. The soothing scent can also help reduce stress and promote relaxation.


Chamomile: The Gentle Healer
Best for: Sensitive skin, burns, inflammation, eczema
Properties: Anti-inflammatory, soothing, calming, antibacterial
Chamomile is a gentle, skin-soothing herb that’s perfect for sensitive or irritated skin. It has strong anti-inflammatory properties, making it beneficial for eczema, rashes, and sunburns. Chamomile-infused salves are also great for babies and those with delicate skin.
Calendula (Calendula officinalis) – The Skin Healer
Best for: Dry skin, wounds, eczema, rashes, burns, diaper rash
Properties: Anti-inflammatory, antibacterial, antifungal, promotes skin regeneration
Calendula is one of the most commonly used herbs in skincare products due to its powerful skin-healing properties. It’s particularly beneficial for eczema, dermatitis, and minor wounds because it helps reduce inflammation and supports tissue regeneration. Calendula-infused salves are gentle enough for babies and sensitive skin.


Yarrow (Achillea millefolium) – The Blood Stopper
Best for: Cuts, scrapes, wound healing
Properties: Astringent, antimicrobial, promotes blood clotting
Yarrow has a long history of being used as a wound-healing herb due to its blood-clotting properties. It helps stop bleeding and prevents infections in minor cuts and scrapes. It’s also mildly antibacterial and anti-inflammatory, making it a great first-aid herb.
Arnica (Arnica montana): The Pain Reliever
Best for: Bruises, muscle pain, swelling, sprains
Properties: Anti-inflammatory, pain-relieving, reduces swelling
Arnica is widely used in pain-relief salves and creams for bruises, muscle soreness, and swelling. It helps reduce pain and inflammation, making it a great choice for athletes or anyone with muscle or joint pain. Note: Arnica should not be applied to open wounds.

You can use a single herb or create a blend depending on what you need. Some suggested different herb and oil combinations are the following:
- For dry skin: Calendula + chamomile + lavender + jojoba oil
- For muscle aches: Arnica + cayenne + coconut oil
- For bug bites or poison ivy relief: Plantain + chamomile + lavender
- For cuts, scrapes, minor burns to prevent infection: Calendula + yarrow + plaintain + lavender + olive oil
- For cracked heels or very dry hands: comfrey + calendula + olive oil

Hard to believe that my last blog post was from March of 2021! A new managerial role at my day job - while a great career opportunity - certainly took its toll on my available time for pleasure writing. Didn't COVID-19 seem to wreak havoc on our habits as well?
Anyhoo, I'm thrilled to get back to some nature musings and restore a little of that important work/life balance we all need.
And fortuitously, the post I happened to be working on last - before earning a paycheck rudely interrupted my farmgirl scribbles - was on elderberry syrup. Which is timely as we'll be coming up on the elderflower season in June and the subsequent elderberry season in July. Perfect excuse to get prepared for their harvest. Hey, it's all good!
What’s the difference between elderflower syrup and elderberry syrup? Elderflower syrup is made from the beautiful, white fairy elderflowers (shown left). It's clear to light yellow in color with a very light, citrusy flavor, and I described how to make it back in Elderflower Enthusiast.
In contrast, elderberry syrup is deep purple in color and is made from the berries of the elder. It has a more tart and fruity taste.

Elderberry syrup has enjoyed quite a renaissance in recent years. Once an old-timey cough and cold remedy that fell out of use due to the availability of modern medicines, it’s become quite popular again as a safe, natural remedy and can now be seen in many forms (tablets, gummies, or liquids) at your local drug store.
We have several elder bushes in our yard. One in particular sits directly at the corner of our patio and has blooms that get so big, they end up hanging over my patio chairs. While I love the scent of the fairy blossoms when sitting outside, this particular location provides extra incentive to make elderberry syrup. Once the flowers turn to berries, I must gather all that lovely purple fruit before it drops or the berries end up permanently staining the patio chair cushions and creating lovely purple circles on the patio stones! Have to keep ahead of the birds and squirrels as well who drop a few while they eat =)
Historical factoid: While I don’t want elderberries staining my patio cushions, this very trait gives them their tried and true reputation for staying power when used as a dye. Historically, they were used for the blue and purple colors in the famous Harris Tweed, and the Romans also used them for hair dye!
And good news, you don't have to have an elder bush in your yard to make syrup. Now that elderberry products have come back into fashion, you can find frozen or dried elderberries very easily online.

HARVEST THE BERRIES: If you are picking fresh berries, they can be quite messy as they stain both skin and cloth. The easiest hack I've learned for gathering them is to cut small branches of berries off over a big bowl to capture falling strays. Then put the whole thing - small branches with berries - into Ziploc bags and freeze them.
When you are ready to make syrup, you literally just shake the frozen branches over a bowl dislodging all the berries. They drop right off with no mess!
If you happen to have any green or red (unripe) berries in there, it's a good idea to remove them. You can run the bowl with berries under water and the unripe ones will just float to the top.

Make sure to discard the branches immediately. If you need to set them on the counter, make sure to place paper towels down for them as any associated juices will stain anything they touch. Then, within the bowl of berries, you can use your fingers to sift through and gather any little branches. I didn't think of it at the time, but it wouldn't be a bad idea to wear some latex gloves to do this. As the berries are still frozen, you can separate the bits you want out pretty easily. No worries if some are still there - it will be strained off later.


The next step is to cook the berries down. This is very important - raw elderberries are toxic since they contain cyanogen glycosides. Eating raw berries creates a build-up of cyanide in your body which can cause severe stomach problems or worse depending on the amount ingested.
Nature factoid: Interestingly, their toxicity seems to only be a problem for humans and many domesticated animals (cats, dogs, etc). The birds and squirrels can eat all they want, ripe or unripe, with no issue! I went down a rabbit hole (they can eat them too) to find out the scientific reason for this but struck out. A question in search of an answer for another day!

TO COOK THE BERRIES:
Fill the pot with around 2 cups of berries and 4 cups of water. Bring to a gentle boil and then immediately reduce the heat and allow them to simmer for about 30 minutes. If you like, you can add a cinnamon stick, cloves, ginger, vanilla bean, or herbs to the mixture for flavor at this time. Remove from the heat and let sit for at least 20 minutes to an hour to steep and cool down.
STRAIN THE BERRIES
Once cooled, strain the mixture over doubled cheesecloth or a very fine mesh strainer to avoid any pulp or seeds.
You can now add other flavor ingredients. A cup of honey balances the tartness and makes it much more palatable for kids. For best results, the added honey should be in a ratio of at least half of the total volume of liquid after it has simmered.


Honey is great as it not only sweetens the syrup but also acts as a natural preservative. But remember, honey should not be given to kiddos younger than 1 year because of the potential for infantile botulism (botulism spores are naturally found in honey, but a baby's system is too immature to remove the toxin released from these spores). Sugar or maple syrup could be used as a substitute.
If desired, a cup of brandy or vodka could also be added to....ahem....increase the medicinal value =). Actually, it does help with preserving it longer so there is a legit reason for adding liquor!
STORAGE:
The syrup can be stored in an airtight container in the refrigerator and it will last for several months. Syrups made with honey or alcohol can last out of the fridge for that amount of time or a little longer.
MEDICINAL USES:
Elderberries naturally have vitamins A, B, and C which can stimulate the immune system. They also contain trace elements (such as copper, zinc, and iron) and minerals (such as potassium, calcium, and magnesium) as well as phytochemicals (such as carotenoids, phytosterols, and polyphenols). Some older studies have shown elderberry can reduce the length of flu symptoms and these particular studies were responsible for reviving the interest in elderberry as a remedy. But more recent studies showed no effect so evidence for treating flu is a bit of a mixed bag - it's likely more important to just get your flu shot. Elderberry is certainly not a substitute for skipping it!
However, there's a long historical record and several reasonably controlled studies that do show elderberry can reduce the duration and severity of sore throat, coughs, and colds. When combined with the familiar beneficial effects of honey in a well-made syrup, it's not unreasonable to expect elderberry will help your immune system fight back!
Elderberry also has very good antioxidant properties and some studies suggest a beneficial effect on blood pressure and cholesterol, but well-controlled clinical studies have not been done in this area.
For coughs and colds: Adults can take 1 tablespoon daily and children can take 1 teaspoon daily as a preventative. If you or your children are experiencing sickness or feel something coming on, that dose can be repeated four times daily until symptoms improve.
FOOD USES:
If you want to use elderberry syrup as a food, here are some ideas to try:
- Drizzle on yogurt or ice cream
- Add to a smoothie or acai bowl
- Drizzle on waffles or pancakes
- Combine with mustard, oil, vinegar, and herbs for a salad vinaigrette
- Add to a marinade or sauce for meat - pairs great with pork
- Add to sparkling water or champagne
I drizzled it on my greek yogurt, and it paired nicely with the black raspberries from my garden!

The relationship of humans to the elder bush has essentially not changed since the time of the Stone Age - we've been using its flowers, berries, and bark for literally ages, and traditional healers have touted its benefits over those many many years. Consider that Hippocrates (the Greek physician considered the father of medicine) called the elderberry tree his medicine chest. So even with the lack of hard clinical evidence we expect for today's medicines, it's one of those plants for which there are lifetimes of accumulated wisdom and likely some truth to its beneficial effects as long as you don't believe it will be a miracle cure. Whether you decide to buy elderberry gummies from your local CVS or make your own syrup as described here, elderberry has stood the test of time and can be celebrated for its many uses!
]]>
It's been a continuing journey to reduce our family's waste footprint over the years - at times really difficult making that choice of consciousness over convenience - particularly with a large family.
We've tried to be aware of our food choices and their impact on water (see What's Your Water Footprint?), our health and beauty choices and their impact on plastics and packaging (switching to bar soaps, shampoos, conditioners), as well as household items like Ziploc bags, cleaners, and laundry detergent (switching to silicone bags and eco laundry sheets).
We're by no means close to model eco-citizens but we keep slowly plugging away at it, hoping to keep lowering our impact.

For several years, we've been enrolled in a subscription program called Mighty Nest that has really helped make some of these switches easier. For $10/month, Mighty Nest sends you a random new eco-friendly product to try. Some have been really great and we made the switch with ease as the products were really good quality and it was a no-brainer.
But some habits have just been difficult to break - Ziploc bags are probably my hardest! They are still my go-to for so many things, even though I have several silicone alternatives.
Awhile back, we were introduced to beeswax wraps thru Mighty Nest. They were great for wrapping chunks of cheese or other hard items for fridge storage. Herbs wrapped in beeswax are also a win as they stay fresher longer. The wraps did cut down significantly the number of Ziploc bags (or amount of plastic wrap) we went thru. Although to be honest, some of the reduction is probably also related to the increase in age of our kids - Ziploc bags solved so many issues in those early years!

Given that they were one of our easy switch successes, it was exciting for me to discover tutorials for making my own homemade beeswax wraps. Plus I now had several years' worth of beeswax collected from my beekeeping honey harvests and had never gotten around to any of the candle, chapstick, or other Pinteresty things I imagined I would do with it. But I did have confidence I would use the wraps for myself and for gifts so this was worth a 'Craft Day'!
I made my first batch and I have to say it was really pretty easy - an afternoon's worth of work. Since all the ingredients can easily be found online, thought it would be worth posting the 'how-to' here for anyone to do themselves, with a few lessons learned on the first few 'not so perfect' squares =). There are many websites providing recipes out there. I took mine from my subscription American Beekeeping Journal magazine from a regular author who tested her method and I felt comfortable copying.
This recipe makes enough for ~16-20 pieces of fabric. And note, you can buy smaller amounts of ingredients than what you see pictured here or even 'beeswax wrap kits' if you didn't want to buy larger bulk supplies.
Ingredients
- 3.5 oz beeswax
- 0.8 oz pine rosin (I used Camp Ben nuggets)
- 1 tbsp jojoba oil (I used certified organic, Kate Blanc)
- Cotton fabric squares (Amazon sells precut packs for quilting or just remnants in tons of designs). Use whatever shapes or sizes you desire. Some people like to edge with pinking shears. I got pack of 50 squares for ~$15.


Equipment
- Kitchen scale
- Small paintbrush
- Chopsticks or stirring sticks
- Double boiler or equivalent
- Glass or metal container (see below first)
- Baking pan covered in tinfoil
Heat oven to 250 degrees F.

Mix beeswax, pine resin, and jojoba oil in metal or glass container - something you can use within a double boiler/pot and that you do not care to reuse as it will be too sticky to clean afterwards. I used one of my glass honey storage jars and this worked great as I can put the lid back on it to store and use for the next time I make some (a mason jar or a Pyrex cup with handle would work too). Note I did a double batch to start so my picture here reflects this amount.

Heat the materials over medium heat in the jar in a double boiler. I just used a saucepan and the metal rack from inside my Instant Pot so the glass sat above the bottom of the saucepan. Stir to make sure everything melted. Chopsticks worked well as a wooden stir stick.

I used a lightweight oven mitt (something not so thick so you can lift the jar and still maintain your grip) to pick up the heated jar. Drizzle a small amount over the fabric. Really this was one of the biggest learned lessons - if you put too much on, it dries with thick globs of beeswax that crack. After the first 1 or 2, you will have a good idea how much you need to put on.

Using the paintbrush to spread the liquid across the fabric evenly, you will easily be able to see where the fabric looks dry and you may need a bit more. If you do happen to put too much on, just use another piece of fabric to mop up extra.
Place pan in the oven for 2 minutes. As it had a wooden handle, I left the paintbrush on the pan and this helped it from drying up in between batches.

After 2 minutes, remove the pan and set it on a safe surface on the counter and then lift the fabric up and wave in the air to cool it (about 30 seconds). I found it was better to pick 2 corners up and wave. When lifting just one corner, it sometimes folded over on itself and created a 'crease' in the look. I then put it on a sheet of wax paper/parchment paper to continue drying fully.
Repeat for each square of fabric. Note I was able to do 2 to 4 pieces of fabric while still leaving the jar of wax mixture on the counter before needing to return it to the water bath to reheat. Fold and style the wraps however you’d like for presentation or storage.

Finished eco-friendly, cost-saving, re-usable wraps!
To use, wrap them around the desired object and use the warmth of your hands to help the fabric 'seal'. You can wash in cold water or with mild soap and let dry.
I put 2 to a pack in my gift sets since the fabric squares I bought had some matching themes and it was fun to pair up colors and patterns. Others I've seen on Etsy or other sites make a nice collection of different sizes in related colors which would be great as well.
They should last several years. You can warm them up in an oven to refresh if the wax hardens or starts to crack.
Hopefully, whether you buy them or make them, this gives you an idea to make one small change in what you use at home as we all get continue to get better at reducing, reusing, and recycling!
]]>As my summer beekeeping season comes to a close, I've processed the last honey harvest and will soon prep the bee hives for their winter break. I've left them enough of their own supply to feed themselves through the winter months and will soon wrap the hives to provide protection from cold winds and snow. And then cross fingers the girls will stay safe, healthy, and happy for a well-earned winter rest!

Similar to last year, one hive was really banging while the other just tried to get up to speed. But with close to a total of 170 pounds from primarily just the one hive, I'm not sure I'm ready for 2 hives at full production! Harvesting frames of honey in June, July, and August gave me 3 different color and flavor varieties due to the abundance of different nectar sources in my area. For fun, I've posted some honey harvest videos at the end of this post.


But even though I've taken my honey to Maple Acres Farm market down the street every couple of weeks this summer, I just learned they are completely out again. Not just of mine, but of all the other local honey sources as well.
The demand for local honey has really taken off and it is really great to see. Why is that?
The biggest reason I think is that people have really caught on that the honey you buy in the store and the honey you buy from a local producer are really 2 totally different products. And that's due to a number of things, most of which are quite sad unfortunately but I can report there is good news on the way!
For years, China and other countries have been illegally dumping their 'fake honey' into the U.S. market. This has been given the clever moniker of 'honey laundering'!
The U.S. imported over 200 million pounds of honey over the past 2 years, mostly from China but about 45 million pounds from India as well.

Honey sourced from these countries has been found to contain corn syrup, heavy metals, or even animal antibiotics. And most of it is ultra-filtered - a deceptive and illegal practice that heats up the honey, waters it down, and forces it thru really fine filters to remove all the pollen. This is different from the microfilter used by most commercial and private beekeepers to remove particles but still let pollen thru (see video below). The reason fraudsters do ultra-filtration is to essentially remove the 'proof' of where the honey is from as you can test the origin of the honey from the pollen. In a recent Food Safety News study, 76% of samples bought at grocery stores like Safeway, Giant, and Kroger all had pollen removed, and 100% of honey from drugstores like Walgreens, CVS and Rite-Aid had no pollen.

The good news is that honey fraud has been recognized as a big problem by the American Honey Producers Association and the U.S. government. In the past few years, significant efforts have been underway to prevent 'country of origin' fraud and dishonest importers that are disrupting the market.
Did you know that honey bees are the 3rd most valuable livestock in the U.S.??
Last year, Senator Tester (D, from Montana) and Senator Hoeven (R, from North Dakota), led efforts to get 2020 funding for Customs and Border Protection to purchase NMR equipment and add staff to test honey samples and stop the imports of these fake products. This is great news for states like North Dakota, the largest honey producer in the U.S., and will hopefully help them with getting a fair price for a good product instead of being locked out of the marketplace by unnatural knock-offs.
Not only that, Apimondia, the world's international beekeeping association, has now made a formal Statement on Honey Fraud and for the first time a formal definition of honey has been added to the Codex Alimentarius (the International 'food code' established by the United Nations and the World Health Organization). This will help reinforce an international standard so that these fake products can no longer even be called honey.

Avoiding 'funny honey' is just one of the many reasons to buy local honey. Raw unfiltered honey has so many benefits, many of which have been recognized for years. Not only does local honey just taste more flavorful, it contains natural antimicrobial properties. In a recent paper in the British Medical Journal, researchers compiled the results from 14 studies looking at honey compared to over-the-counter cold products and found that honey was as good or superior to these products in treating common cold symptoms. And given that cold medicines are really not recommended for younger children anyway, honey provides a safe, effective option (as long as not given to children younger than one as their gut bacteria are not developed enough at that age).

Some people swear by local honey to help with their seasonal allergies. It does make sense as honey color and content can really vary thru the season depending on what the bees are collecting.
While there isn't hard research out there on this, it does make sense that small doses of local pollen found in the honey would help build relevant immune responses.
And it's well known ancient wisdom that the antioxidant, antibacterial and anti-inflammatory properties of honey make it an effective topical treatment for wound healing.
So next time you are ready to refill that honey bear, check out the variety of honey in your area before reaching for something from the grocery store shelf. Search up farmers' markets or stores known to sell natural products like Trader Joes or Whole Foods. Most states keep a list of certified beekeepers and many beekeepers sell directly online so that is also an option.
According to the Bee Informed Partnership which surveys beekeepers every year, there were fewer losses this past year and U.S. honey bees are hopefully making a comeback in numbers. Let's support our U.S. producers and help keep our healthy honest honey supply strong!

Hi all! I've been having a blast harvesting honey every couple weeks this whole summer, but the season is almost over and I'm looking at pulling my last few frames this weekend before leaving the rest to the bees for their winter. So it's time for a non-bee related topic!
The last Veggie Highlight I did (on the Japanese sweet potato) was over 2 years ago so I'm MORE than overdue for a new one. And if you follow this blog, you know my Veggie Highlights will give you the basics, a few cooking ideas, along with a few crazy factoids thrown in.
On my last trip to Maple Acres Farm, my local farmstand, I picked up some heirloom tomatoes and a few tomatillos. While I love Mexican dishes including salsa verde and have enjoyed tomatillos in a variety of restaurant dishes, I had actually never cooked with them before. Tomatillos will be in season pretty much at the same time as tomatoes, even a little longer into Fall so you should be able to find them easily at your local farmers market right now. Figured this was a perfect opportunity for both you and me to learn something new, right?


Tomatillos are a small green fruit in the nightshade family native to Mexico and Central America. Nightshades include your tomatoes, potatoes, tobacco, peppers, and eggplants. Tomatillos are also called husk tomatoes, jamberries, or Mexican tomatoes. You will know them by the distinctive paper-like husk that surrounds them. Inside, they look like a large green cherry tomato.
The Aztecs, with their advanced farming practices, are credited for domesticating this plant around the 1300's. The Aztec word for tomato was xitomatl and for tomatillo was miltomatl. The more general word, 'tomatl' just meant something round and plump. So even though they are from 2 different plant families, when the Spanish conquistadors brought back various Aztec foods from their travels, they referred to both as 'tomatoes', and the miltomatl, being the smaller in size, became 'tomatillo'.
Factoid Interlude #1: In 2017, a fossilized tomatillo, still in its papery shell, was found in the Patagonia region of Argentina. Scientists were quite excited about it - not only because it was a complete fossil showing the stem, berry, and husk but also by the fact that it was found to be more than 50 million years old! The earliest fossil larger than a seed previously found had only dated to 16 million years ago. What this demonstrated was the true hardiness of the nightshades family considering 50 million years ago during the Eocene epoch, the planet cooled, the ice caps formed, and rainforest and jungles turned into deciduous forests. The fact that the tomatillo, or should we call it 'the little plant that could' survived all those changes to earn its prominent place in Mexican cuisine....well, evolutionarily, tomatillos must contain the 'whole enchilada' when it comes to enduring genetic traits =)


Most often, tomatillos are used to make sauces - they actually contain a pectin-like substance that naturally thickens sauce or salsa upon refrigeration. They are incredibly versatile and depending on how they are prepared, the flavor will be a little different. If used raw, they add a fresh, citrus-like flavor. If blanched, they are more mild. To blanch, boil in water for five minutes or until soft. If dry roasted, they have a more nutty flavor. To roast, place on a sheet pan on low heat in the oven for 20 to 30 minutes. Once you peel them out of the husk to prepare them, just remember to rinse them as they can have a sticky film.
Factoid Interlude #2: Unlike the tomato, tomatillos do not contain lycopene. But they do contain compounds even better for your health. Researchers at the University of Kansas found that the tomatillo contains 14 phyto-chemical compounds, called withanolides. Some of these have been found to have anti-cancer and antibacterial activity. Tomatillos also contain flavonoid anti-oxidants such as beta-carotene and lutein, known to be great for eye health. See, they're super healthy!

Here are just a few ideas for incorporating tomatillos into your meals:
- Add to omelets, scrambled eggs or Huevos Rancheros
- Add to gazpacho
- Substitute pureed tomatillos as the acid source in vinaigrettes
- Make salsa verde and add to fish or meat dishes or for flavoring rice. To make salsa verde: combine chopped tomatillos, onions, cilantro, garlic, serrano or jalapeno peppers, salt and pepper. Cook in a saucepan for 6 to 8 minutes and puree.
- Serve salsa cruda with chips. To make salsa cruda: combine chopped tomatillos, tomatoes, onions, jalapeno, and cilantro with a little bit of lime juice and salt added.

What did I do with mine? I roasted 5 or 6 of them for ~25 minutes, pureed them with some sauteed onions and garlic and mixed that with a can of cream of mushroom soup and cilantro. I poured that sauce over some pork tenderloins and baked the tenderloins til done. A delicious simple dish with some brown rice that got a thumbs up from the kids.
So hopefully that has given you an orientation to the tomatillo and as well as a boost of confidence to pick a few up yourselves this season and create your own meal experiment. Buena suerte in your cooking adventures!
]]>Isn't it funny how something so common and naturally occurring can happen every Spring across the whole country without you knowing a thing about it and then suddenly, once it happens in your own backyard, you wonder how you possibly could not have seen it before?

Bee swarms. They're quite common this time of year and clumps of bees might be found on signposts or fences, backyard trees, or even patio furniture. How could I not know anything about this fascinating and amazing natural event before now? And....importantly.....know they're nothing to fear and something to behold. Really. More on the fear thing later.
As a second year beekeeper, I was exposed to the topic through my beekeeping classes and reading. But that was all theoretical. Just recently I got first hand experience with a swarm.....my own hive. This post is to share that story so you can now say you know something about swarms the next time you see one.

Last year I started two beehives. The goal was to get them built up, store enough honey, and keep them healthy enough to survive the winter. The 'package bees' I started with come from the South so it is not always a sure thing they will acclimate to our Pennsylvania climate and survive our colder winters (see Backyard Beginner Beekeeper, Part 2 if you want to see what a 'package' looks like).
It was a more expensive option to start with a local 'nuc' (nucleus colony, a small starter population raised locally) but now I see why it might have been a better option as one of my hives survived and one didn't. Hives that 'overwinter' are ready to get going in early spring and start to rebuild in size to get ready to take advantage of all those flowering plants. As they build up, that's when swarm season starts. So this is the story of my one hive that survived and built up....fast.
Bees swarm for 2 reasons - because it's too crowded and they need more space and just because its their natural way to reproduce and promote the species. Essentially the swarm is the queen taking off with a third to half of the hive to find a new home leaving the original hive to make a queen of their own.
When a swarm happens, typically the hive has been preparing for weeks, making new queen cells and putting the current queen on a diet so she thins down and can fly better. To make new queens, they take a normal egg and feed it royal jelly, a special secretion they make for all bee babies, but they provide it for more days to make a queen. They also make a special 'cell' that is a little larger to fit a queen.

That is why you monitor hives closely in the Spring to see if they are making queen cells to try to head off their plans to swarm. Mine were making a few but I thought I had caught them all and removed them. You also try to create more room for them by adding boxes and enticing them to stay. But sometimes the bees just outsmart your best efforts =).

So one Saturday morning in early May, I took my son to karate as usual. When I came home and walked into my bedroom, I heard a loud buzzing ROAR and saw out my window a huge black moving mass. My hives sit right under my bedroom window. Ahhhh, my hive was swarming! My first thought was 'What a failure I am.....now I'm going to lose my second hive!'
I went down to watch the drama and take some video. It looks like absolute chaos with thousands of bees just circling madly in the air. But what looks like a disorganized frenzy, I learned later is actually some amazing bee behavior. When the hive swarms, all the bees fill their stomachs with honey for the trip. The queen isn't that great of a flyer so the first thing they do is find something relatively close to hang on while they figure out where to go. Scout bees look for a close location and then come back and 'dance' at the top of the cloud to communicate to the rest of the bees where to go. At their temporary location, while most of the hive hangs out, about 100 scout bees then go out in every direction to find a place to live. This can take just a few hours and is usually figured out within a day.
Luckily in my case, the first place they went was to a dead pine right in my yard that has been on the 'to do' list to take care of for quite awhile. Okay, I thought, I might be able to do something here. I had just attended one of my second year beekeeping classes and our instructor told us about one trick where you try to draw a swarm farther down the tree so you can reach them and get them into a box. He told us that lemongrass oil works as a good lure. I didn't have lemongrass oil but I did have a tube of lemongrass paste for cooking in my fridge. Would it work? Worth a try. I soaked a paper towel and fastened it to a lower branch and waited an hour or so. Absolutely no scout bee interest.
I was so worried they'd find a place soon and just take off. It was time to go to Plan B. Luckily my husband was willing to entertain the idea of cutting down the tree and letting a bunch of bees fall near him. That's love folks.
It did help that I reassured him from all my reading, classes, and obsession with bee-related YouTube videos, that swarms are typically docile. The bees stomachs are full and they have a hard time curving their abdomen to sting, and it's the one time bees have nothing to defend - no hive or honey supply - so they’re not really interested in stinging you. There are many videos of experienced beekeepers just scooping swarms into their bare hands. (For me and I think most beekeepers though, it’s always a good idea to err on the side of caution and suit up to be protected.)

And I know now that there is actually a small army of local beekeepers that, following a panicked phone call, are willing to go at a moment's notice to any location within their area to retrieve a swarm. Knowing that the bees are gentle at this time and they are essentially getting free bees, there are many beekeepers willing to come to the rescue. The important thing to do if you see one is to not disturb it (i.e. don’t spray with water!) and to call a local beekeeper (or police if you don’t know one). There's also a general website (Beeswarmed.org) where you can report a sighting.
If you still have a fear of bees and don't believe you can stand anywhere near a swarm, watch 'Bees - Living for the Queen' on Amazon Prime. It has great explanations and features a swarm that occurred in downtown Graz Austria with the bees eventually settling on the wires above a local tram. Before they got to the wire, they were just swirling around people crowded on the street. Austrians must be a bee-knowledgeable bunch as not a single person was freaking out as this happened. I was trying to picture what might happen in downtown Philly - don't think it would be the same!


Anyway, back to our swarm story. I'm certainly not at the level of a local 'swarmcatcher' but was willing to experiment in my own backyard. Wolfgang donned my extra bee jacket and proceeded to cut down the tree. I had laid a white sheet under where I expected them to fall and had an empty temporary 'nuc' box (small cardboard box containing 5 frames) just emptied because I bought new bees for the hive that didn't make it thru winter.
The tree fell reasonably gently, and once they were down on the ground, we were able to scoop a whole ball of them into the box. Lots of pine needles in the mess as well but figured they would clean all that up after a few days in their new home. The goal was to get the queen in the box because if you get her, the rest just follow to be with her and protect her. The bees will actually act like air traffic controllers, putting their butts in the air and flapping their wings, releasing the pheromone of the hive....essentially telling all the other ladies 'Over here!'.
Look closely at the bees in the grass in the video and how they all just move to file into the box. Success! I basically 'caught' my own hive. It was thrilling and I was so glad I got to experience it to see how it's done.

So now the bees and the 'old' queen were safe and sound in a small cardboard 'nuc' box. I’ve since purchased a wooden nuc box to transfer them into since I would be waiting a few weeks to see if I might need that old queen as insurance. It’s likely I may face similar dilemmas in years to come so I figure it’s worth investing in the right equipment.
The bees made some wonky comb in the temporary cardboard nuc box so I cut it out and put it in reach for them to clean out the honey and pollen to reuse. Bee-recycling!
I am now in waiting mode because back at the 'old hive', the bees have to make their new queen. She has to go on her mating flight where she mates with many drones and then must return to the hive to start making bee babies and get going again on building up the population. If something happened to her (like a rainstorm or a bird eating her), I now had the old queen as backup to put back in the hive. This whole process can take weeks so I’m checking the hive weekly to see if any eggs started to indicate a new queen is there and working. No luck so far and I’m about to the end of a reasonable waiting period so next week I will likely need to insert a queen.
The great news though is while a hive is queenless and they have no babies to feed and queen to attend to, the ladies don't have anything to do but bring in pollen and nectar all day.
Ramped up honey production....a nice consolation prize for a hectic month of bee management. Sweet!


Finally, I want to end with something I just read and really enjoyed. If you are just a bit 'bee curious' or just enjoy a good read, I highly recommend The Honey Bus by Meredith May.
She's a journalist who tells the story of her coming of age thru a difficult family life situation and her relationship with her beekeeper grandfather in Big Sur California. It's a heartwarming story and her grandfather's lessons about bees and life are really something that will stay with you.

Happy summer folks! Until next time!
]]>It's that time of year to get planting! It's still a bit cold here in Philly but I got my beds ready last week and planted one box with the usual greens plus a few new ones (trying to take my own advice from the "Lettuce Be More Exciting" post). So I've thrown some mache (corn salad), mizuna, and minutina in with the spinach and lettuce.

But I'm planning on stepping it up even further this year with a few more unusual greens as well as some exciting alternatives to the 'tried and true' veggies. I want to share with you a great book by Niki Jabbour titled "Veggie Garden Remix" that matches up the typical veggie garden staples with ideas for how to try more unusual alternatives. Many of them inspired by immigrant cultures who have introduced an amazing and flavorful diversity to our home gardens, the book has a stunning variety of suggestions - it was hard not to go overboard when I was deciding what to order from the seed catalog!

So for example, like spinach? The book suggests trying sweet potato leaf, orach, molokhia, or amaranth. Never heard of any of them other than amaranth so I'm starting there first. Also called Chinese multicolor spinach, looks beautiful, right? It's also a superfood - with twice the vitamin C, same amount of iron, and similar taste to spinach. Unlike spinach it doesn't bolt in hot weather so looking forward to enjoying this throughout the summer.
I'm also adding blood sorrel, or red veined dock, a beautiful bright green culinary green and aromatic herb. It's best in early Spring or in Fall and cut back during the summer heat. It's tangy with a lemony bite to it, providing a nice dose of vitamin C.


I'm also kicking up the experimentation on cucumbers with 3 fun additions - dragon's egg cucumber, cucamelons, and a Japanese long cucumber. The dragon's egg cucumber is an heirloom cucumber that is about 3 to 5 inches long with smooth cream-colored skin and a kid friendly mild flavor.
I'm super excited about the cucamelon - it's just cute! Also called Mexican sour gherkin or a mouse melon, it looks like a tiny watermelon - only an inch long! They have a cucumber citrusy flavor and must be picked before they get too sour. Looking forward to the first taste test!

And lastly, I've added a long cucumber variety, the Japanese Long. It's slim and crisp with few seeds so will be a fun variety to use in our standard weekly And lastly, I've added a long cucumber variety, the Japanese Long. It's slim and crisp with few seeds so will be a fun variety to use in our standard weekly
I have my favorites for tomatoes and have not really ventured into all the unusual heirloom varieties which seem to be very trendy these days. But I am going to try ground cherries this year.

When reading Niki Jabbour's book, she described their flavor as comparable to 'pineapple with hints of cherry tomato and vanilla'. What?? I just want to know what that tastes like! They're also called 'strawberry tomatoes' or 'Cossack pineapple'. Should be a great addition to salads, and they can also be dried for snacks. Supposedly they are hard to get started but are self sowing after that so I'll need to find a place where they can come back year after year.
Also, throwing a few additional oddballs in just for fun....
I'm adding soybeans with the idea we might enjoy some edamame later in the year, some jerusalem artichokes (sunchokes, which I wrote about several years ago), as well as a colorful mix of radish varieties. For the jerusalem artichokes, I tried them before and got a small harvest so want to try again to see if I have better luck. As they spread quickly, I'll plant in a container within the garden to keep them in line. And lastly, the radish varieties will be added to some watermelon radishes and hakurei turnips, both of which I've written about before as well and heartily endorse for a repeat.


So hoping many of these will actually grow well enough to try them all! If nothing else, they will add some fun and a greater incentive to monitor and make sure they're progressing along with the regular staples of beans and peas and such. And maybe, if I'm lucky, they'll keep the kids interested in checking out what's growing long enough to pull a few weeds, right??
One more note. This year, I'm trying many seeds from Baker Creek Heirloom Seeds out of Missouri. I picked them because they are on several lists that don't get their seeds from Monsanto which I try to avoid. Their seeds are non-treated, open-pollinated NON-GMO seeds and I think it's important to support these companies. The link here has a list of the top ten best seed companies that don't get their stock from Monsanto so support the little guy and check one out!
So here's to getting our gardens growing!
]]>
I've been meaning to tackle the challenge of Dakota Kuchen for awhile now but my day job kept me busy all Fall.
Was glad to have a few quiet days over the holidays to finally test my grandmother's recipe.
What is Dakota Kuchen?
Well kuchen just means 'cake' in German so really it could mean any kind of cake generally speaking. But Dakota Kuchen refers to a specialty of the region made by German Russians - a pie-shaped pastry with a sweet yeast dough and fruit mixed into a custard with a little crumble on top.

There are variations like sugar kuchen with a crusted sugar coating similar to a coffee cake, or 'kase-kuchen' which uses cottage cheese to make the custard for a softer cheesecake like dessert (sounds weird but tastes good!).
The fruit custard variety is the most common and well-recognized. All varieties have simple, common ingredients as these were made in times and areas that had access to mostly just basic staples.
It's actually the official dessert of South Dakota and if you happen to be traveling in the Dakotas, particularly the Central and Western areas, you might find a diner or restaurant that has a lovely rotating glass case displaying a variety of fruit kuchen for dessert options. Keep your eyes peeled next time you're traveling through!


But while Dakota Kuchen refers to a specific type of dessert prepared by those of German Russian heritage, there are as many variations of recipes for it as there are German Russian grandmothers.
Of course, every grandmother gave her unique touch to it. If you went to a neighbors for coffee hour, for example, it might be similar but just not the same!
And given that many of our grandmother's recipes have not been written down.....or were written but with vague instructions because they thought you already knew what you were doing =)......some of the tricks of the trade have been lost by those of us who might have watched or even helped when we were younger. I've wanted to take a stab at making kuchen on my own and seeing if I could capture that taste sensation that might bring back a memory of the many times our family has shared her kuchen together.
My grandmother, Emma Werner, was from the Carson/Elgin area of North Dakota, in the Southwest area between Teddy Roosevelt National Park and the Missouri River. Her parents and my grandfather's parents were Germans who emigrated from the Odessa region of Russia (see the Tale of the Farmers Daughter).


Several pictures I have of her from the 1920's have her with a 'kiss curl', a popular style from the movies of the time. It's fun to think of her as a young girl in a flapper dress. Apparently stories have been told that she got up to some high-jinks in her younger days, sneaking out of the house to party (only in those days, it was by horse and not car).
But of course, in her later years, she was just 'Grandma', always quick with an enveloping hug or making delicious meals or treats in my memory.
She would make big batches of kuchen (~25 pies) and freeze them - they could then be pulled out for guests or holidays, thawing quickly and providing a nice dessert for coffee hour. As a kid sent down to the deep freezer to pull another one out to thaw, it seemed there was thankfully a never-ending supply.
My mother had written down the ingredients probably captured while her mother-in-law was in action but there wasn't much there for technique. Even the measurements might have been 'guesstimated' as I don't remember her really using measuring cups or spoons. So I did a little web searching to glean what was out there for ingredients and techniques from other sources just to orient myself.
There were nice instructions on a variation by Prairie Californian , actually one on Epicurious by America's Test Kitchens as well as several available (sans illustrations or much detail) on the Germans from Russian Foodways and Traditions Facebook Notes page. While the fruit custard recipes were roughly similar, some differed in using sour cream, vegetable oil or lard instead of butter or used different proportions. I couldn't find any recipes for the sugar kuchen and no coffee cake variations that mixed crushed corn flakes with graham crackers like my grandmother's. I don't think it was all that uncommon, just found it odd that none were documented.
It was likely more just a sign of the times, many recipes probably preceding the internet age and living only in local town or regional cookbooks or on family recipe cards. Even more reason for me to take pictures and write down what I did in case others are trying to keep the tradition alive.
So the recipe and steps of my grandmother's recipe are presented below in detail. While most steps are described within the recipe steps themselves, I do have a few additional notes before you get there.

Scalding Milk
You will note the recipe calls for scalding the milk and cream used for the dough. I didn't see this in the other recipes I found online so I looked into why this might be and learned a bit along the way.

While 'scalding' sounds like you are burning something, it's not as scary as it sounds and I was surprised I was already doing this when making yogurt in the Instant Pot, I just didn't know that was what it was called! Essentially scalding means heating the milk over medium heat to bring to ~180 degrees F (well short of boiling). If you don't have a thermometer, heat until you see tiny bubbles forming on the sides of the saucepan. Then you remove from heat and cool it 5-10 min to closer to room temperature before using.
Before the age of pasteurization, milk was scalded to eliminate enzymatic activity and to kill off bacteria. While that's not really necessary anymore, pastry chefs will still scald milk for a couple good reasons.

- Warm milk absorbs flavors so you get a more flavorful dough if you are adding something like vanilla or herbs.
- Scalding denatures whey proteins (which weaken gluten and can interfere with dough rising) so that they unfold. You get a better rise and a finer crumb. See highly scientific diagram above.
- Having warm milk helps the yeast activate faster and sugar dissolve helping your ingredients just incorporate together better.
Love getting at the science of why you do something! One more thing.....the kuchen dough recipe is the same one my grandmother used for cinnamon buns.....now I know that scalded milk is what made them so light and fluffy! (So if inspired, make an even bigger batch of dough and save it for making rolls.)
Big Batch Philosophy
Speaking of a bigger batch, one more note. You may wonder why the recipe is proportioned to make such a big batch....it might seem extreme. Let me disabuse you of this notion.

While my daughter Mallory was completely disgusted by having to cut up rehydrated prunes and apricots (not her faves but I needed to make the traditional variations), having kuchen in the oven appears to be a great way of pulling teenagers out of their rooms and off their electronic devices.
As I was pulling the first batch of 4 out of the oven, children started to wander into the kitchen one by one asking 'What is that smell?' 'What are you making?'
My son kept pestering me to take the requisite blog photo of the results so he could dig in.
The first 3 were gone in under 15 minutes. I recommend making at least 12 as they will go fast. Whatever you don't eat right away in a few days, you can wrap in aluminum foil and freeze for later.


I'm looking forward to pulling these out for a cup of coffee on a cold February weekend!
Here's the recipe below! (makes 12 pies)
| Ingredient List |
|---|
| Pastry Ingredients (~12 pies) |
| 1 c heavy cream (mix with milk and scald) |
| 1 c milk (mix with cream and scald) |
| 6 eggs |
| 1 c sugar |
| 2 tsp salt |
| 1 packet yeast |
| 1 stick butter, cold |
| ~8 cups flour |
| Custard Ingredients (for 6-8 pies) |
| 6 eggs |
| 2 c whipping cream |
| 1 c sugar |
| 1/8 tsp salt |
| 1 tsp vanilla |
| Crumble for Fruit Kuchen (for 6-8 pies) |
| 2 c flour |
| 1.5 stick butter, cold |
| 1 tsp cinnamon |
| Crumble for Sugar Kuchen (for 6 pies) |
| 1 c crushed corn flakes |
| 1 packet graham cracker crumbs |
| 1 c sugar |
| 1 tbsp cinnamon |
| 1 stick butter, melted |
Pastry Instructions
| For the dough, start by scalding the milk and cream (see details in blog text). Remove from stove and let cool ~10 minutes |  |
| While milk/cream heating, mix flour and salt together in a separate bowl. Cut the dry ingredients with butter as you would for a pie crust. I use very cold butter and a box grater to make quick work of breaking butter into small pieces and mixing with the flour |  |
| Once milk/cream cooled, put ~1/2 cup of milk/cream in a separate container (like a measuring cup) and add yeast packet to allow yeast to activate (use small whisk to disperse yeast clumps). You can add a pinch of sugar to help activate. Once nice and foamy, add yeast mixture to milk/cream and add sugar and eggs. Stir well. You want the liquid mixture to be slightly warm to dissolve the sugar well. |  |
| Add the dry ingredients to the liquid ingredients gradually and incorporate to create a shaggy, slightly wet dough. |  |
| Dump onto the counter with a little flour to form into a nice large ball. Let rise 1 1/2 to 2 hours in warm location (I place in a stainless steel mixing bowl sprayed with Pam). |  |
| After the rise, divide dough and shape into 12 balls and let rise another 1/2 hour. |  |
| If making fruit kuchen, roll out to fill the pie pans (8 inch). It's best to roll to a slightly smaller than needed size as you can push the dough easily into the tins. |  |
| Spray pie tins with Pam before putting dough in. The dough should not come completely up the side of the pie tin (little higher than 3/4 up the side). |  |
| If making sugar kuchen, take the balls of dough and prick all over with a fork. Allow to rise for additional hour before rolling out and placing in pie tins. The dough can go into the tin flat (not up the sides). |
Fruit Kuchen Custard
| Add eggs, sugar, salt, cream and vanilla all together. Mix by hand and set aside until ready to pour over fruit. |  |
Crumble for Fruit Kuchen
| Cut the dry ingredients with butter as you would for a pie crust. I use very cold butter and a box grater to make quick work of breaking butter into small pieces and mixing with the flour. |  |
Crumble for Sugar Kuchen
| Add crushed corn flakes, crushed graham cracker, sugar and cinnamon together. |  |
| Stir to mix thoroughly. Melt the stick of butter and mix into the dry ingredients. |  |
Assembly and Baking
| For fruit kuchen: apples, peaches, plums, prunes, apricots, or rhubarb are most commonly used. Use fresh fruit when available. If using dried fruit like apricots or plums, place in hot water to soften and rehydrate and then cut into small pieces. If using canned peaches, use those in fruit juice rather than heavy syrup and drain and dry before adding. Apples should be cored, peeled, and sliced thin. |  |
| Place cut up fruit (apples, peaches, plums, prunes, apricot) on top of the dough with spaces in between pieces so the custard can fill in. |  |
| Pour 1 soup ladle of custard over the fruit just so it is covered. (Remember to thicken the custard with a hand mixer for a few minutes prior to pouring.) |  |
| Sprinkle a handful of the crumble mix on top of the custard. |  |
| Bake at 350 degrees for ~30 min til golden brown. Cool on a rack. |  |
| You can bake in batches of 3 or 4 depending on your oven size. (I baked 2 on top rack and 2 on lower rack and just rotated them halfway thru for even browning). |  |
| Assembly for Sugar Kuchen | |
| For sugar kuchen, remember you are using dough that has been allowed to rise longer and you are placing it in the tins without stretching it up the sides. Just add ~1/2 cup sugar kuchen crumble on top of dough and bake as above. |  |

As a first-year beekeeper, it was definitely not an expectation to be able to harvest any honey, so it was thrilling to discover I would be able to pull off a few frames this month and still have plenty to leave for the bees to get thru winter.
In this post, I'm going to share the fun of this harvest with multiple videos capturing the process of getting to the good stuff!
Just to put honey production in perspective before I get to the videos, on average each full medium frame of capped honey (like in the picture above) weighs about 5 pounds total. To translate that into bee activity, it's estimated to take 556 foraging bees visiting 2 million flowers to make just 1 pound of honey, and one honey bee produces about 1/12th of a teaspoon of honey in her lifetime. It gives you such an appreciation for the amount of collective work those ladies do, right?
A total of ~70 lbs of honey is needed for them for food over winter, and each medium super holds about 30 to 40 lbs of honey when each of the 10 frames is full. Right now, for each hive, I have one fully filled honey super in addition to ~4 frames of honey in each of the 2 bottom brood boxes (~50 lbs of honey per hive).

And they are working on another super on top of the full one. Important to note, I stopped feeding the bees simple syrup (something you do to help a new colony get started) very early before I added the honey supers as they were doing just fine on their own - so I know my honey is just from natural sources.
So given that they'll still continue to fill frames before I close down the hives around November, I felt pretty safe pulling a few frames out for harvest. Another reason is that goldenrod is the primary source of pollen and nectar now and they are really bringing it in. I've heard that goldenrod honey can have a bitter smell and taste to it so I'd rather take the good tasting honey out now while I know its not goldenrod and let them keep storing the goldenrod honey for themselves.

The queen is laying eggs now for what will be my 'winter bees' (the frame in the picture shows a full frame of capped cells of baby bees).
And her crew is busy bringing in all kinds of white, yellow, and orange pollen to make food for the brood. So they are busy doing what bees do.
Enough background.....let's get to the action!
This first video is the longest and shows what equipment I used and how to take the honey and wax off the frames. My son Daniel did a fantastic job helping me. Although, novice that I am, I've filmed all my videos with my phone upright (rather than landscape) so please excuse those annoying black bars on either side. Future note for blog improvement!

Isn't it amazing to see all that honey goodness drip off those frames?? Even after I cleaned the frames with a rubber spatula (not in the video), there was even MORE honey just sitting in those empty cells.
As you could see, I was able to pull off 3 frames. Normally for this amount, you could likely just use some kitchen equipment and cheesecloth and that would work fine. Next year, if I have what is expected, I will likely rent or borrow a honey centrifuge to 'spin out' the honey from the frames after uncapping into this tub, and the centrifuge will then drain into the white bucket the same way. With this method I won't destroy the wax the bees have built and they can be even more productive getting back to work filling it back up rather than creating new cells.
In the next video, I show how the honey drains in the uncapping tank and some features of this particular tank which I ordered from Mann-Lake, a popular beekeeping supply company. I've looked at a gazillion YouTube videos of various homemade improvised methods but in the end decided to invest in something helpful considering it will be used year to year. I was able to obtain all my materials from Amazon so it's nice that a lot of these common beekeeping supplies are easily available.
After I thought the honey had sufficient time to drain down from the wire rack inside the tub, I basically tilted the tub to allow honey to flow into the finer filter. This fine mesh strainer also comes from a beekeeping supply company - it's adjustable to fit on top of any size container below and filters out even the smallest particles (1875 micron upper mesh and 650 micron bottom mesh). So in this next short video, you can see nice beautifully clean honey being captured in the 5 gallon bucket underneath.
Okay, I lied in this next video, it's really not the last one but I thought it was handy to show how easy this all was to clean up in case there are some other beekeepers out there considering whether to invest in this uncapping tub or not. The other part of the video explains what I will do with the wax and cappings that still have a bit of honey in them before I can process the wax (which will likely be the subject of a future post).
And here it is! The final product.....I can't believe how much came out of just those 3 frames. Basically each frame was a quart jar of honey, 3 lbs each! It makes me a little scared for next year to think what quantities I will be dealing with if my bees do well and survive the winter.
Our honey color is a dark amber. Typically, darker honeys tend to be a little bolder and sweeter than lighter ones. From what I understand, buckwheat, tulip poplar, and black locust are commonly found in our area and can all contribute to a darker honey. We live right down the road from Maple Acres Farm which grows several fields of 'pick your own zinnias' and typically wildflower honey is a lighter in color so I imagine ours is a likely a mix of all of the above. Darker honey contains more vitamins, minerals, and antioxidants so I'm happy with what I got! It will be interesting to see what honey is produced for our hives earlier in the year and if it will differ in color. We'll see what happens I guess!

So that' it! Pretty amazing right??
It will be hard to wait until next year for another harvest. But first things first, I need my bees to survive the winter to be able to create the sweet stuff. Fingers crossed!
]]>