Homemade oatmeal muffin mix stays fresh in the pantry for months so you can whip up a batch of warm muffins with ease anytime. You only need a large mixing bowl, a handful of pantry staples, and a few minutes you to whip up this premade mix.
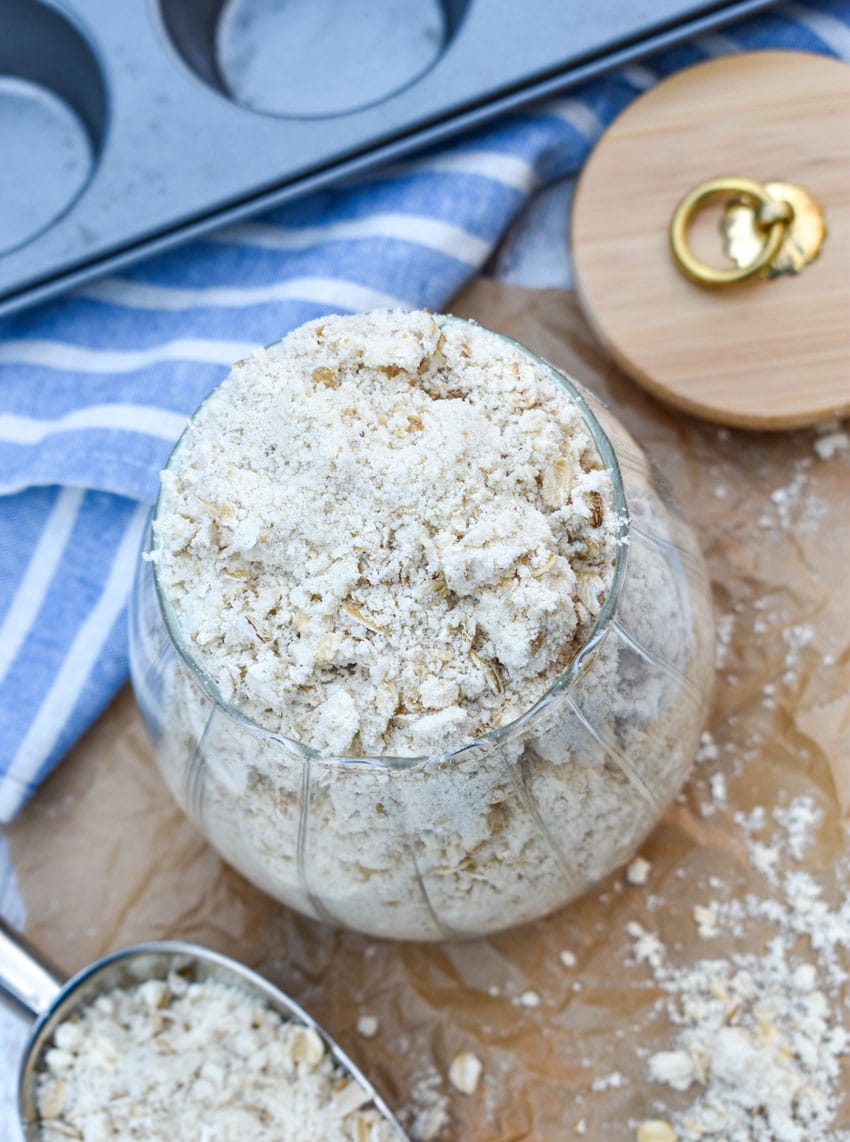
My family loves a good grab and go breakfast and good snacks to tide them over to dinner.
A muffin fits right into those categories, and into their small, yet capable hands.
So this homemade oatmeal muffin mix is something I make sure to keep on hand in the pantry.
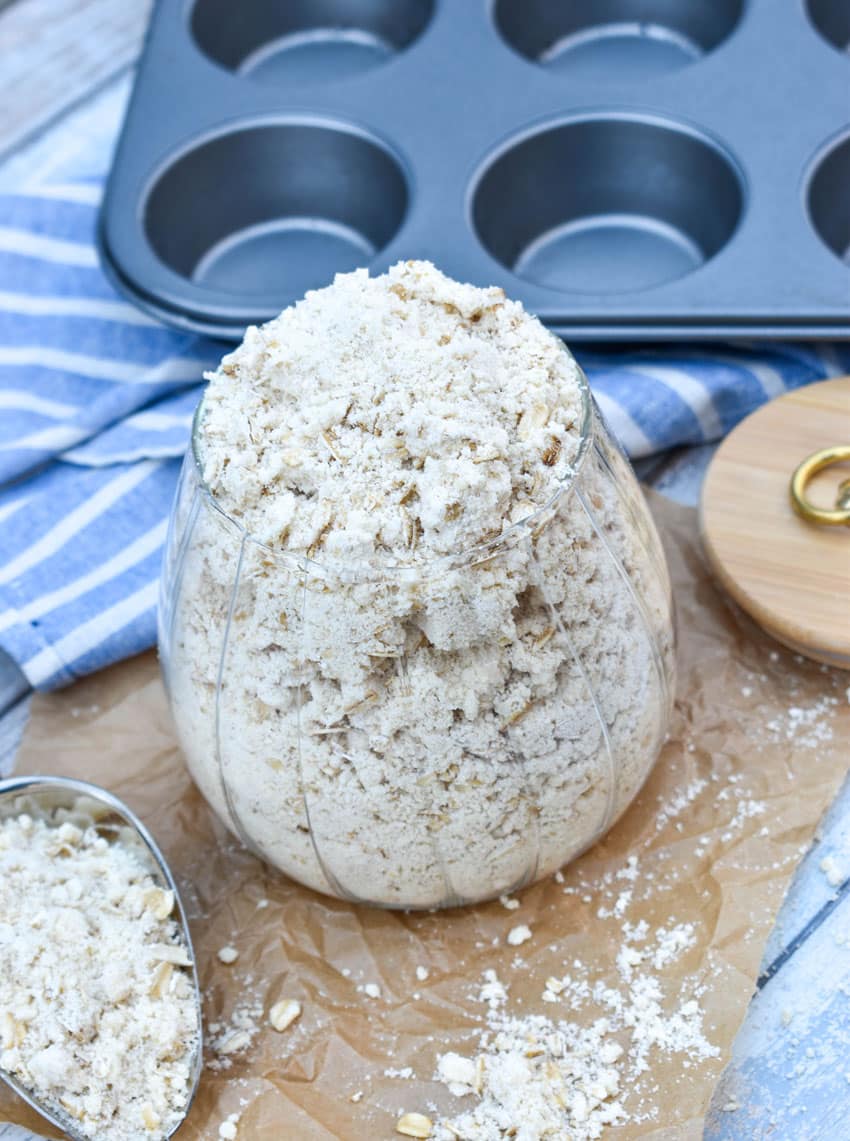
This recipe stores in the cupboard for months, and it bakes up into warm, crumbly goodness.
And this dry mix recipe is the only oatmeal muffin recipe you’ll ever need because it is so adaptable, making your favorite flavors easy to incorporate.
You can substitute ingredients to your liking, add toppings, raisins, nuts, berries, candies or whatever you can think of to make the muffins of your dreams.
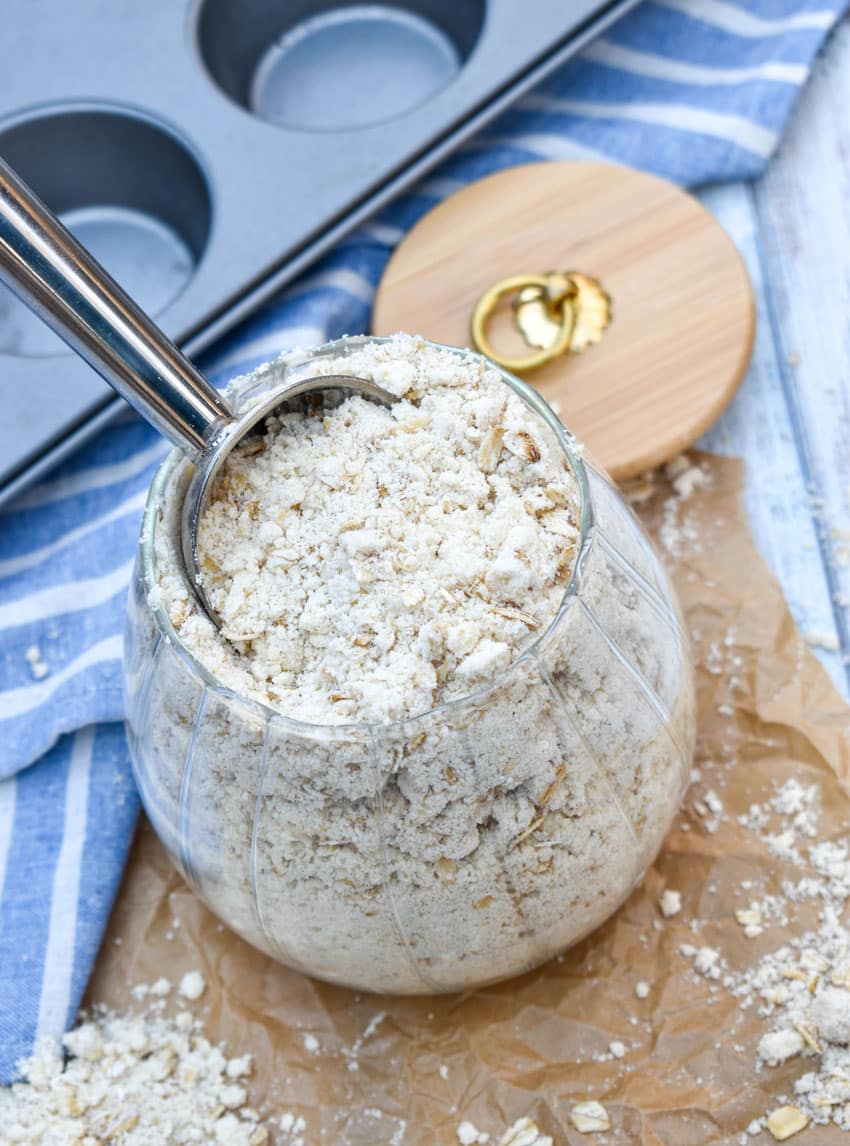
Ingredients
To make these you’ll need:
- Flour– All purpose.
- Sugar– Granulated.
- Salt
- Baking powder– For leavening.
- Shortening– Don’t substitute this for another fat. Shortening is shelf stable.
- Oats– Quick cooking or regular oats that you’ve given a whirl through the food processor.
And when you’re ready to bake the muffins you’ll need:
- Muffin mix
- Milk– Whole is best.
- Egg– Beaten.
- Mix ins– Chocolate chips, dried fruit, nuts, etc.
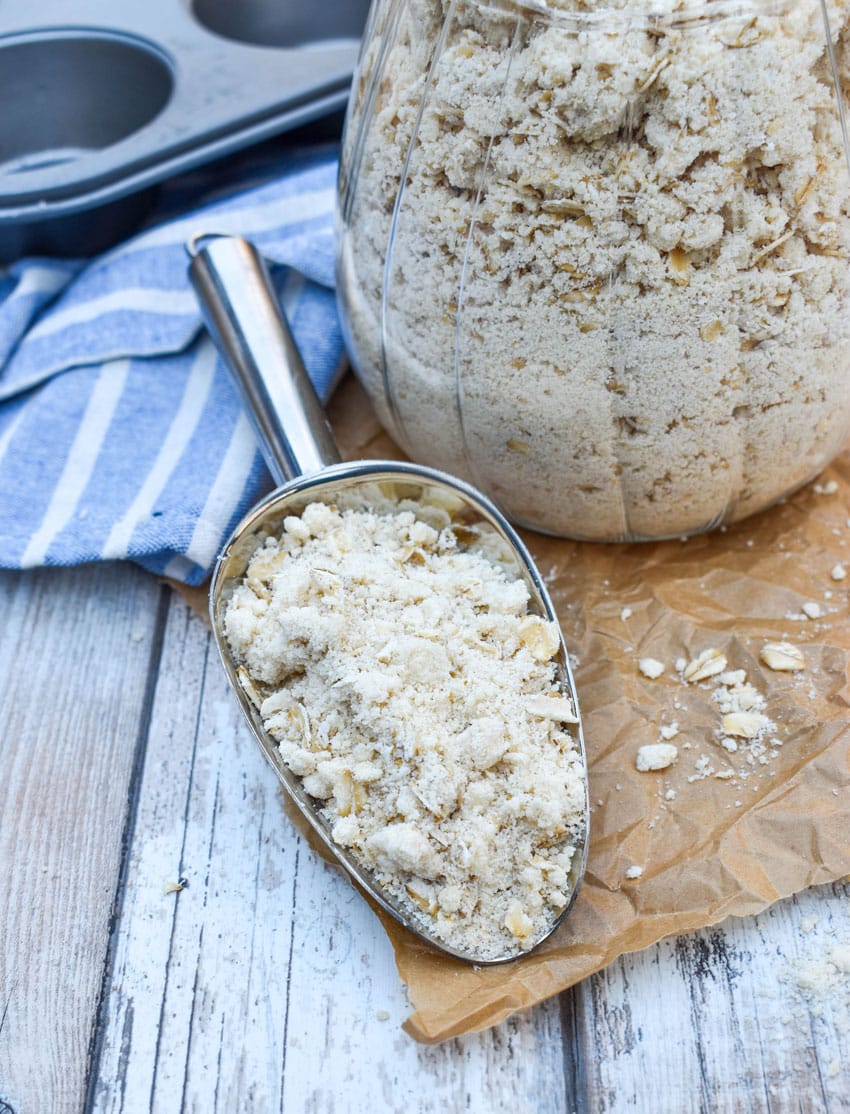
How to Make Oatmeal Muffin Mix
Making homemade oatmeal muffin mix is so easy.
In an extra large bowl, stir together the flour, sugar, salt, and baking powder until everything is equally incorporated.
Cut in the shortening with a fork or pastry cutter until the mix is the consistency of corn meal.
Then stir in the oats until they’ve evenly incorporated throughout the mix.
Transfer the mix into an airtight container and seal the container.
This mix is shelf stable and will keep perfectly fine on pantry shelves for several months.
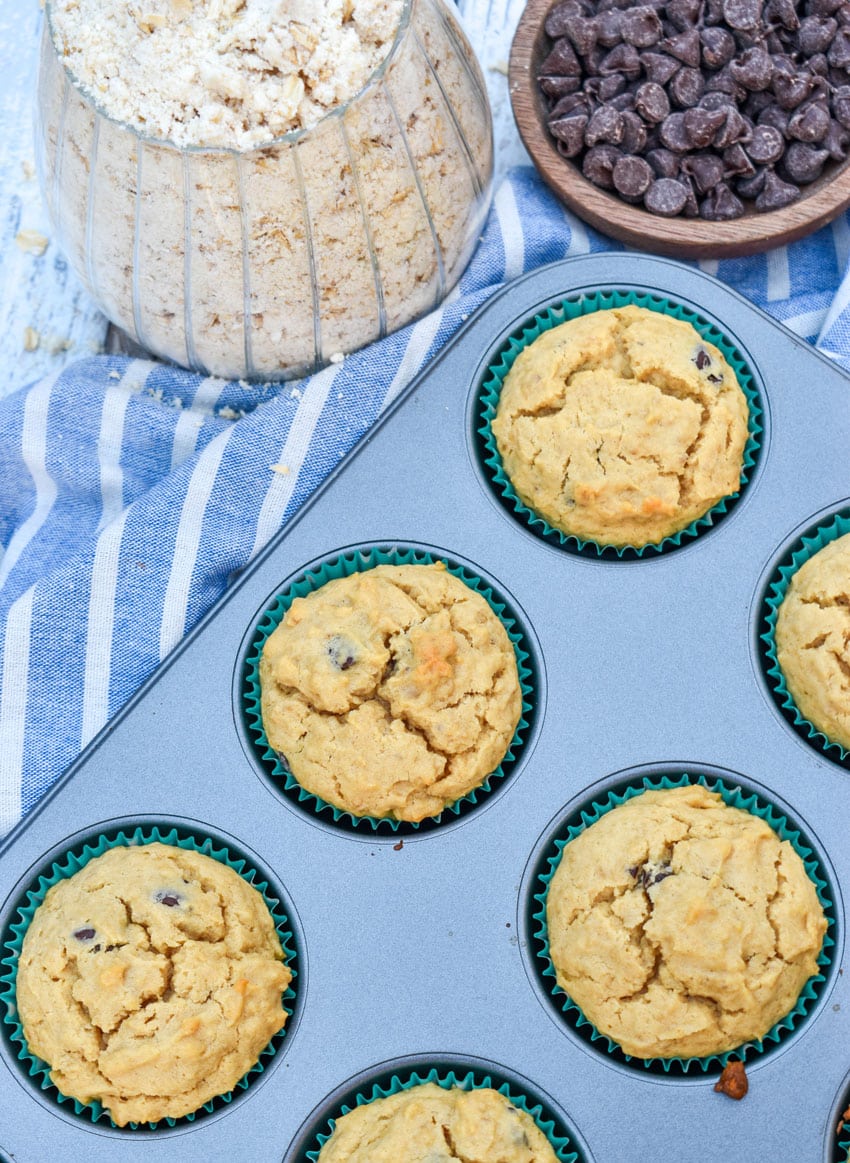
To Bake Oatmeal Muffins
Once you’ve got the muffin mix made, it’s so easy to make oatmeal muffins.
Stir together 3 cups of the homemade muffin mix, a half cupof milk, and 1 beaten egg in a large bowl until it forms a batter.
Fold in whatever mix in you’d like.
Line a muffin tin/cupcake pan with paper baking liners or spray it well with nonstick spray.
Fill each muffin cup with batter so it’s just about 3/4 full.
Bake the muffins for 20-22 minutes at 350 degrees or until toothpick inserted in the center comes out clean.
Enjoy!
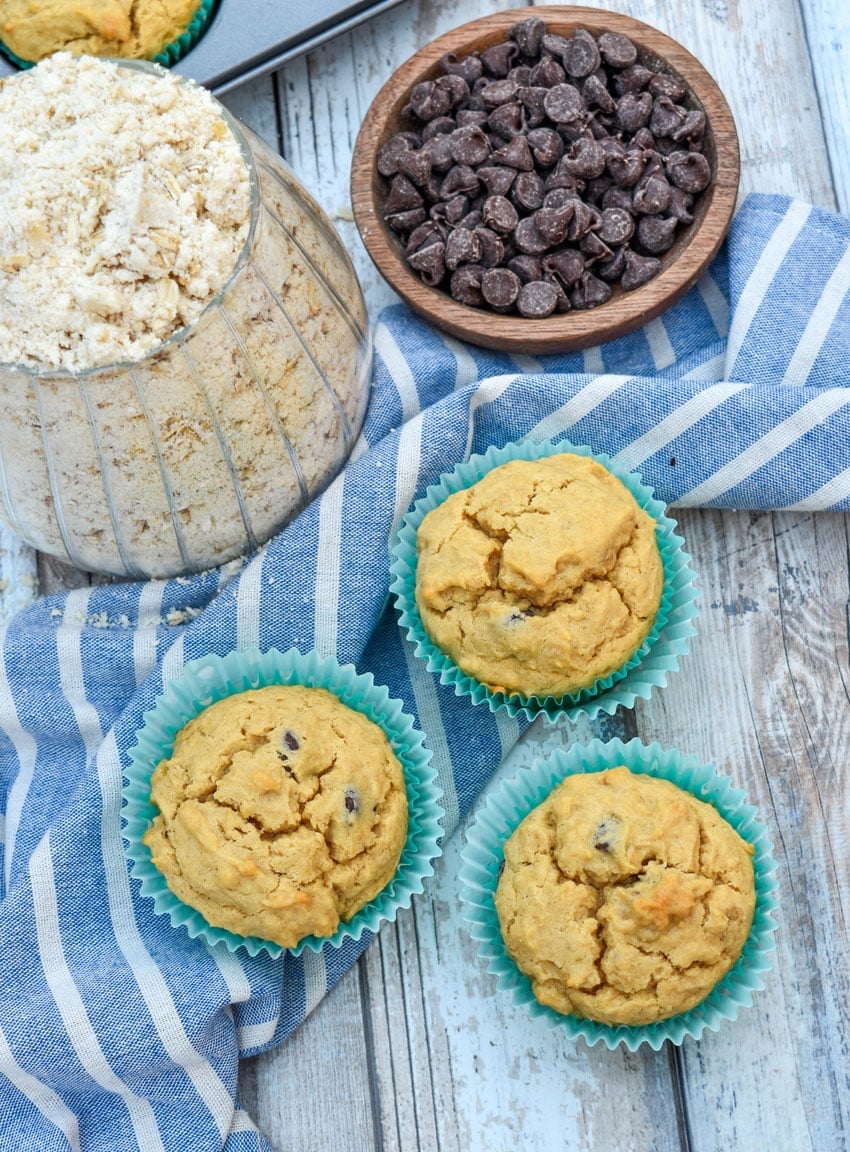
Storing
Store the mix in a sealed, airtight container in the pantry for up to 3 months.
To store baked oatmeal muffins, let them cool to room temperature and then transfer them to a paper towel lined airtight container.
They will keep in an airtight container at room temperature for up to 3 days.
Reheat them in the microwave for 15 seconds or so.
Tips and Tricks
- Keep the mix in an airtight container or sealed food safe bag in a cool, dry pantry away from heat and sunlight.
- Check for an off smell, discoloration, moisture or other issues before using it again. Discard the mix if you notice any of these signs.
- Refrigerating it or freezing it can help preserve freshness.
- For the best results, label the container with the date you made it.
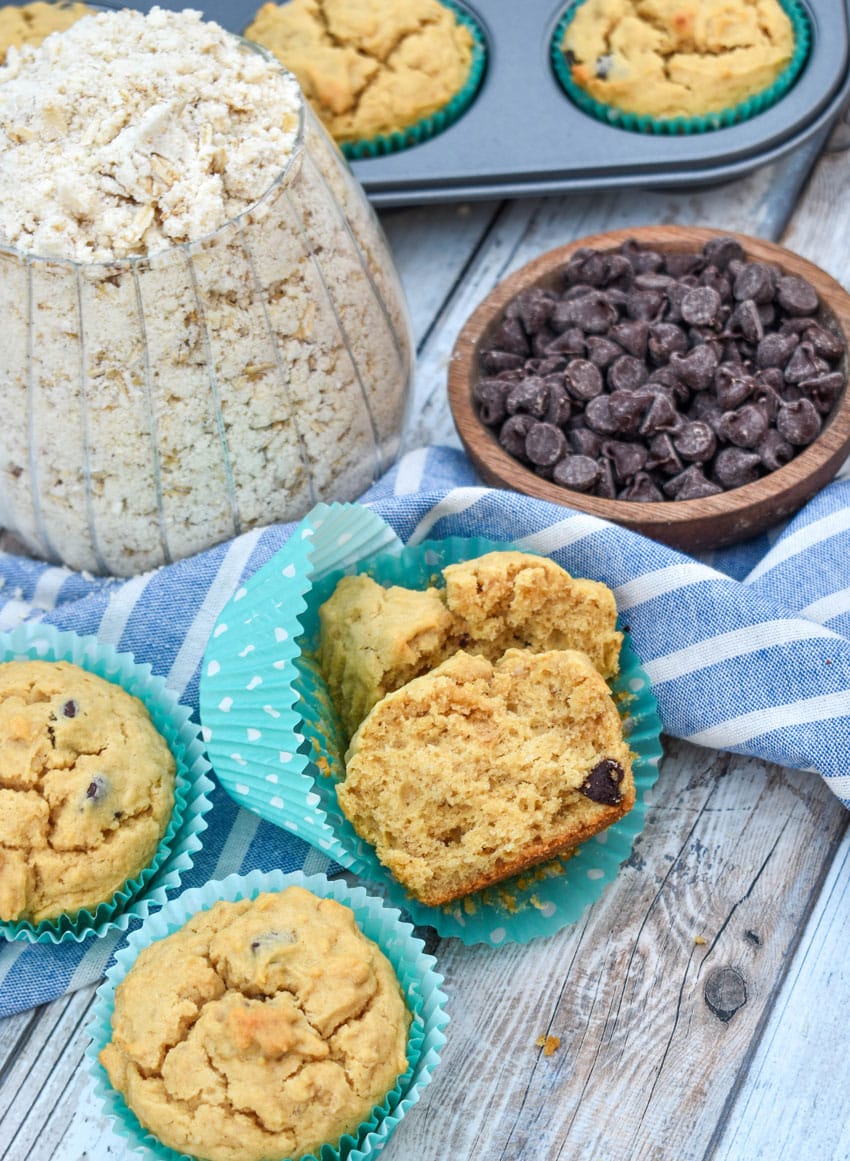
Other Homemade Baking Mixes
Homemade oatmeal muffin mix is an easy muffin base you can put together with ingredients you likely already have in the pantry.
Make it and enjoy months of homemade muffins!
Looking for other homemade baking mixes?
Try these:
If you’ve tried this HOMEMADE OATMEAL MUFFIN MIX, or any other recipe on the site, let me know in the comment section how it turned out, we love hearing from our readers! You can also follow along with me on PINTEREST, FACEBOOK, and INSTAGRAM to see more amazing recipes and whatever else we’ve got going on!
Make-Ahead Homemade Oatmeal Muffin Mix
Ingredients
- 7 cups all purpose flour
- 3 1/2 cups sugar
- 1 1/2 tbsp salt
- 1/4 cup baking powder
- 2 1/4 cups shortening
- 18 oz quick cooking oats or 18 oz of regular oats that you've given a good whirl with a blade in a food processor
To Bake
- 3 cups homemade muffin mix
- 1/2 cup milk
- 1 egg beaten
- 1 cup of mix-ins optional
Instructions
- In an extra large bowl, stir together the flour, sugar, salt, and baking powder until they're equally incorporated.7 cups all purpose flour, 3 1/2 cups sugar, 1 1/2 tbsp salt, 1/4 cup baking powder
- Using your preferred method, cut in the shortening until the mix is the consistency of corn meal.2 1/4 cups shortening
- Stir in the oats until they've evenly incorporated and spread throughout the mix.18 oz quick cooking oats
- Seal in an airtight container. This mix is shelf stable and will keep perfectly fine on pantry shelves.
To Bake
- In a medium size bowl, stir together 3 cups of the homemade muffin mix, 1/2 cup milk, and 1 beaten egg until all are evenly incorporated into batter.3 cups homemade muffin mix, 1/2 cup milk, 1 egg
- Fold in the mix ins, until evenly incorporated.1 cup of mix-ins
- Line a muffin tin/cupcake pan with paper baking liners and fill each muffin cup with batter to just over 3/4 full.
- Bake for 20-22 minutes at 350 degrees, or until toothpick inserted in the center comes out clean.
Notes
- Keep the mix in an airtight container or sealed food safe bag in a cool, dry pantry away from heat and sunlight.
- Check for an off smell, discoloration, moisture or other issues before using it again. Discard the mix if you notice any of these signs.
- Refrigerating it or freezing it can help preserve freshness.
- For the best results, label the container with the date you made it.
Nutrition
]]>
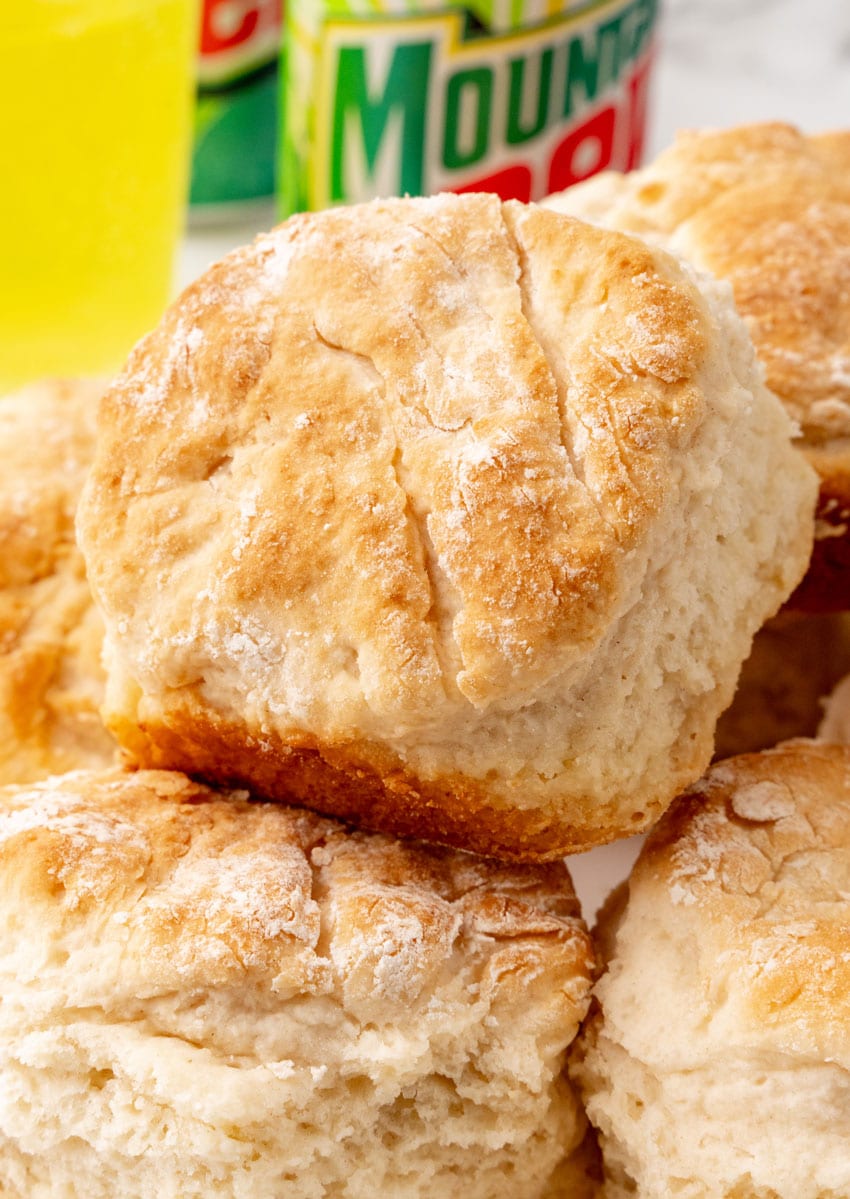
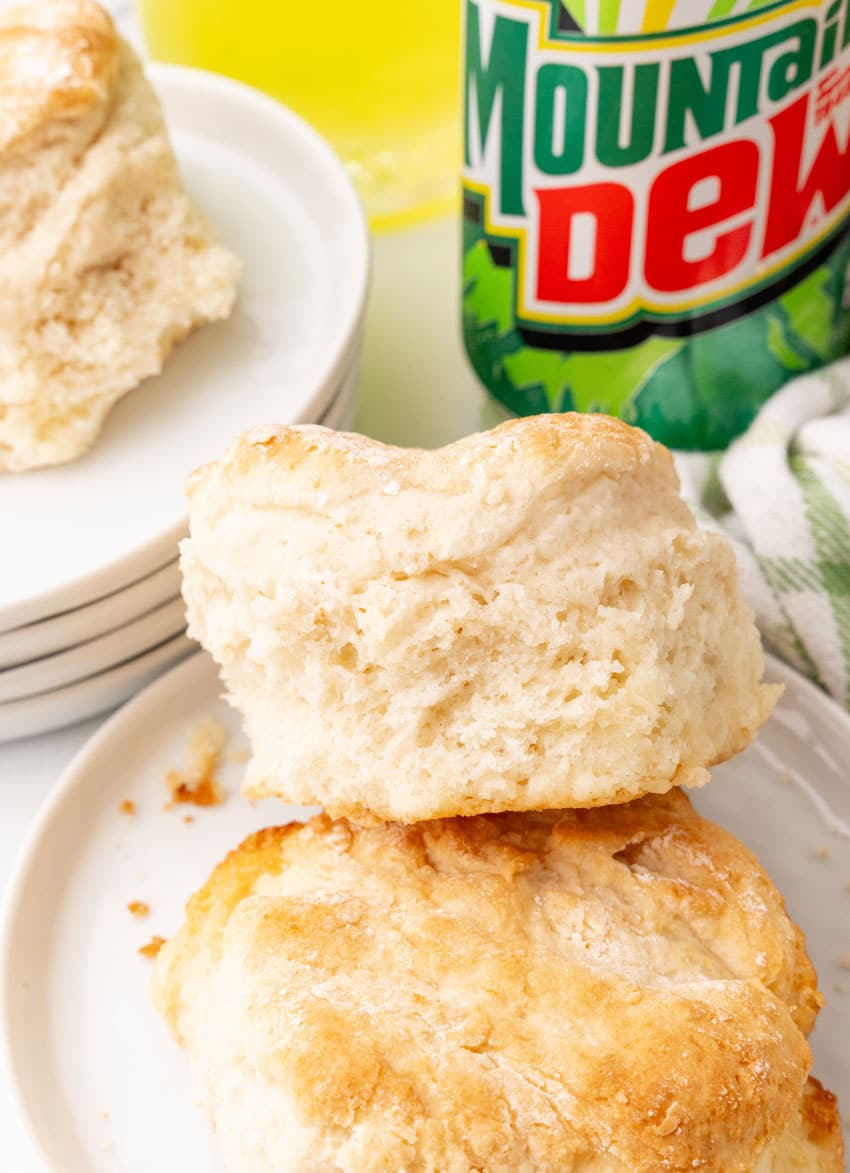
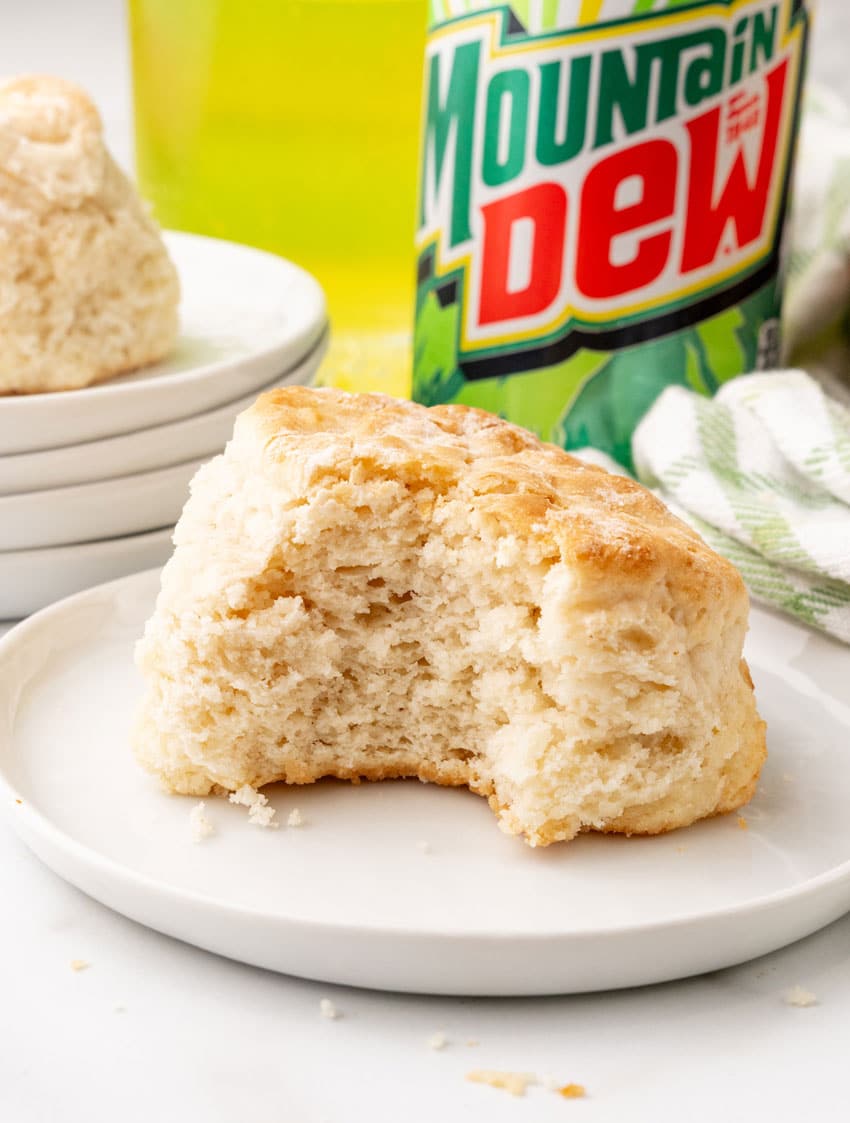
Mountain Dew biscuits are soft, fluffy, buttery biscuits made with a surprising splash of soda that helps create a tender texture with hardly any fuss. They’re an easy shortcut side dish made with just a 4 ingredients so you can enjoy a homemade version without a ton of work.
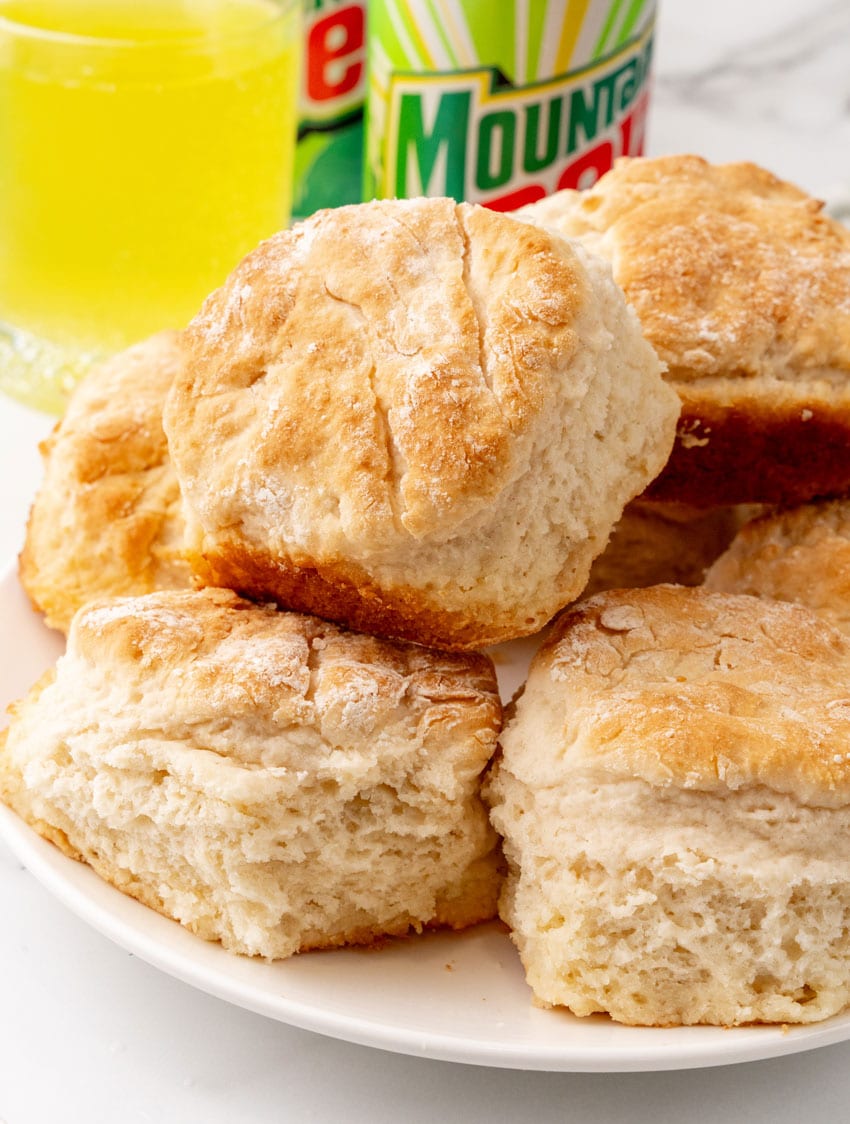
If you grew up in the South like me, then you know biscuits are their own food group.
I’d serve them everyday if I didn’t have to do all the work of cutting in butter.
Well with these Mountain Dew biscuits, there is no cutting in butter.
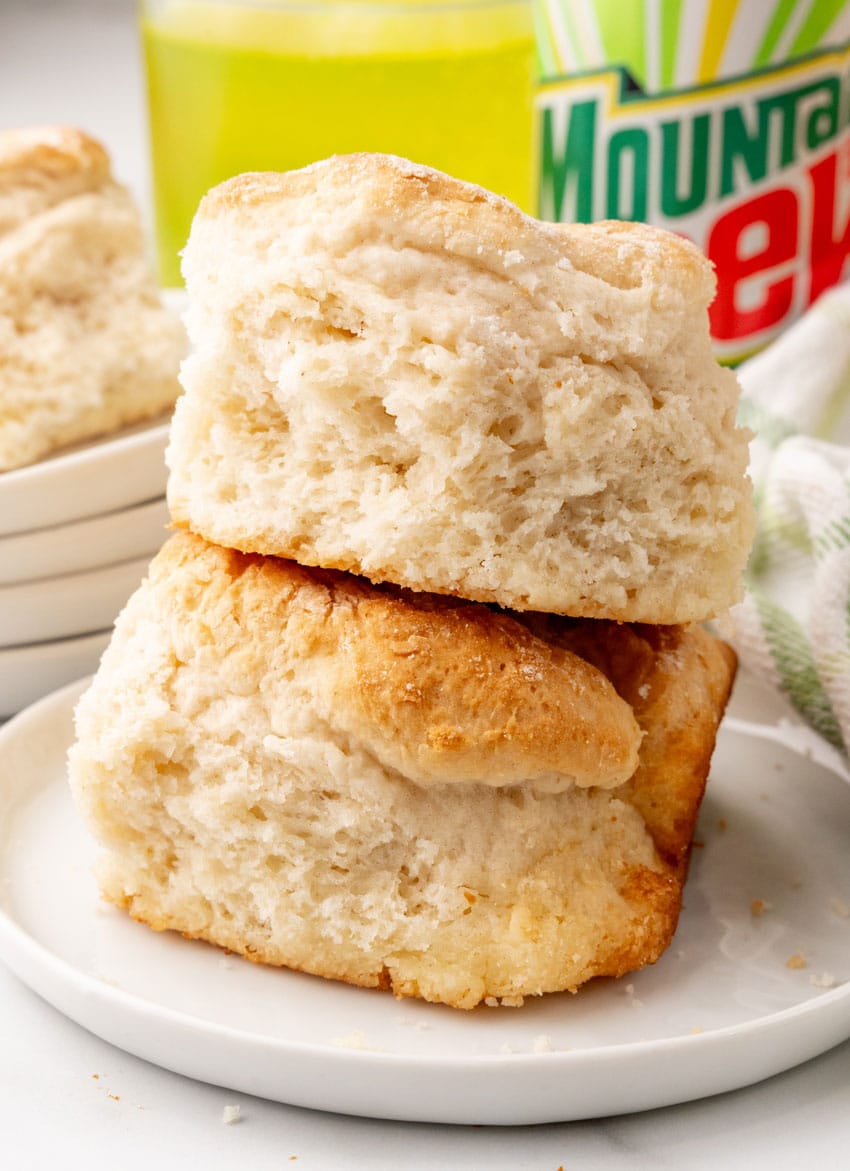
These are a style of butter swim biscuits, where you bake them directly in melted butter so they are still buttery and delicious without cutting in cold butter.
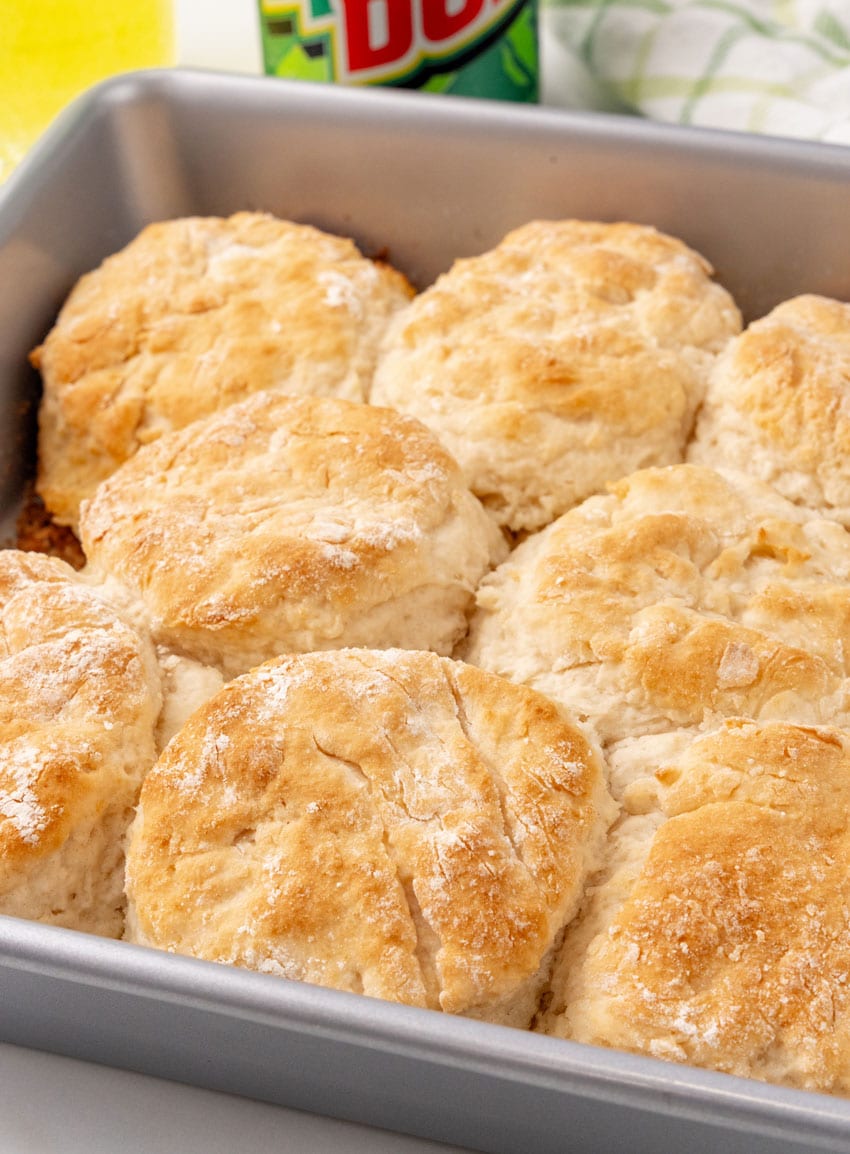
Plus the Mountain Dew gives the biscuits a tender texture and hint of sweetness.
These biscuits are right at home next to fried chicken, pot roast, soup, or a big family dinner when you need an easy bread option to round out the meal.
Ingredients
To make these you’ll need:
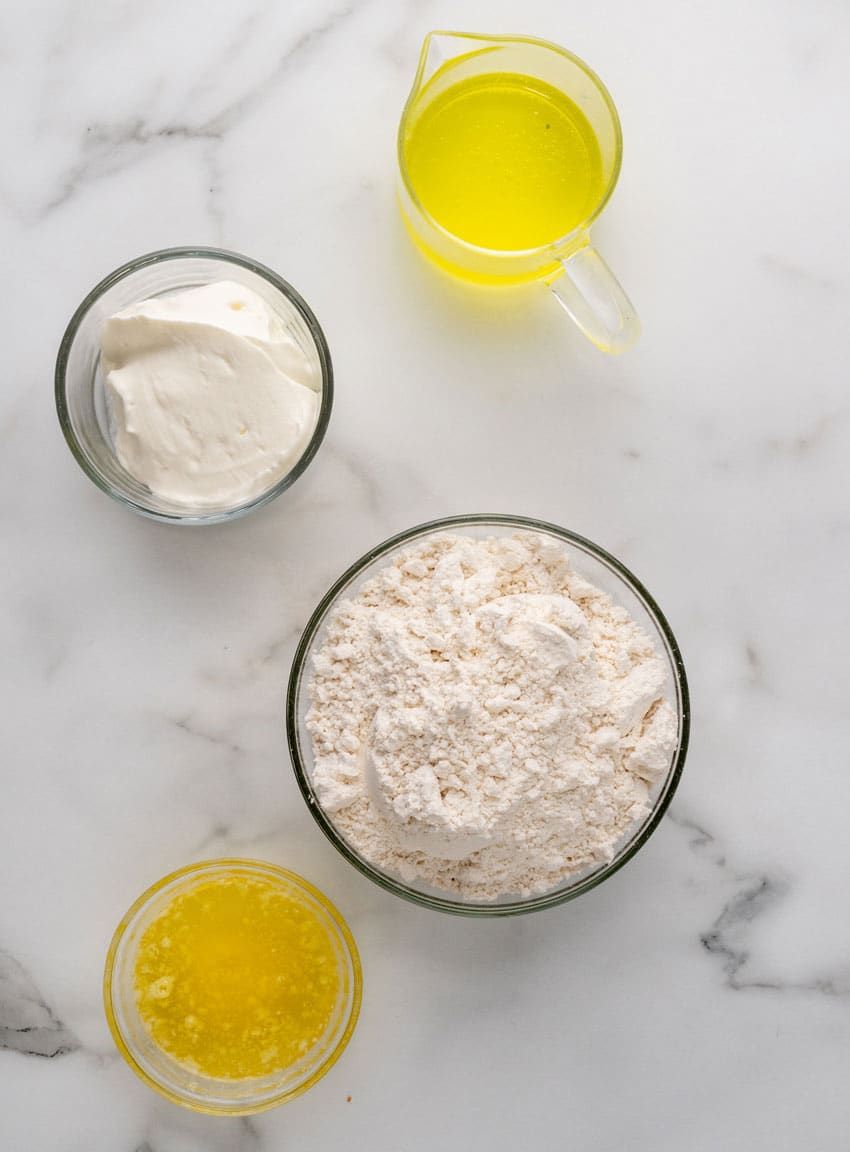
- Butter– Salted or unsalted.
- Bisquick– Homemade Bisquick is ok too.
- Sour cream– Full fat is best.
- Mountain Dew
How to Make
Mountain Dew biscuits are a snap to make!
Start by preheat the oven to 425° F.
Put the butter in a 9×9 baking dish and pop the dish with the butter into the oven to let the butter melts as the oven is preheating.
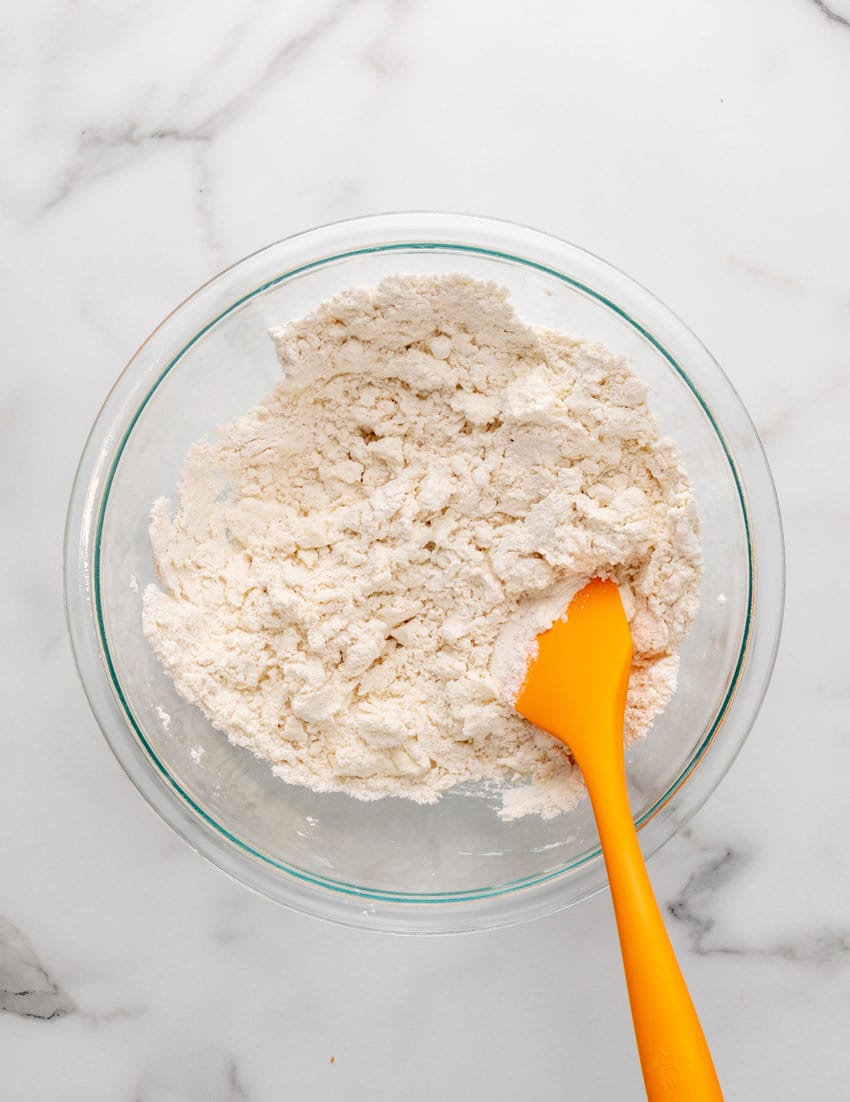
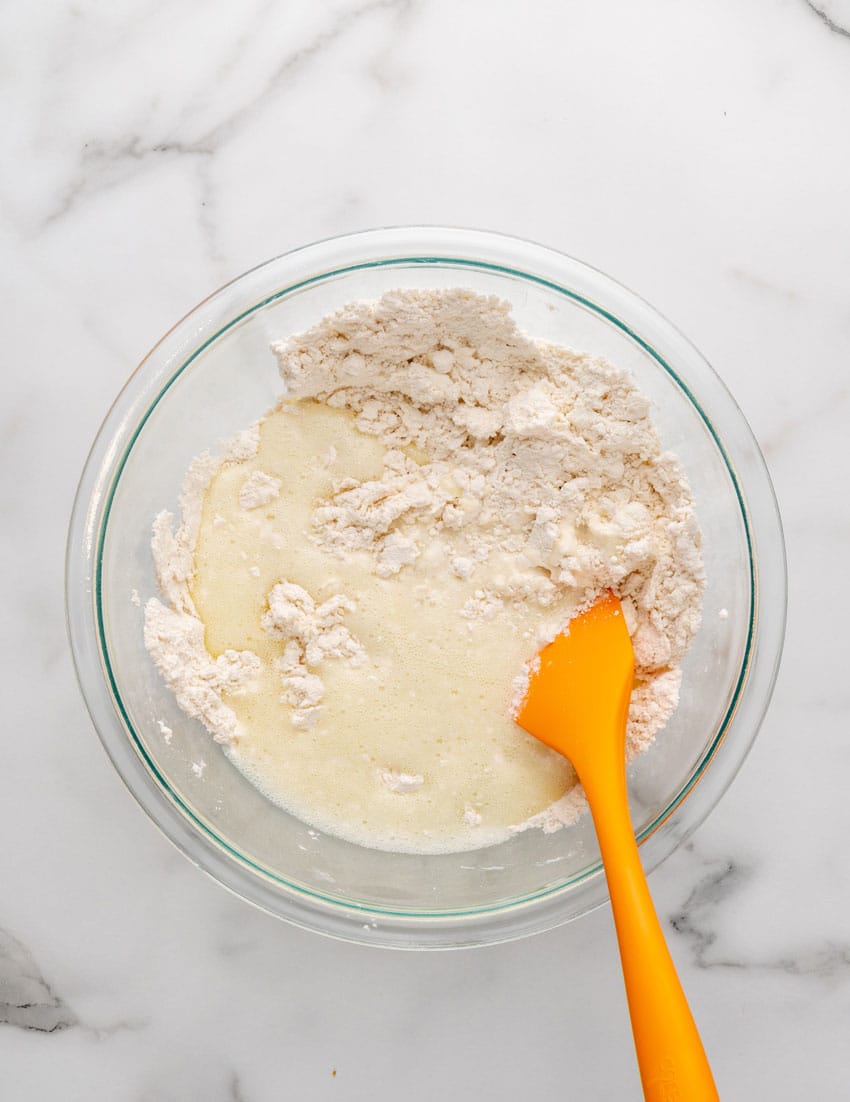
Then mix the Bisquick and the sour cream until crumbly in a medium bowl.
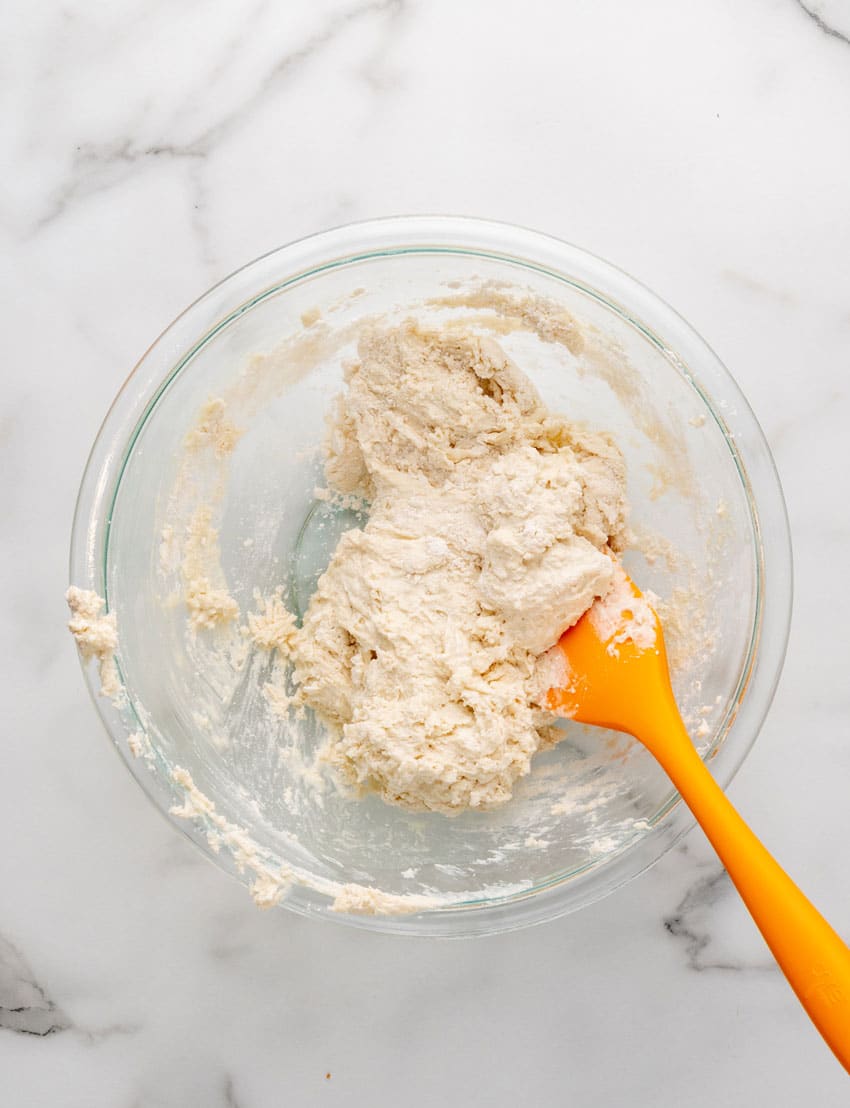
Pour the Mountain Dew and mix it just until a dough comes together.
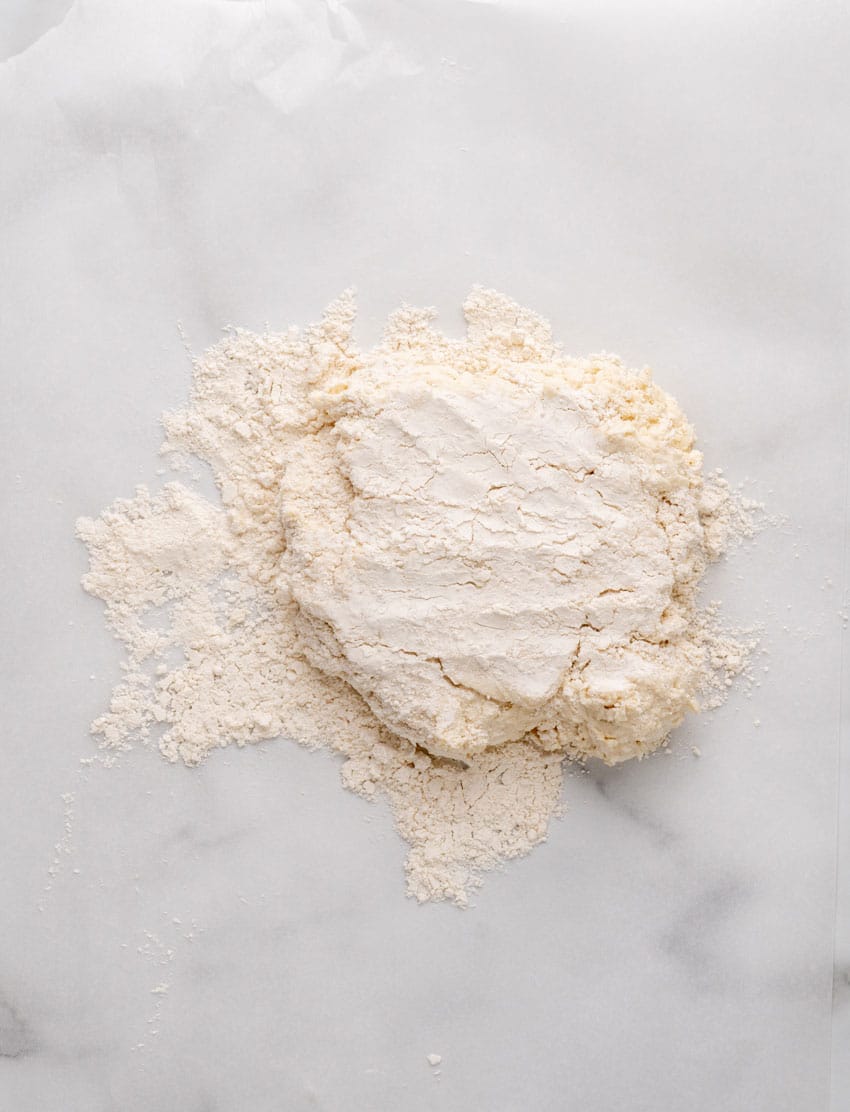
Sprinkle a flat surface with extra Bisquick.
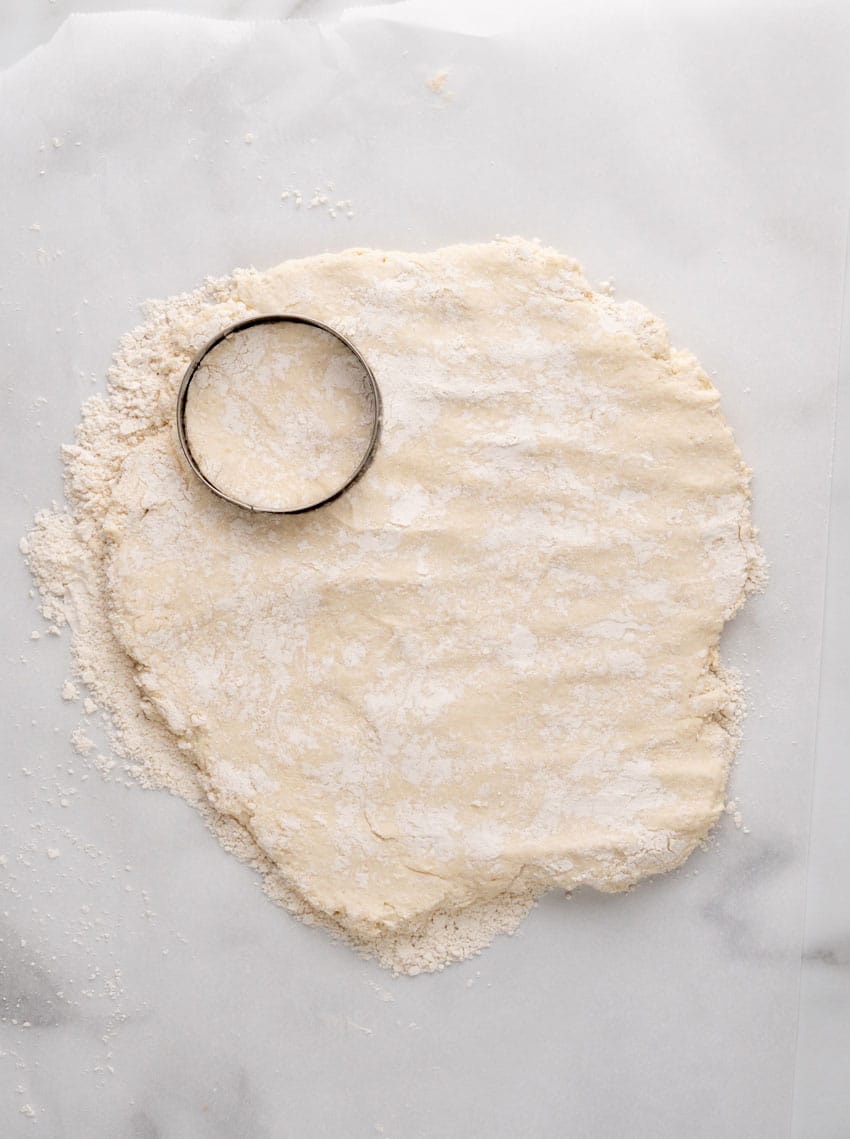
Put the dough onto the prepared surface and then flatten the dough until it is about 1” thick.
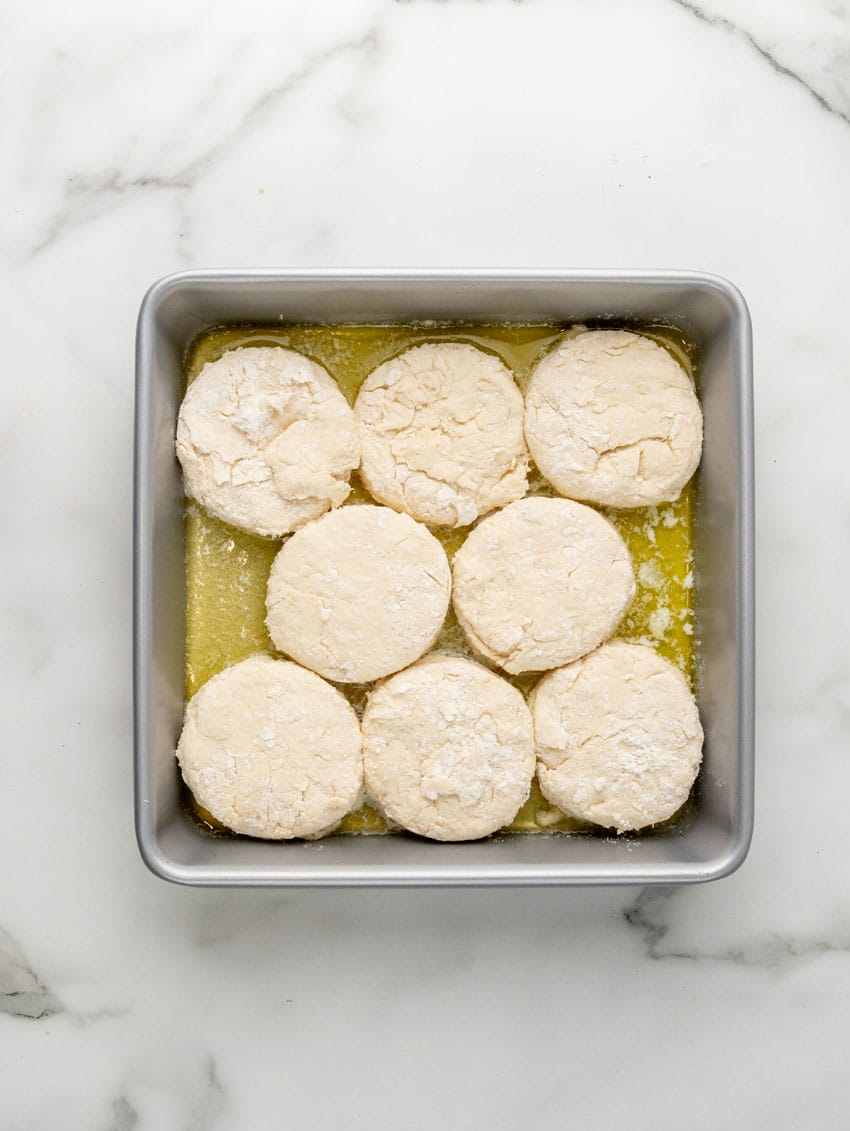
Cut 2-3” round biscuits with a biscuit cutter and put them into the preheated pan with the melted butter.
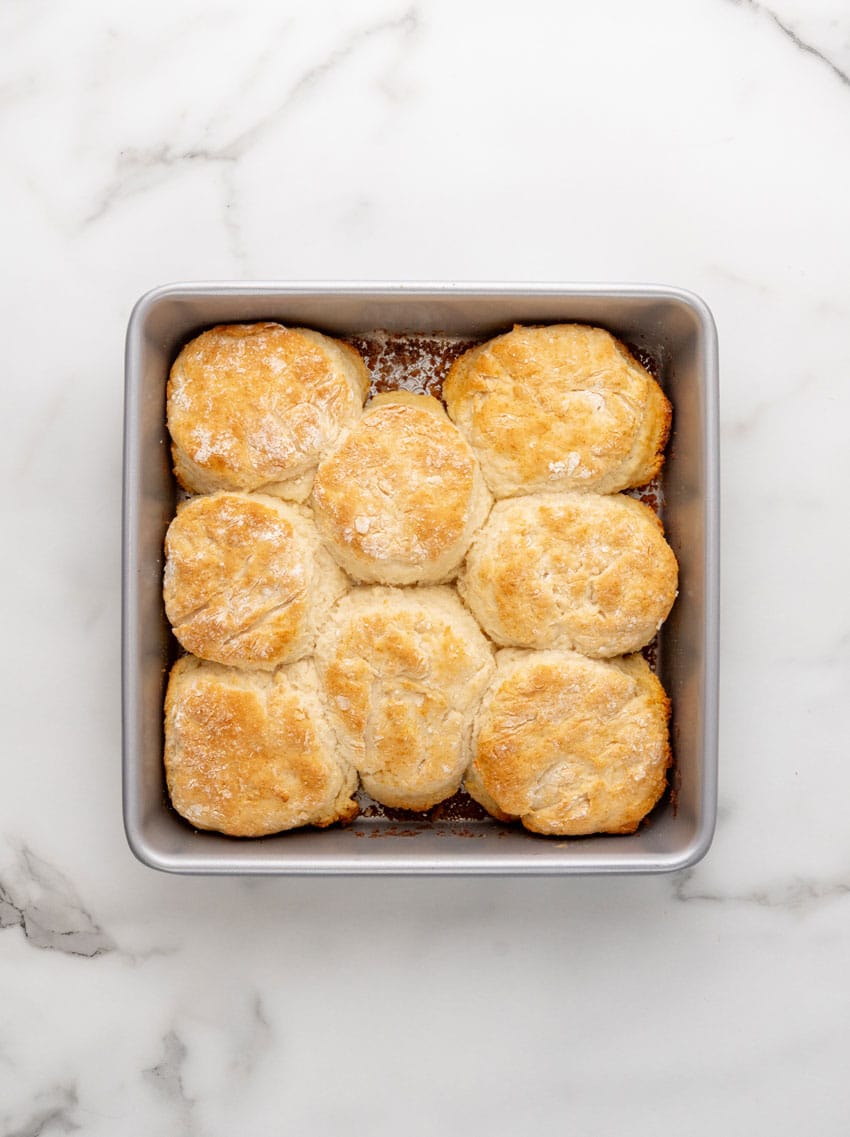
Return the pan to the oven and bake 10-12 minutes or until the the biscuits are golden brown.
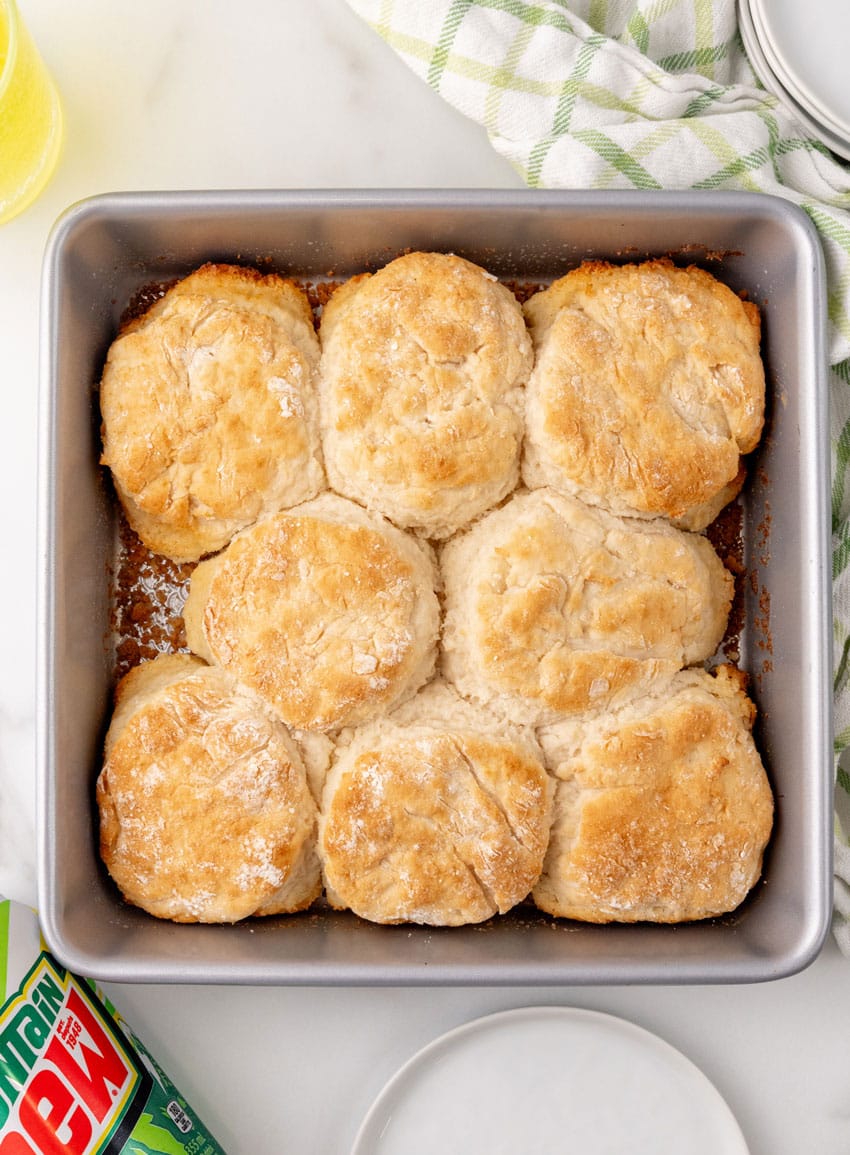
Remove the pan from the oven, let them cool until they are safe to handle, and enjoy!
Storing
Store leftover Mountain Dew biscuits in an airtight container at room temperature for up to 2 days.
You can also refrigerate them for up to 5 days in an airtight container.
To reheat, warm the biscuits in a 300°F oven for about 5 minutes or until heated through.
You can also microwave an individual biscuit for about 10 to 15 seconds, although the texture will not be as tender.
Tips and Tricks
- Be careful handling the hot pan with the melted butter when you take it out of the oven. It will be very hot.
- Don’t over mix the dough. You want to stir it just until it comes together. If you overmix the biscuits, they won’t be light and tender.
- Don’t have a biscuit cutter? Use a clean mason jar lid or cup to cut the biscuits.
Other Biscuit Recipes
Mountain Dew biscuits are a delicious, slightly sweet biscuit you’ll love.
Make them and enjoy!
Looking for other biscuit recipes?
Try these:
- Easy Drop Biscuits
- Southern Mayonnaise Biscuits
- Homemade Cheddar Bay Biscuits
- Butter Swim Biscuits
- Copycat KFC Biscuits
If you’ve tried these MOUNTAIN DEW BISCUITS, or any other recipe on my site, let me know in the comment section how it turned out, we love hearing from our readers! You can also follow along with me on PINTEREST, FACEBOOK, and INSTAGRAM to see more amazing recipes and whatever else we’ve got going on!

Mountain Dew Biscuits
Instructions
- Preheat the oven to 425 F, then place the butter in a 9x9 baking dish and allow to melt in the oven while the oven preheats.¼ cup butter
- In a medium bowl, mix the bisquick and the sour cream until crumbly. Pour in the mountain dew and mix until dough comes together.2 ½ cups bisquick, ½ cup sour cream, ½ cup mountain dew
- Sprinkle a flat surface with extra bisquick, then flatten the dough until it is about 1” thick.
- Cut 2-3” round biscuits and add them to the preheated pan with the butter.
- Return the pan to the oven and bake 10-12 minutes, or until the the biscuits are golden brown.
- Serve warm and enjoy!
Notes
- Be careful handling the hot pan with the melted butter when you take it out of the oven. It will be very hot.
- Don't over mix the dough. You want to stir it just until it comes together. If you overmix the biscuits, they won't be light and tender.
- Don't have a biscuit cutter? Use a clean mason jar lid or cup to cut the biscuits.
Nutrition
]]>
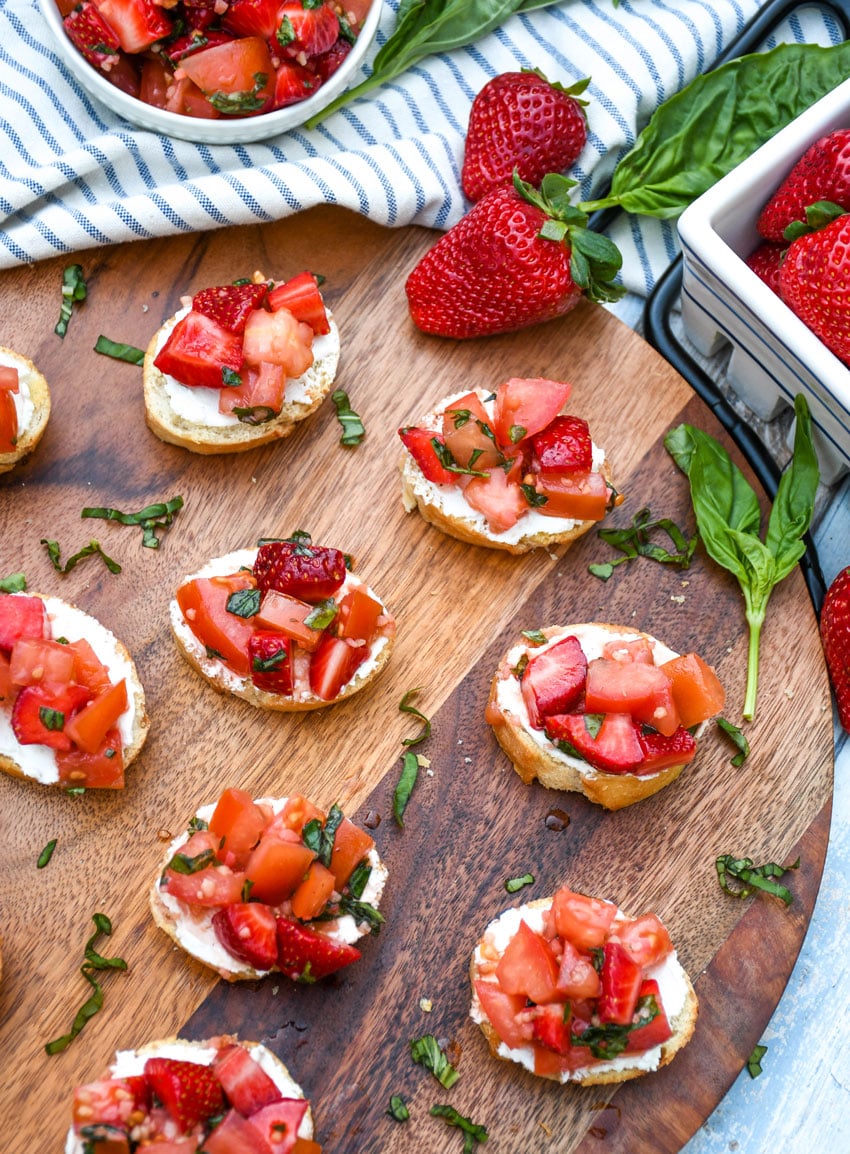
This strawberry and goat cheese bruschetta makes elegant entertaining practically effortless. Sweet strawberries, tomatoes, and basil compliment the earthy goat cheese. The tart flavor of balsamic vinegar and olive oil blend the tastes together for a delightful appetizer that’s perfect for serving at parties, potlucks, and holiday meals alike!

We entertain fairly often, whether it’s something pre-planned or impromptu get togethers, pretty much all year long.
I enjoy the time spent with family and friends, and the one thing that tends to bring us all together is food.
Simple options that are easy to throw together are my saving grace, especially at the last minute. I tend to keep it to a variety of finger foods, a mix of appetizers and snacks.
However, sometimes I need something with a fancier feel that looks great, tastes amazing, and still is easy for me to whip up- which is exactly where this strawberry and goat cheese bruschetta comes in, checking all the boxes.

It’s a delicious fruity spin on the classic Italian appetizer that comes together easily with minimal prep.
Lightly toasted slices of baguette bread are spread with creamy goat cheese, topped with a sweet and savory fruit bruschetta with hints of fresh basil and balsamic vinegar.
Whether it’s a patio party in Spring or a holiday menu, this goat cheese bruschetta with strawberries is a must have that’s guaranteed to impress your guests!
Ingredients Needed
My favorite appetizers always have straightforward ingredients that’re easy to find and that’s the case even for this fancy looking bruschetta recipe.
To make it you’ll need:
- Tomatoes – Fresh ripe roma tomatoes, diced
- Strawberries – Fresh strawberries, hulled & diced
- Garlic – Minced garlic, you can use the store bought jarred variety or fresh garlic you’ve prepared yourself.
- Basil – Fresh basil leaves, chopped, plus extra for garnishing.
- Oil – Specifically extra virgin olive oil
- Vinegar – Balsamic vinegar
- Salt & Pepper – To taste- and these are optional, but recommended.
- Baguette – A fresh French baguette
- Butter – You can use salted or unsalted, depending on your preference and dietary needs.
- Goat Cheese – Real goat cheese, the log/’chub’ kind not anything labeled ‘spreadable’. Cold goat cheese can still be more crumbly than spreadable, but if you let it sit on the counter and come to room temperature before using, as instructed, it spreads perfectly.
Once you’ve gathered all of your ingredients together you’re ready to whip up this easy goat cheese appetizer!

How To Make
This strawberry goat cheese bruschetta looks and tastes so fancy and elegant that you’d never guess how effortless it actually is to put together.
Start by adding the diced tomatoes and strawberries to a mixing bowl, gently tossing them just until evenly combined.
Add chopped fresh basil and minced garlic to the bowl, again gently tossing just until evenly incorporated.
Then drizzle the mixture with olive oil and balsamic vinegar and give it a good toss to combine the ingredients.
Next, you need to set the tomatoes and strawberries aside for about an hour. Just cover the bowl with a clean dish towel and let it sit on the counter.
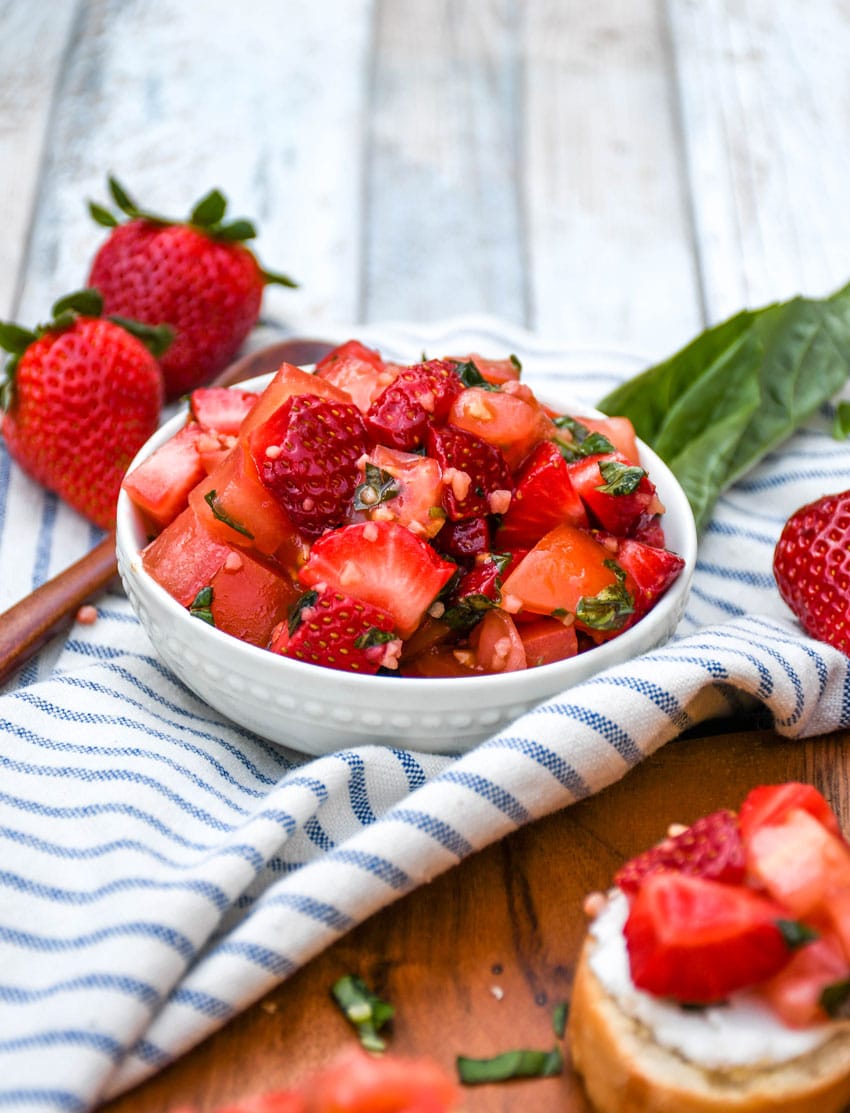
This will allow the flavors to really develop and blend together as the acid in the vinegar will start to break them down and release all these delicious juices that will make this bruschetta out of this world.
Right before the hour is up, you can slice your baguette.
Then brush both sides of the bread with melted butter and bake in a 350 degree oven for 5 minutes. The bread will get toasted, slightly crunchy, and develop a gorgeous golden brown color.
As soon as the bread comes out of the oven, you can spread the goat cheese on each slice. Because the bread will be warm, the goat cheese will start to melt and get into all the bread’s nooks and crannies.
To finish, spoon some of the strawberry and tomato mixture on top of each slice. Garnish with a bit of extra fresh basil.
Serve immediately and enjoy!

Storing
Unfortunately this strawberry goat cheese bruschetta does not store well, so it’s best enjoyed freshly made.
I recommend making them just before you’re ready to serve, and only making as many as you think you’ll need.
If you have more bruschetta than you have bread for, you can store that in an airtight container in the refrigerator for up to 24 hours.

TIPS & TRICKS
- Cold goat cheese can be more crumbly than spreadable. Before starting the recipe let the goat cheese come to room temperature and it will be easily spreadable when using as instructed.
- For a creamier effect, whip your goat cheese before spreading it on the baguettes.
- Don’t like goat cheese? Mascarpone or cream cheese will both work as substitutes.
- Chiffonade the basil for maximum effect in presentation.
- Don’t want to mix tomatoes in with your strawberries? You can leave them out and just use extra berries.
- Garnish with chopped pistachios & a drizzle of balsamic glaze for a truly stunning appetizer.
Just like that you have a gorgeous, elegant appetizer ready to go just bursting with all the best flavors of summer.

Other Easy Strawberry Recipes
Looking for other easy recipes using fresh strawberries that will impress your guests?
Check these out!
If you’ve tried this STRAWBERRY AND GOAT CHEESE BRUSCHETTA, or any other recipe on the site, let me know in the comment section how it turned out, we love hearing from our readers! You can also follow along with me on PINTEREST, FACEBOOK, and INSTAGRAM to see more amazing recipes and whatever else we’ve got going on!

Strawberry and Goat Cheese Bruschetta
Ingredients
- 2 cups diced ripe roma tomatoes
- 1 cup diced fresh strawberries
- ½ cup fresh basil chopped + extra for garnish
- 1 1/2 tbsp minced garlic
- salt and pepper to taste
- 1 tbsp olive oil
- 1 tbsp balsamic vinegar
- 1 french baguette sliced on a diagonal, 1/2" thick
- 4 tbsp butter melted
- 8 oz goat cheese
Instructions
- In a medium mixing bowl, add chopped tomatoes, strawberries, minced garlic, olive oil, and balsamic vinegar gently tossing them together until evenly combined.2 cups diced ripe roma tomatoes, 1 cup diced fresh strawberries, 1 1/2 tbsp minced garlic, 1 tbsp olive oil, 1 tbsp balsamic vinegar
- Chop the basil and add to the strawberry mixture, again gently tossing until evenly incorporated.½ cup fresh basil
- Cover the bowl with a clean dish towel, and set to the side for 1 hour to rest.
- Season with salt and pepper, to taste, if desired.salt and pepper
- Place the baguette slices onto a rimmed baking sheet and brush them all evenly with melted butter.1 french baguette, 4 tbsp butter
- Bake at 350° for 5 minutes, just until slightly browned.
- Spread the goat cheese evenly out on top of the baguettes.8 oz goat cheese
- Spoon bruschetta on top of the goat cheese.
- Garnish with fresh basil, serve immediately, and enjoy!
Notes
- Cold goat cheese can be more crumbly than spreadable. Before starting the recipe let the goat cheese come to room temperature and it will be easily spreadable when using as instructed.
- For a creamier effect, whip your goat cheese before spreading it on the baguettes.
- Don't like goat cheese? Mascarpone or cream cheese will both work as substitutes.
- Chiffonade the basil for maximum effect in presentation.
- Don't want to mix tomatoes in with your strawberries? You can leave them out and just use extra berries.
- Garnish with chopped pistachios & a drizzle of balsamic glaze for a truly stunning appetizer.
Nutrition
]]>
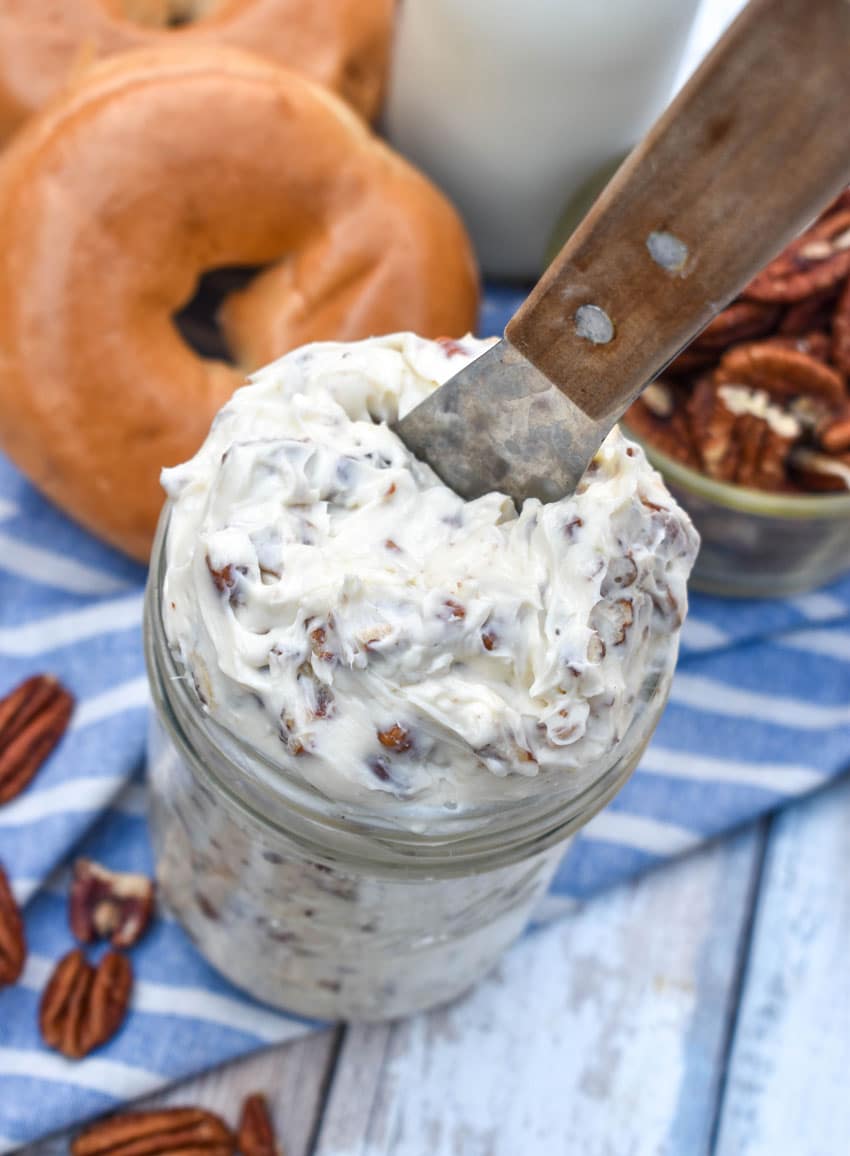
Honey pecan cream cheese spread turns basic cream cheese into a bagel shop style spread full of sweet honey and crunchy, nutty pecans. Make it for everyday breakfast bagels or to dress up your brunch spreads and holiday gatherings.
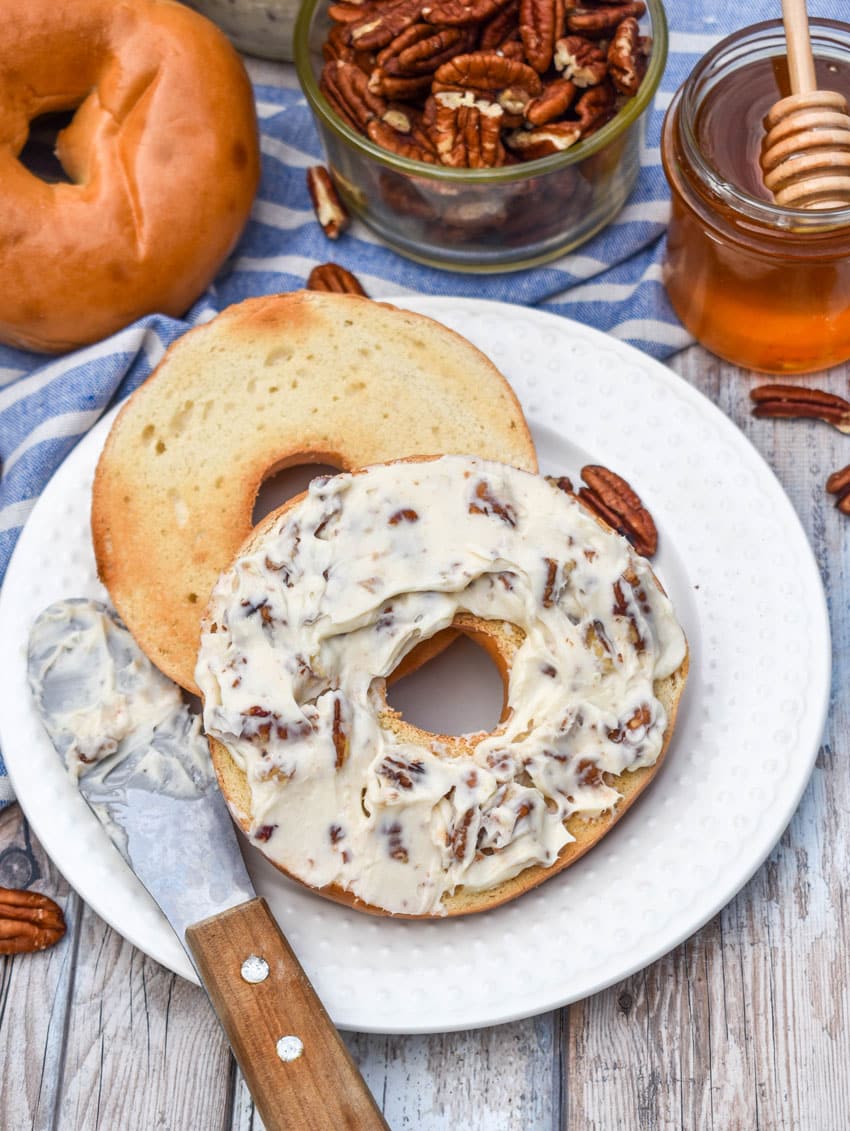
If you’re looking for a simple way to dress up your morning bagel or make a breakfast spread feel a little fancier, this honey pecan cream cheese is just the thing.
It’s a fancy bagel shop style cream cheese spread but it’s so easy to make!
Just whip in some honey and toasted, chopped pecans and you’ve got a dressed up schmear experience with sweet honey and nutty pecans in each bite- no cooking skills required.
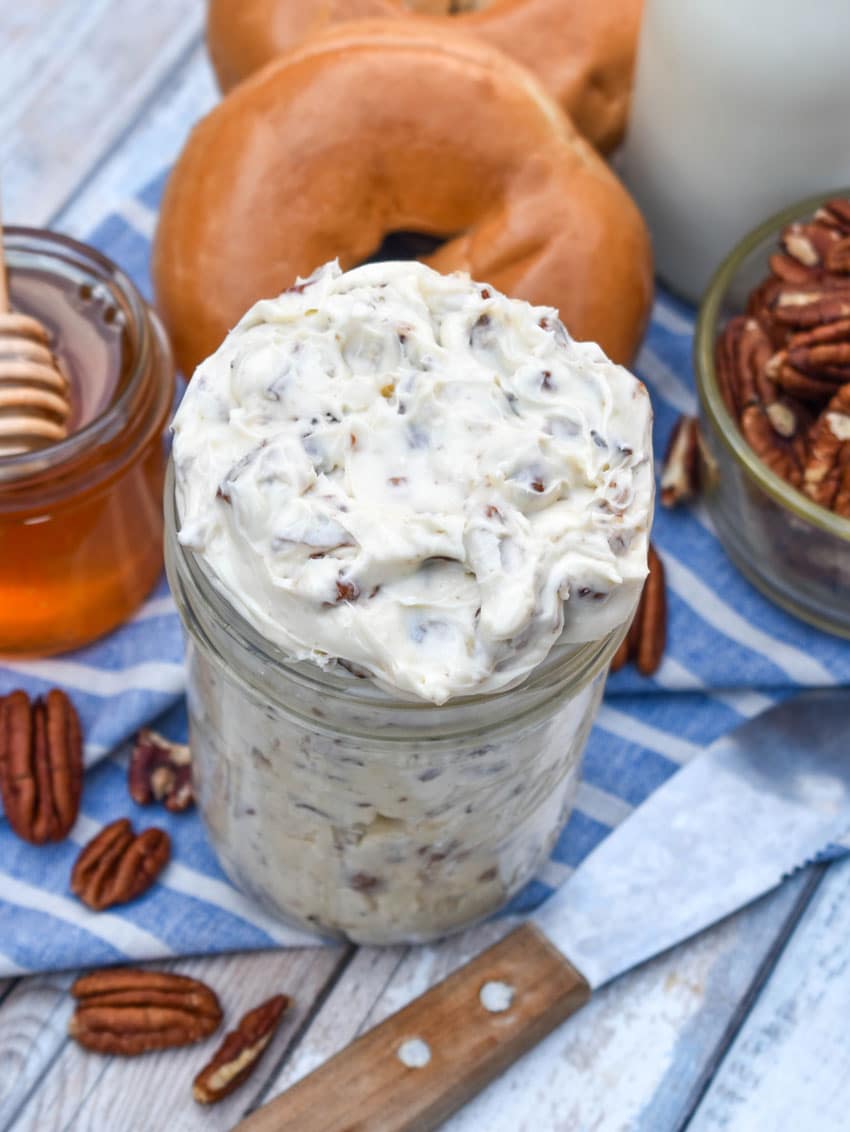
While it’s easy enough to make for everyday mornings, it’s also a lovely and easy way to dress up a holiday brunch.
You could make a few different artisan cream cheese spreads including this one and set them out for your guests to enjoy.
Since you can make it ahead of time, it takes pressure off of the morning of while still adding a little special touch to your table.
Ingredients
To make this you’ll need:
- Cream cheese– Softened to room temperature.
- Honey
- Pecans– Buy the chopped pecans. If you have whole pecan halves, chop them first with a chef’s knife.
How to Make
Honey pecan cream cheese spread is very easy to make!
Start by toasting the pecans.
To do this, spread the pecan pieces out in an even layer on a rimmed baking sheet and bake them at 350° for 5 minutes, shaking half way through.
Carefully remove the hot pan from the oven, and set it aside to cool.
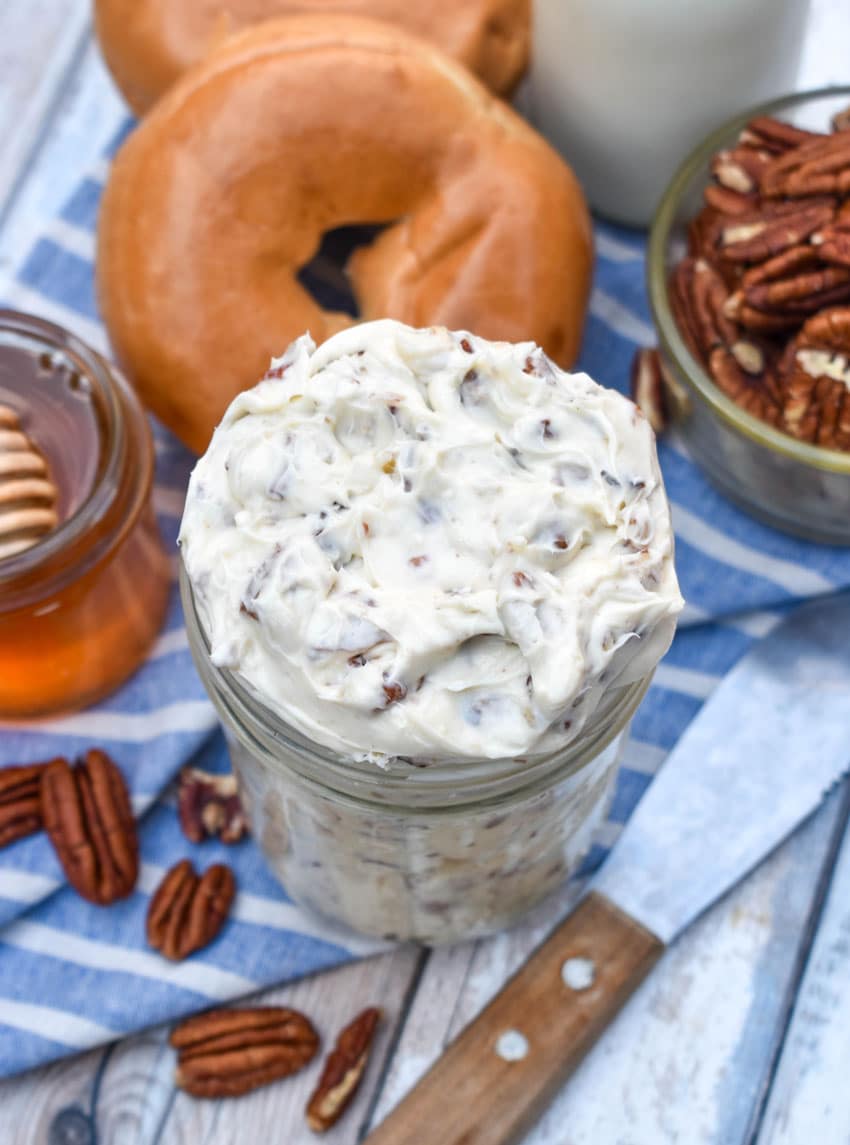
Then whip the cream cheese and honey together a mixing bowl with a hand mixer until the mixture is evenly combined, light, and fluffy.
Fold in the cooled nuts with a sturdy spatula until they are evenly distributed.
Cover the bowl and chill in the refrigerator for 30 minutes.
Use and enjoy!
Serving Suggestions
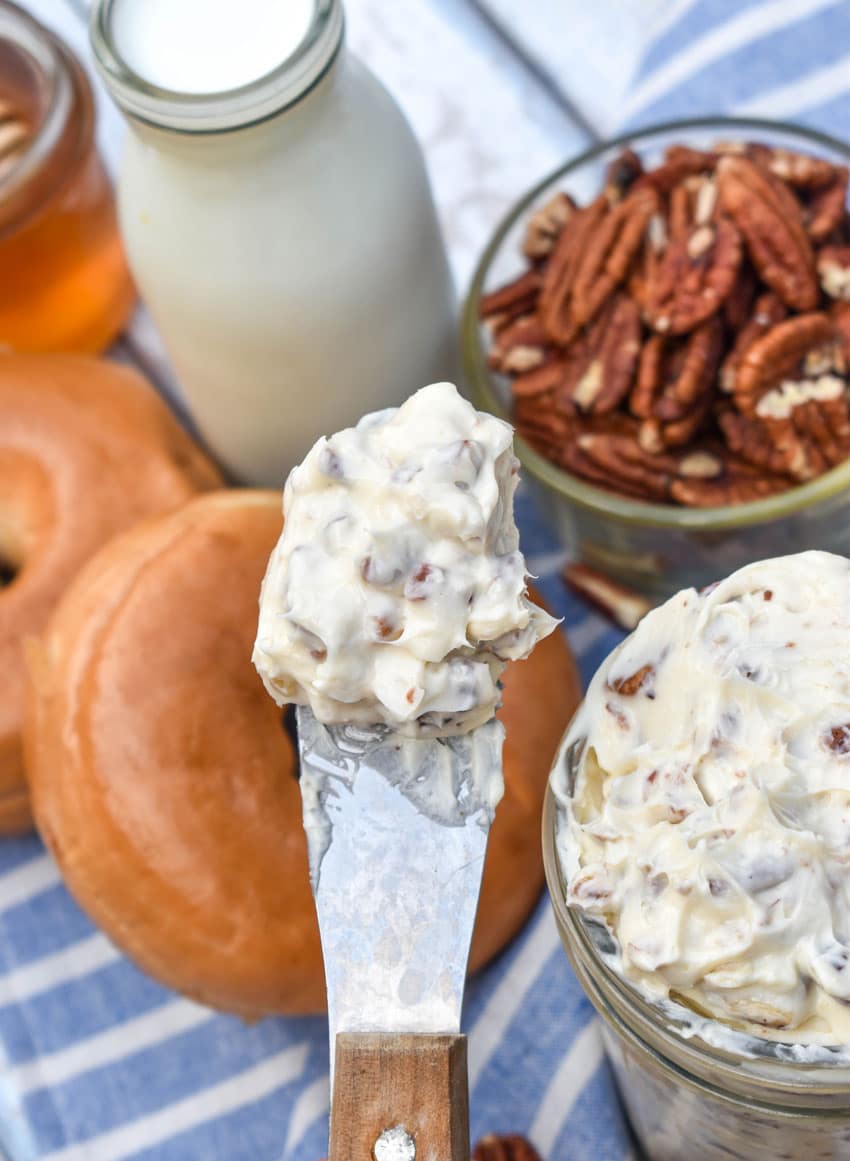
This honey pecan cream cheese spread is so versatile!
My favorite ways to serve it are:
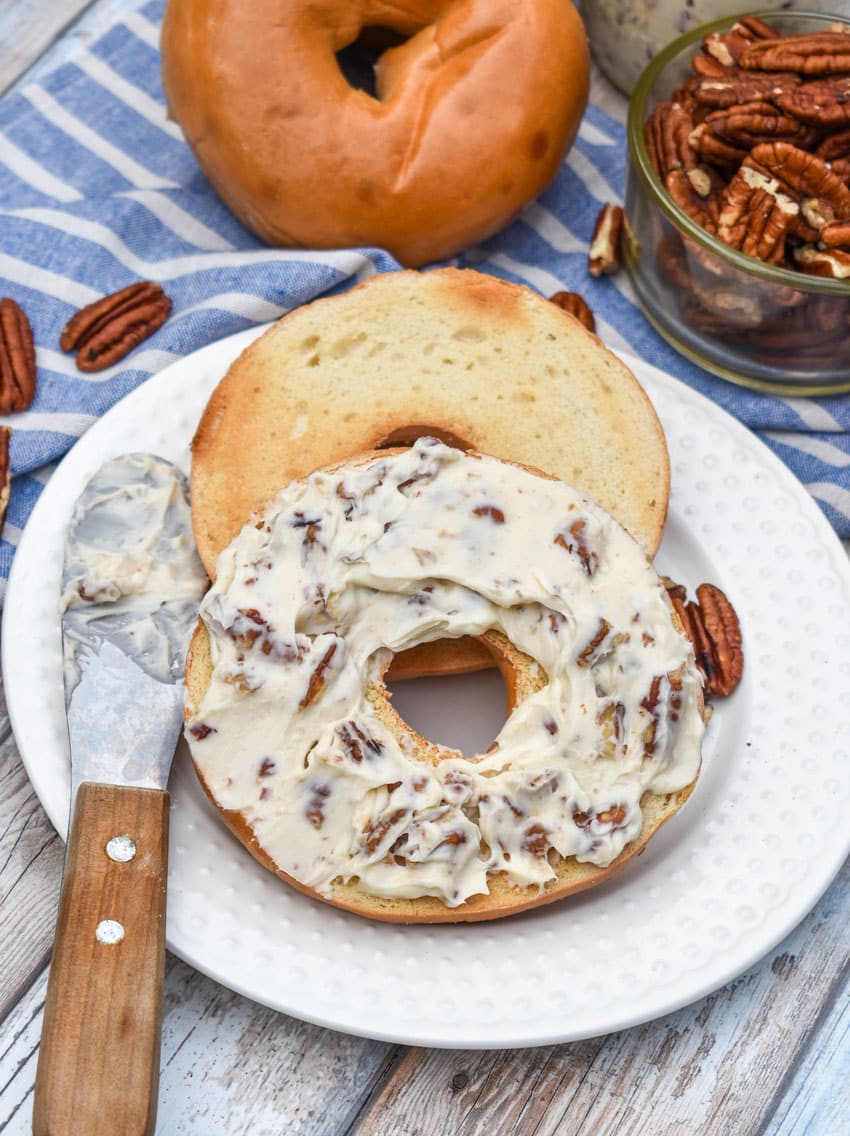
- spread on bagels, toast, pancakes, waffles, or french toast
- as a substitute it for the cream cheese frosting on warm cinnamon rolls
- dolloped on roasted sweet potatoes
- as a dip for fruit
Storing
Store this spread in an airtight container in the refrigerator for up to 5 days.
Keep it chilled between servings.
Remember the spread will firm up in the fridge so let it sit at room temperature for about 10 to 15 minutes before serving so it’s easier to spread.
Tips and Tricks
- Toasting the pecan pieces is an optional step, but one I highly recommend since it deepens the flavor of the pecans.
- Add a little extra into this by stirring in some cinnamon or pumpkin spice for a fall flavor. You can also stir in bits of dried apples, raisins, or craisins for a little extra fruity action.
- It’s really important to let the block of cream cheese soften on the counter before you make this. It helps everything incorporate much more easily and more evenly if it’s soft.
Other Cream Cheese Spreads
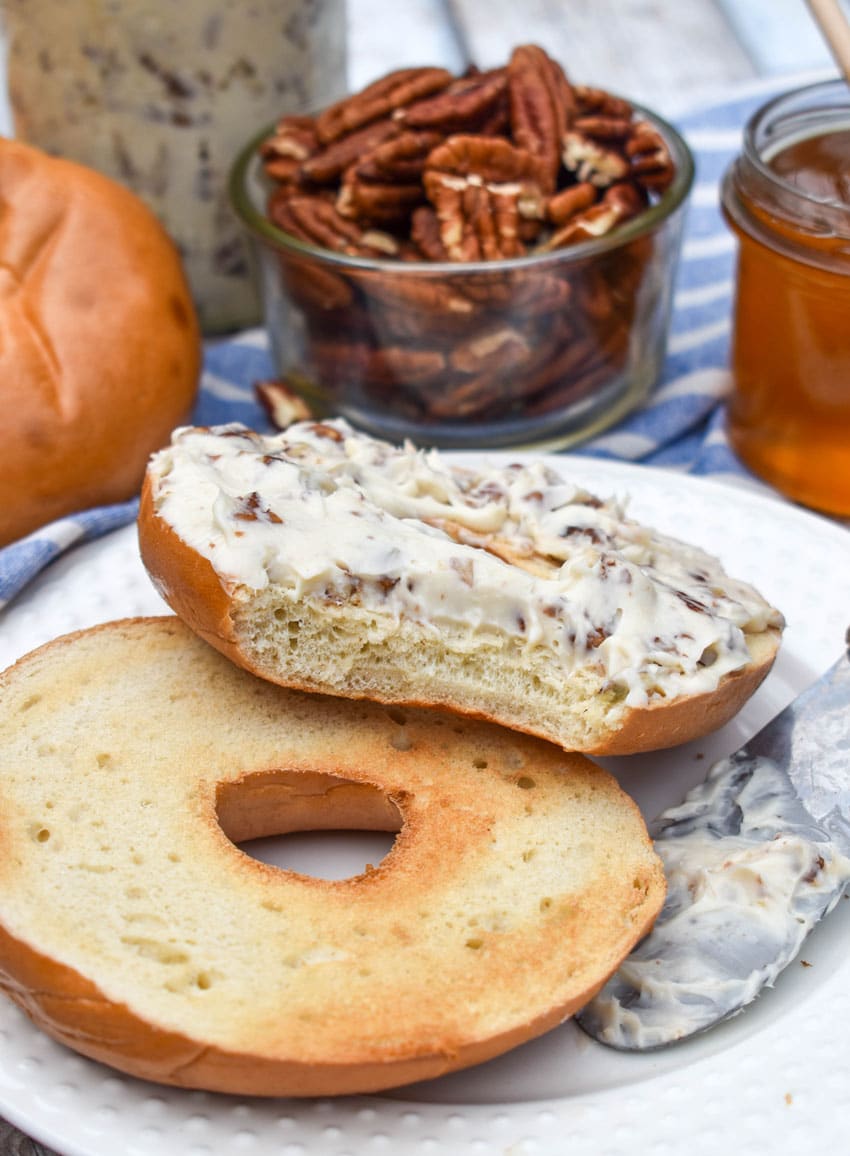
Honey pecan cream cheese spread brings a bagel shop experience home.
Make it and enjoy!
Looking for other cream cheese spreads?
Try these:
- Strawberry Cream Cheese
- Pesto Cream Cheese Spread With Sun Dried Tomatoes
- Pumpkin Cream Cheese Spread
- Herbed Cream Cheese Spread
If you’ve tried this HONEY PECAN CREAM CHEESE SPREAD, or any other recipe on my site, let me know in the comment section how it turned out, we love hearing from our readers! You can also follow along with me on PINTEREST, FACEBOOK, and INSTAGRAM to see more amazing recipes and whatever else we’ve got going on!

Honey Pecan Cream Cheese Spread
Instructions
- Spread the pecan pieces out in an even layer on a rimmed baking sheet. Bake at 350° for 5 minutes, shaking half way through. Carefully remove the hot pan from the oven, and set it aside to cool.3/4 cup pecan pieces
- Add the cream cheese and honey to a mixing bowl. Using a hand mixer, whip them together until evenly combined and the mixture's light & fluffy.8 oz cream cheese, 4 1/2 tbsp honey
- Using a spatula fold in the cooled nuts until evenly incorporated.
- Cover the bowl and chill in the refrgierator for 30 minutes.
- Use and enjoy!
Notes
- Toasting the pecan pieces is an optional step, but one I highly recommend since it deepens the flavor of the pecans.
- Add a little extra into this by stirring in some cinnamon or pumpkin spice for a fall flavor. You can also stir in bits of dried apples, raisins, or craisins for a little extra fruity action.
- It's really important to let the block of cream cheese soften on the counter before you make this. It helps everything incorporate much more easily and more evenly if it's soft.
Nutrition
]]>
Butterfinger truffles are an easy no bake treat packed with the sweet peanut butter flavor and crunchy candy goodness of your favorite Butterfinger bars, all wrapped in a smooth chocolate coating. This treat is perfect for holiday cookie trays, parties, and homemade gifts.

During the holidays, I love to gift homemade candy.
I also love to put some homemade candies out on my cookie trays.
And my family is full of peanut butter lovers.
These homemade Butterfinger truffles are a hit with them and any peanut butter fan!

They take all that familiar candy bar flavor and turn it into bite sized treats with a creamy, yet crunchy center and a chocolate shell that makes every piece feel like a little homemade candy shop indulgence.
The best part is that you don’t need to turn on the oven or fuss with complicated candy making techniques to pull them together.
Whip up a batch ahead of time and keep them chilled until you’re ready to serve.
Ingredients
To make these you’ll need:
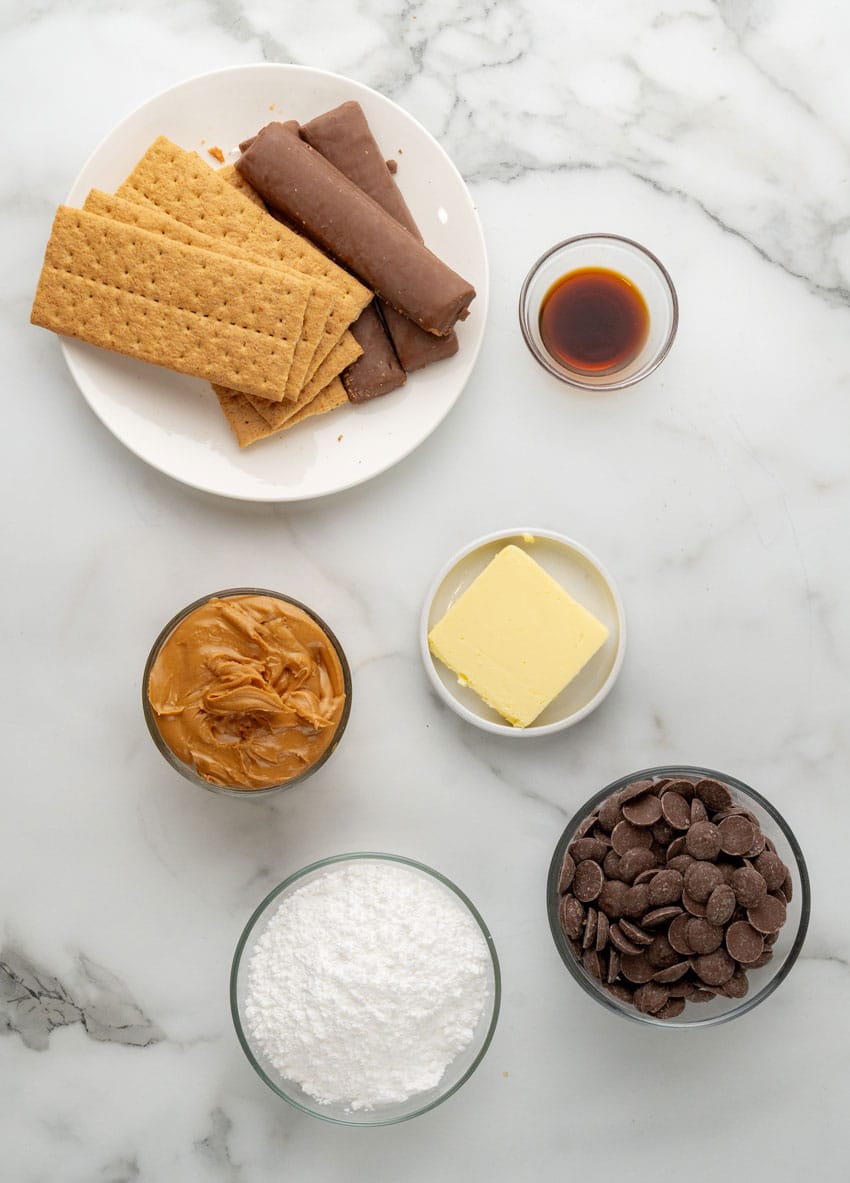
- Graham crackers– 6 sheets.
- Butterfinger chocolate bars– 3 whole chocolate bars plus more for garnish.
- Sugar– Powdered.
- Peanut butter– Creamy is best. Don’t use natural. It will separate.
- Vanilla extract
- Melting chocolate– Sometimes these are called melting wafers.
How to Make
Butterfinger truffles are pretty easy to make.
Just pulse the graham crackers and Butterfingers together in a large food processor until they are crumbly.
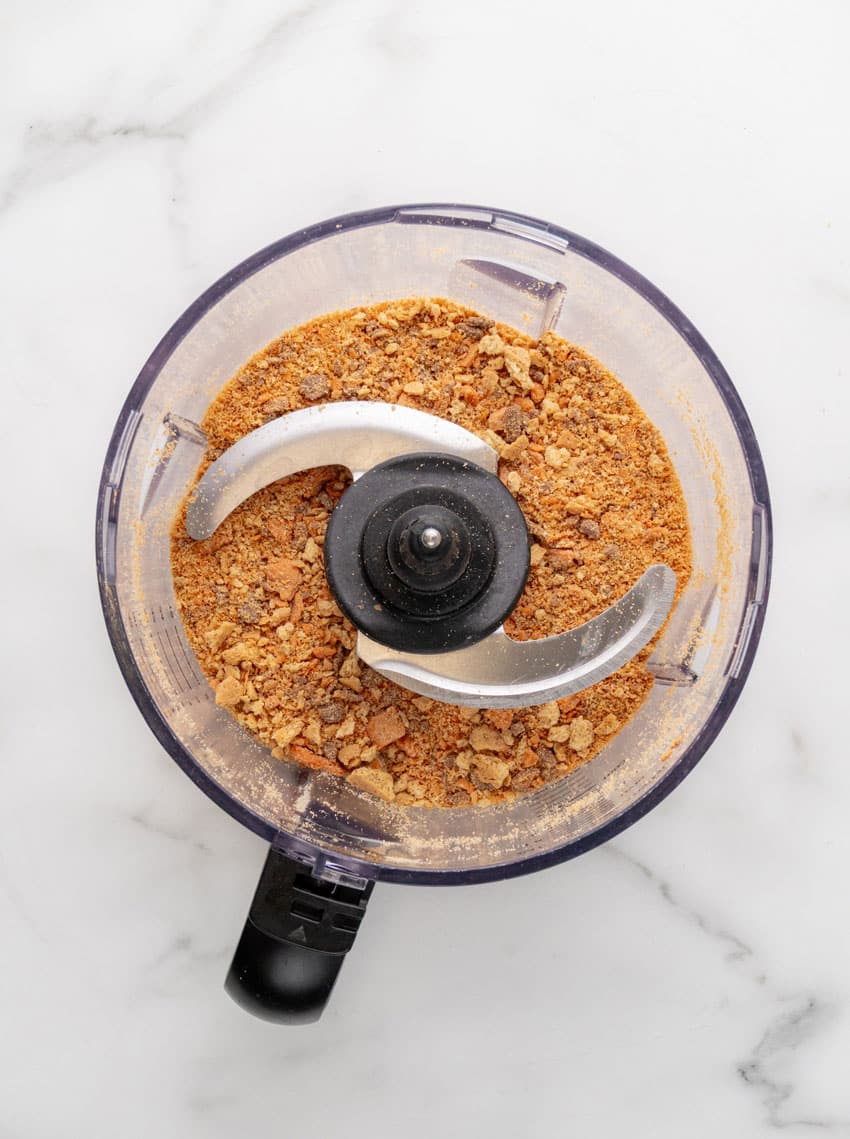
Add the powdered sugar, peanut butter, and vanilla to the crumbs in the food processor and pulse everything again until the mixture comes together.
Roll the mixture into small balls that are roughly 1-2 tablespoon each.
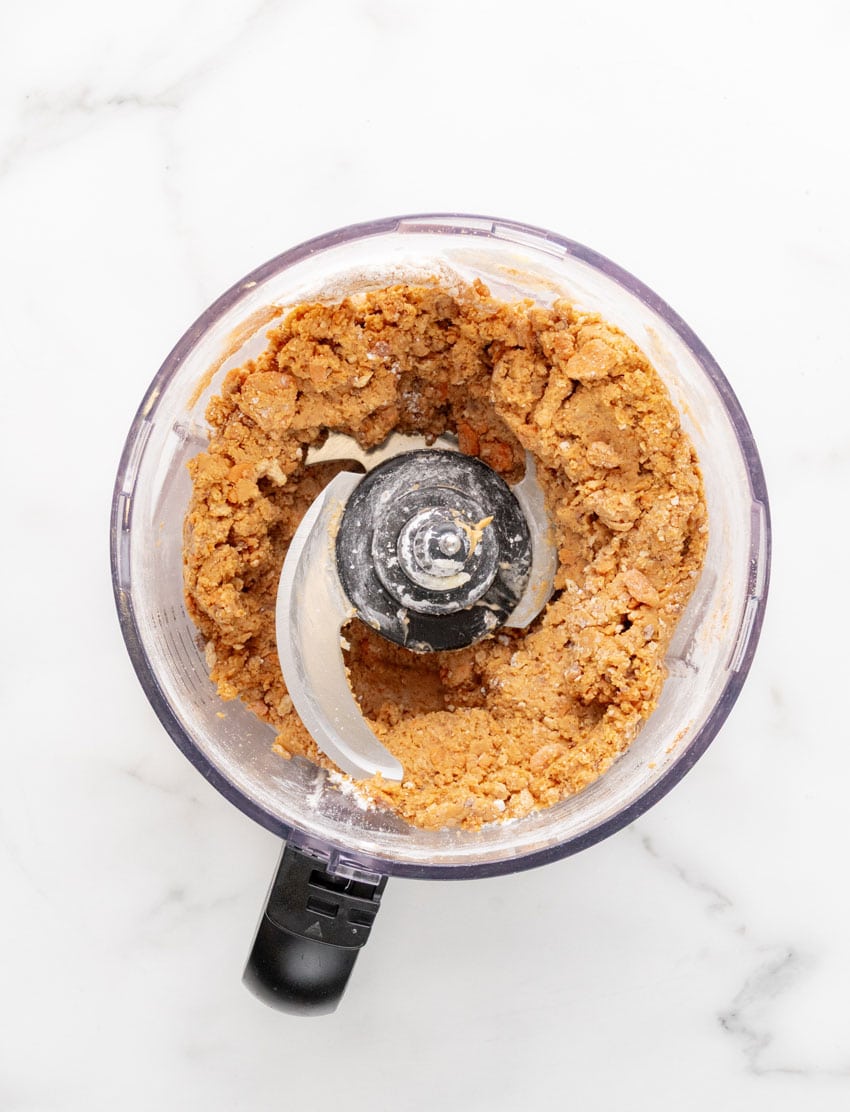
Put them onto a parchment lined baking sheet.
Repeat until you’ve used up all the mixture.
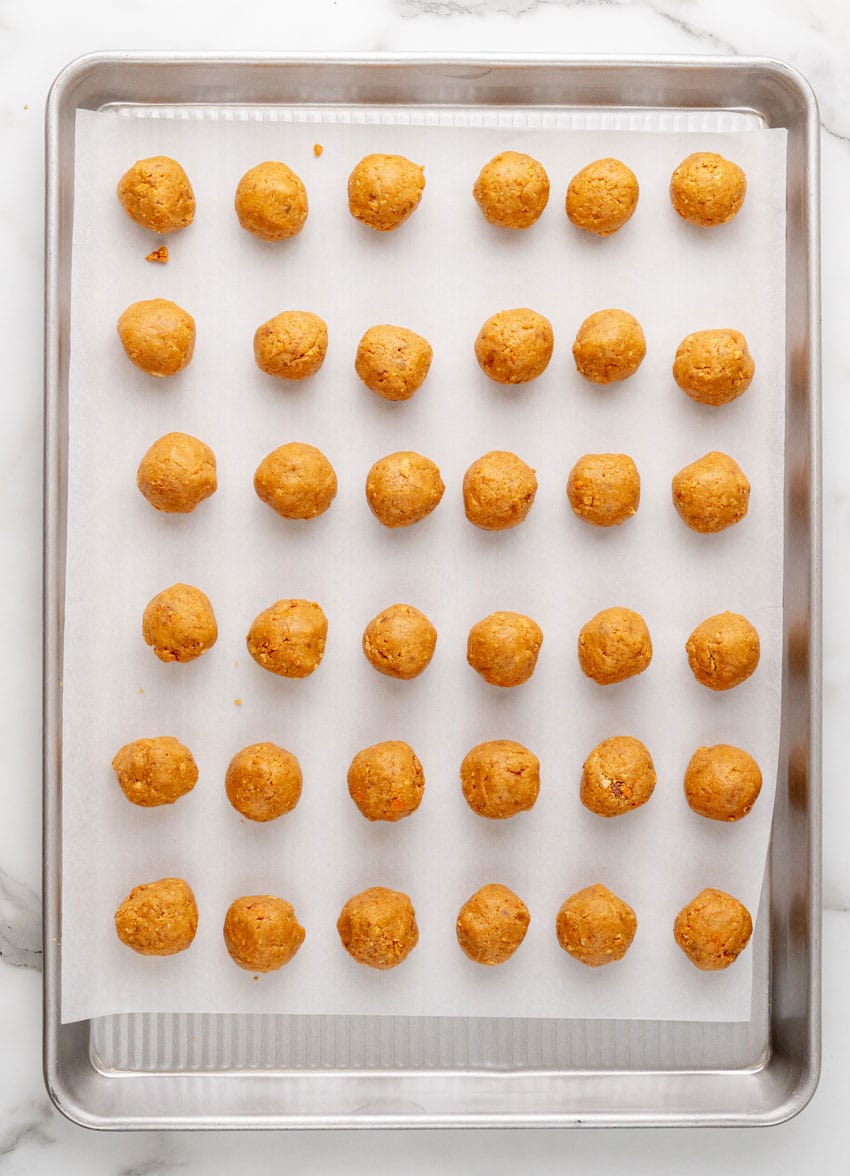
Put the tray of truffle centers into the fridge to firm up for 25 minutes.
After they have refrigerated, melt the chocolate in a microwave safe bowl in 30 second increments in the microwave, stirring after each.
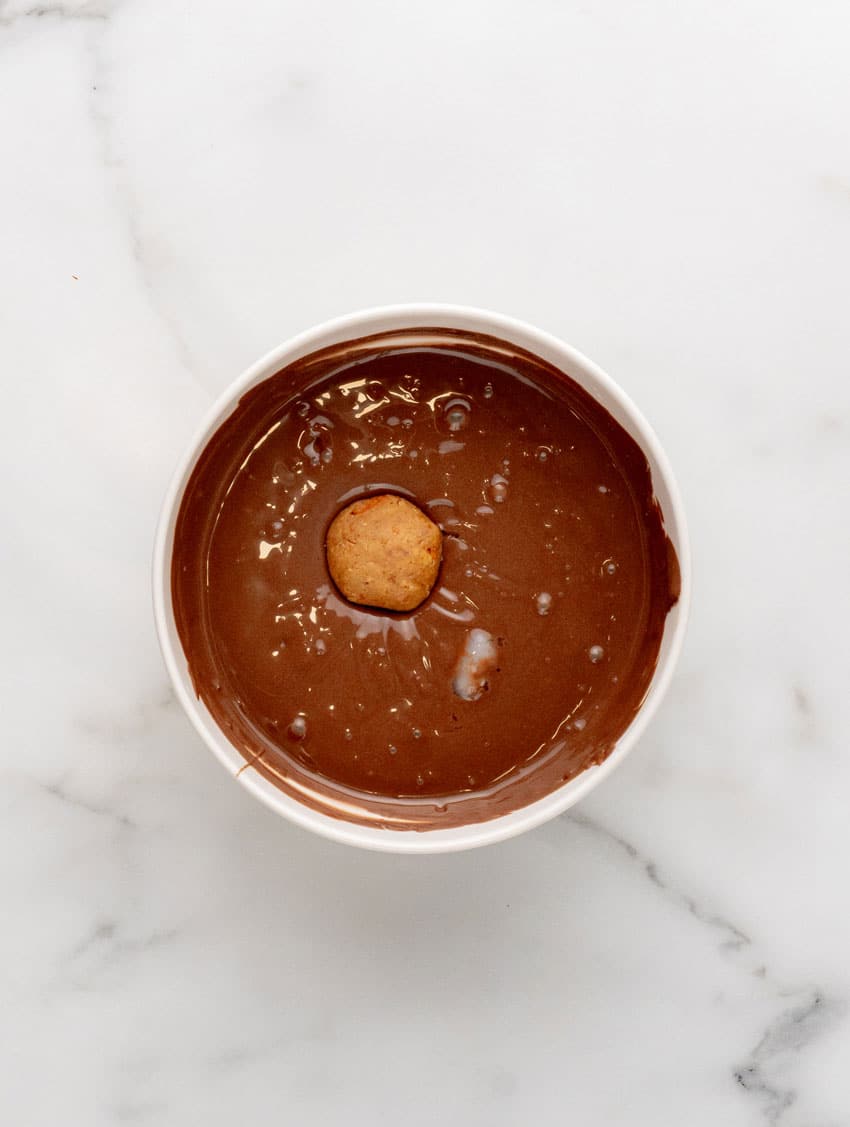
Do this until the chocolate melts are smooth.
Dip the truffles into the melted chocolate to cover, letting any excess chocolate drip off into the bowl.
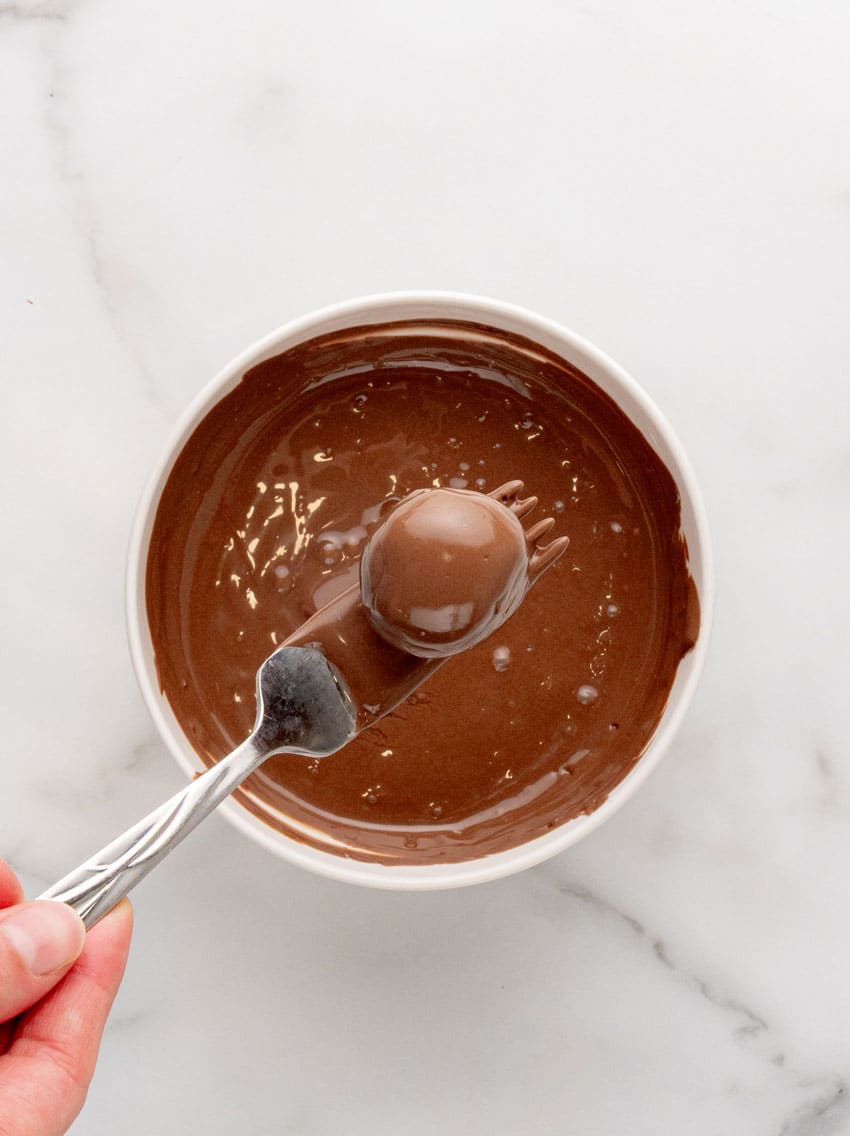
Top each truffle with chopped Butterfinger for garnish if desired.

Set them back on the parchment lined tray and refrigerate them to set.
Serve and enjoy!

Storing
Store these truffles in an airtight container.
They will keep in a container on the counter for up to a week or in the fridge for 2.

Tips and Tricks
- Break apart the graham cracker sheets and coarsely chop the bars before you pulse them together in the food processor.
- Use a small cookie scoop to evenly portion out the truffle filling.
- If you are using Butterfinger bars to garnish the truffles, sprinkle the topping onto each one as soon as they are dipped so the topping sticks.

Other Easy Candy Recipes
Butterfinger truffles are an easy no bake treat for anyone whole loves peanut butter.
Make them and enjoy!
Looking for other easy candy recipes?
Try these:
- Chocolate Turtles Candy
- Brownie Cheesecake Truffles
- Soft Chewy Caramels
- Maple Glazed Walnuts
- Grandma’s Secret Ingredient Fudge
If you’ve tried these BUTTERFINGER TRUFFLES or any other recipe on the site, let me know in the comment section how it turned out, we love hearing from our readers! You can also follow along with me on PINTEREST, FACEBOOK, and INSTAGRAM to see more amazing recipes and whatever else we’ve got going on!

Butterfinger Truffles
Ingredients
- 6 sheets graham crackers
- 3 butterfinger chocolate bars plus more to garnish if desired
- 1 ¼ cup powdered sugar
- 1 ¼ cups peanut butter
- 1 teaspoon vanilla extract
- 2 cups chocolate melting wafers
Instructions
- In a large food processor, add the graham crackers and butter finger bars and pulse until crumbly.6 sheets graham crackers, 3 butterfinger chocolate bars
- Add the powdered sugar, peanut butter, and vanilla and pulse again until the mixture comes together.1 ¼ cup powdered sugar, 1 ¼ cups peanut butter, 1 teaspoon vanilla extract
- Form into small balls, roughly 1-2 tablespoons, and put onto a parchment lined baking sheet.
- Put into the fridge to firm up for 25 minutes.
- In a heatproof bowl, melt the chocolate in 30 second increments in the microwave, stirring after each, until smooth.2 cups chocolate melting wafers
- Dip the truffles into the melted chocolate and top with chopped butterfinger chocolate bar if desired.
- Allow to set before serving.
Notes
- Break apart the graham cracker sheets and coarsely chop the bars before you pulse them together in the food processor.
- Use a small cookie scoop to evenly portion out the truffle filling.
- If you are using Butterfinger bars to garnish the truffles, sprinkle the topping onto each one as soon as they are dipped so the topping sticks.
Nutrition
]]>
One pot chicken bacon couscous is an easy dinner recipe that’s both hearty and quick to come together. It’s a full meal that cooks in a single pot, loaded with flavor and leaving behind only a single dish to clean afterwards. Studded with crisp bacon, savory chunks of chicken, and tender veggies mixed into fluffy couscous- it’s simple yet savory & a perfect option for busy evenings!

Some days I feel like a darn rock star. I got up on time, got all the kids off on time- possibly even cooked breakfast. You know because most mornings it’s cold bowls of cereal all around.
Then I’ve had a productive day working, both for my job and cleaning up around the house. Obviously copious amounts of coffee are involved on these days. Those days, I’ve also already cooked dinner by 5 pm- or I know what I’m making and everything’s ready & waiting.
However, there are many more days where life get’s busy and dinner time is just around the corner and I still have no clue what to make. Nothing’s thawed out, no plans, just a prayer for my sanity and a hungry family wondering when they’re going to get a hot meal.
Which is pretty much when I thanked the gifted kitchen goddess that originally came up with this easy one pot chicken bacon couscous recipe.
Thanks to my (usually) well stocked fridge and pantry, it comes in clutch and with a little bit of minimal prep and a single pot, it’s ready to serve in just 30 minutes.
If you thought pasta was quick cooking and a great go-to option on busy nights, let me introduce you to couscous- which is completely cooked in just about 5 minutes flat.
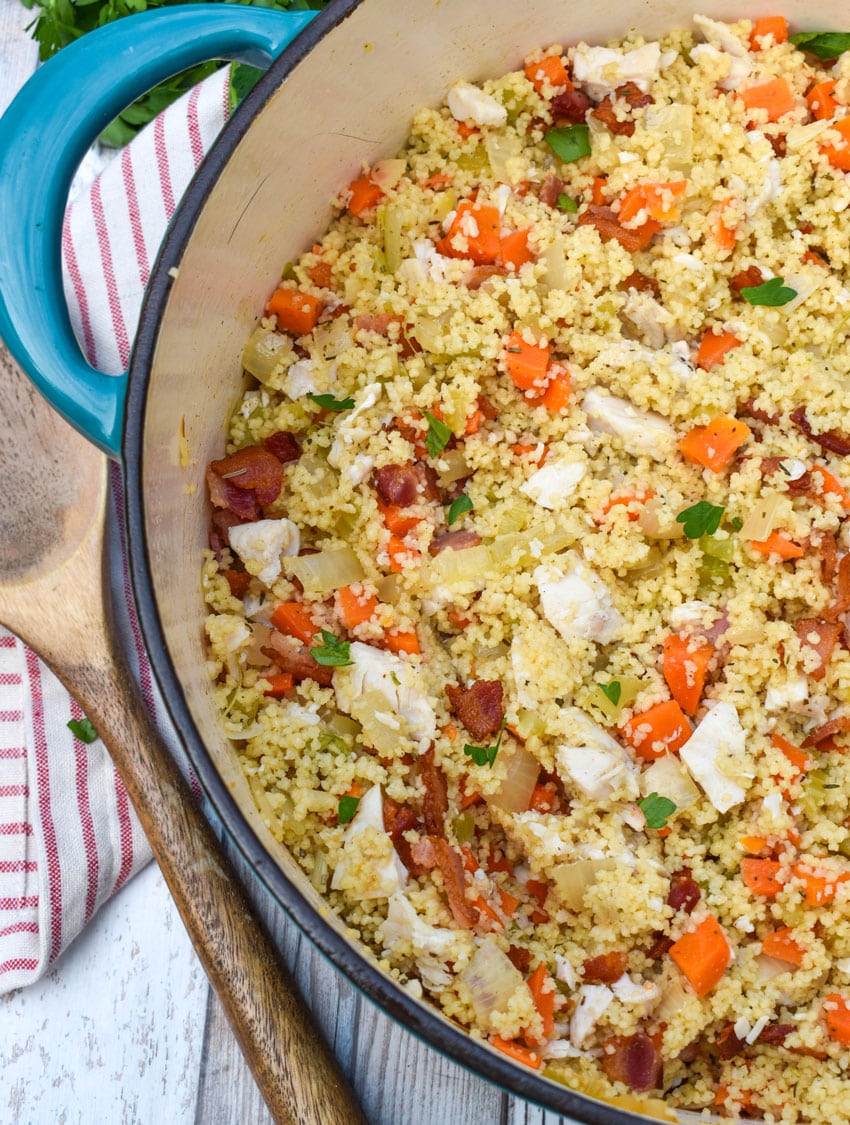
What Is Couscous?
What exactly is couscous though? You might be surprised to learn that it’s derived from the same main ingredient as traditional pasta- semolina durum wheat. In it’s native Africa, it isn’t formed into different shapes, but into tiny balls.
It was actually a genius way to use all of the wheat and waste nothing. The hard bits that didn’t want to be ground up into flour were sprinkled with water and rolled to form small pellets. Those were then dusted with flour to keep them separate, and any that didn’t take were sieved out and the process repeated.
Thankfully, with the spread of cultural foods world wide- I know what couscous is, and can also grab it off the shelf at my local grocer’s. We’re not talking about Israeli couscous today either. While pearl couscous is yummy, it’s more pasta like in substance.
Proper, traditional couscous should be light and fluffy when prepared, not gritty like my beloved Southern grits. Think of it a bit like rice, but smaller. And of course, much quicker to cook!
Now let’s dig into the main reason we’re here, this one pot chicken bacon couscous!

Ingredients Needed
Since this is a busy day dinner, it’s prep is simple and only calls for easy ingredients- most of which you probably have on hand already, and any others are easy to find in any modern grocery store.
To make it you’ll need:
- Bacon – Six strips of bacon, NOT thick cut
- Vegetables – A mixture of diced onion, carrots, and celery
- Garlic – Minced garlic- fresh is recommended, but the jarred kind words as a substitute
- Wine – White cooking wine; however, if this is an ingredient you’d prefer to skip, you can substitute a bit of extra chicken broth in it’s place.
- Couscous – Regular couscous, NOT Israeli/pearl couscous. These are very tiny balls, and can sometimes be found referred to as Moroccan couscous.
- Broth – Chicken broth; either your favorite storebought variety, or our homemade version.
- Chicken – Several cups of chopped rotisserie chicken
- Butter – I tend to keep salted butter on hand, but if sodium is a concern use unsalted butter
- Seasonings – A blend of Italian seasoning, salt, and pepper round out the flavor profile of this dish.
Once you’ve gathered all your ingredients you’re ready to begin throwing this 30 minute meal together!

How To Make
This chicken bacon couscous recipe comes together in a single pot, specifically a large Dutch oven or other heavy bottomed pot. For best results though, I do recommend using a Dutch oven.
Start by adding the bacon to the pot in a single layer, set over medium heat. This will ensure a real crisp with little effort, just make sure to flip the strips over halfway through their cooking.
Once the bacon’s cooked & crispy, transfer it to a waiting paper towel lined plate. Drain all but two tablespoons of the bacon grease from the pot.
Add the carrots, celery, and onion to the pot, stirring them around in the bacon drippings until evenly coated, then saute until they’re softened & tender.
I advise adding a pinch of salt to the veggies as they cook. It helps them ‘sweat’ out the moisture and soften quicker without them becoming mushy. At this point, the salt is optional though.
Add the minced garlic, stirring to combine, then letting it cook for roughly 30 seconds. We want it to infuse the dish, but not burn or turn bitter- which can happen all too easily with fresh garlic.
A dash of white wine is poured into the dish to deglaze it. Make sure to scrape up any browned bits from the bottom as you stir it in. Those are golden flavor nuggets you don’t want to leave behind!
Add both the broth and the couscous, stirring to combine. Bring the mixture to a boil, then immediately reduce the heat so it’s gently simmering. Cover and cook for 4-5 minutes.
Stir the couscous to ‘fluff’ it, just like you would with rice. It’s done cooking if the mixture’s airy and has completely absorbed the liquid. Remove the pot from heat.
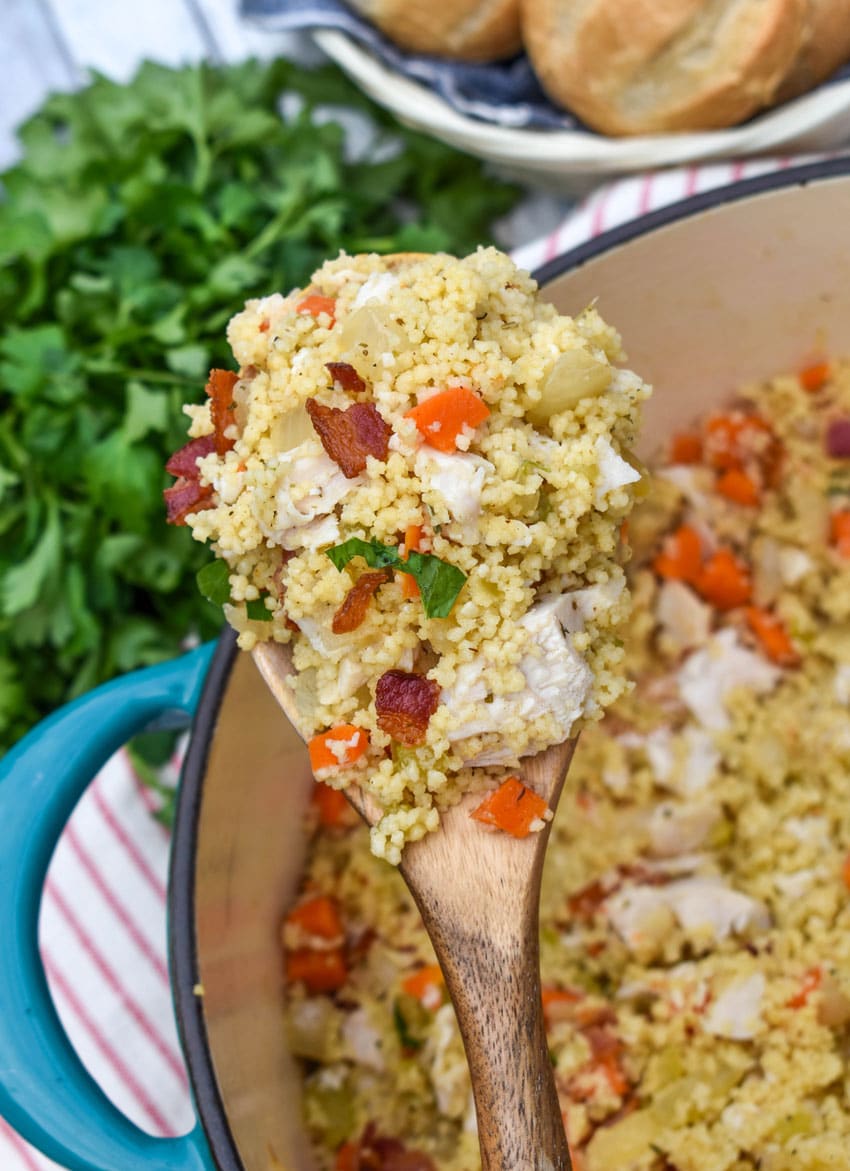
Chop the bacon and add it, along with the remaining ingredients, to the pot. Stir everything together until evenly combined.
Salt & pepper the dish, to taste, then serve warm and enjoy!
Storing
Leftover chicken bacon couscous can be stored in an airtight container in the refrigerator for up to 3 days.

Tips & Tricks
- Be careful to use regular couscous and not the Israeli/pearl variety, which is larger and cooks differently. The two can’t be used interchangeably, and using the pearl kind will result in a mess.
- Use regular bacon, not thick cut bacon.
- For best results, use a Dutch oven to make this recipe. Since everything cooks in one pot, it enables you to get through all the different cooking stages properly. You can use another heavy bottomed pot, but it will be the most accurate in the proper pot.
- Drain off most of the bacon grease from the pot, but leave roughly two tablespoons. In an otherwise completely lean dish, it lends a great element of flavor. Couscous is pretty bland all by itself, so we’re trying to dress it up nicely.
- I love using leftover rotisserie chicken in this dish because it’s so convenient, but you could also use leftover grilled chicken.

Other One Pot Chicken Recipes
You can’t beat a one pot meal that’s quick, easy, and full of flavor. Whether you’ve got it all together and had a delicious dinner preplanned, or you’re just winging it at the last minute, this chicken bacon couscous is a hearty meal that’s going to save the day and become a new family favorite!
Looking for other easy one pot chicken recipes to enjoy?
Try these:
- One Pot Cajun Chicken Alfredo
- Creamy Chicken & Vegetable Pasta
- One Pot Cheesy Chicken, Broccoli & Rice
- One Pot Balsamic Chicken & Veggies
- One Pot Chicken & Vegetable Lo Mein
- One Pot Chicken Marsala Pasta
- One Pot Mexican Chicken & Rice
If you’ve tried this ONE POT CHICKEN BACON COUSCOUS, or any other recipe on my site, let me know in the comment section how it turned out, we love hearing from our readers! You can also follow along with me on PINTEREST, FACEBOOK, and INSTAGRAM to see more amazing recipes and whatever else we’ve got going on!

Chicken Bacon Couscous (One Pot Recipe)
Ingredients
- 6 strips bacon
- 1 large white onion peeled & diced
- 1 1/2 cups chopped carrots
- 2-3 stalks celery diced
- 2 tbsp minced garlic
- 2 tbsp white cooking wine
- 1 1/2 cups couscous (not Israeli/pearl)
- 2 cups chicken broth
- 3-4 cups chopped rotisserie chicken
- 2 tbsp butter softened
- 1/2 tsp Italian seasoning
- salt & pepper to taste
Instructions
- Add the bacon to a large dutch oven, set over medium heat, in a single layer. Cook until crispy, making sure to flip the strips half way through. Transfer the bacon to a paper towel lined plate to drain. Drain most of the bacon grease from the pot, leaving two tablespoons in it.6 strips bacon
- Return the dutch oven to the stove top, again over medium heat. Stir in the diced veggies with a pinch of salt to help them 'sweat' as they tenderize. Stir them occasionally, and cook until softened.1 large white onion, 1 1/2 cups chopped carrots, 2-3 stalks celery
- Stir in the garlic, cooking for an extra 30 seconds. Stir in the wine, deglazing the pan and scraping up any browned bits as you go.2 tbsp minced garlic, 2 tbsp white cooking wine
- Add the chicken broth and couscous, stirring to combine. Bring the pot to a boil, then reduce the heat to a simmer, cover, and cook for 4-5 minutes- until the couscous is fully cooked and has absorbed all of the liquid.1 1/2 cups couscous , 2 cups chicken broth
- Roughly chop the bacon, and add it to the pot along with the chicken, butter, & Italian seasoning. Stir everything to evenly combine and fluff the couscous.3-4 cups chopped rotisserie chicken, 2 tbsp butter, 1/2 tsp Italian seasoning
- Season with salt & pepper, to taste, serve warm, and enjoy!salt & pepper
Notes
- Be careful to use regular couscous and not the Israeli/pearl variety, which is larger and cooks differently. The two can't be used interchangeably, and using the pearl kind will result in a mess.
- Use regular bacon, not thick cut bacon.
- For best results, use a Dutch oven to make this recipe. Since everything cooks in one pot, it enables you to get through all the different cooking stages properly. You can use another heavy bottomed pot, but it will be the most accurate in the proper pot.
- Drain off most of the bacon grease from the pot, but leave roughly two tablespoons. In an otherwise completely lean dish, it lends a great element of flavor. Couscous is pretty bland all by itself, so we're trying to dress it up nicely.
- I love using leftover rotisserie chicken in this dish because it's so convenient, but you could also use leftover grilled chicken.
Nutrition
recipe adapted from Show Me The Yummy
]]>
Doritos crusted chicken tenders are a fun, snackable appetizer or dinner main that the whole family will love. This finger food kisses traditional breadcrumbs goodbye in favor of nacho cheese Dorito crumbs for crunch and flavor.

When I bought a few Costco sized bags of Doritos, I knew I had to do more with those cheesy chips than serve them to my kids and turn them into orange dusted warriors.
And these Doritos crusted chicken tenders will have everyone licking their plates instead of their fingers.
Turning the best chip into a coating for buttermilk marinaded chicken makes for some seriously yummy chicken tenders.

I wasn’t the only one who thought so.
They became an instant family favorite with baked in nacho cheese flavor and crisp crunch (without the cheese dust fingers!).
Make them once for dinner, a snack, or lunch and you just know everyone will be begging for them time and time again!

Ingredients
To make these you’ll need:
- Chicken breasts– Boneless, skinless chicken breasts. Trim the excess fat off and cut them into thin tenders. You could also save yourself this step and use chicken breast tenderloin instead.
- Doritos– A large bag of the Nacho Cheese Doritos.
- Buttermilk– To marinate the chicken.
- Flour– For dredging the chicken in. Use all purpose.
- Cayenne pepper– Optional for a hint of a kick.
- Eggs– Beaten.

How to Make
Doritos crusted chicken tenders are pretty easy to make.
Start by cutting each breast into 1/2″ thick strips.
Put the chicken strips into a medium-large tupperware container.
Pour the buttermilk evenly out over top and put the lid on the container.
Refrigerate it for at least 2 hours, flipping the chicken once or twice to make sure the chicken is evenly coated.
After 2 hours, open the Doritos bag and let the air out.
Hold the open end closed and roll a rolling pin lightly over the chips to coarsley break them.
Then put them into the bowl of a food processor and pulse them until they resemble panko style breadcrumbs.
Turn the chips out onto a large, flat plate.
Then combine the flour and cayenne pepper on a separate plate.
Beat the eggs in a separate bowl.
Set up your dredging station in order of use: chicken, flour, eggs, chips.

Use a fork to spear a chicken strip, letting the buttermilk drip off for a couple seconds to remove the excess.
Dredge the strip in the flour to coat it completely.
Shake off any excess flour before dipping the strip in the egg wash, letting any excess egg drip off.
Transfer the strip to the Dorito crumbs and press the crumbs in until the strip is completely coated.
Put the Doritos crusted chicken strip onto a baking sheet that’s been lightly coated with nonstick cooking spray.
Repeat this until all the strips are done.
Bake the tenders at 400° for 10 minutes.
After 10 minutes, flip the tenders with tongs.
Put them back in the oven and bake them for 5-10 more minutes or until the chicken is completely cooked through.
Serve and enjoy!

Storing Leftovers
Let any leftovers cool to room temperature.
Transfer them into an airtight container and refrigerate them for up to 4 days.
Reheat them in a hot oven until they are warm.
You could reheat them in the microwave but the oven gives you crispier results.

Tips and Tricks
- Don’t skip marinating the chicken tenders in the buttermilk. Buttermilk is acidic and will tenderize the chicken.
- Make sure you aren’t crushing the Doritos into powder. You want crumbs for the best texture.
- You could use your clean hands to dredge the chicken, but I don’t recommend this. Doing so tends to lead to the ingredients clumping on your fingers.
- Chicken tenders are safe to eat when the thickest part reaches 165°F. Use an instant-read thermometer to avoid overcooking them.
- You can switch up the flavors by changing Doritos. Try Cool Ranch, Thai Chili, or even Spicy Nacho for some variety.
- Serve them with your favorite dipping sauces. Ranch dressing, salsa, blue cheese dressing, barbecue, and honey mustard all work well.

Other Chicken Tender Recipes
Doritos crusted chicken tenders are a fun twist on classic chicken fingers that the whole family will love.
Make them and enjoy!
Looking for other chicken tender recipes?
Try these:
If you’ve tried these DORITOS CRUSTED CHICKEN TENDERS, or any other recipe on my site, let me know in the comment section how it turned out, we love hearing from our readers! You can also follow along with me on PINTEREST, FACEBOOK, and INSTAGRAM to see more amazing recipes and whatever else we’ve got going on!

Doritos Crusted Chicken Tenders
Ingredients
- 4 boneless, skinless chicken breasts can substitute chicken tenderloins
- 1 14.5 oz bag nacho cheese Doritos chips
- 2 cups buttermilk
- 2 cups flour
- 1 tsp cayenne pepper optional
- 4 eggs
Instructions
- Working with one breast at a time, cut it into thin strips, about 1/2" each, until you've finished with all four breasts.4 boneless, skinless chicken breasts
- Transfer the strips to a medium-large tupperware. Pour the buttermilk evenly out over top, and seal with it's lid. Let the chicken marinate at least two hours, flipping the container once or twice throughout, to ensure an even marinade.2 cups buttermilk
- Let the air out of the Doritos bag. Hold the end closed and roll lightly over the chips with a rolling pin once or twice.1 14.5 oz bag nacho cheese Doritos chips
- Transfer the broken chips to the bowl of a food processor. Lightly pulse until the chips have crumbled and resemble course panko-style crumbs. Turn the chips out onto a large, flat plate.
- Add the flour to a separate plate, and use a fork to gently stir in the cayenne pepper-- if using. Beat the eggs in a separate bowl until scrambled. Then line them up in order of use: chicken, flour, eggs, chips.2 cups flour, 1 tsp cayenne pepper, 4 eggs
- You can use your fingers, but I recommend a fork to keep the various things from getting clumpy and contaminated. Spear a chicken strip, and let it drip a second or two to remove any excess buttermilk. Dredge them in the flour to coat completely. Shake off any excess flour before dipping them in the egg wash. Again, let any excess drip off, and then transfer them to the plate of Doritos breading.
- Dredge until completely coated with Doritos crumbs. Remove the prepared chicken strip to a baking sheet that's been lightly coated with non-stick cooking spray. Repeat until all the strips are done.
- Bake the tenders at 400 degrees for 10 minutes. Remove from the oven, use tongs to turn the tenders, and return to the oven. Bake an additional 5-10 minutes, or until the chicken tenders are completely cooked through.
Notes
- Don't skip marinating the chicken tenders in the buttermilk. Buttermilk is acidic and will tenderize the chicken.
- Make sure you aren't crushing the Doritos into powder. You want crumbs for the best texture.
- You could use your clean hands to dredge the chicken, but I don't recommend this. Doing so tends to lead to the ingredients clumping on your fingers.
- Chicken tenders are safe to eat when the thickest part reaches 165°F. Use an instant-read thermometer to avoid overcooking them.
- You can switch up the flavors by changing Doritos. Try Cool Ranch, Thai Chili, or even Spicy Nacho for some variety.
- Serve them with your favorite dipping sauces. Ranch dressing, salsa, blue cheese dressing, barbecue, and honey mustard all work well.
Nutrition
recipe adapted from The Black Peppercorn
]]>
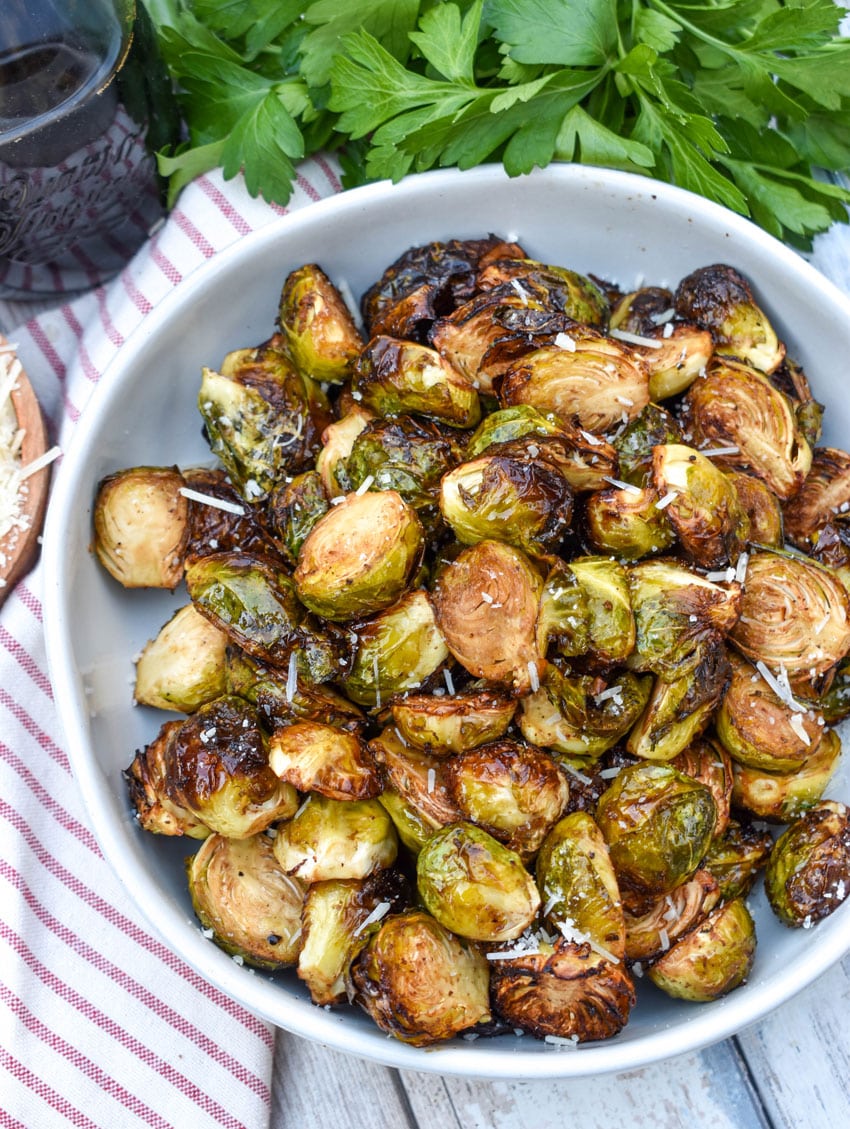
Air fryer balsamic roasted Brussels sprouts are full of tangy flavor from the balsamic vinegar and have addictingly crunchy edges. This easy vegetable side dish comes together quickly with just a handful of ingredients, making it perfect for everything from busy weeknight dinners to holiday meals.

Move over ho hum vegetable side dishes.
There’s a new superstar side dish on the table: balsamic roasted Brussels sprouts.
They crunchy on the outside but still soft on the inside and packed with that tangy balsamic flavor.
Even people who say they don’t like Brussels sprouts will love these.
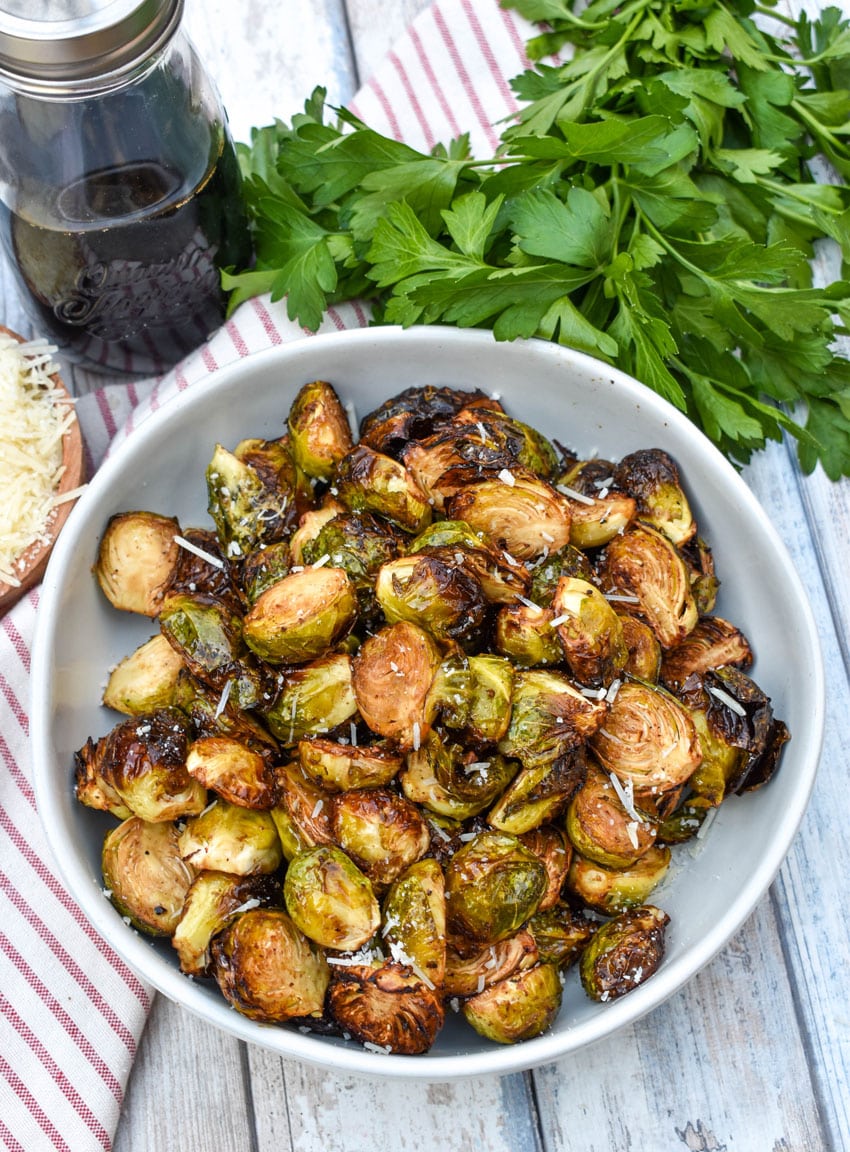
Roasting them mellows them out and brings out the natural sugars in the vegetable so they aren’t bitter at all.
And the edges are basically crispy, crunchy flavor bombs.
You can serve these Brussels sprouts alongside roasted chicken, pork chops, steak, or your favorite pasta, and they’re just as fitting for a holiday spread as they are for a quick weeknight meal.

Ingredients
To make these you’ll need:
- Brussels sprouts– Cut the ends off and cut them in half lengthwise.
- Olive oil– Extra virgin.
- Balsamic vinegar
- Spices– Salt, pepper, and garlic powder.
How to Make
Air fryer balsamic roasted Brussels sprouts are very easy to make!
Just add the cut and cleaned sprouts to a mixing bowl and drizzle the oil and vinegar out overtop.
Gently toss until all are evenly coated.
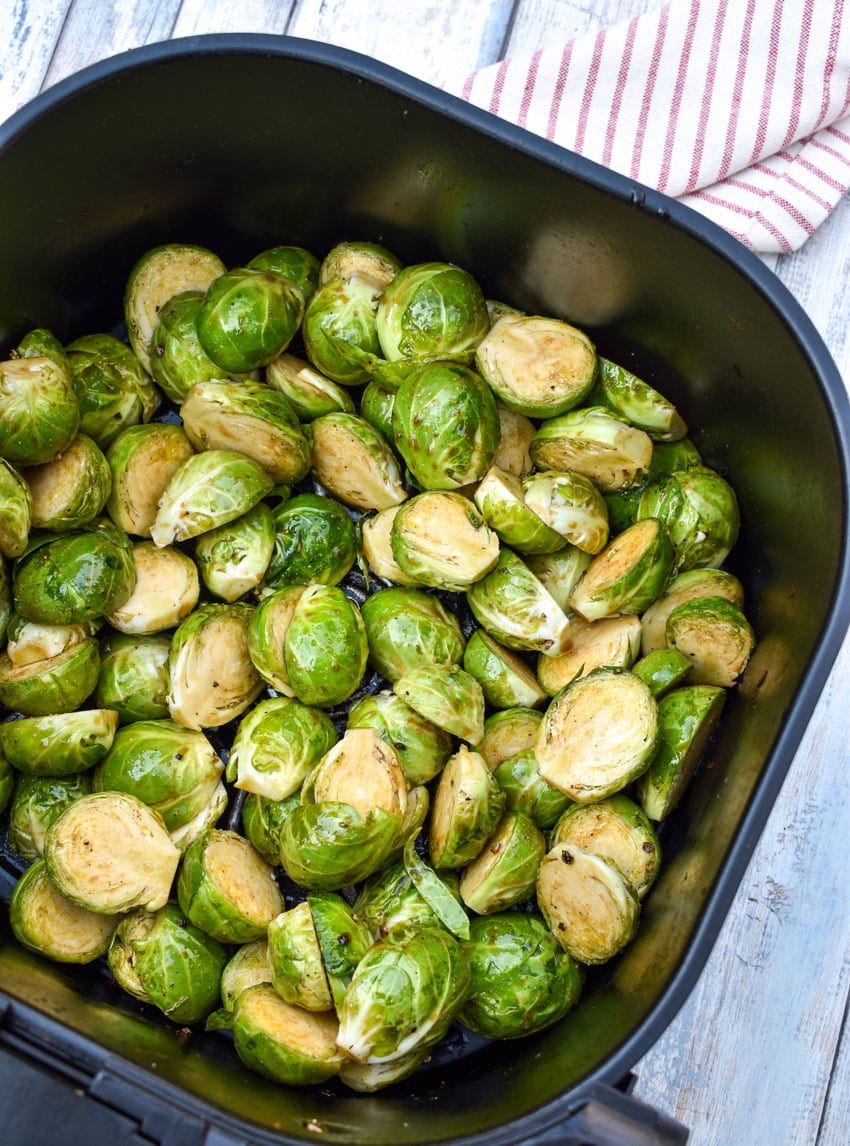
Sprinkle the seasonings over top and gently toss again to evenly distribute the spices.
Transfer the sprouts to the basket of an air fryer in an even layer.
Pour any extra marinade evenly out overtop of them.
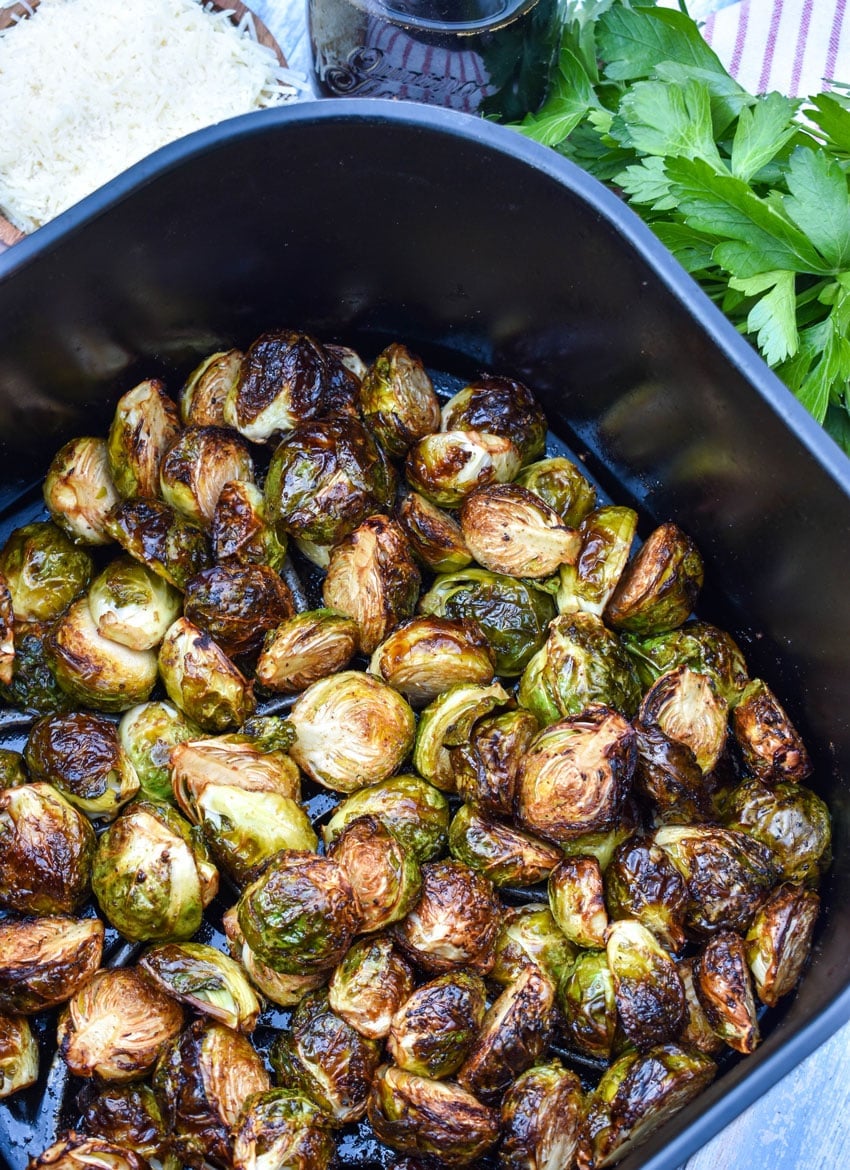
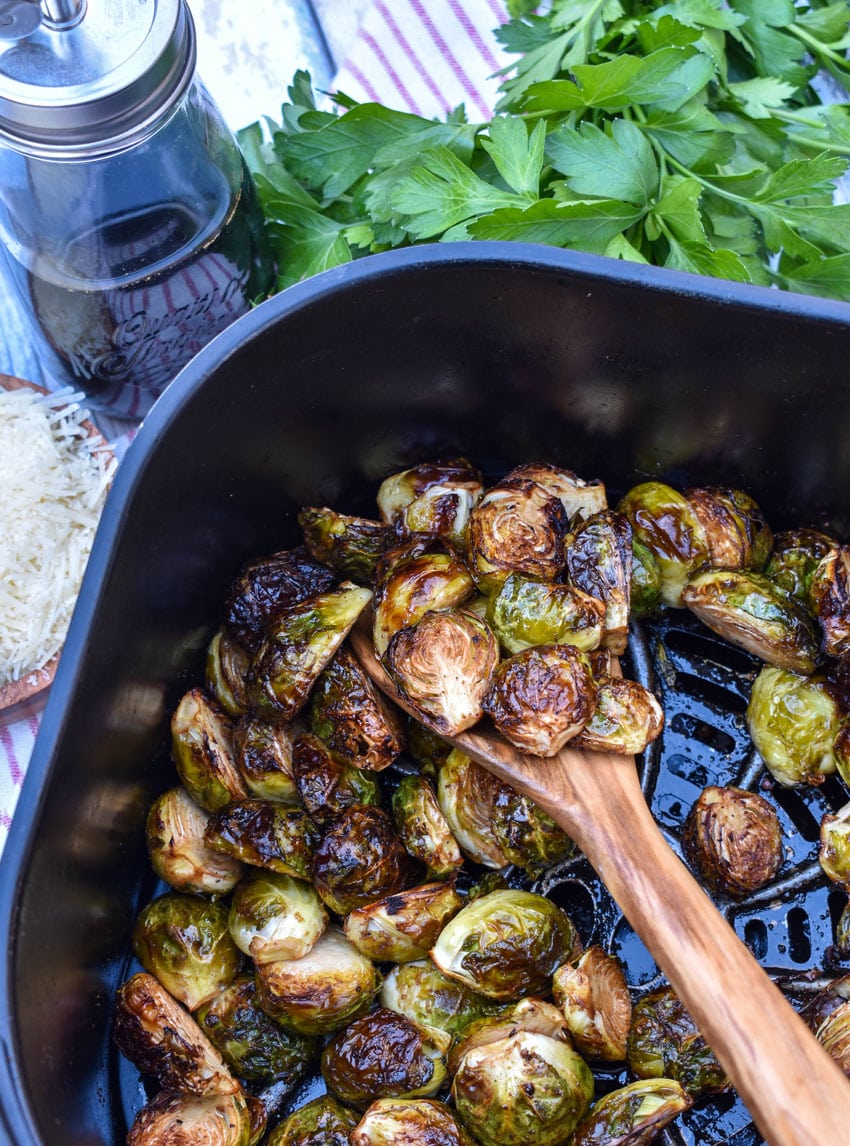
Air fry them at 360° for 15-20 minutes, shaking the basket half way through the cook time.
Serve warm and enjoy!
Storing Leftovers
Let the Brussels sprouts cool to room temperature and then transfer them to an airtight container.
Store them in the fridge for up to 4 days.
For the best texture, warm them in the air fryer or oven to help them crisp back up again.

Tips and Tricks
- For the best results, the sprouts need to cook in a single layer with a tiny bit of space in between them. Depending on the size of your air fryer, you may need to cook them in two batches to prevent overcrowding and uneven cooking.
- Don’t forget to shake the basket of the air fryer halfway through the cook time. This helps them cook evenly.
- For extra flavor, serve them with some Parmesan cheese on top.
Other Air Fryer Side Dish Recipes
Air fryer balsamic roasted Brussels sprouts are a delicious side for any meal from a quick weeknight dinner to a holiday celebration.
Make them and enjoy!
Looking for other air fryer side dish recipes?
Try these:
- Air Fryer Fried Red Tomatoes
- Crispy Air Fryer Potato Wedges
- Crispy Arancini Balls
- Air Fryer Hush Puppies

If you’ve tried these AIR FRYER BALSAMIC ROASTED BRUSSELS SPROUTS, or any other recipe on my site, let me know in the comment section how it turned out, we love hearing from our readers! You can also follow along with me on PINTEREST, FACEBOOK, and INSTAGRAM to see more amazing recipes and whatever else we’ve got going on!

Balsamic Roasted Brussels Sprouts (Air Fryer Recipe)
Ingredients
- 1 lb brussels sprouts ends trimmed & halved lengthwise
- 2 tbsp extra virgin olive oil
- 1 tbsp balsamic vinegar
- salt & pepper to taste
- 1/2 tsp garlic powder
Instructions
- Add the prepared sprouts to a mixing bowl, then drizzle the oil and vinegar out overtop. Gently toss until all are evenly coated.1 lb brussels sprouts, 2 tbsp extra virgin olive oil, 1 tbsp balsamic vinegar
- Sprinkle the seasonings over top, then gently toss again to evenly combine.salt & pepper, 1/2 tsp garlic powder
- Transfer the sprouts to the basket of an air fryer in an even layers. Pour any excess marinade evenly out overtop of them.
- Air fry them at 360° for 15-20 minutes, shaking the basket half way through.
- Serve warm and enjoy!
Notes
- For the best results, the sprouts need to cook in a single layer with a tiny bit of space in between them. Depending on the size of your air fryer, you may need to cook them in two batches to prevent overcrowding and uneven cooking.
- Don't forget to shake the basket of the air fryer halfway through the cook time. This helps them cook evenly.
- For extra flavor, serve them with some Parmesan cheese on top.
Nutrition
]]>
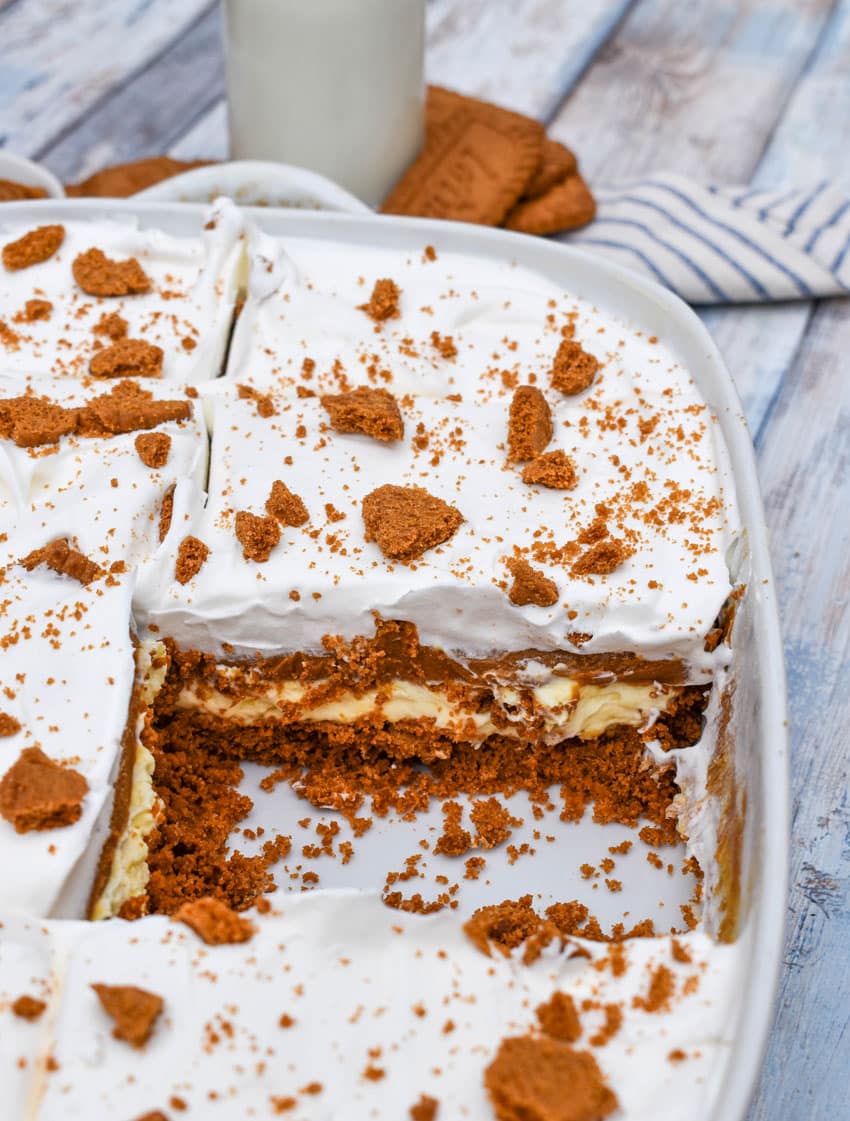
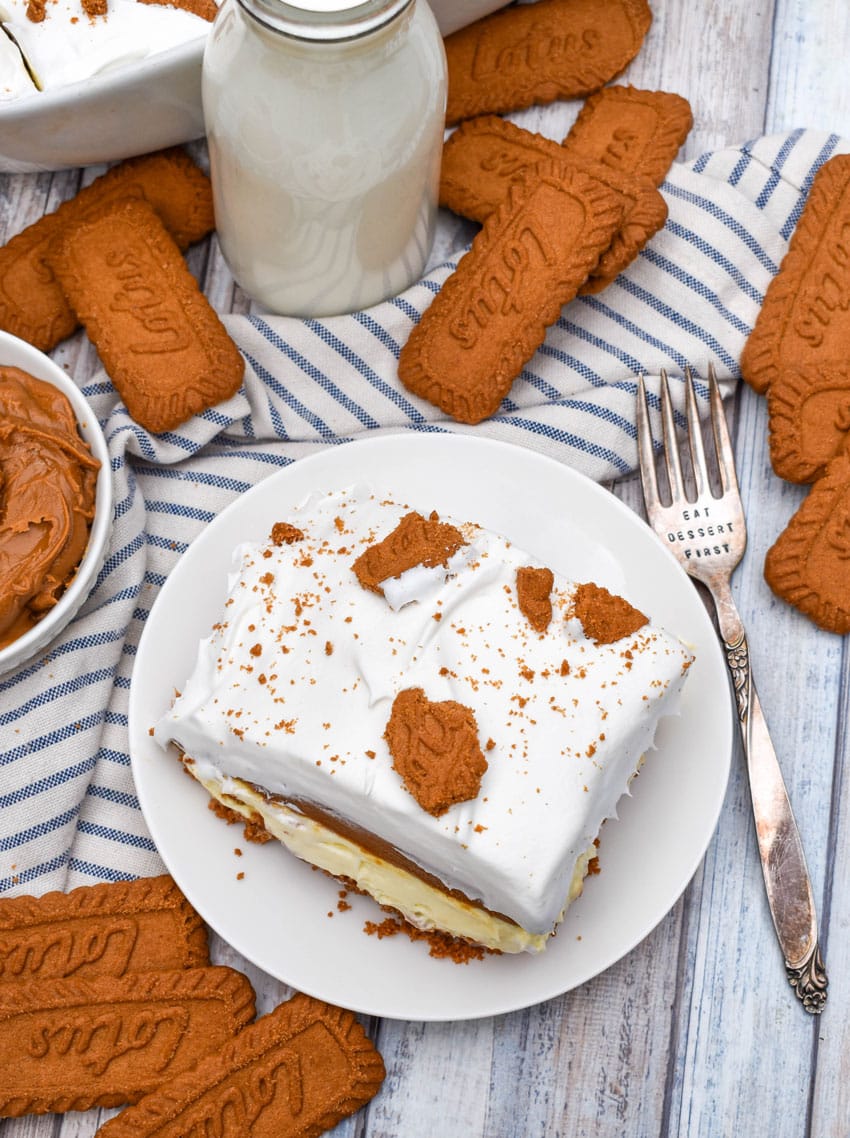
Cookie butter delight is a viral TikTok dessert with layers of crunchy Biscoff cookie crust, sweet cookie butter, and smooth filling. It’s easy to make ahead, doesn’t require turning on the oven, and is perfect for potlucks, family parties or any occasion when you want a sweet dessert without a lot of work.
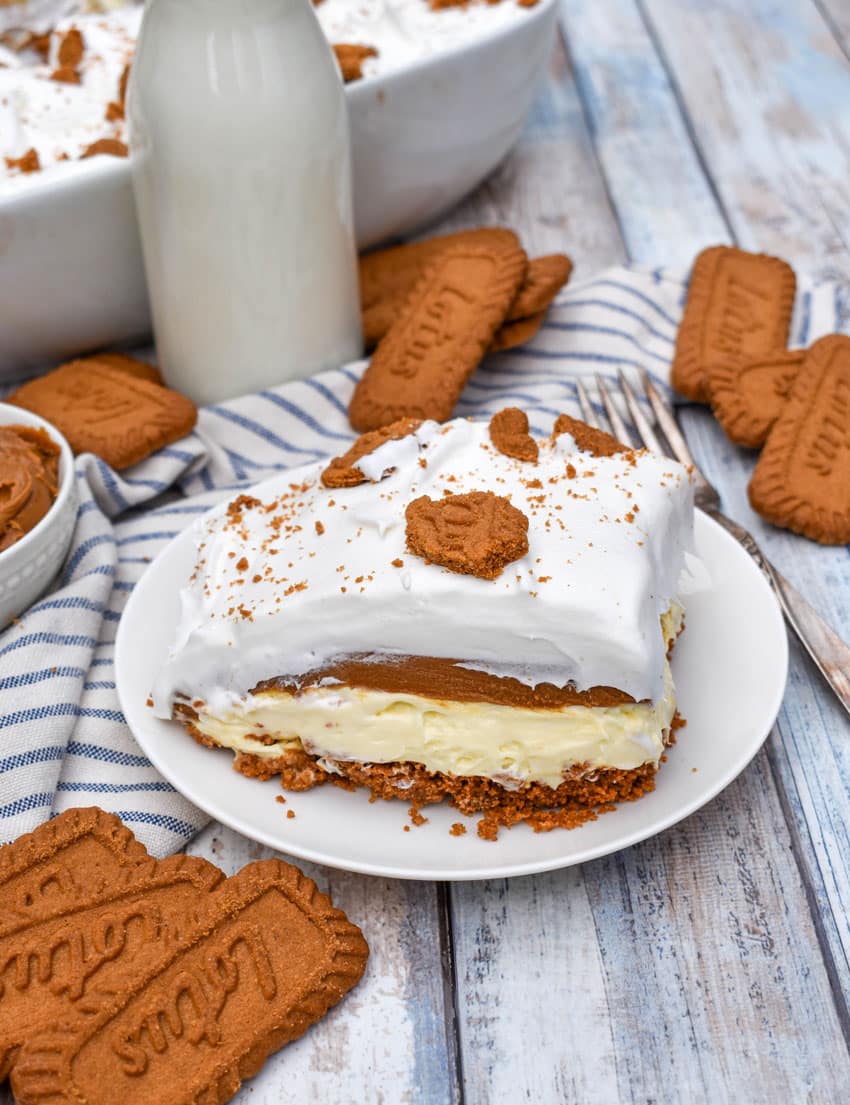
Have you hopped aboard the cookie butter train?
I am not only on it, but I may actually be the conductor.
Toot, toot!
Anyway, if you are on this train too, then you need to try this TikTok cookie butter delight.
TikTok really got it right when this recipe when viral,
The result is an easy, rich, creamy, layered dessert full of that warming cookie butter flavor,
Plus you don’t need to be an experienced baker to pull it together and it’s perfect for sharing at a big gathering!
Ingredients
To make this you’ll need:
- Butter– Melted.
- Biscoff cookies– 2 8 ounces packages.
- Cookie butter– 2 14 ounce jars.
- No bake cheesecake filling– You can often find this in the refrigerated section near the cream cheese.
- Whipped topping– The kind in the freezer section. Let it thaw.
How to Make
This cookie butter delight is so easy to make!
Just pulse 12 ounces of the cookies in the bowl of a food processor fitted with the blade attachments until they’re coarse crumbs.
Then pour the melted butter into the cookie crumbs and process everything until the mixture is evenly combined.
Press the cookie mixture evenly into a 9×13″ baking dish to form a crust.
Spread the cheesecake filling evenly out overtop of the crust.
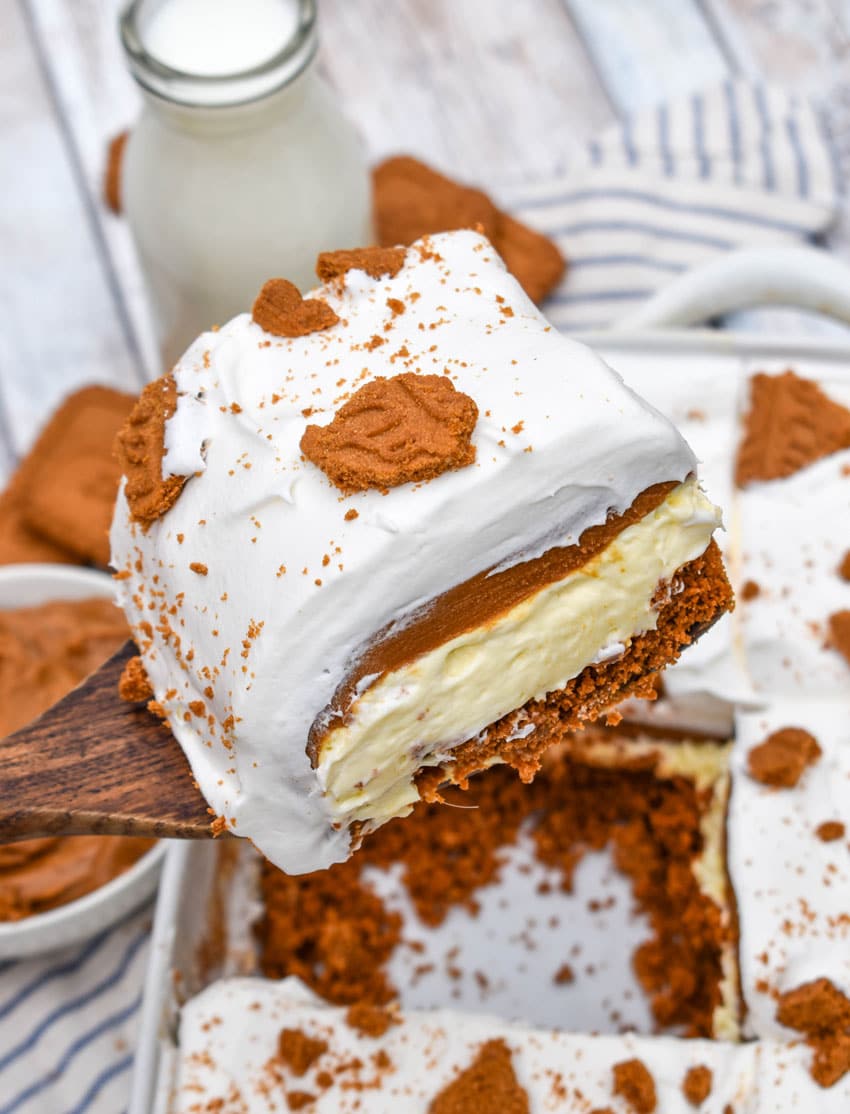
Microwave the cookie butter in a microwave safe bowl in 15-20 second intervals, stirring in between each, just until it’s a spreadable consistency.
Immediately pour the cookie butter over the cheesecake filling and spread it out into an even layer.
Chill the dish in the refrigerator for 20 minutes to firm up.
Spread the whipped topping evenly out overtop of the cookie butter layer.
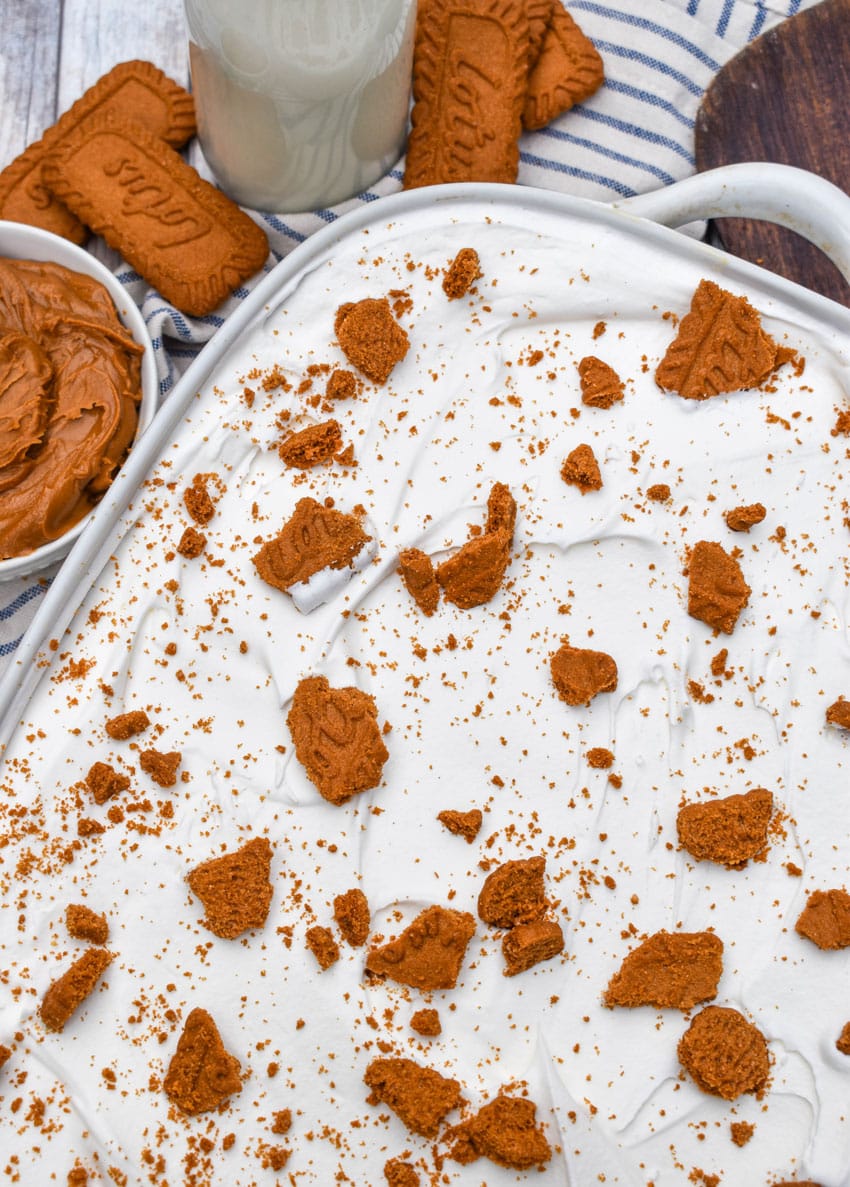
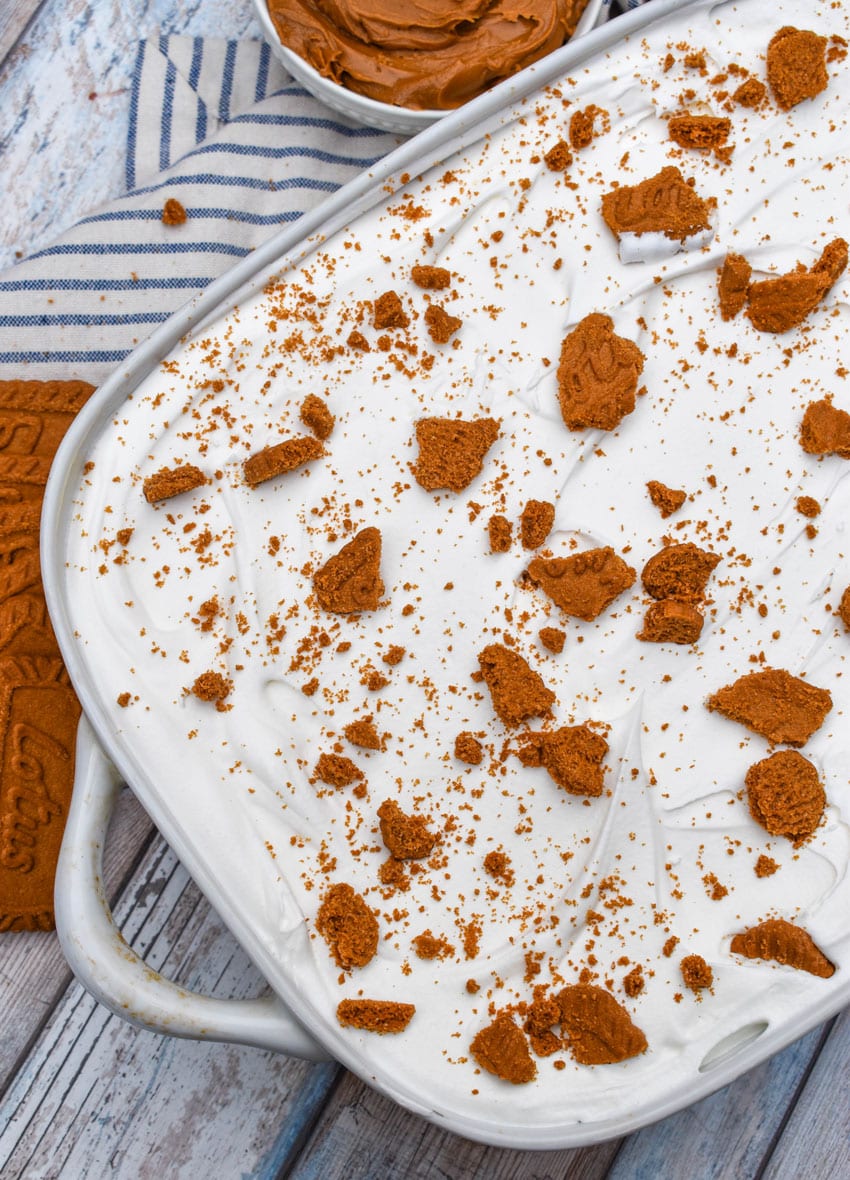
Lightly crush the remaining cookies and sprinkle them over the whipped cream layer.
Slice, scoop, serve, and enjoy!
Storing
Store leftover cookie butter delight covered tightly with plastic wrap or in an airtight container in the refrigerator for up to 4 days.

Tips and Tricks
- It really helps to let the cheesecake filling come to room temperature before spreading it over the crust.
- You can make this dessert a day ahead, which gives the layers plenty of time to chill and set before serving.
- I don’t recommend leaving it at room temperature for more than 2 hours since the creamy filling needs to stay refrigerated.

Other Cookie Butter Recipes
Cookie butter delight is a viral TikTok recipe that lives up to the hype- especially if you’re a cookie butter fan!
Make it and enjoy!
Looking for other cookie butter recipes?
Try these:
If you’ve tried this COOKIE BUTTER DELIGHT, or any other recipe on my site, let me know in the comment section how it turned out, we love hearing from our readers! You can also follow along with me on PINTEREST, FACEBOOK, and INSTAGRAM to see more amazing recipes and whatever else we’ve got going on!

Cookie Butter Delight (Viral TikTok Recipe)
Ingredients
- 1 stick butter melted
- 2 8 oz pkg Biscoff cookies
- 2 14 oz jars cookie butter
- 1 24 oz tub no bake cheesecake filling
- 1 8 oz tub whipped topping thawed
Instructions
- Add 12 ounces of cookies to the bowl of a food processor fitted with the blade attachments, then blend until they're coarse crumbs.2 8 oz pkg Biscoff cookies
- Add the melted butter to the cookie crumbs and process until evenly combined.1 stick butter
- Transfer the cookie mixture to a 9x13" baking dish and press it evenly out into the bottom of the dish to form a crust.
- Add the cheesecake filling to the dish and spread it evenly out overtop of the crust.1 24 oz tub no bake cheesecake filling
- Add the cookie butter to a microwave safe bowl & microwave in 15-20 second intervals, stirring in between each, just until it's a spreadable consistency.2 14 oz jars cookie butter
- Immediately pour the cookie butter over the cheesecake filling and spread out gently in an even layer. Chill the dish in the refrigerator for 20 minutes to firm up.
- Spread the whipped topping evenly out overtop of the cookie butter layer, then lightly crush the remaining cookies and sprinkle them out overtop of the dessert.1 8 oz tub whipped topping
- Slice, scoop, serve, and enjoy!
Notes
- It really helps to let the cheesecake filling come to room temperature before spreading it over the crust.
- You can make this dessert a day ahead, which gives the layers plenty of time to chill and set before serving.
- I don't recommend leaving it at room temperature for more than 2 hours since the creamy filling needs to stay refrigerated.
Nutrition
]]>
Copycat Chick Fil A chicken tortilla soup is a creamy, hearty soup packed with tender chicken, beans, corn, and flavorful seasonings. This easy homemade version brings the restaurant favorite to your own kitchen so you can skip the expensive drive thru trip!

When I get sick, I find myself hitting the drive thru or ordering in more than I should.
And Chick Fil A is one of my favorites to order from.
They have the nuggets and sandwiches the kids want and comforting hearty chicken tortilla soup, which is the perfect sick day meal.
This copycat Chick Fil A chicken tortilla soup tastes just as cozy and satisfying as the original version.

It’s loaded with tender chicken, hearty beans, sweet corn, and warm spices in a creamy, flavorful broth.
Making it at home means you can whip up a big pot for the whole family, adjust the seasonings to your liking, and have plenty of leftovers for easy lunches during the week.
Serve each bowl with crispy tortilla strips, a sprinkle of cheese, or your favorite toppings for an easy meal without hitting the drive thru.
Ingredients
To make this you’ll need:
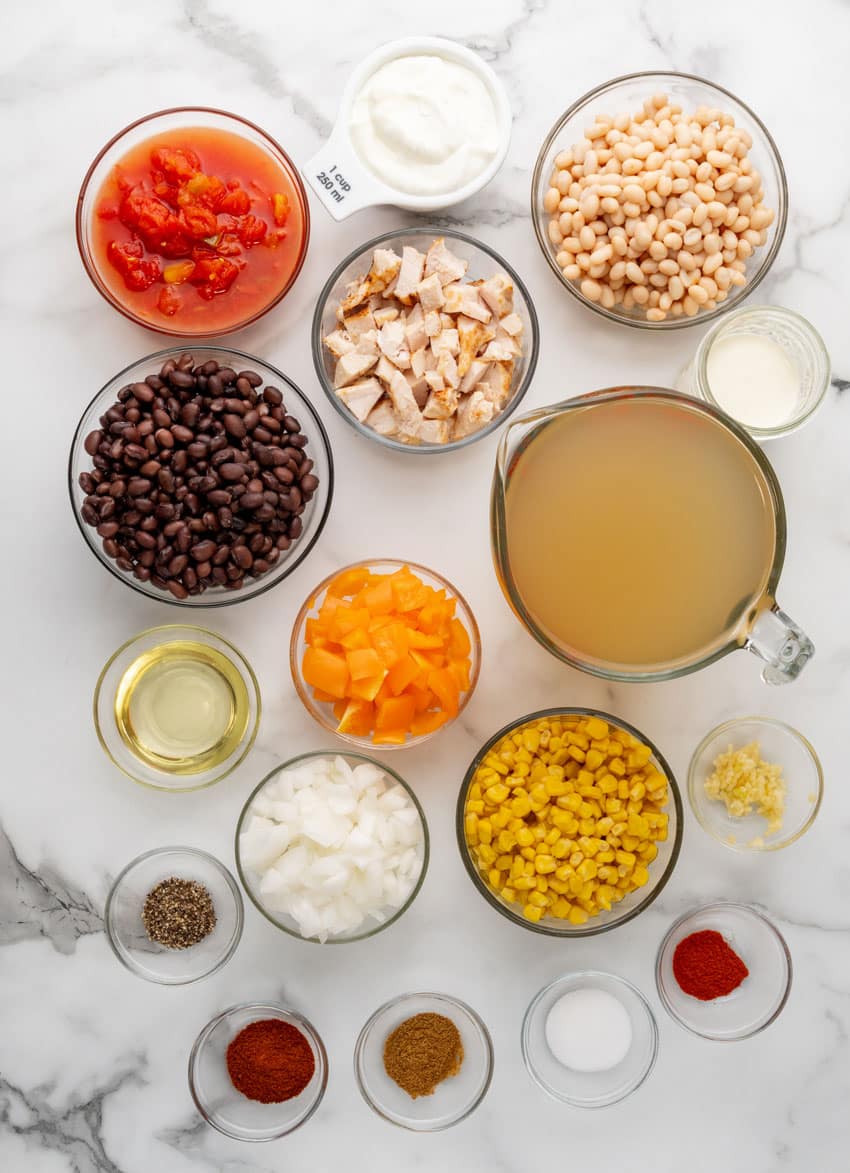
- Heavy cream– Don’t substitute a lower fat dairy product.
- Sour cream– Full fat is best.
- Navy beans– A drained can, divided.
- Oil– Vegetable. You could also use olive oil or canola oil.
- Fresh veggies– Diced sweet onion and diced bell pepper.
- Garlic– Minced.
- Spices– Chili powder, cumin, salt, smoked paprika, black pepper.
- Chicken stock– You could substitute chicken broth.
- Chicken– Chopped. Rotisserie or leftover grilled chicken works really well.
- Rotel – Canned diced tomatoes with green chiles, undrained.
- Black beans– A can of black beans, drained.
- Corn– Canned.
- Toppings– Sour cream, tortilla strips, lime, jalapeno, and/or cilantro.
How to Make
Copycat Chick Fil A chicken tortilla soup is very easy to make.
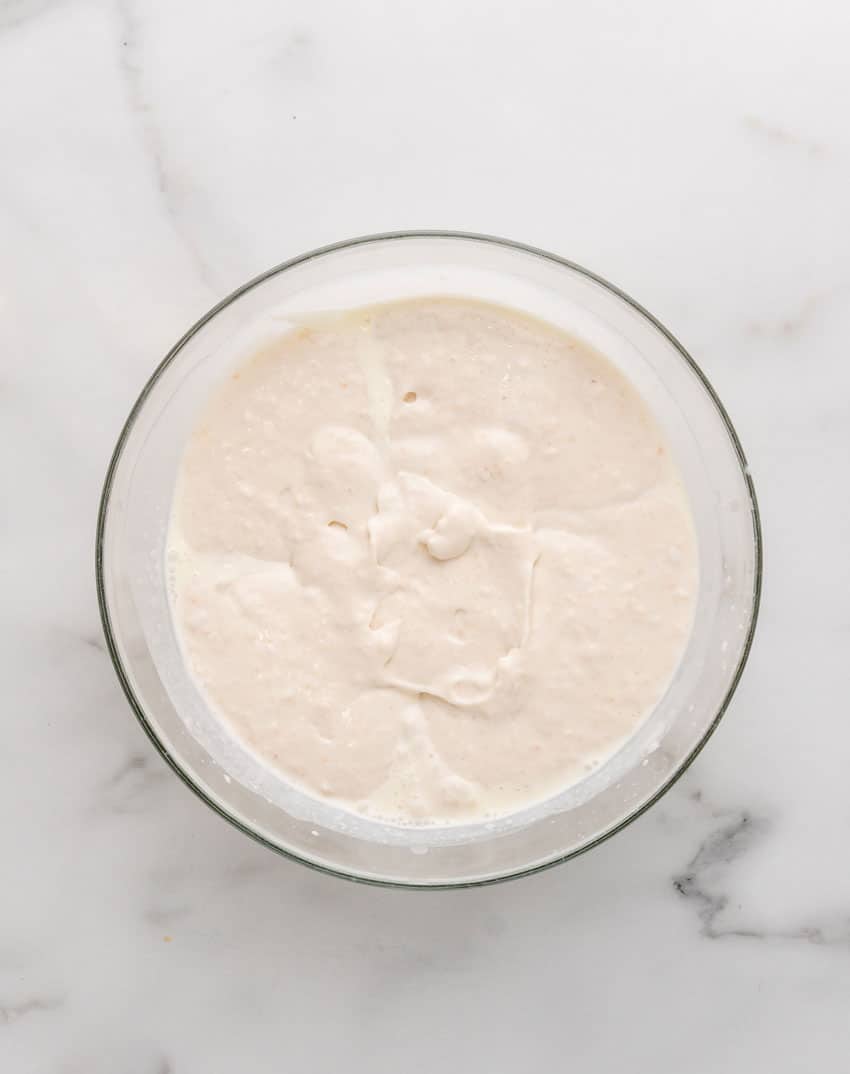
Start by blending the cream, sour cream and half the navy beans until smooth in a blender or food processor.
Set the mixture aside.
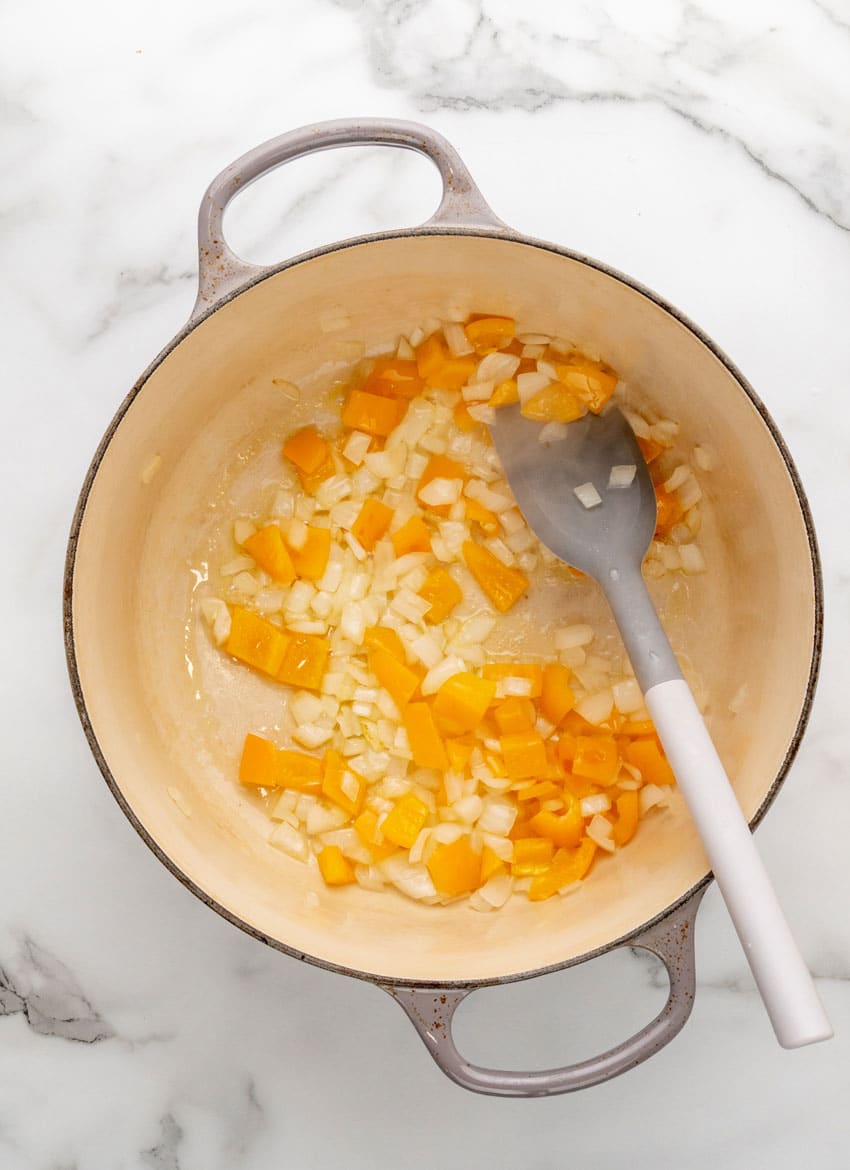
Then add the oil, onion and pepper to a large pot over medium heat.
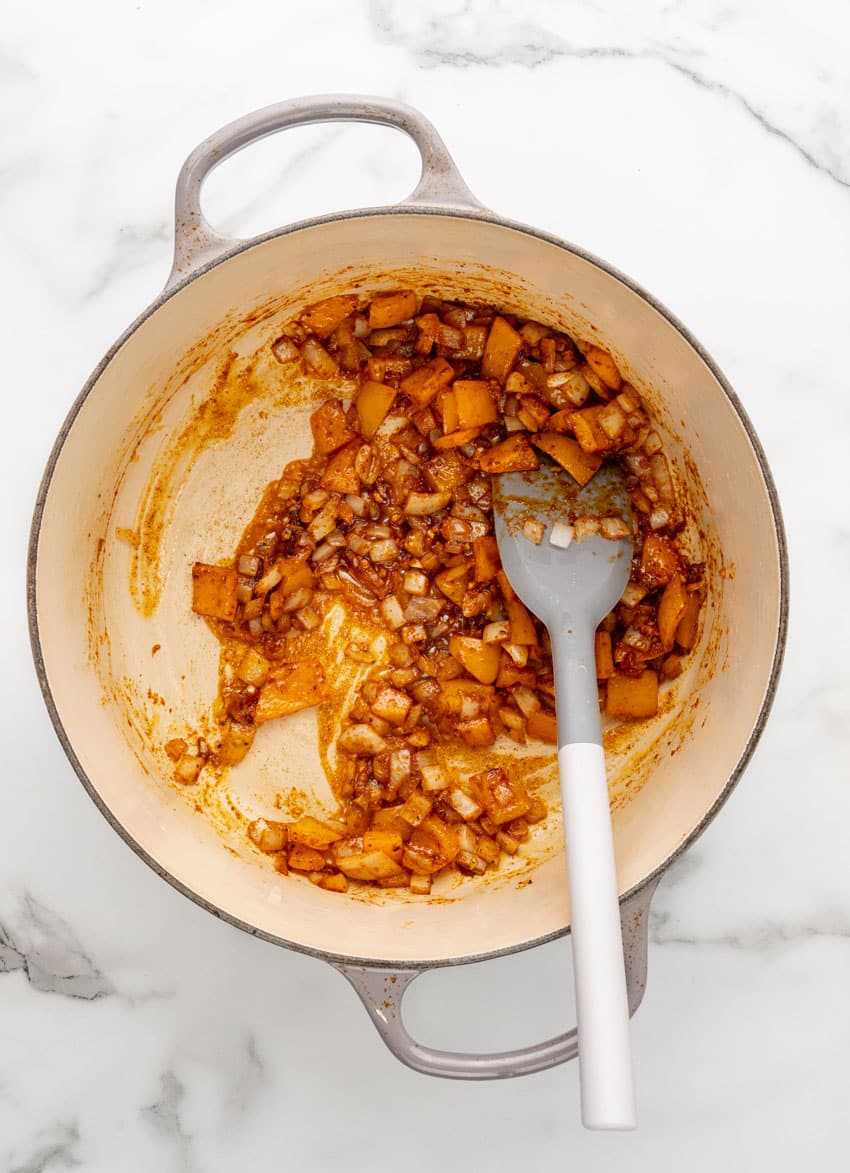
Let them cook until they start to soften, about 2-3 minutes.
Stir in the garlic, chili powder, cumin, salt, smoked paprika, and pepper and cook for an additional 1-2 minutes.
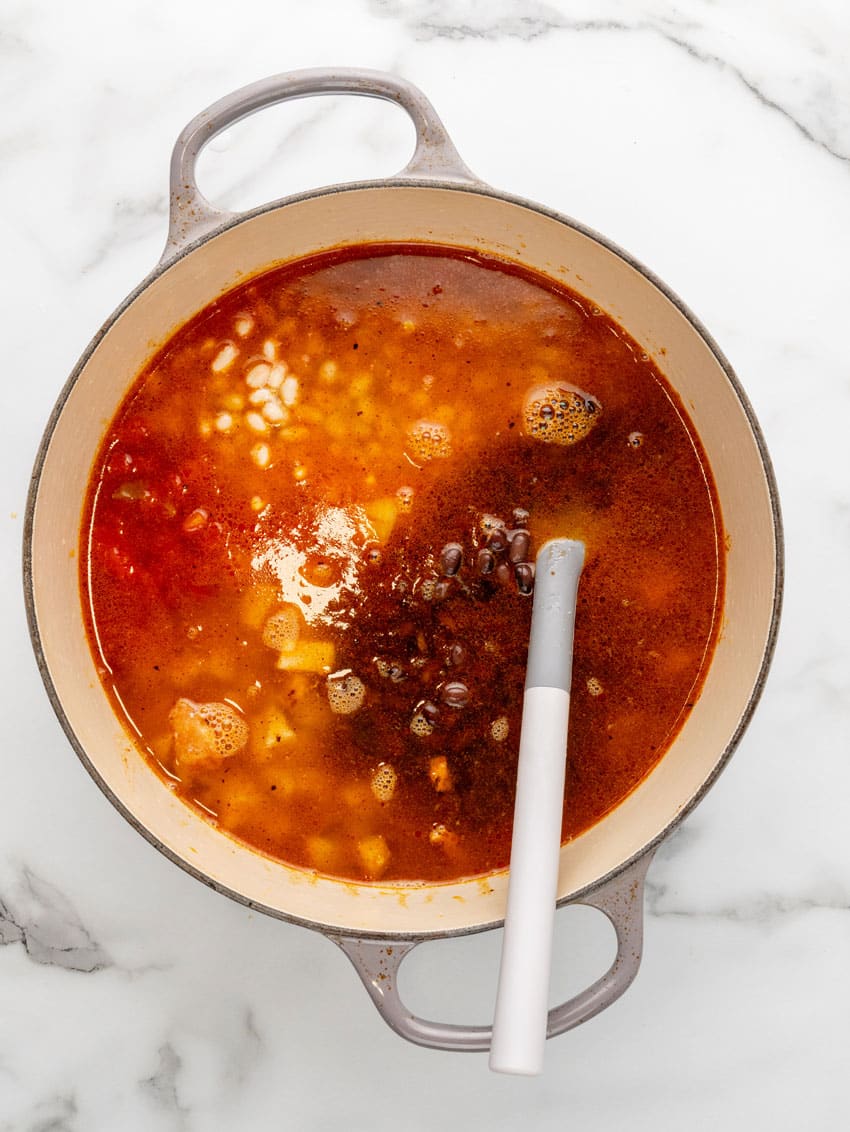
Add the chicken stock, chicken, rotel, black beans, and corn.
Give everything a good stir and bring the soup to a boil.

Once it boils, stir the heavy cream mixture into the pot.

Cook the soup for 10 more minutes or until the soup reaches the desired thickness.

Serve topped with sour cream, cilantro, limes, tortilla strips, and jalapeno if desired.
Enjoy!

Storing Leftovers
Store leftovers in an airtight container in the fridge for up to 4 days.
The leftovers will likely thicken in the fridge.
For the best consistency, reheat in a pot on the stove and thin out with a little chicken broth or stock if needed.

Tips and Tricks
- Go for rotisserie chicken or leftover grilled or roast chicken for this. It saves time.
- You can’t stir this soup too much! When in doubt, stir, especially when you are adding in the creamy base.
- Store any toppings like tortilla strips separately.
- Worried about sodium? Use low sodium broth or stock.
- Feel free to add a little more stock to thin the soup out if it gets too thick.

Other Copycat Chick Fil A Recipes
Copycat Chick Fil A chicken tortilla soup is an easy, tasty take on the fast food comfort food.
Make it and enjoy without hitting the drive thru!
Looking for other copycat Chick Fil A recipes?
Try these:
- Spicy Deluxe Sandwich
- Frosted Lemonade
- Chick Fil A’s Chicken Salad Recipe
- Chicken Cool Wraps
- Chick Fil A Chicken Nuggets
- Avocado Lime Dressing
- Chick Fil A Mac And Cheese
- Chicken Minis Recipe
- Creamy Peach Milkshake
- Original Chicken Sandwich Recipe

If you’ve tried this COPYCAT CHICK FIL A CHICKEN TORTILLA SOUP, or any other recipe on my site, let me know in the comment section how it turned out, we love hearing from our readers! You can also follow along with me on PINTEREST, FACEBOOK, and INSTAGRAM to see more amazing recipes and whatever else we’ve got going on!

Chick Fil A’s Chicken Tortilla Soup (Copycat Recipe)
Ingredients
- 1 cup heavy cream
- 1 cup sour cream
- 1 15 oz can navy beans divided
- 3 tablespoons vegetable oil
- 1 sweet onion peeled & diced
- 1 bell pepper seeded & diced
- 3 cloves garlic minced
- 2 teaspoons chili powder
- 1 teaspoon cumin
- 1 teaspoon salt
- ½ teaspoon smoked paprika
- ¼ teaspoon black pepper
- 5 cups chicken stock
- 2 cups chopped chicken
- 1 10 oz can diced tomatoes with green chiles
- 1 15 oz can black beans drained & rinsed
- 1 15 oz can corn kernels drained
- Sour cream tortilla strips, limes, jalapeno, cilantro for topping
Instructions
- Blend the cream, sour cream and half the navy beans until smooth, set aside.1 cup heavy cream, 1 cup sour cream, 1 15 oz can navy beans
- In a large pot over medium heat, add the oil, followed by the onion and peppers and cook until they start to soften, about 2-3 minutes.3 tablespoons vegetable oil, 1 sweet onion, 1 bell pepper
- Add the garlic, chili powder, cumin, salt, smoked paprika, and pepper and cook for an additional 1-2 minutes, stirring constantly.3 cloves garlic, 2 teaspoons chili powder, 1 teaspoon cumin, 1 teaspoon salt, ½ teaspoon smoked paprika, ¼ teaspoon black pepper
- Add the chicken stock, chicken, tomatoes, black beans, and corn and stir. Bring to a boil5 cups chicken stock, 2 cups chopped chicken, 1 10 oz can diced tomatoes with green chiles, 1 15 oz can black beans, 1 15 oz can corn kernels
- Add the heavy cream mixture to the pot and stir.
- Cook for 10 minutes, or until the soup reaches the desired thickness
- Serve topped with sour cream, cilantro, limes, tortilla strips, and jalapeno if desired.
Notes
- Go for rotisserie chicken or leftover grilled or roast chicken for this. It saves time.
- You can't stir this soup too much! When in doubt, stir, especially when you are adding in the creamy base.
- Store any toppings like tortilla strips separately.
- Worried about sodium? Use low sodium broth or stock.
- Feel free to add a little more stock to thin the soup out if it gets too thick.
]]>