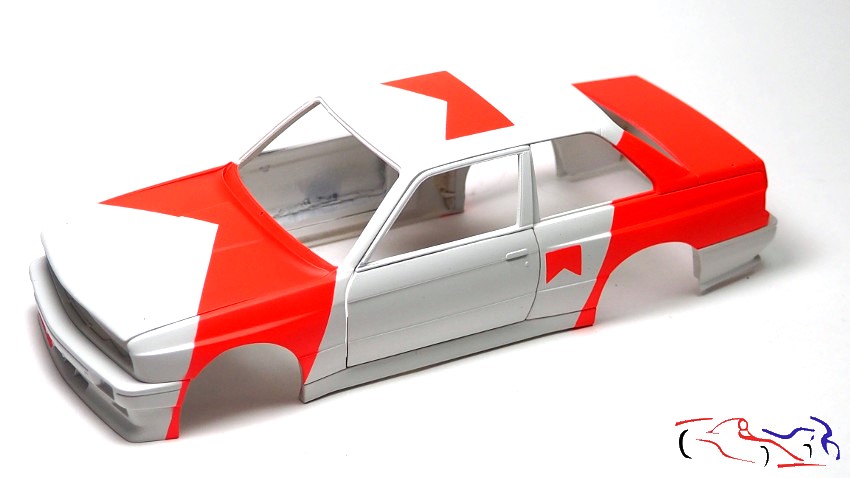
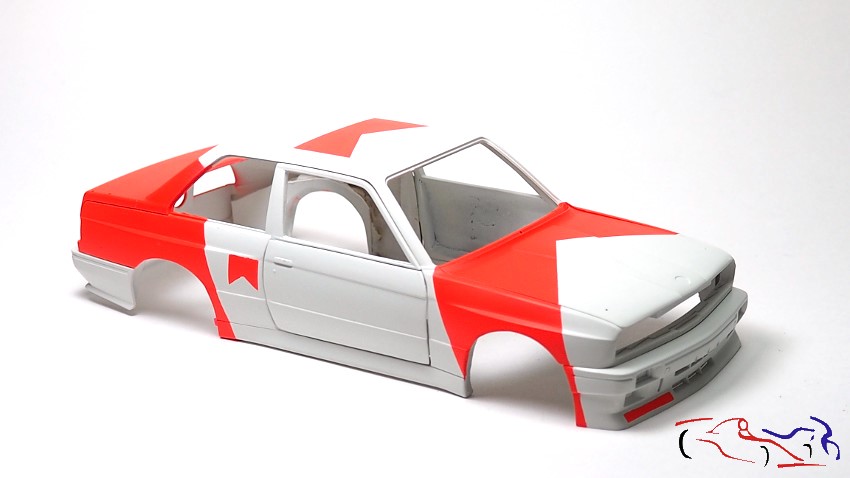
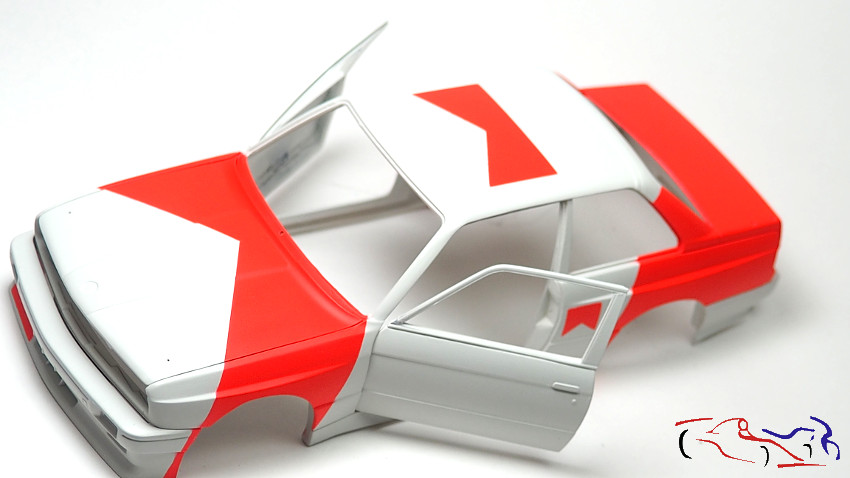
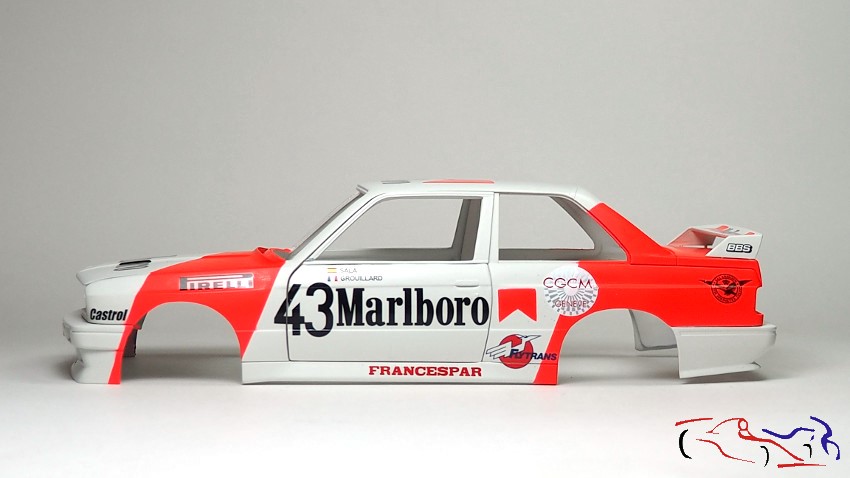
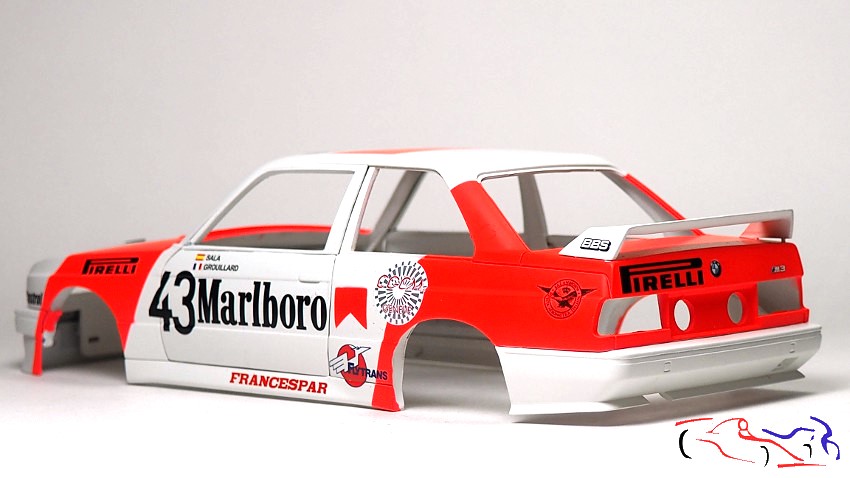
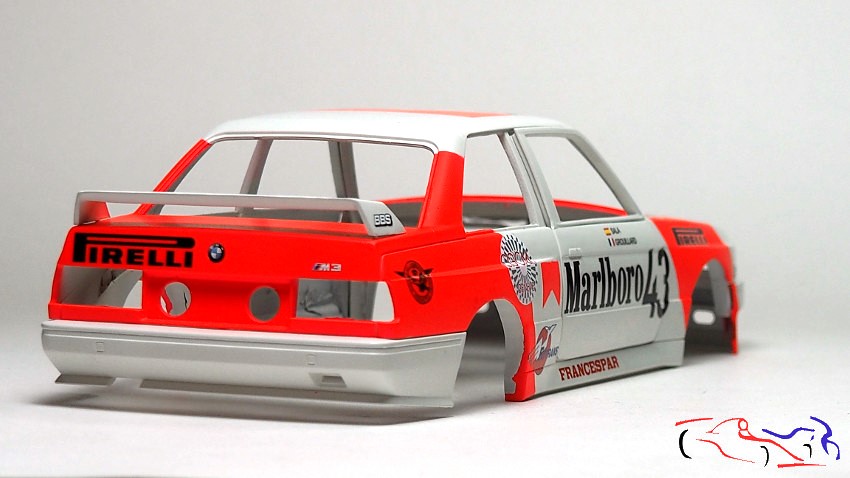
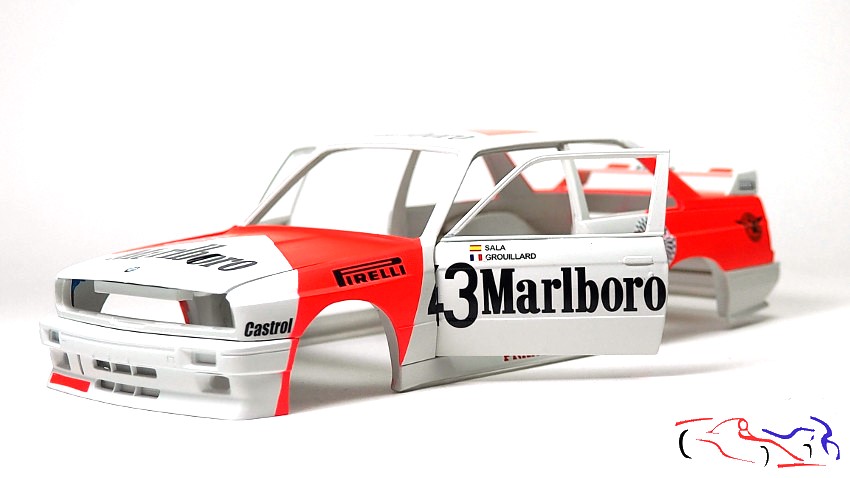
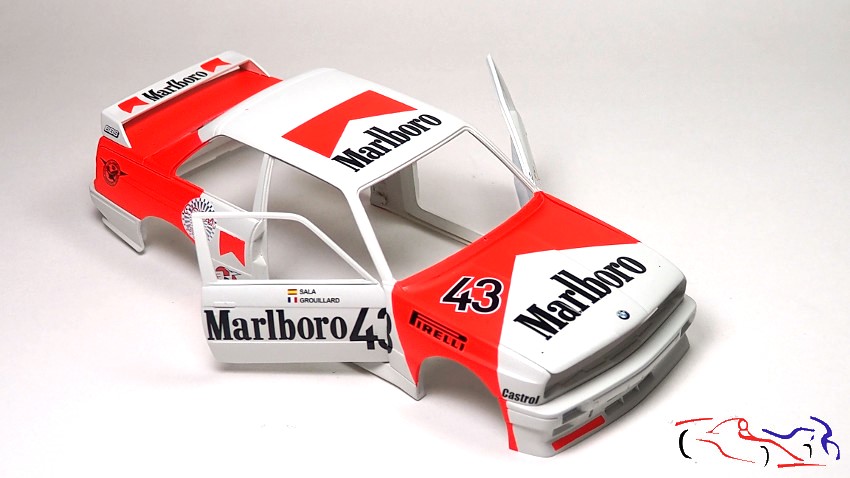
Y después, nos ponemos a colocar las calcas de Decalcas. Son fabricadas por Cartograph con lo que la calidad es superior: son muy delgadas, pero lo suficiente duras para que no se rompan. Además, no necesitan nigún líquido y solo con agua se colocan de maravilla
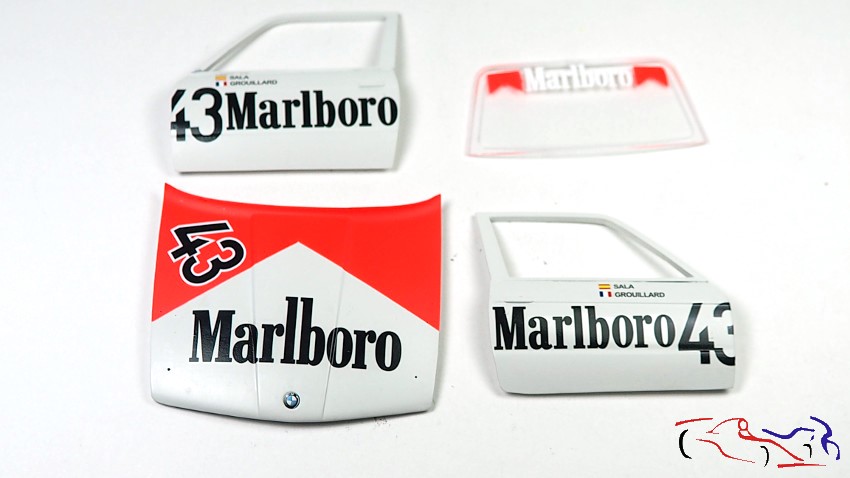
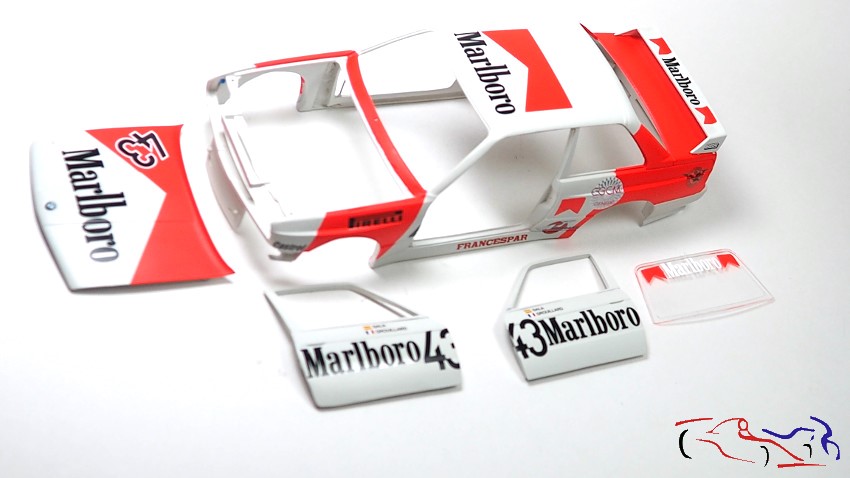
Si vemos la carrocería al completo, el resultado es simplemente fantástico: una decoración mítica del automovilismo de los años 80/90!! Desde cualquier vista, llama la atención!!
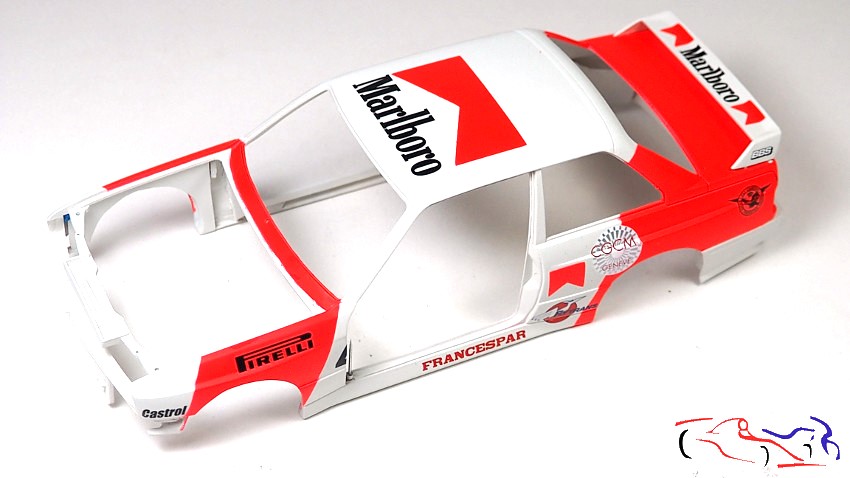
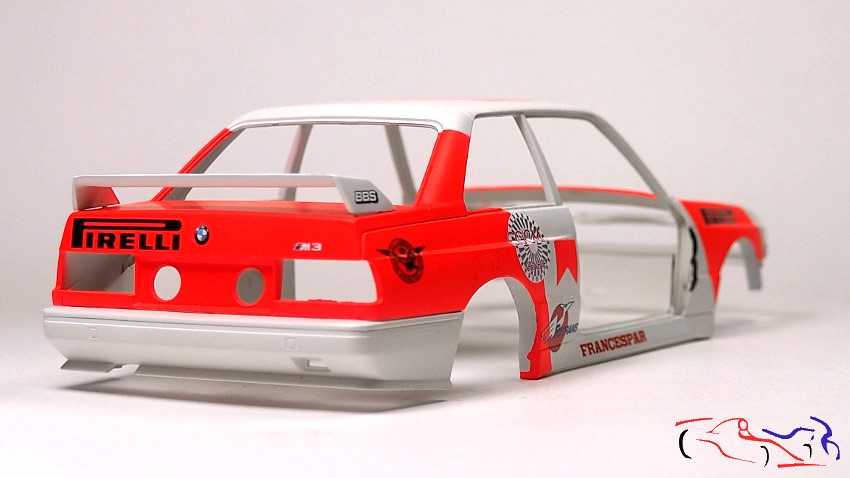
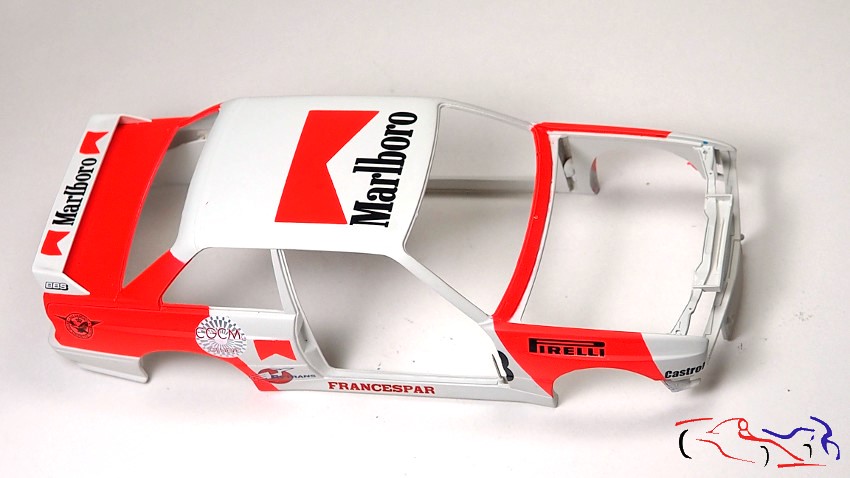
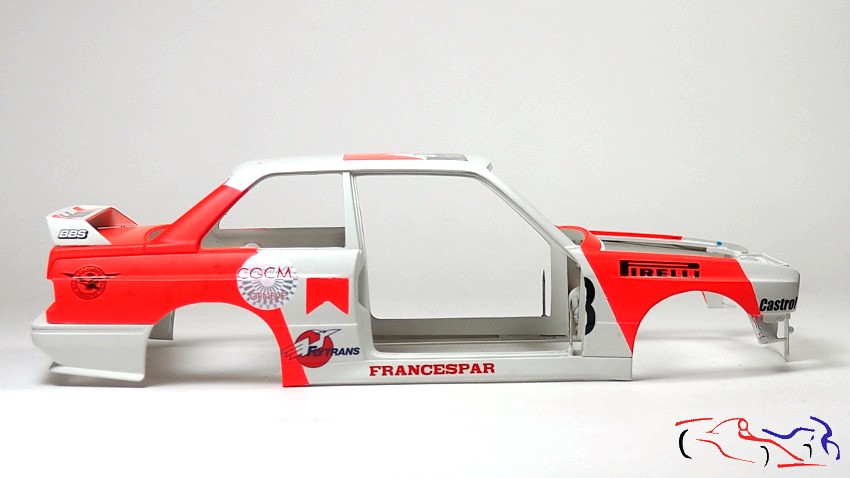
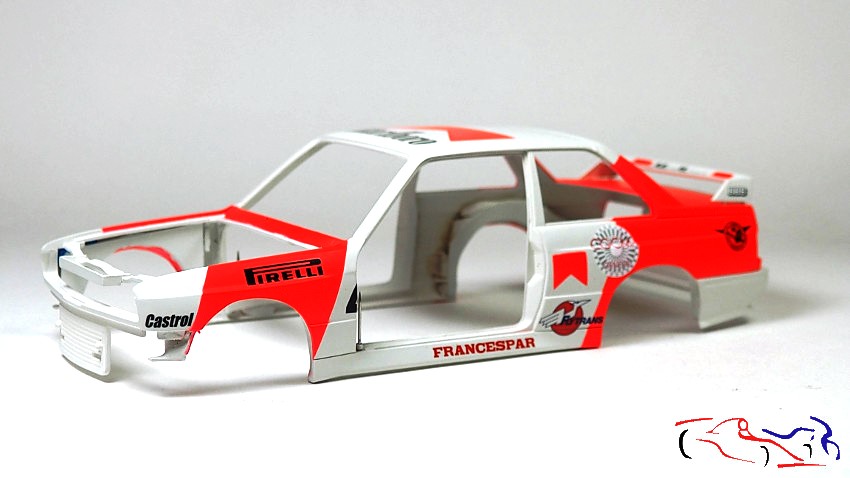
Si nos acercamos para ver los detalles, no se ve ninguna marca del soporte de las calcas. Hay que reconocer, que Decalcas ha realizado un fantástico trabajo en el diseño y en la búsqueda de todos los logos originales, que junto a las máscaras, hacen el conjunto un extra esencial para hacer este coche!!
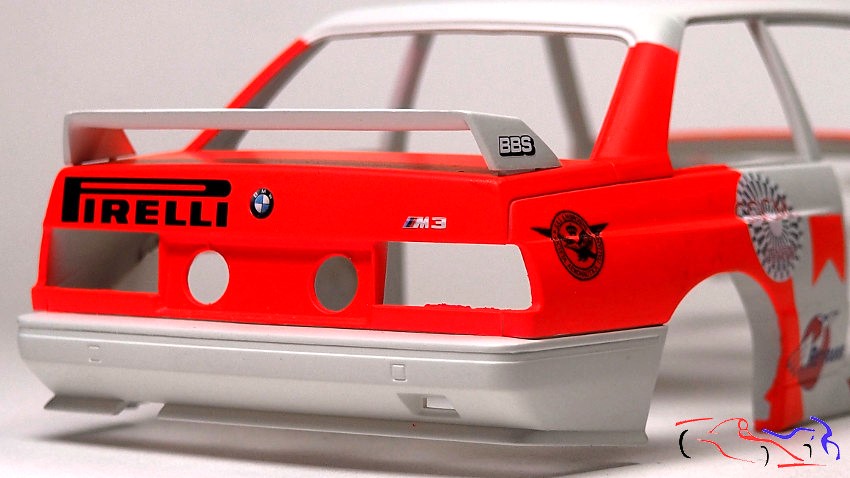
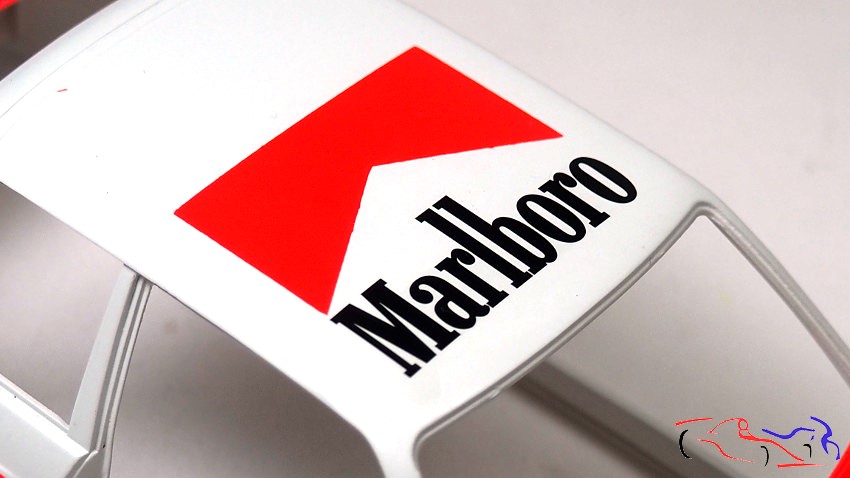
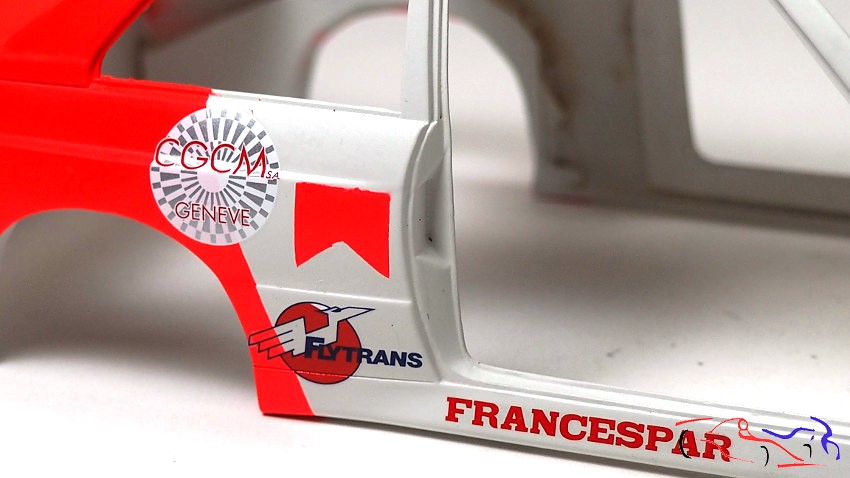
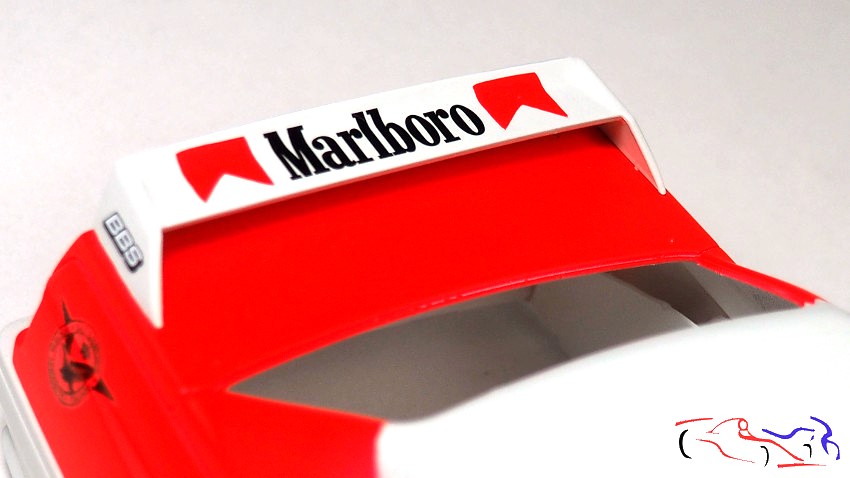
Y ahora, unas vistas del conjunto con las puertas, capó. faldon y alerón colocados!!
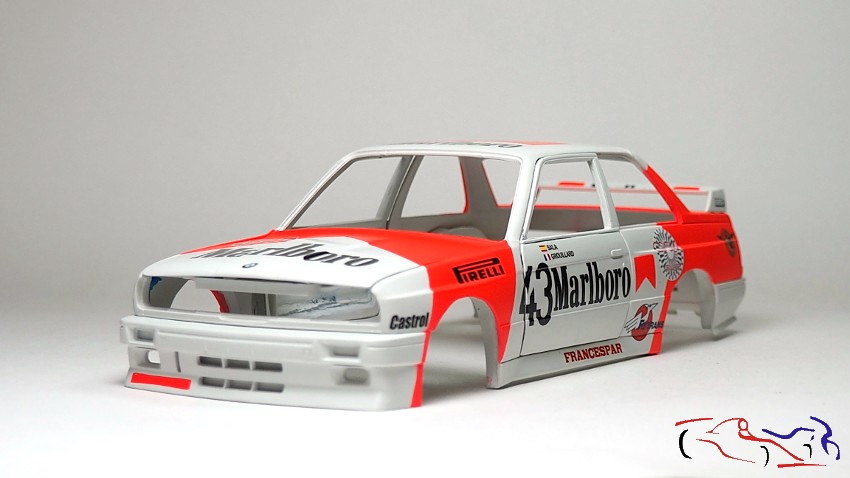
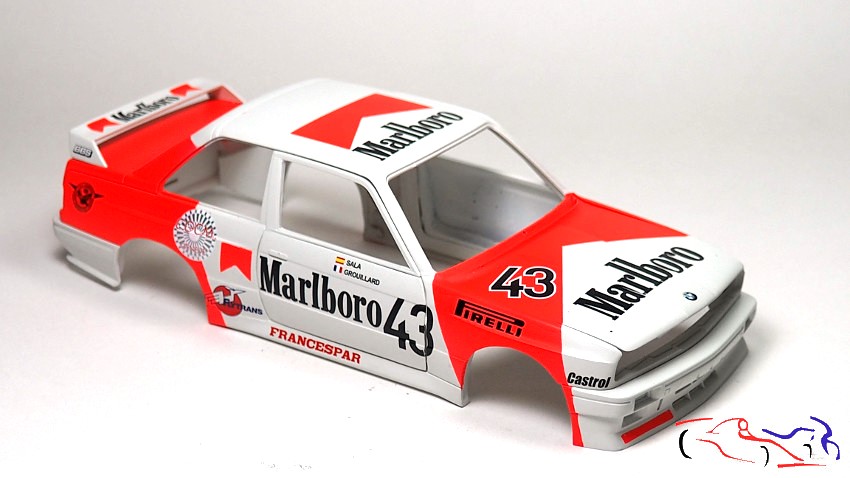
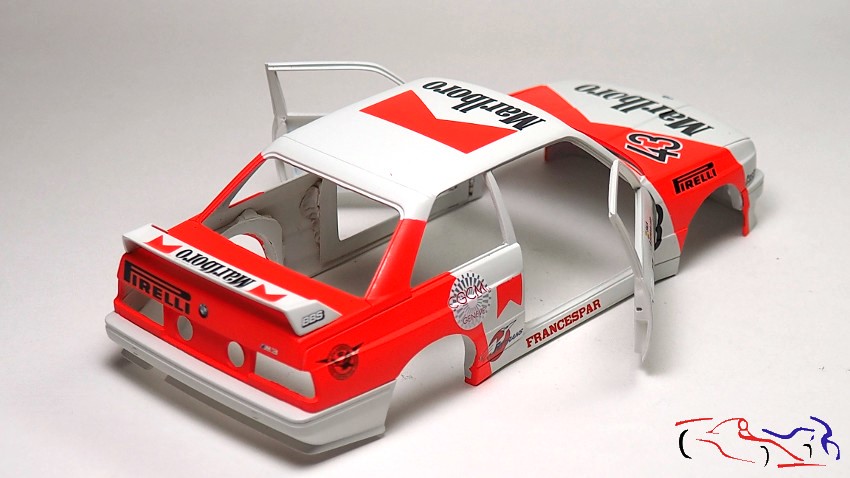
El siguiente paso será el lacado!! Gracias por ver y comentar!!
]]>
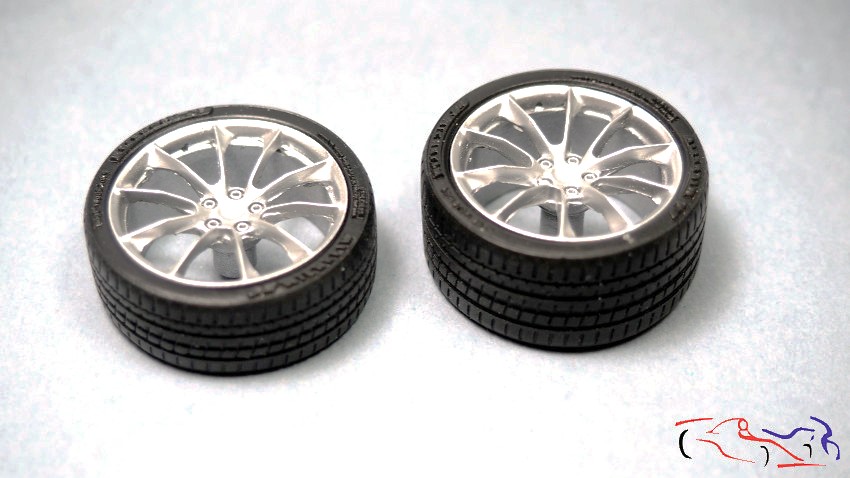
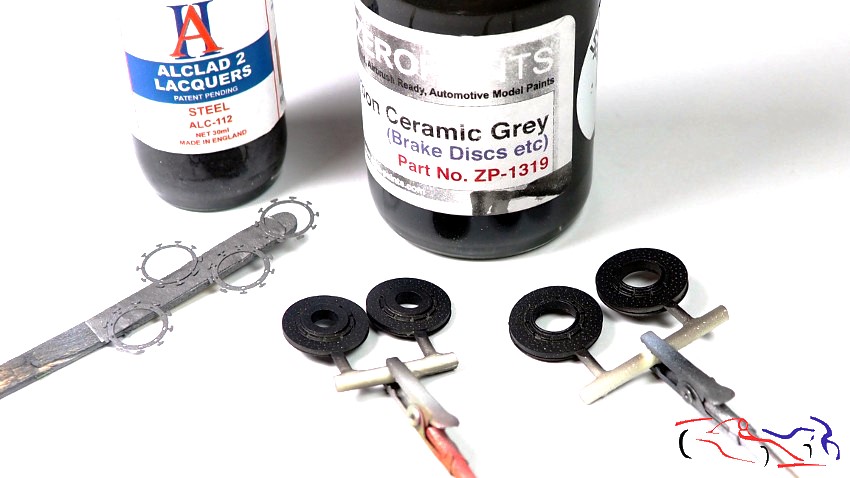
A su vez, también dejé pintadas las llantas con aluminio del rango Metal de Zero, siendo el siguiente paso, la pintura de los discos de freno con el gris Carbon Ceramic, y del fotograbado que se coloca en el centro de los discos, con el Steel de Alclad:
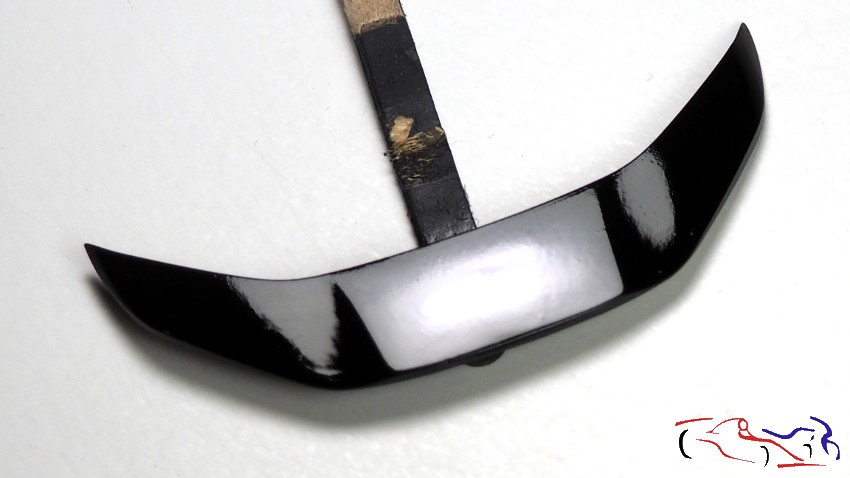
También pinté la pieza del capó delantero con el negro brillo de MIG:
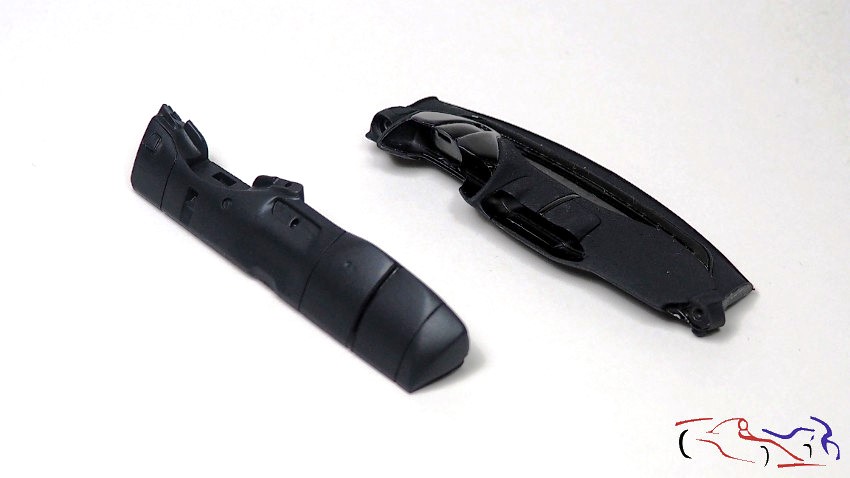
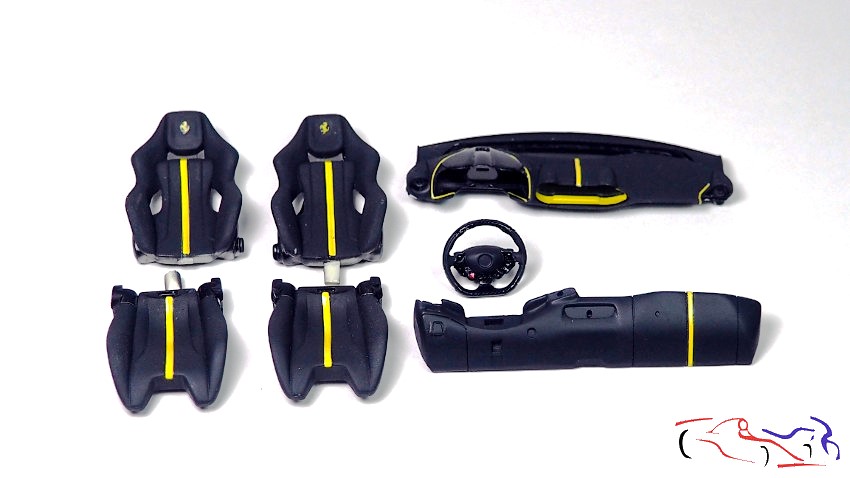
Viendo fotos del coche real, compruebo que unas versiones tenían los asientos y el salpicadero con la tipica tela con microfibra que parece ante, y de un color que no es negro, sino un gris oscuro, con lo que me decido a aplicarlo en este coche. Pero primero enmascaro las zonas que no van de ese color. Nótese que también enmascaro las lineas que después irán con las calcas amarillas:
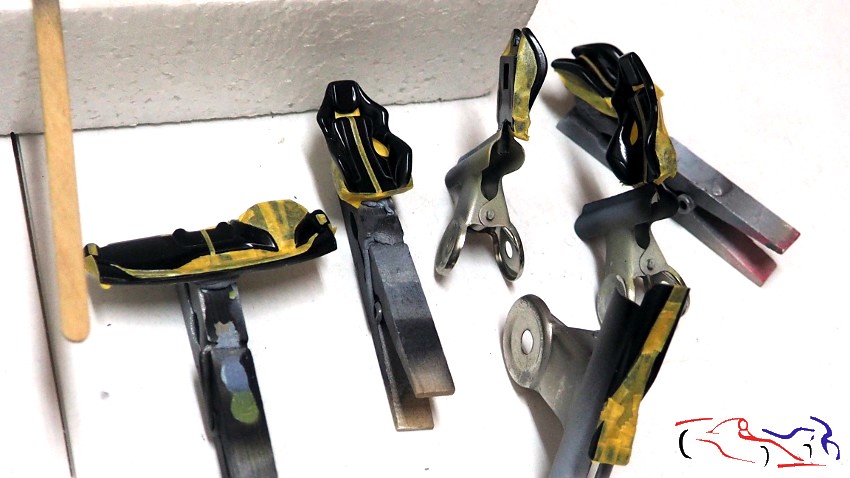
Para el color, utilizo el negro Gris Alemán y el negro semi mate, ambos de la gama LP de Tamiya. Una vez obtenido el color deseado, le pongo disolvente y le añado polvos de talco reultando el efecto deseado. Una vez seco, retiro las máscaras y coloco las calcas de fibra y amarillas.
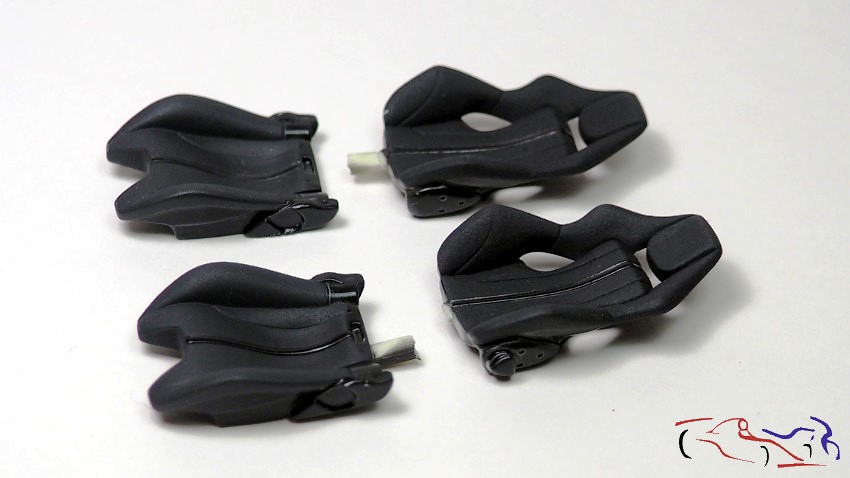
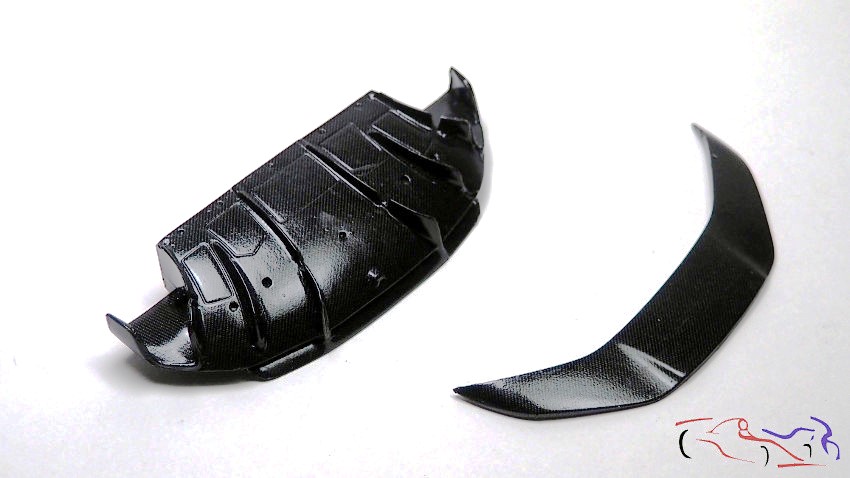
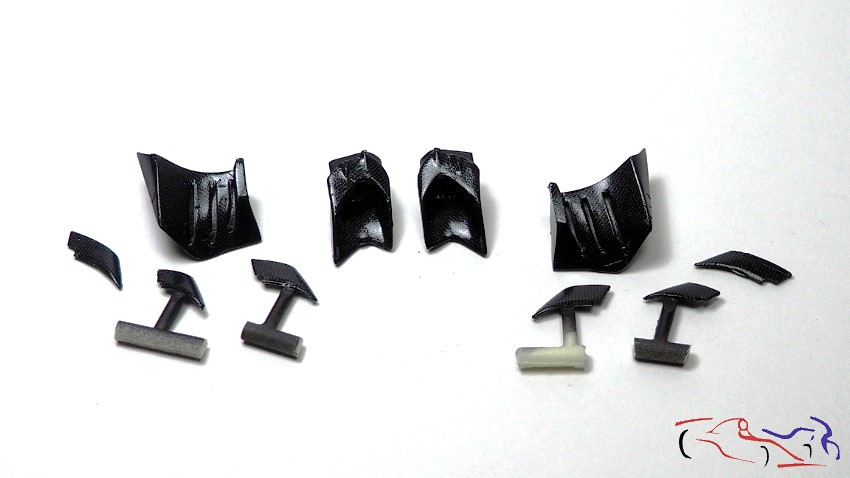
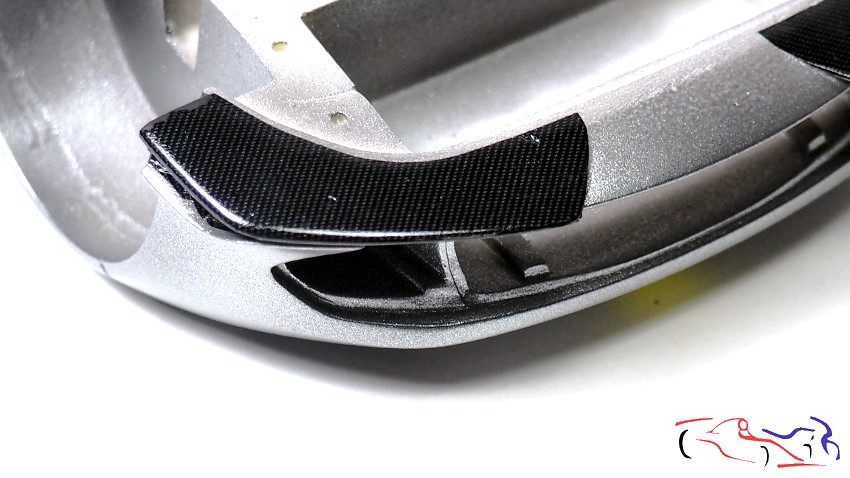
Y como andamos trabajando las calcas, os presnto todas las piezas que han sido “carbonizadas”. En general, he estado poniendo calcas durante 15 horas, proceso que se hace un poco pesado…aunque me ayudé de los líquidos de Tamiya y del secador de aire! Podéis ver en las fotos el difusor, la pieza del capó delantero, piezas de canalización de aire delanteras y traseras, y las que hay en la carrrocería encima del motor, en total, unas 50 calcas!!
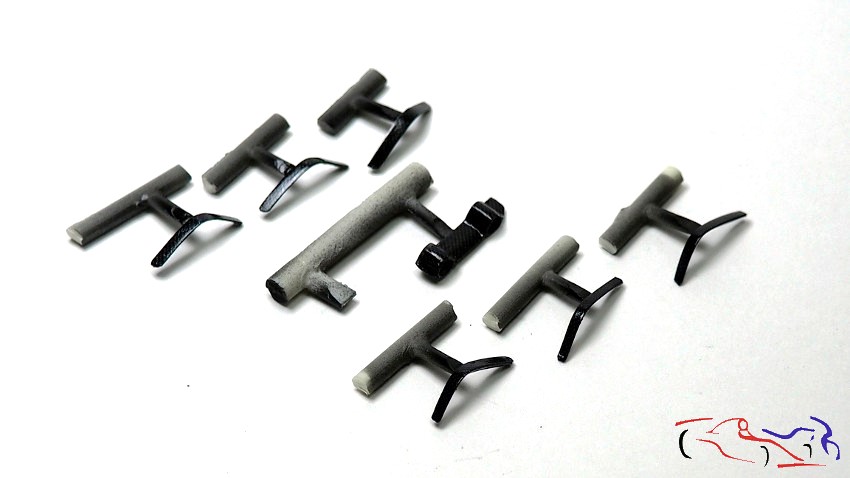
Pasamos a los interiores de las puertas. La base lleva calcas de carbono, y las piezas auxiliares las pinto con el gris oscuro anterior, siendo las puezas superiores las que llevan los polvos de talco:
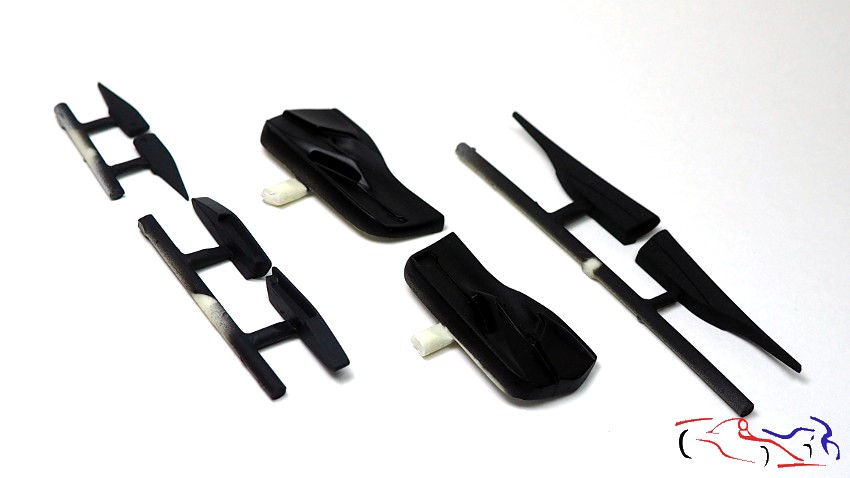
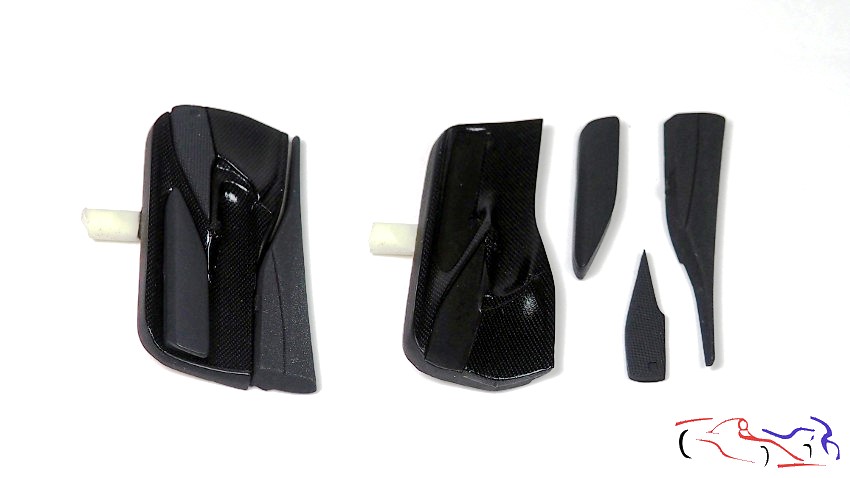
En cuanto a la cuna, va pintada de negro semimate LP de Tamiya, con calcas de carbono en la parte trasera, y teniendo las alfombrillas, el acabo de ante del color gris oscuro. Nótese las calcas amarillas de dichas alfombrillas. La consola central va igualmente con calcas de carbono estando las piezas laterales pintadas del gris oscuro sin acabado de ante.
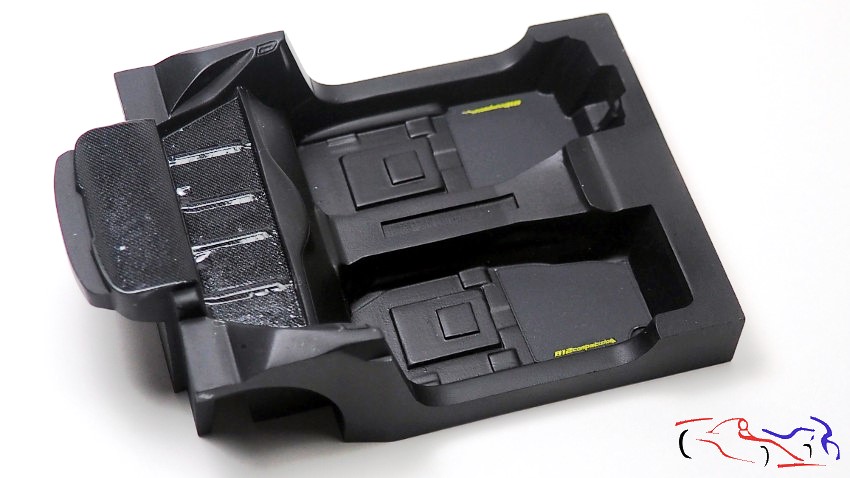
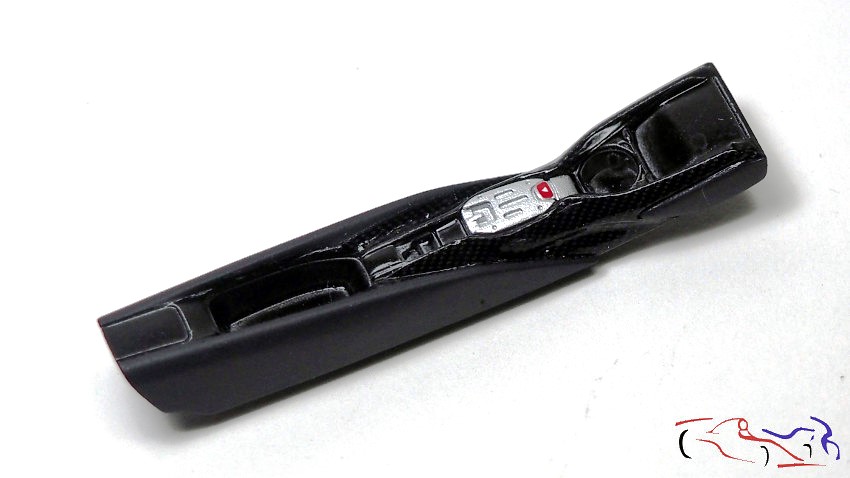
Y pasamos a la carrocería. Las taloneras y las salidas de aire contienen sus hojas de calcas que para su colocación es necesario el secador de aire y los liquidos, además de mucha paciencia!! Los bajos del frontal también tienen sus correspondientes calcas:
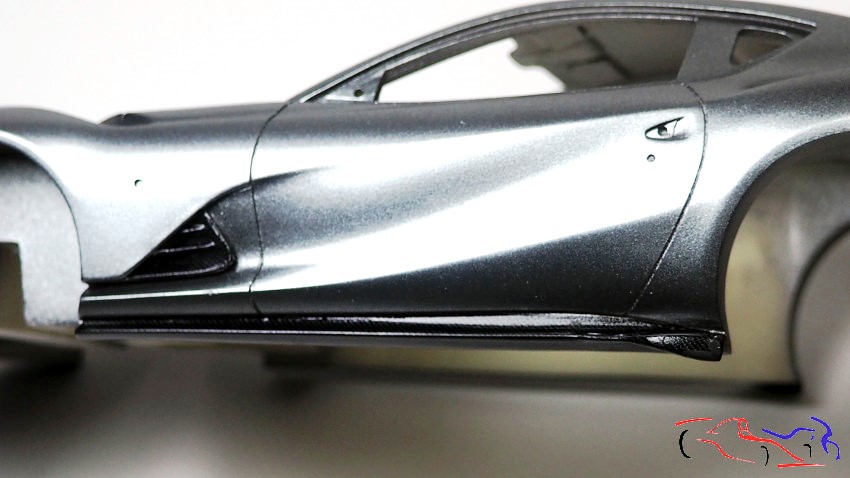
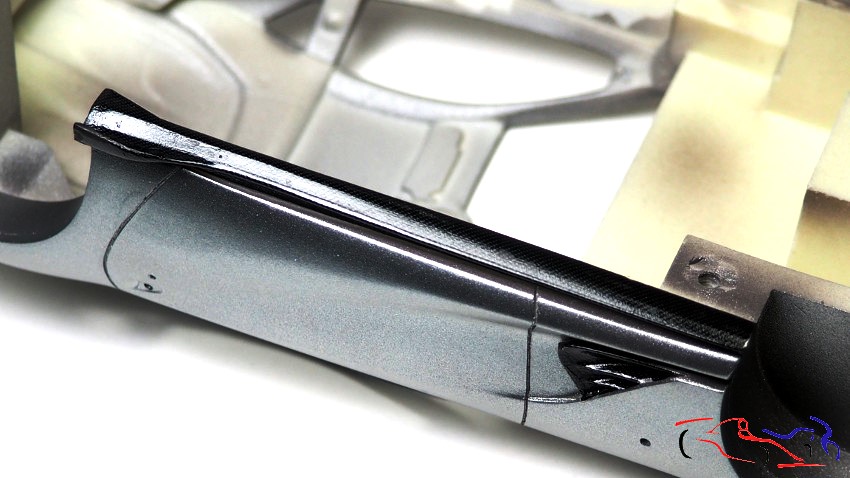
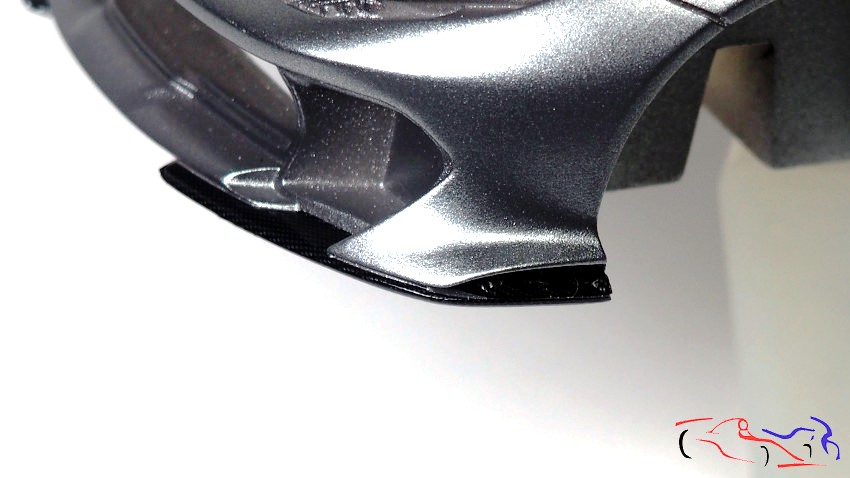
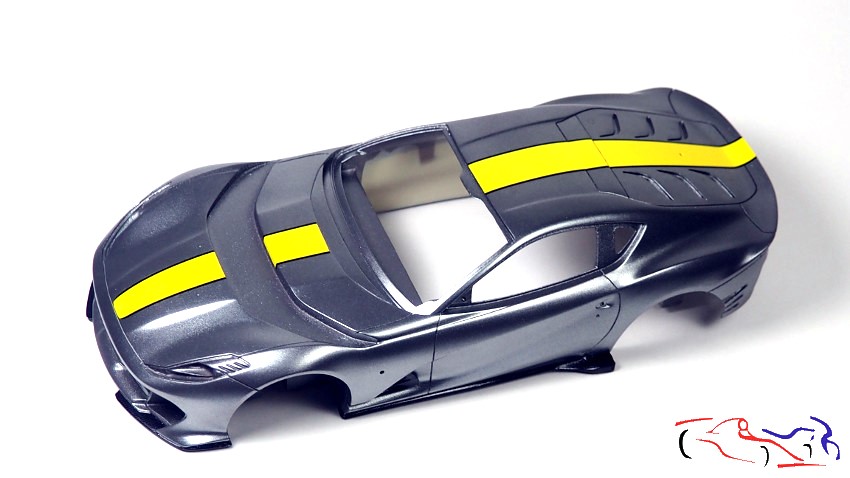
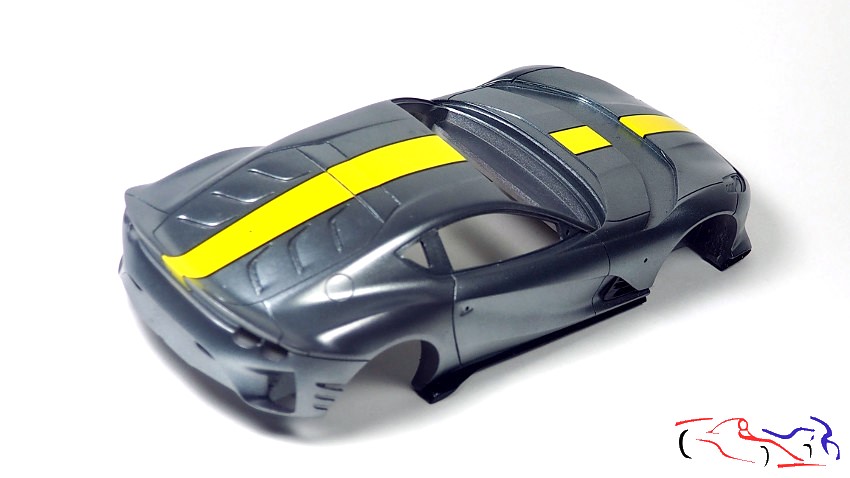
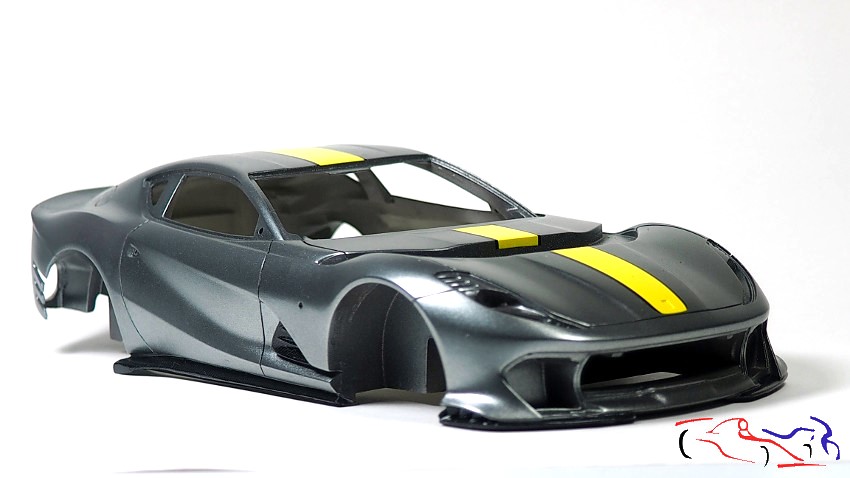
Y finalmente, las lineas amarillas de la carrocería. Podía elegir entre varias, pero decidí este color por ser una combinación llamativa!! Hay que tener especial cuidado con la alineación de las calcas, pues un descuadre mínimo se nota mucho!!
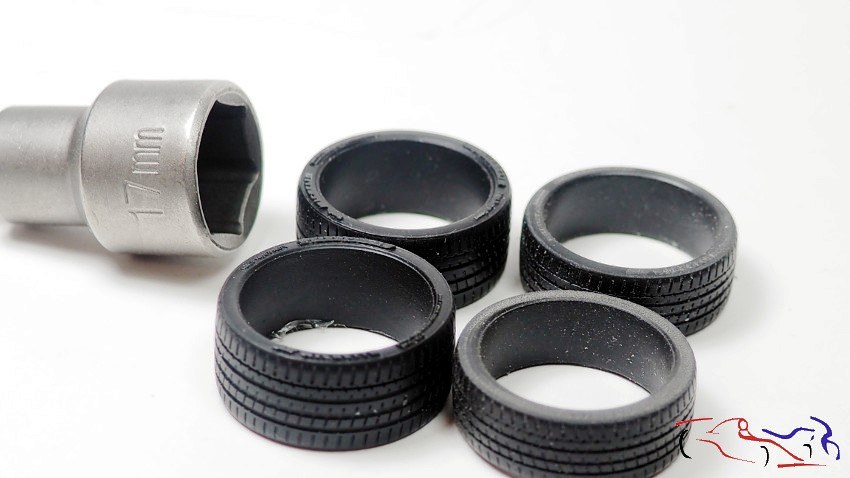
Para finalizar por hoy, he tenido que lijar los neumáticos porque tienen las marcas con relieve, y si voy a poner sus correspondientes calcas, sería imposible. Decir que además de las letras, los neumaticos llevan una linea amarilla que necesita una superficie lisa. Por eso, tengo que barnizar los neumáticos para poner las calcas, y posteriormente matizarlos con barniz. Para lijarlos, me ayudo del taladro con unas llaves de vaso, como el de la imagen:
Gracias por ver y comentar!!
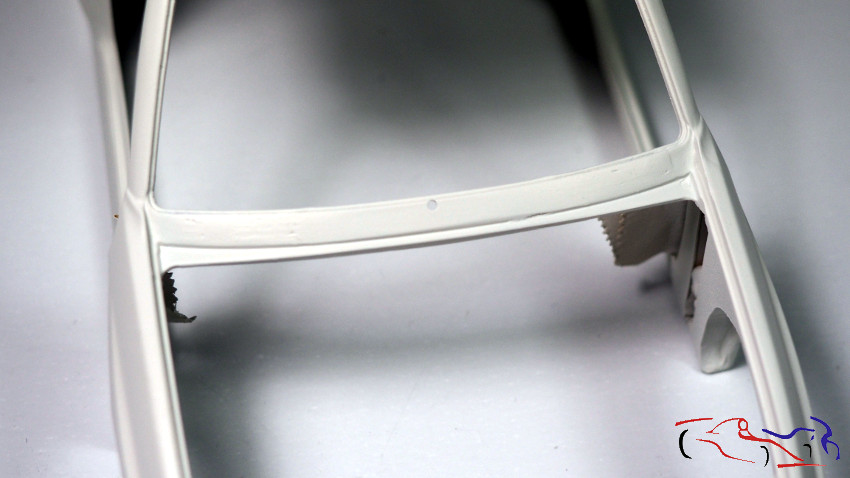
]]>Hello everyone. My work in the “cave” has slowed down due to the summer break and changes I’m making to my workspace, but I haven’t stopped altogether; so, I’m now sharing the work done on the BMW M3—which, while not extensive, is very rewarding: painting the bodywork. First, we started by sanding and filling the cockpit air intakes with Tamiya polyester putty. Then, we masked and painted them using the same white as the bodywork:
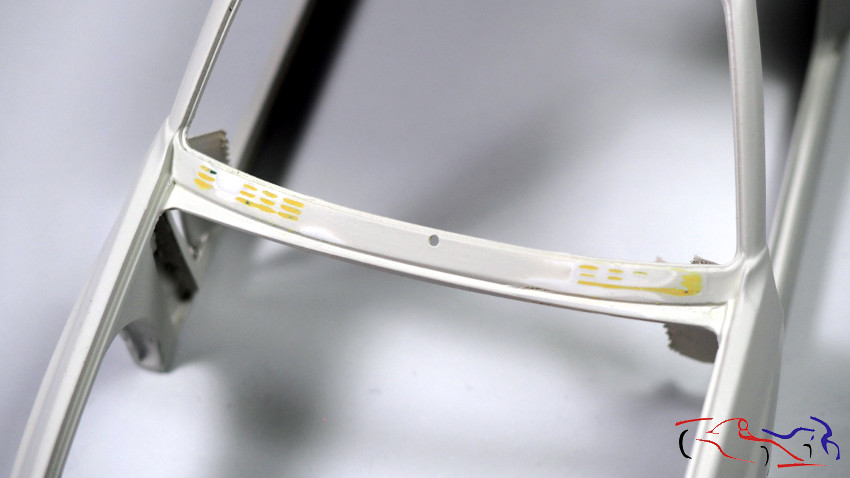
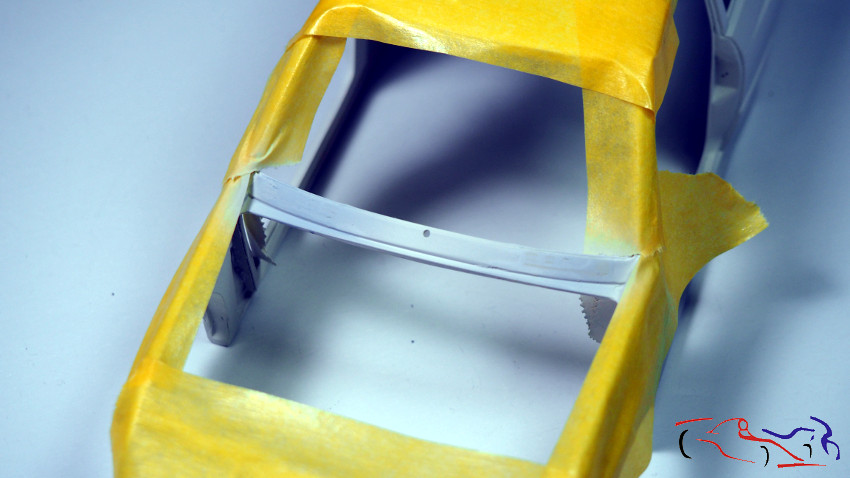
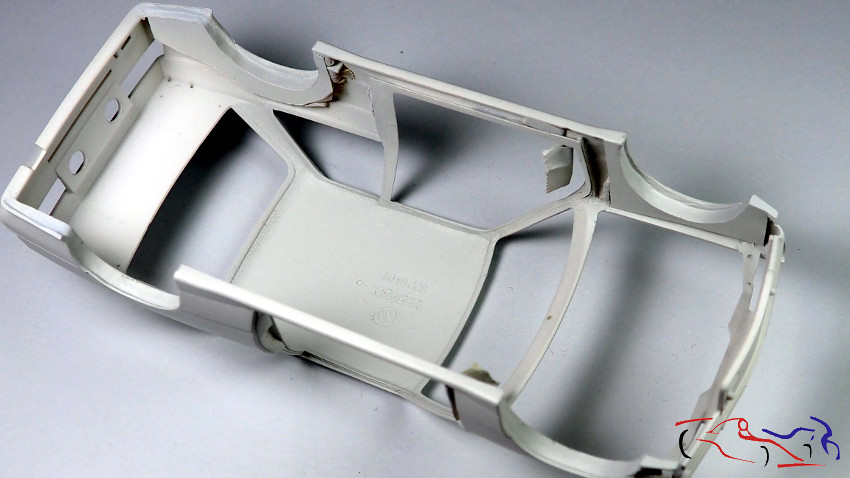
El siguiente paso es preparar las partes interiores de la carrocería así como los retrovisores para pintarlos con el mismo blanco. Para eso, imprimamos la cara inferior del capó y los espejos que aun no estaban preparados….
The next step is to prepare the interior parts of the bodywork, as well as the side mirrors, for painting in the same white color. To do this, we prime the underside of the hood and the mirrors that hadn’t been prepared yet…
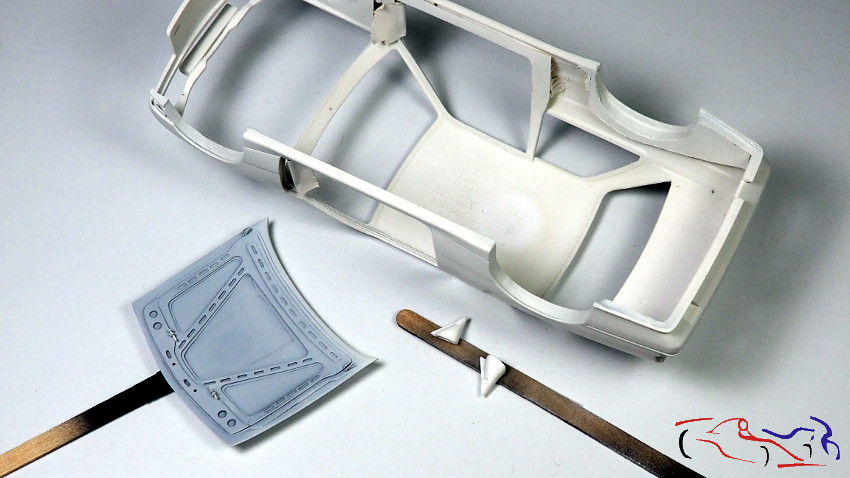
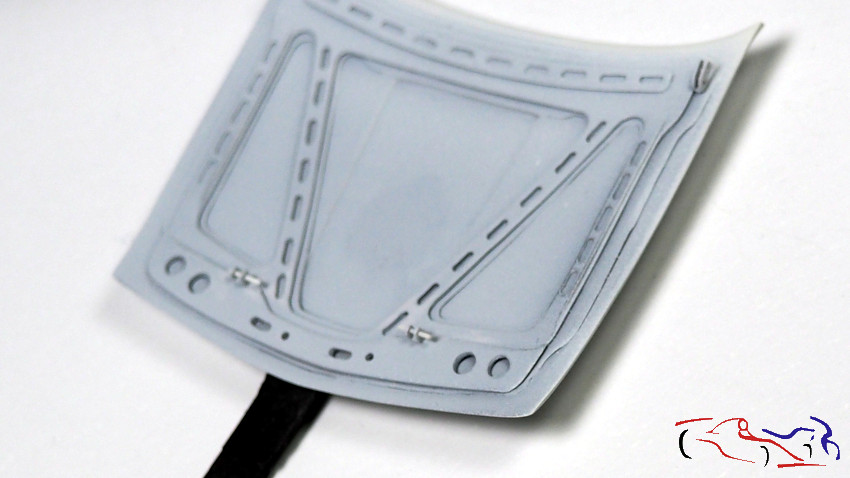
….para pintarlos a continuación (se nota que el blanco de este BMW es un poco crema):
…to paint them next (you can tell the white on this BMW is a bit of a cream shade):
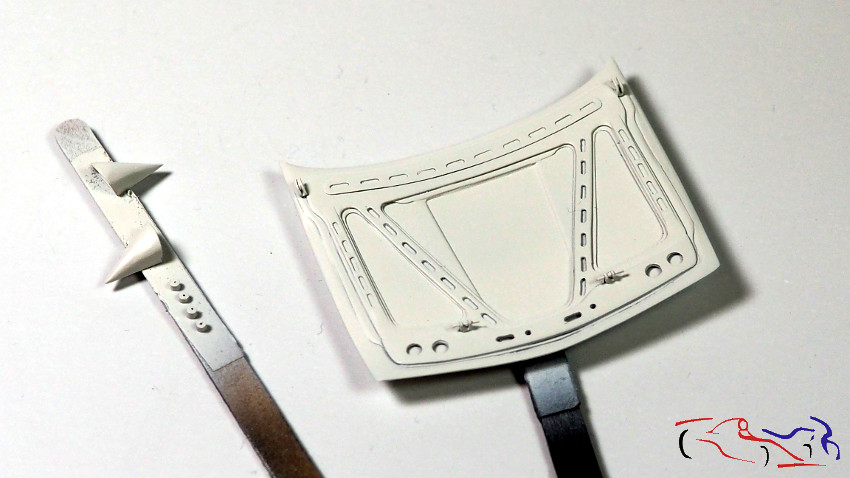
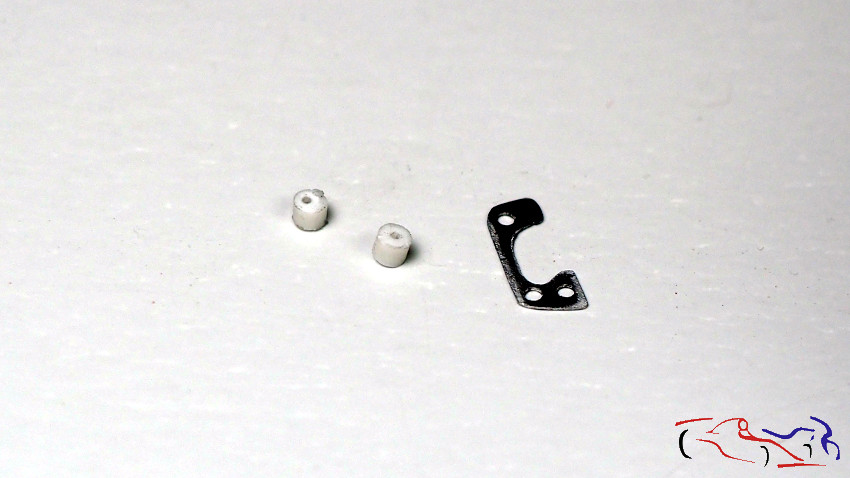
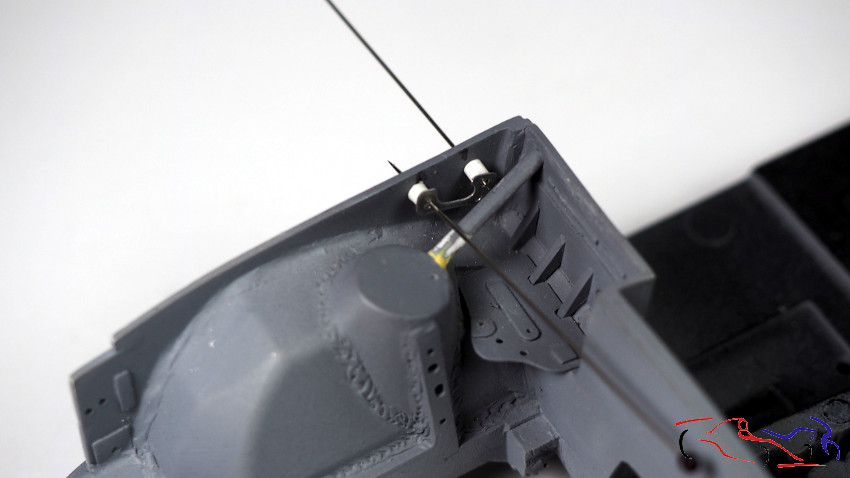
Y mientras seca, pasamos a realizar las fijaciones del capó que lleva este coche. Si bien ya hice y añadí en el capó la parte correspondiente, ahora tocaba fijar las piezas de metal en el vano motor. Para ello, taladro desde el exterior con la pieza como guía, y corto dos redondos pequeños que con unos taladros, fijo con unos alfileres. La pieza de metal irá tal como está en metal, y los redondos los pinto con el blanco de la carrocería, que también será el color del chasis. En la segunda foto, se ve la posición de estas fijaciones.
While that dries, we move on to installing the hood fasteners. Although I had already prepared and attached the corresponding section to the hood itself, the next step was to mount the metal parts in the engine bay. To do this, I drill from the outside using the part as a guide, and I cut two small round pieces which I secure using pins inserted into drilled holes. The metal part will remain unpainted, while the round pieces are painted in the same white as the bodywork—which will also be the color of the chassis. The second photo shows the positioning of these fasteners.
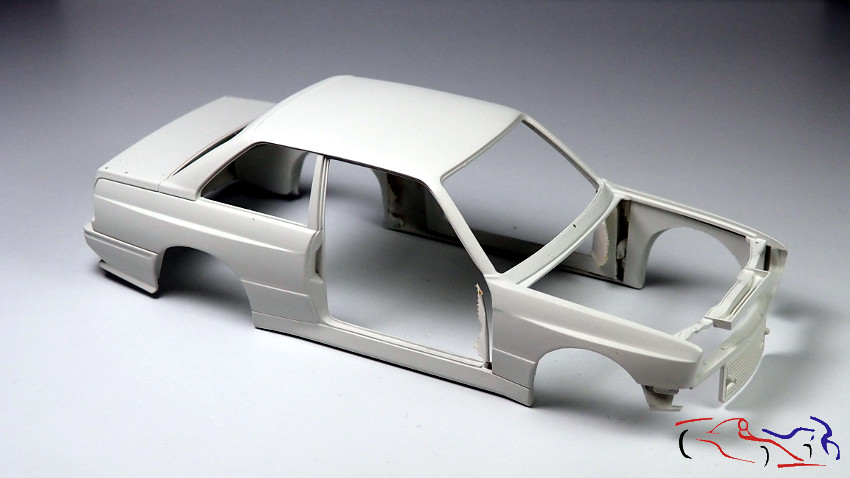
Y ahora si, vamos a pintar la carrocería con el rojo fluo de Number5. Partimos de la carrocería en blanco y añadimos las máscaras que proporciona Decalcas junto a las calcas de esta carrera. Las máscaras vienen muy bien explicadas pero hay que ser pacientes y tener mucho cuidado para ponerlas en sus correctas posiciones, ya que un pequeño giro al ponerlas, las descuadra por completo. Especial cuidado en las de los faros delanteros (pintar los cristales de blanco previamente) y en el aleron trasero, ya que la parte final de la máscara es muy finita encima de los logos de Marlboro. El capó conviene fijarlo a la carrocería para continuar las máscaras hasta los bajos laterales del faldón delantero, asi como crear las máscaras que delimitan el rojo delante de las puertas. Las instrucciones de Decalcas indican todo claramente.
Now, let’s paint the bodywork using Number5’s fluorescent red. Starting with the white body, we apply the masks provided by Decalcas along with the race-specific decals. The masking instructions are very clear, but patience and great care are required during placement; even a slight twist can completely throw off the alignment. Pay special attention to the headlight areas (remember to paint the lenses white beforehand) and the rear wing, as the tip of the mask is very thin where it sits over the Marlboro logos. It is best to attach the hood to the body to ensure the masking lines flow seamlessly down to the lower front splitter, and to correctly position the masks that define the red area ahead of the doors. The Decalcas instructions clearly outline all these steps.
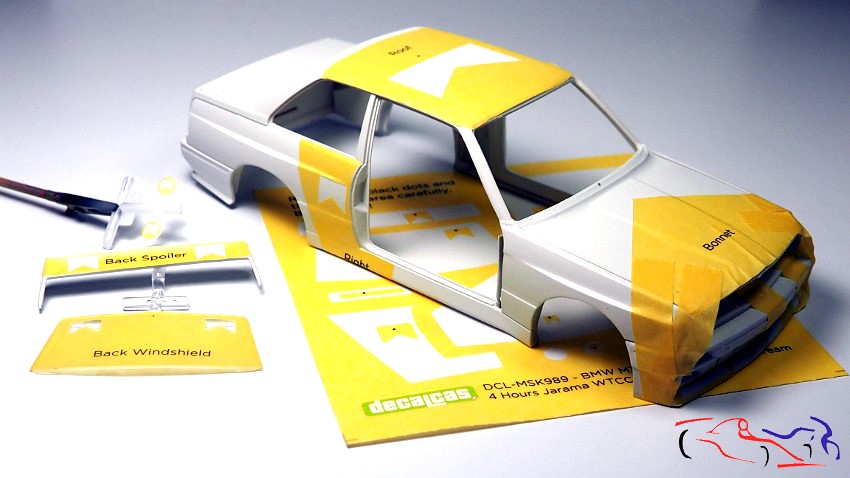
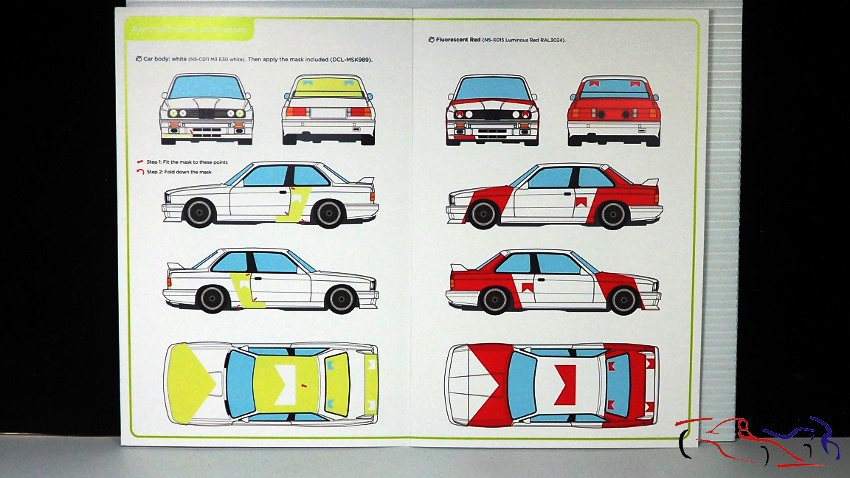
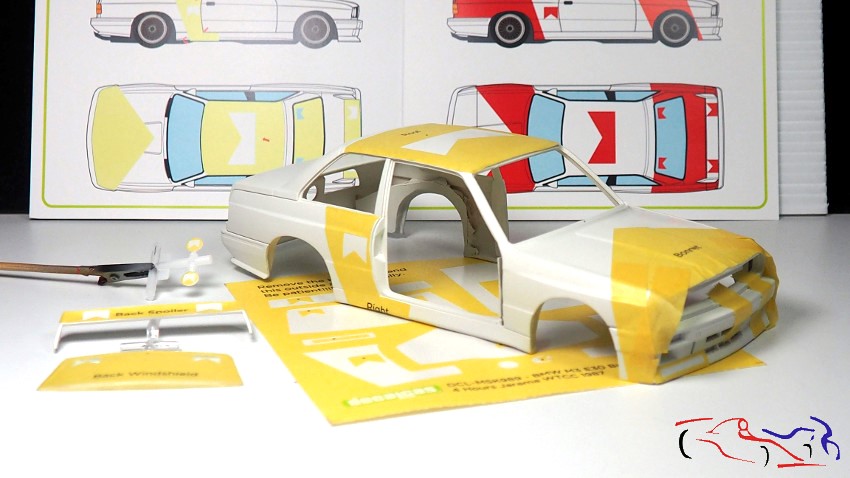
Aún así, después hay que enmascarar todo el resto para que el rojo no pinte en el blanco, y más en mi caso, que tiene las puertas abiertas. Mención especial son los pasos de rueda, que el interior es blanco mientras del perfil, es del color rojo. Y después tapamos los posibles huecos en las mascaras con Máscara líquida de AK.
Even so, I then have to mask off everything else so the red doesn’t get onto the white areas—especially in my case, since the doors are open. The wheel arches deserve special mention, as their interiors are white while the outer profile is red. Finally, I fill any potential gaps in the masking using AK liquid mask.
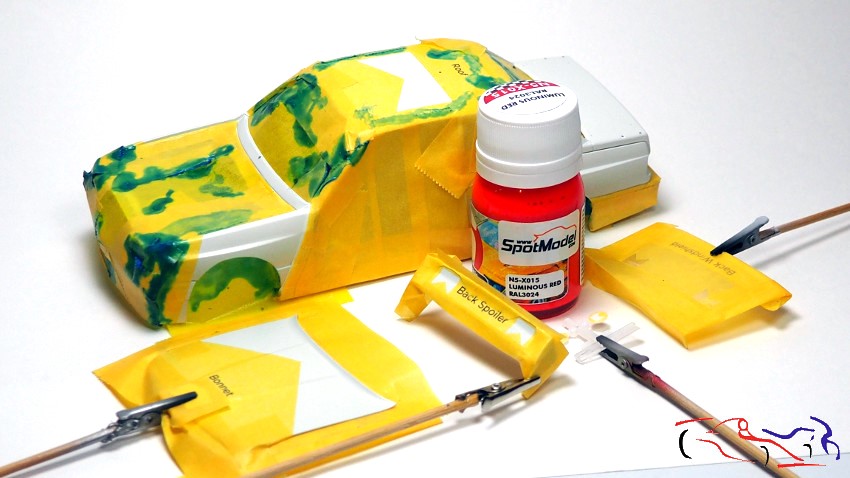
La pintura rojo fluo de Number5 viene un poco espesa para que el fluo tenga consistencia, por lo que decido añadirle disolvente de Number5. La medida sería entre 50/50 y 60/40 (pintura/thinner). Le doy primero una capa fina, y después de que seque un poco, le voy dando más capas hasta que el rojo sea opaco y sature, es decir, que no sea más rojo por más pintura que ponga.
Number5’s fluorescent red paint comes somewhat thick to ensure the fluorescent pigment has the right consistency, so I decide to add Number5 thinner. The mixing ratio is between 50/50 and 60/40 (paint to thinner). I apply a thin coat first, and after it dries slightly, I add more layers until the red is opaque and fully saturated—meaning the color doesn’t get any redder regardless of how much more paint I apply.
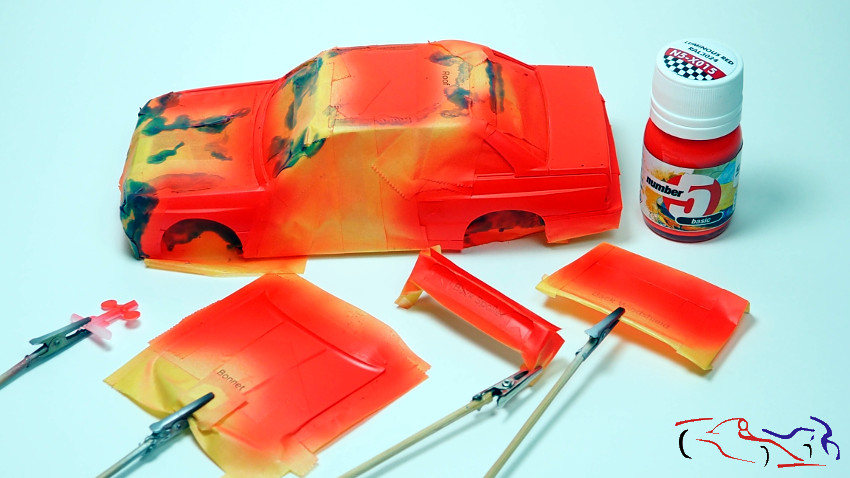
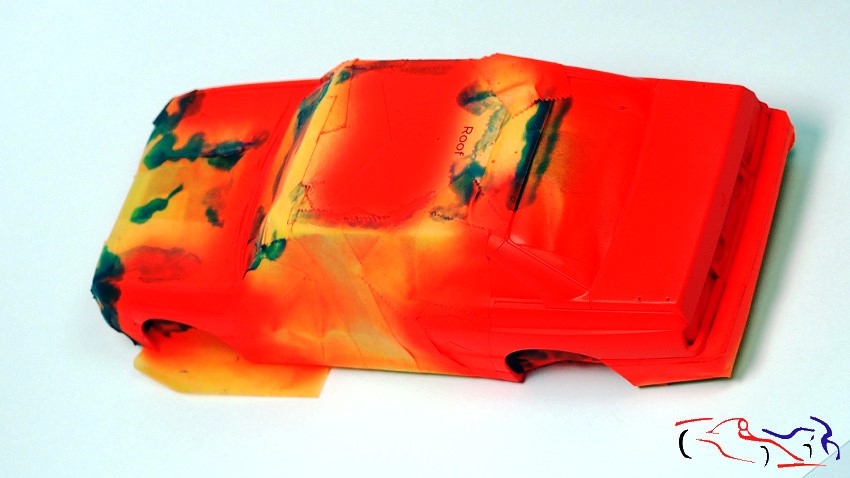
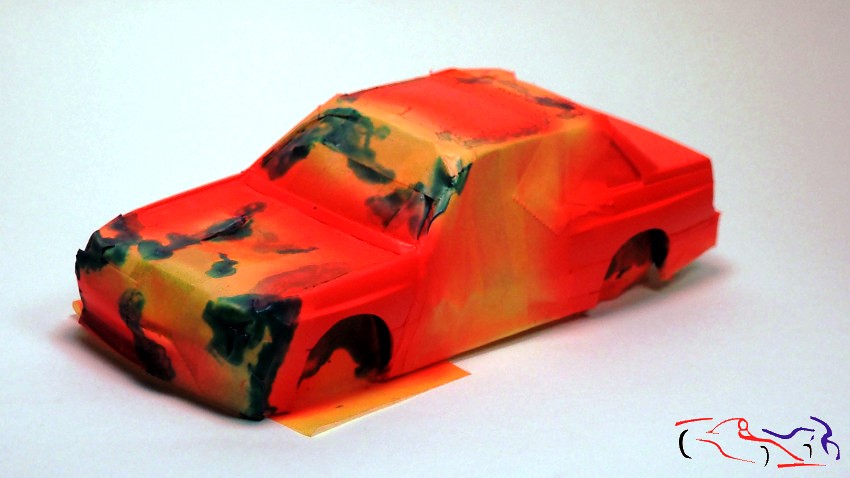
Y una vez seca, retiro las máscaras con cuidado, resultando la carrocería bonita, atractiva y mítica, sin muchos problemas.
And once it is dry, I carefully remove the masks, resulting in a beautiful, attractive, and iconic bodywork, without any major issues.
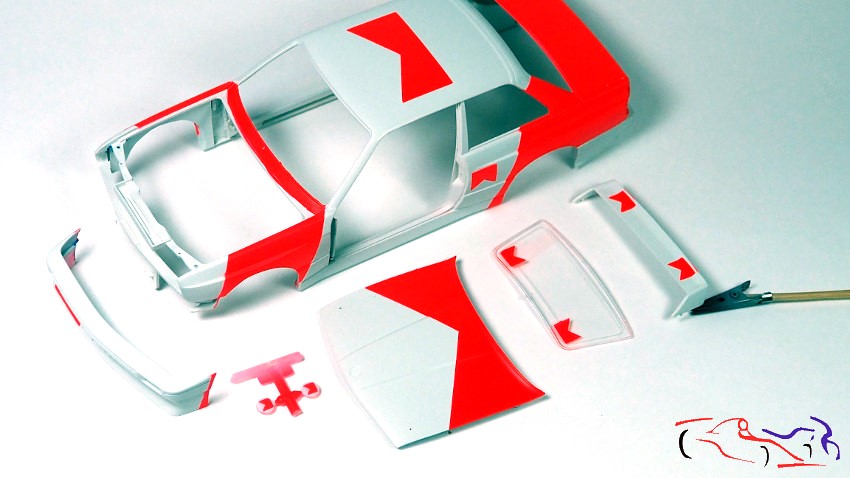
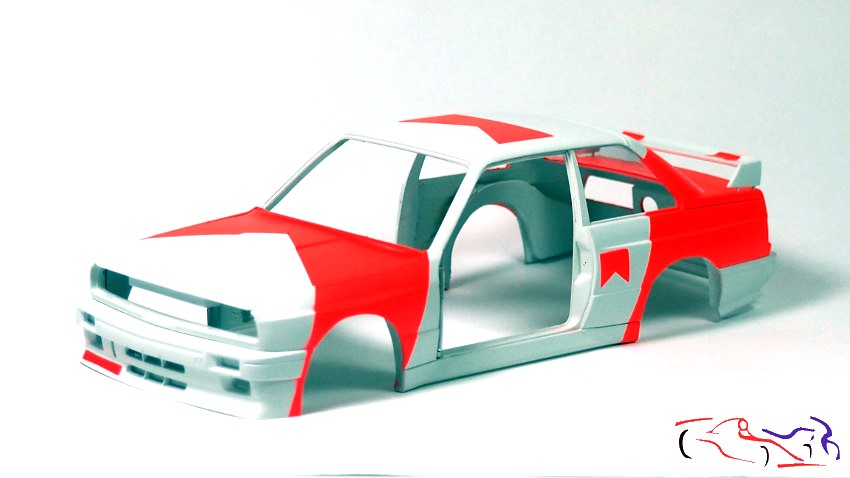
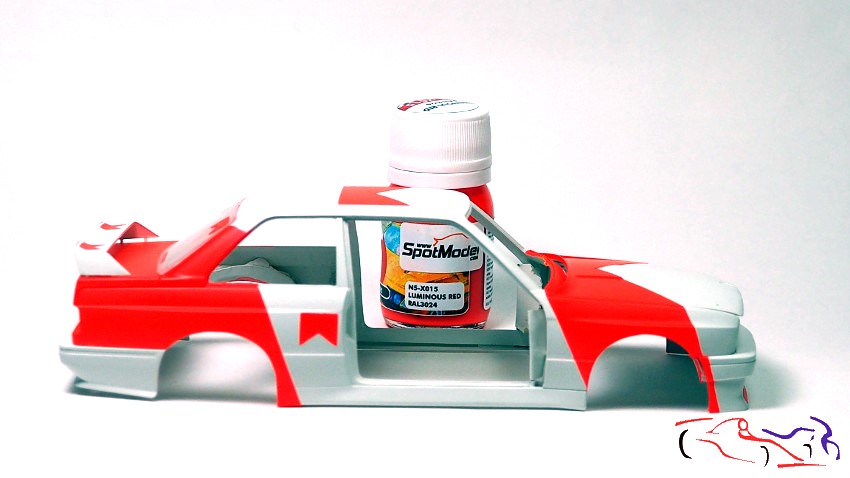
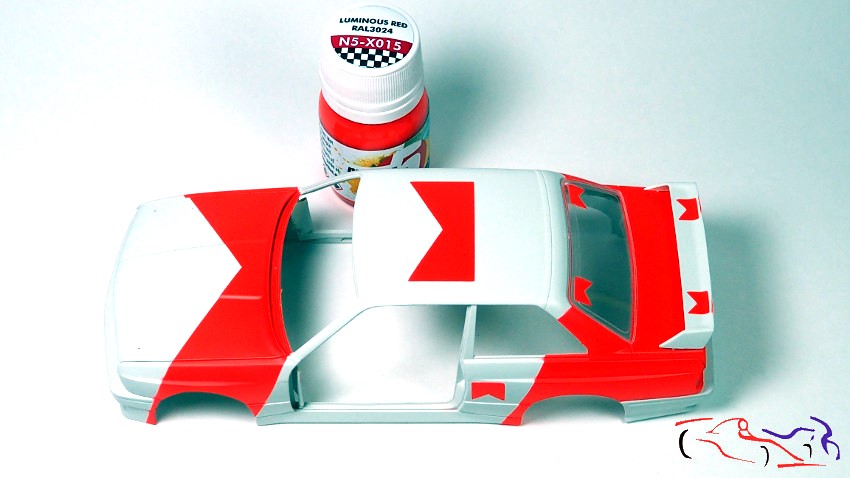
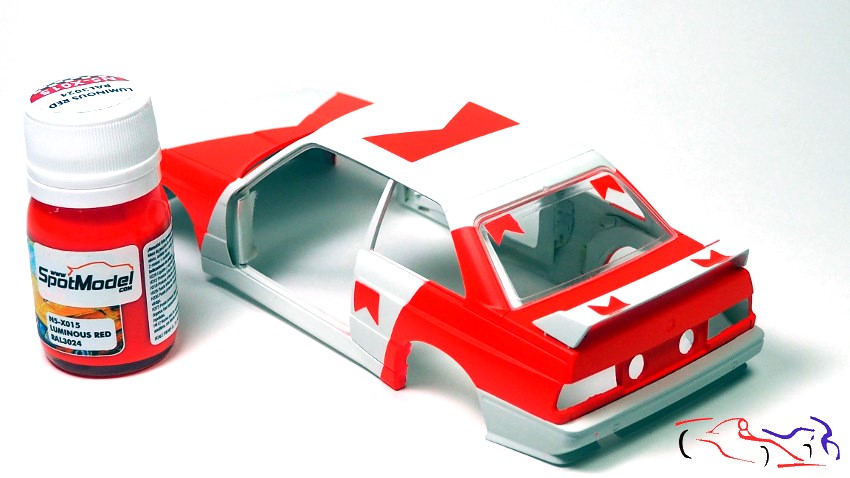
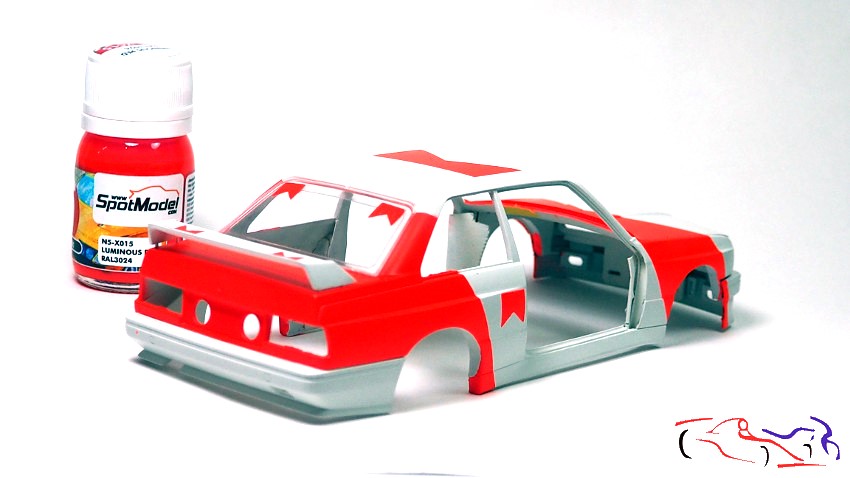
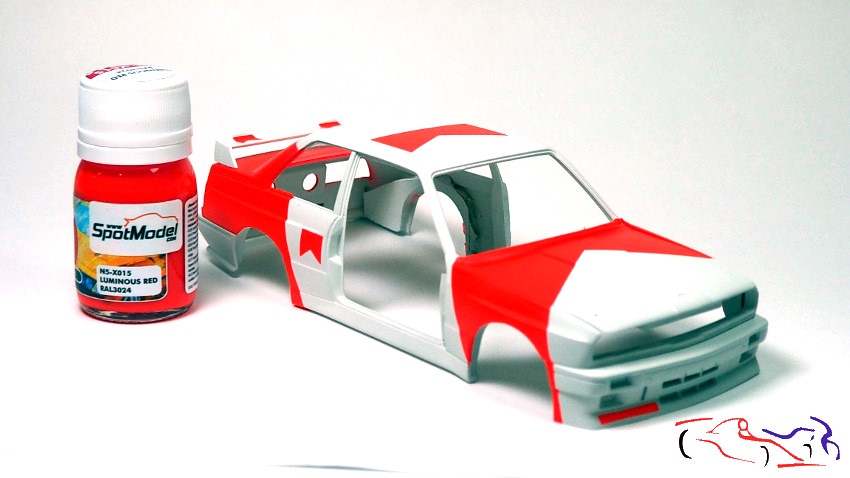
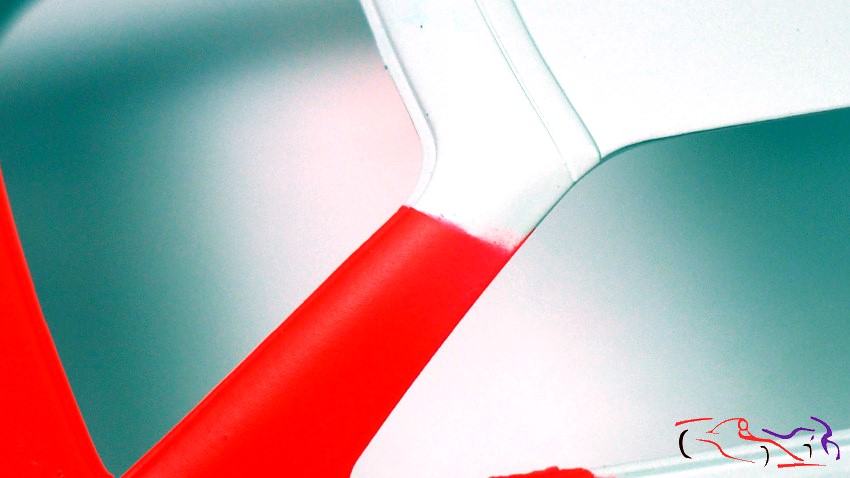
Y vamos con los fallos, los escapes de pintura roja pot fuera de las máscaras. Son solo estos tres que se eliminan al pasar una lija de grano 2000 con agua. Ese mismo lijado me servirá para eliminar el salto entre ambas pinturas y alisar toda la carrocería, lo blanco y lo rojo, como paso previo a la colocación de las calcas. Decir qie no he eliminado del todo el salto de blanco al rojo puesto que en los años 80, existía un salto, mínimo, porque no los coches no estaban vinilados sino pintados.
Now for the flaws: spots where the red paint bled outside the masking lines. There are just three of them, and they can be removed by wet-sanding with 2000-grit paper. That same sanding process will also help eliminate the ridge between the two paint colors and smooth out the entire bodywork—both the white and red sections—in preparation for applying the decals. It is worth noting that I haven’t completely eliminated the transition ridge between the white and red; back in the 80s, there was a slight ridge because the cars were painted rather than wrapped in vinyl.
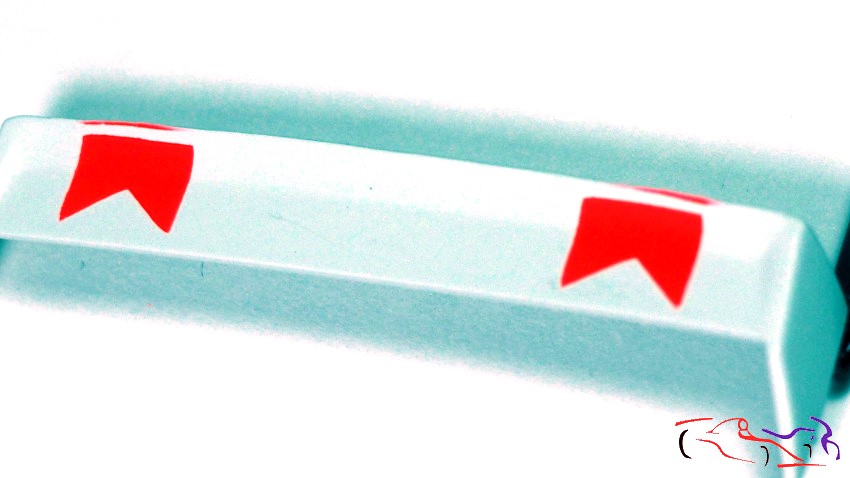
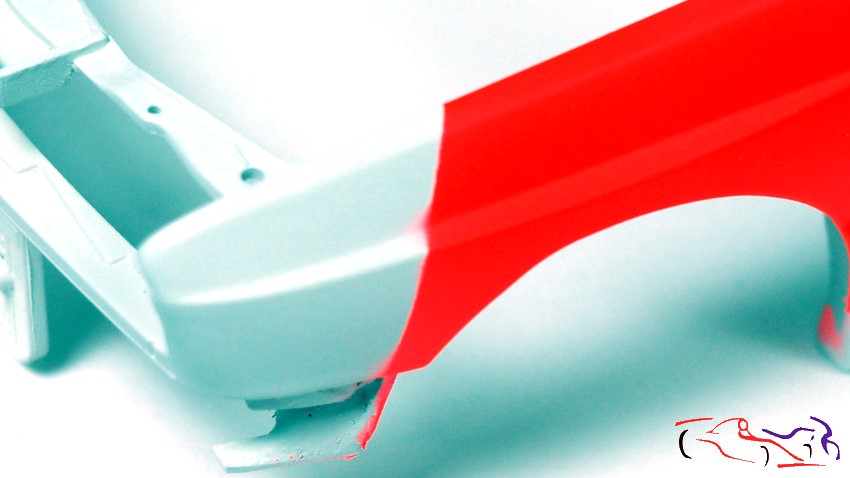
Ahora, lo siguiente son las calcas y lacar, proceso que haré junto al Ferrari 812. Gracias por ver y comentar!!
Next up are the decals and clear-coating—a process I’ll be doing alongside the Ferrari 812. Thanks for watching and commenting!
]]>Hello everyone. We’re continuing with the Ferrari at the same time as the BMW to save time on the processes. Therefore, I’m preparing all the parts for priming. All the parts are sanded and on their respective supports, including the body and chassis.
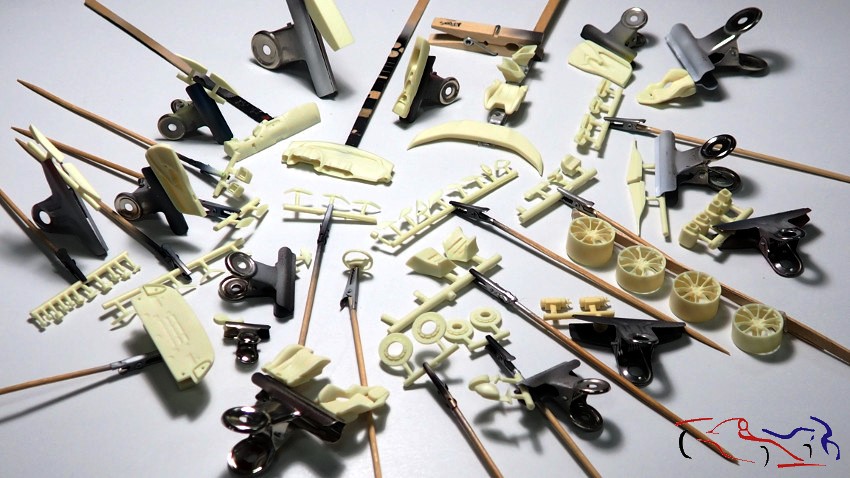
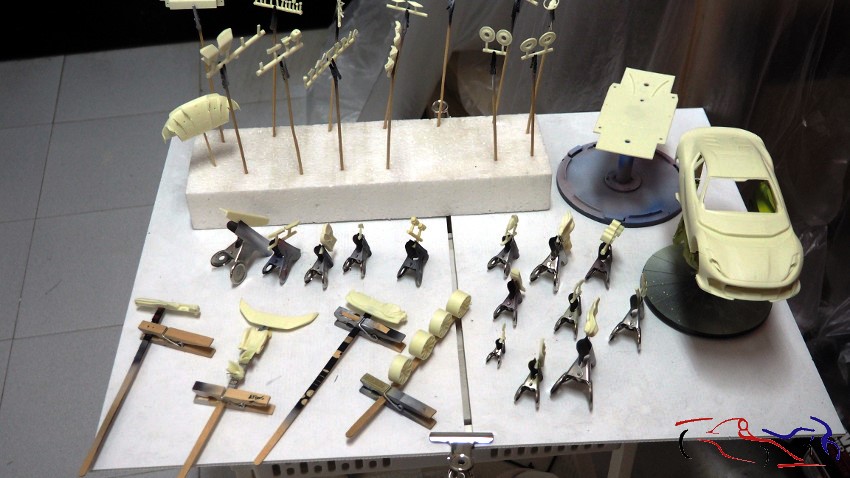
El proceso de imprimación se ha realizado con Gravity-Spain, tanto para las piezas como para la carrocería. He aplicado una primera capa muy ligera, y una segunda más húmeda para cubrir todo. Estas son las piezas….
The priming process was done with Gravity-Spain, both for the parts and the bodywork. I applied a very light first coat, and a second, wetter coat to cover everything. These are the parts…
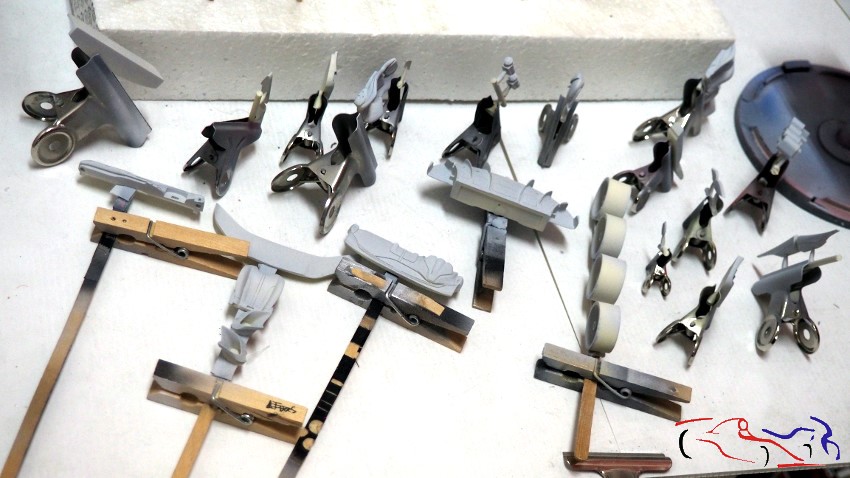
…y ésta es la carrocería:
…and this is the body:
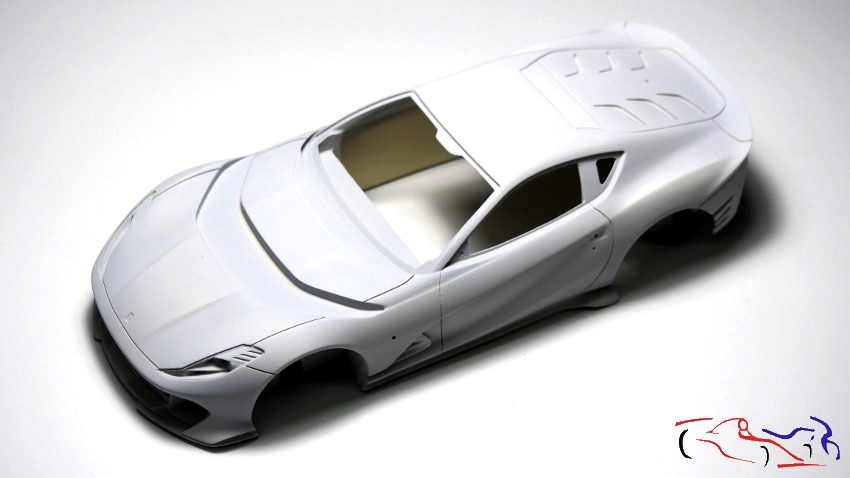
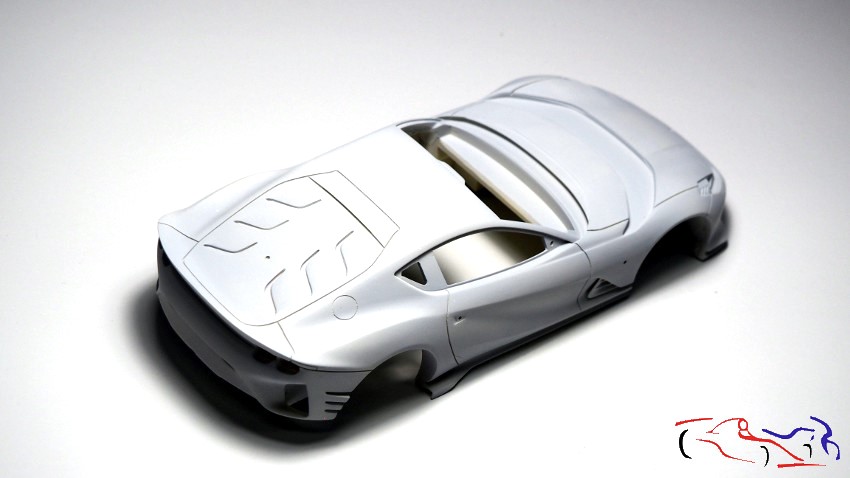
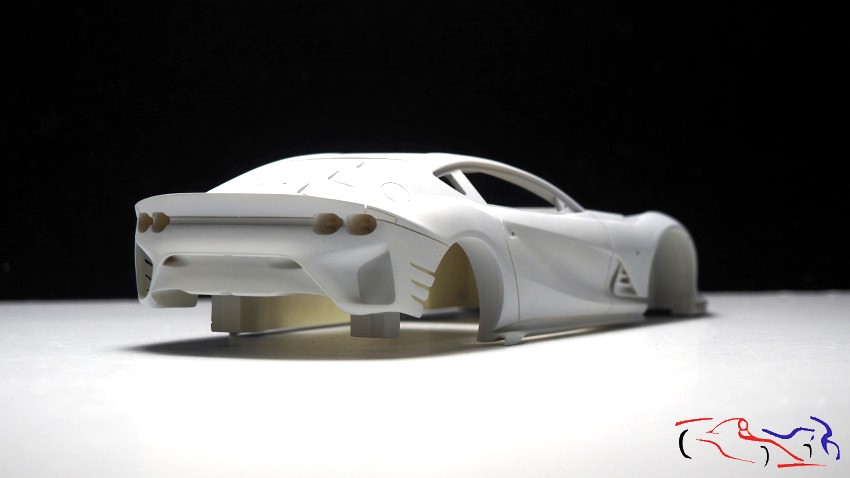
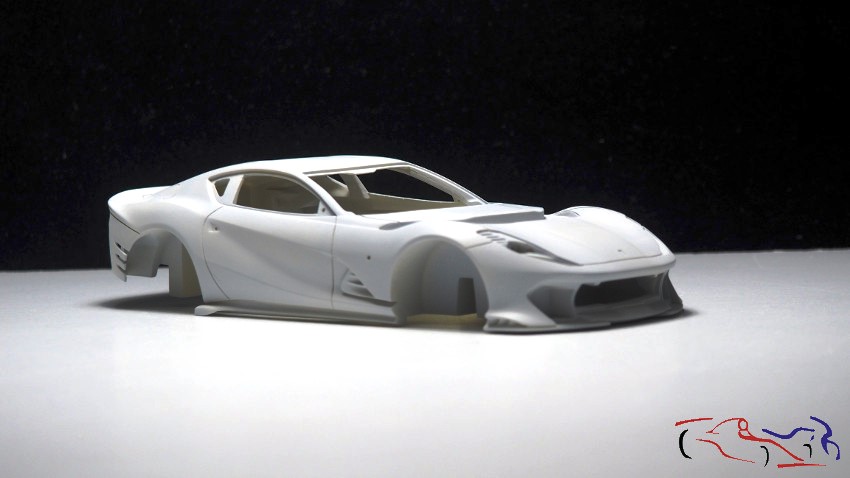
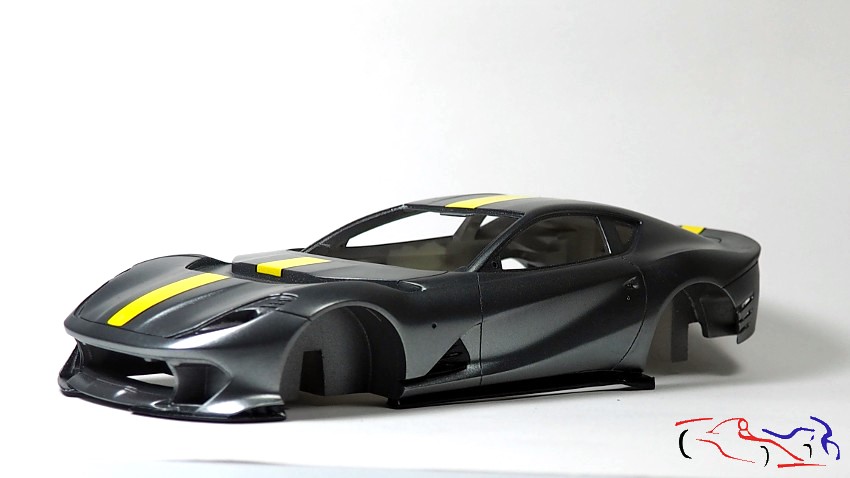
Ahora pasamos a la pintura: voy a utilizar el color Ferrari Grigio Competizione, característico de este coche, de la marca Gravity Spain:
Now we move on to the paint: I’m going to use the Ferrari Grigio Competizione color, characteristic of this car, from the Gravity Spain brand:
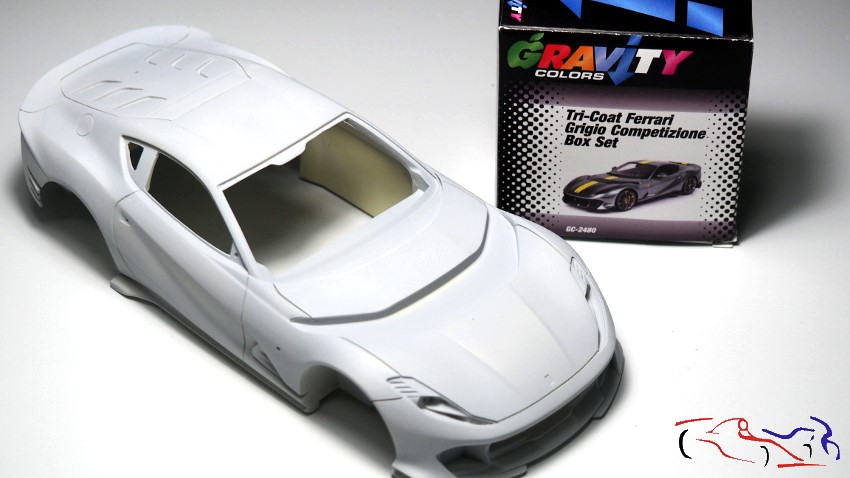
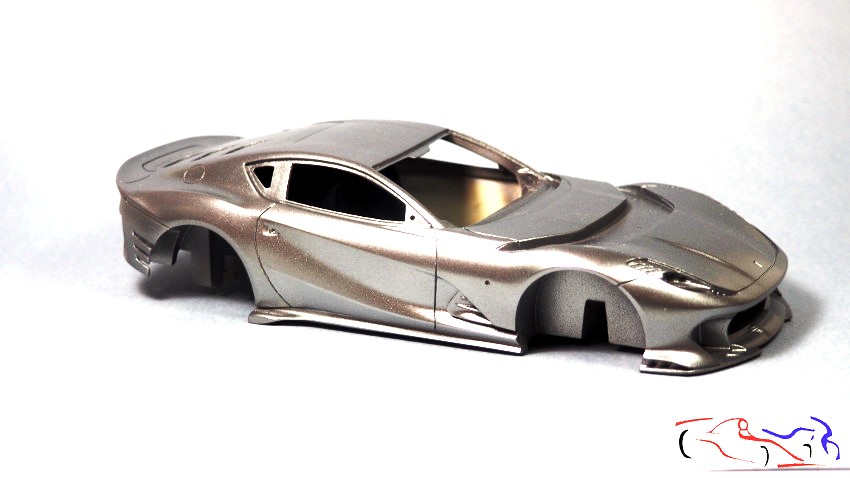
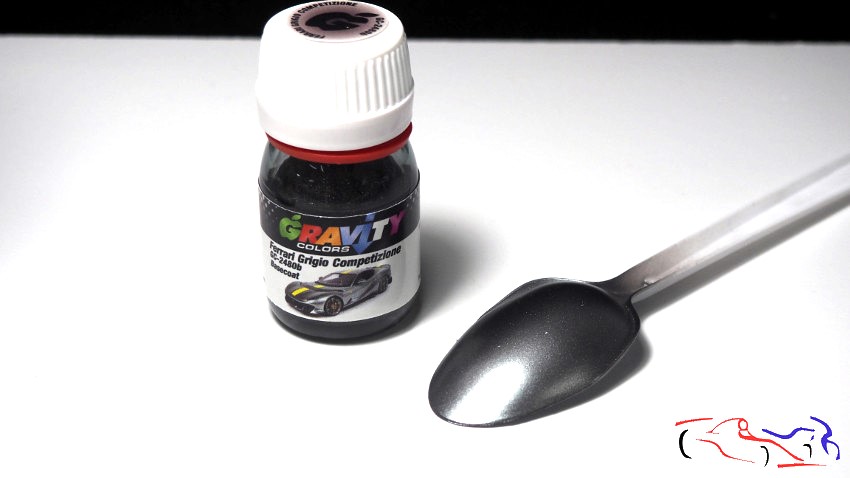
Esta pintura consta de una base gris y una capa externa metalizada. Vemos el resultado en las cucharas:
This paint consists of a gray base and a metallic outer layer. We can see the result on the spoons:
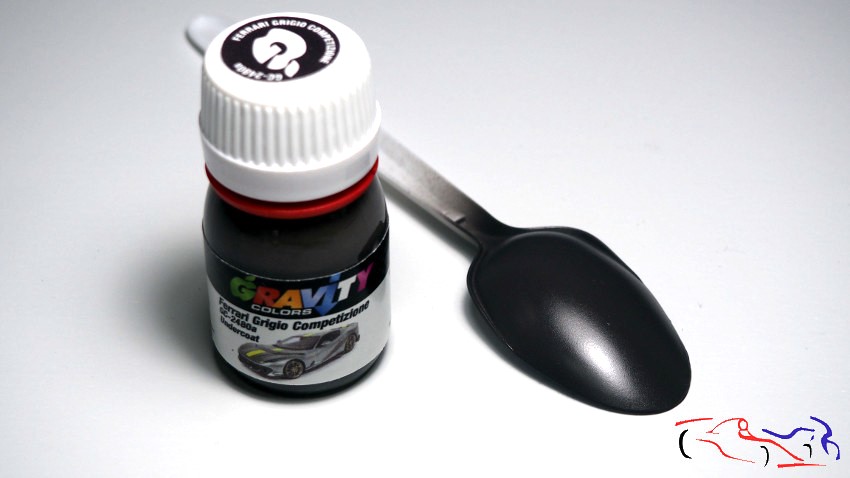
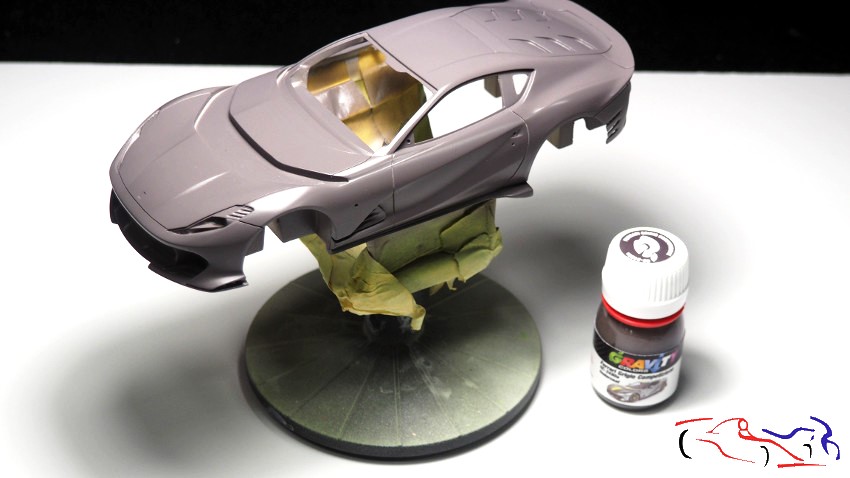
Empezamos por la primera capa gris. Se aplica en varias capas de la misma manera: una primera muy ligera, y una segunda más húmeda a los 5 minutos, hasta completar y saturar el color. He comprobado que una vez saturado, no se pone más oscuro por mucho que apliques color, al menos cuando todo está húmedo.
We start with the first gray layer. It is applied in several layers in the same way: a first very light one, and a second wetter one after 5 minutes, until the color is complete and saturated. I have found that once saturated, it does not get darker no matter how much you apply color, at least when everything was wet.
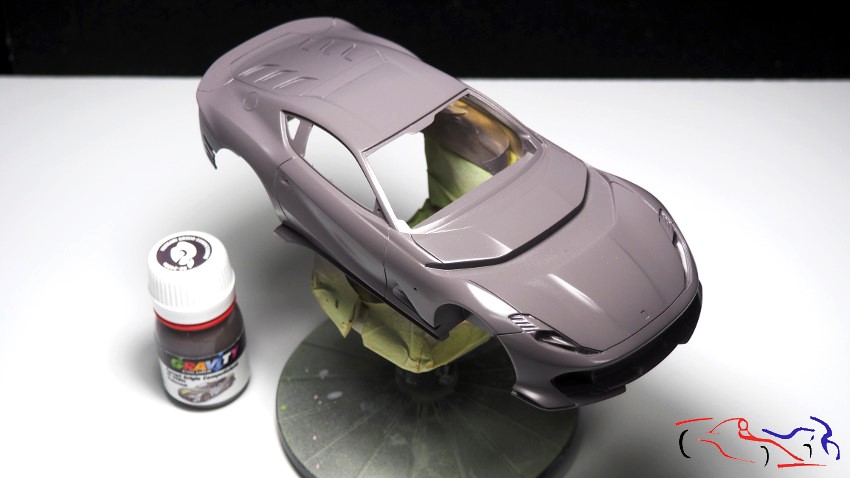
Y una vez seco, pasamos a la segunda capa con el acabado metalizado:
And once it’s dry, we move on to the second layer with the metallic finish:
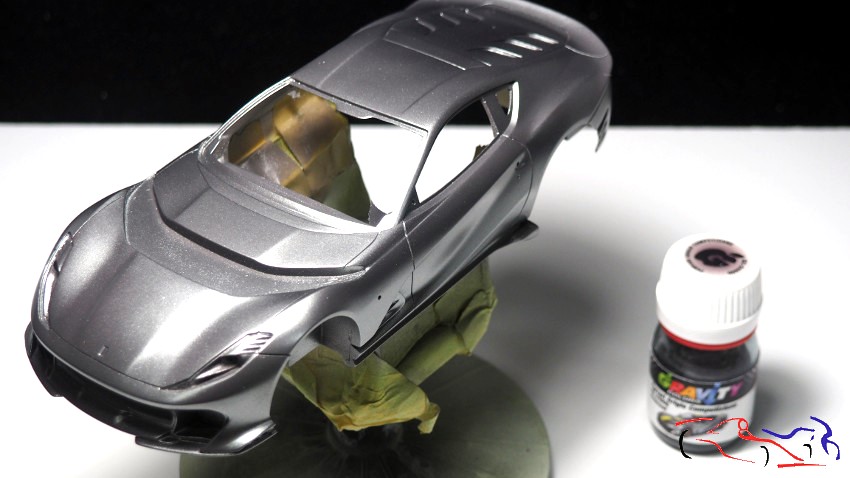
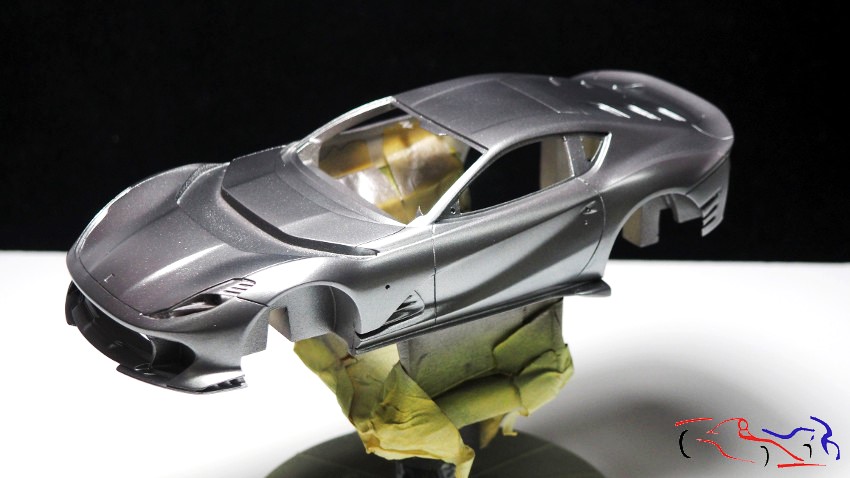
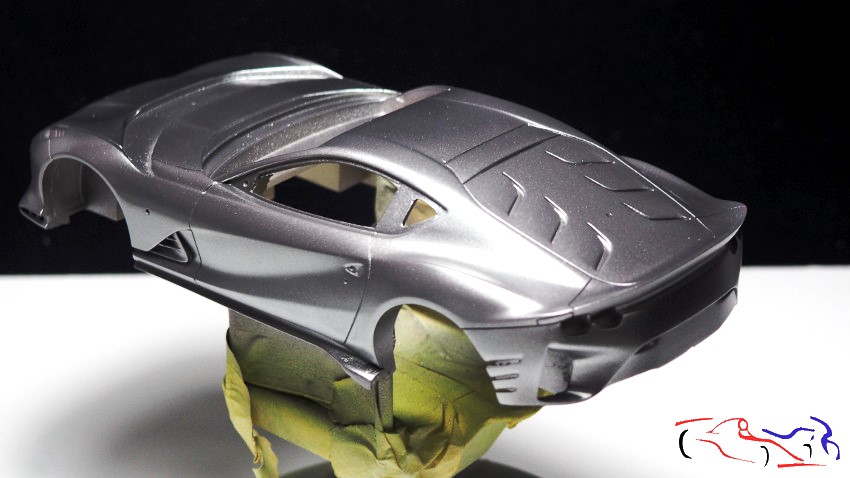
La forma de aplicación es la misma: una primera capa ligera, y una segunda más húmeda cubriendo y metalizando la anterior. El resultado es muy bueno como podéis ver a continuación:
The application method is the same: a light first coat, and a second, wetter coat covering and metallicizing the first. The result is very good, as you can see below:
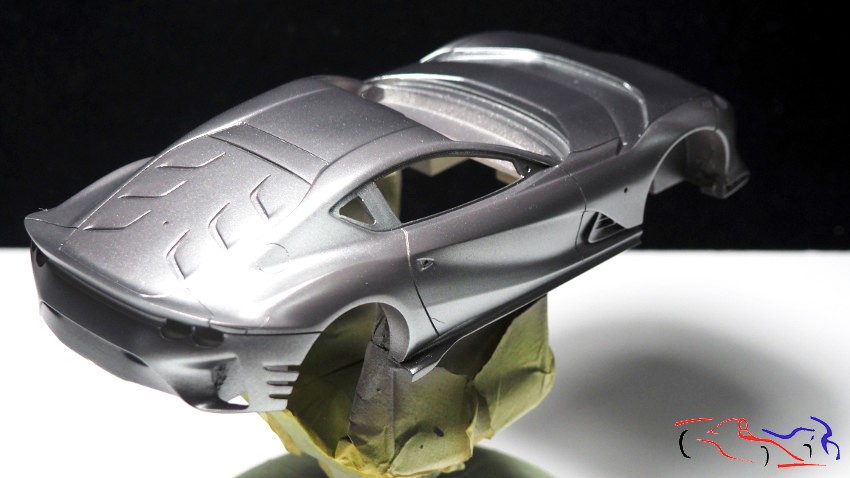
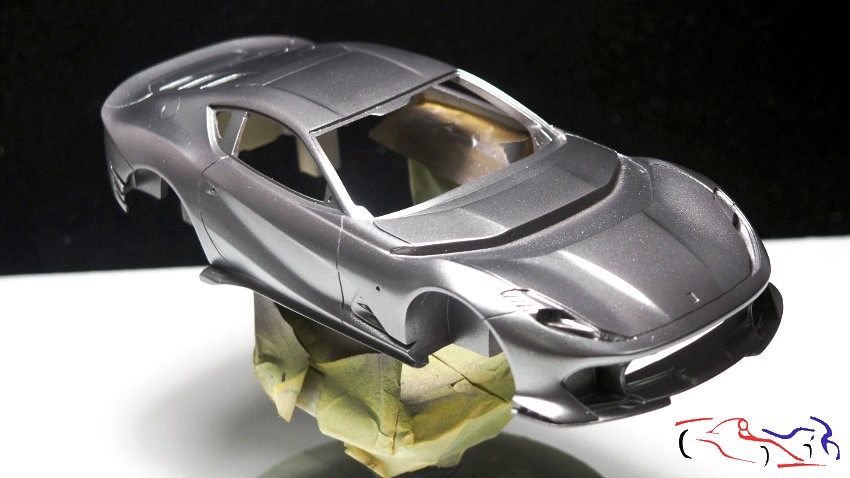
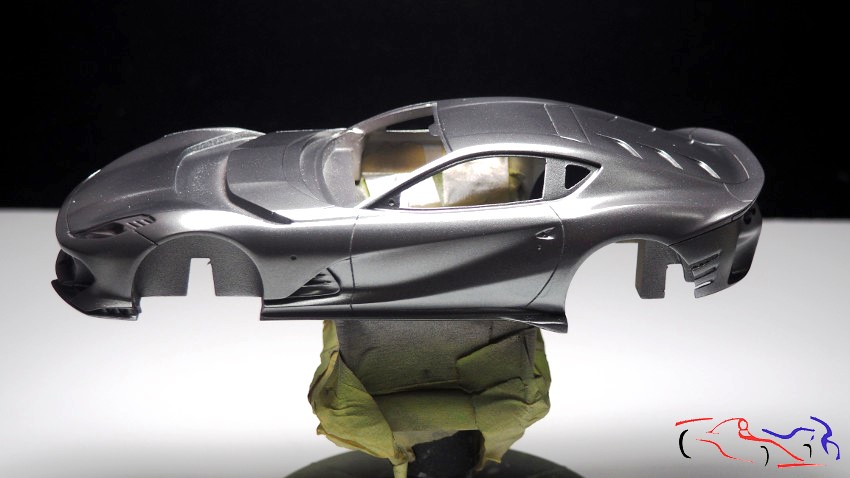
Pero hay veces, que las cosas no salen bien. En este caso, me olvidé de enmasillar una linea realizada al profundizar las lineas de panelado. Por tanto tuve que lijar un poco, enmascarar la zona y aplicar la masilla de Polyester de Tamiya. Volví a lijar, limpiar, y seguir con el proceso normal: imprimación, primera capa de pintura base y capa exterior metalizada. Una vez terminado, no se nota el problema!!
But sometimes things don’t go as planned. In this case, I forgot to fill a line I made while deepening the panel lines. So I had to sand it down a bit, mask the area, and apply Tamiya Polyester Filler. I sanded it again, cleaned it up, and continued with the normal process: primer, first coat of base paint, and metallic topcoat. Once finished, the problem was completely unnoticeable!
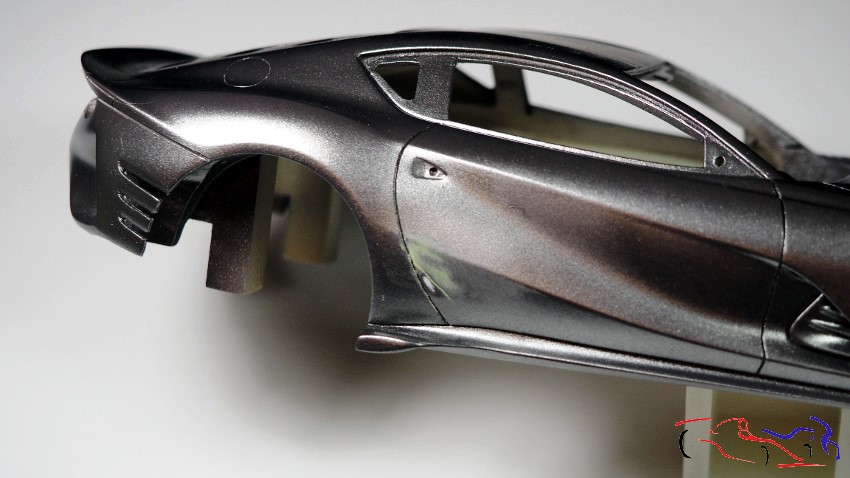
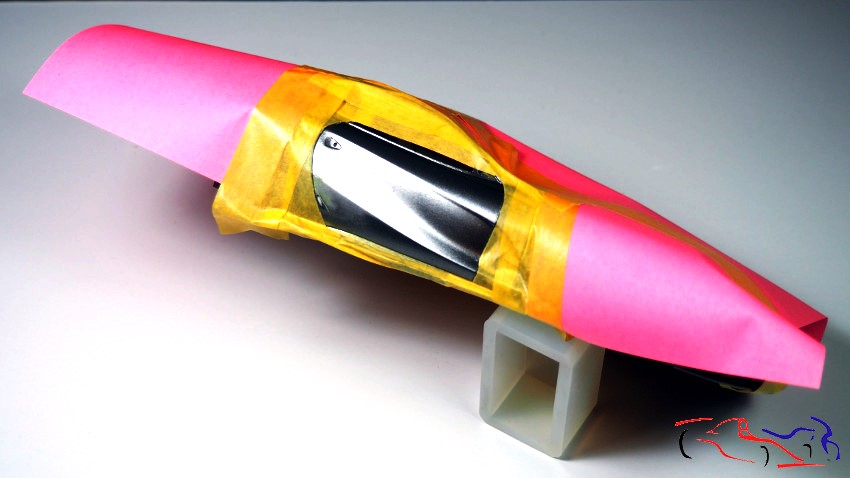
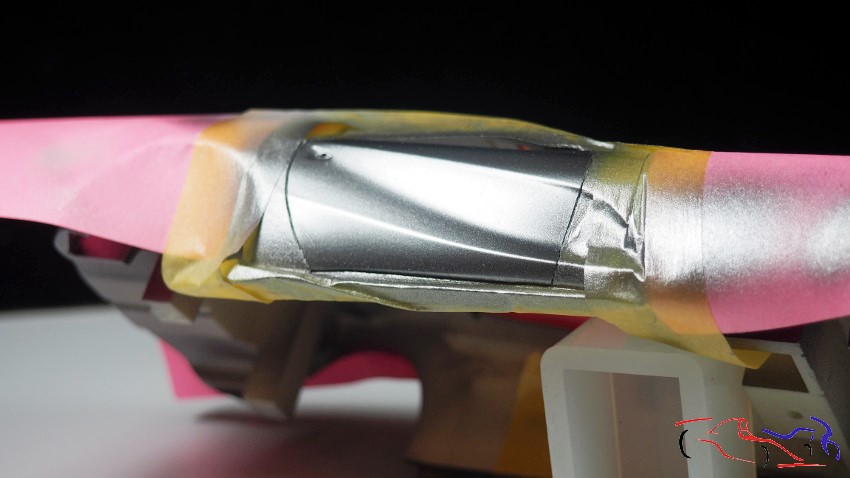
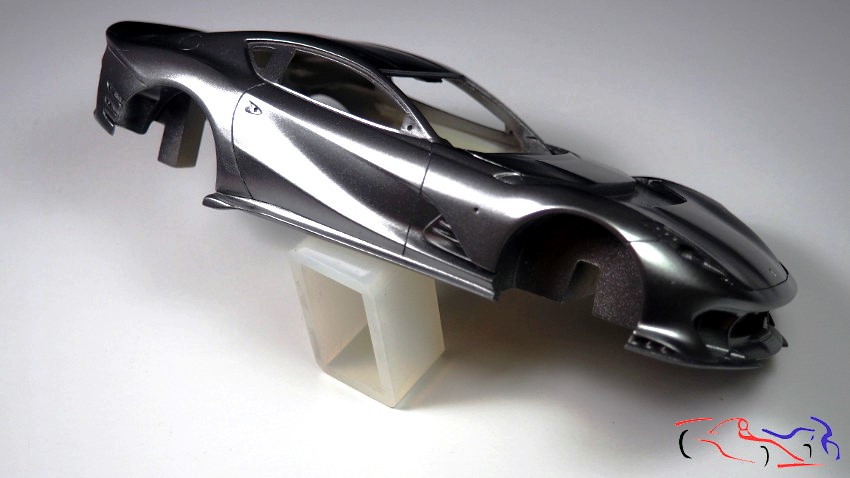
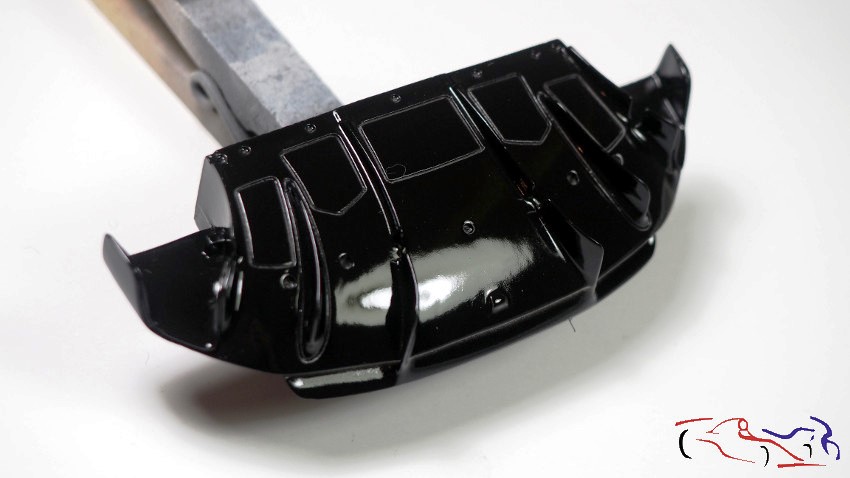
Para el resto de piezas, utilizo la base negra brillante de MIG para la spiezas que llevan algún tipo de calca como el difusor trasero que irá repleto de carbono…
For the rest of the parts, I use MIG’s glossy black base for the pieces that have some kind of decal, like the rear diffuser which will be covered in carbon fiber…
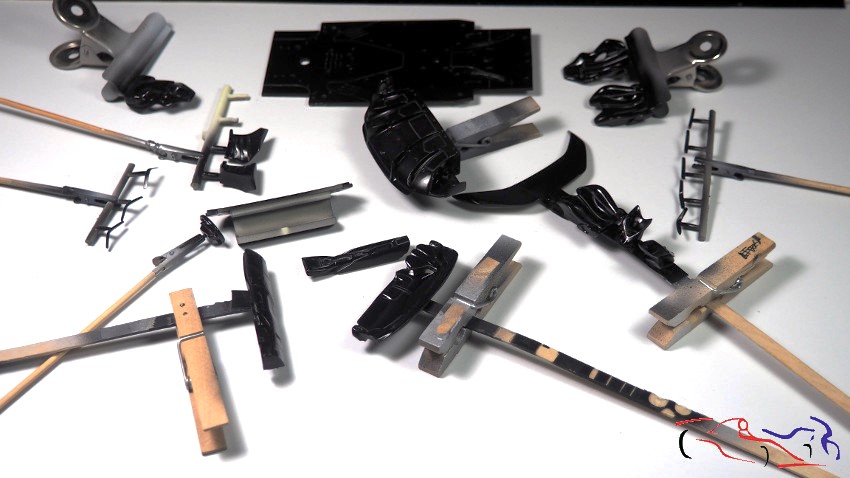
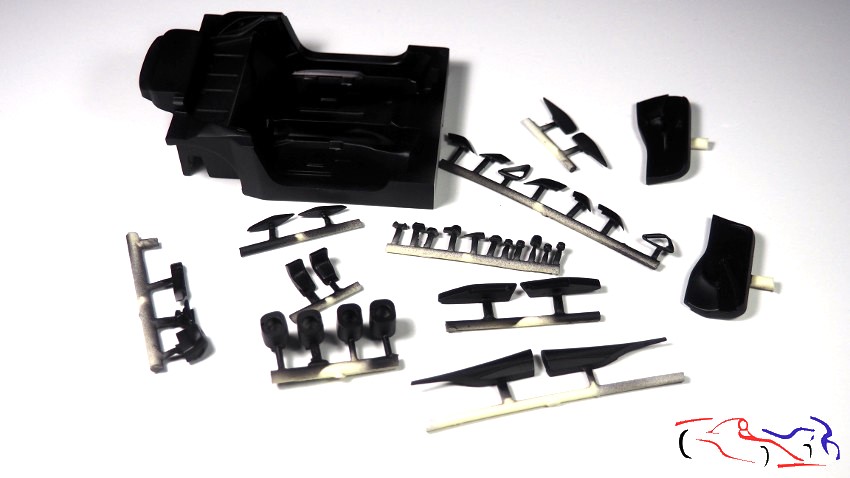
….y el negro semimate LP de Tamiya, para las piezas que no llevarían calcas:
…and Tamiya LP semi-matte black, for the parts that wouldn’t have decals:
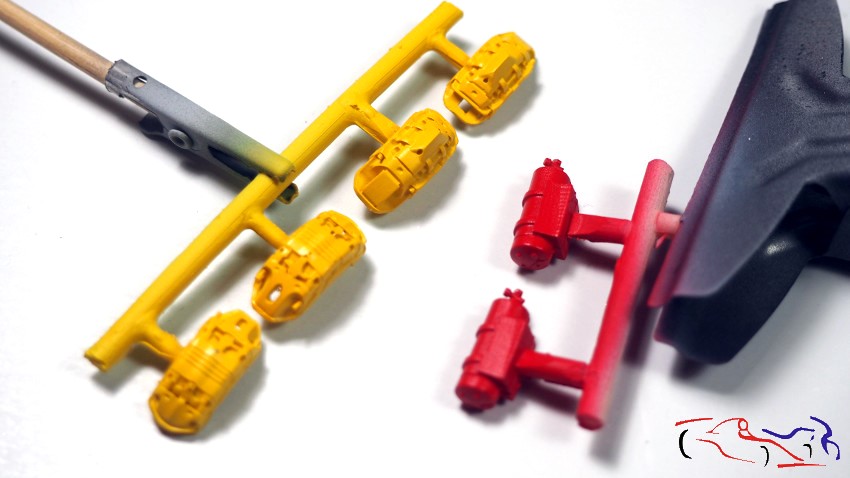
Aprovechamos para pintar las pinzas de freno con Giagio Modena, y rojo intenso para los extintores:
We took the opportunity to paint the brake calipers with Giagio Modena, and the fire extinguishers with a deep red:
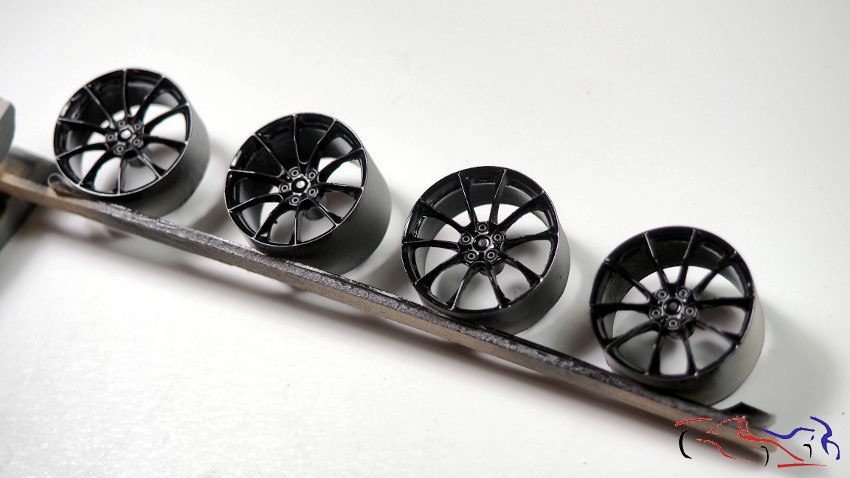
En el caso de las llantas, tambiénse pintan con el negro brillante de MIG, para terminar con el aluminui de la gama Zero Metal, que da un grano finísimo!!
In the case of the rims, they are also painted with MIG’s gloss black, and finished with the aluminum from the Zero Metal range, which gives a very fine grain!
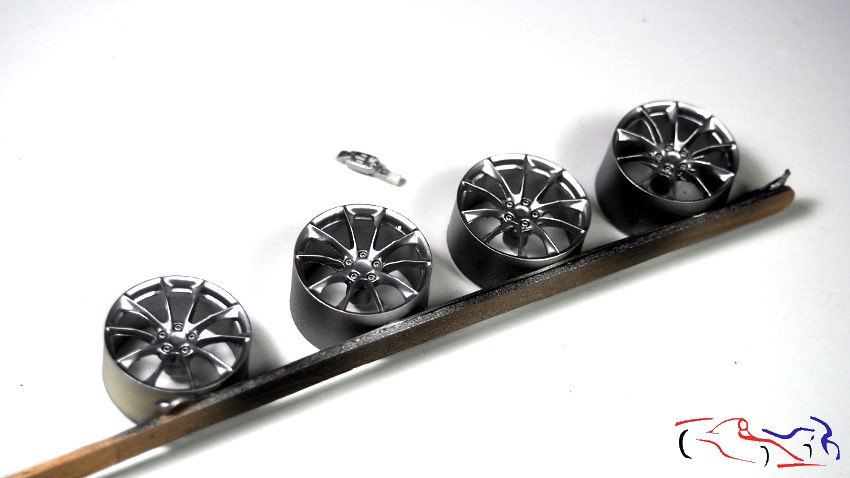
Espero que os haya gustado los avances de este proyecto. Gracias por ver y comentar!!
I hope you enjoyed the progress on this project. Thanks for watching and commenting!
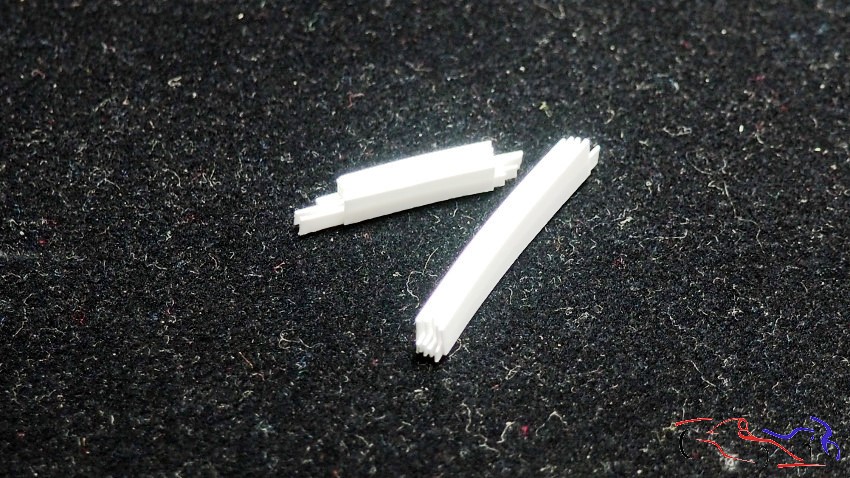
]]>Hello everyone. We’re back with this project, as the three small models I set out to do to detox from the super-detailing of this car are now finished. One complication I had with the bodywork was the grilles between the hood and the windshield, one on each side. I tried deepening these openings, but it didn’t work. So I tried recreating them with plastic. I glued very thin sheets together to create the grilles, planning to make resin copies once I was finished. But I realized that wasn’t a good solution, so I looked for the photo-etched parts from Syudio27 that my friend Borja recommended me, and I’ll post pictures of them later.
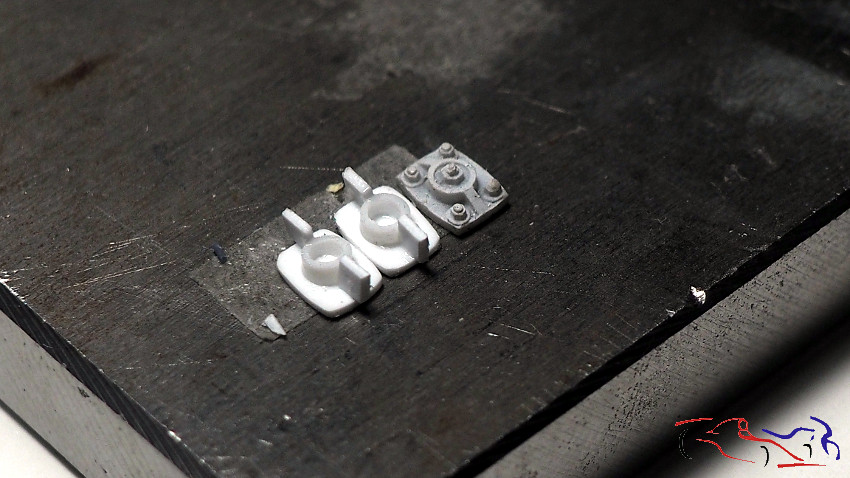
Otras piezas que voy a recrear son las copelas delanteras. El TK trae unas en resina, pero desgraciadamente, una de ellas volóy tuve que hacerlas a partir de esa. Esta es una foto del proceso antes de estar finalizadas.
Other parts I’m going to recreate are the front strut mounts. The TK comes with some in resin, but unfortunately, one of them broke off, and I had to make them from that one. This is a photo of the process before they were finished.
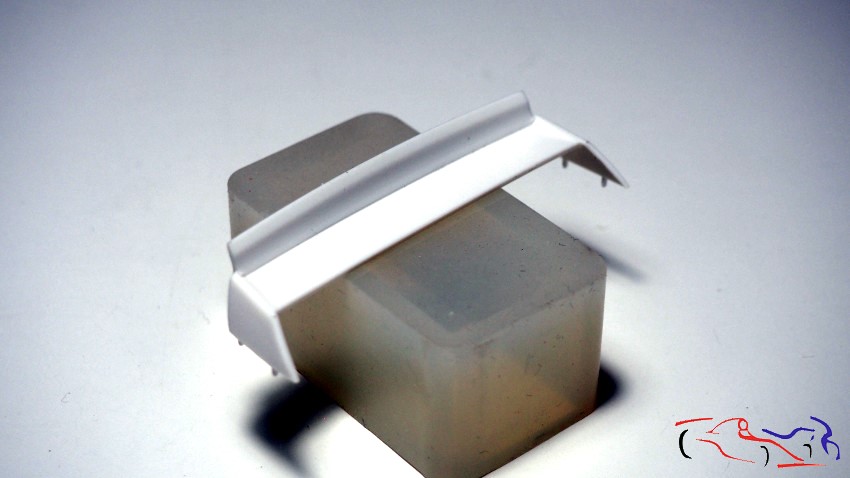
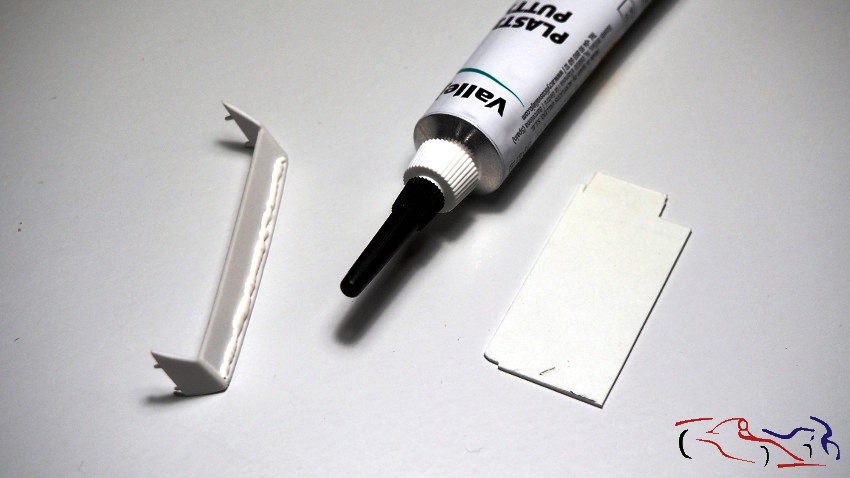
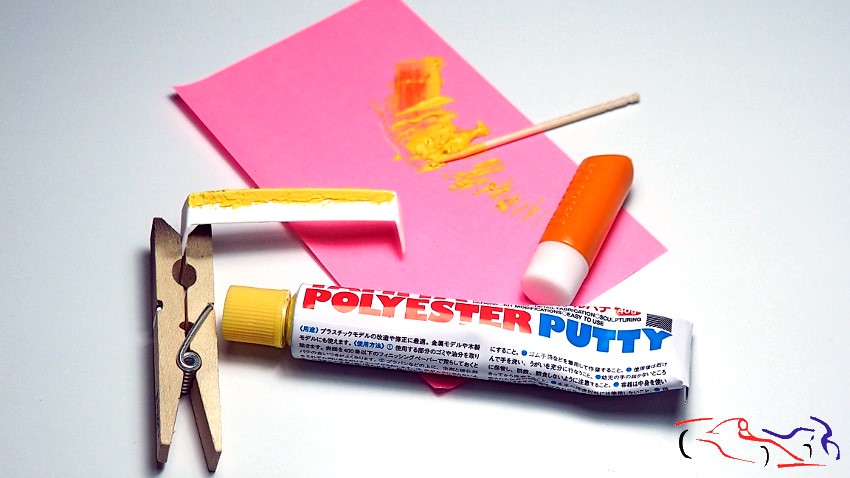
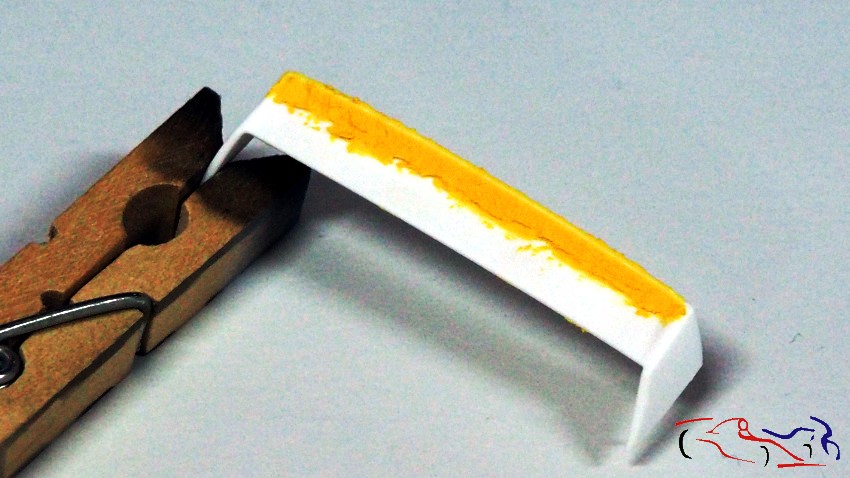
Más cosas de la carrocería. El alerón trasero viene configurado para el DTM, con una sobreelevación vertical, que no llevaba el coche de Peres Sala, que hay que recortar. A su vez, la linea de unión con el plano horizontal no es una linea sino que es una curva, por lo que tendremos que rellenar con masilla y dar la correspondiente forma. Una vez recortado, uso una masilla nueva para mi que era la Vallejo, que una vez puesta, la iba a definir con un útil que me hice en plástico. Pero no me gustó la masilla, ya que se comportaba como plástico blando. Quizás hice algo mal, pero decicí quitarla y poner masilla Putty de poliester de Tamiya. En la última foto veis que está ya puesta lista para lijar.
More on the bodywork. The rear wing comes configured for DTM racing, with a vertical lift, which Peres Sala’s car didn’t have, and this needs to be trimmed. Also, the line where it meets the horizontal plane isn’t a straight line but a curve, so we’ll have to fill it with putty and shape it accordingly. Once trimmed, I used a new putty for me, Vallejo, which I was going to refine with a tool I made out of plastic. But I didn’t like the putty, as it behaved like soft plastic. Perhaps I did something wrong, but I decided to remove it and use Tamiya polyester putty. In the last photo, you can see it’s already in place and ready to be sanded.
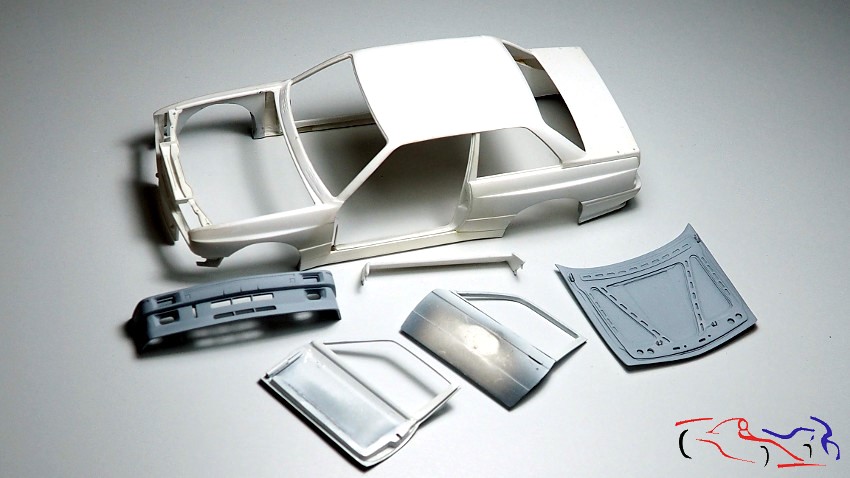
En este momento, ya tenía todo listo para imprimar y pintar posteriormente:
At this point, I had everything ready to prime and then paint:
Y así lo hice con imprimación Tamiya blanca en spray para todas las piezas de la carrocería:
And so I did, using Tamiya white spray primer for all the body parts:
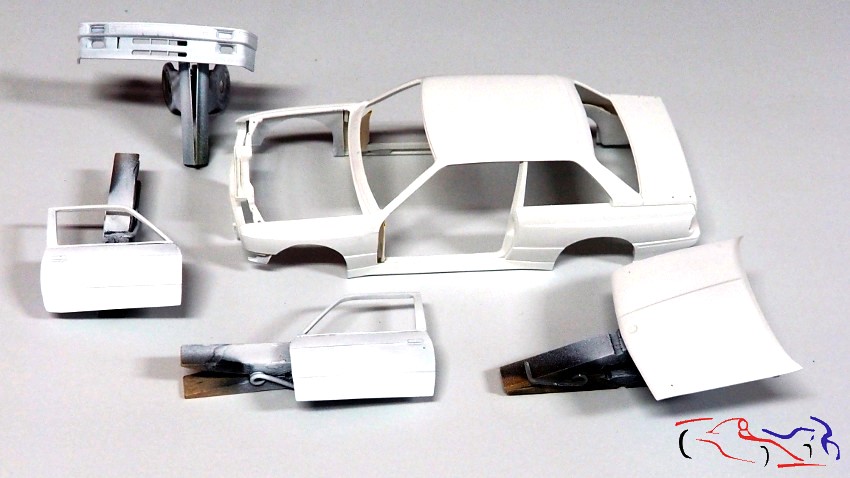
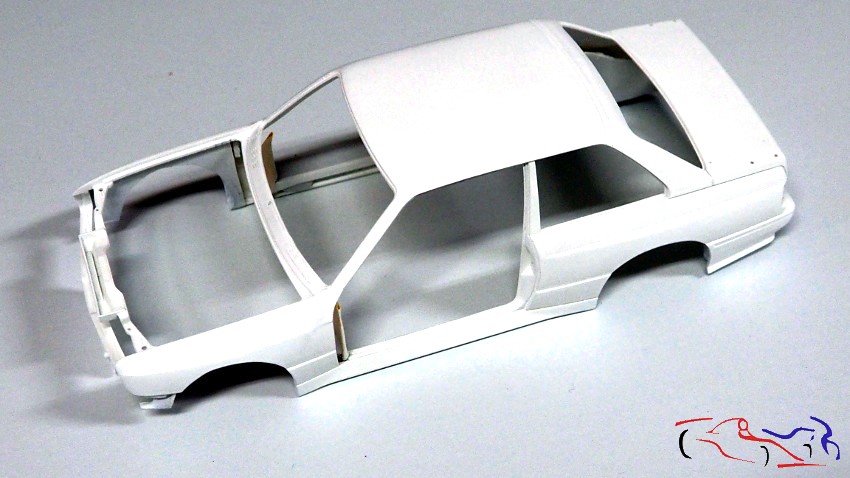
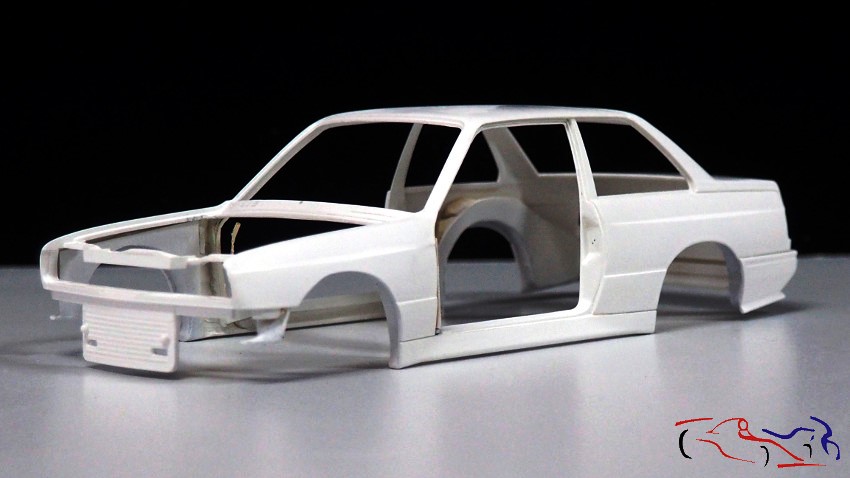
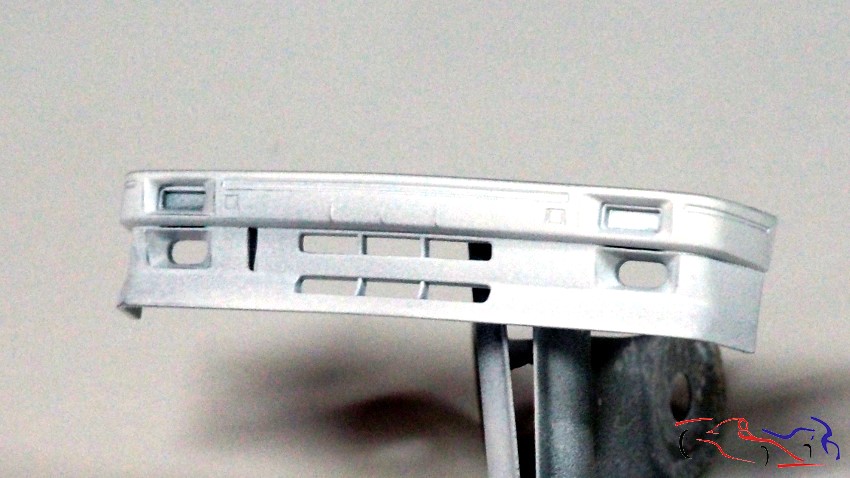
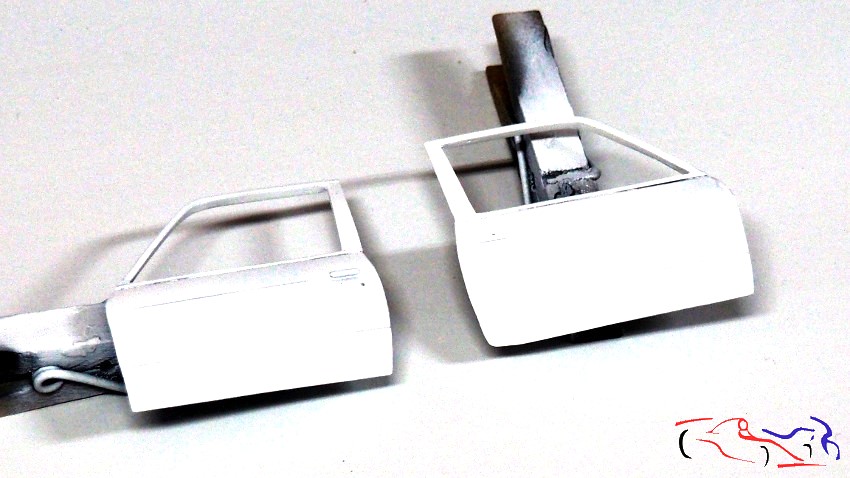
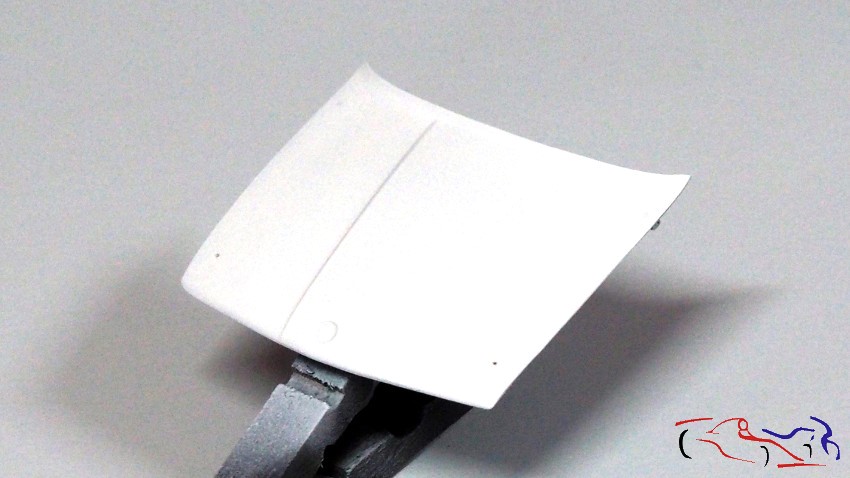
Una vez seca, le paso una lija con grano 2000 y pasamos a su pintado: utilizo la pintura de Number5 que tiene para este BMW M3 E30. Sobre el blanco de la imprimación, se puede ver que es un tono un poco más crema, siendo su aplicación muy buena. Yo suelo dar siempre una capa muy fina, y una segunda que ya cubra bien. El resultado es inmejorable!!
Once it’s dry, I sand it with 2000-grit sandpaper and then we move on to painting: I use the Number 5 paint they have for this BMW M3 E30. Over the white primer, you can see it’s a slightly creamier tone, and it applies very well. I usually apply a very thin coat, and then a second coat for good coverage. The result is unbeatable!
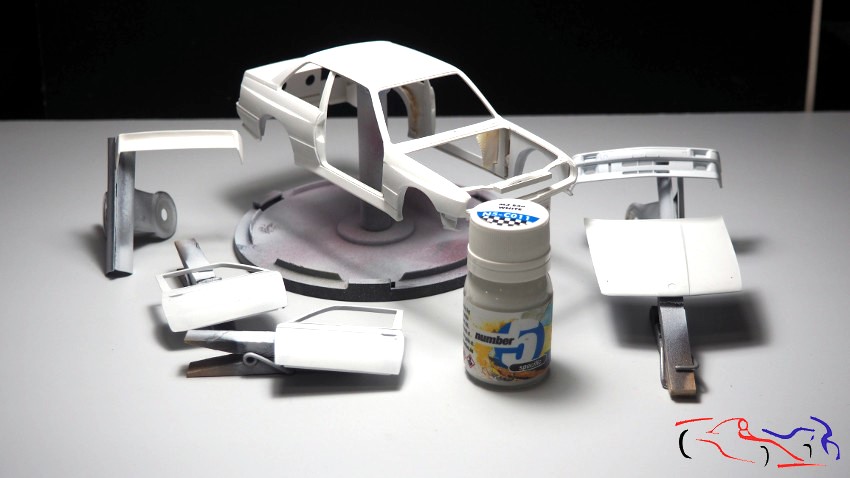
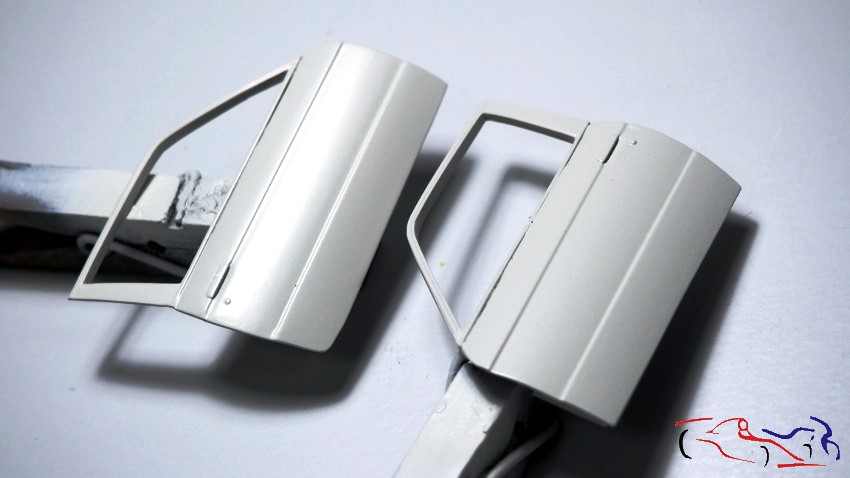
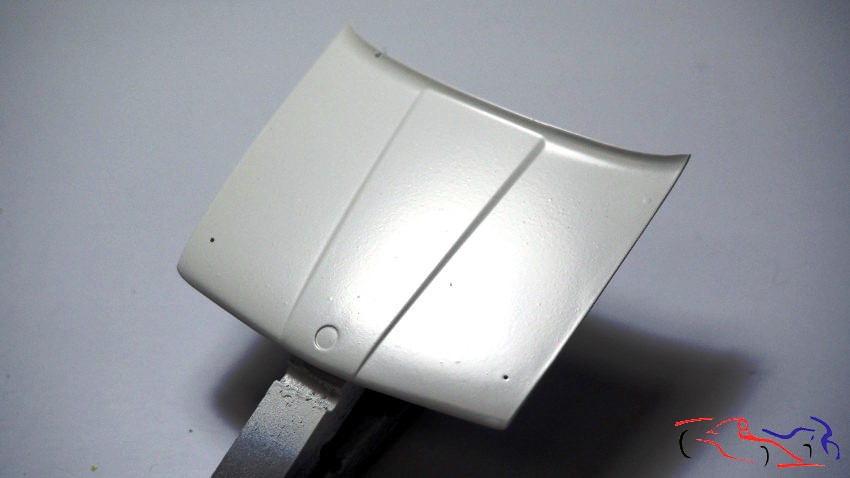
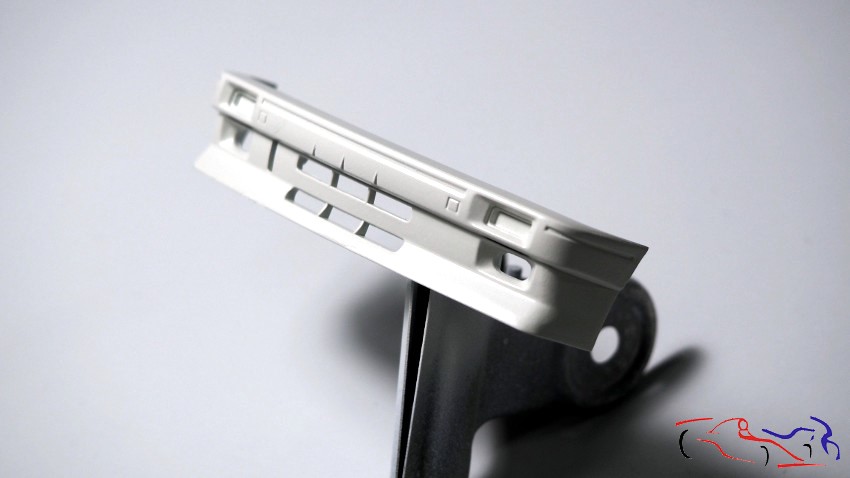
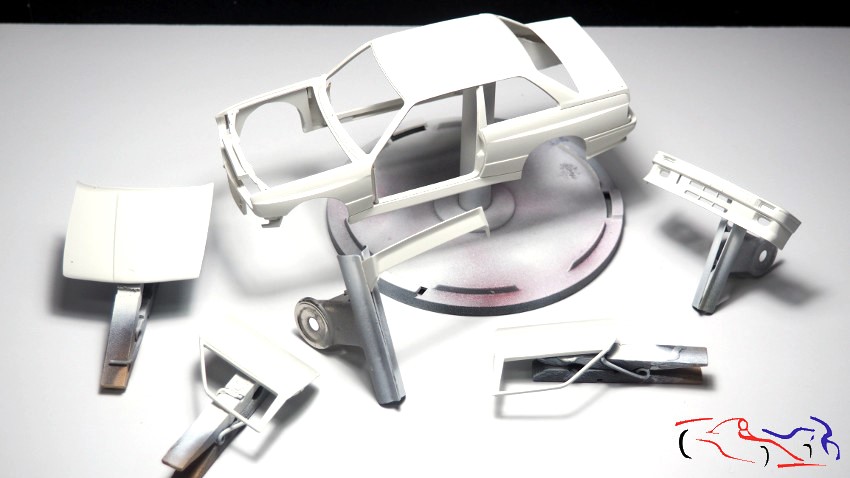
Ahora, os muestro fotos de la carrocería:
Now, I’ll show you photos of the bodywork:
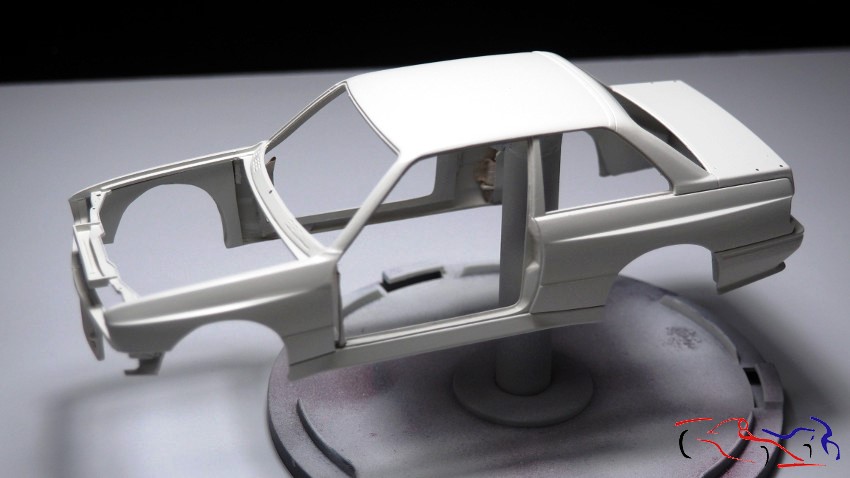
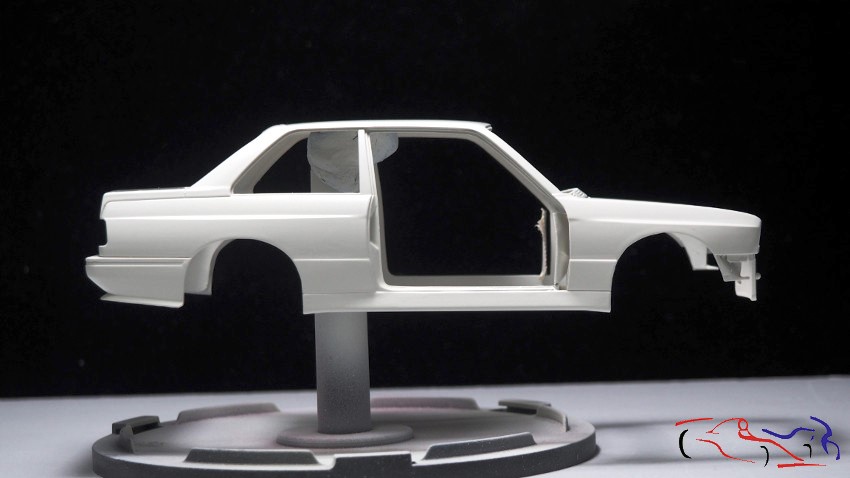
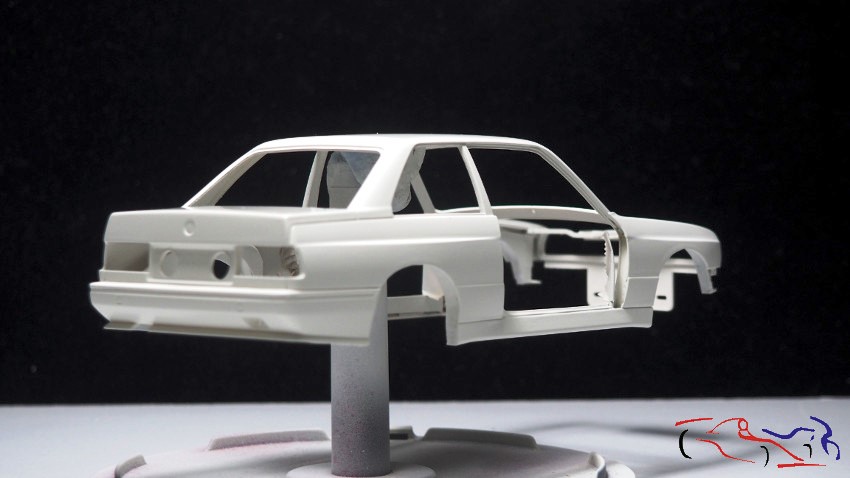
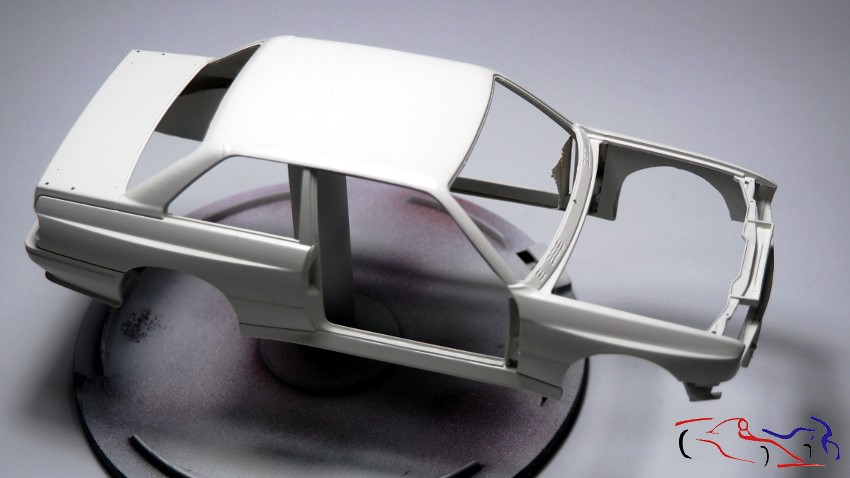
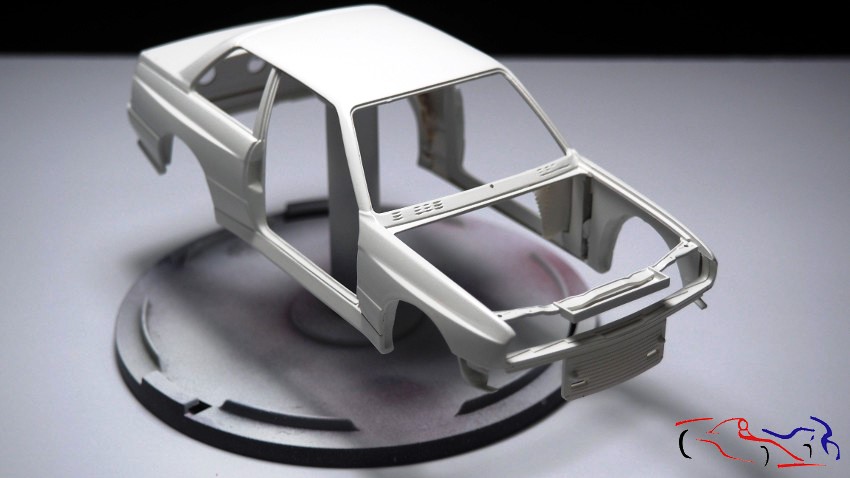
Podéis ver que en la foto anterior, se ven las endiduras de las rejillas de aire que comenté antes, y que en el siguiente post, habré arreglado, poniendo masilla, lijando, imprimando y pintando de nuevo la zona. Espero que os guste!!! Gracias por ver y comentar!!
As you can see in the previous photo, the gaps from the air vents I mentioned earlier are visible. In the next post, I’ll have fixed them by applying filler, sanding, priming, and repainting the area. I hope you like it! Thanks for watching and commenting!
]]>Good morning. While we’re continuing with the BMW M3, and since I’m going to be working on the bodywork, I’m starting this project to share resources. It’s a 1/24 scale model of the Ferrari 812 Competizione from Alpha Models..

El Ferrari 812 Competizione es una edición limitada (999 unidades) basada en el 812 Superfast. Representa el pináculo de las berlinettas V12 de motor delantero de la marca, destacando por su motor atmosférico de 830 CV a 9.500 rpm, aerodinámica extrema y un peso aligerado en 38 kg frente al modelo estándar. El corazón de este superdeportivo es un motor V12 de 6,5 litros sin turboalimentación que alcanza la espectacular cifra de 830 caballos de fuerza. Gracias a componentes aligerados—como bielas de titanio—y una transmisión automática de doble embrague de siete velocidades, logra acelerar de 0 a 100 km/h en solo 2,8 segundos y alcanzar una velocidad máxima superior a los 340 km/h. Visualmente, se distingue por la ausencia de luneta trasera, reemplazada por un panel completo de aluminio con generadores de vórtices para mejorar el flujo de aire. En el capó destaca una hoja transversal de fibra de carbono y su carrocería está repleta de tomas de aire, aletas y un difusor masivo que garantizan una carga aerodinámica formidable sin aumentar la resistencia
The Ferrari 812 Competizione is a limited edition (999 units) based on the 812 Superfast. It represents the pinnacle of the brand’s front-engined V12 berlinettas, distinguished by its naturally aspirated 830 hp engine at 9,500 rpm, extreme aerodynamics, and a weight reduction of 38 kg compared to the standard model. The heart of this supercar is a naturally aspirated 6.5-liter V12 engine that achieves a spectacular 830 horsepower. Thanks to lightweight components—such as titanium connecting rods—and a seven-speed dual-clutch automatic transmission, it accelerates from 0 to 100 km/h in just 2.8 seconds and reaches a top speed exceeding 340 km/h. Visually, it is distinguished by the absence of a rear window, replaced by a full aluminum panel with vortex generators to improve airflow. The hood features a prominent carbon fiber cross-section, and its body is filled with air intakes, fins, and a massive diffuser that guarantee formidable downforce without increasing drag.
Respecto al kit, la mayor parte de las piezas son de resina, con una fabricación muy buena, limpia y sin burbujas, donde lo único que debes hacer es remarcar las líneas de panel y lijar la carrocería. Si bien es cierto que las instrucciones no tienen mención a los colores de las piezas, el proceso para su pintura requiere de una buena observación de fotos del coche original, y debe seleccionarse el color a emplear por uno mismo. EL kit tiene muchos fotograbados y a veces muy pequeños, así como muchas calcas, de fibra de carbono o de colores para la decoración del kit. Decir que respecto a las calcas, el kit trae muchas posibilidades para poder seleccionar diversos acabados reales, lo que lo hace muy interesante. Y a partir de aquí, las fotos del despiece:
Regarding the kit, most of the parts are resin, very well manufactured, clean, and bubble-free. All you need to do is reinforce the panel lines and sand the body. While the instructions don’t mention the colors of the parts, the painting process requires careful observation of photos of the original car, and you must select the color yourself. The kit includes many photo-etched parts, some very small, as well as numerous decals, both carbon fiber and colored, for decorating the kit. The kit offers a wide range of decal options for achieving various realistic finishes, making it very appealing. And from here, the exploded view photos:


Gracias por ver y comentar!!
Thanks for viewing and comenting!!
]]>Hello everyone. Let’s get to the kit review. Tameo is a great brand with many years of experience, providing very good quality in its products. The body and parts breakdown are fantastic, although, as with all kits, some basic preparation is required: removing flash and cleaning the metal, checking all the holes, and pre-assembling everything possible. With these steps, the kit will be easy to assemble and of excellent quality. Care must be taken, because any added extras are complex due to their size: you must carefully measure the cables and tubes you want to include, and the space the kit provides for them. The Gravity Spain primer, which works very well with metals, and the Number 5 paint and lacquer, along with the parts painted with Tamiya LP, added the right finish to a good kit.
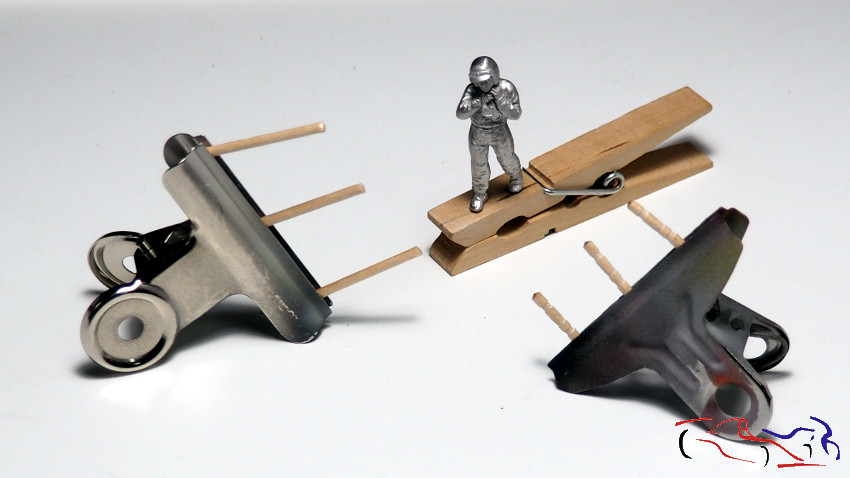
Y como bien os dije, las fotos finales de este coche irían junto a la peana, y aquí os voy a mostrar el proceso de la misma. Primero recogemos los materiales: base de madera con un agujero para fijar el coche, la figura de metal con su agujero para fijarla, red que viene con los ajos en el mercado, y palillos para fijar la red.
And as I mentioned, the final photos of this car would be taken with the base, and here I’m going to show you the process of making it. First, we gather the materials: a wooden base with a hole to attach the car, the metal figure with its own hole for attaching it, the net that comes with garlic from the market, and toothpicks to secure the net.
Una vez compuesto las piezas en la viñeta, aplicamos la base de la viñeta; asfalto y tierra (con bolitas de tierra para los trenes eléctricos) de AK. Tapamos los agujeros para que no se tapen al aplicar esos productos.
Once the pieces are assembled on the vignette, we apply the base coat: asphalt and earth (with small balls of earth for electric trains) from AK. We cover the holes so they don’t get clogged when applying these products.
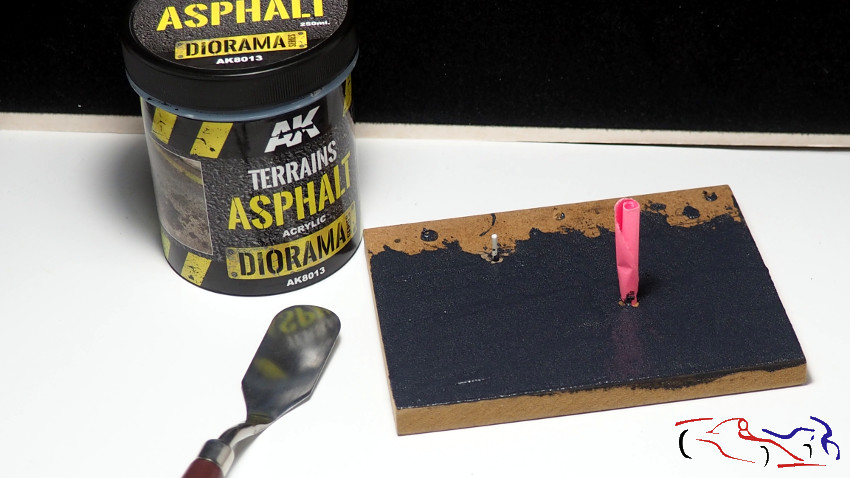
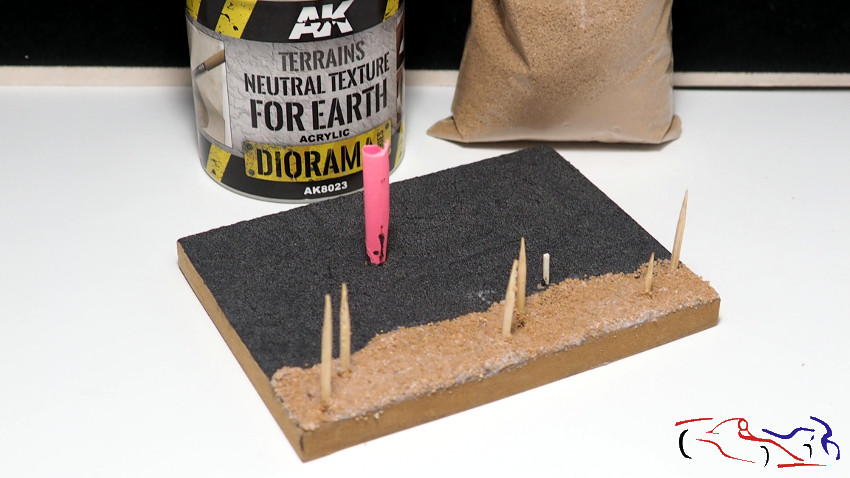
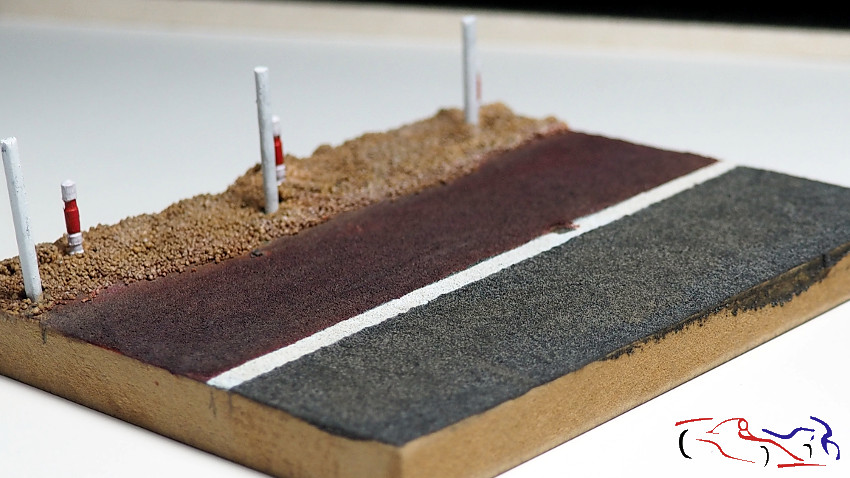
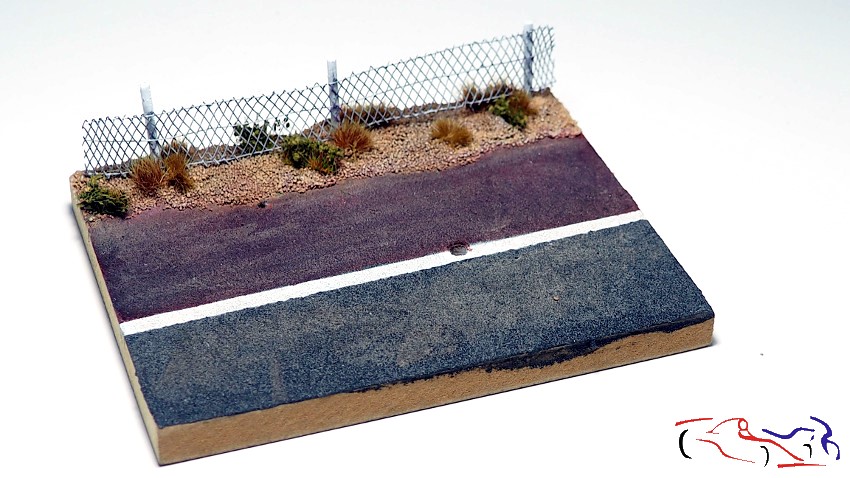
Y empezamos a pintar: enmascaramos para la línea blanca pintada con aero, y los palos de las vallas metálicas. En la segunda foto veis dos tipos de palos, que eran para dos vallas, pero al final, me decidí solo por la valla más alta. A su vez, la parte de asfalto que está entre la línea blanca y la tierra, el arcén, tiene un ligero color rojizo, como se ven en las fotos de la carrera, del circuito del Jarama. Por tanto, le aplico distintos tonos de rojo y negro muy diluidos.
And we started painting: we masked off the white line painted with an airbrush, and the posts for the metal fences. In the second photo you can see two types of posts, which were for two fences, but in the end, I decided to use only the taller fence. The asphalt section between the white line and the dirt, the shoulder, has a slight reddish tint, as you can see in the race photos from the Jarama circuit. Therefore, I applied various shades of very diluted red and black paint.
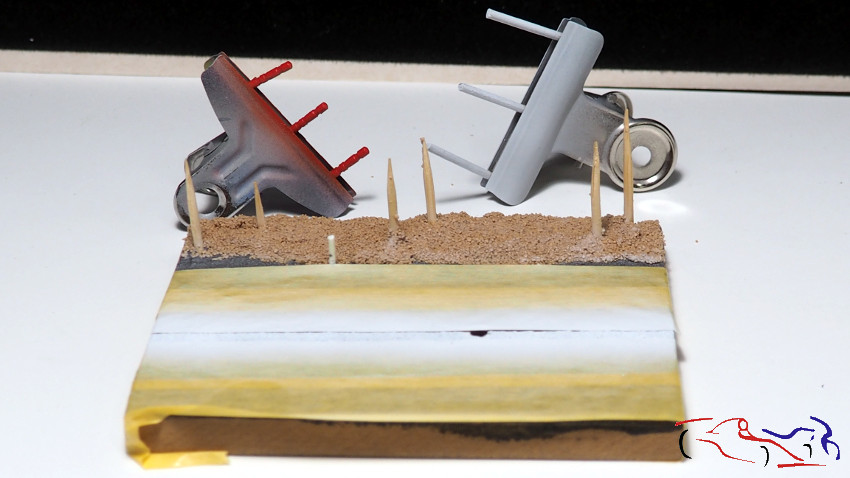
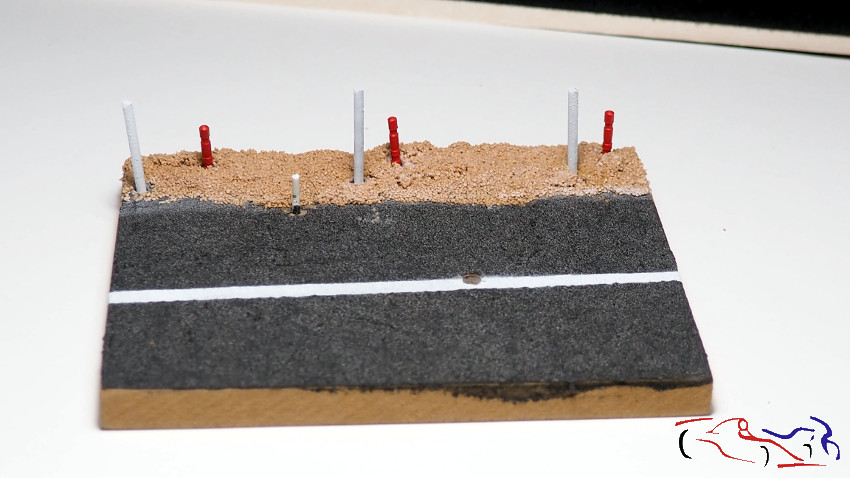
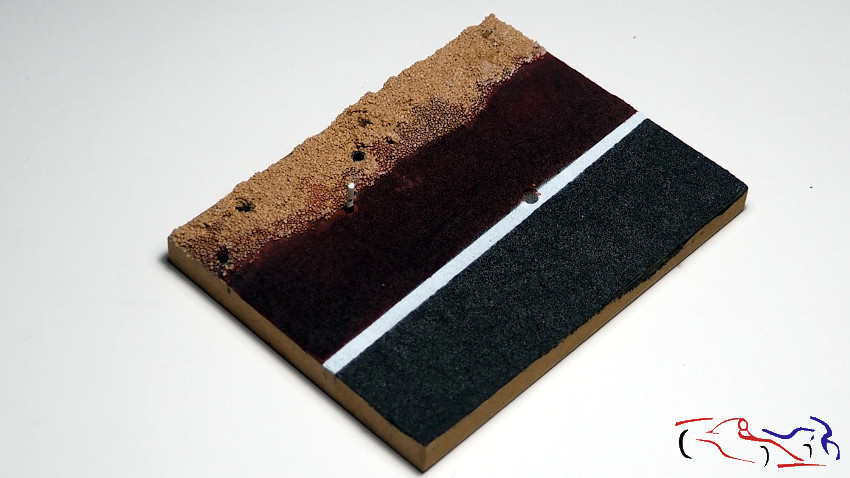
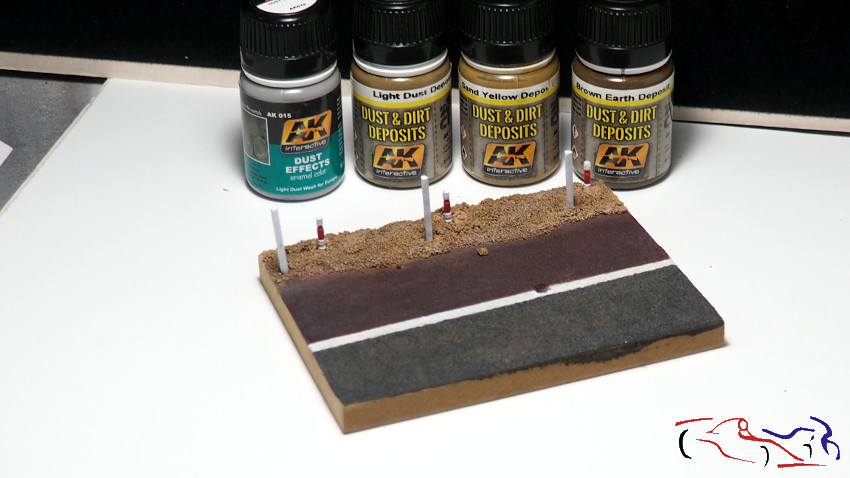
En cuanto al terreno, le aplico igualmente, lavados pero en este caso, de suciedad y de tierras de la marca AK, dando un resultado muy bueno al secarse.
As for the ground, I also apply washes, but in this case, for dirt and soil from the AK brand, giving a very good result when it dries.
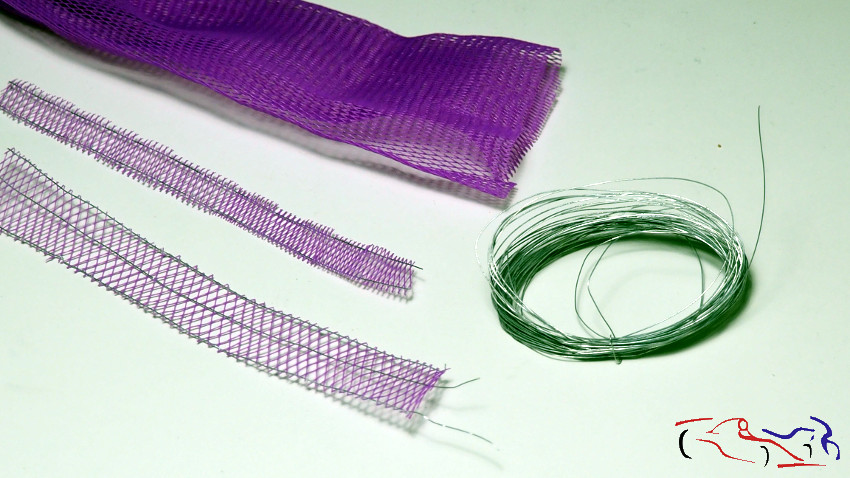
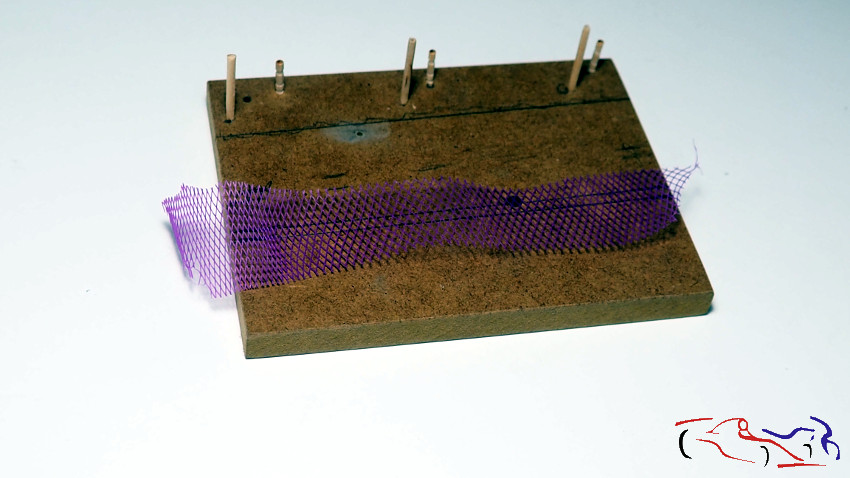
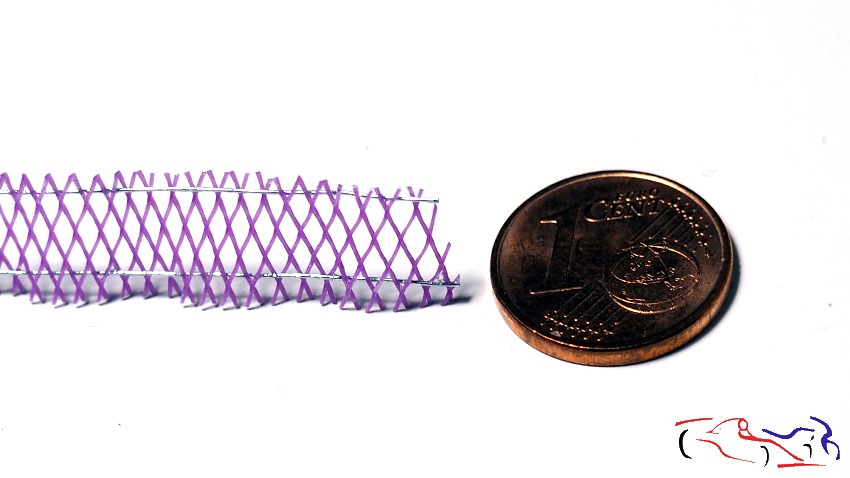
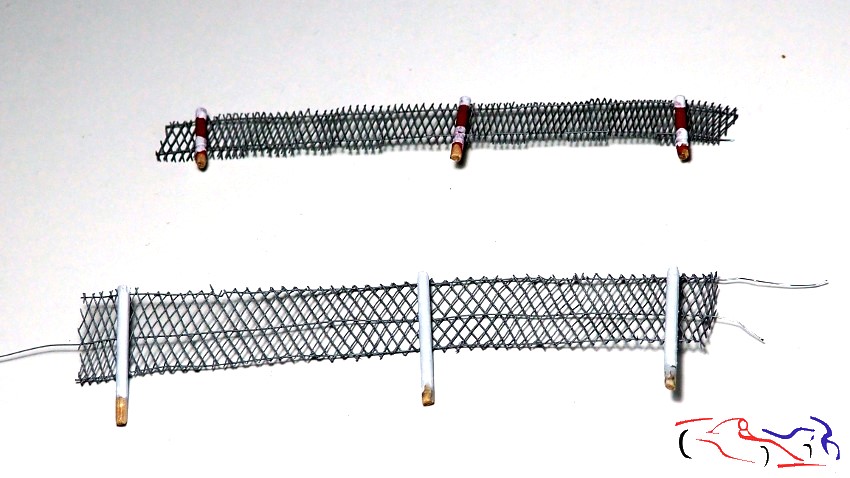
Vamos con la red. Una vez cortada según las medidas de la peana, la estiro para hacer los rombos más grandes. El siguiente paso es meter arriba, abajo y por el medio, un cable muy finito intercalando los rombos, y fijándolo con ciano. Después se imprima y se pinta con aluminio. Esta red se pega a los palos, y éstos a la base. Por ultimo, añadimos unos arbustos de los que vienen ya montados listos para pegar.
Let’s move on to the netting. Once cut to the dimensions of the base, I stretch it out to make the diamonds larger. The next step is to insert a very thin wire through the top, bottom, and middle of the diamonds, securing it with cyanoacrylate glue. Then I prime it and paint it with aluminum foil. This netting is glued to the poles, and the poles to the base. Finally, we add some pre-assembled bushes that are ready to be glued on.
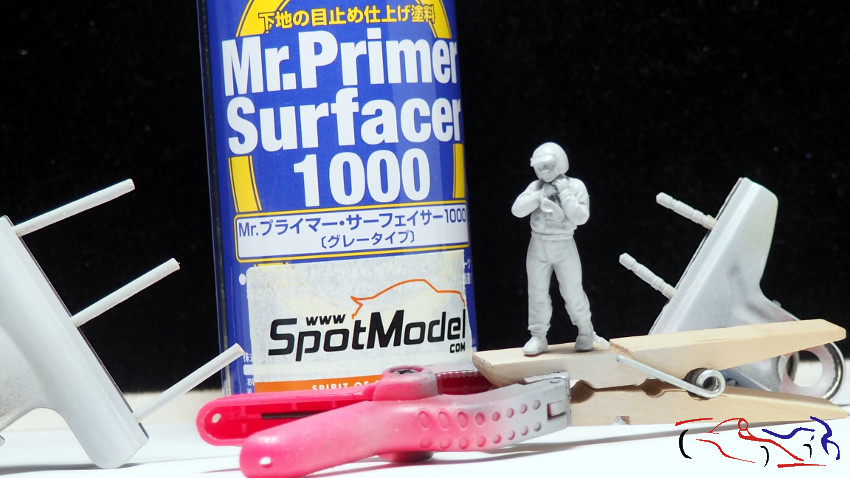
Pasamos a la figura. Después de imprimarse con Mr Primer Surfacer a spray, le aplico varias veces al mono, un color azul claro de Vallejo un poco diluido. Después le doy lavados de ese azul con otro más oscuro, con gris y hasta con negro del Panel Liner de Tamiya. Los guantes rojos y las botas azules, siguen el mismo proceso. Para la cara, aplico color carne, con un lavado en negro para después dar luces con el color carne y marfil.
Let’s move on to the figure. After priming it with Mr Primer Surfacer spray, I apply several coats of Vallejo light blue, slightly diluted, to the jumpsuit. Then I apply washes of that blue with a darker blue, with gray, and even with black from Tamiya Panel Liner. The red gloves and blue boots follow the same process. For the face, I apply flesh tone, with a black wash, and then highlight with flesh tone and ivory.
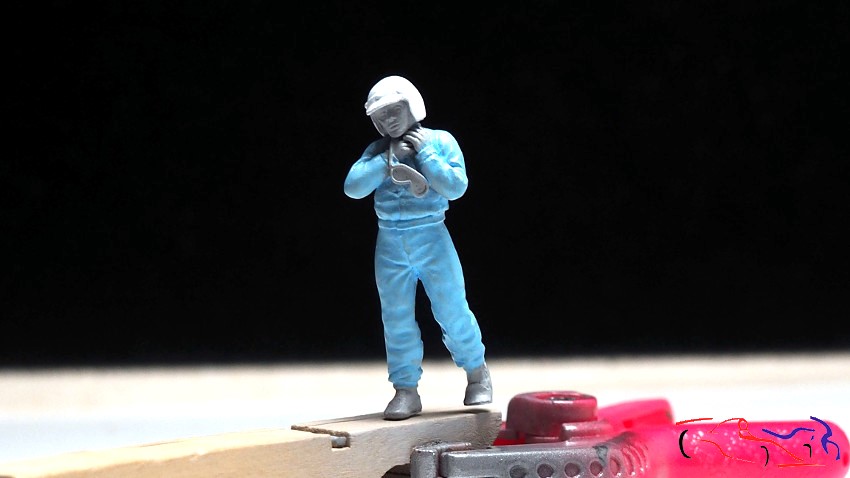
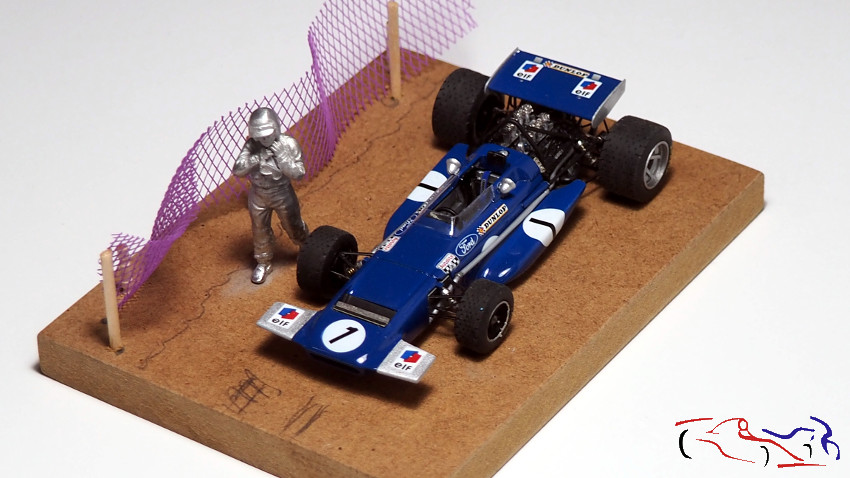
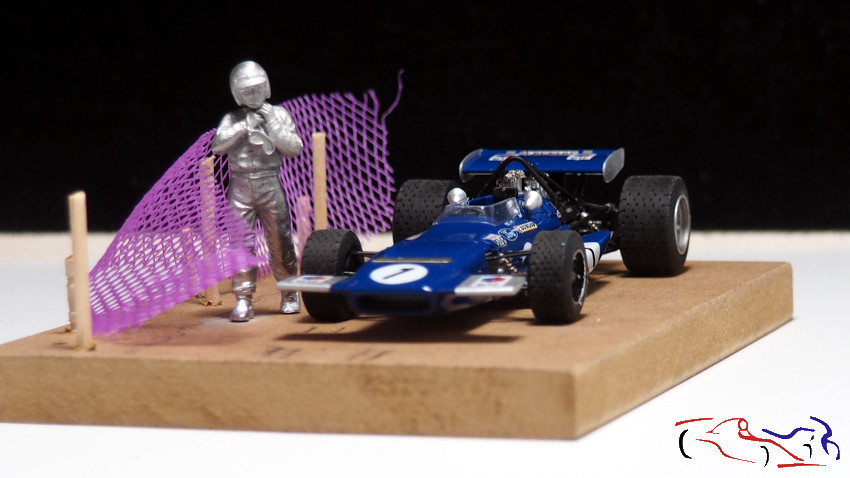
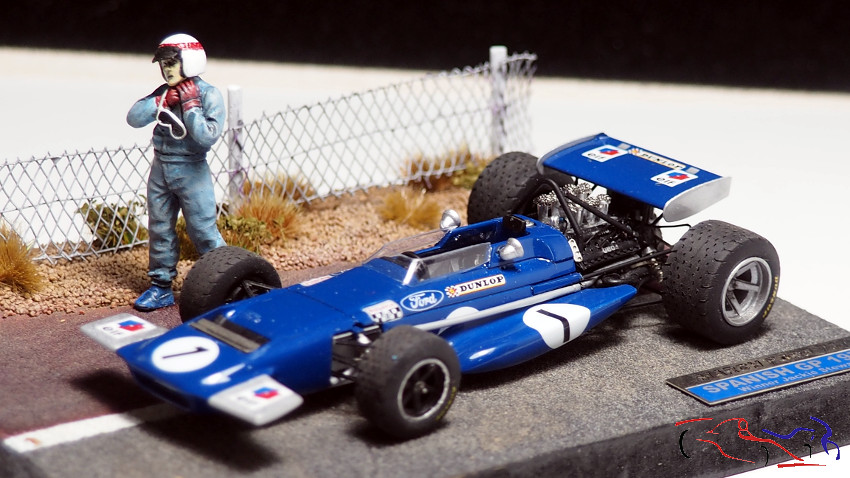
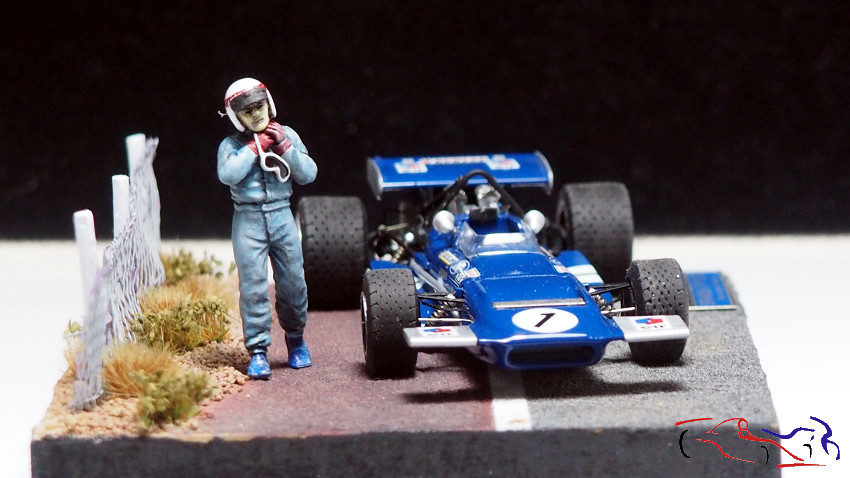
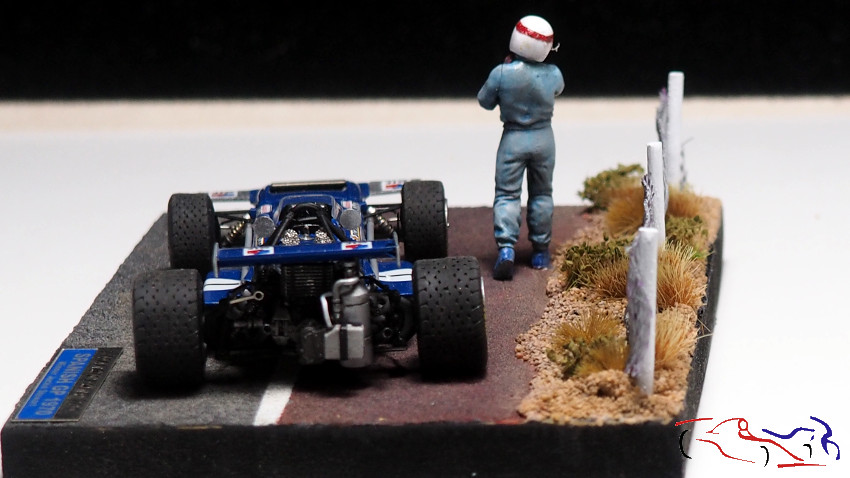
Y la viñeta está terminada! Decir que el casco blanco con una calca de 1/12 reducida a 1/43 e impresa en papel de calca trasparente, junto a la visera negra, es el punto final de la figura. A la cara no le he dado más detalle porque no soy experto y prefiero dejarla así. Por tanto, con la placa y habiendo pintado de negro el contorno de la base, este proyecto está acabado!!
And the vignette is finished! The white helmet, with a 1/12 scale decal reduced to 1/43 and printed on clear decal paper, along with the black visor, completes the figure. I haven’t added any more detail to the face because I’m not an expert and prefer to leave it as is. Therefore, with the baseplate and having painted the outline of the base black, this project is finished!
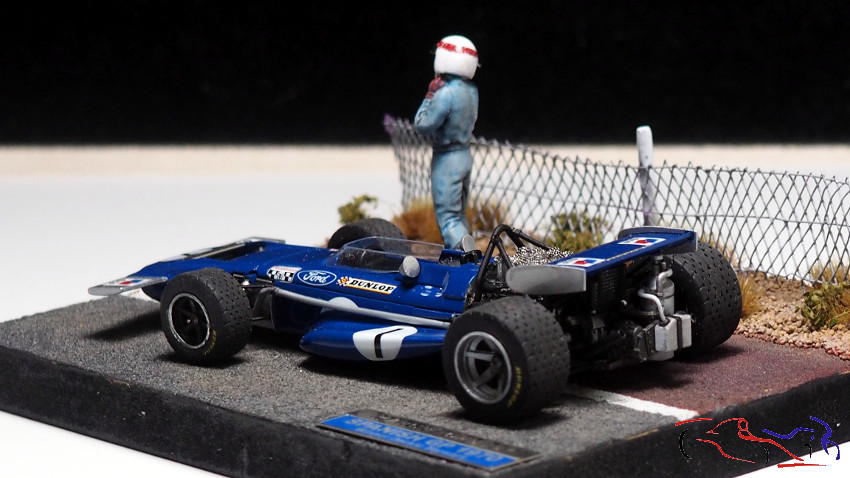
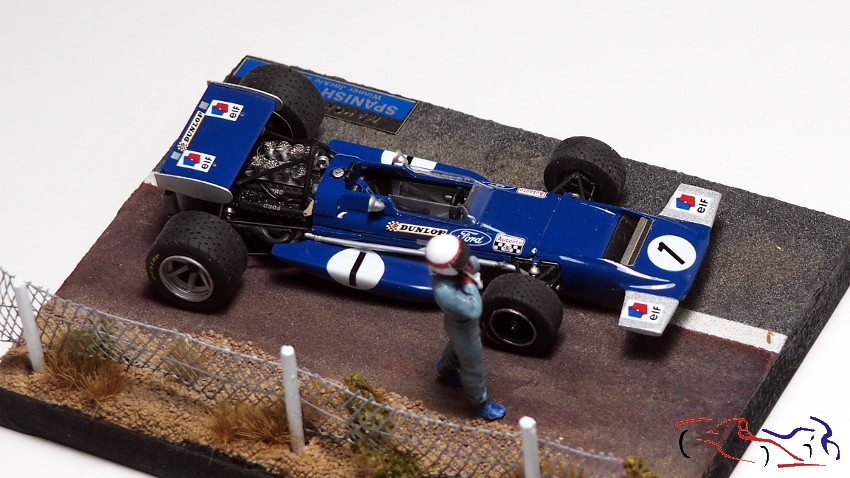
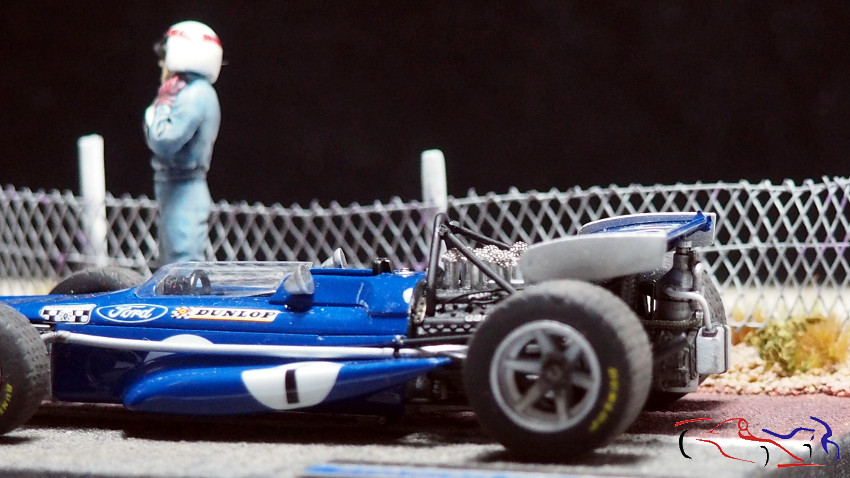
Gracias por ver y comentar!!
Thanks for watching and commenting!
]]>Hello again! Since the car is now finished, we’ll be posting updates on the process very frequently, and with this one, we’ve completed the kit. In this final step, we’re attaching the taillights, the Shell decal, the tailgate fasteners, and the central bar used to adjust the spoiler.


Y como ya comenté anteriormente, a este kit lo voy a ensuciar. Deciros que es la primera vez que lo hago y el resultado no es lo satisfactorio que yo quería, pero es un comienzo. Lo primero fue dar puntos de negro acrílico con un pincel viejo, por delante y por detrás de las ruedas, simulando la goma y posibles manchas puntuales de grasa. Eso se ve en la primera foto junto al bote de pintura negra acrílica, y los botes de pintura Tamiya que usé para ensuciarlo . Los mezclé a mi gusto, le añadi bastante disolvente, bajé la presion del aero y le pulvericé, siempre desde una posición delantera. A su vez, y antes de poner el limpiaparabrisas, cortñe una máscará que coloqué en el cristal, para simular la limpieza del limpiaparabrisas:
And as I mentioned before, I’m going to weather this kit. I should mention that it’s the first time I’ve done this, and the result isn’t as satisfactory as I’d hoped, but it’s a start. The first thing I did was apply dots of black acrylic paint with an old brush, both in front of and behind the wheels, simulating rubber and any occasional grease stains. You can see this in the first photo, next to the pot of black acrylic paint and the pots of Tamiya paint I used for the weathering. I mixed them to my liking, added quite a bit of thinner, lowered the airbrush pressure, and sprayed, always from a front-facing position. Also, before attaching the windshield wipers, I cut a mask that I placed on the glass to simulate the wiper action.


Y una vez eliminada la máscara y puesto el limpiaparabrisas, este el el resultado, que para mi gusto es excesivo. El problema fue que cuando seca la pintura, se acrecienta su opacidad.
And once the mask was removed and the windshield wiper installed, this is the result, which in my opinion is excessive. The problem was that when the paint dried, its opacity increased.


Y aquí es el final. Una maqueta complicada y antigua, realizada para aprovechar el proceso de lacado, y que al final, ha servido de experiencia para practicar con calcas problemáticas, carrocería no muy fina y ensuciado del modelo. Gracias por ver y comentar!!
And here’s the end. A complicated and old model, built to take advantage of the lacquering process, which in the end served as practice for dealing with problematic decals, a less-than-perfect body, and weathering the model. Thanks for watching and commenting!
]]>Hello everyone again. We left the 917 LH with some of the decals applied, and here’s the car with all the decals in place. They were still a bit of a challenge because there were rounded shapes, and liquids and heat were essential.
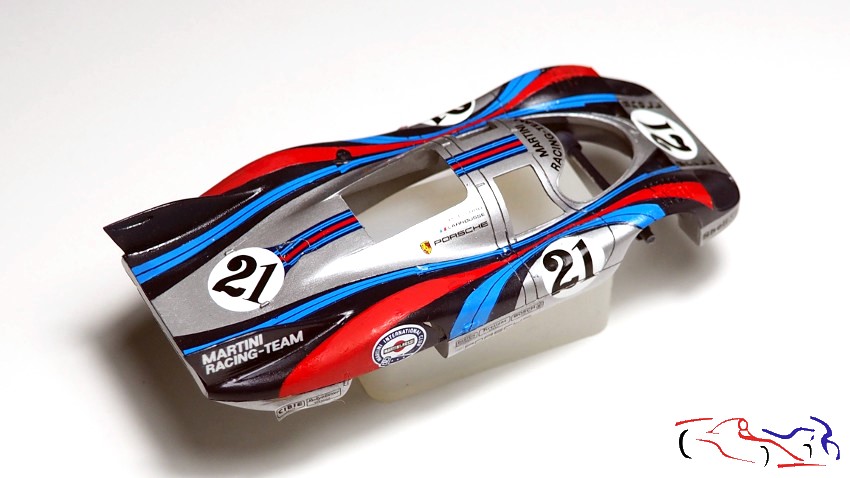
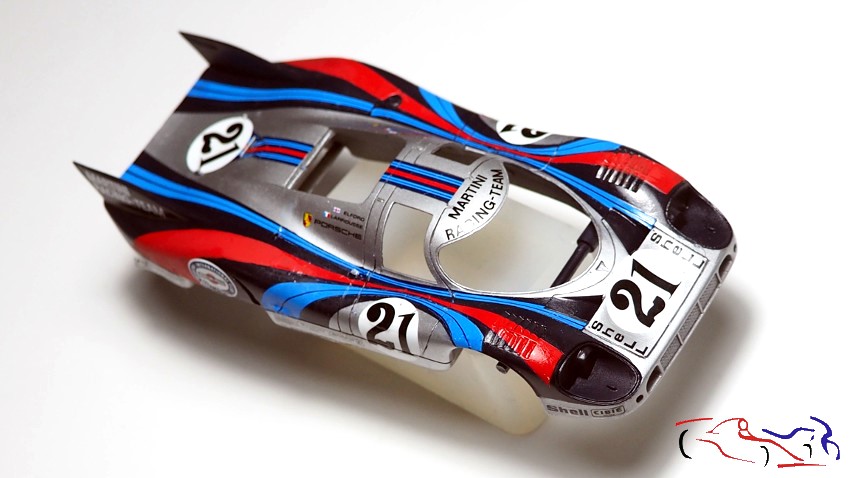
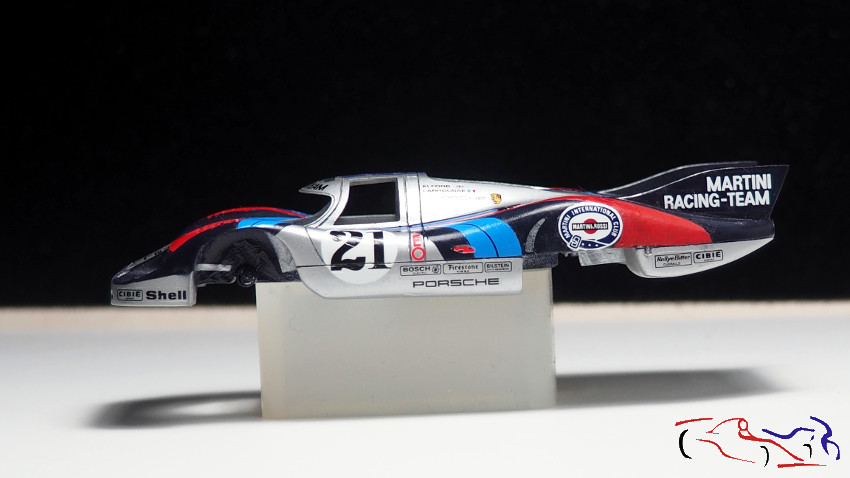
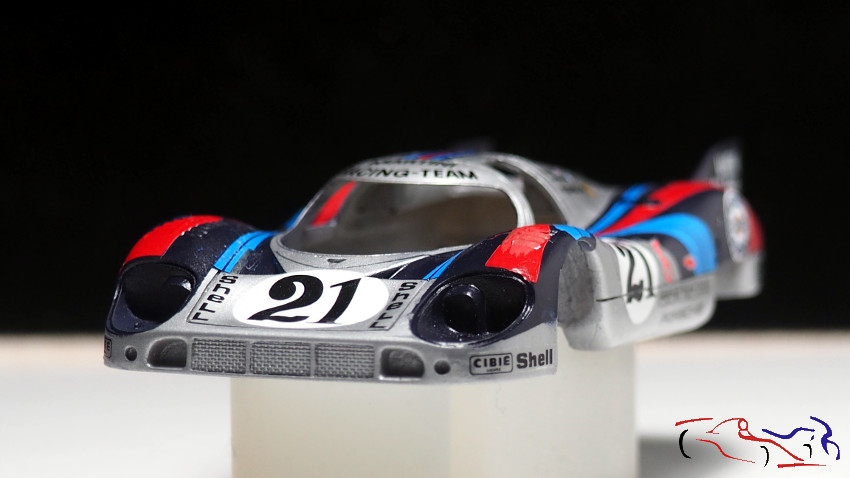
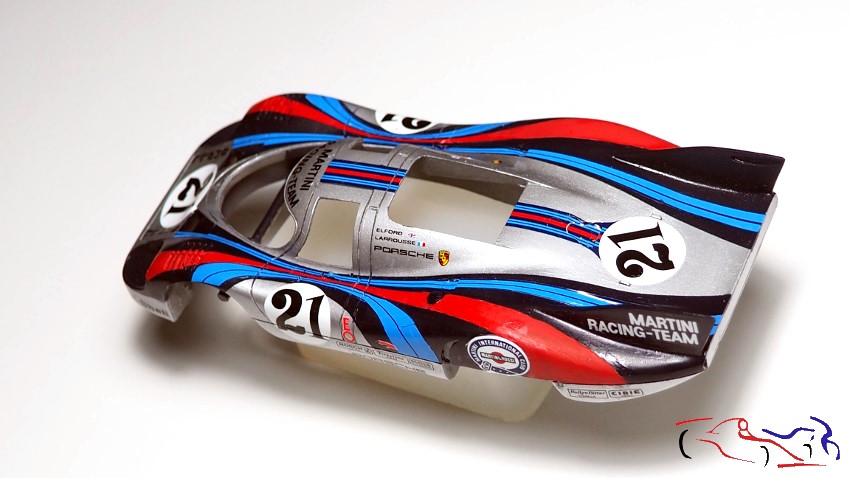
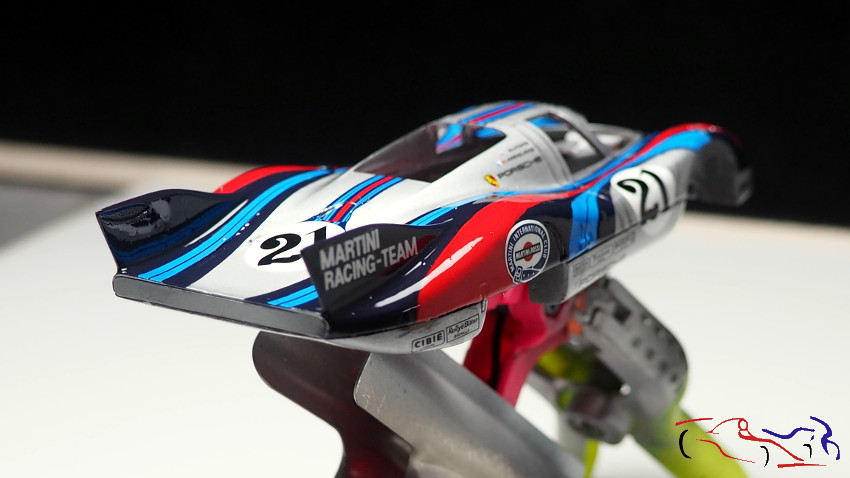
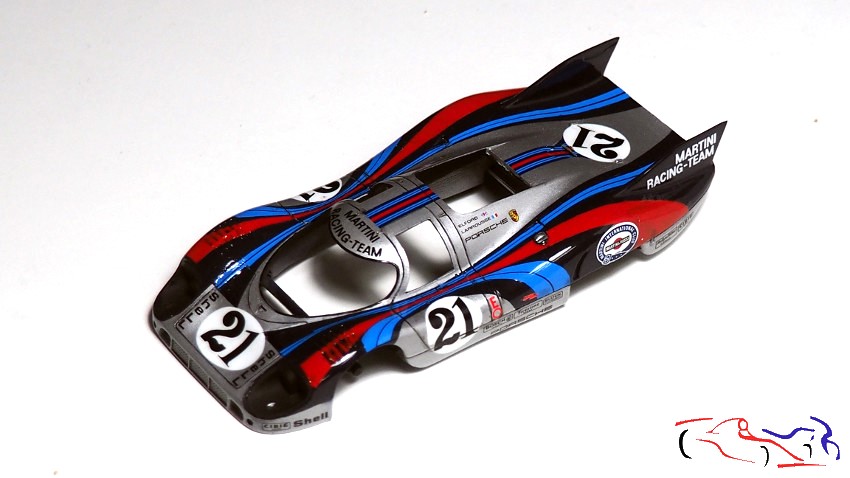
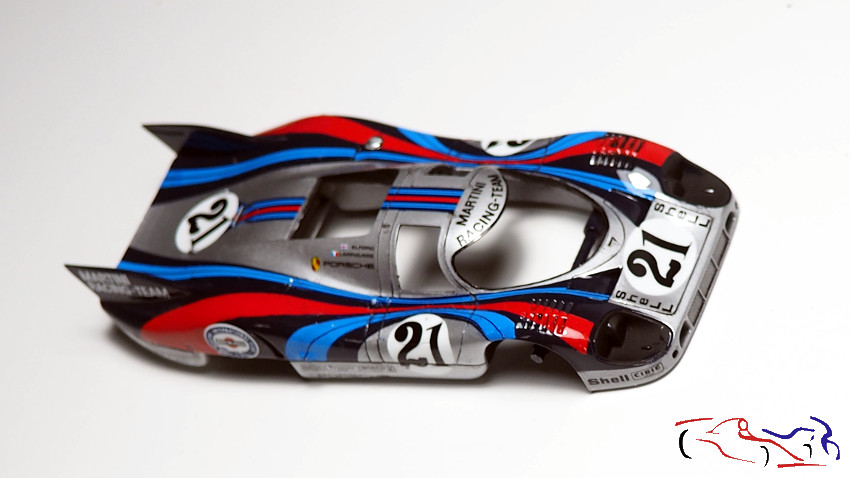
Y el siguiente paso fue lacar la carroceria, proceso que realicé junto al March y al 917K con el producto de Number5. Fue todo bien excepto unos puntos que salieron en las bandas Martini superiores de la parte trasera derecha y una mota en el alerón trasero. El resto fue todo bien:
The next step was to paint the bodywork, a process I carried out alongside the March and the 917K using Number 5’s product. Everything went well except for a few spots that appeared on the upper Martini stripes on the right rear and a speck on the rear spoiler. The rest was fine.
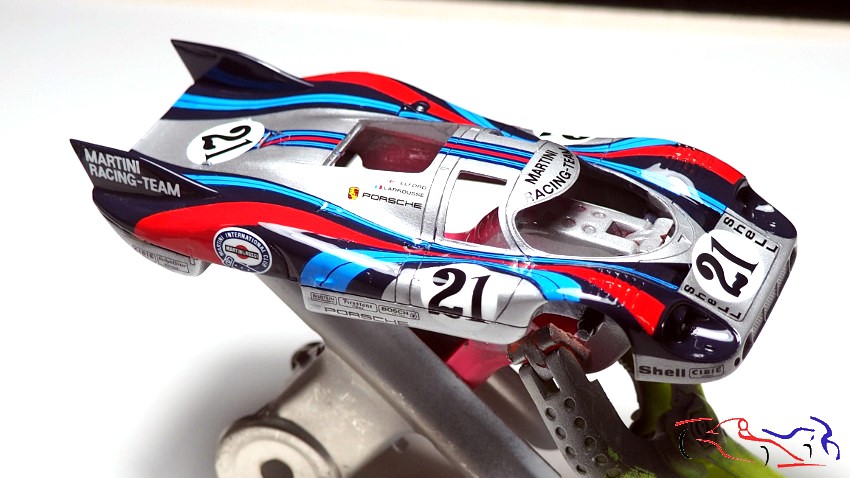
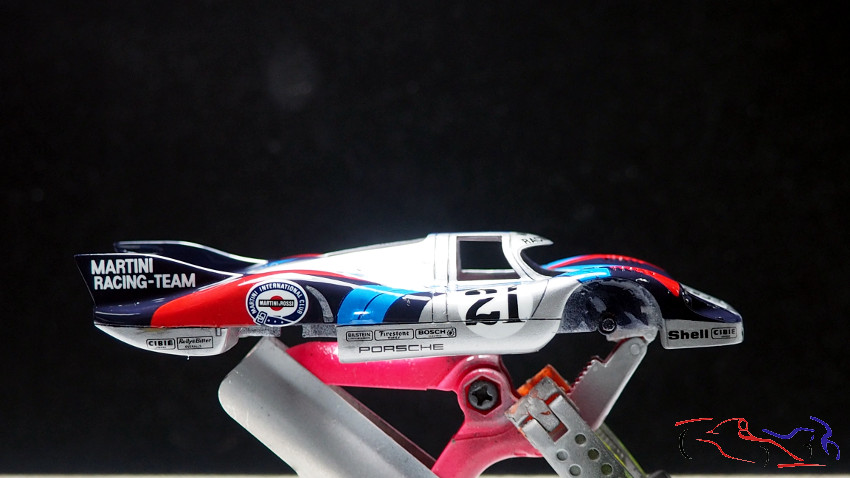
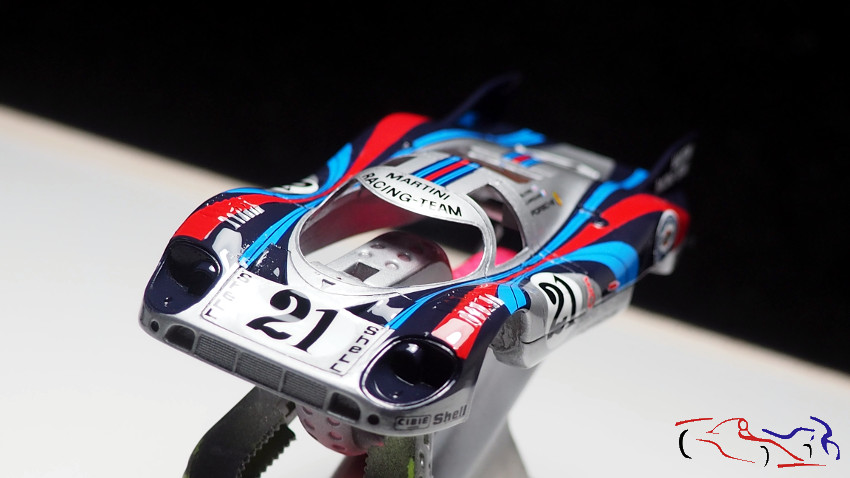
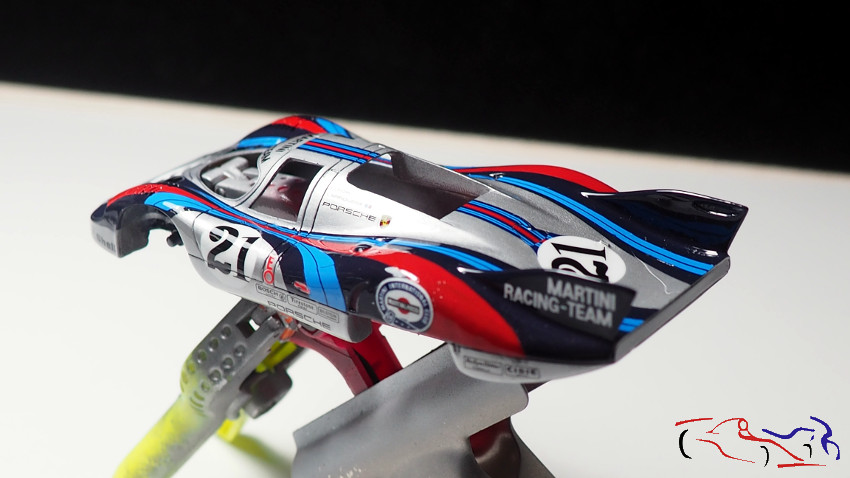
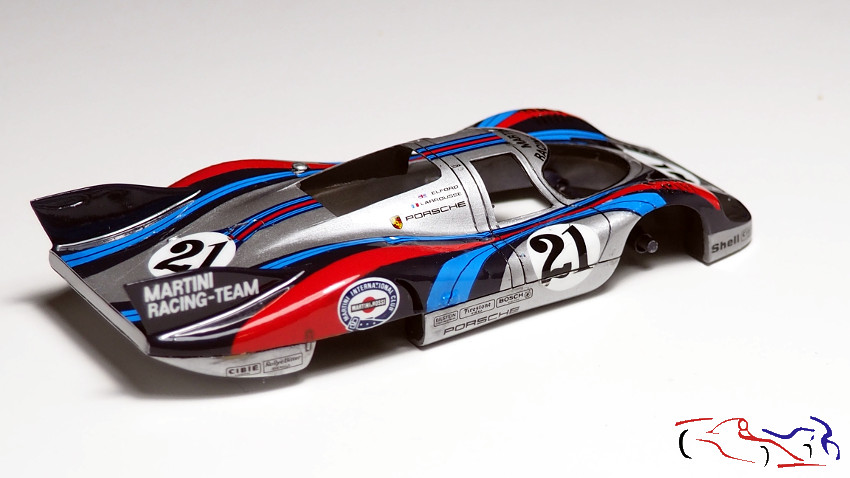
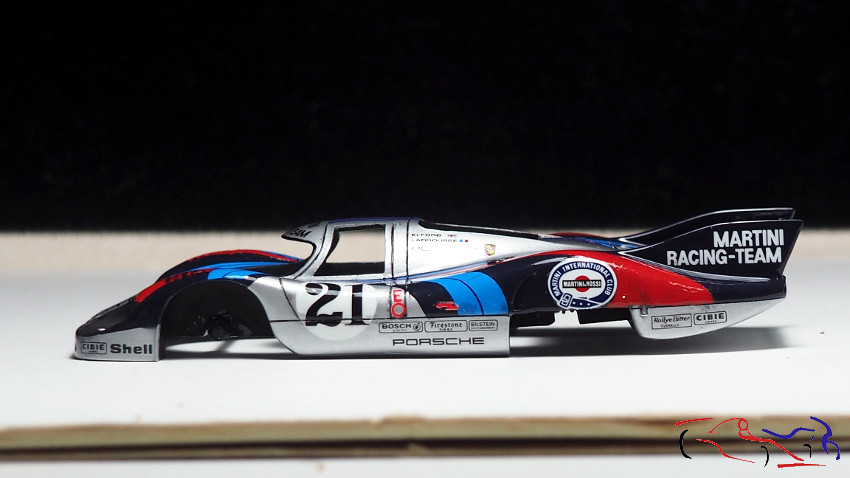
Una vez la carrocería estuvo seca, marqué las lineas de panel con Panel Liner negro de Tamiya, el borde del cristal delantero con un rotulador permanente, y los pasos de rueda con negro de Vallejo:
Once the bodywork was dry, I marked the panel lines with Tamiya black Panel Liner, the edge of the windshield with a permanent marker, and the wheel arches with Vallejo black:
Y ahora es el turno de montar el coche. Pegamos los cristales por el interior con resina UV. El salpicadero va a continuación junto a los ejes y sus ruedas.
And now it’s time to assemble the car. We glue the windows on the inside with UV resin. The dashboard goes next, along with the axles and their wheels.
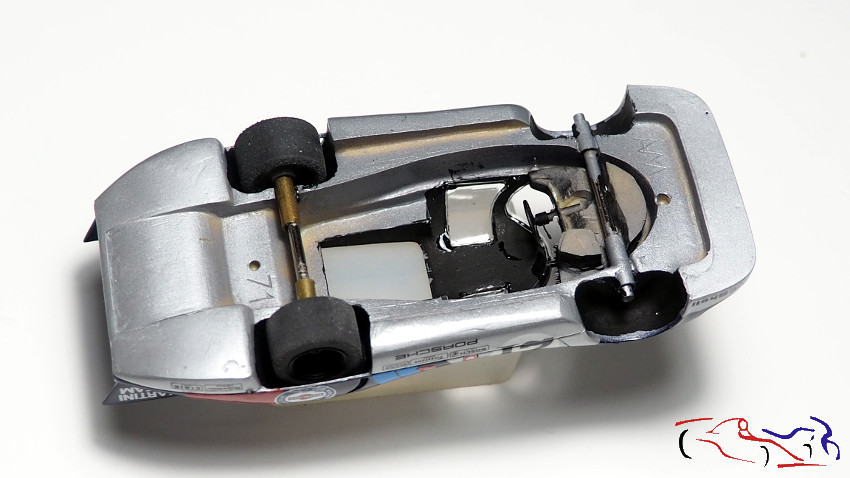
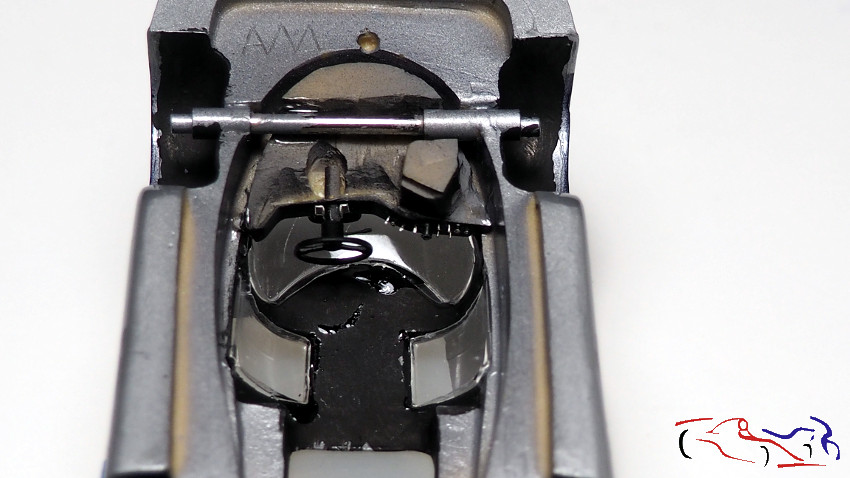
Por último,pegamos y atornillamos el chasis.
Finally, we glued and screwed the chassis to the body.
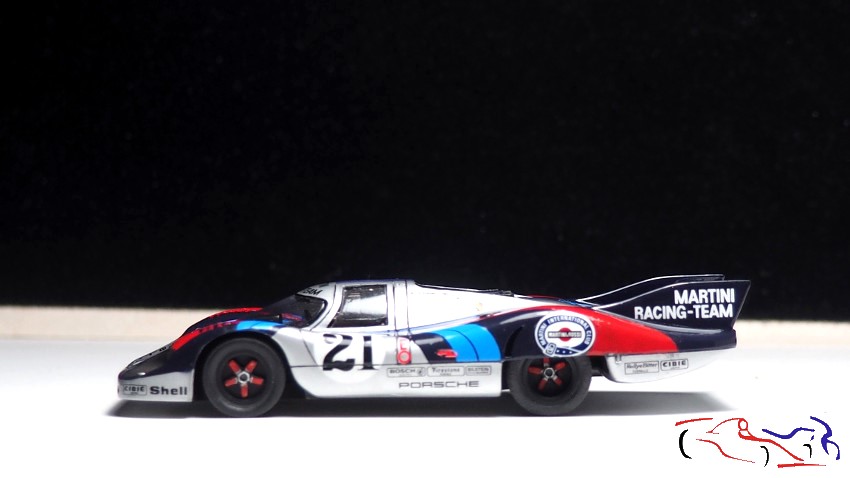
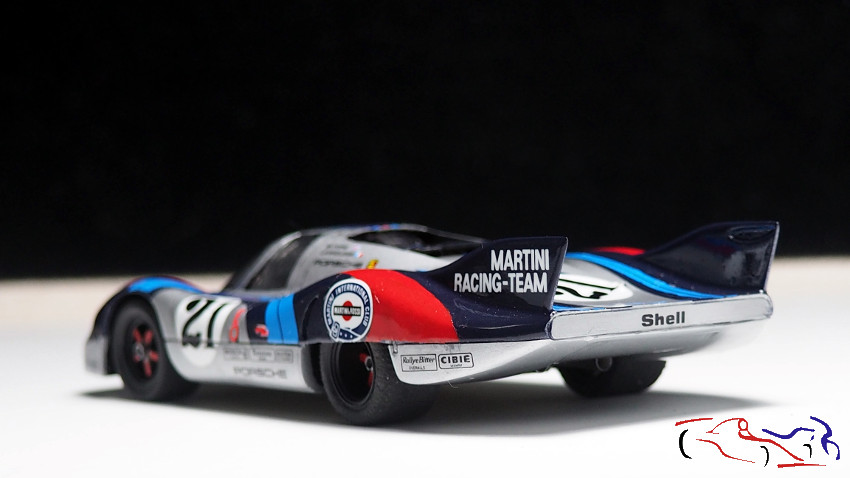
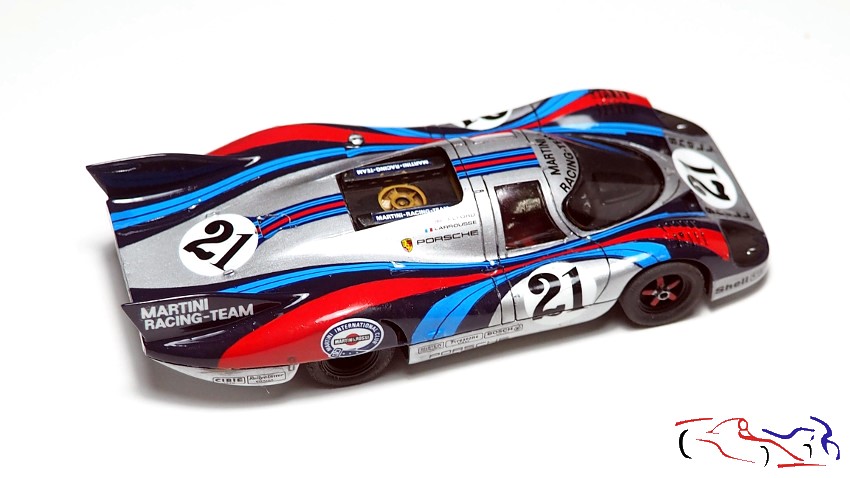
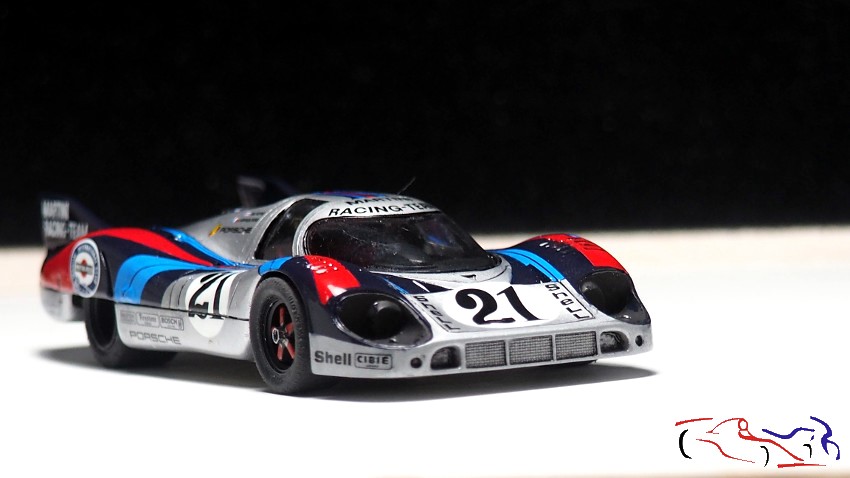
En el siguiente post, terminaremos la parte trasera y….. Gracias por ver y comentar!!
In the next post, we’ll finish the back and… Thanks for watching and commenting!!
]]>Hi everyone. In this post, I’ll show you the final steps of this kit and the final photos. But let’s pick up where we left off, before the lacquering step, which I’ve now completed. I used Number 5 lacquer, to which I added a little thinner, as I prefer it more liquid. And here’s the result:
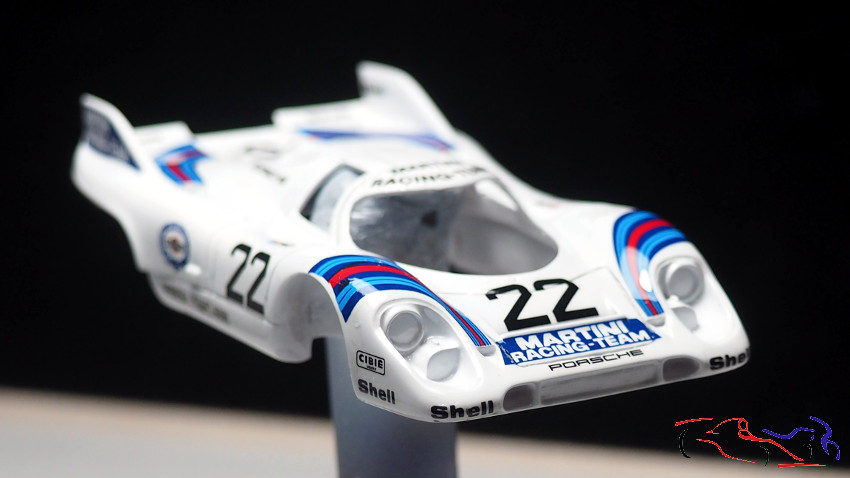
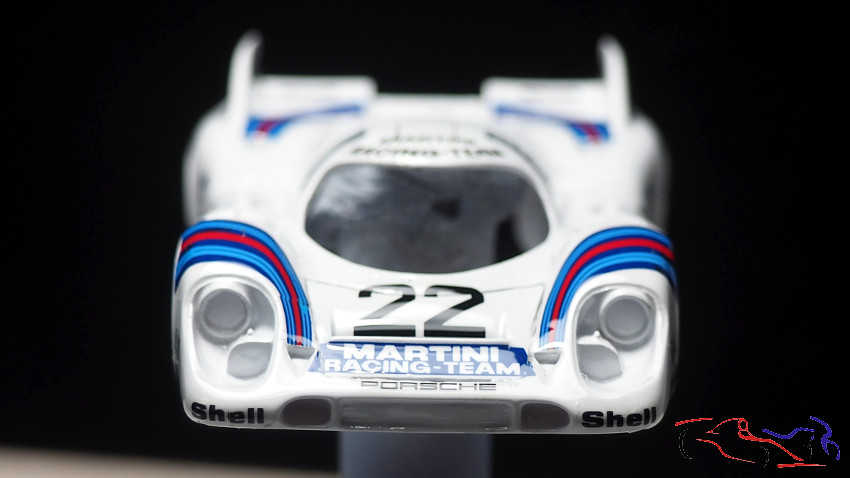
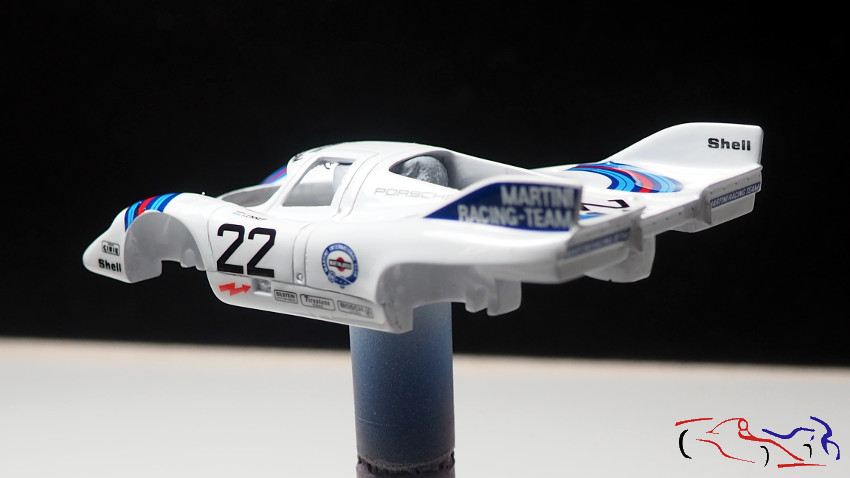
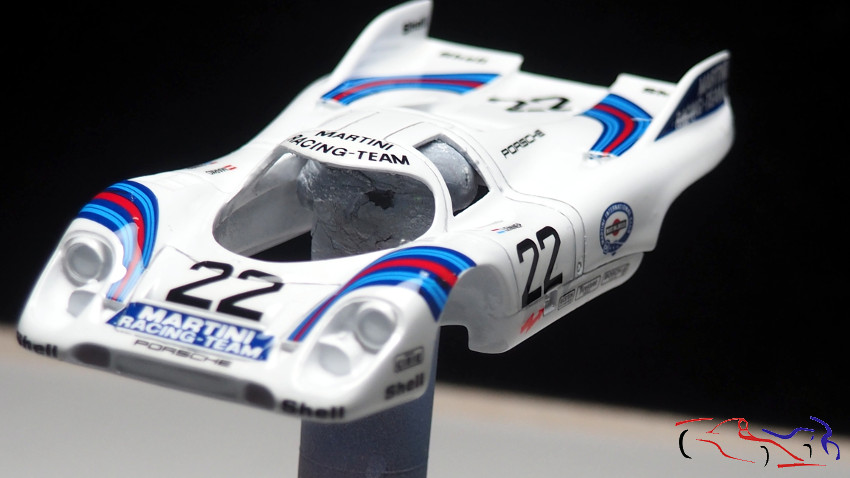
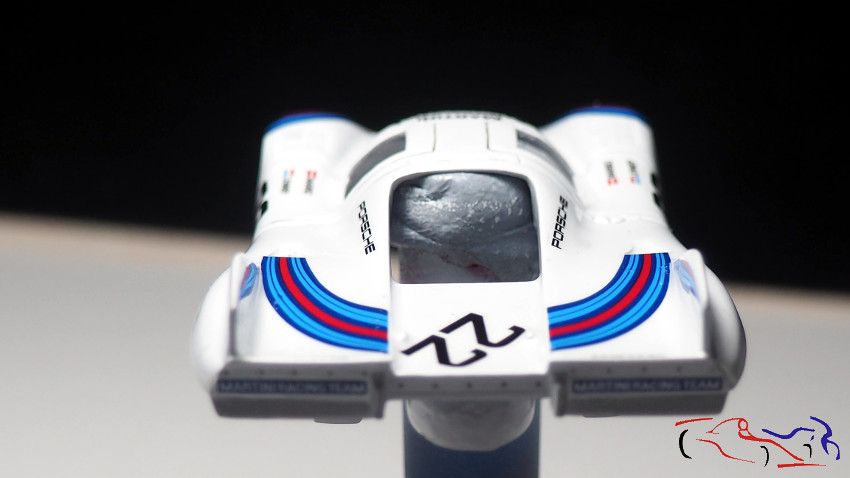
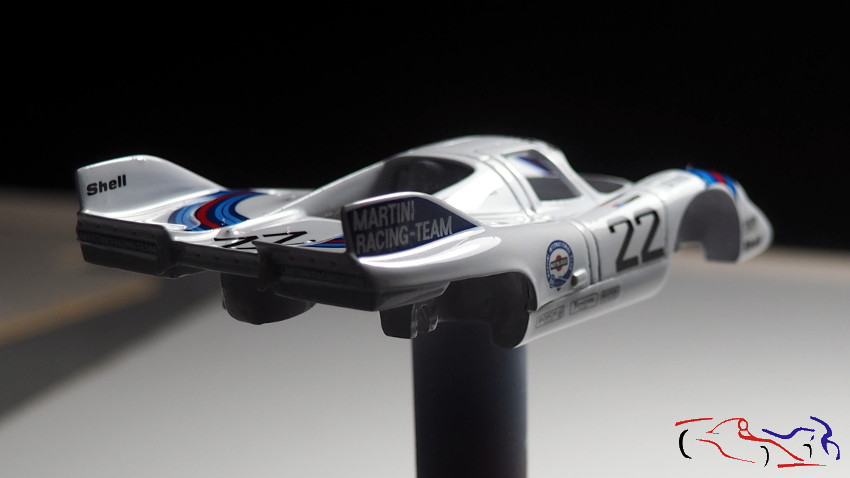
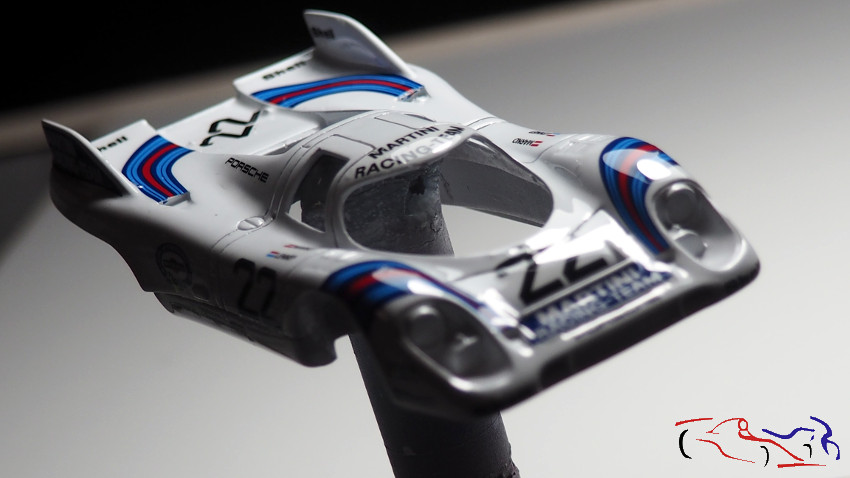
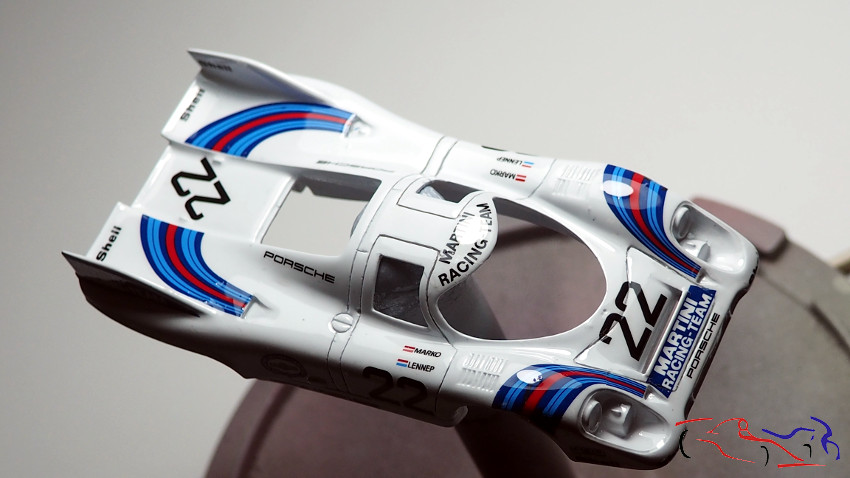
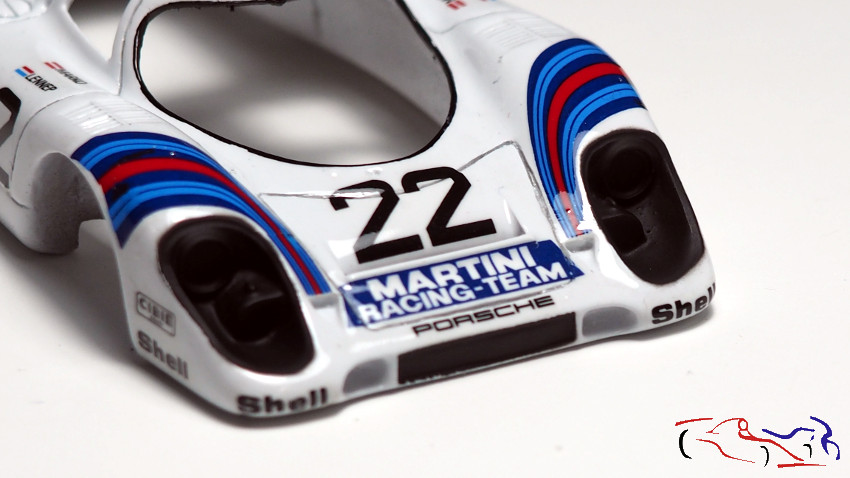
Y una vez seca, procedemos a enmascarra para pintar los faros y varias partes de la parte trasera. Utilizo máscara Tamiya y color negro Mate de la gama LP, también de Tamiya:
Once dry, we proceed to mask off for painting the headlights and various parts of the rear. I use Tamiya masking tape and Matte Black paint from the LP range, also by Tamiya.
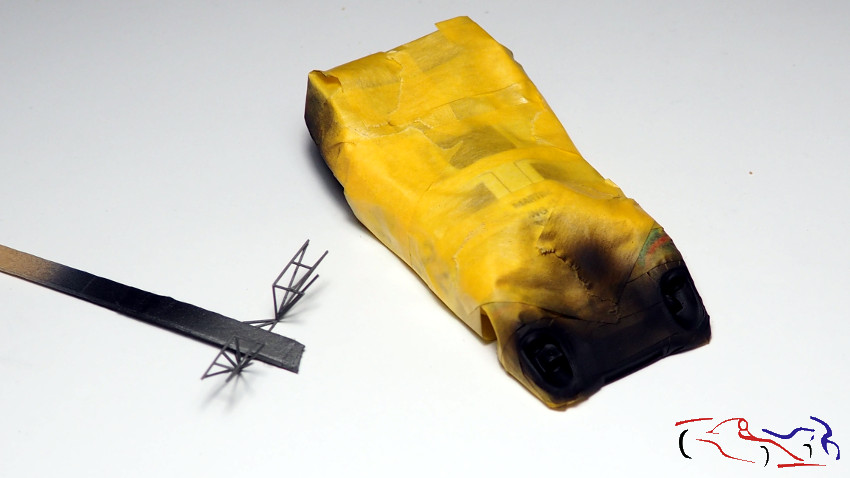
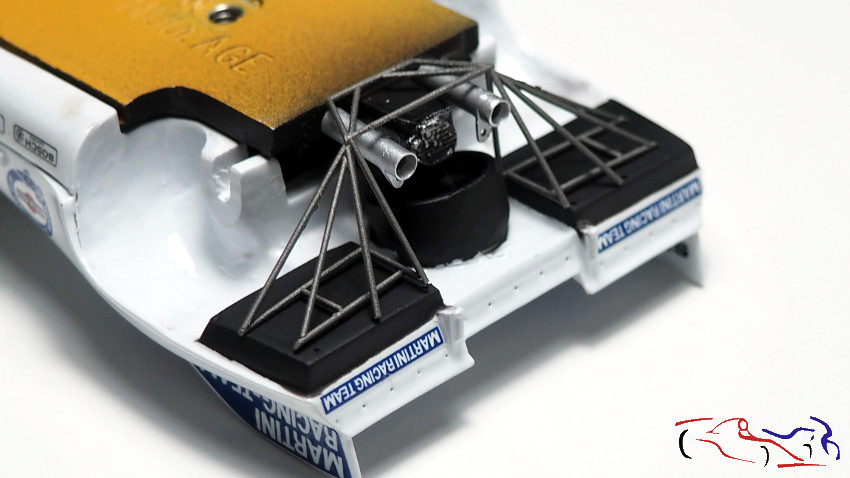
Las partes de la parte trasera son las que os muestro en la siguiente foto, junto con el conjunto tubular creado, y pintado con gris metalizado de la gama LP de Tamiya:
The parts of the rear section are shown in the following photo, along with the tubular assembly created and painted with metallic gray from Tamiya’s LP range:
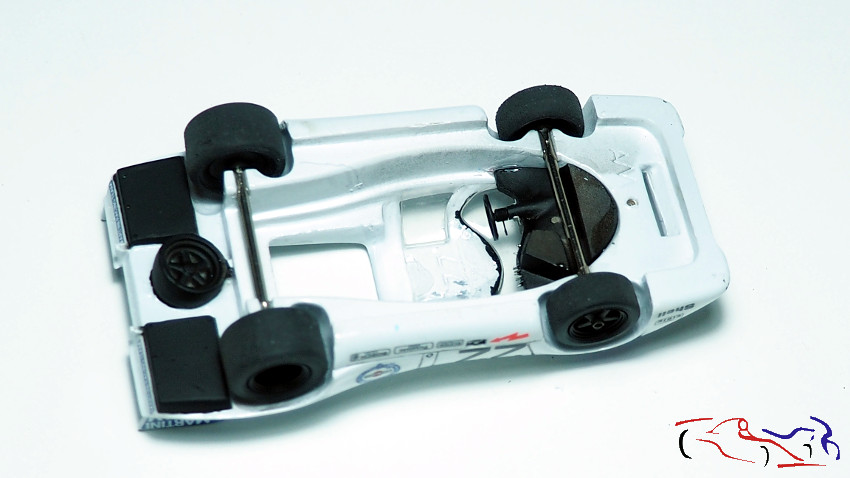
A continuación, pegué los acetatos con pegamento UV, el salpicadero, los ejes y las ruedas, estos ultimos con ciano, y todo por debajo de la carrocería:
Next, I glued the acetate sheets with UV glue, the dashboard, the axles and the wheels, the latter with cyanoacrylate, all underneath the bodywork:
A continuación, pegué y atormille el chasis, puse los faros delanteros con su acetato, los pilotos traseros y el limpiaparabrisas, dando el modelo por terminado:
Next, I glued and screwed the chassis, attached the headlights with their acetate, the taillights and the windshield wiper, thus completing the model:
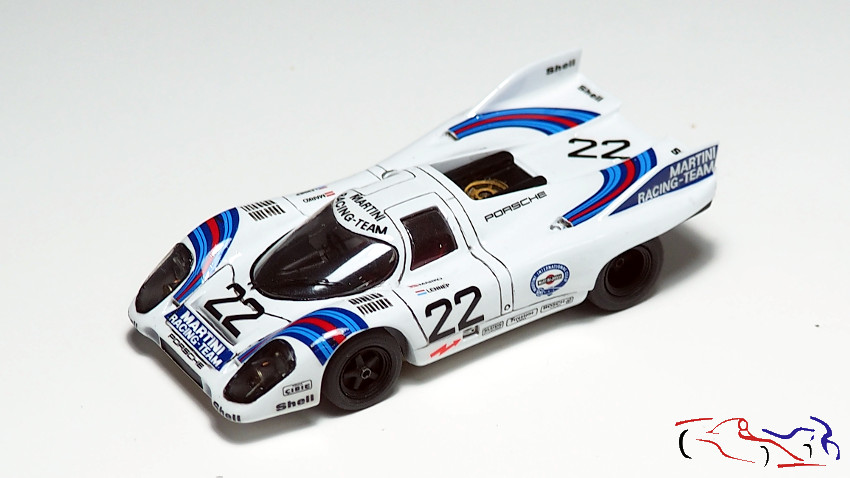
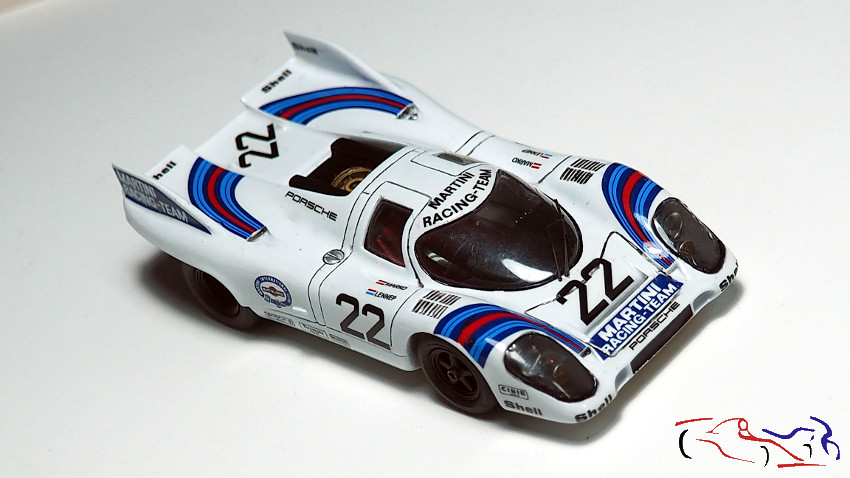
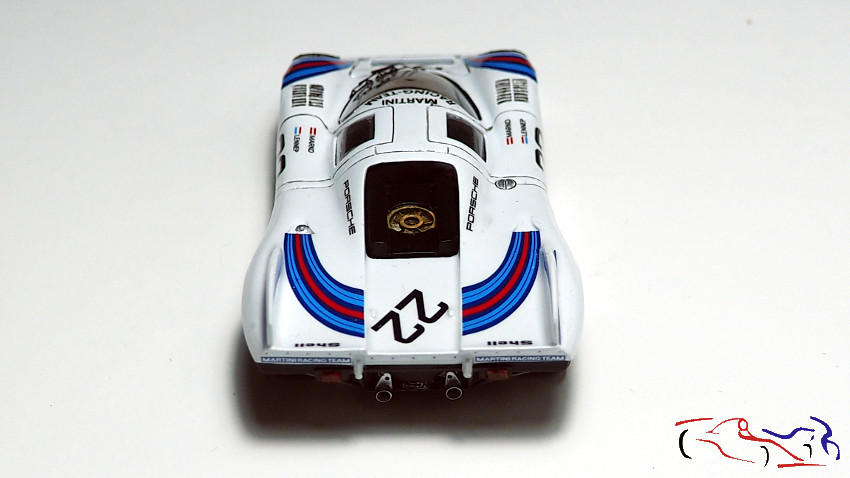
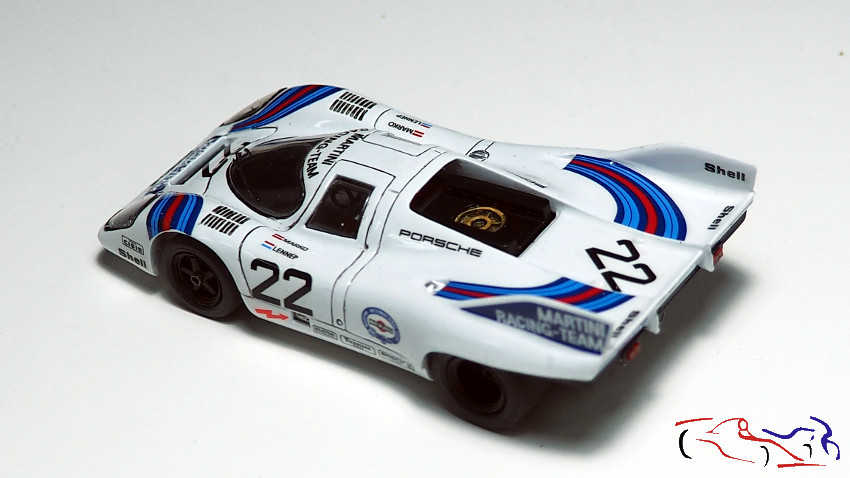
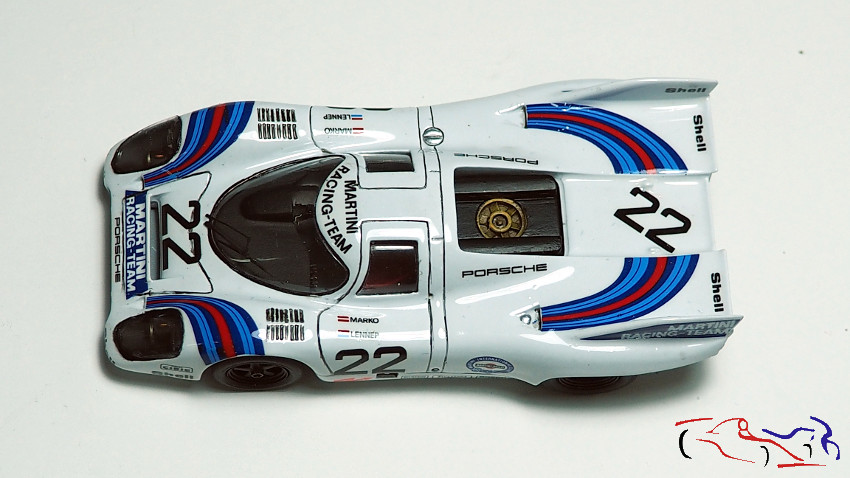
Mi valoración sobre este kit: las piezas en general están bien de formas y proporciones aunque como ya tiene muchos años, las técnicas de hoy en dia superan con creces a estas resinas. Las lineas de los paneles no están bien y es dificil profundizarlas si no las haces de nuevo. Y lo mismo pasa con las calcas, que aunque sean de Cartograph, se rompían por todos lados, además de ser muy duras. La pintura y la laca de Number no me han dado problemas. La pintura del interior se hizo todo con Vallejo, aplicando un rotulador Edding permanente al contorno de los acetatos de los faros delanteros. He intentado hacer un kit rápido para tener la satisfacción de acabar proyectos. Y bueno, ha quedado resultona, siendo un coche mítico con una decoración también mítica!
My assessment of this kit: the parts are generally well-shaped and proportioned, although, being quite old, modern techniques far surpass these resins. The panel lines aren’t good and it’s difficult to deepen them without redrawing them. The same goes for the decals, which, even though they’re from Cartograph, tore everywhere and were also very hard. The Number paint and lacquer didn’t give me any problems. The interior painting was done entirely with Vallejo paints, using a permanent Edding marker to outline the acetate overlays of the headlights. I tried to put together a quick kit to have the satisfaction of finishing a project. And well, it turned out quite well, being a legendary car with a legendary livery!
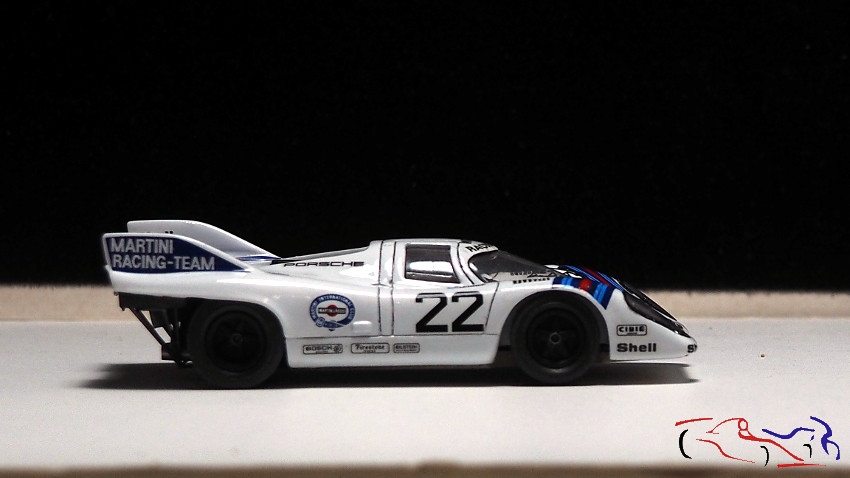
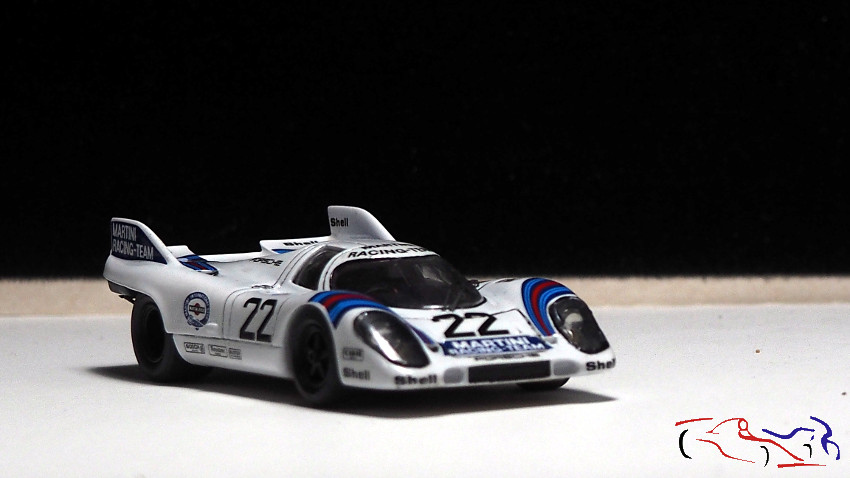
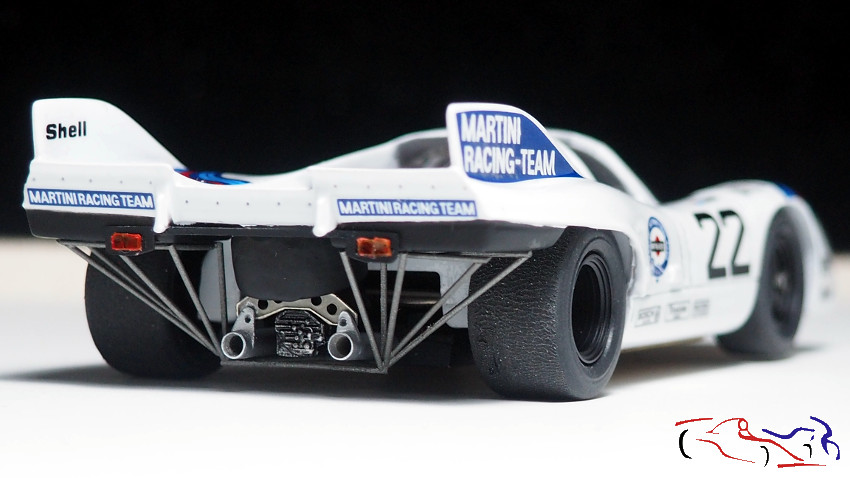
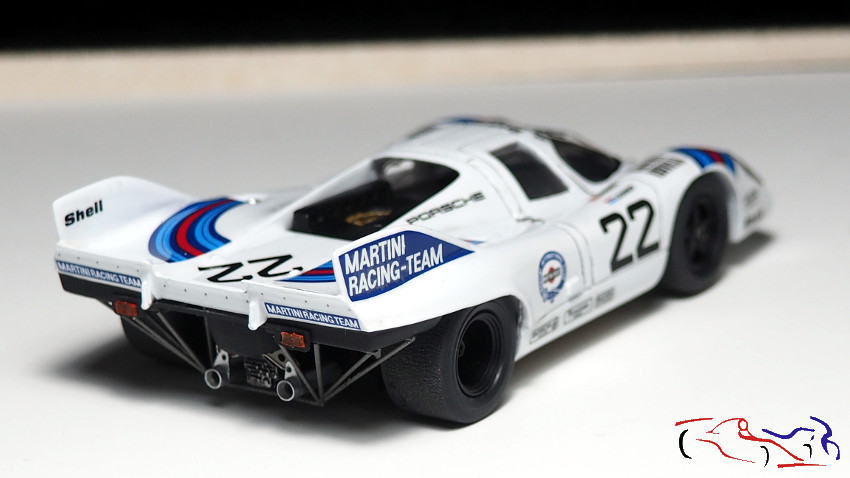
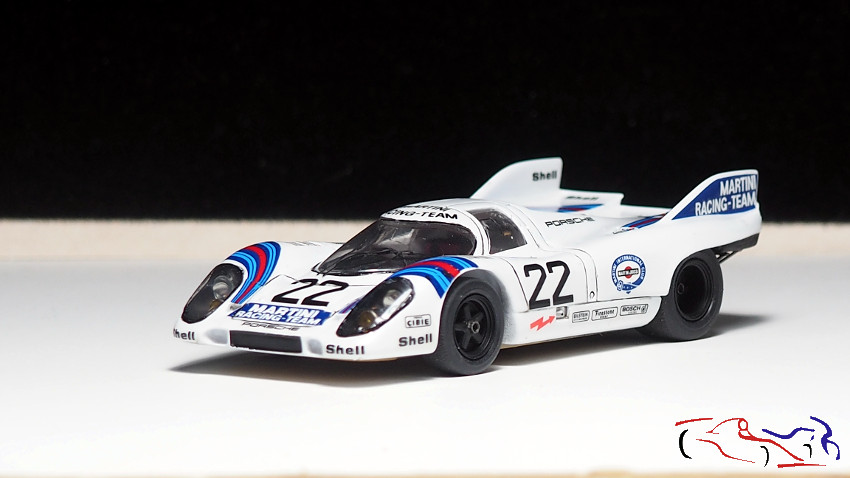
Esto es todo de esta maqueta. Espero que os haya gustado y gracias por ver y comentar!!
This is all for this model. I hope you liked it and thanks for watching and commenting!!
]]>