The post Gluten-Free Banoffee Pie appeared first on Meaningful Eats.
]]>Why You’ll Love Banoffee Pie
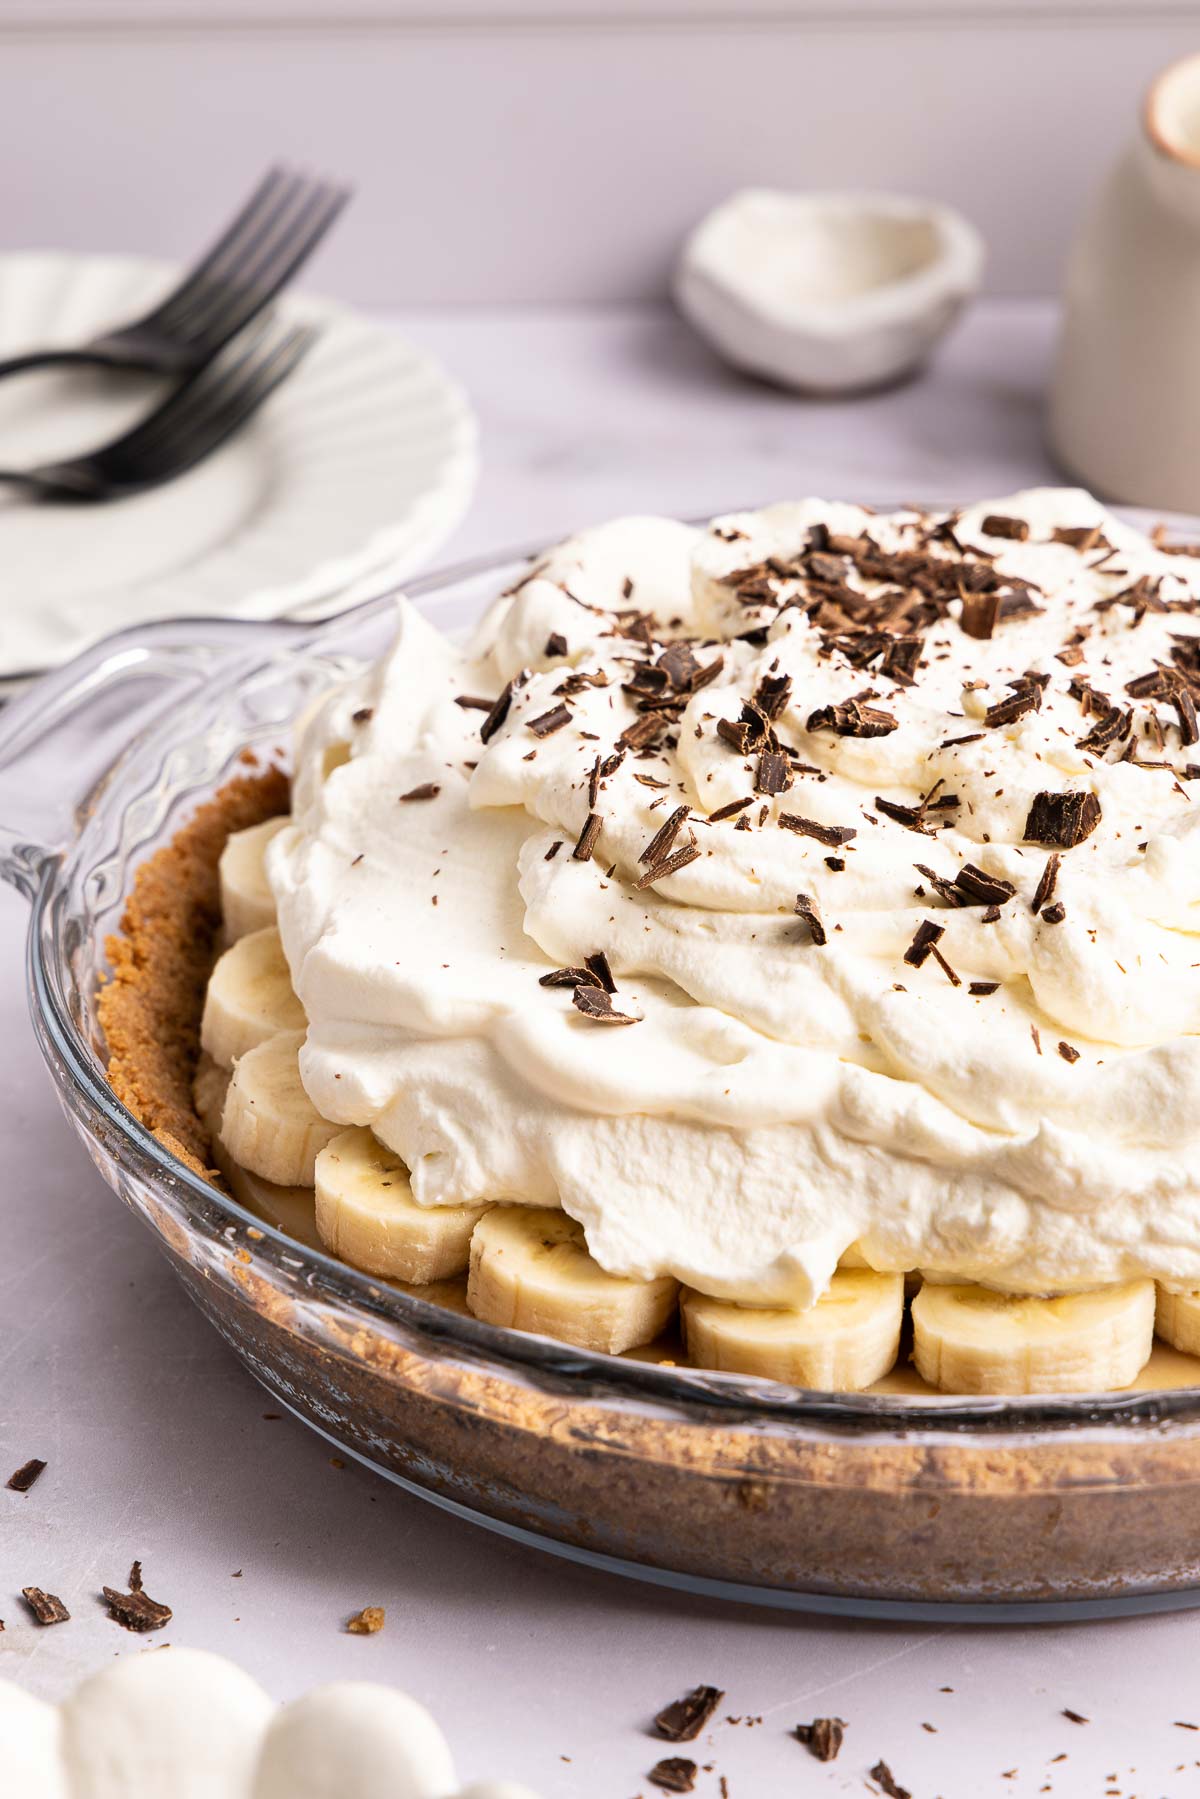
If you’ve never made banoffee pie before, you’re in for a treat! It’s surprisingly simple to make, but there’s something about the combination that is SO good. It’s rich and creamy without feeling too heavy, with plenty of crunch and fresh banana flavor. This is one of those desserts that’s hard to stop eating!
- No candy thermometer needed. The caramel comes together right on the stovetop using simple visual cues, so there’s no special equipment required.
- A crust that actually holds its shape. I use the same graham cracker crust from my gluten-free key lime pie for this recipe. A little gluten-free flour gives the graham cracker crust just enough structure to hold together and slice cleanly.
- An easy caramel that tastes completely homemade. After lots of testing, I landed on a simple sweetened condensed milk-based caramel that’s rich and glossy, sets beautifully and slices cleanly once chilled.
- Easy to make ahead. Make the crust and caramel layer the day before, then all that’s left is adding the bananas and freshly whipped cream before serving.
What You Need
Here are a few notes on some of the key ingredients to make this gluten-free banoffee pie. Jump to the recipe card below for the exact measurements.
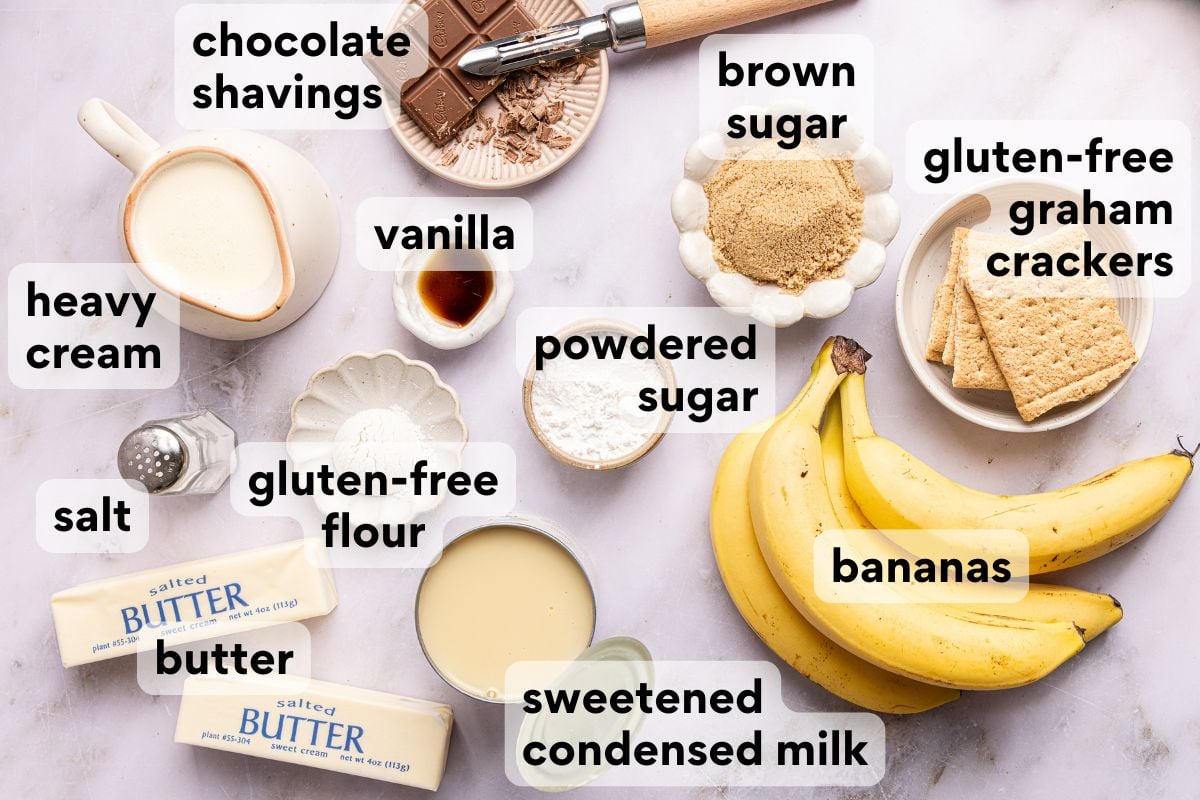
- Graham cracker crumbs. I use one box of Schar gluten-free graham crackers here, processed into fine crumbs. I’ve also had good results with Kinnikinnick S’moreables. The crumbs need to be uniform and fine so the crust presses together evenly and bakes up crisp.
- Gluten-free measure-for-measure flour. Just one tablespoon goes into the crust, but it makes a real difference. It binds the crumbs together so the crust holds its shape when you slice into the pie instead of crumbling apart.
- Sweetened condensed. This makes the caramel so easy! It creates a thick, creamy base for the caramel, while brown sugar and butter give it that deep, buttery flavor.
How to Make Gluten-Free Banoffee Pie
Here’s an overview of how to make this recipe. You can jump to the recipe for the full instructions!
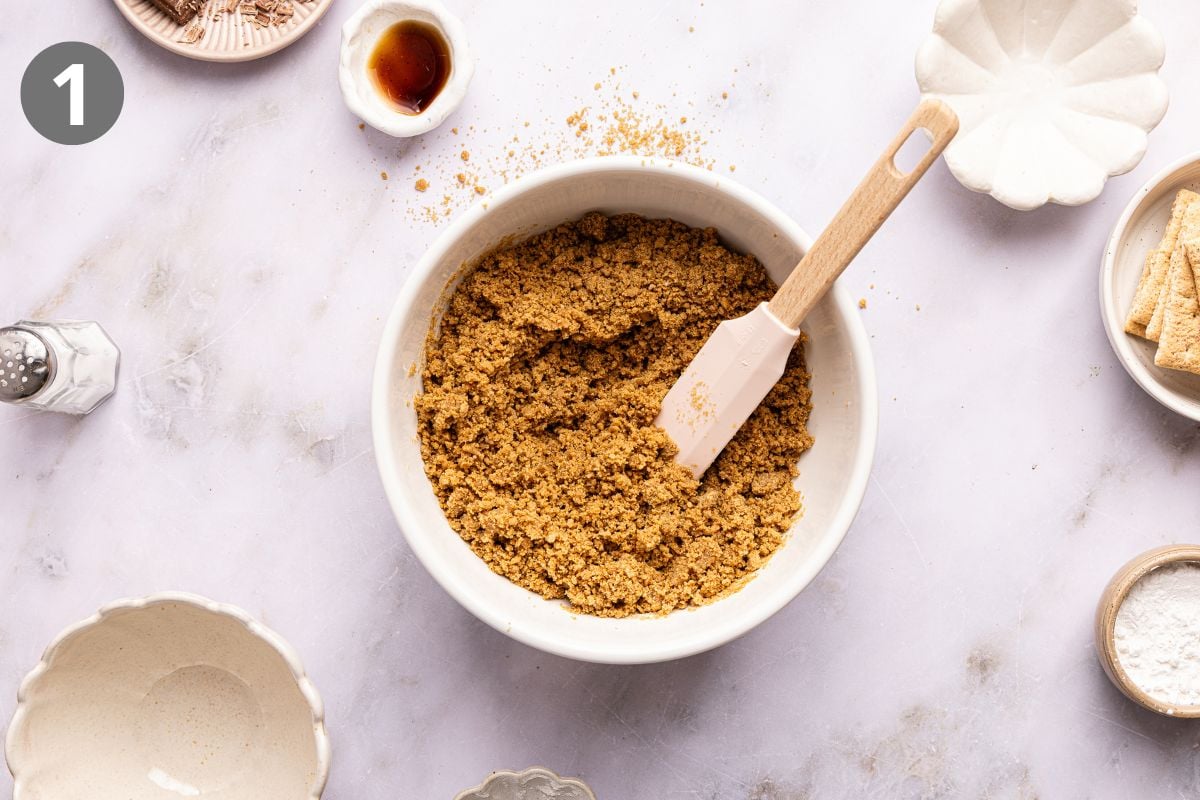
Prepare the graham cracker crumbs. I use a food processor to break the gluten-free graham crackers down into fine crumbs, then mix in the brown sugar and gluten-free flour. Stir the melted butter in until all crumbs are moist.
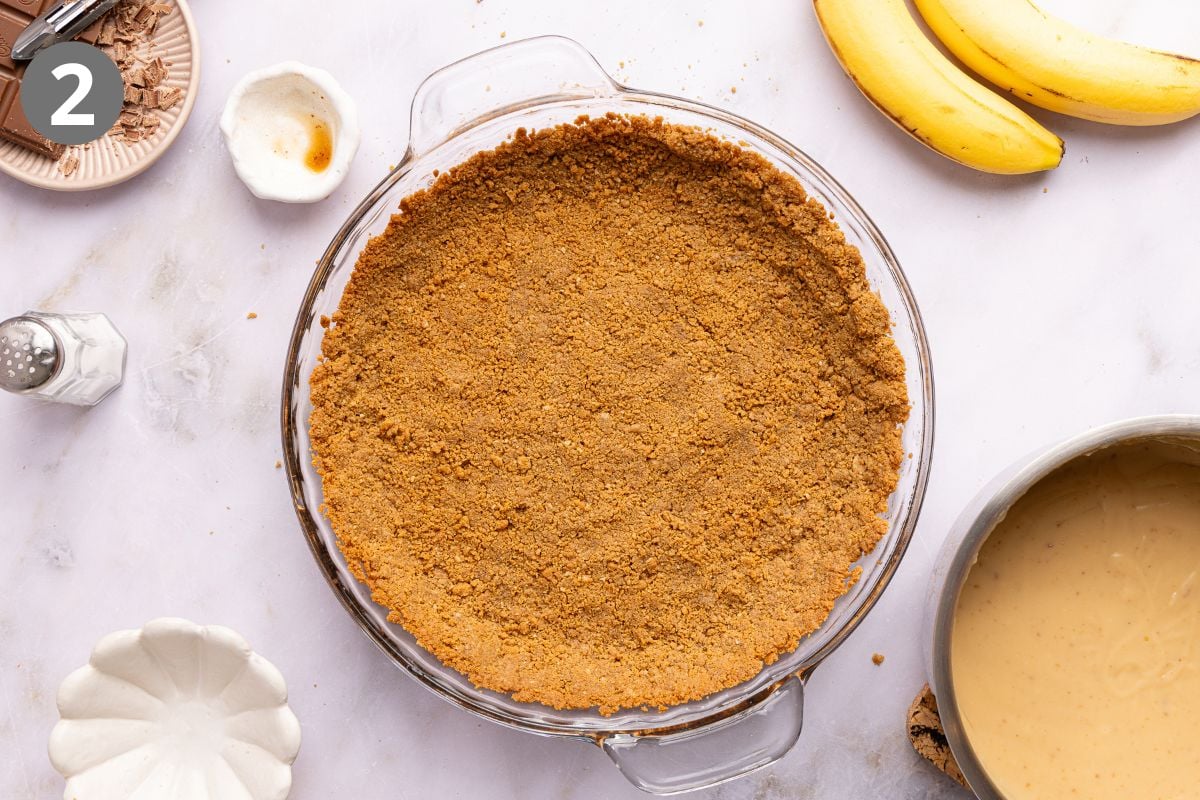
Make the graham cracker crust. I recommend a 9-inch pie pan. Press the crumbs firmly into the pan, covering the bottom and sides. Bake for 8-10 minutes, then let it cool for 10 minutes. I make the caramel while it cools!
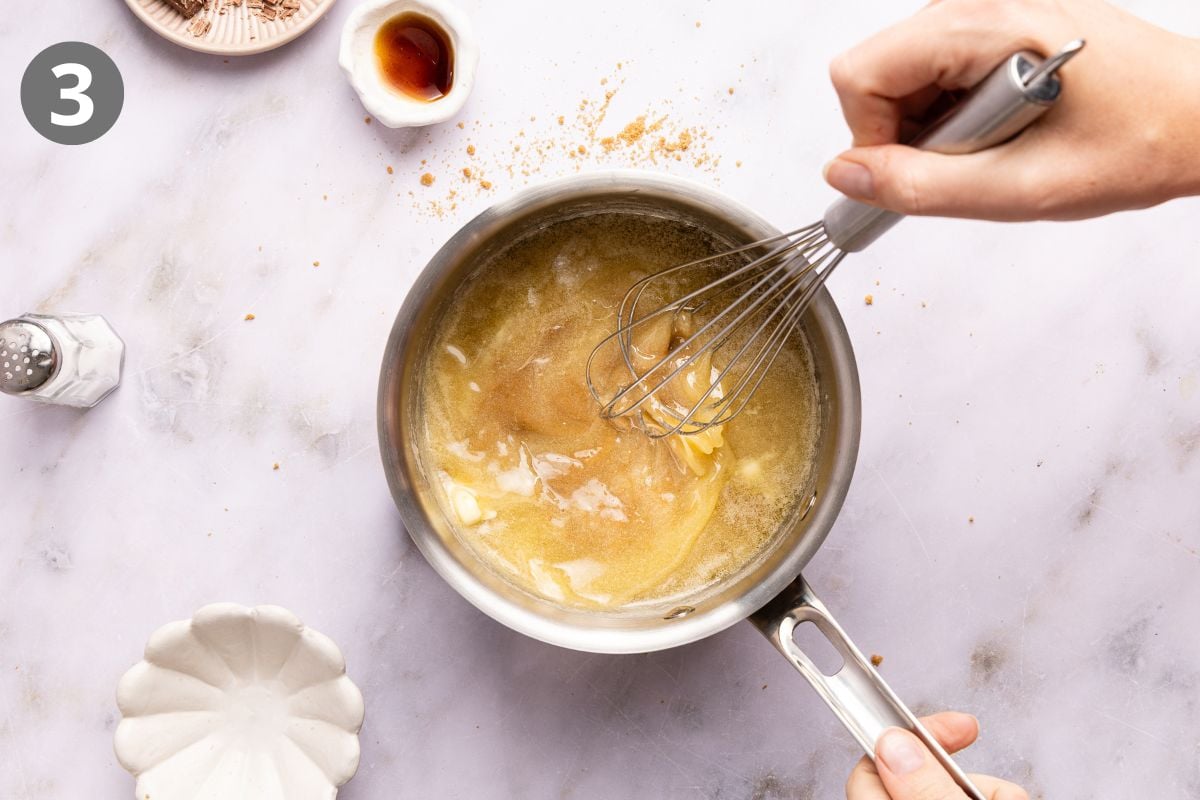
Start the caramel. I use a heavy-bottomed medium saucepan for this caramel. Whisk the butter, brown sugar, and salt constantly over medium heat until melted and well-combined. Keep stirring until it starts to boil.
Erin’s Tip
Keep the heat at medium! Turning it up can cause the caramel to scorch on the bottom before it’s finished cooking.
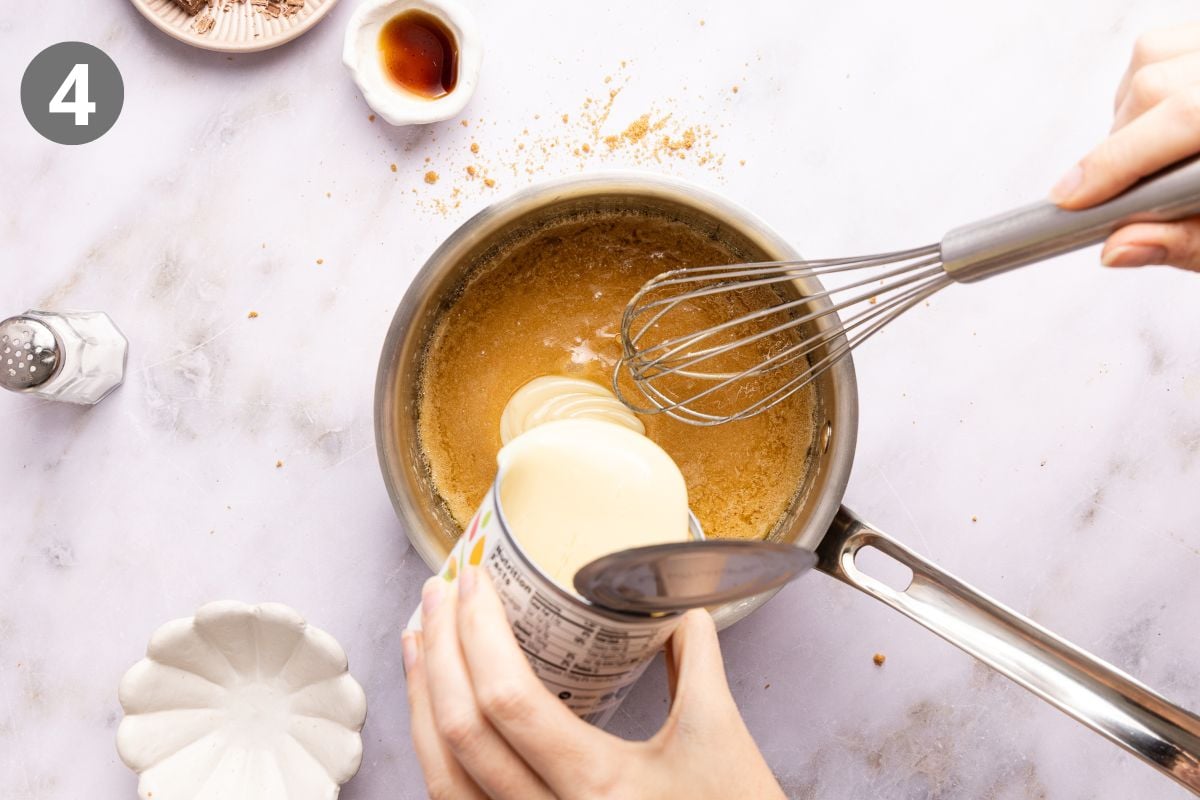
Cook the caramel. I whisk constantly while adding the sweetened condensed milk, then bring the whole mixture back to a boil. Reduce the heat and simmer for about 5 minutes. Make sure you keep whisking!
Erin’s Tip
You’ll know the caramel is ready when it deepens in color and starts to pull away from the sides of the pan as you stir. These are the best visual cues to look for.
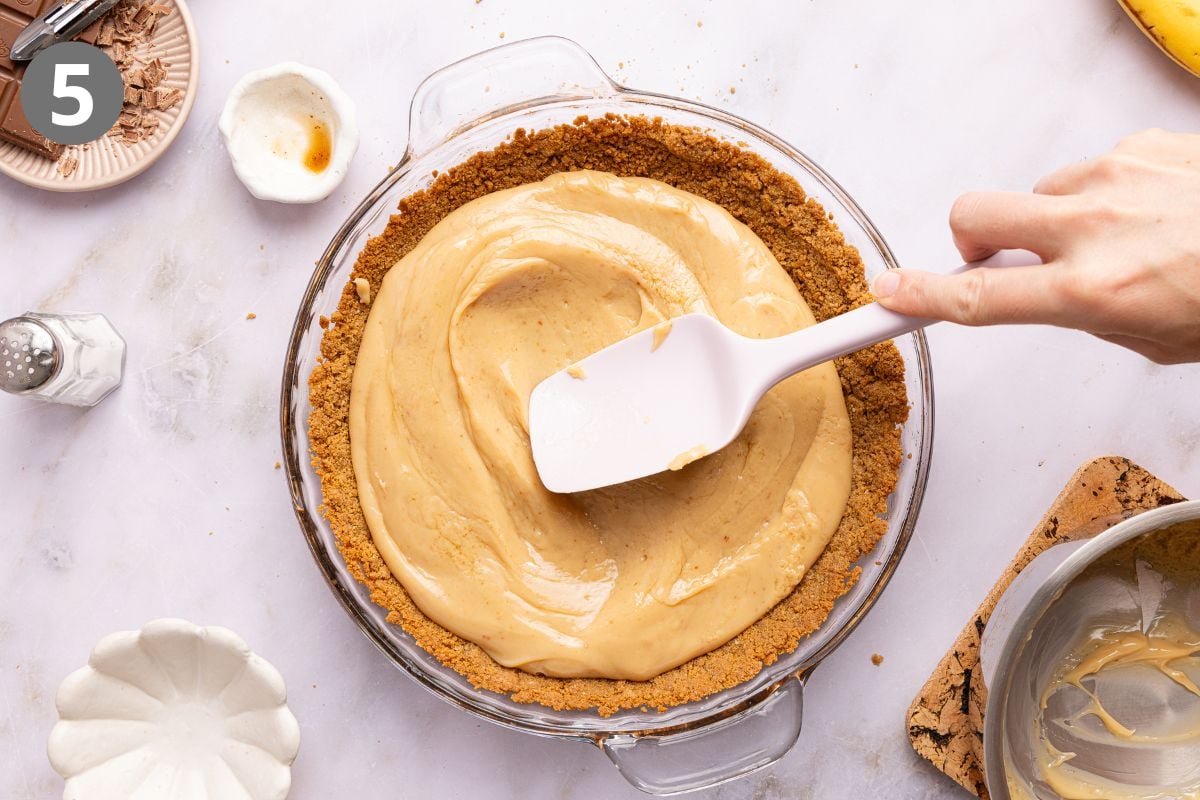
Add the caramel layer. After I remove the caramel from the heat, I stir in the vanilla, then pour it over the crust. I find a rubber spatula is the easiest way to spread it evenly. Refrigerate for 1 hour.
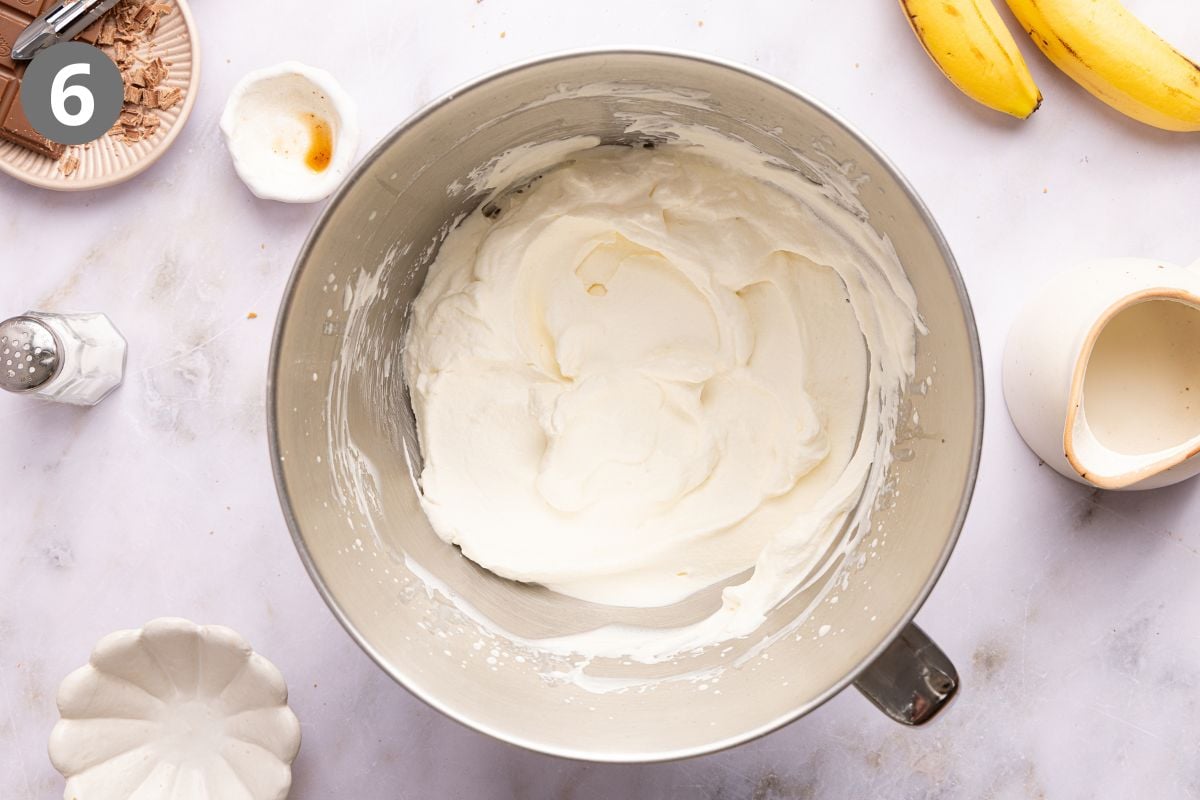
Make the whipped cream. I use my stand mixer with the whisk attachment to beat the heavy cream, powdered sugar, and vanilla until stiff peaks form. On medium-high speed this usually takes about 5 minutes.
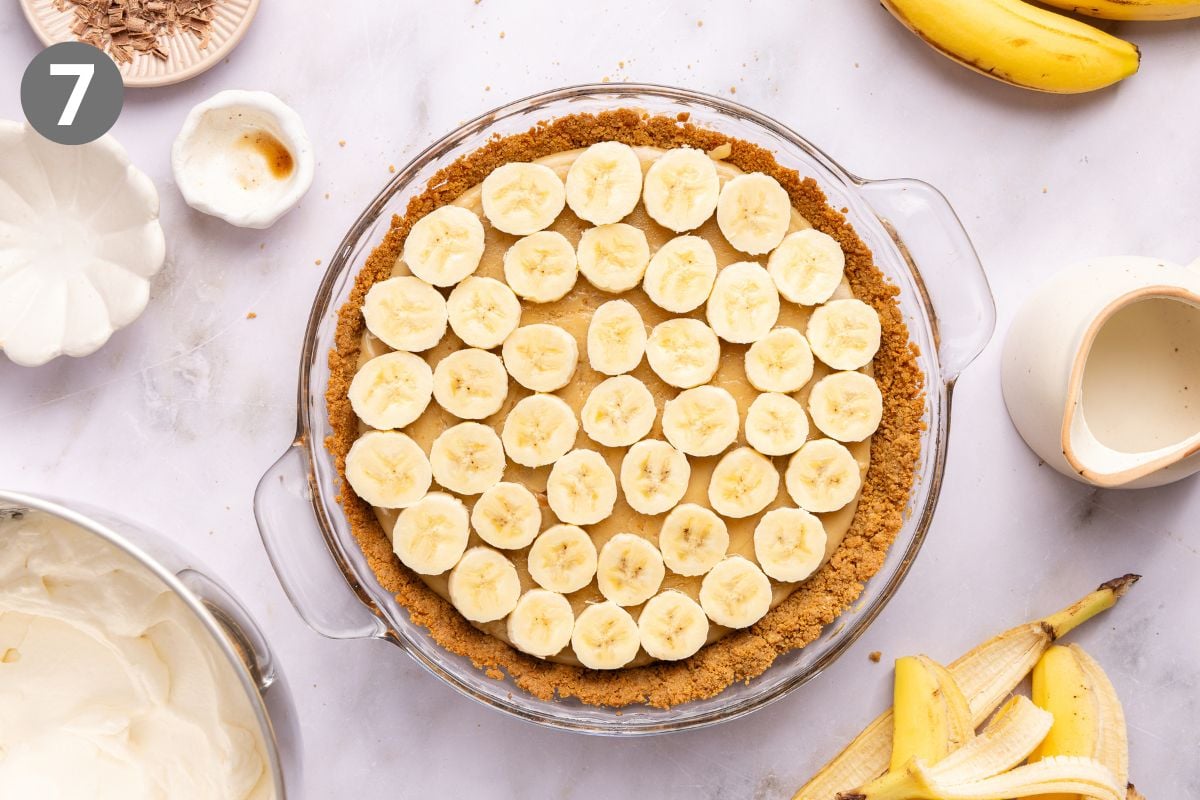
Layer the pie. Lay the banana slices evenly on top of the caramel layer. I usually do one even layer, but if you really love bananas, you can do two!
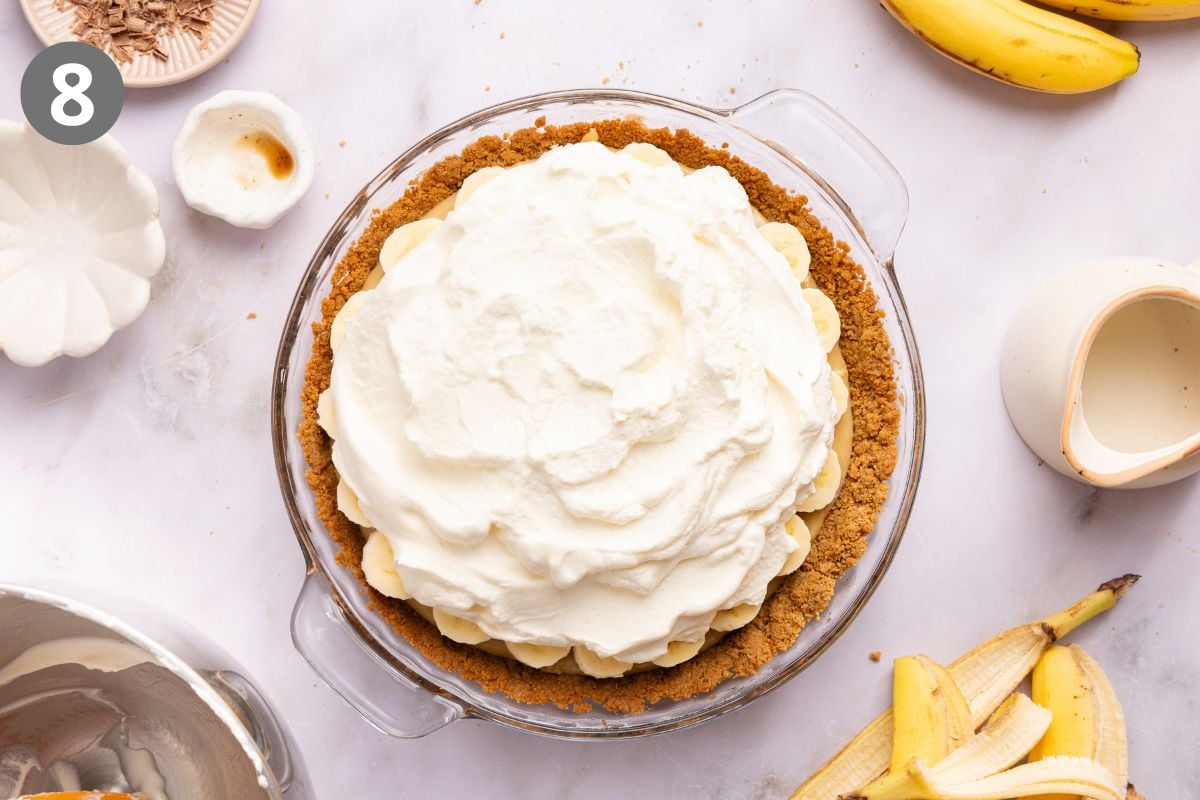
Garnish and serve. Spread the homemade whipped cream evenly on top of the banana slices. I love adding chocolate shavings on top for the perfect finishing touch!
Erin’s Tip
Wait to add the bananas and whipped cream until just before serving. The caramel-filled crust can be made a day ahead and refrigerated until you’re ready to finish the pie.
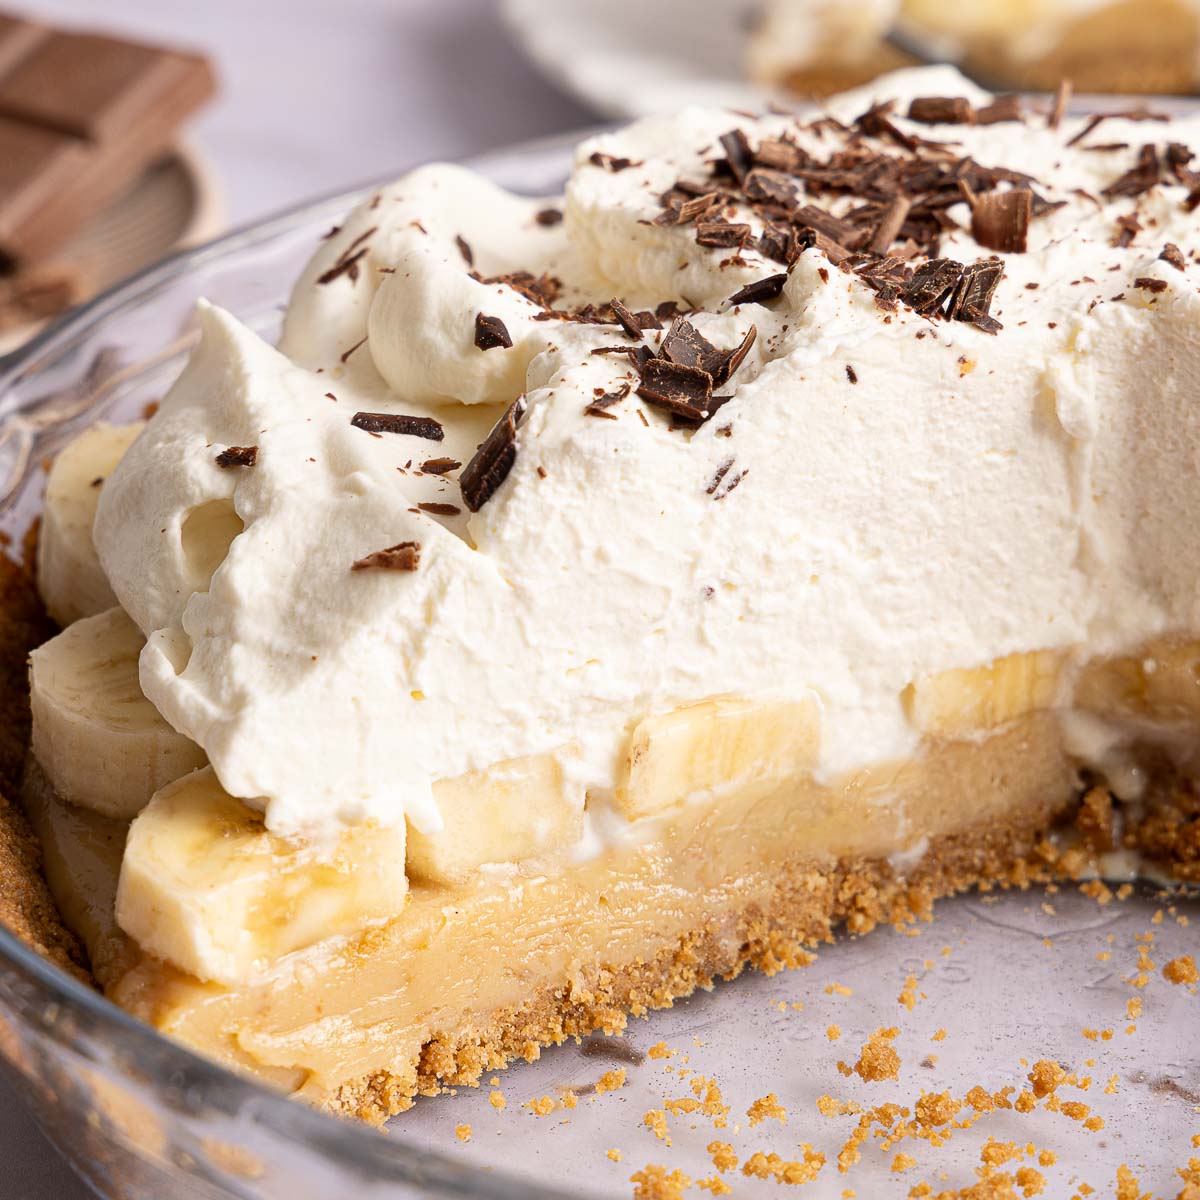
Gluten-Free Banoffee Pie
Ingredients
Graham Cracker Crust
- 1½ cups (158g) gluten-free graham cracker crumbs (one 5.6oz box of Schar graham crackers)
- ¼ cup (53g) brown sugar
- 1 tablespoon (9g) gluten-free measure-for-measure flour
- 4 tablespoons (56g) butter, melted and slightly cooled
Caramel
- ½ cup (113g) butter
- ½ cup (106g) brown sugar
- 1 7-ounce can (198g) sweetened condensed milk
- Pinch of kosher salt
- ½ teaspoon vanilla extract
Whipped Cream Topping
- 1 cup (240ml) heavy cream
- 3 tablespoons (23g) powdered sugar
- ½ teaspoon vanilla extract
Other
- 2 –3 bananas sliced
- Chocolate shavings for garnish
Instructions
- For the graham cracker crust: Preheat the oven to 350°F. Blend the graham crackers in a food processor until they turn into fine crumbs. Pour the crumbs into a large mixing bowl.
- Add the brown sugar and gluten-free flour and mix until well-combined. Add the melted butter and stir until fully combined and all of the crumbs are moistened.
- Press the crumbs firmly into the bottom and up the sides of a 9×1.5-inch pie pan.
- Bake for 8–10 minutes. Remove from the oven and set aside to cool for 10 minutes while you make the caramel.
- For the caramel: In a heavy-bottomed medium saucepan over medium heat, combine the butter, brown sugar and salt. Whisk constantly until the butter is melted and everything is well-combined, then continue whisking until the mixture starts to boil.
- Once the mixture reaches a boil, add the sweetened condensed milk, whisking constantly, and bring back to a boil.
- Reduce the heat to a simmer and continue whisking. Cook for about 5 minutes, until the caramel turns a rich golden color, thickens and starts to pull away from the sides of the pan as you stir.
- Remove from heat and stir in the vanilla.
- Pour the caramel over the cooled crust and spread it evenly with a rubber spatula.
- Refrigerate for 1 hour.
- For the whipped cream topping: In the bowl of a stand mixer fitted with the whisk attachment, or using a hand mixer, beat together the heavy cream, powdered sugar and vanilla on medium-high speed until stiff peaks form, about 4–5 minutes.
- Arrange the banana slices over the caramel in an even layer (or two layers if you love bananas). Spread the whipped cream on top.
- Garnish with chocolate shavings and serve immediately.
Notes
Nutrition
The post Gluten-Free Banoffee Pie appeared first on Meaningful Eats.
]]>The post Gluten-Free Sour Cream Cornbread Loaf appeared first on Meaningful Eats.
]]>Why You’ll Love This GF Cornbread Loaf
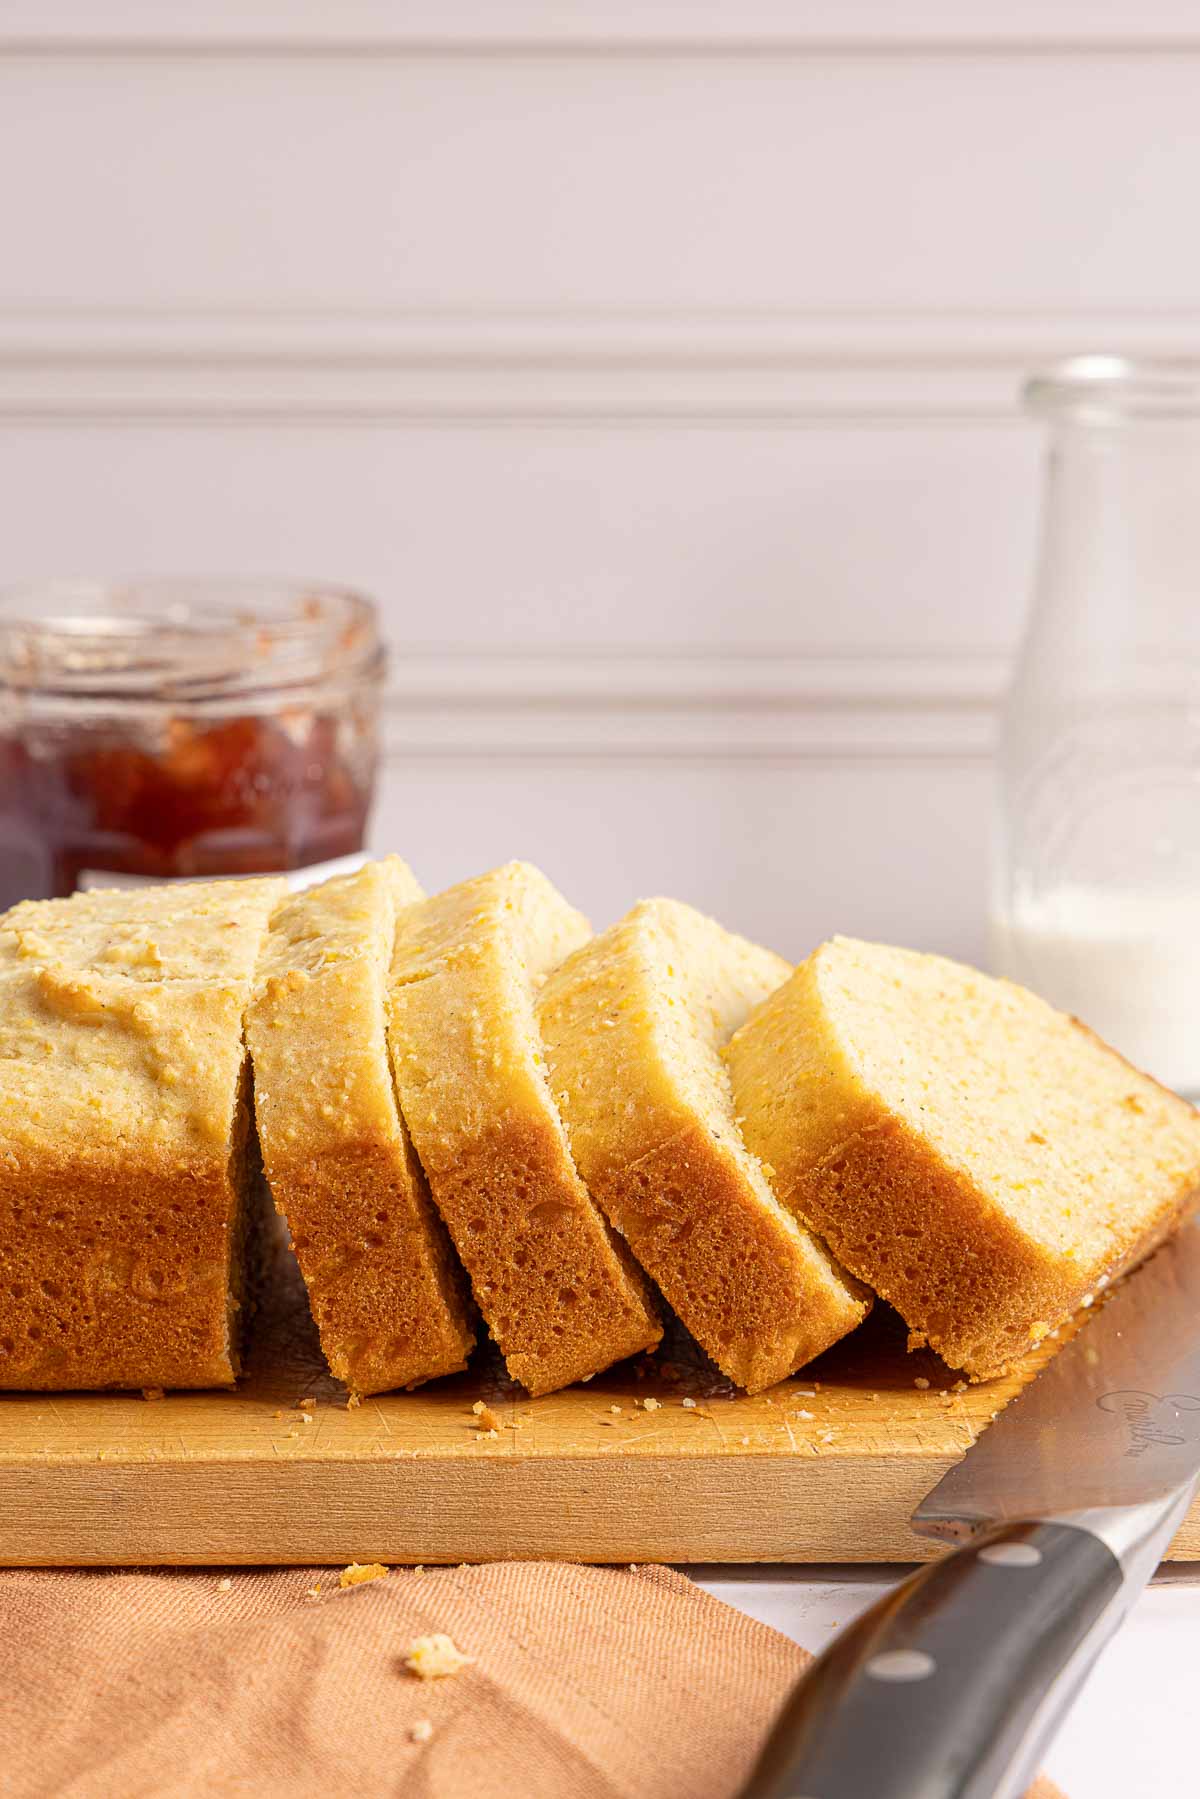
Cornbread is one of my favorite things to make when the weather cools down. Recently, a Meaningful Eats reader sent me a recipe for sour cream cornbread and asked if I could make it gluten-free. I loved the idea of a sour cream-based cornbread baked in a loaf pan. Once I tried it, I was hooked on its rich flavor and soft, sliceable texture. I think you’ll love it too!
- Versatile. It’s delicious served alongside a bowl of gluten-free chili or gluten-free soup or on your breakfast plate the next morning.
- Loaf format. It slices cleanly and thick, which means no crumbling mess at the table.
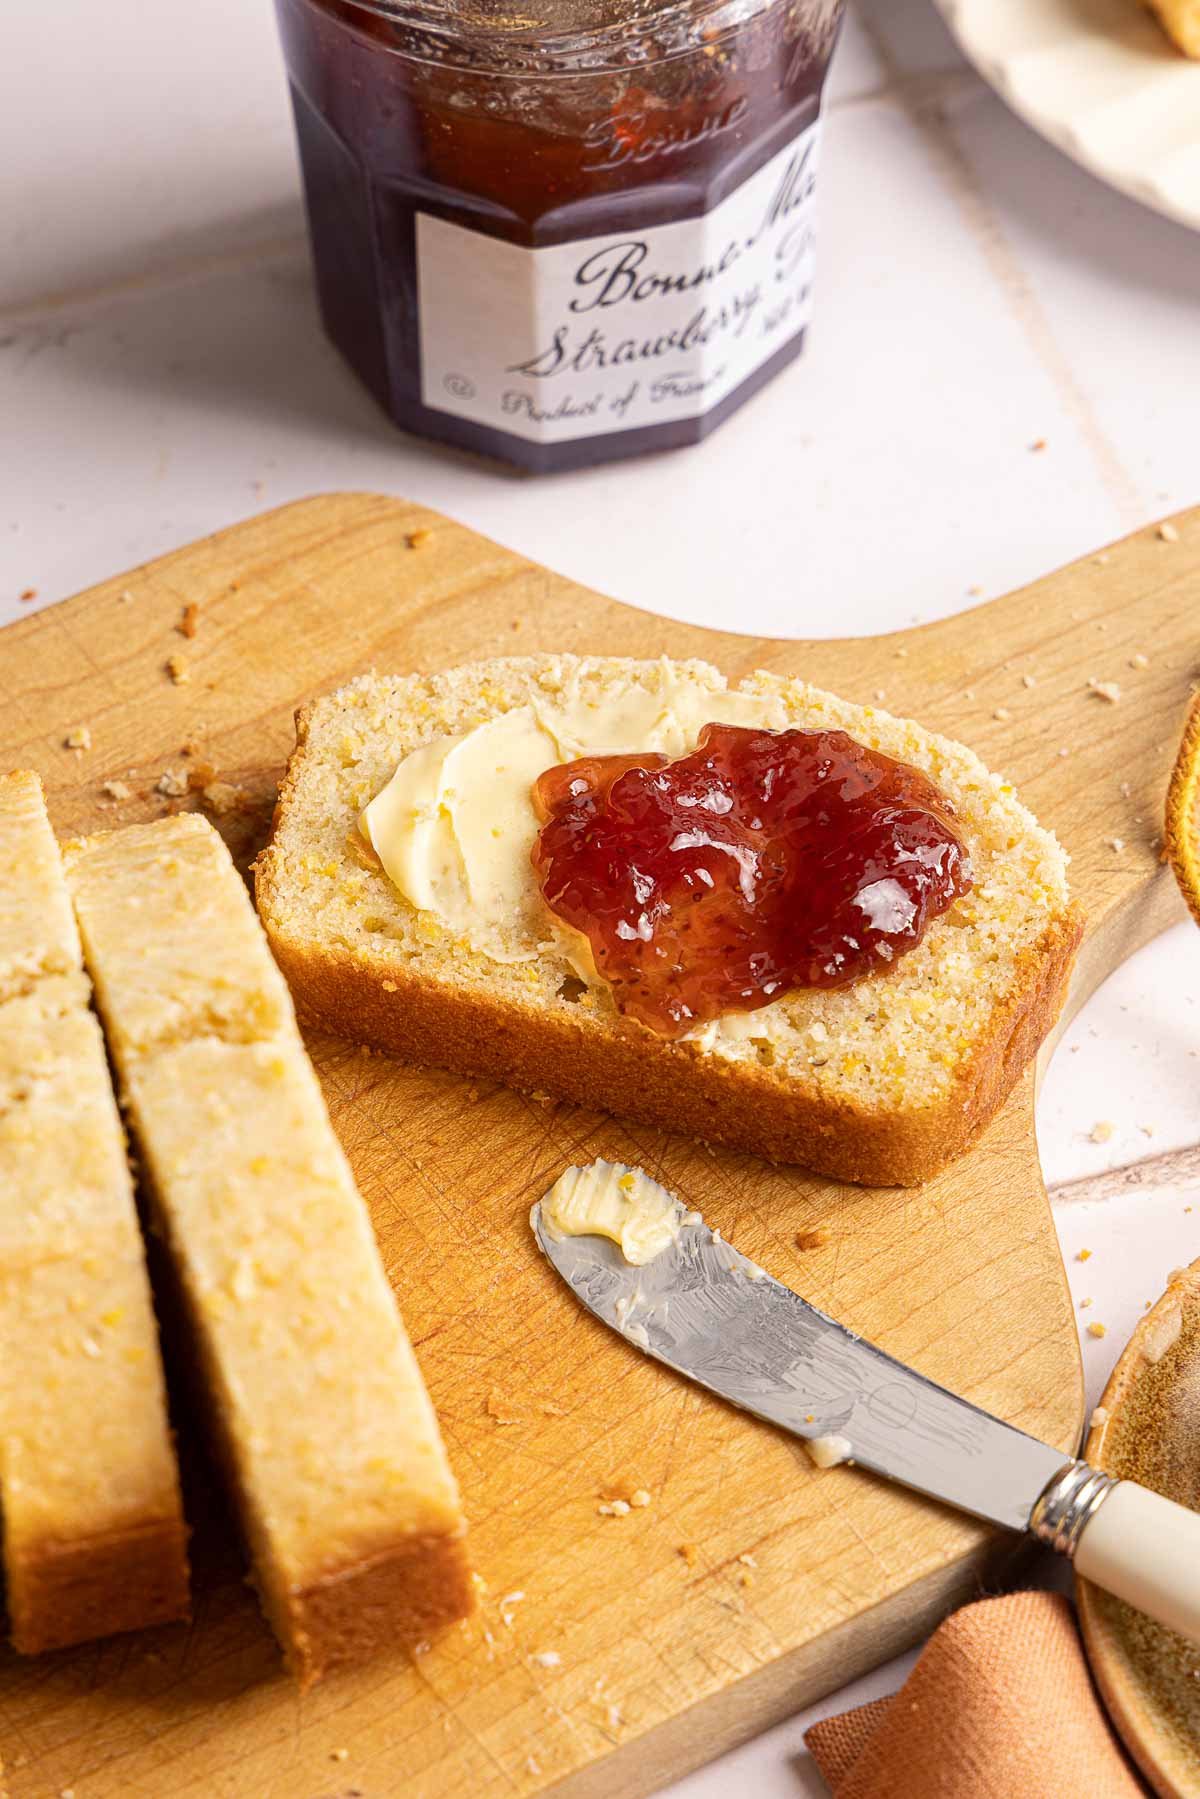
- The best leftovers. Leftovers might be the best part! Toast a slice the next day and top it with butter and strawberry jam.
- Simple pantry ingredients. One bowl of dry, one bowl of wet and it comes together fast
What You Need
Here are a few notes on some of the key ingredients to make this gluten-free sour cream cornbread loaf. Jump to the recipe card below for the exact measurements.
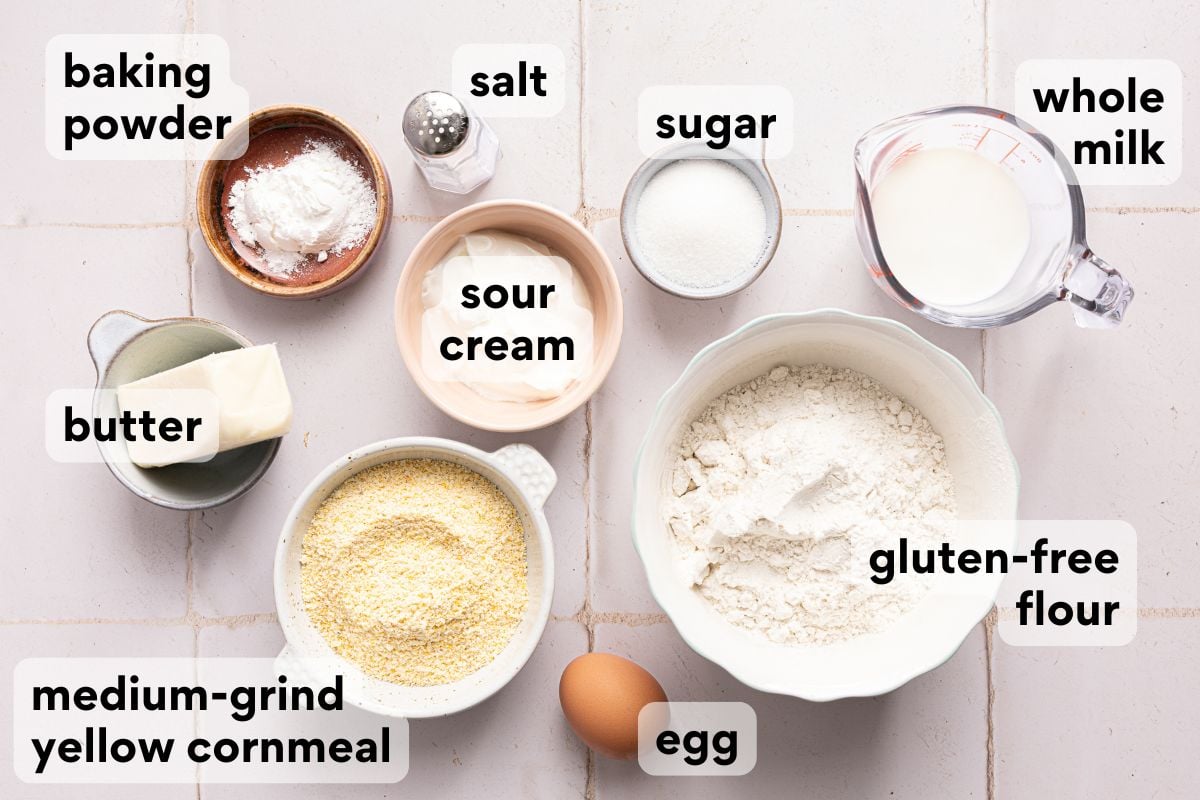
- Gluten-free measure-for-measure flour. I recommend using a high quality gluten-free 1:1 baking flour that contains xanthan gum for best results.
- Medium-grind yellow cornmeal. The grind matters here. Medium-grind gives you that satisfying texture and a little tooth without making the crumb gritty. My favorite brand is Bob’s Red Mill.
- Sour cream. The secret ingredient! This is what keeps the loaf moist and tender all the way through. It adds a subtle tang that balances the sweetness beautifully.
- Butter. I like to use a high-quality grassfed butter for best results. I think it lends the best flavor and color to the cornbread.
How to Make Gluten-Free Sour Cream Cornbread
Here’s an overview of how to make this recipe. You can jump to the recipe for the full instructions!
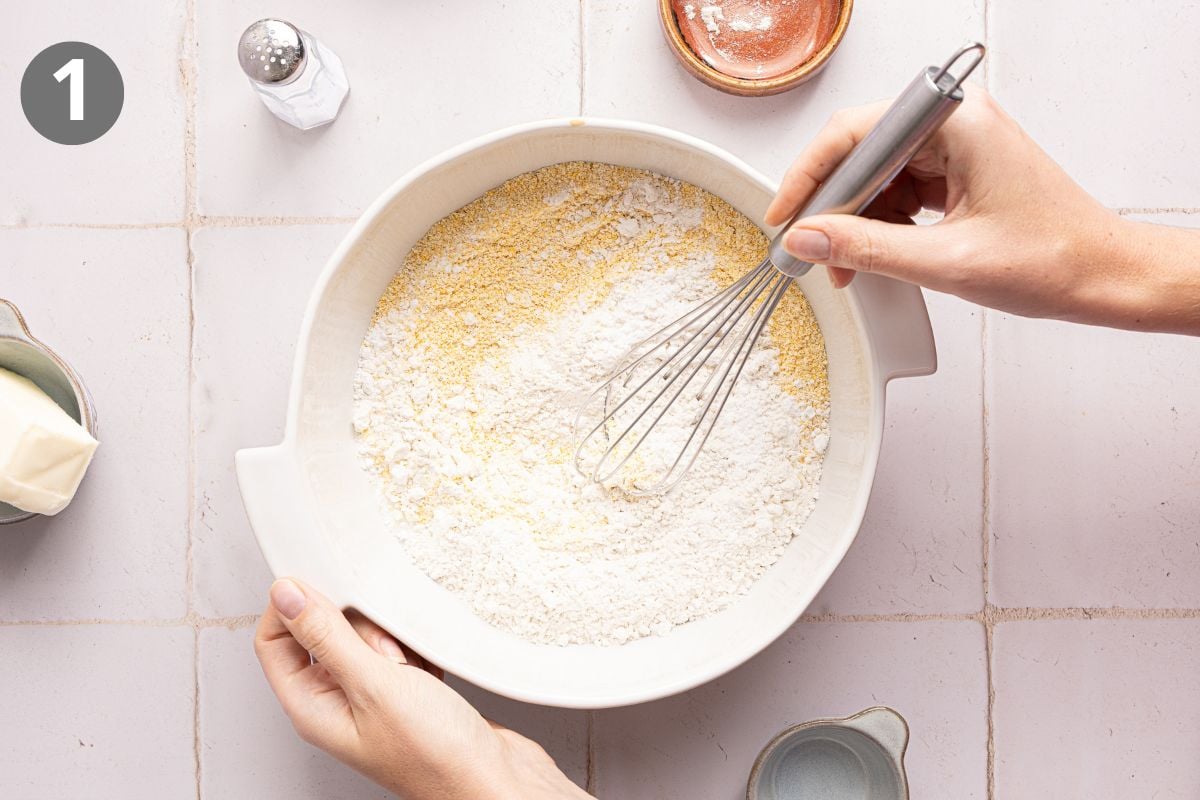
Mix the dry ingredients. I use a large bowl so there’s plenty of room to whisk all of the dry ingredients together evenly.
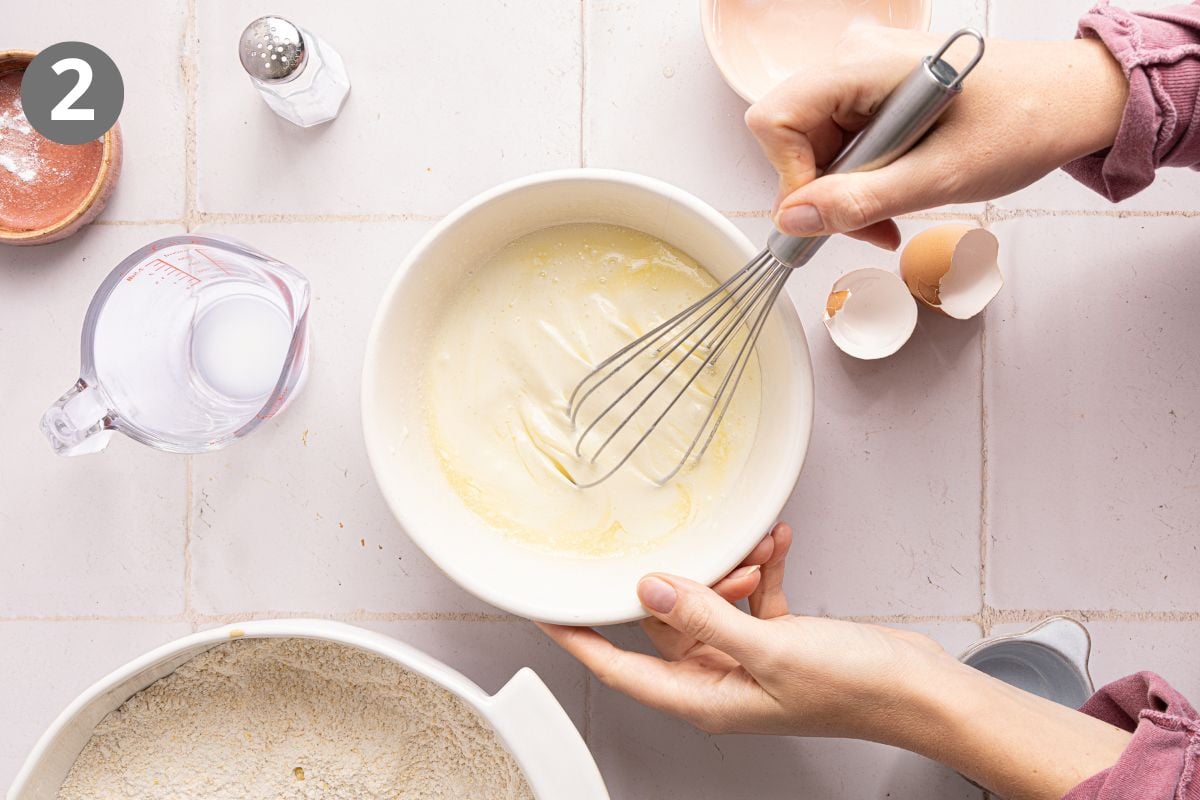
Whisk the wet ingredients. I whisk the milk, sour cream, and egg together in a medium bowl, then slowly mix in the melted butter.
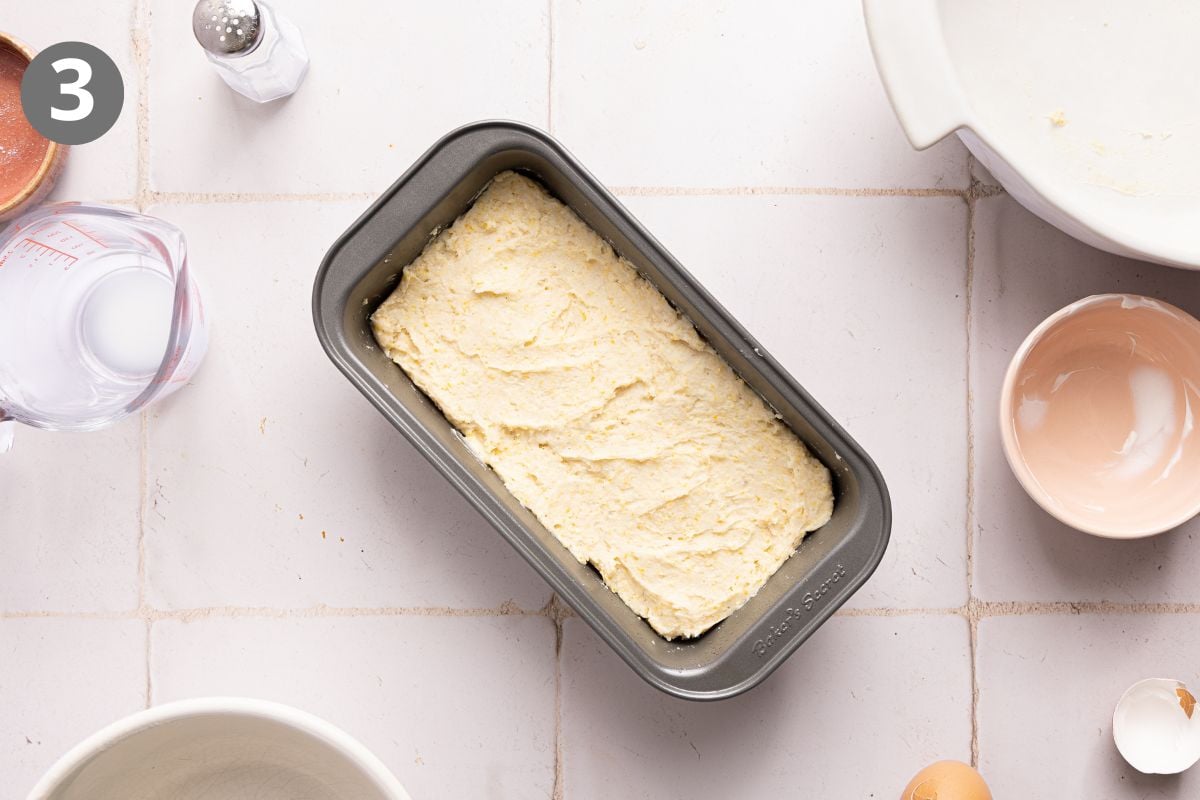
Combine and rest. I find a rubber spatula works best for mixing the wet and dry together. Once no dry flour streaks remain, pour the batter into the pan and smooth out the top. Make sure you plan for 5 minutes of resting time at room temperature!
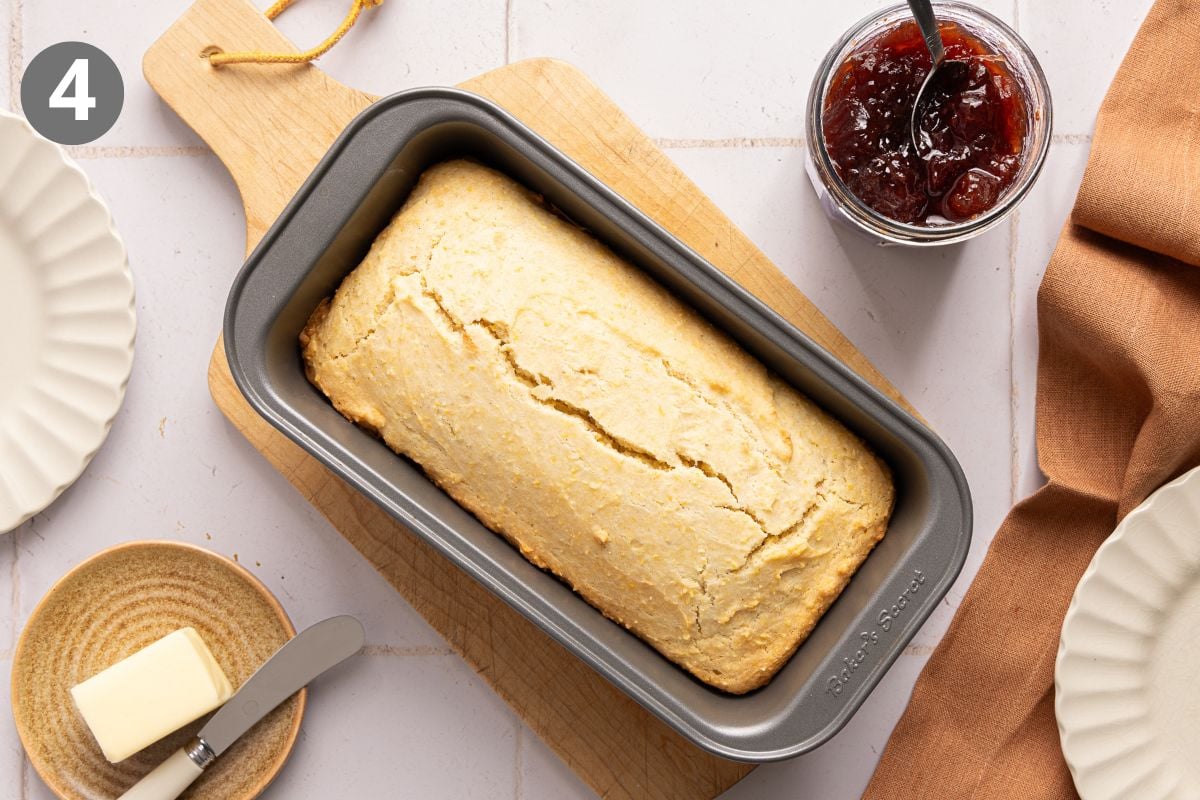
Bake and cool. This loaf usually takes 30-35 minutes to bake, but I always use a toothpick to check the center for the most accurate results. Let the cornbread cool in the pan for 10 minutes before transferring it to a wire rack to cool completely. Slice and serve!
Erin’s Tip
I found that letting the batter rest for just 5 minutes gives the gluten-free flour time to hydrate and results in a better rise and softer, more even crumb.
More Gluten-Free Quick Breads
Gluten-Free Sour Cream Cornbread Loaf
Ingredients
- ½ cup (113g) butter, melted
- 1¼ cups (187g) gluten-free measure-for-measure flour
- ½ cup (60g) medium-grind yellow cornmeal
- ¼ cup (50g) granulated sugar
- 1 tablespoon baking powder
- ½ teaspoon kosher salt
- ½ cup (120ml) whole milk, at room temperature
- ½ cup (120g) sour cream
- 1 large egg, at room temperature
Instructions
- Preheat the oven to 350°F. Spray an 8×4-inch loaf pan with cooking spray.
- In a large bowl, whisk together the gluten-free flour, cornmeal, sugar, baking powder and salt.
- In a medium bowl, whisk together the milk, sour cream and egg. Slowly whisk in the melted butter until combined.
- Add the wet ingredients to the dry ingredients and stir with a rubber spatula until just combined and no dry flour streaks remain.
- Pour the batter into the prepared pan and smooth the top. Let the loaf rest at room temperature for 5 minutes before baking.
- Bake for 30-35 minutes, until a toothpick inserted into the center comes out clean.
- Remove from the oven and let the cornbread cool in the pan for 10 minutes, then transfer to a wire rack to cool completely.
- To serve, slice and toast the cornbread, then top with butter and strawberry jam.
Notes
Nutrition
The post Gluten-Free Sour Cream Cornbread Loaf appeared first on Meaningful Eats.
]]>The post Gluten-Free Mini Powdered Sugar Donuts appeared first on Meaningful Eats.
]]>WHY YOU’LL LOVE THIS RECIPE
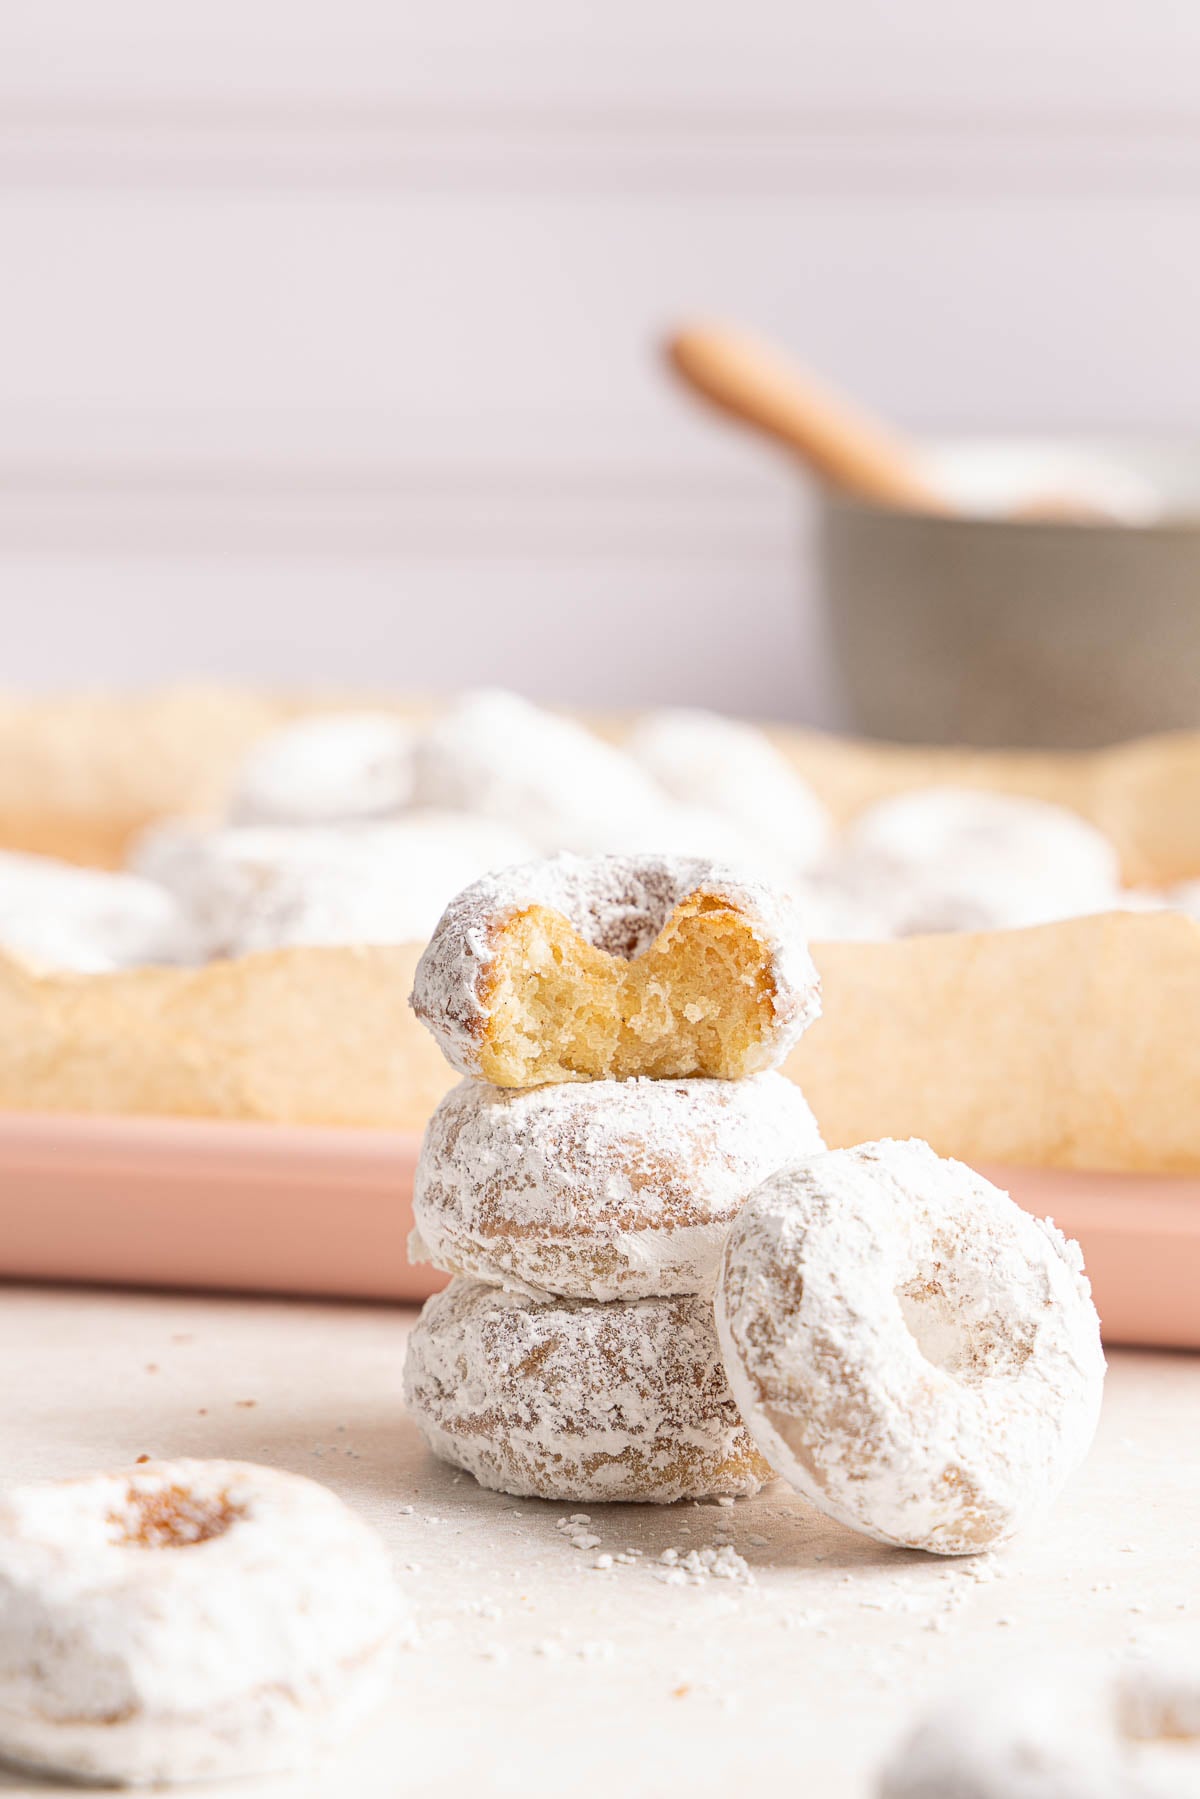
When I first went gluten-free, I really missed the little treats I grew up loving. I’ve spent years recreating those nostalgic favorites, and I’m so happy to finally have a gluten-free version of those gas station mini powdered sugar donuts that taste just like I remember!
- Ready in 30 minutes. I love how quick these are when a donut craving strikes! You only need one bowl and they bake up in under 10 minutes.
- Nostalgic flavor. Vanilla, a hint of nutmeg and a generous powdered sugar coating give these mini donuts that classic, old-fashioned flavor.
- No frying. The oven does all the work, but the donuts still turn out wonderfully soft and tender. For a classic fried version, try my gluten-free fried donut recipe.
- Makes 24 mini donuts. One batch makes plenty to share for birthday mornings, brunch or an easy weekend treat. In my house, they disappear quickly!
What You Need
Here are a few notes on some of the key ingredients to make these gluten-free mini powdered sugar donuts. Jump to the recipe card below for the exact measurements.
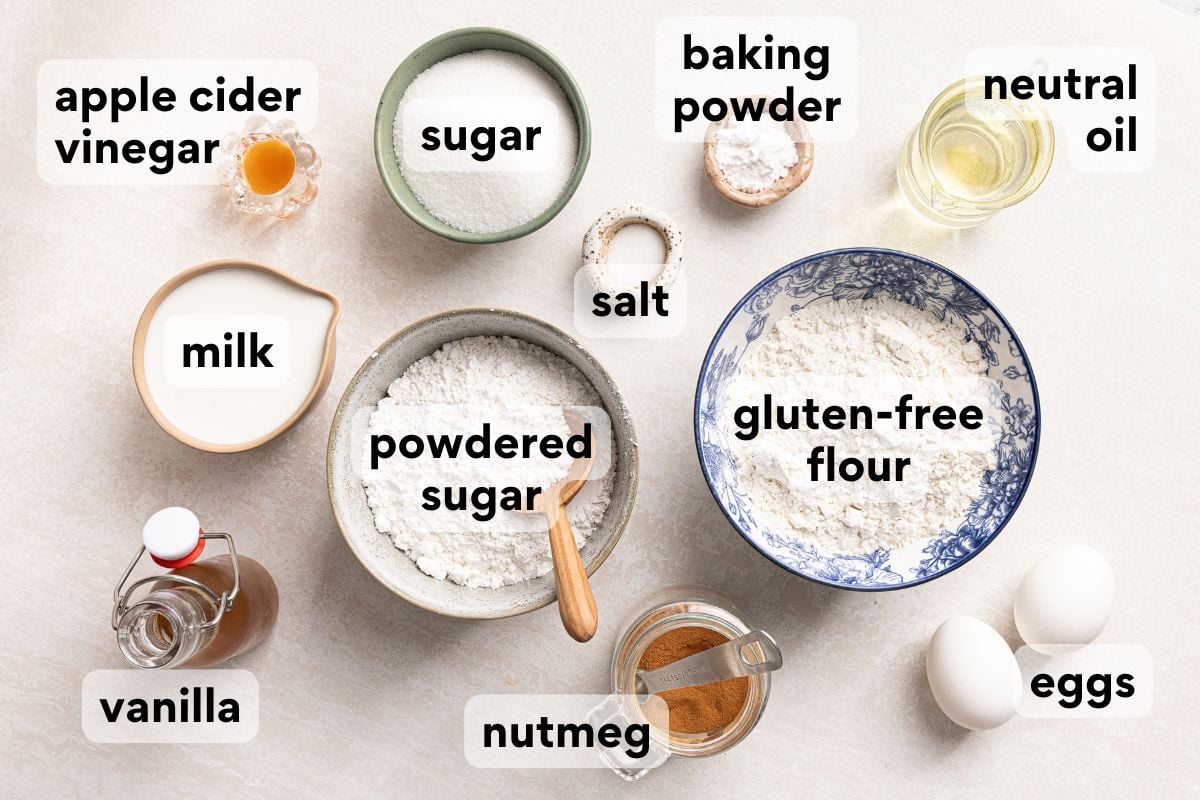
- Gluten-free measure-for-measure flour. Be sure to use a high-quality 1:1 gluten-free baking flour that contains xanthan gum. King Arthur and Bob’s Red Mill both work great.
- Apple cider vinegar. One teaspoon reacts with the baking powder to give the donuts extra lift and a lighter, more tender crumb. You can substitute an equal amount of lemon juice if that’s what you have on hand. I also use ACV in these gluten-free baked donuts!
- Milk of choice. Any unsweetened milk you like will work here. I usually use almond milk to keep these dairy-free!
- Neutral oil. You can use any neutral oil you like here! Avocado, vegetable or canola are all great choices.
How to Make Gluten-Free Mini Donuts
Here’s an overview of how to make this recipe. You can jump to the recipe for the full instructions!
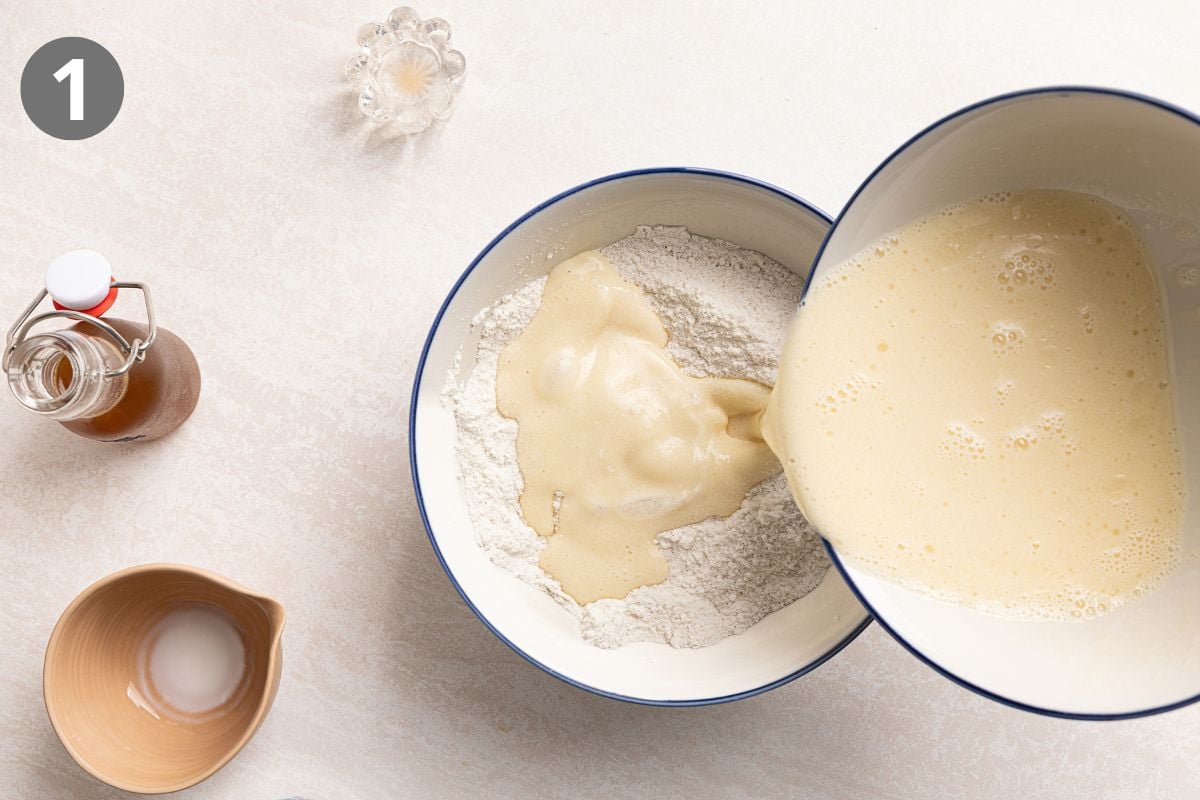
Make the batter. Whisk the dry ingredients in one bowl and the wet ingredients in a second bowl. Pour the wet mixture into the dry and whisk until fully combined.
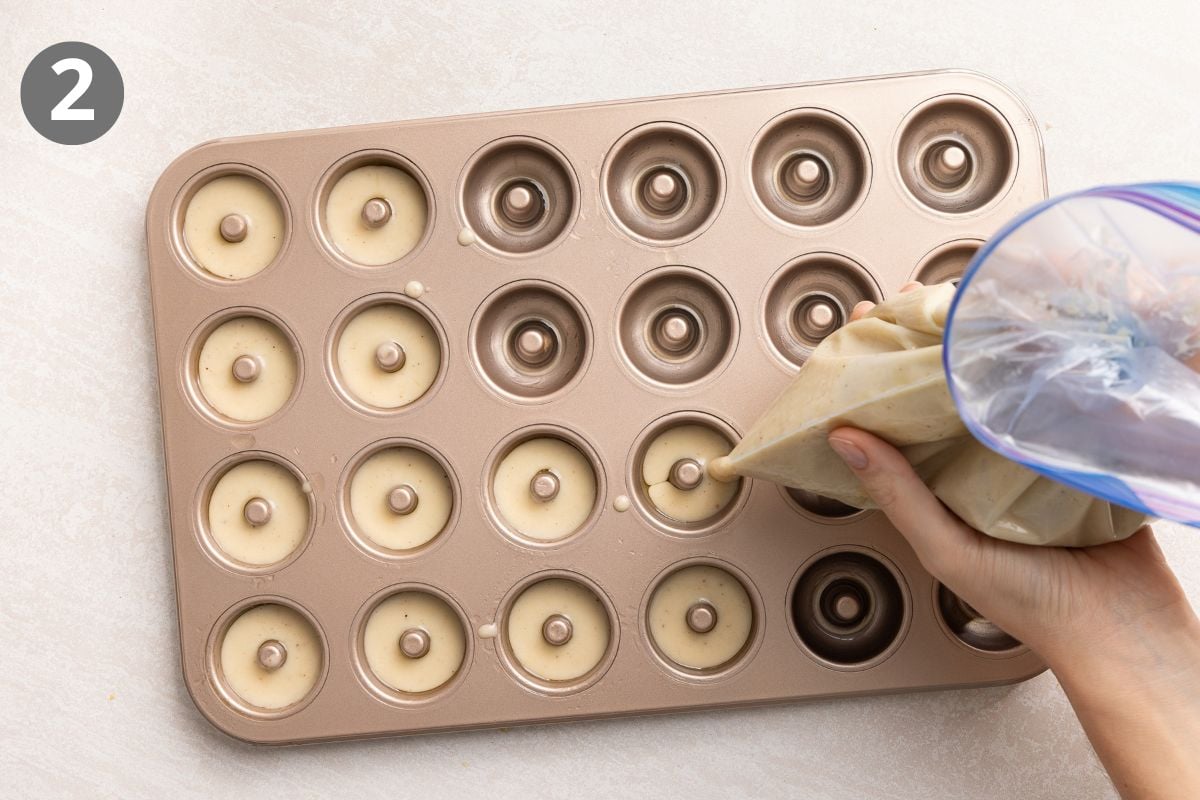
Pipe the batter. I like to pour the batter into a large zipped-top bag, then cut a hole in one corner. It makes it so easy to pipe the batter into the prepared mini donut pans!
Erin’s Tips
There’s nothing more frustrating than donuts that stick to the pan! I always take a few extra seconds to generously coat every cavity with cooking spray so they release easily.
I found that filling each cavity about ⅔ full gives the donuts just enough room to puff up without overflowing. This made the biggest difference in getting that perfect donut shape!
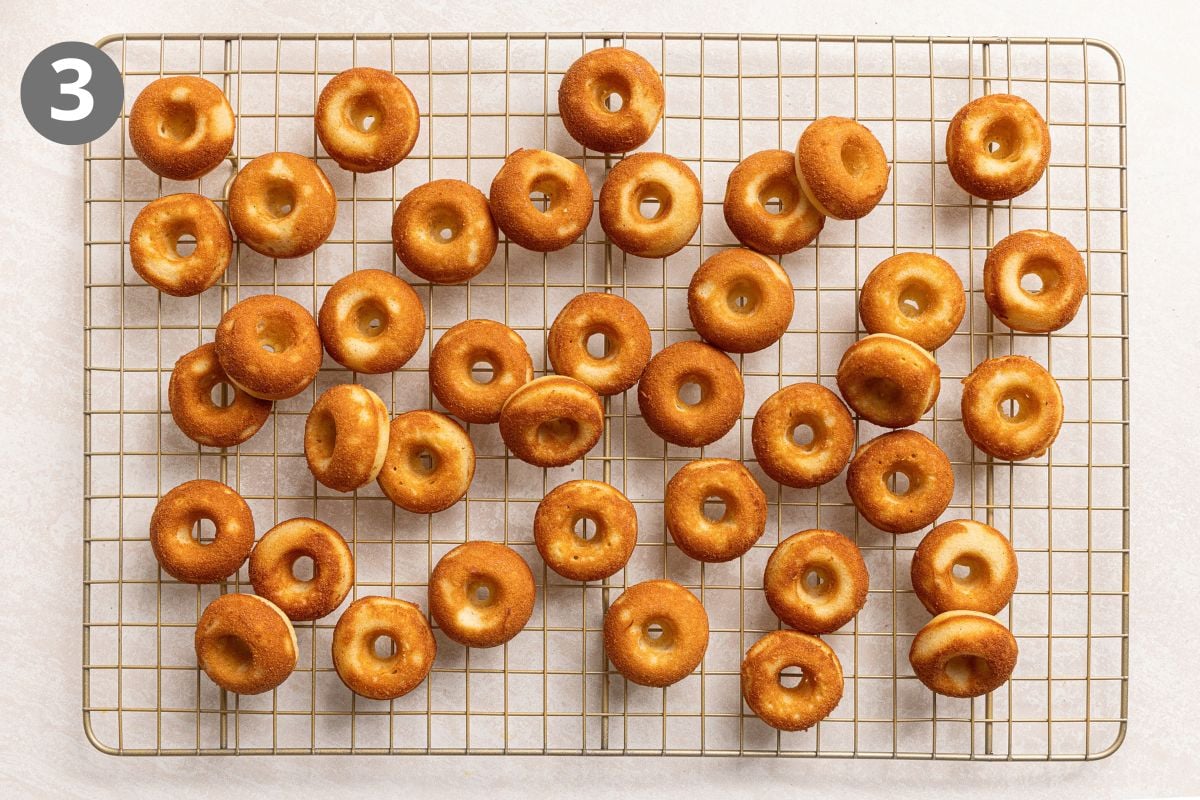
Bake and cool. These little donuts take less than 10 minutes to bake up lightly golden. Once they’re set, pull them from the oven and let them cool on a wire rack.
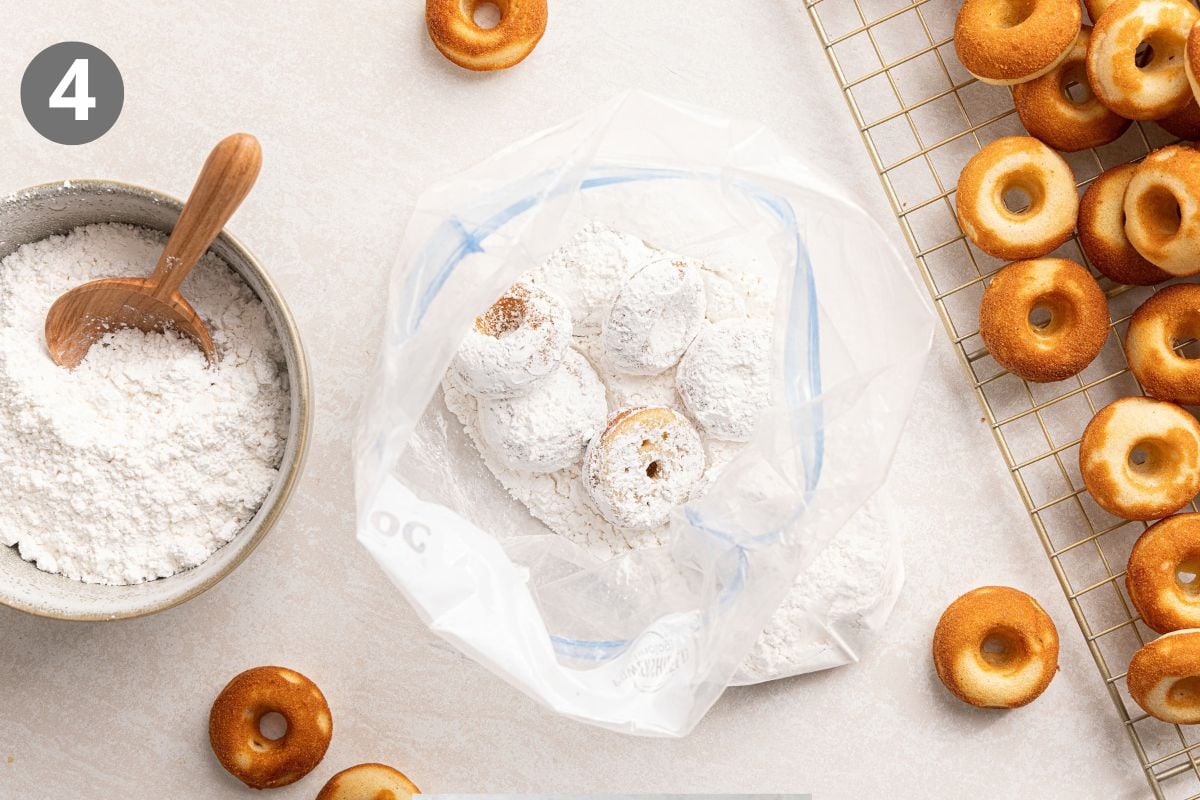
Coat the donuts. I fill another large zipped-top bag with powdered sugar and add just a few donuts in the bag at a time. Shake until well coated and repeat until all donuts are covered.
Erin’s Tip
I was sure the powdered sugar would stick best while the donuts were warm, but it actually adhered better once they were fully cooled.
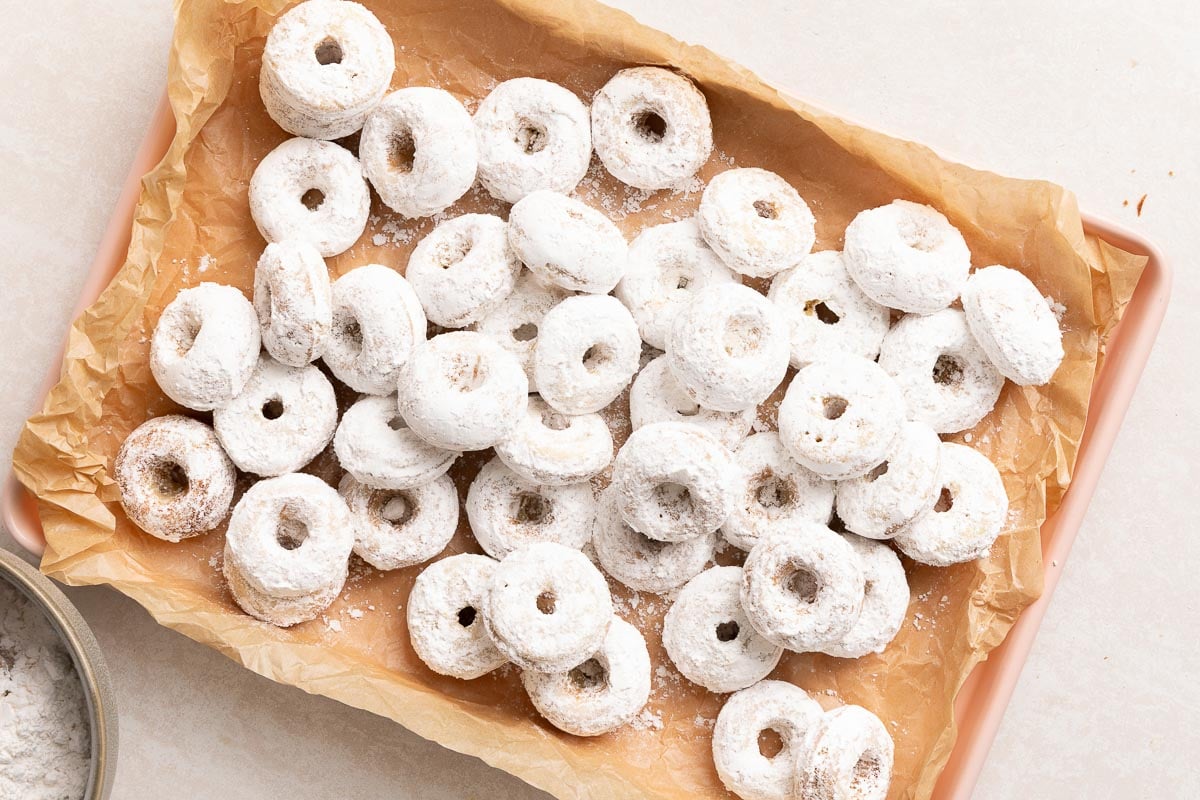
More Gluten-Free Donut Recipes
Gluten-Free Mini Powdered Sugar Donuts
Ingredients
Dry Ingredients
- 1½ cups (225g) gluten-free measure-for-measure flour
- ⅔ cup (133g) granulated sugar
- 2 teaspoons baking powder
- ¾ teaspoon kosher salt
- ¼ teaspoon ground nutmeg
Wet Ingredients
- 2 large eggs
- 2 teaspoons vanilla extract
- 1 teaspoon apple cider vinegar
- ¾ cup (180ml) milk of choice
- ½ cup (120ml) neutral oil
Coating
- 2 cups (240g) powdered sugar
Instructions
- Preheat the oven to 400°F. Lightly grease two 12-cavity mini donut pans with cooking spray.
- In a large bowl, whisk together the gluten-free flour, sugar, baking powder, salt and nutmeg. In a separate bowl, whisk together the eggs, vanilla, apple cider vinegar, milk and oil until well-combined.
- Add the wet ingredients to the dry ingredients and whisk until evenly combined.
- Pour the batter into a large zipped-top bag. Cut a 1-inch hole in one corner and pipe the batter into the prepared pans, filling each cavity about ⅔ full.
- Bake for 7-9 minutes, until the donuts are set and lightly golden on top. These bake up quickly, so it’s worth keeping an eye on them! Turn the donuts out onto a wire rack and let them fully cool.
- Place the powdered sugar in a large zipped-top bag. Working in small batches, add a few donuts at a time and shake until generously coated. Repeat with the remaining donuts.
Notes
Nutrition
The post Gluten-Free Mini Powdered Sugar Donuts appeared first on Meaningful Eats.
]]>The post Gluten-Free Black Bottom Cupcakes appeared first on Meaningful Eats.
]]>Why You’ll Love These Gluten-Free Cupcakes
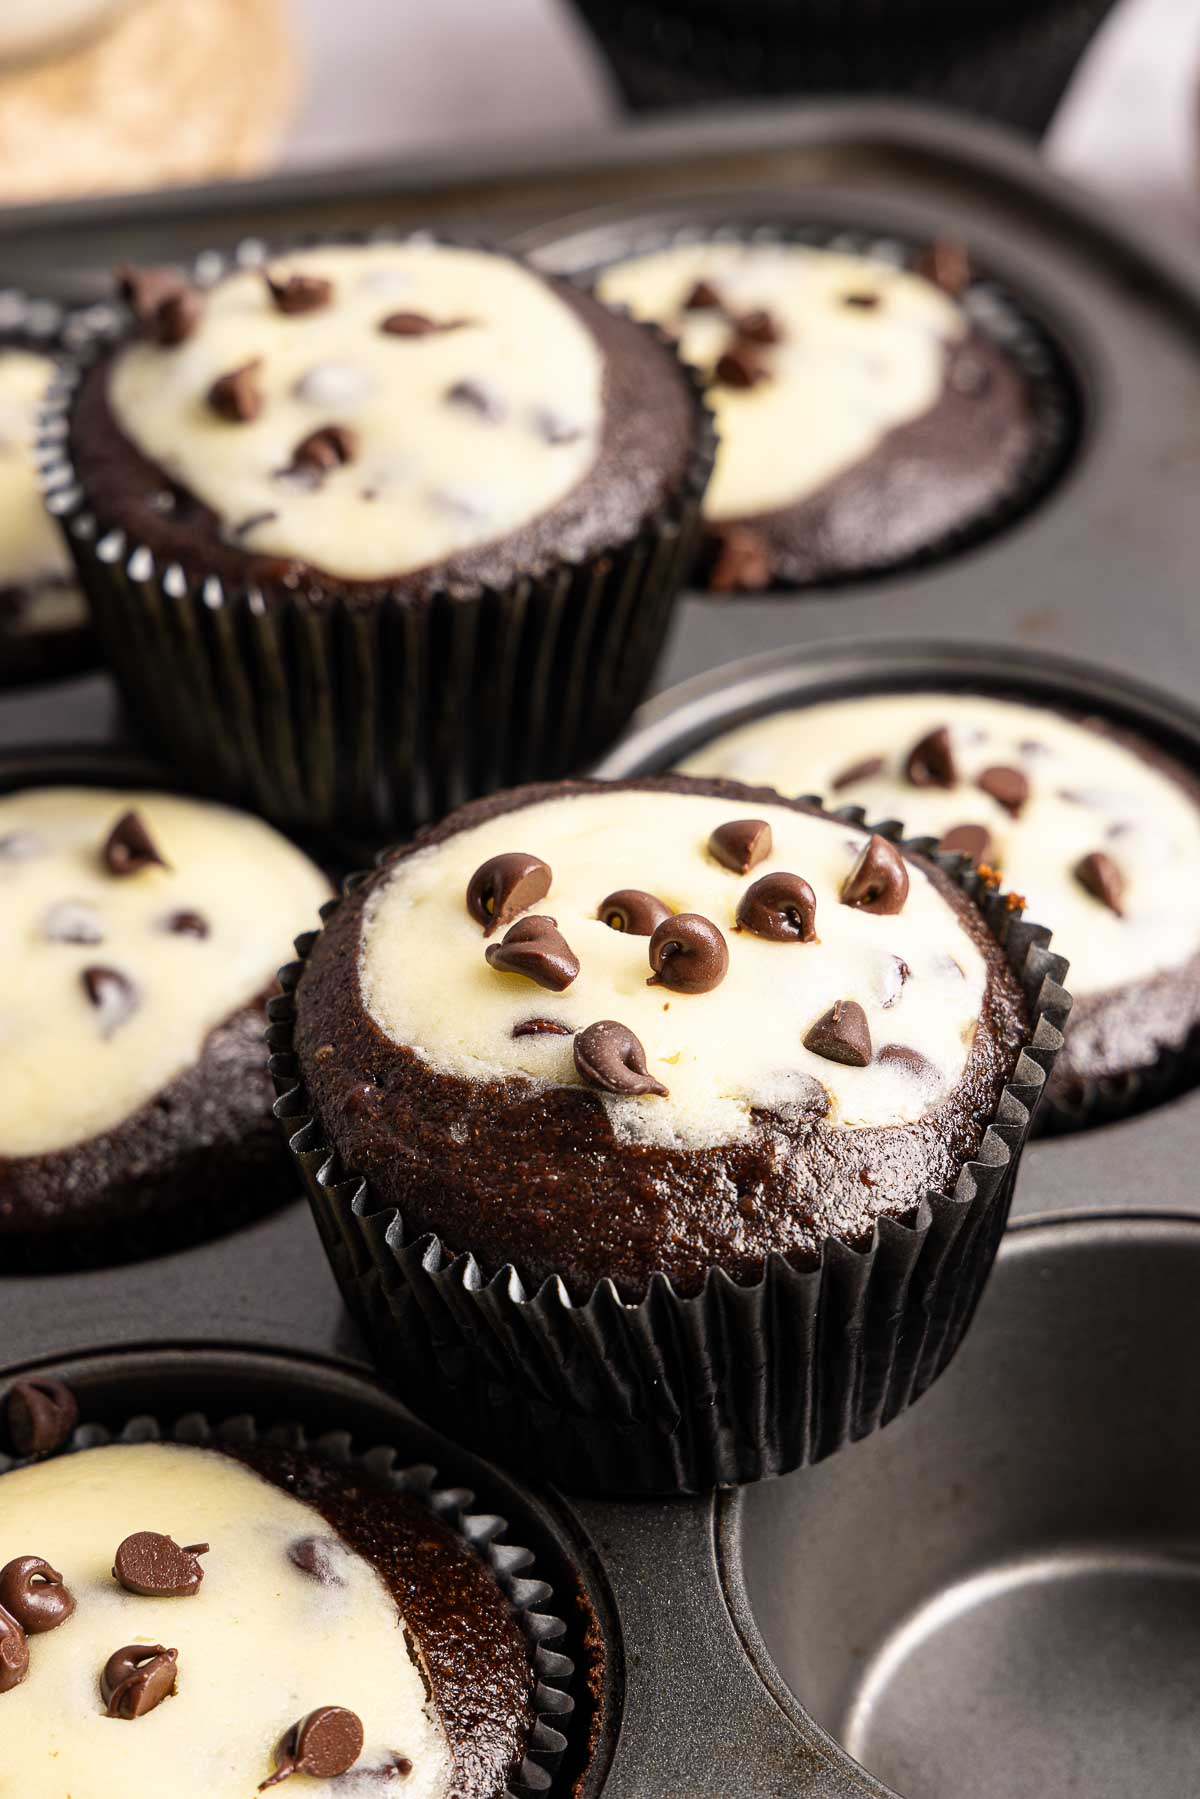
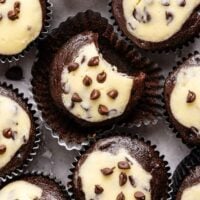
There’s something magical about cutting into a black bottom cupcake and finding that creamy, tangy center tucked inside a deeply chocolatey base.
The chocolate batter bakes up dark and fudgy from a touch of espresso powder, while the cream cheese filling stays rich and just barely set.
- No frosting needed. The cream cheese filling bakes right into the center and comes out rich and tangy every time. Who needs frosting when the filling is this good?!
- Minimal cleanup. The batter comes together in one bowl and the filling in another. You’ll barely have any dishes to deal with!
- Make-ahead friendly. Bake these the night before and they’re just as good the next day. That makes them a great pick for parties or holiday baking.
What You Need
Here are a few notes on some of the key ingredients to make these gluten-free black bottom cupcakes. Jump to the recipe card below for the exact measurements.
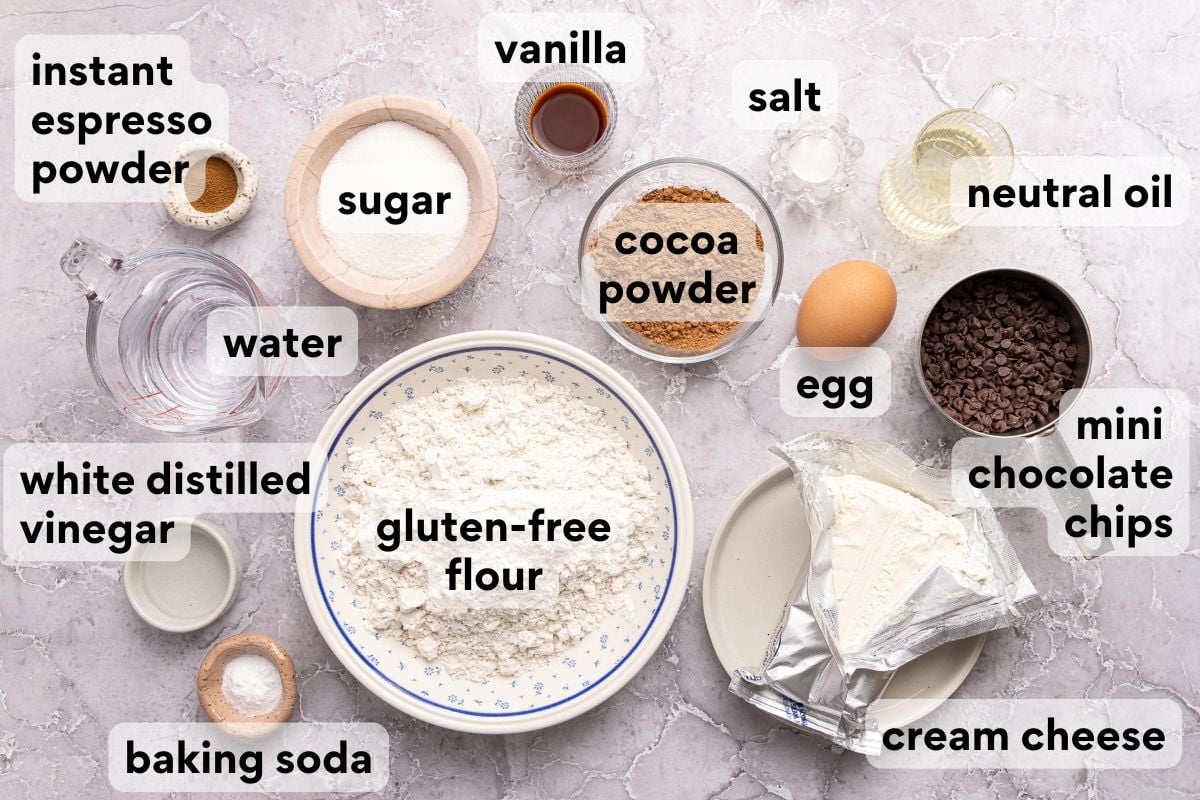
- Cream cheese. Use it cold (straight from the fridge!) so the filling stays thick and dense enough to sink into the batter instead of spreading over the top.
- Vinegar. This batter skips eggs entirely, which is actually by design. The vinegar reacts with the baking soda to leaven the chocolate base and keep it light. It’s the classic trick from Depression-era wacky cake, and it makes these naturally egg-free and vegan (minus the cream cheese filling!).
- Unsweetened cocoa powder. Use natural, not Dutch-processed. Natural cocoa is acidic and reacts with the baking soda to leaven the cupcakes properly. Dutch-process has been neutralized, so the baking soda won’t activate the same way. I use the same kind in these gluten-free red velvet cupcakes!
- Mini chocolate chips. I switched to mini chips after testing with regular-size ones. The smaller chips stay suspended throughout the cream cheese filling so you get chocolate in every single bite.
How to Make Gluten-Free Black Bottom Cupcakes
Here’s an overview of how to make this recipe. You can jump to the recipe for the full instructions!
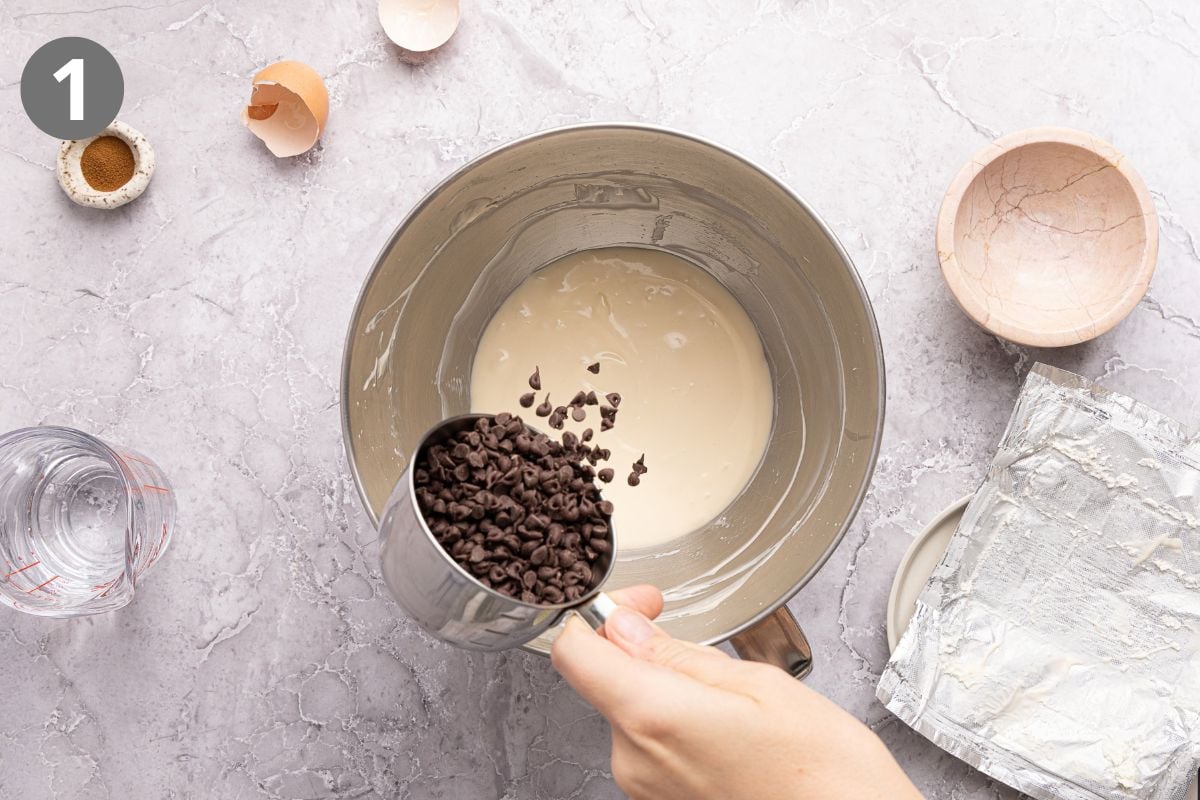
Make the filling. First, beat the cream cheese and sugar until smooth, then beat in the eggs and salt until well-combined. I use a rubber spatula to fold in the chocolate chips, then set the filling aside for now.
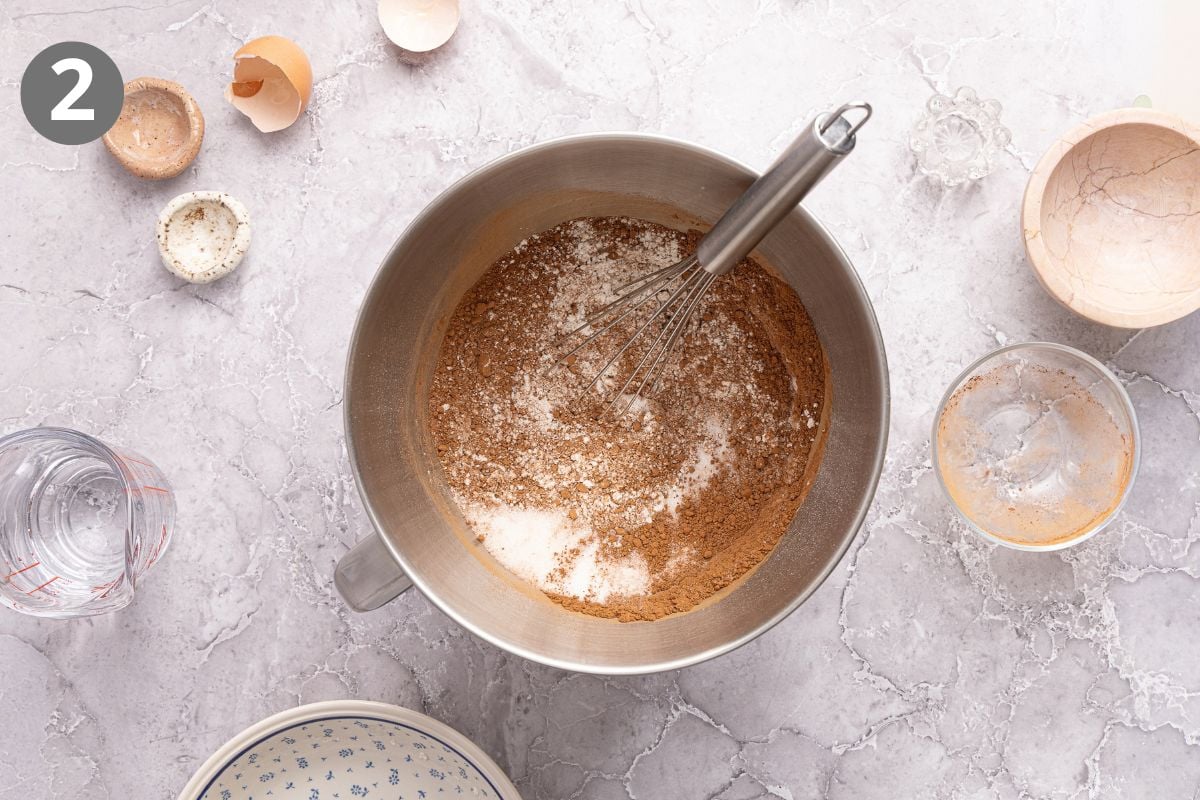
Make the batter. I whisk the dry ingredients together by hand in the bowl from my stand mixer. I like to let it do the work when I add the liquids, and this way I only use one bowl!
Erin’s Tip
On my second attempt making these cupcakes I added espresso powder. It really enhances the chocolate flavor! I also use it to deepen the chocolate in these gluten-free Hostess cupcakes.
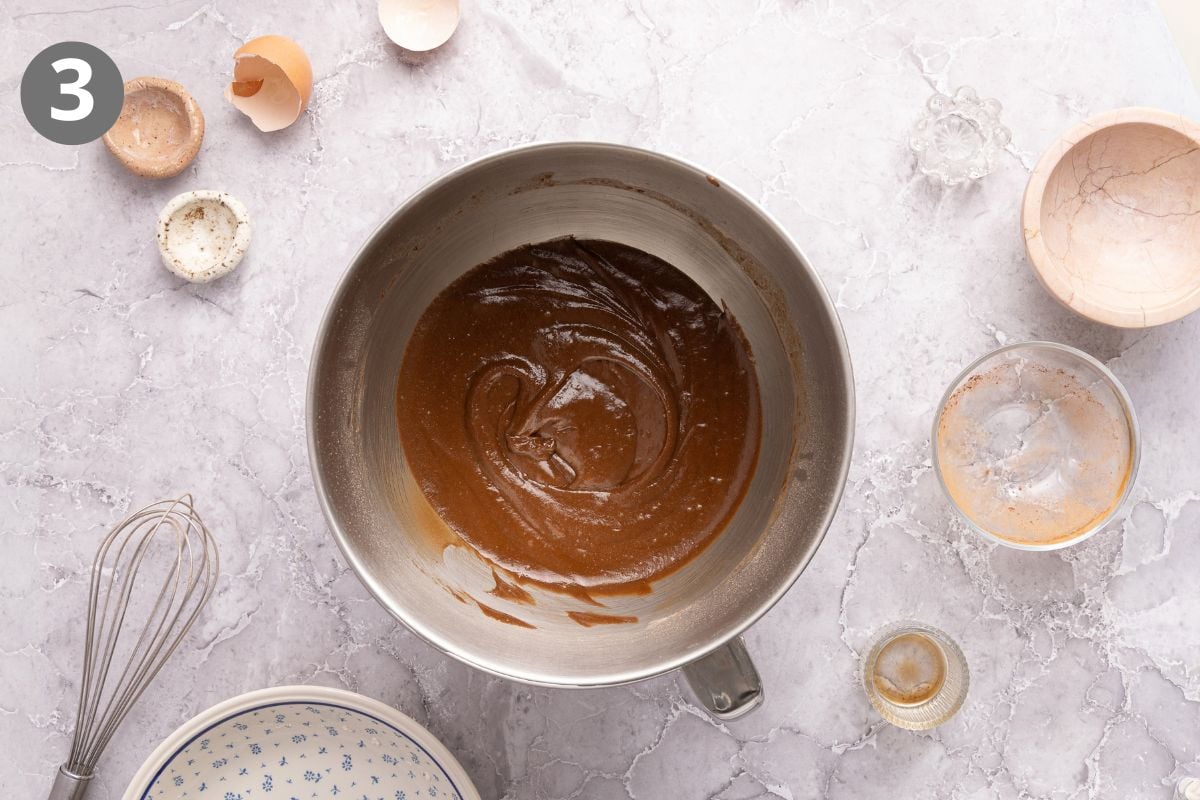
Add the liquids. Mix in the liquid ingredients on medium speed until the batter is smooth. I find I always need to scrape the sides and bottom about halfway through get everything evenly mixed.
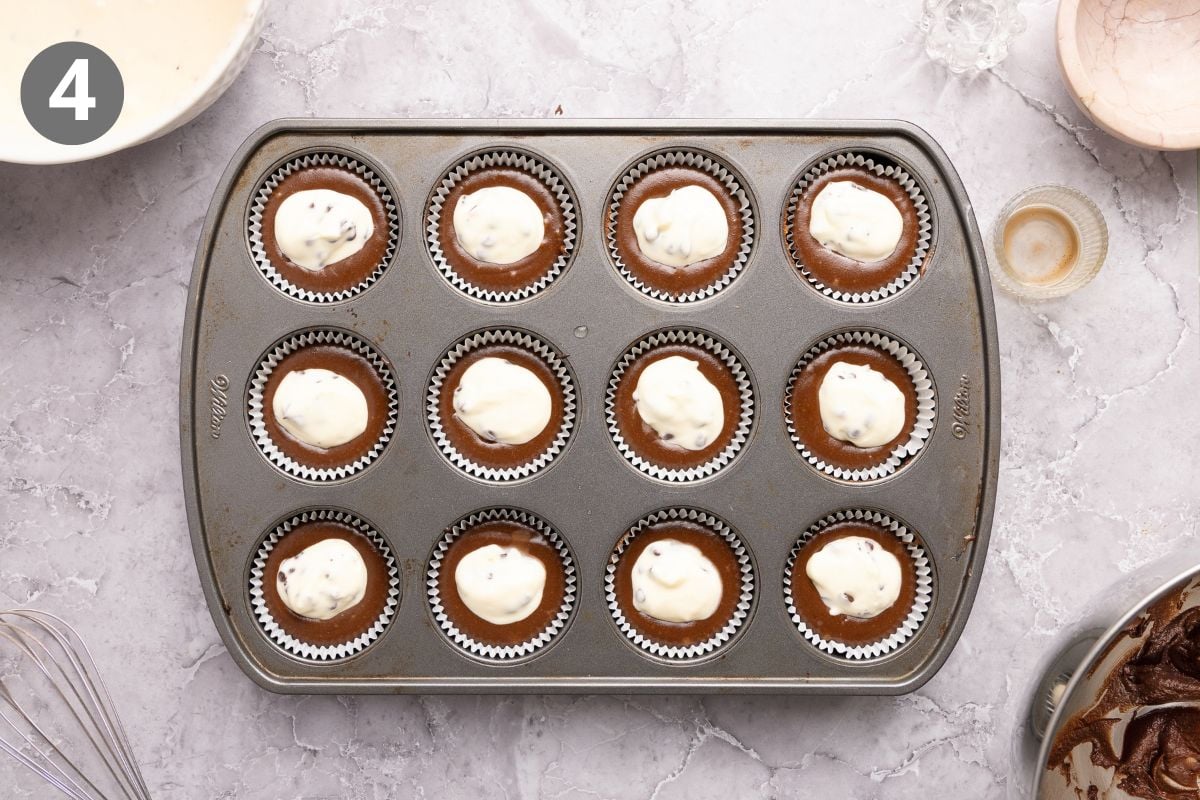
Prepare to bake. I use a kitchen scoop or large spoon to add the batter to the lined muffin pan. It’s important to only fill them halfway! Then add a dollop of filling to the center of each.
Erin’s Tip
You may have a little leftover cream cheese filling, and it’s too good to toss. Swirl it into brownie batter or drop spoonfuls onto pancakes while they cook for a creamy, cheesecake-y center.
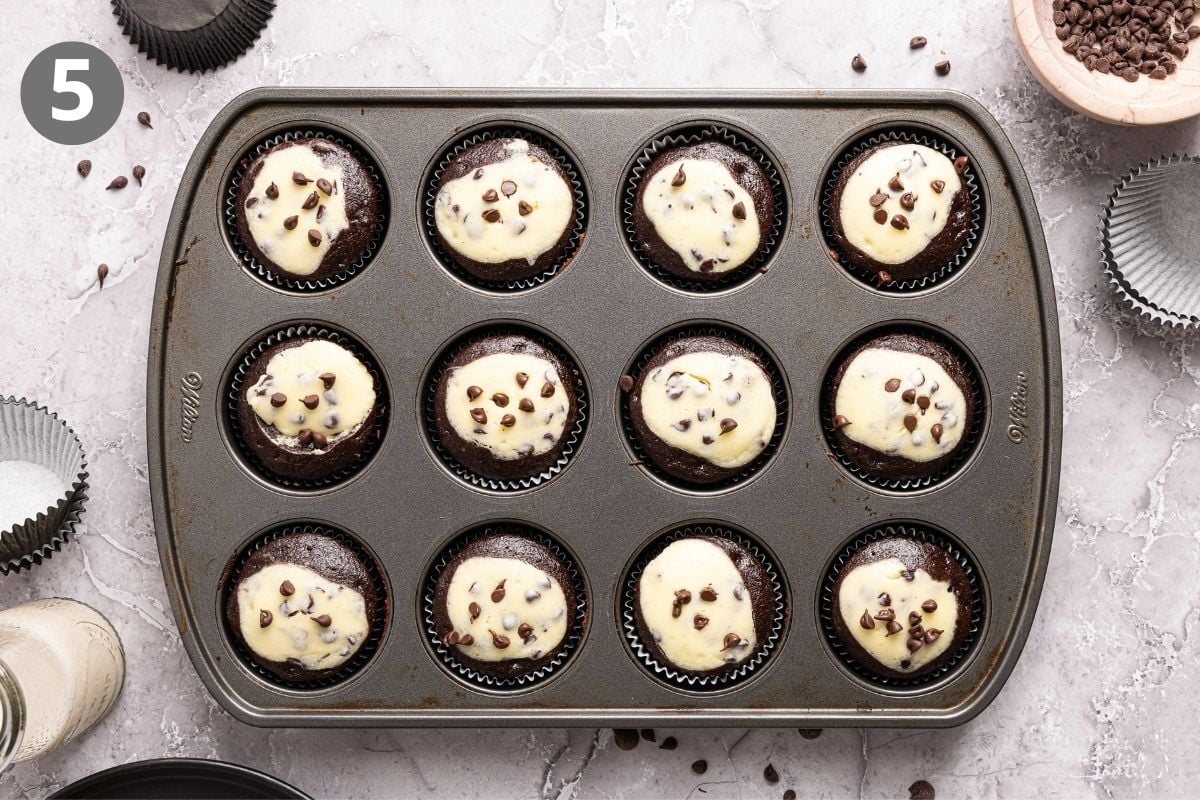
Bake and cool. Bake the cupcakes for about 16-18 minutes. The cream cheese should still look pale. I recommend pulling them the moment the filling starts to take on any color. Cool them in the pan for 5 minutes, then let them cool the rest of the way on a wire rack.
Erin’s Tip
I always test my toothpick in the chocolate base, not the cream cheese center. A few moist crumbs means they’re done and the residual heat takes care of the rest.
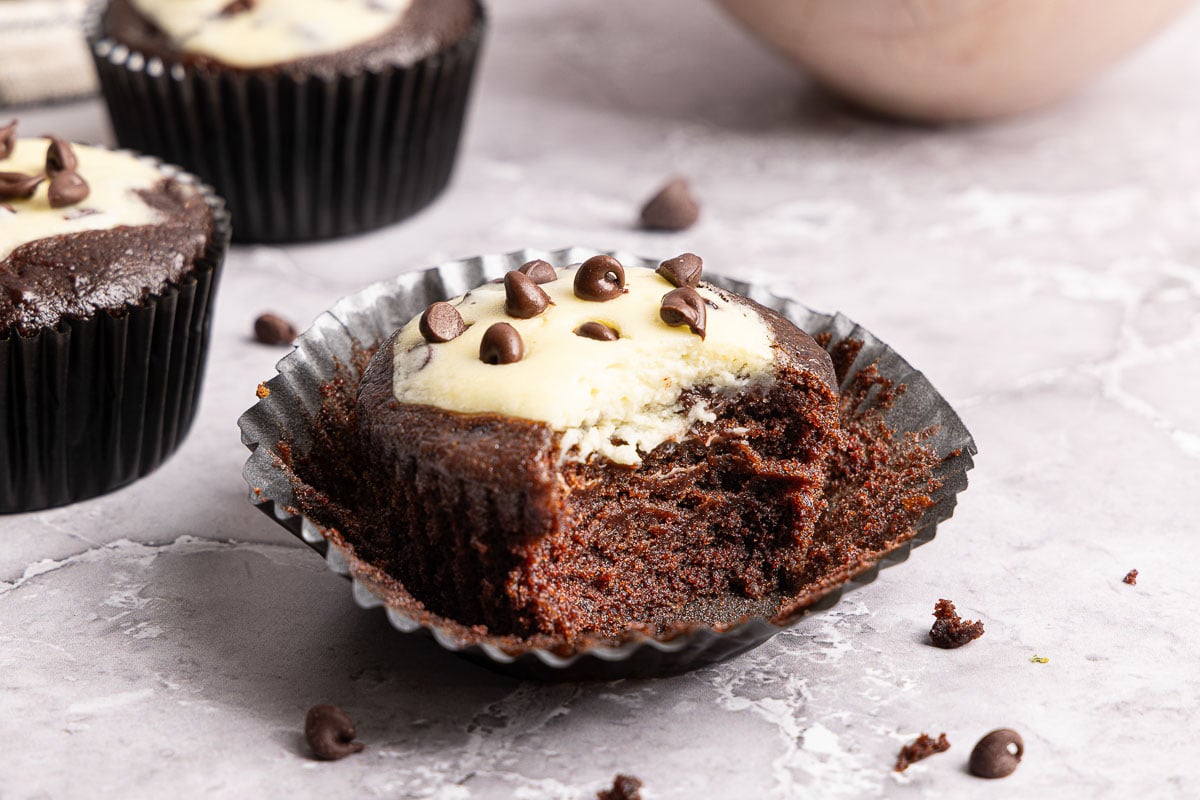
More Gluten-Free Chocolate Recipes
Gluten-Free Black Bottom Cupcakes
Ingredients
Cream Cheese Filling
- 8 oz (226g) cream cheese, cold
- ⅓ cup (66g) granulated sugar
- 1 large egg, at room temperature
- pinch of kosher salt
- ½ cup (90g) mini chocolate chips
Chocolate Cupcake Batter
- 1⅓ cups (200g) gluten-free measure-for-measure flour
- 1 cup (200g) granulated sugar
- 1 teaspoon baking soda
- ⅓ cup (27g) unsweetened cocoa powder (not Dutch-processed)
- ¼ teaspoon instant espresso powder, optional
- ½ teaspoon kosher salt
- ⅓ cup (80ml) neutral oil
- 1 tablespoon white distilled vinegar
- 1 teaspoon vanilla extract
- 1 cup (240ml) hot water
Instructions
- Preheat the oven to 350°F. Line a standard muffin pan with paper baking cups.
- Make the filling: In the bowl of a stand mixer fitted with a paddle attachment, or using a hand mixer, beat the cold cream cheese and sugar on medium-high speed until fully combined and smooth, about 2 minutes. Add the egg and salt and beat again until well-combined, about 2 more minutes. Fold in the mini chocolate chips with a rubber spatula. Set aside.
- Make the batter: In a large bowl, whisk together the gluten-free flour, sugar, baking soda, cocoa powder, espresso powder (if using) and salt.
- Add the oil, vinegar, vanilla and hot water. Mix on medium speed for 2–3 minutes, scraping the sides and bottom halfway through, until smooth and fully incorporated. The batter will be thin.
- Using a kitchen scoop or large spoon, divide the batter evenly among the prepared liners, filling each about halfway. Dollop about 1½ tablespoons of the cream cheese filling into the center of each.
- Bake for 16–18 minutes, until a toothpick inserted into the chocolate base comes out clean with just a few moist crumbs. The cream cheese should look pale on top — pull them the moment it starts to take on any color.
- Cool in the pan for 5 minutes, then transfer to a wire rack to cool completely.
Notes
Nutrition
The post Gluten-Free Black Bottom Cupcakes appeared first on Meaningful Eats.
]]>The post Gluten-Free Apple Dutch Baby appeared first on Meaningful Eats.
]]>Why You’ll Love This Gluten-Free Apple Dutch Baby
I’ve always loved how much a Dutch baby can transform a few simple ingredients into something special!
After years of making this classic gluten-free Dutch baby, I was inspired to create seasonal flavors, like this gluten-free lemon blueberry Dutch baby and now this cozy apple version.
- Works for a crowd. This serves 6–8 people from a single skillet, which makes it perfect for weekend guests or a holiday morning!
- One pan, done in 30 minutes. Everything happens in the cast iron skillet. Cleanup is minimal and the whole thing is on the table fast.
- Impressive but easy. The Dutch baby puffs up tall and golden without any special technique — the hot skillet does all the work.
What You Need
Here are a few notes on some of the key ingredients to make this gluten-free apple Dutch baby. Jump to the recipe card below for the exact measurements.
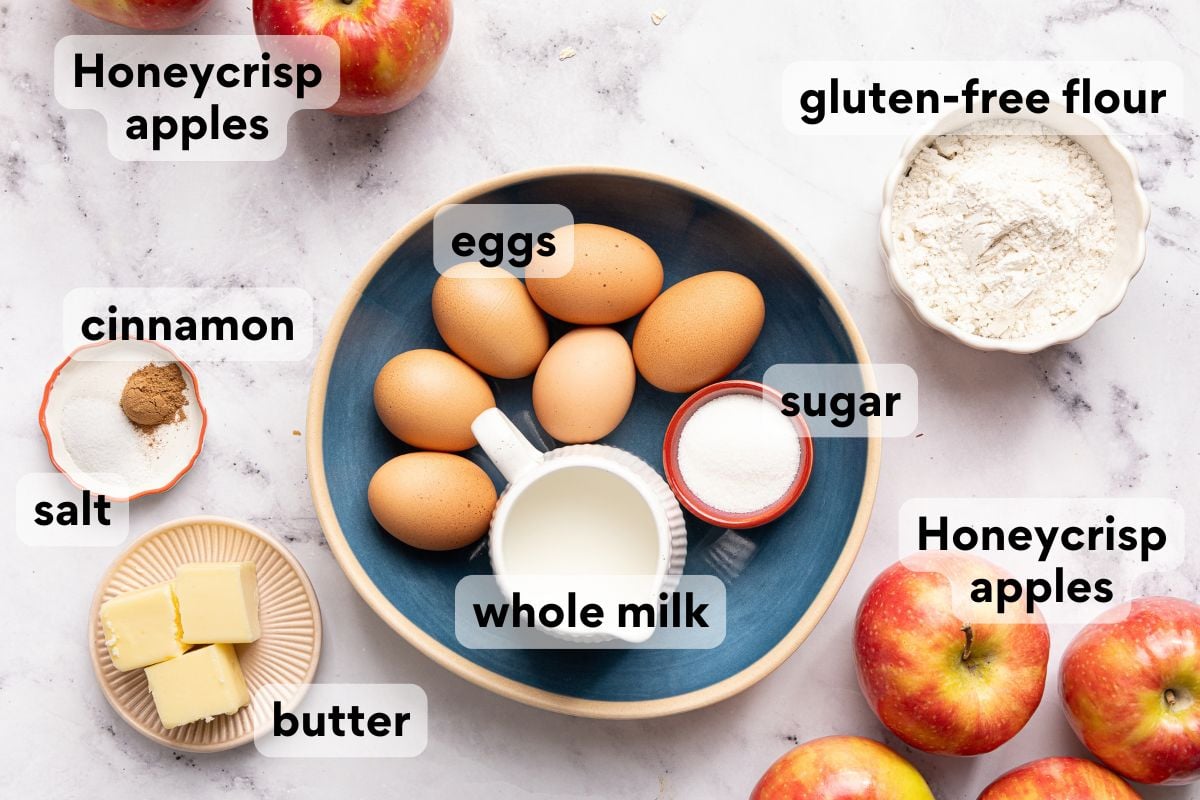
- Gluten-free measure-for-measure flour. I recommend using a high quality gluten-free 1:1 baking flour that contains xanthan gum for best results.
- Honeycrisp apples. I love Honeycrisp for this because they hold their shape during that 5–6 minute sauté and don’t turn to mush under the batter. You can use Granny Smith instead, but avoid anything too soft — they’ll release more liquid and can make the bottom wet.
- Whole milk. The fat content matters for texture. Whole milk gives the batter a rich, custardy interior that lower-fat milks won’t quite replicate.
- Eggs. Six eggs is not a typo! 😂 A Dutch baby batter is essentially a savory-leaning custard. The eggs provide structure, lift and richness.
How to Make Gluten-Free Apple Dutch Baby
Here’s an overview of how to make this recipe. You can jump to the recipe for the full instructions!
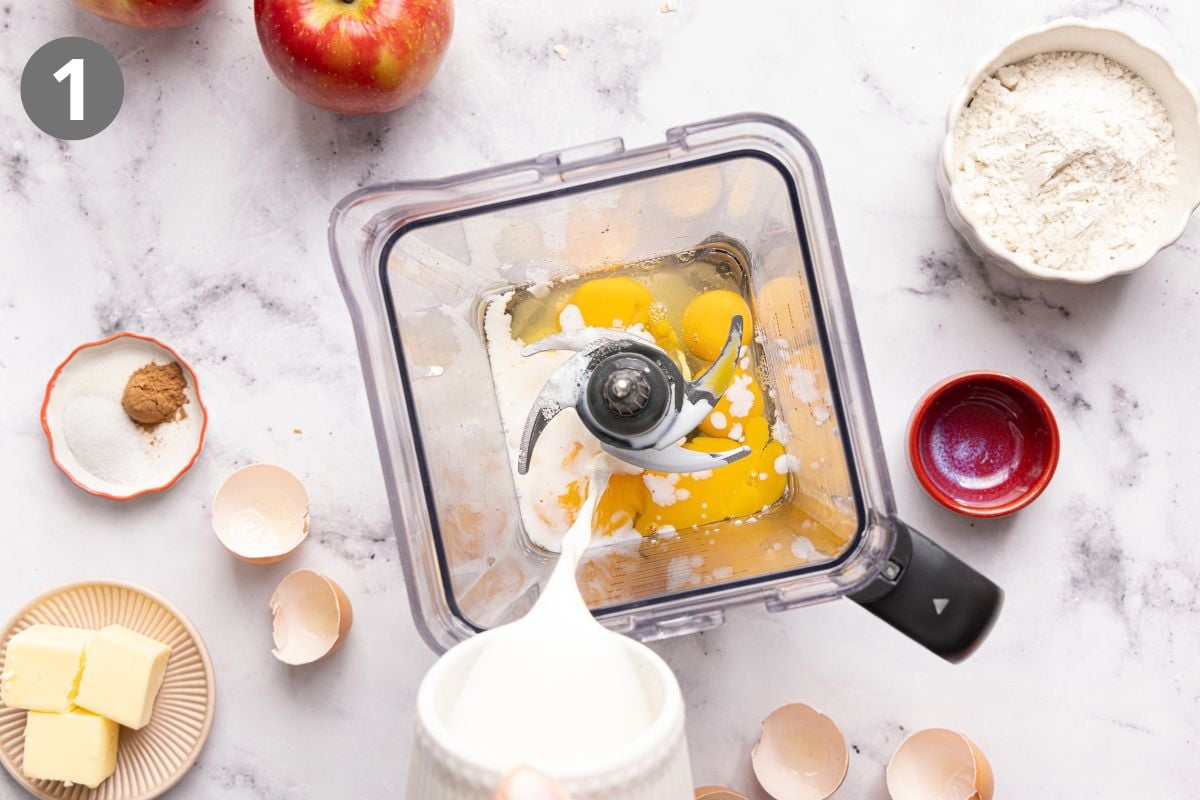
Blend just until combined. I use a blender to mix the milk, eggs, sugar and salt.
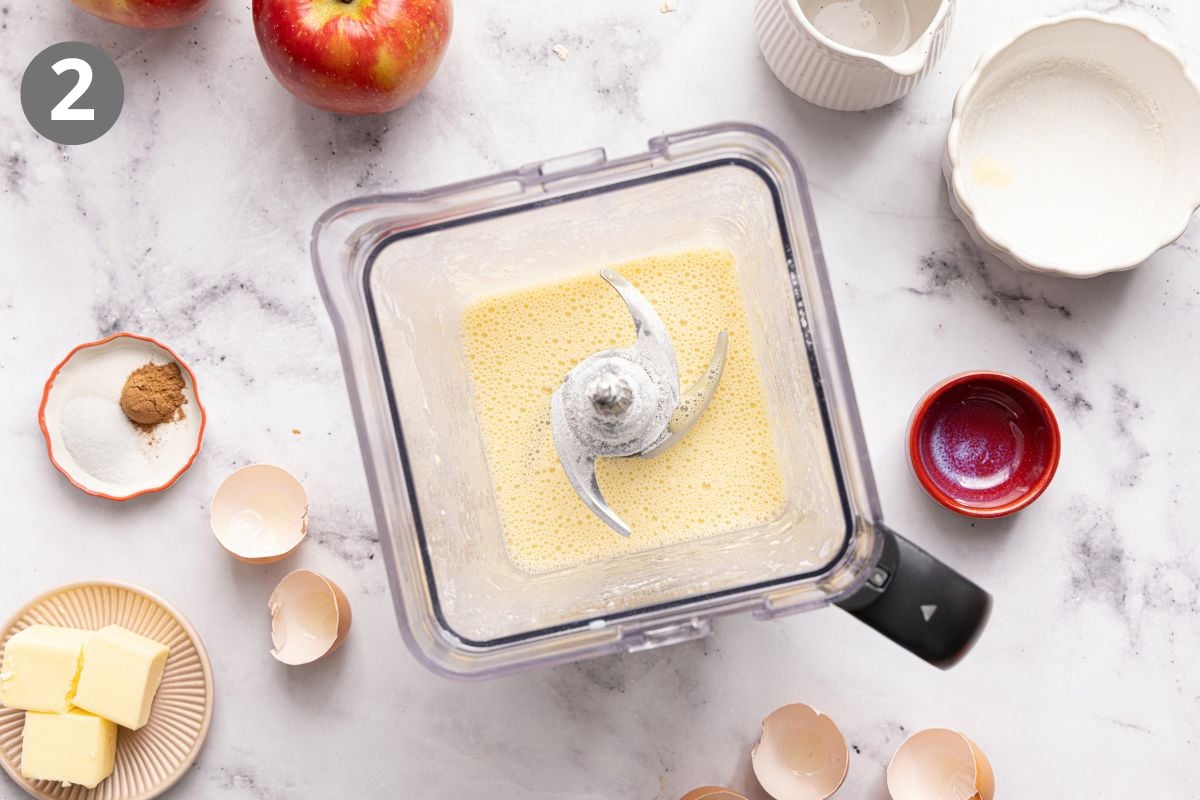
Add the flour. Pulse in the gluten-free flour just until combined.
Erin’s Tip
Be sure to just pulse the flour in at the end. Gluten-free flour contains binders and gums that can make the batter thick and tough if you overblend.
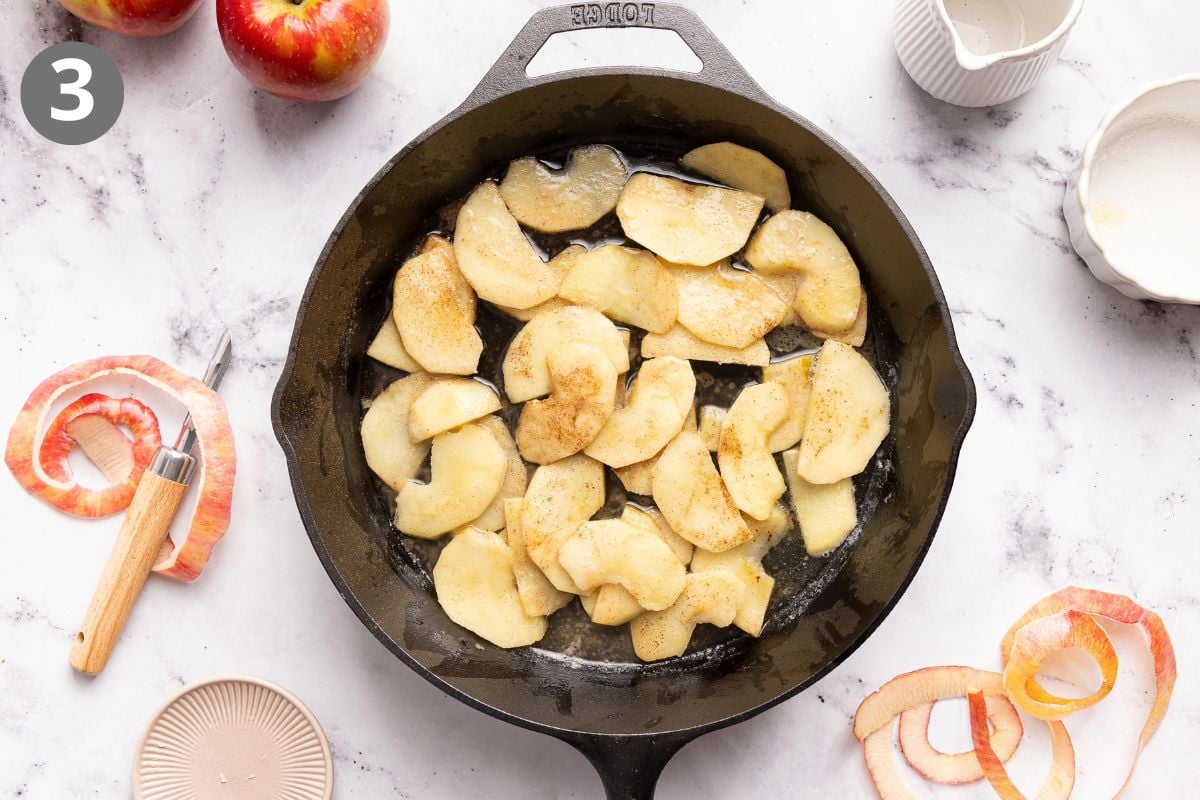
Cook the apples. First, melt butter in the cast iron skillet, then add the apples and cinnamon. Stir often!
Erin’s Tip
The apples don’t need to be fully cooked through at this stage, just slightly softened. They’ll finish cooking in the oven, and a little texture in the finished slice is a good thing.
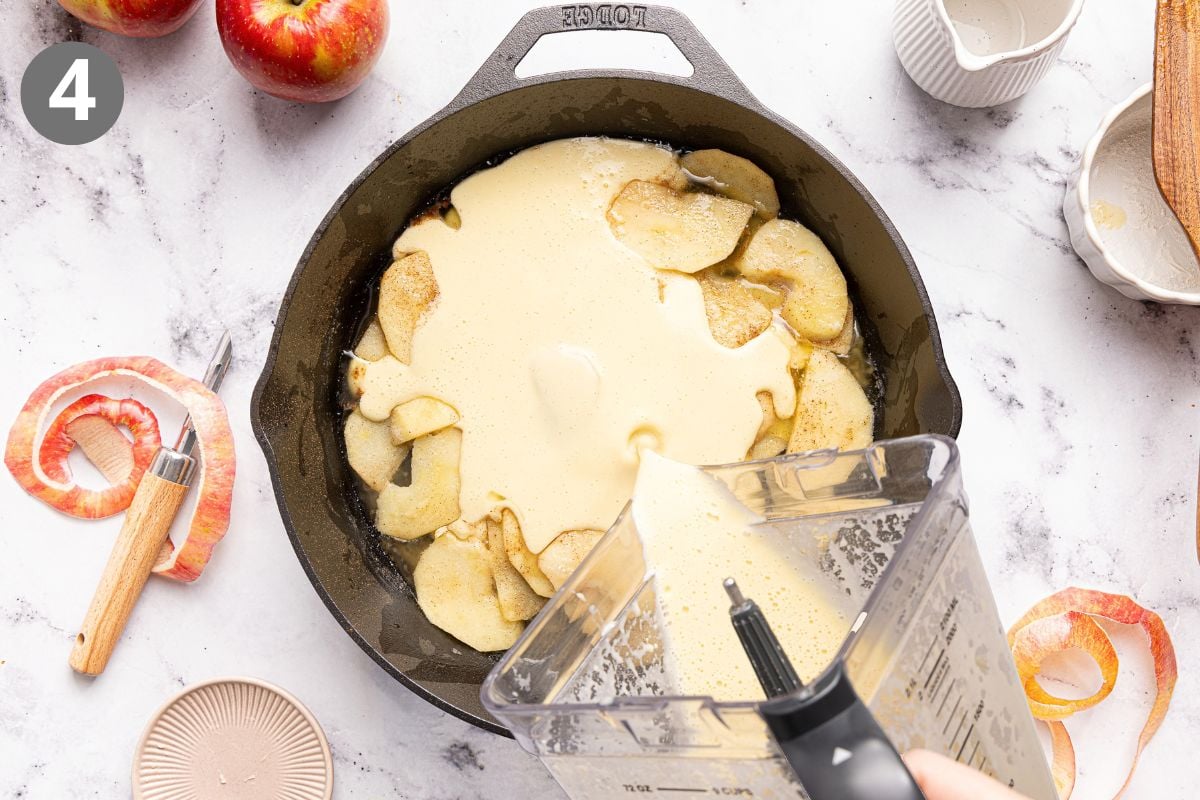
Add the batter. Swirl the batter as you pour it over the apples, then immediately place the cast iron on the middle oven rack to bake until the Dutch baby is puffy and golden brown around the edges.
Erin’s Tip
Swirling the batter as you pour helps create those signature peaks and valleys you want in a Dutch baby.
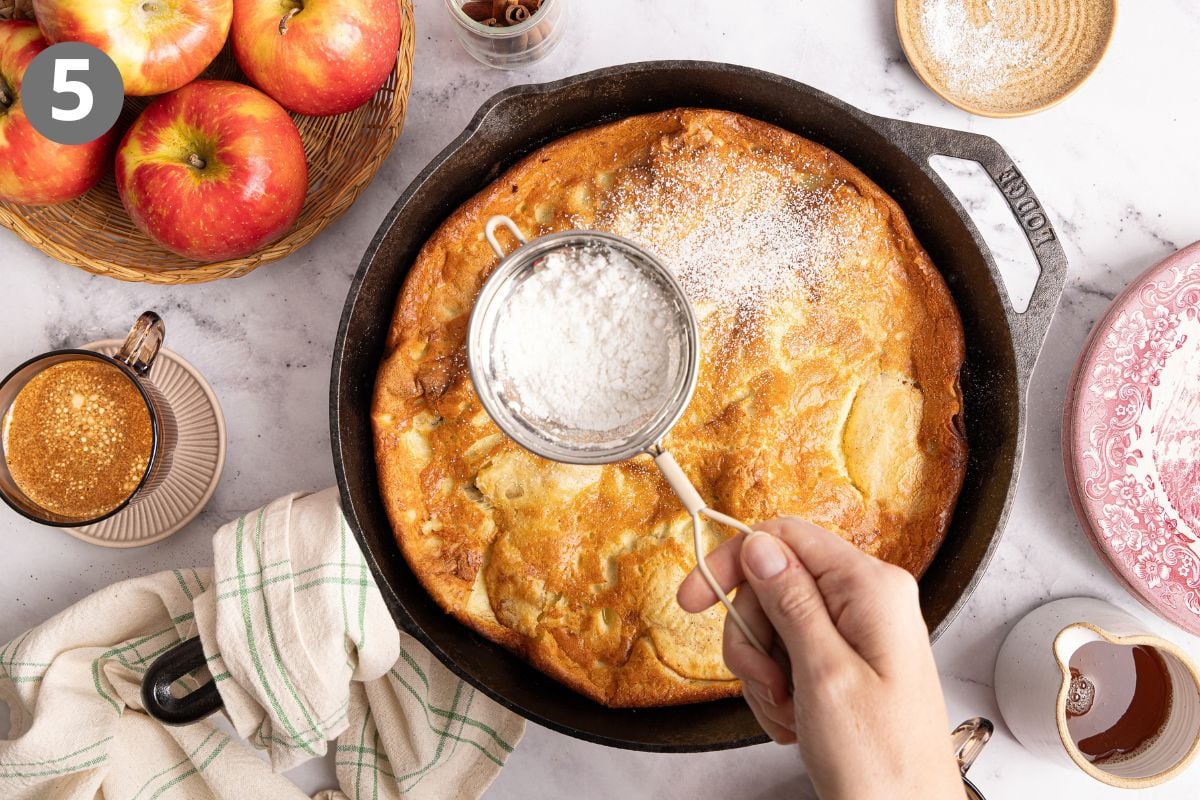
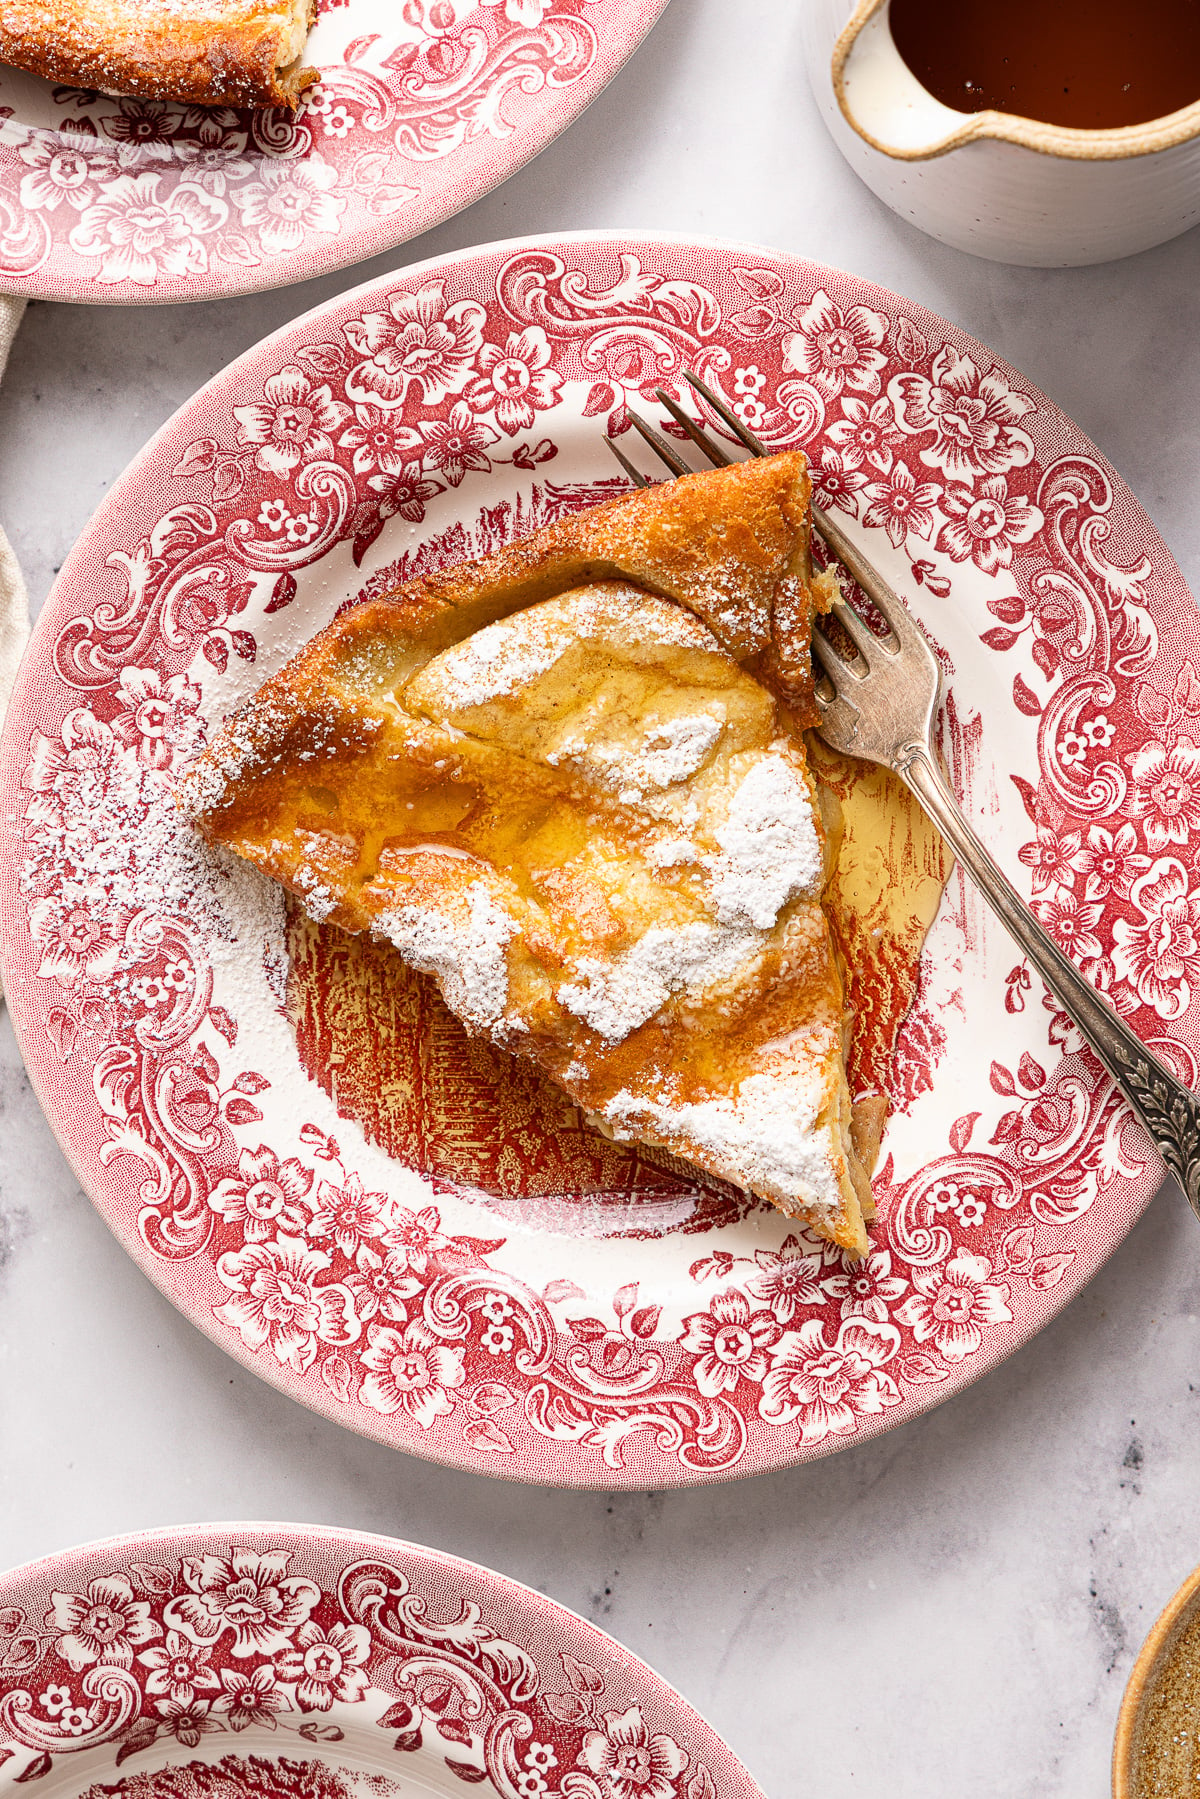
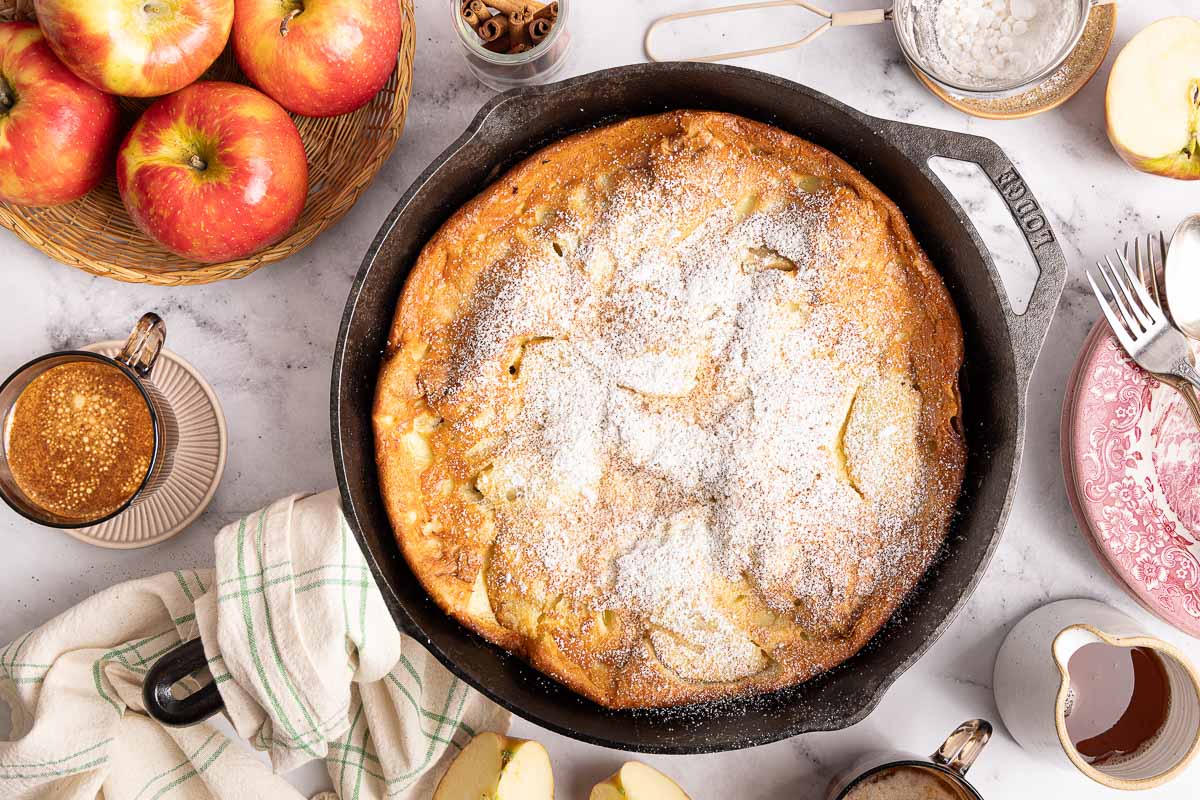
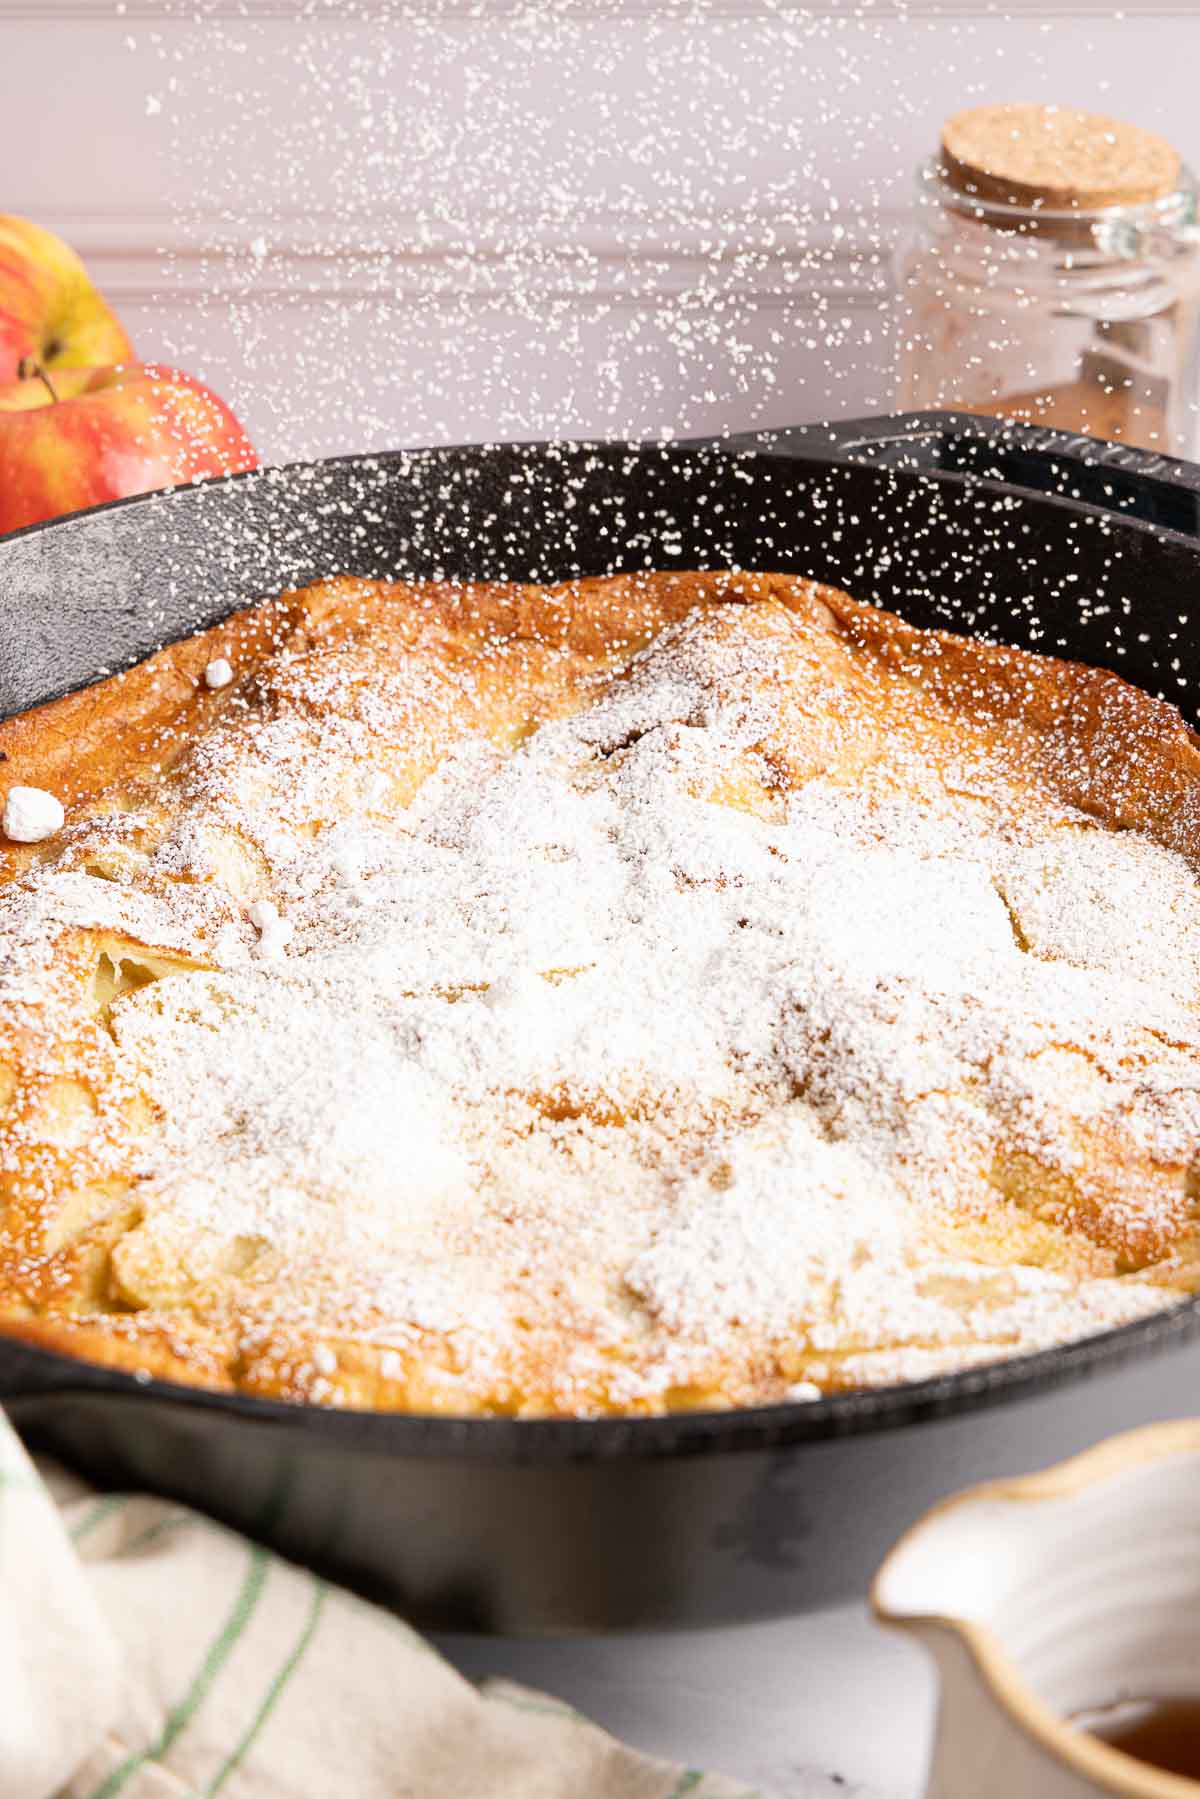
Top and serve. I like to top the apple Dutch baby with maple syrup and a dusting of powdered sugar. It will deflate within a few minutes — that’s completely normal. It’s best served immediately!
Recipe Testing Notes
I tested this recipe four times before landing on the version you see here. Here’s what I learned along the way:
Attempt 1 — Raw Granny Smith slices under the batter with cinnamon sugar on top, baked at 450°F. The cinnamon sugar nearly burned, the apples were flavorless, and the whole thing lacked the cozy apple flavor I was after.
Attempt 2 — Cooked the Granny Smith apples in butter with ¼ teaspoon cinnamon on the stovetop first, then poured the batter over and baked at 450°F. Much better flavor — but the apples were overcooked and I needed more of them.
Attempt 3 — Switched to Honeycrisp apples and doubled the amount to 300g, cooked on medium-low heat, dropped the oven to 425°F, and added a teaspoon of vanilla. The Dutch baby didn’t puff at all, and I couldn’t taste the vanilla. Both changes went in the wrong direction.
Attempt 4 — Back to 450°F, medium heat, 300g Honeycrisp apples, ½ teaspoon cinnamon, no vanilla. The apples rose to the top, the Dutch baby puffed beautifully, and the cinnamon flavor was just right.
More Gluten-Free Fall Breakfast Recipes
Gluten-Free Apple Dutch Baby
Ingredients
- ¾ cup (180ml) whole milk
- 6 large eggs
- 2 tablespoons (25g) granulated sugar
- ¼ teaspoon kosher salt
- ¾ cup (112g) gluten-free measure-for-measure flour
- 6 tablespoons (85g) butter
- 2½ cups (300g) Honeycrisp apple (about 1–2 apples), peeled and thinly sliced about ¼ inch thick
- ½ teaspoon ground cinnamon
- Maple syrup and powdered sugar to serve
Instructions
- Preheat the oven to 450°F with the rack in the middle position.
- Add the milk, eggs, sugar and salt to a blender. Blend until just combined. Add the gluten-free flour and pulse to combine.
- Melt the butter in a 12-inch cast iron skillet over medium heat. Add the apple slices and sprinkle with the cinnamon. Cook, stirring often, until the apples are slightly softened, about 5–6 minutes.
- Pour the batter over the apples in the hot skillet, swirling as you pour.
- Bake on the middle rack for 20–25 minutes, until the Dutch baby is deeply puffed and golden brown around the edges.
- Serve immediately with maple syrup and a dusting of powdered sugar, if desired.
Notes
Nutrition
The post Gluten-Free Apple Dutch Baby appeared first on Meaningful Eats.
]]>The post Gluten-Free Pumpkin Protein Muffins appeared first on Meaningful Eats.
]]>Why This Recipe WORKS
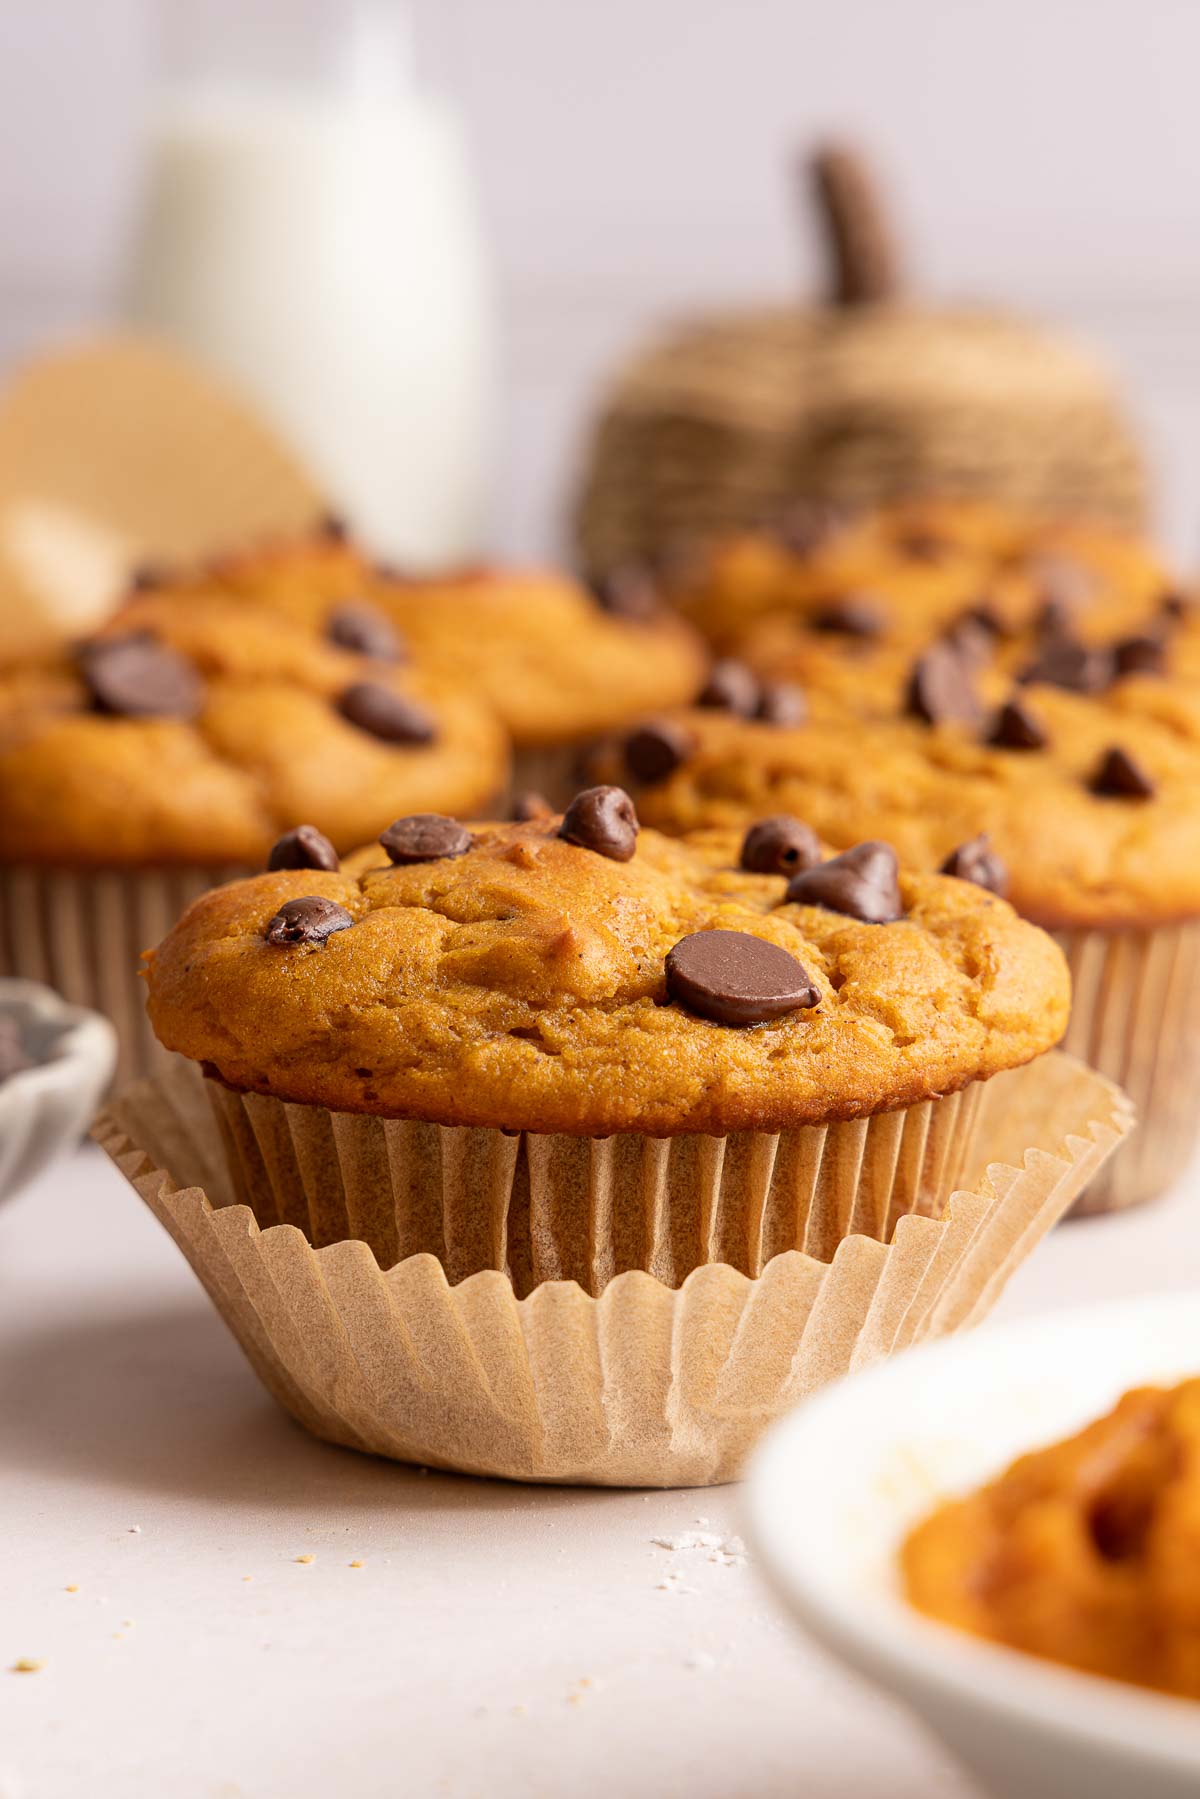
- Moist, never chalky. I specifically formulated this batter with enough moisture to balance the protein powder and keep the muffins tender.
- The perfect sweetness. The coconut sugar, maple syrup, and chocolate chips give these muffins a balanced sweetness that doesn’t overpower the pumpkin spice.
- A hearty muffin. The protein powder, eggs, and Greek yogurt give these muffins more staying power than a typical pumpkin muffin, making them a satisfying option for breakfast or a snack.
- Easy to grab and go. These are one of my favorite muffins to make ahead. Once they’re completely cool, I store them in an airtight container or freeze them individually so they’re easy to grab whenever we need a quick, protein-packed snack.
As much as I love breakfast recipes that are more sweet treats than healthy meals, I also enjoy creating healthier, protein-packed options that I can make on regular rotation in my house. We’ve made my pumpkin protein pancakes on repeat, so I knew I had to make a muffin recipe for pumpkin season this year!
These gluten-free pumpkin protein muffins are filling enough to keep me going on busy mornings, and my kids love them too! They’ve easily earned a spot among my favorite gluten-free pumpkin recipes.
What You Need
Here are a few notes on some of the key ingredients to make these gluten-free pumpkin protein muffins. Jump to the recipe card below for the exact measurements.
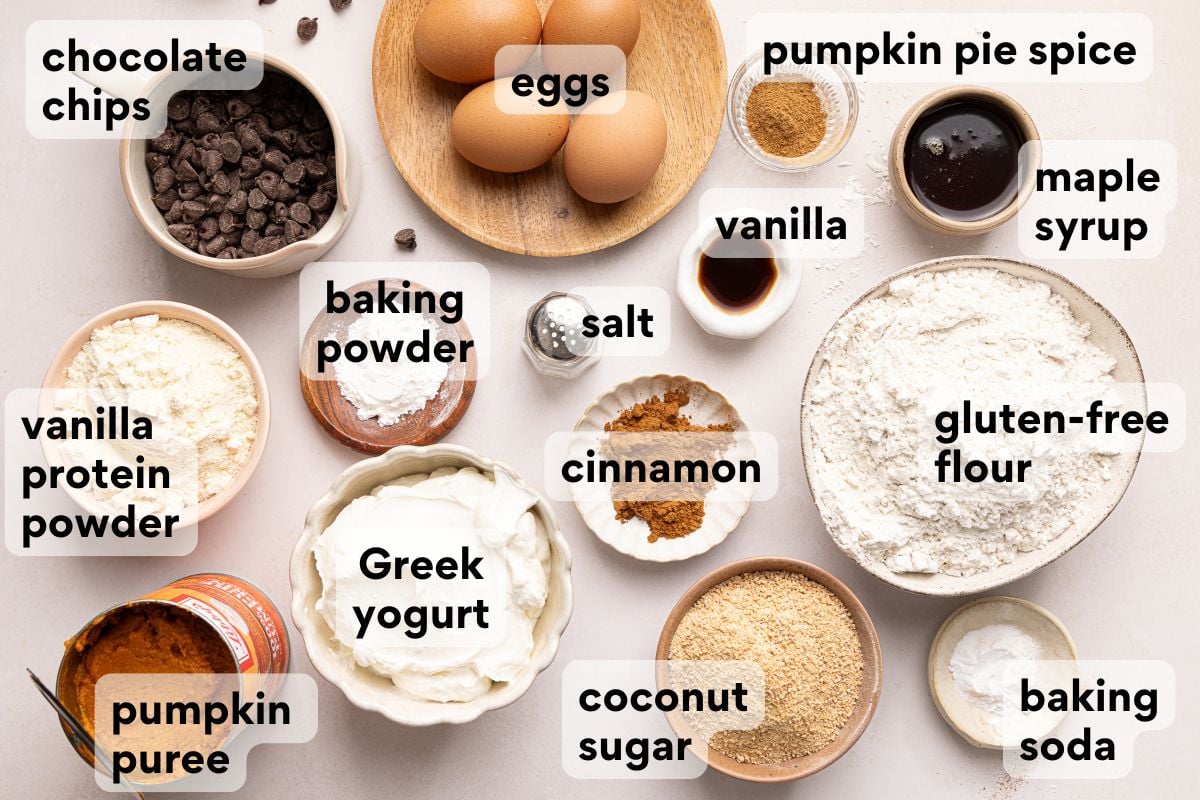
- Vanilla protein powder. Protein powder gives these muffins an extra boost of protein while adding a little sweetness and vanilla flavor. Protein powders can vary quite a bit in how they bake, so I recommend using one you already know you like the flavor of. This is my favorite brand.
- Pumpkin purée. I specifically created this recipe to use a whole can of pumpkin because there’s nothing worse than having ½ cup of pumpkin sitting in your fridge that you’re not sure what to do with. Be sure to use pure pumpkin purée, not pumpkin pie filling.
- Greek yogurt. I use plain Greek yogurt to add even more protein while keeping the muffins moist. Its slight tang also balances the sweetness from the coconut sugar, maple syrup and chocolate chips.
- Coconut sugar. I always have coconut sugar on hand because we use it as a filling for buckwheat crepes. If you don’t have coconut sugar you can use brown sugar no problem!
How to Make Gluten-Free Pumpkin Protein Muffins
Here’s an overview of how to make this recipe. You can jump to the recipe for the full instructions!
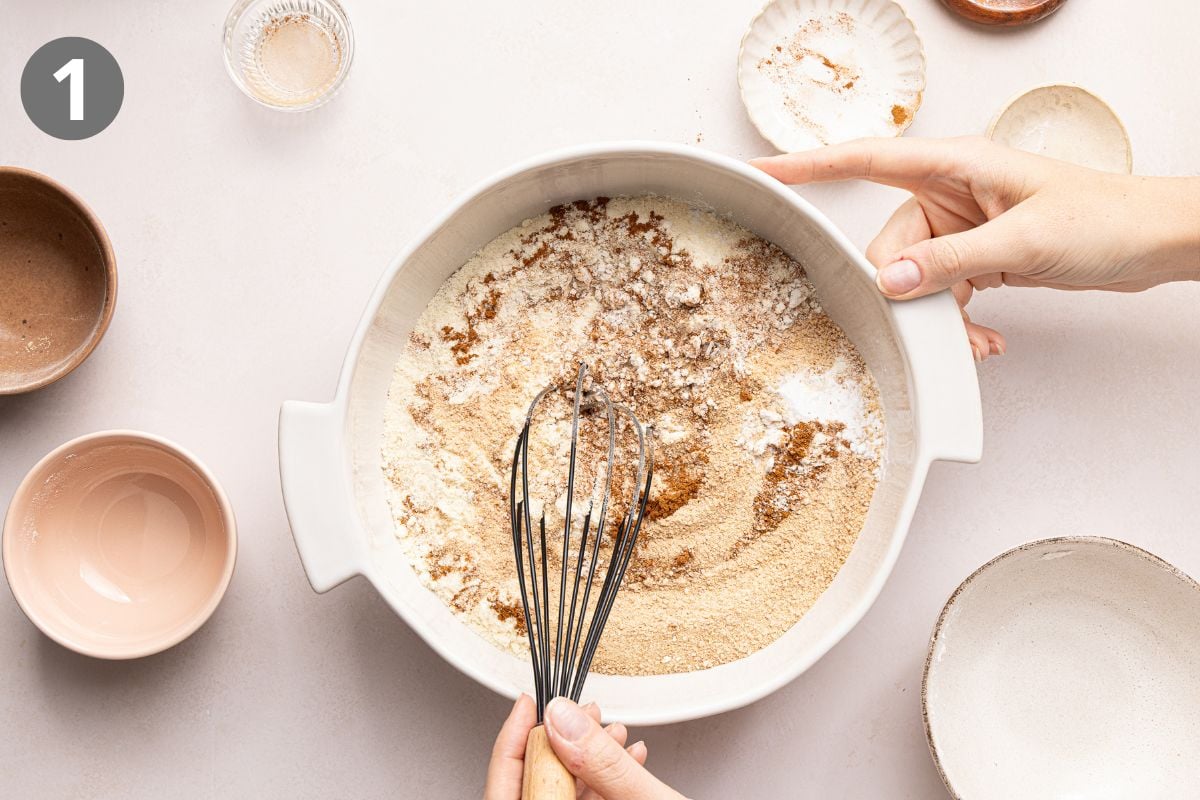
Whisk the dry ingredients. Combine the gluten-free flour, protein powder, coconut sugar, baking powder and soda, salt, and spices in a large bowl.
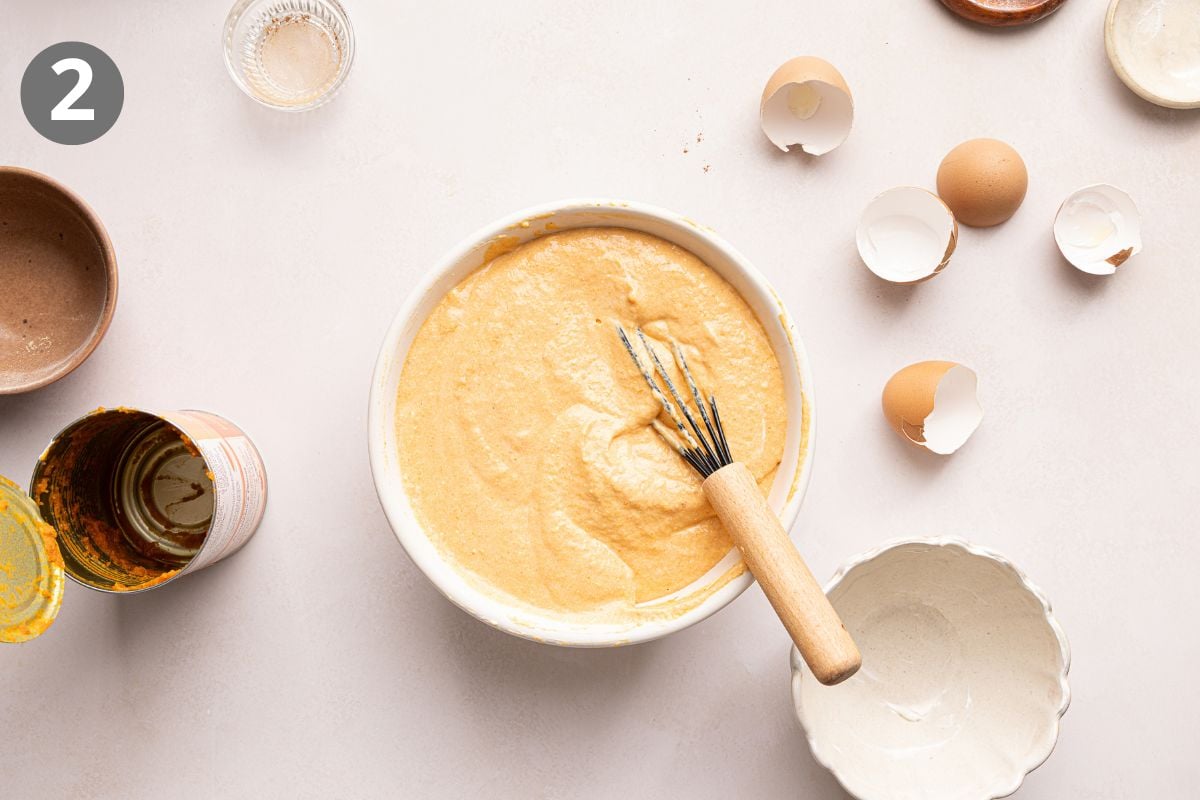
Mix the wet ingredients. In a separate bowl whisk the pumpkin purée, yogurt, eggs, syrup, and vanilla until smooth.
Erin’s Tip
Protein powder naturally absorbs quite a bit of moisture, which is why this recipe uses a generous amount of pumpkin purée and Greek yogurt. I wouldn’t reduce either one—they help keep the muffins from turning out dry or chalky.
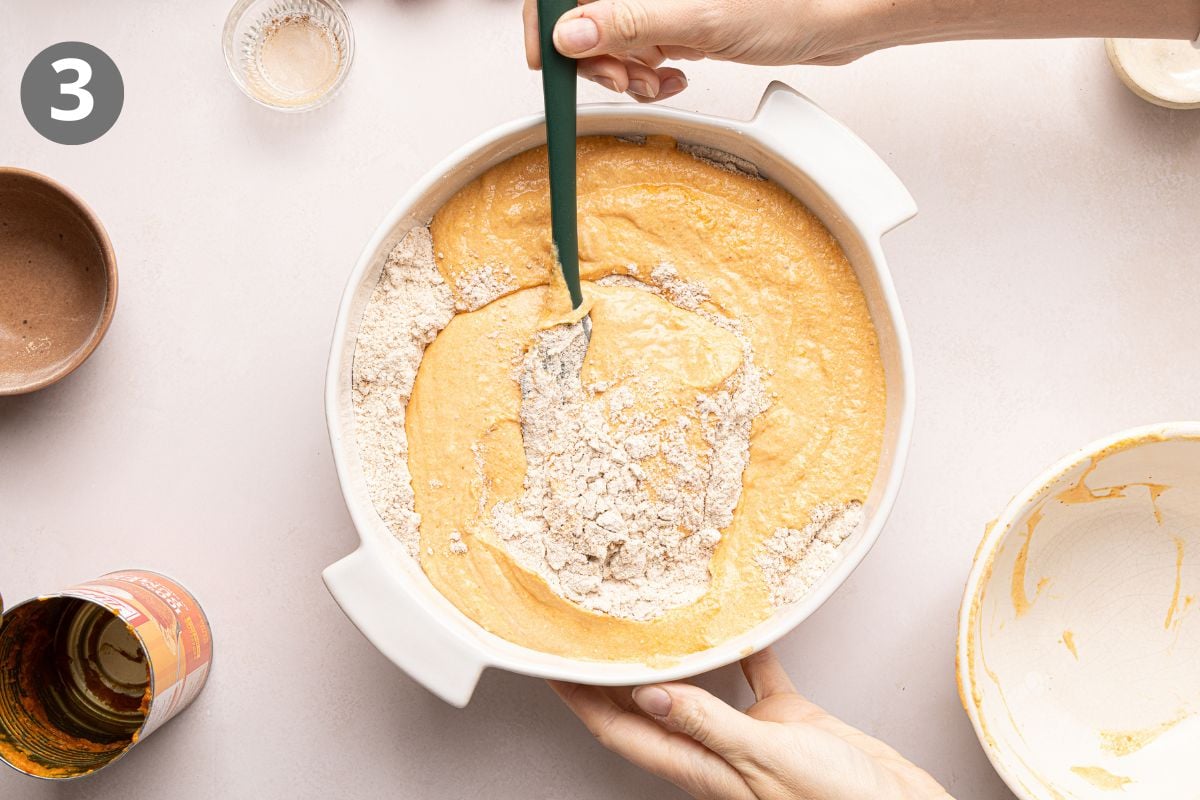
Combine mixtures. A rubber spatula makes it easy to blend the pumpkin mixture into the dry ingredients, leaving no streaks behind.
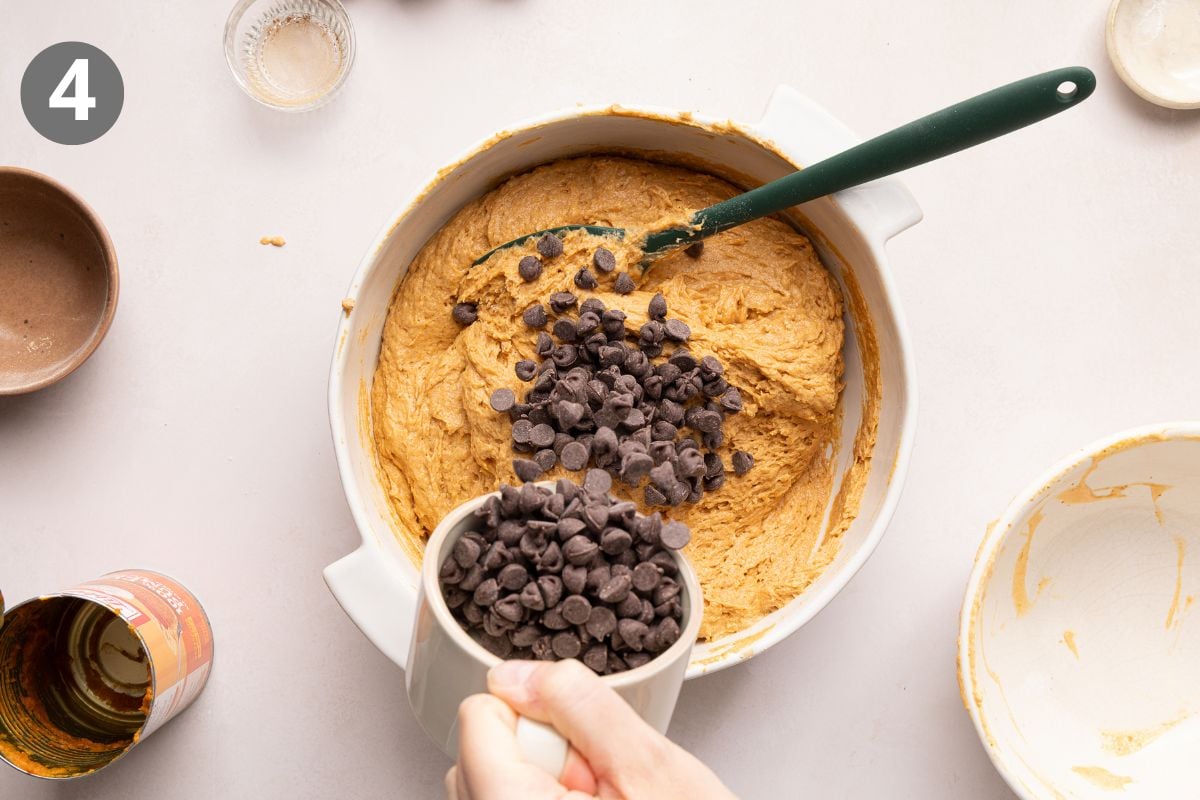
Add mix-ins. Once the batter is fully combined, fold the chocolate chips into the mixture.
Erin’s Tip
I like to use mini chocolate chips in many of my muffin recipes, like these gluten-free banana muffins, but I actually prefer regular-size semi-sweet chocolate chips in this recipe. I think they hold up better and create little pockets of chocolate in every bite!
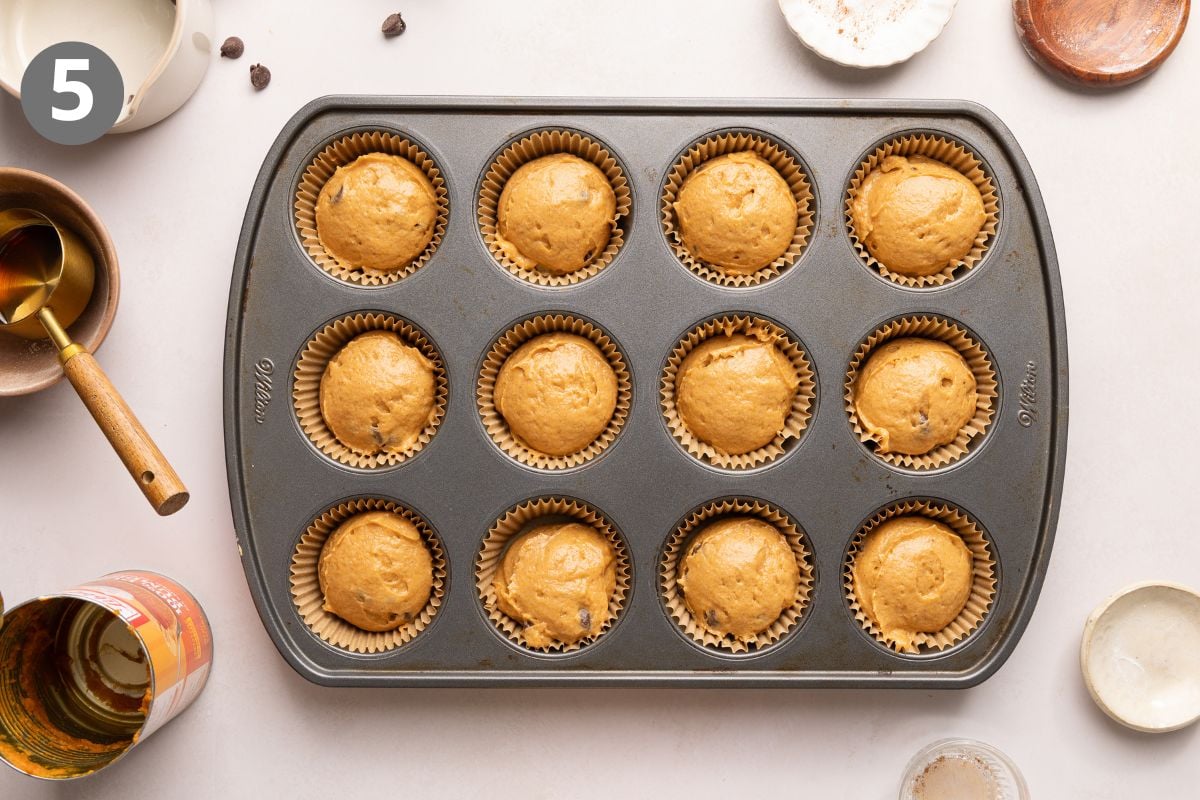
Scoop and bake. Divide the batter evenly into the two muffin pans. Bake until a toothpick inserted into the center of a muffin comes out clean (about 25 minutes).
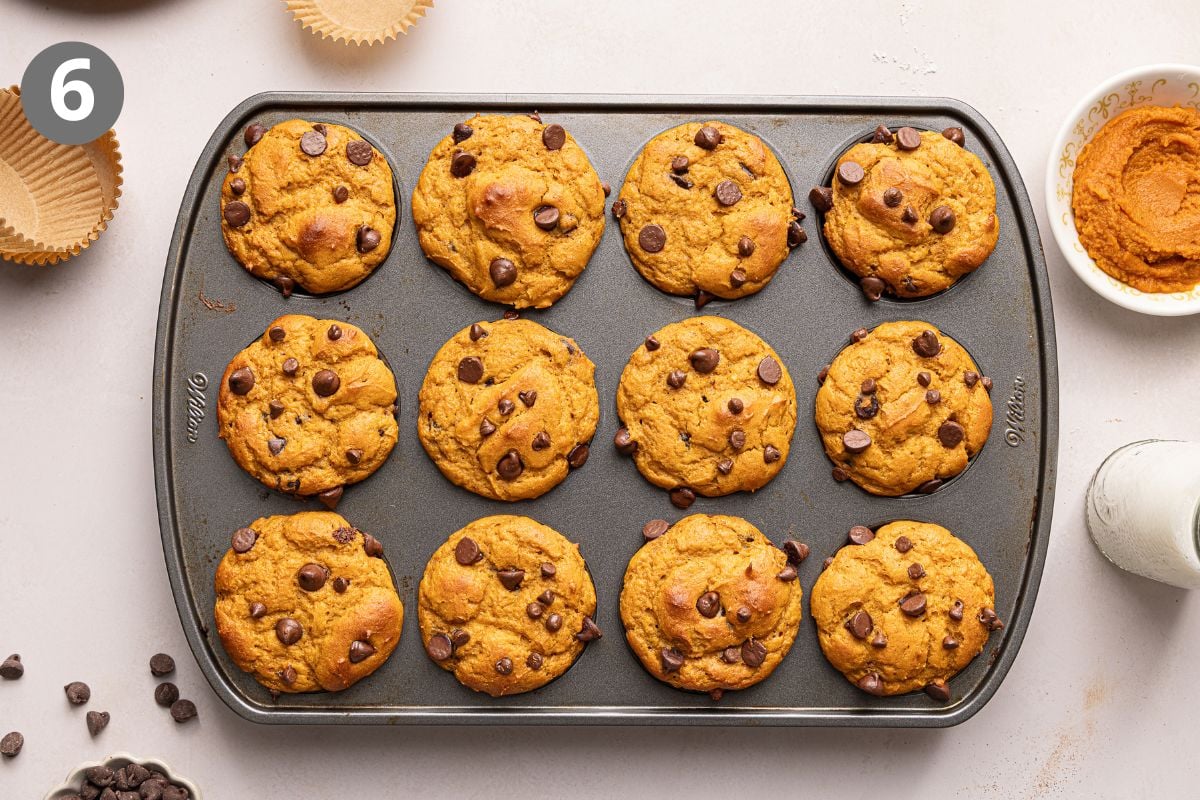
Cool and serve. After the muffins cool a little bit in the pan (about 5 minutes), move them to a wire rack to cool the rest of the way. Enjoy!
Erin’s Tip
I like using a large cookie scoop to portion the batter so all of the muffins are roughly the same size and bake evenly.
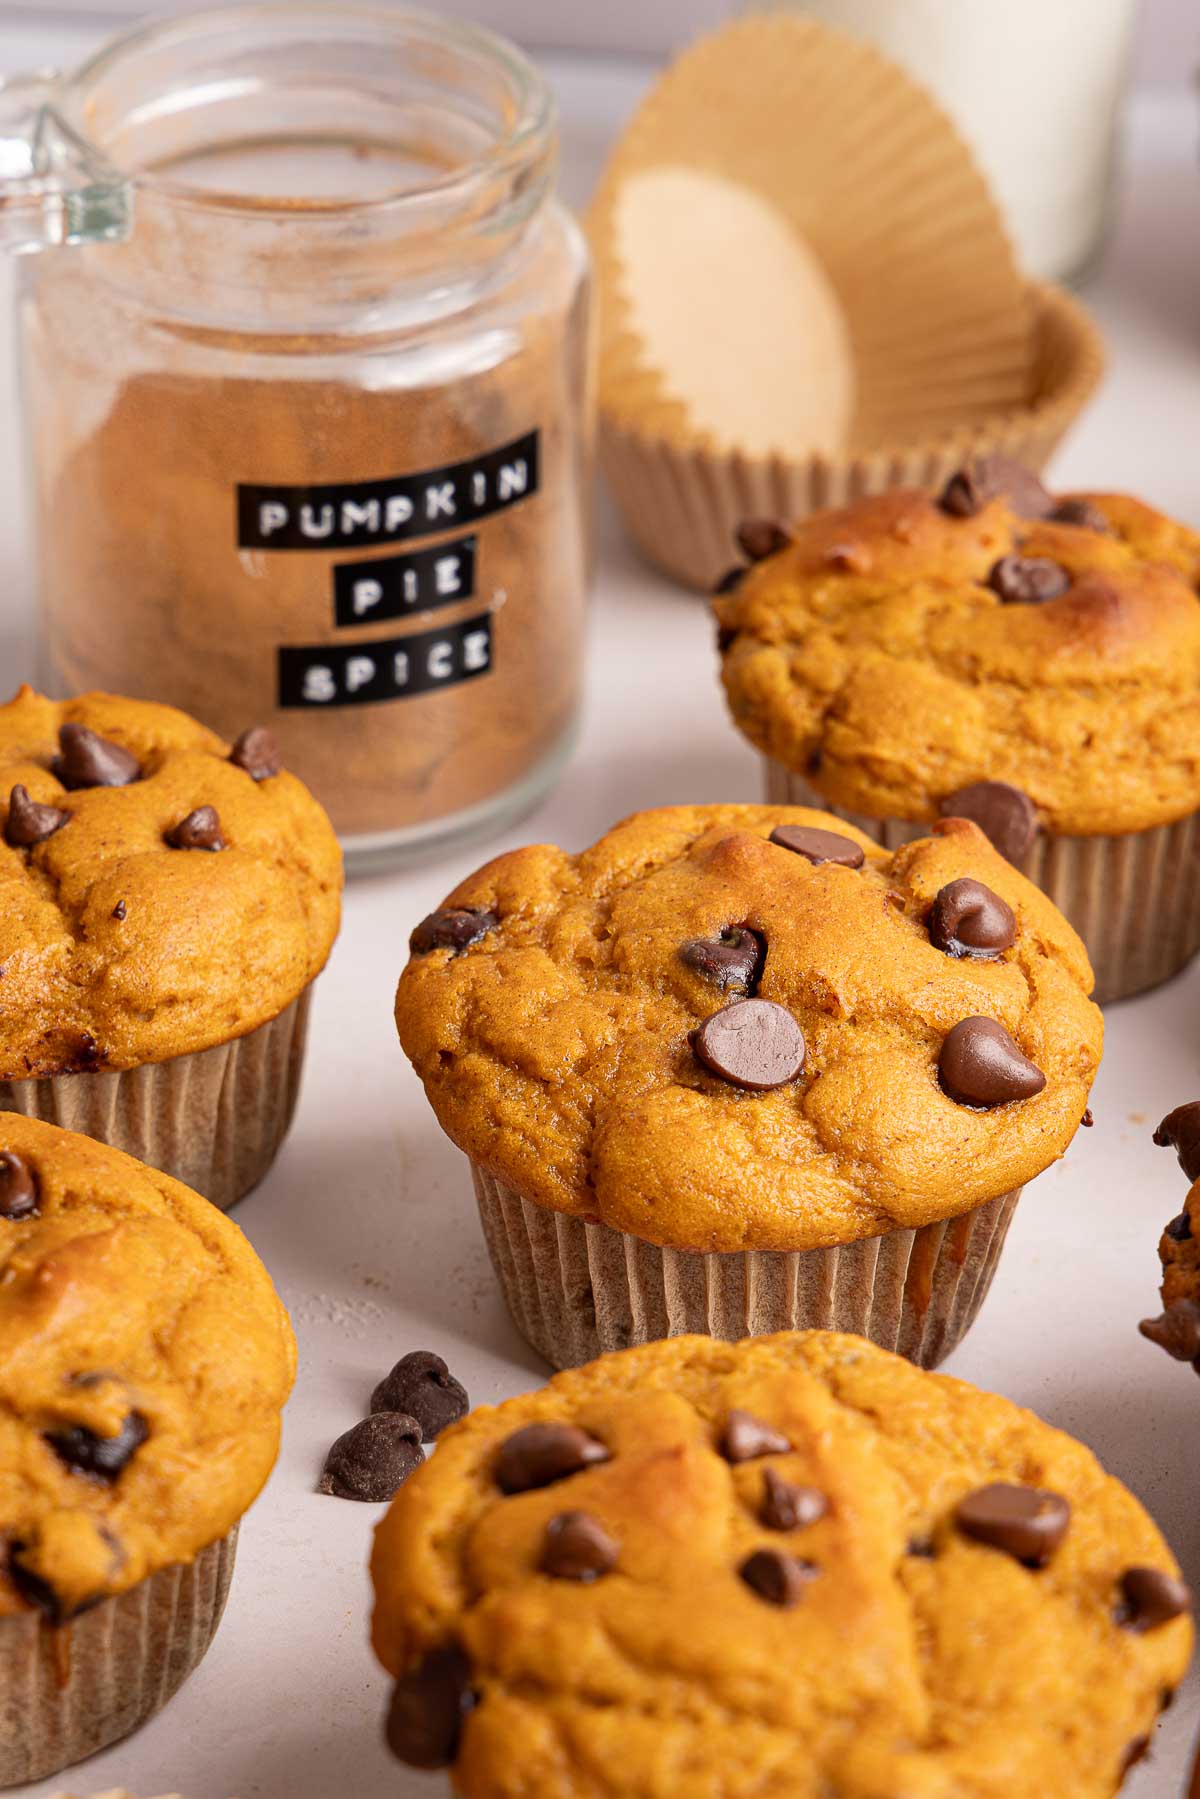
More Gluten-Free Protein-Packed Breakfast Recipes
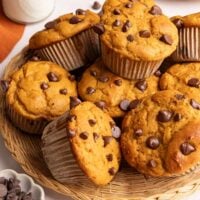
Gluten-Free Pumpkin Protein Muffins
Ingredients
Dry Ingredients
- 2 cups (300g) gluten-free measure-for-measure flour
- 1 cup (110g) vanilla protein powder
- ¾ cup (127g) coconut sugar
- 2 teaspoons baking powder
- 1 teaspoon baking soda
- ½ teaspoon kosher salt
- 2 teaspoons ground cinnamon
- 1 teaspoon pumpkin pie spice
Other Ingredients
- One 15-ounce can (425g) pumpkin purée
- 1½ cups (360g) plain Greek yogurt
- 4 large eggs
- ¼ cup maple syrup
- 1 teaspoon vanilla extract
- 1 cup (170g) semi-sweet chocolate chips
Instructions
- Preheat the oven to 350°F. Line two standard muffin pans with paper baking cups.
- In a large bowl, whisk together the gluten-free flour, protein powder, coconut sugar, baking powder, baking soda, salt, cinnamon and pumpkin pie spice.
- In a medium bowl, whisk together the pumpkin purée, Greek yogurt, eggs, maple syrup and vanilla extract until smooth.
- Add the pumpkin mixture to the dry ingredients and stir with a rubber spatula until just combined and no dry flour streaks remain. Fold in the chocolate chips.
- Using a kitchen scoop or large spoon, portion the batter evenly into the prepared muffin pans.
- Bake for 25 minutes, or until a toothpick inserted into the center of a muffin comes out clean.
- Let the muffins cool in the pans for 5 minutes, then transfer to a wire rack to cool completely.
Video
Notes
Nutrition
The post Gluten-Free Pumpkin Protein Muffins appeared first on Meaningful Eats.
]]>The post Gluten-Free Pumpkin Scones appeared first on Meaningful Eats.
]]>Recipe Overview
⏱️ Time to Taste: About 1 hour 20 minutes, including chilling time.
✨ Texture: Tender and flaky, with crisp edges and a soft center.
🎃 Flavor: Warmly spiced pumpkin with notes of cinnamon, nutmeg, ginger, and cloves, finished with a rich brown sugar glaze.
🍴 Equipment Needed: Box grater, baking sheet, and parchment paper or a silicone baking mat.
💡 Helpful Tip: Start with a very hot oven. I preheat the oven to 500°F, then immediately lower it to 425°F once the scones go in. That initial blast of heat helps the scones rise quickly and bake up beautifully.
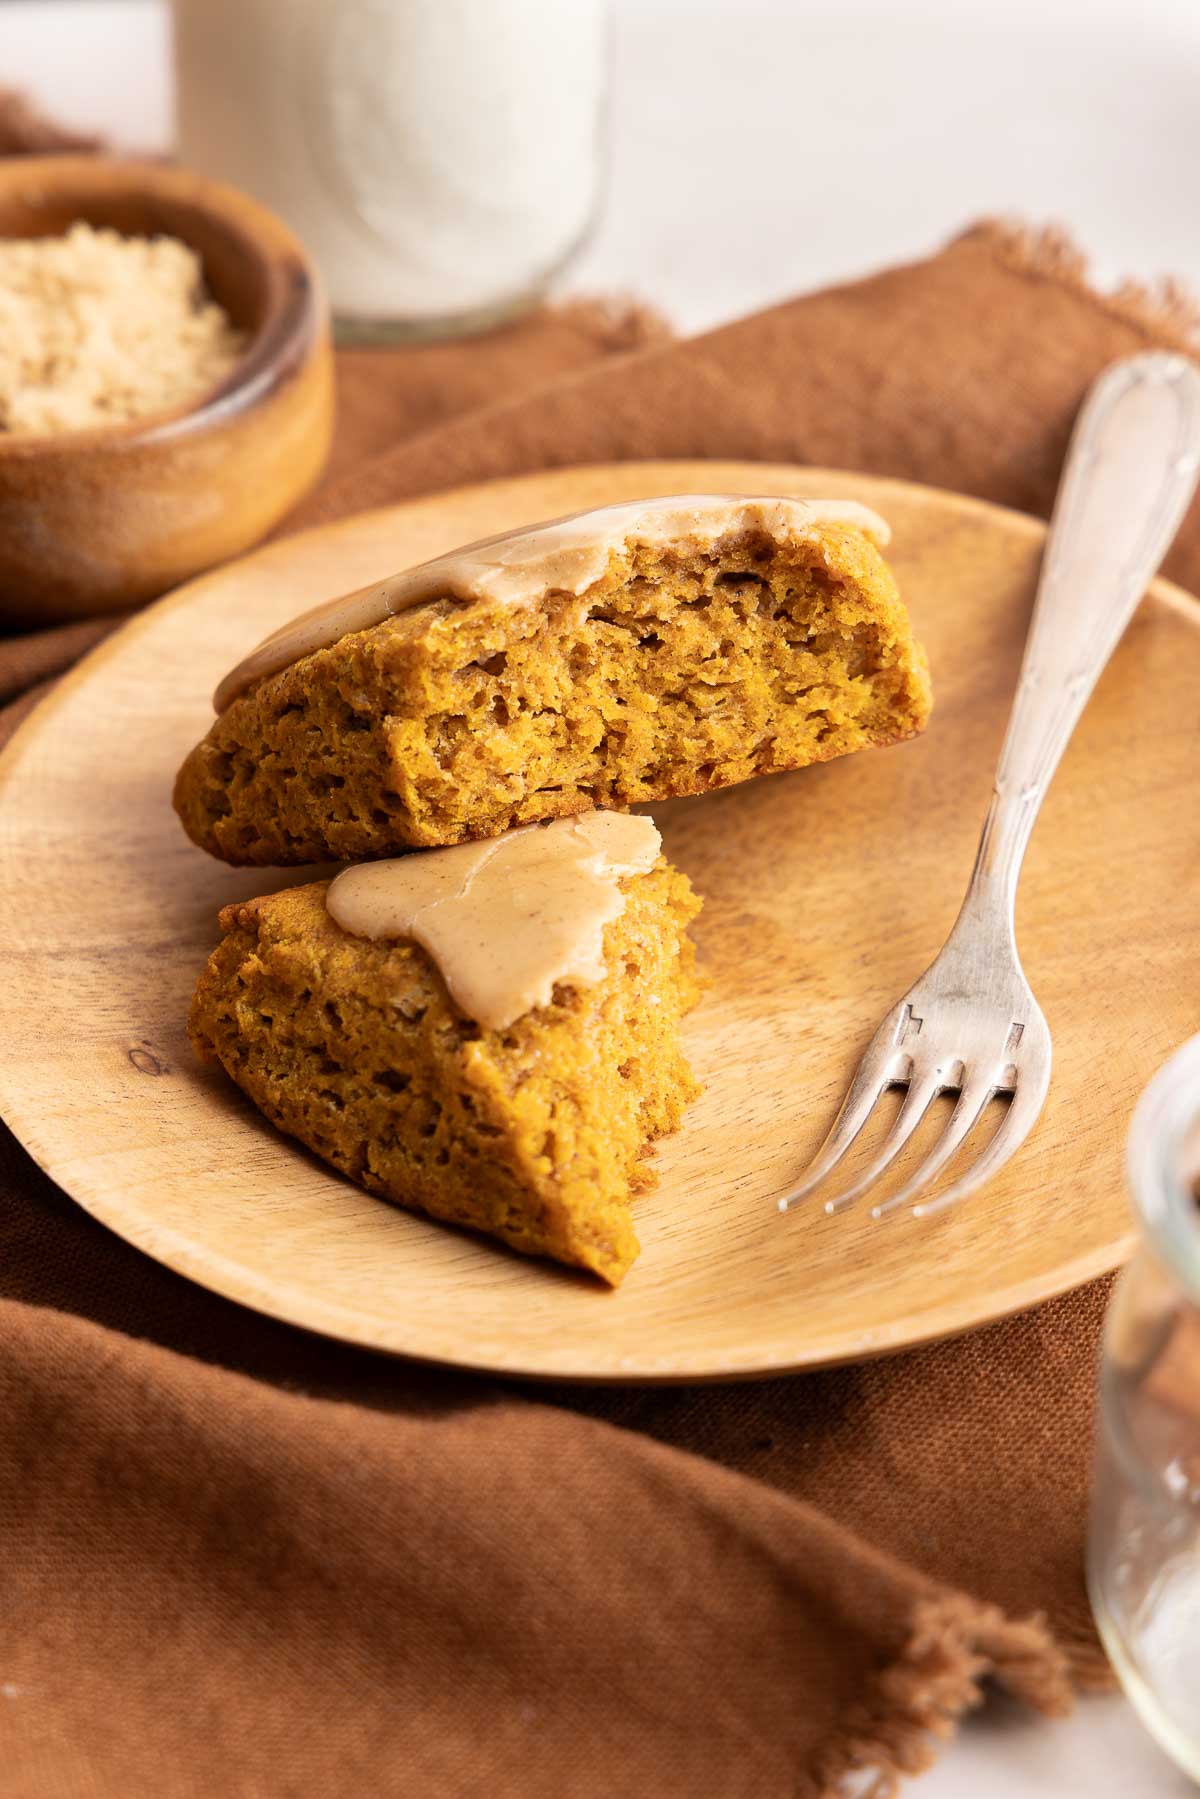
Is there anything better than a good gluten-free scone with a hot latte in the morning (or as an afternoon treat)? After making so many different flavored scones over the years, I knew I needed to make a pumpkin-flavored one for fall. It was overdue, really!
These gluten-free pumpkin scones have warm pumpkin spice flavor in every bite, plus a buttery brown sugar glaze that has just the right amount of sweetness. This one is going at the top of my favorite gluten-free pumpkin recipes!
Ingredients You’ll Need
Here are a few notes on some of the key ingredients to make these gluten-free pumpkin scones. Jump to the recipe card below for the exact measurements.
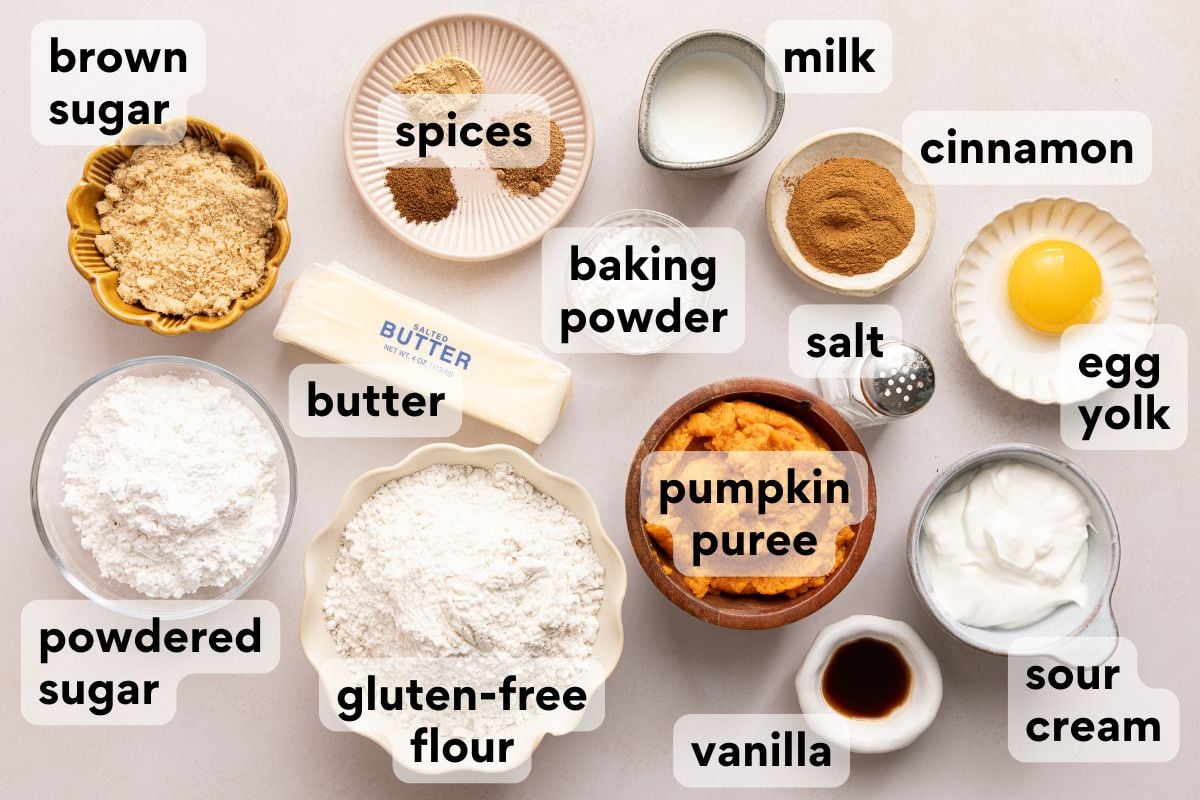
- Pumpkin purée: Just like with my chewy gluten-free pumpkin snickerdoodles, I recommend patting the pumpkin dry to remove excess moisture and keep the scones from becoming cakey. Start with ½ cup (113g) pumpkin purée and spread it on a plate. I usually press a paper towel over the pumpkin, move it around with a spoon to expose more of the moist areas, then blot again with a fresh paper towel. You’ll go through quite a few paper towels! Keep going until the pumpkin is very thick and dry and weighs about 45–53g.
- Frozen butter: Keeping the butter very cold is key for scones. I freeze it and grate it with a box grater before working it into the flour mixture. Those little pieces of cold butter melt in the oven and help create a flaky texture.
- Egg yolk: During testing, we found that using just the egg yolk instead of a whole egg helped us get away from the cakey texture we were trying to avoid. It adds richness and helps bind the dough without introducing the extra moisture from the egg white.
- Powdered sugar: I don’t insist on sifting powdered sugar for every recipe, but it’s actually necessary for this glaze! Be sure to sift it before whisking it into the brown sugar mixture or you’ll end up with little lumps that are difficult to whisk out.
How to Make Gluten-Free Pumpkin Scones
Here’s an overview of how to make this recipe. You can jump to the recipe for the full instructions!
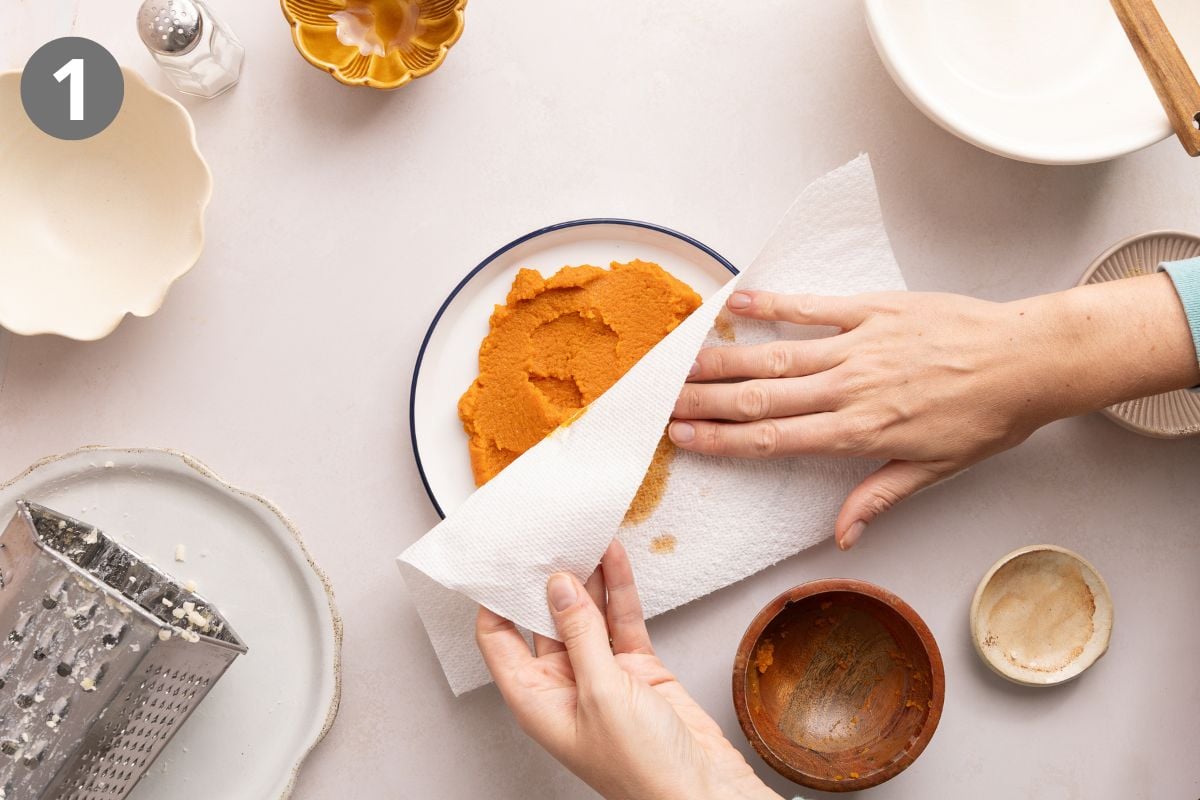
Really dry out the pumpkin. Don’t rush this step! Pumpkin contains a lot of moisture, and we found during testing that removing as much of it as possible was one of the keys to getting a true scone texture instead of a cakey one. The pumpkin should be thick and almost dough-like when you’re finished.
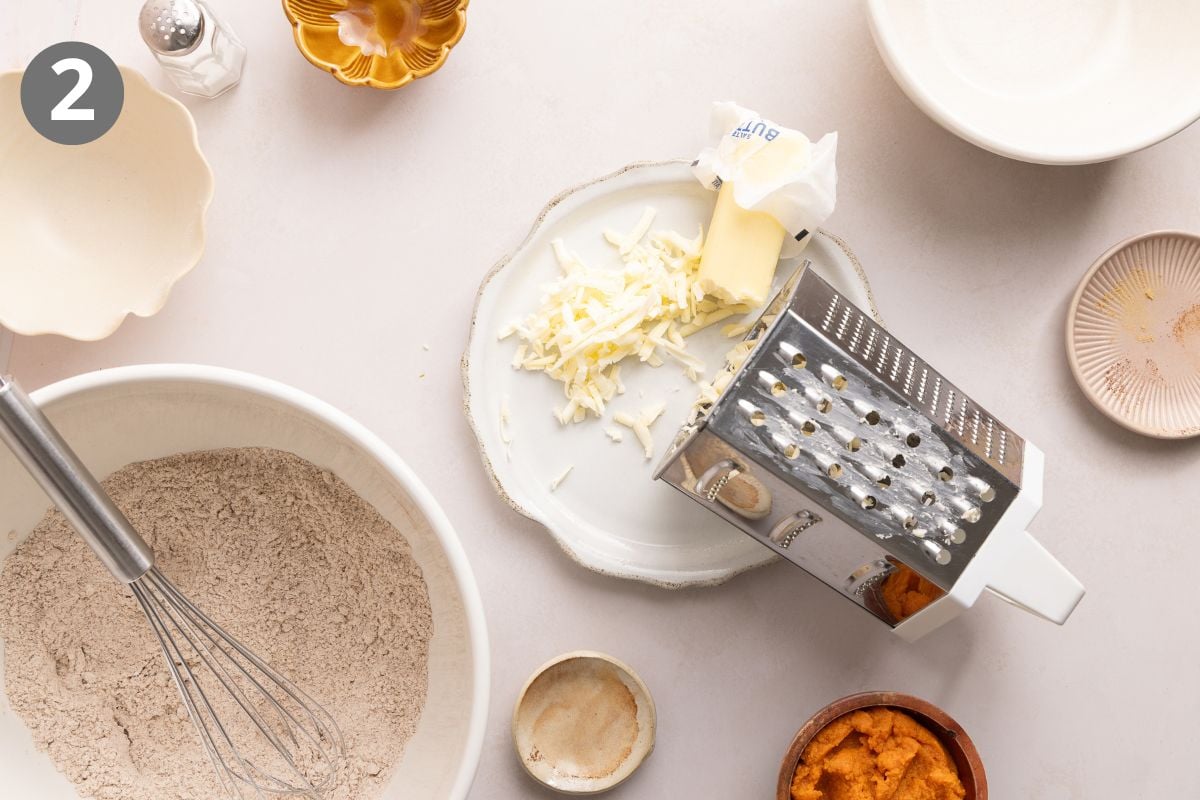
Grate the butter while it’s frozen. Don’t let the butter thaw before grating! I think a box grater is the easiest way to quickly break the frozen butter into small pieces. Then I use a pastry cutter or two forks to work the butter into the flour mixture. The key is to work it in until the crumbs are about pea-sized.
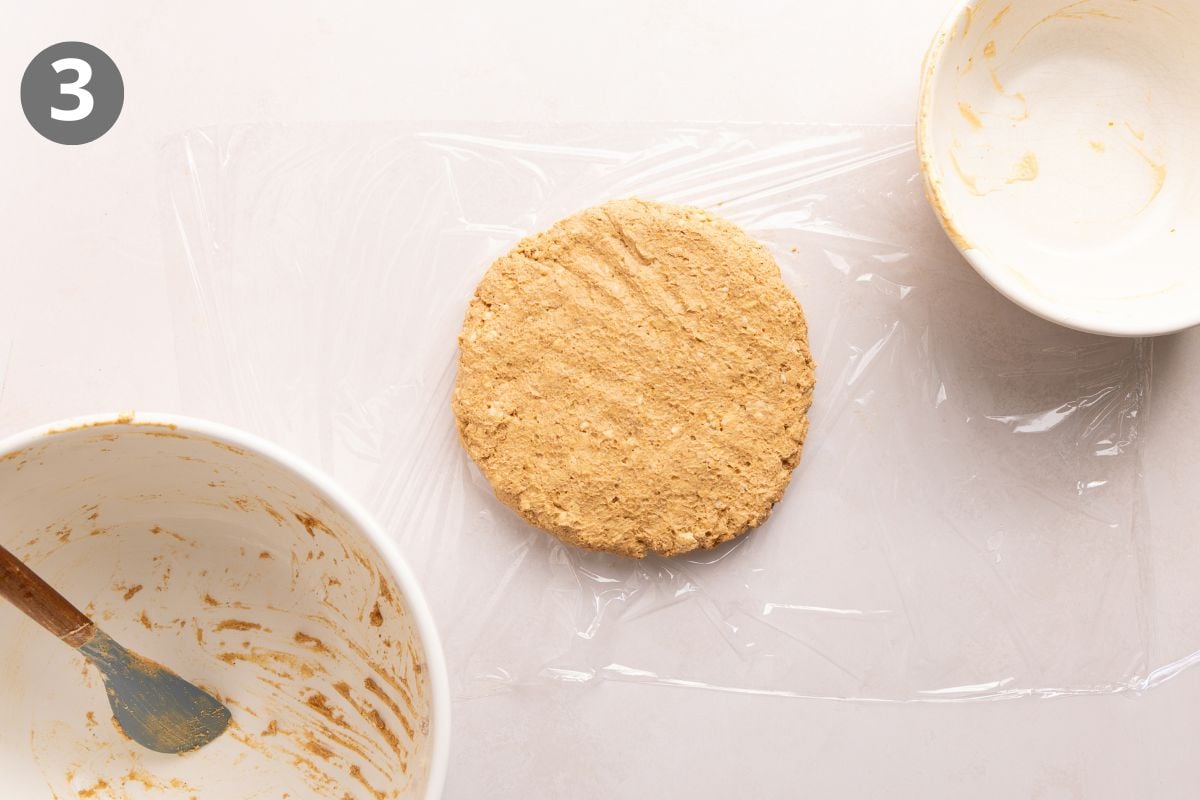
Don’t skip the chill and freeze times. The dough gets 30 minutes in the refrigerator followed by 15 minutes in the freezer. This gets the butter and dough very cold before the scones go into the hot oven. I don’t recommend refrigerating the dough for longer than 30 minutes.
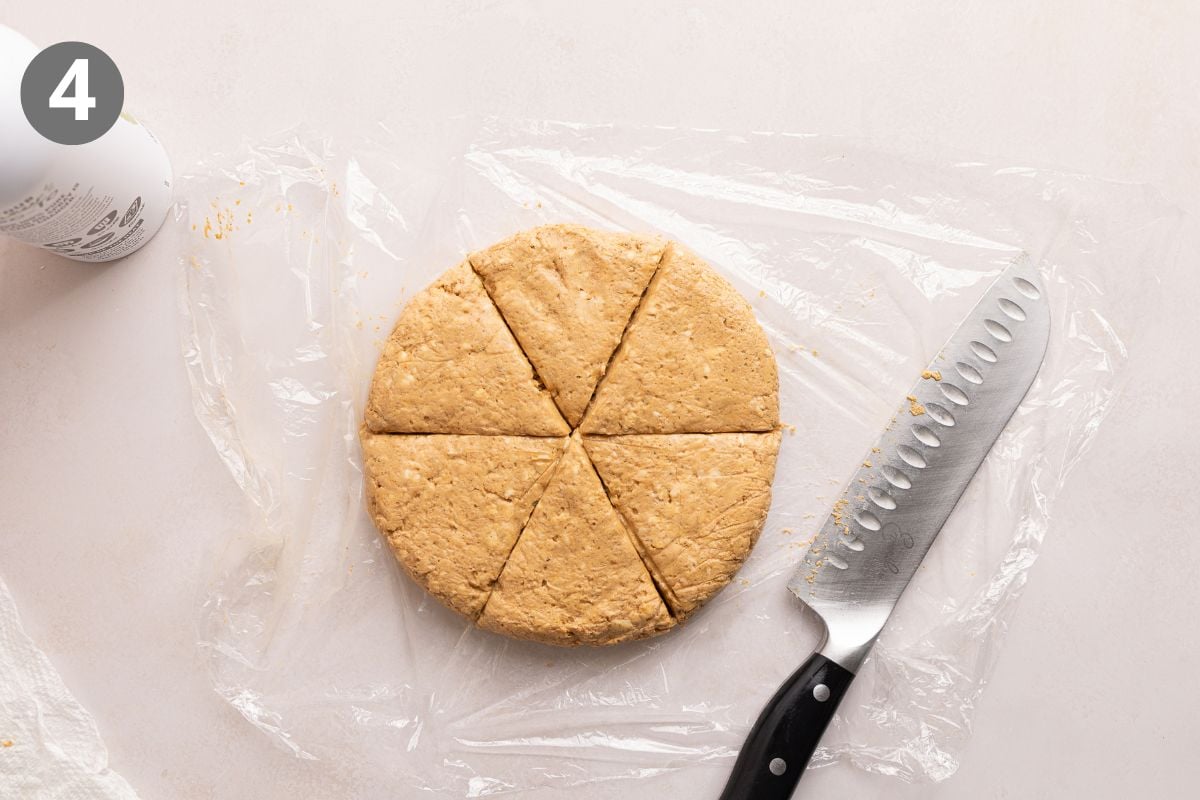
Cut the dough into wedges. After chilling and freezing, use a sharp knife to cut the dough into 6 equal wedges. I find spraying the knife with cooking spray first makes cutting through the dough so much easier. I want my scones to slice cleanly without the frustration of the dough sticking!
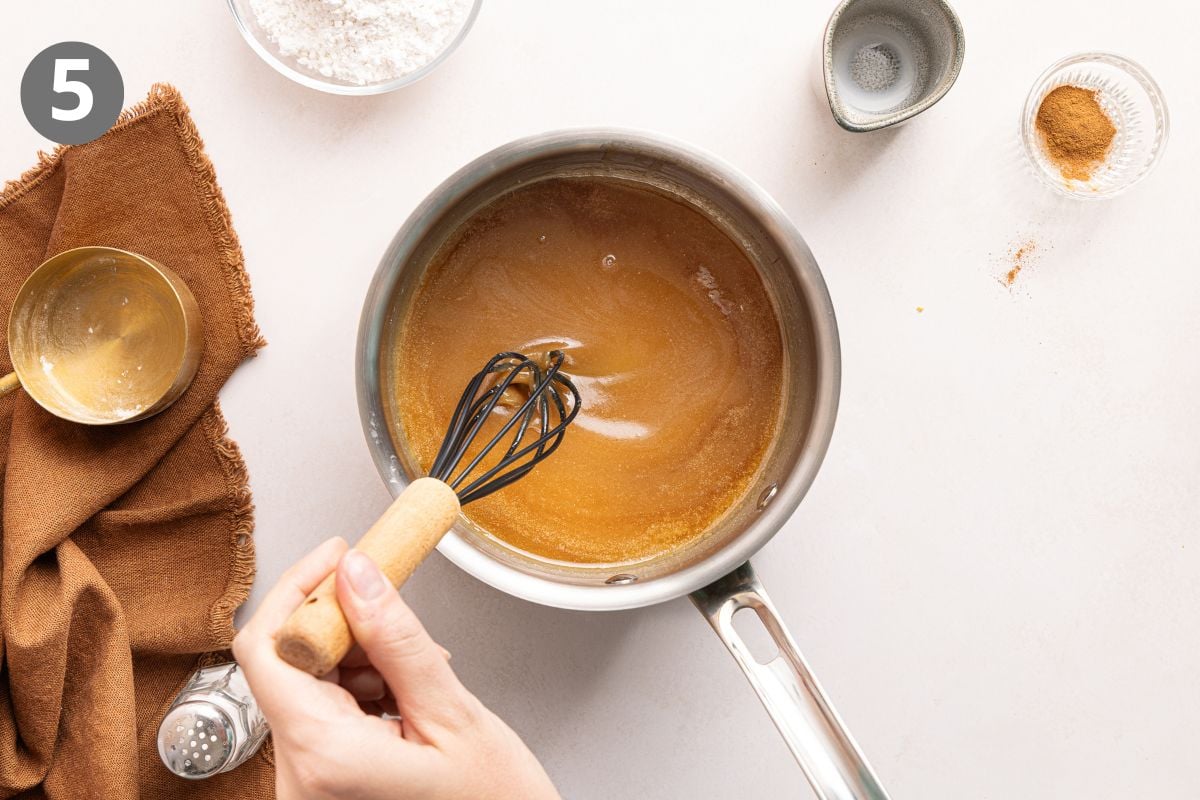
Make the glaze while the scones cool. The brown sugar mixture comes together quickly on the stovetop. Be sure to sift the powdered sugar first so the finished glaze is smooth and lump-free.
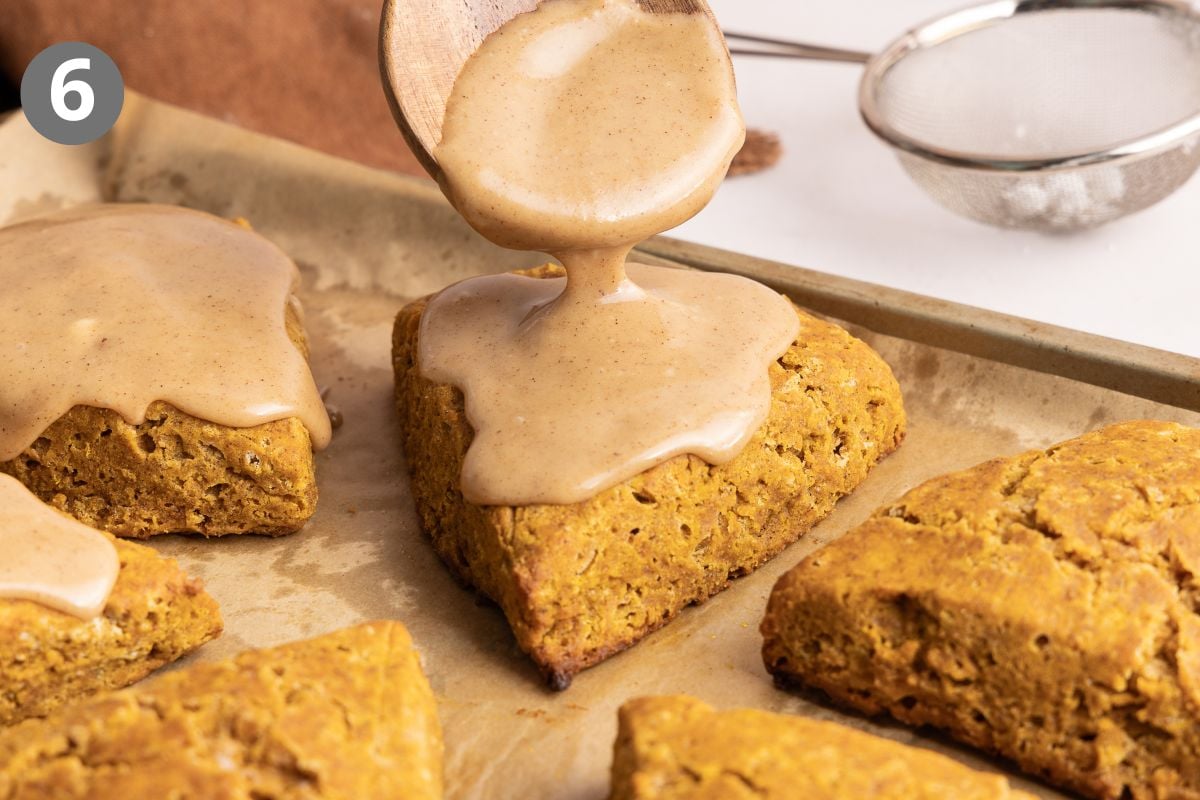
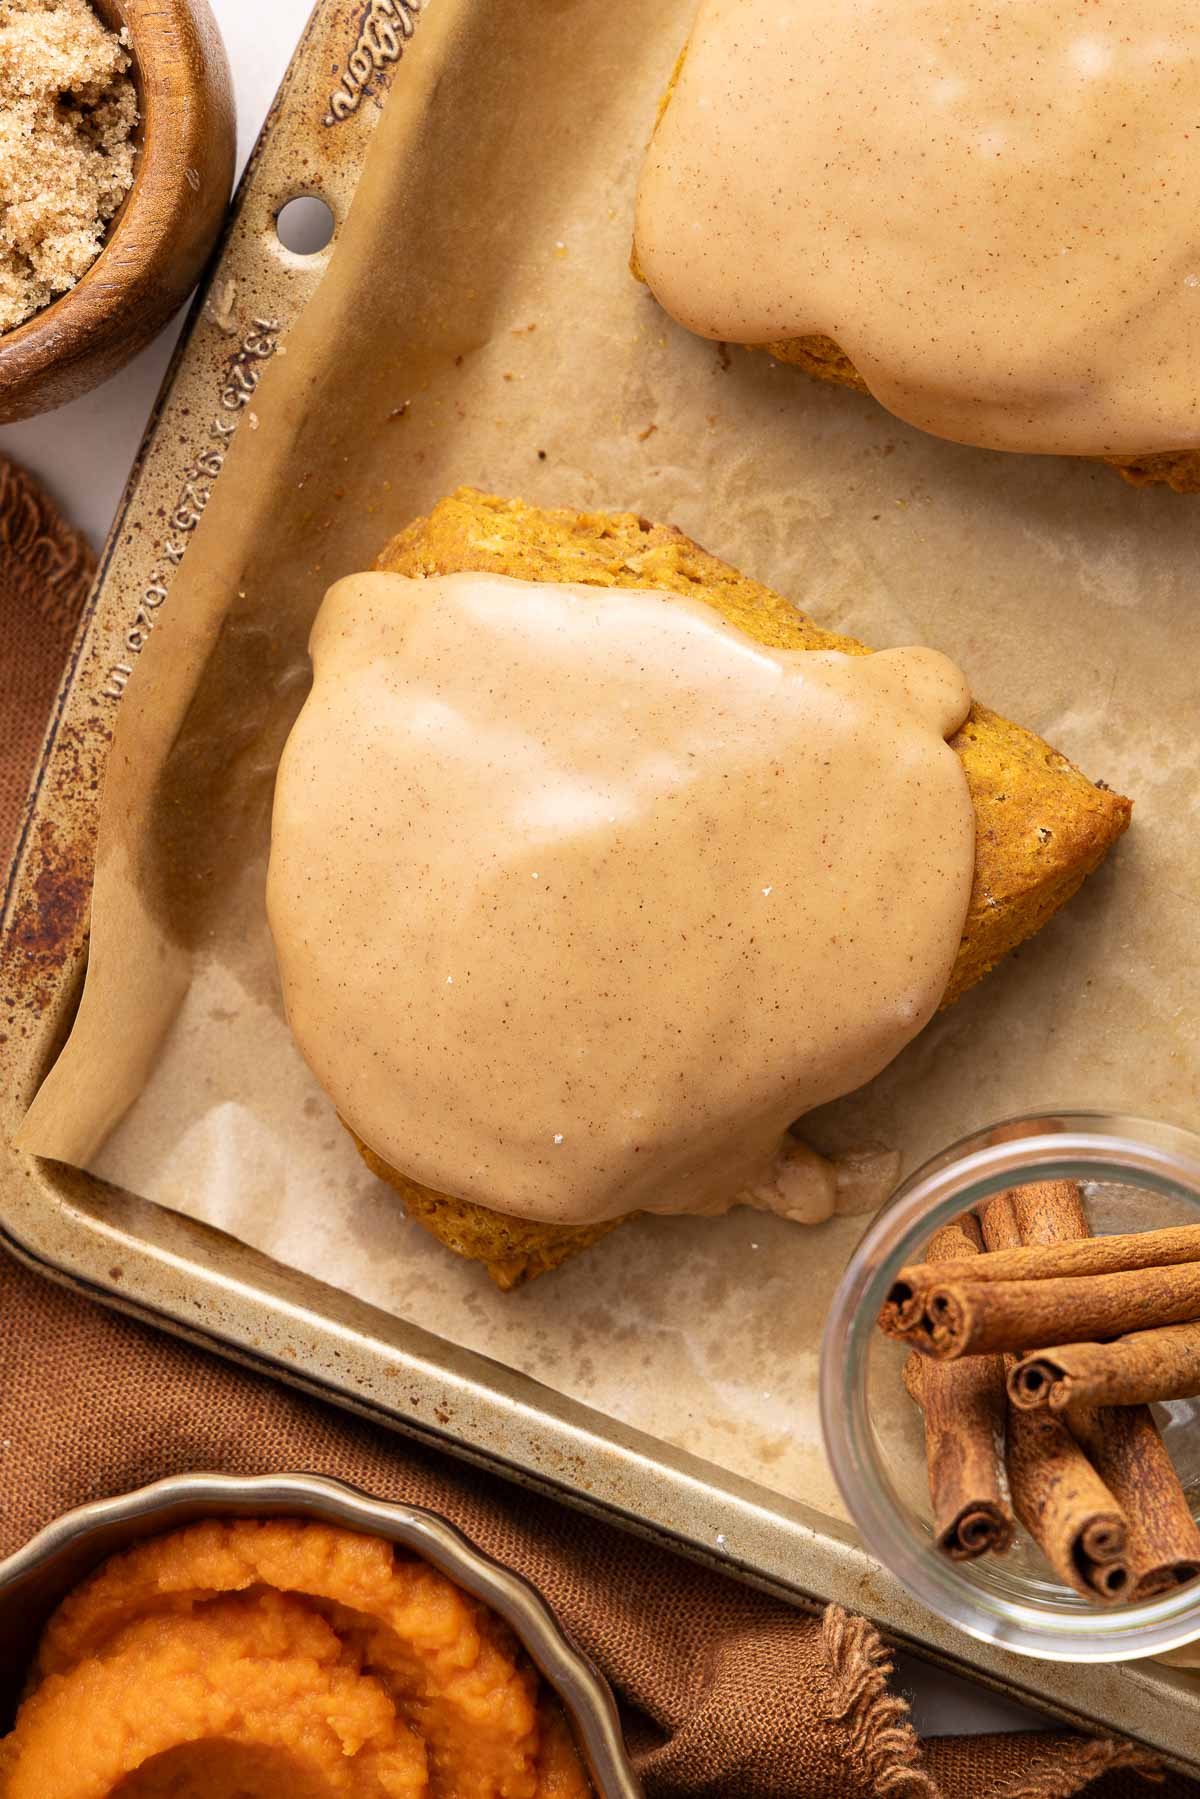
Let the scones cool before glazing. I wait about 20 minutes before adding the brown sugar glaze. If the scones are too hot, the glaze will melt right off instead of settling into a thick layer on top.
More Gluten-Free Pumpkin Recipes

Gluten-Free Pumpkin Scones
Ingredients
Pumpkin Scones
- ½ cup (113g) pumpkin puree
- 1½ cups (225g) gluten-free measure-for-measure flour
- ¼ cup (53g) brown sugar
- 1 tablespoon baking powder
- ½ teaspoon kosher salt
- 2 teaspoons ground cinnamon
- ½ teaspoon ground nutmeg
- ½ teaspoon ground ginger
- ¼ teaspoon ground cloves
- ½ cup (113g) butter, frozen
- ⅔ cup (160g) sour cream
- 1 large egg yolk
- 1 teaspoon vanilla extract
Brown Sugar Glaze
- ¾ cup (150g) brown sugar
- ¼ cup (60ml) milk of choice
- 1 tablespoon butter
- ¼ teaspoon kosher salt
- 1 teaspoon vanilla extract
- 1½ cups (180g) powdered sugar, sifted
- pinch of ground cinnamon
Instructions
- Spread the pumpkin puree onto a plate. Pat with paper towels to “dry” the pumpkin. This will take several minutes and several paper towels. Continue blotting until the pumpkin has a thick, dough-like consistency and the original ½ cup has reduced to about ¼ cup (45–53g).
- For the pumpkin scones: In a large mixing bowl, whisk together the gluten-free flour, brown sugar, baking powder, salt, cinnamon, nutmeg, ginger and cloves.
- Grate the frozen butter using a box grater. Add the butter to the flour mixture and combine with a pastry cutter, two forks or your fingers until the mixture resembles pea-sized crumbs.
- In a separate bowl, whisk together the dried pumpkin puree, sour cream, egg yolk and vanilla.
- Using a rubber spatula, stir the pumpkin-sour cream mixture into the flour mixture until no dry bits of flour remain.
- Spread out a large piece of plastic wrap. Using wet hands, transfer the dough to the plastic wrap. Clean and wet your hands again, then pat the dough into a 6-inch round about 1 inch thick. Wrap the dough tightly in plastic wrap and refrigerate for 30 minutes. (Do not refrigerate longer than 30 minutes.) Then freeze for 15 minutes while the oven preheats.
- Preheat the oven to 500°F. Line a large baking sheet with parchment paper or a silicone baking mat.
- After 15 minutes, remove the dough from the freezer. Spray a sharp knife with cooking spray and cut the dough into 6 equal wedges. Arrange the scones on the prepared baking sheet.
- Place the scones in the oven, then immediately lower the oven temperature to 425°F. Bake for 12–14 minutes, until golden brown.
- Remove from the oven. Transfer the scones to a wire rack and let cool for 20 minutes.
- For the brown sugar glaze: Combine the brown sugar, milk, butter and salt in a medium saucepan over medium heat. Stir until the butter has melted and the mixture is smooth. Bring to a simmer.
- Simmer for 1 minute, then remove from the heat. Whisk in the vanilla, sifted powdered sugar and cinnamon until smooth. Using a large spoon, drizzle the glaze evenly over the scones.
Video
Notes
Nutrition
The post Gluten-Free Pumpkin Scones appeared first on Meaningful Eats.
]]>The post Gluten-Free Pumpkin Crumb Cake appeared first on Meaningful Eats.
]]>Recipe Overview
⏱️ Time to Taste: Pumpkin perfection in about 1 hour!
🥣 Ease: Easy fall baking with simple ingredients and straightforward steps.
🌾 Flour Used: My favorite gluten-free measure-for-measure flour!
🎂 Pan Size: A 9×9-inch pan gives you the perfect cake-to-crumb ratio.
❄️ Freezer Friendly: Yes! Freeze the unglazed cake for up to 3 months then glaze after thawing.
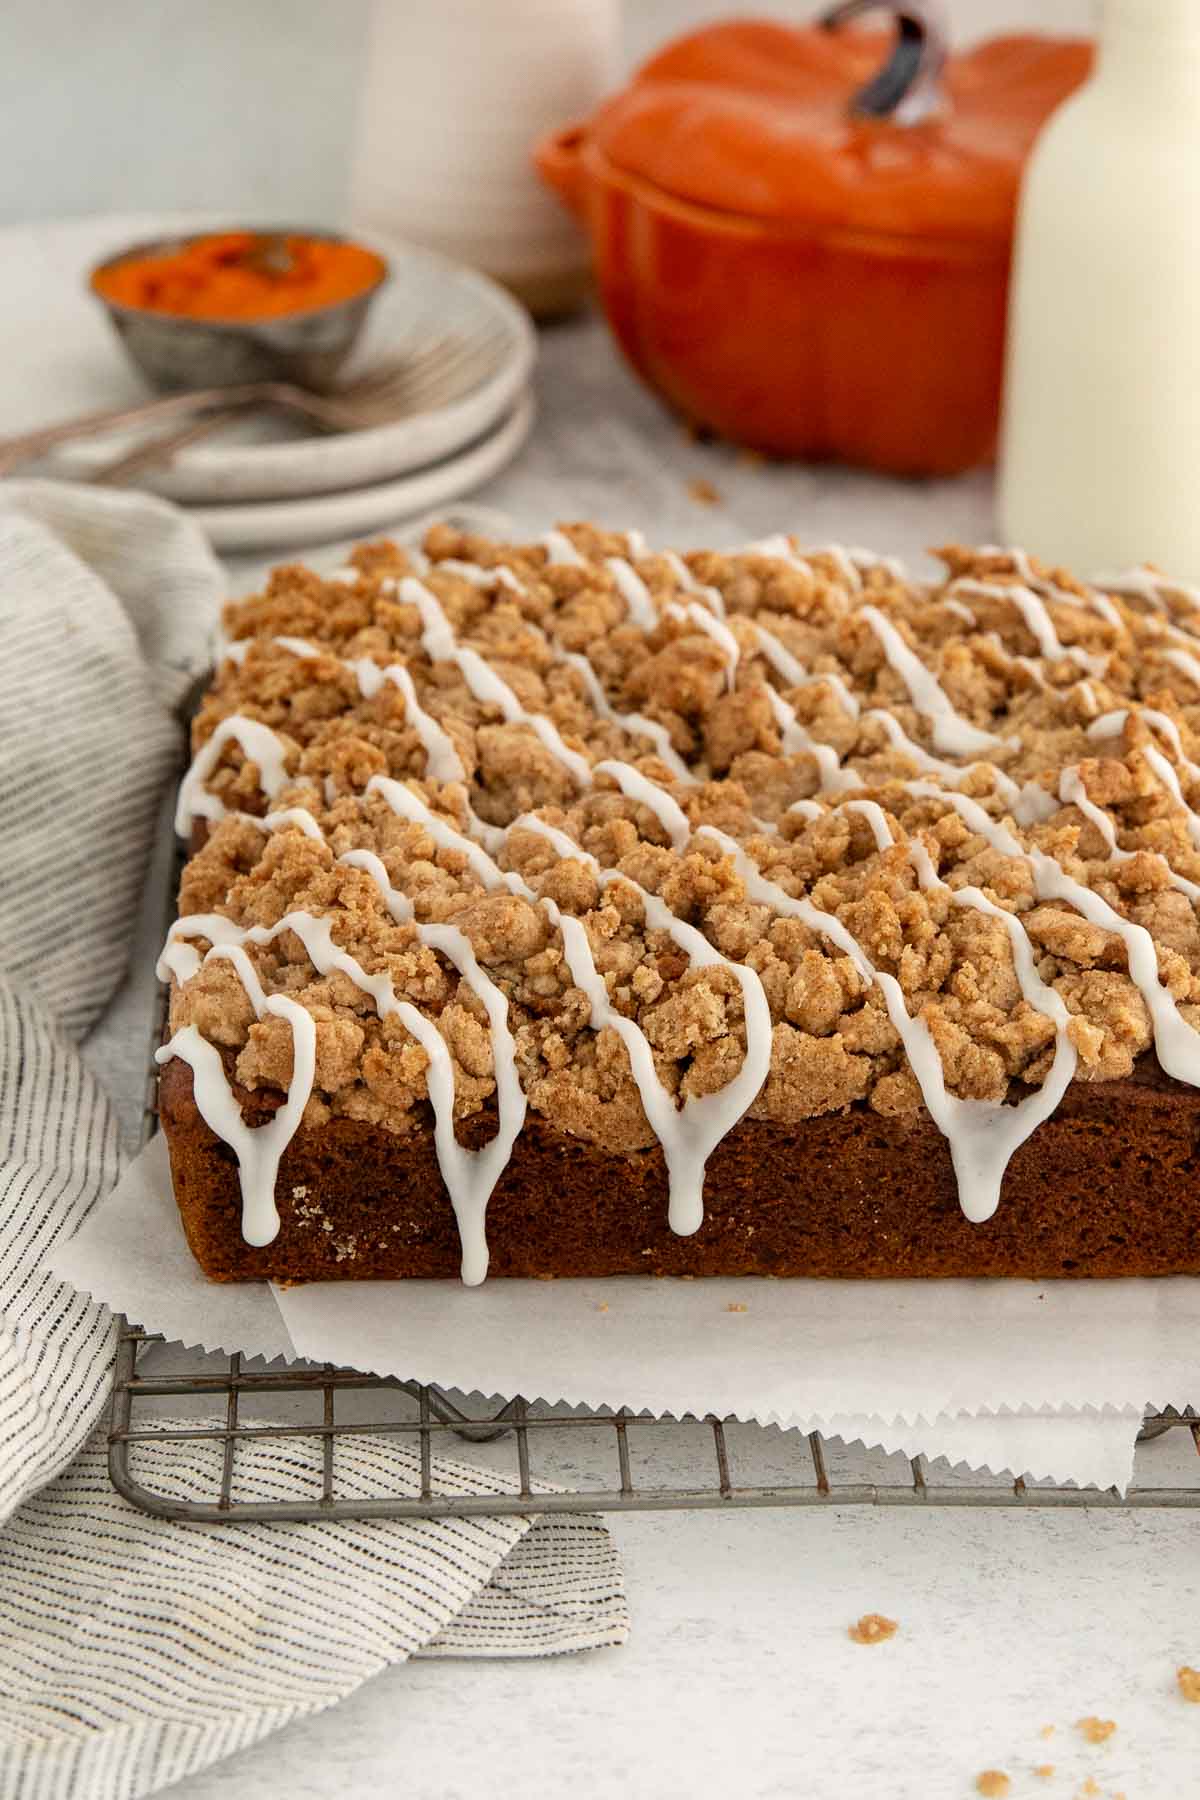
Pumpkin season is one of my favorite parts of fall, and I always find myself wanting to create new gluten-free pumpkin recipes to celebrate. I love this crumb cake for a weekend breakfast with coffee, but it’s just as good for an afternoon treat!
For breakfast or brunch, I tend to pair this recipe with a savory option, like my gluten-free tater tot breakfast casserole or my almond flour crust quiche for a well-rounded meal.
Ingredients You’ll Need
Here are a few notes on some of the key ingredients to make this gluten-free pumpkin crumb cake. Jump to the recipe card below for the exact measurements.
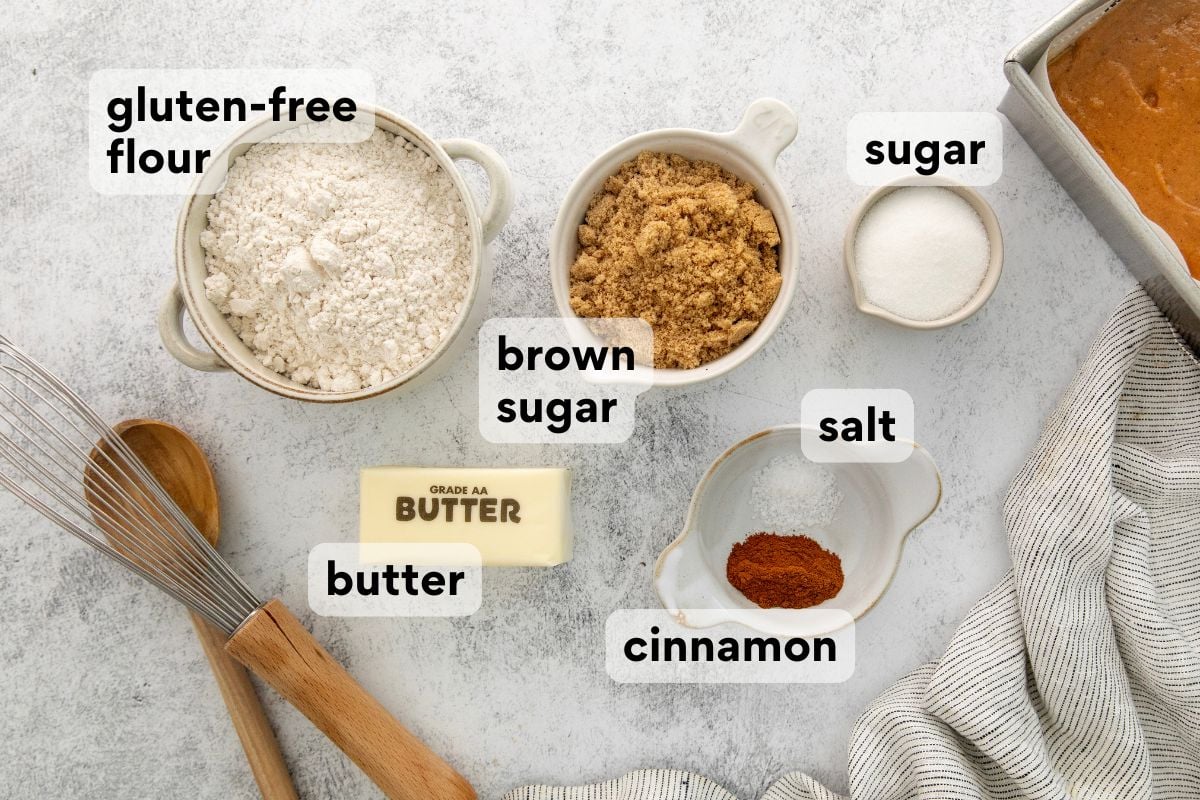
- Melted butter: Using melted butter is a game-changer for creating those big, soft bakery-style crumbs. I’ve tried making gluten-free crumb toppings many different ways over the years and I’ve found this method works the very best. I mix the melted butter into the sugar mixture first, then gently work in the gluten-free flour with a fork, being careful not to overmix. This helps hydrate everything evenly while still allowing those large crumbs to form. Dairy-free butter works great here too!
- Pumpkin purée: I wanted the pumpkin cake to be moist but sturdy enough to hold a generous layer of crumb topping. One cup gives me the balance I’m looking for without weighing down the cake. Since most cans are 15 ounces, that leaves me enough extra purée to make other favorites, like my gluten-free pumpkin scones!
- Milk of choice: I typically use regular milk, but unsweetened almond milk works great too. Use it along with dairy-free butter to make this coffee cake completely dairy-free.
How to Make Gluten-Free Pumpkin Crumb Cake
Here’s an overview of how to make this recipe. You can jump to the recipe for the full instructions!
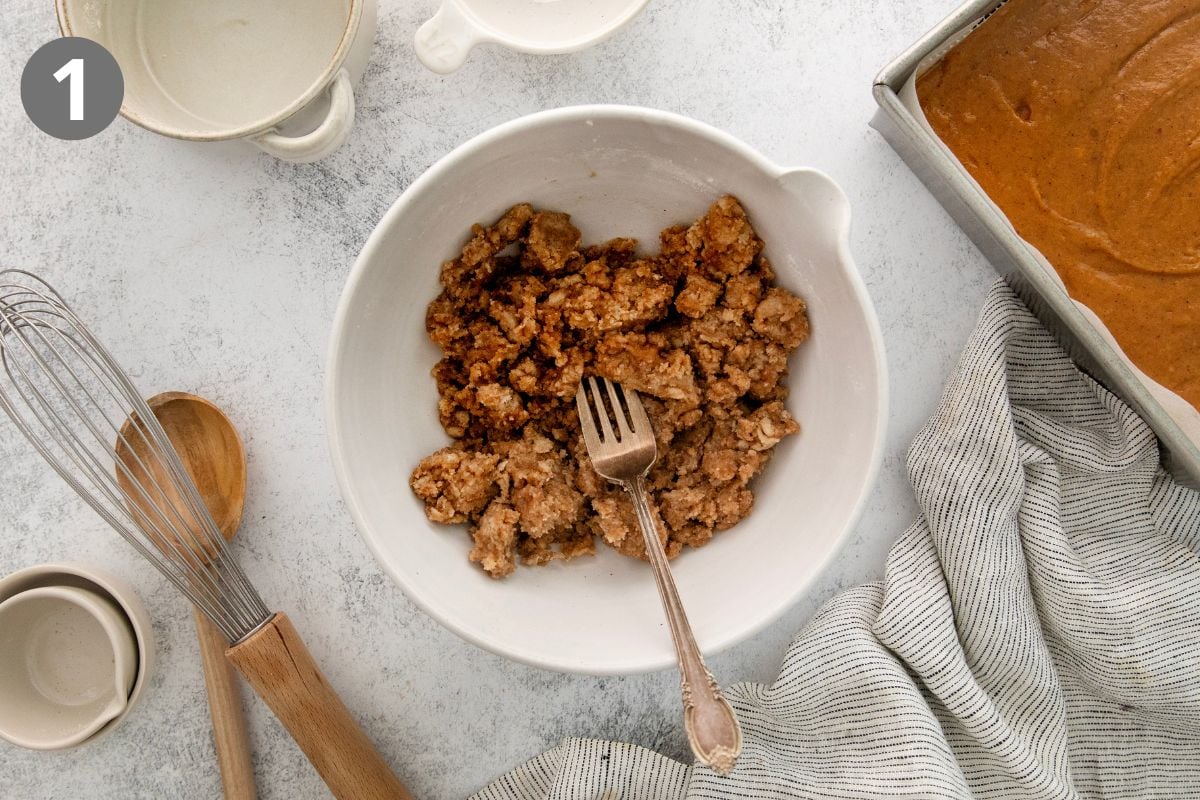
Use a fork for the crumb topping. This is my favorite method for making big, bakery-style crumbs! I mix the sugars, cinnamon, salt and melted butter first, then use a fork to gently mix in the gluten-free flour. A fork makes it easy to create large crumbs without overworking the mixture.
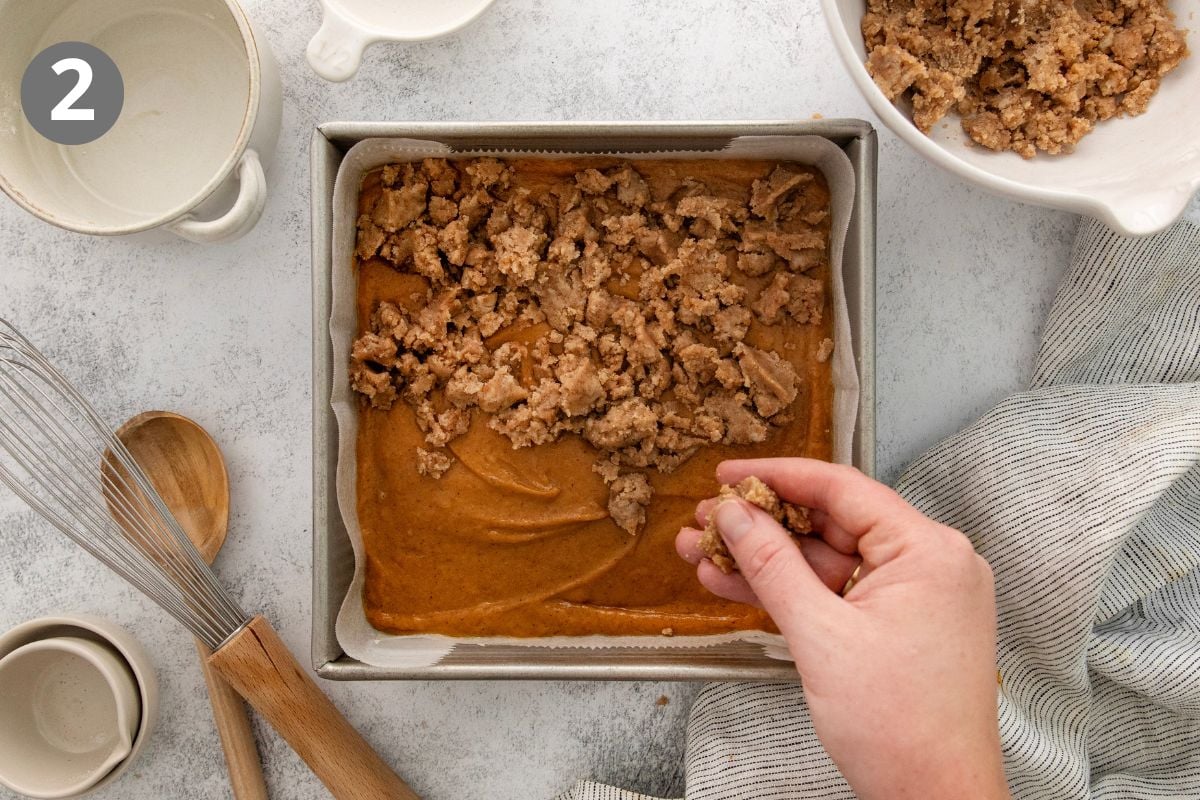
Don’t overmix the crumbs. Once you add the flour, stop mixing as soon as large crumbs form. If you keep stirring, especially with a spoon, the mixture can turn pasty instead of staying crumbly.
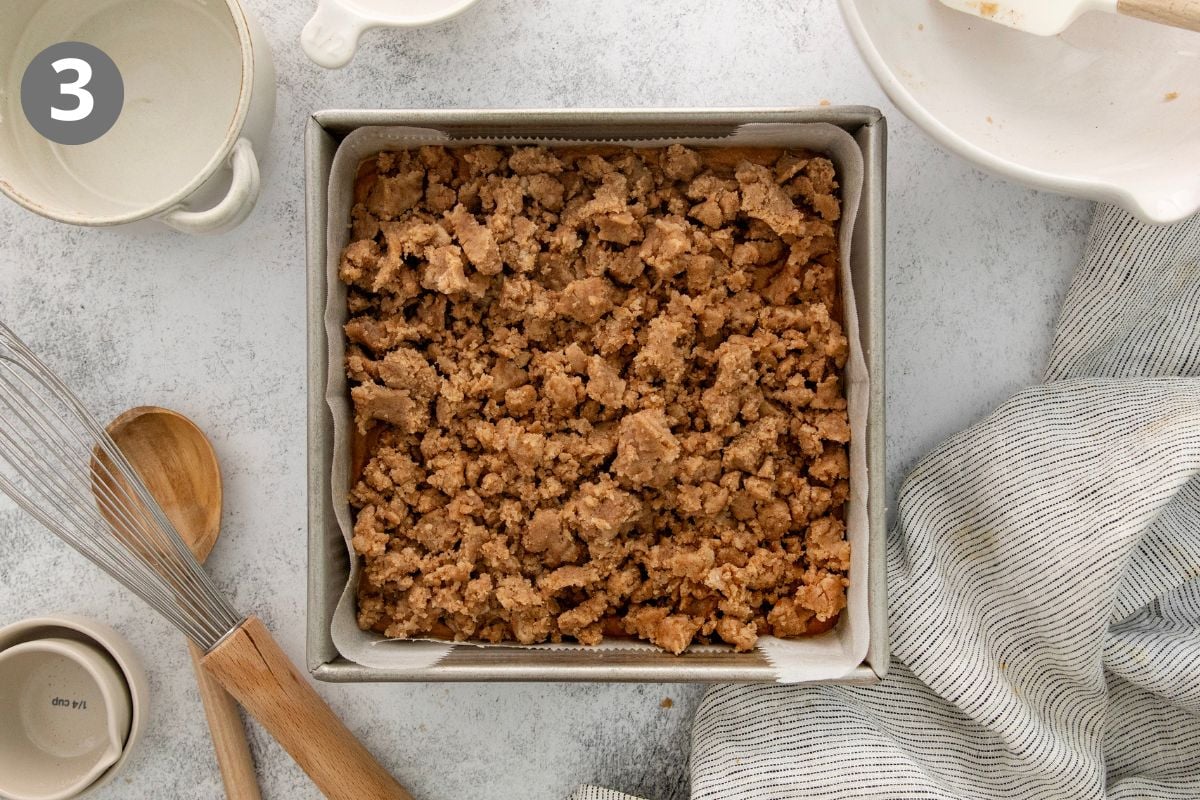
Pile on all of the crumb topping. It may look like a lot, but that’s intentional! I wanted every bite to have a generous layer of buttery brown sugar crumbs.
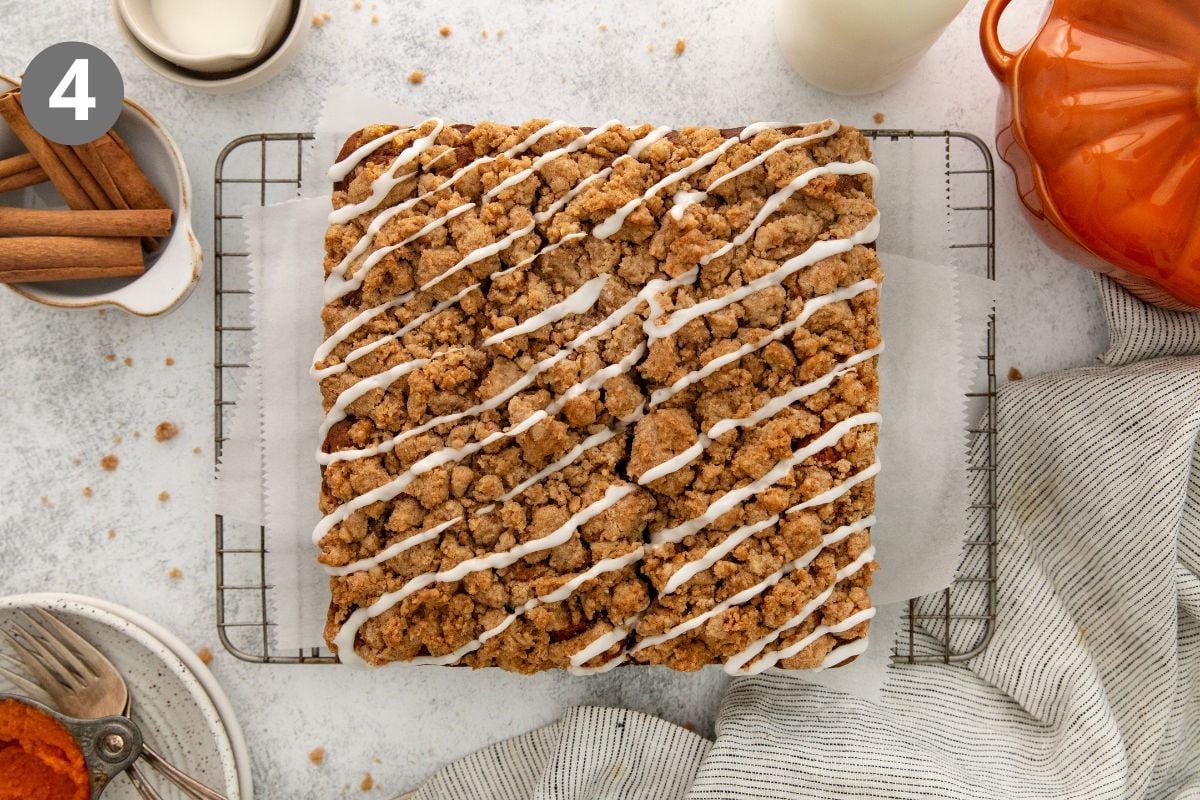
Let the cake cool before glazing. If the cake is still warm, the glaze will melt right into the crumb topping. I wait until it’s completely cool so the glaze stays thick and pretty on top.
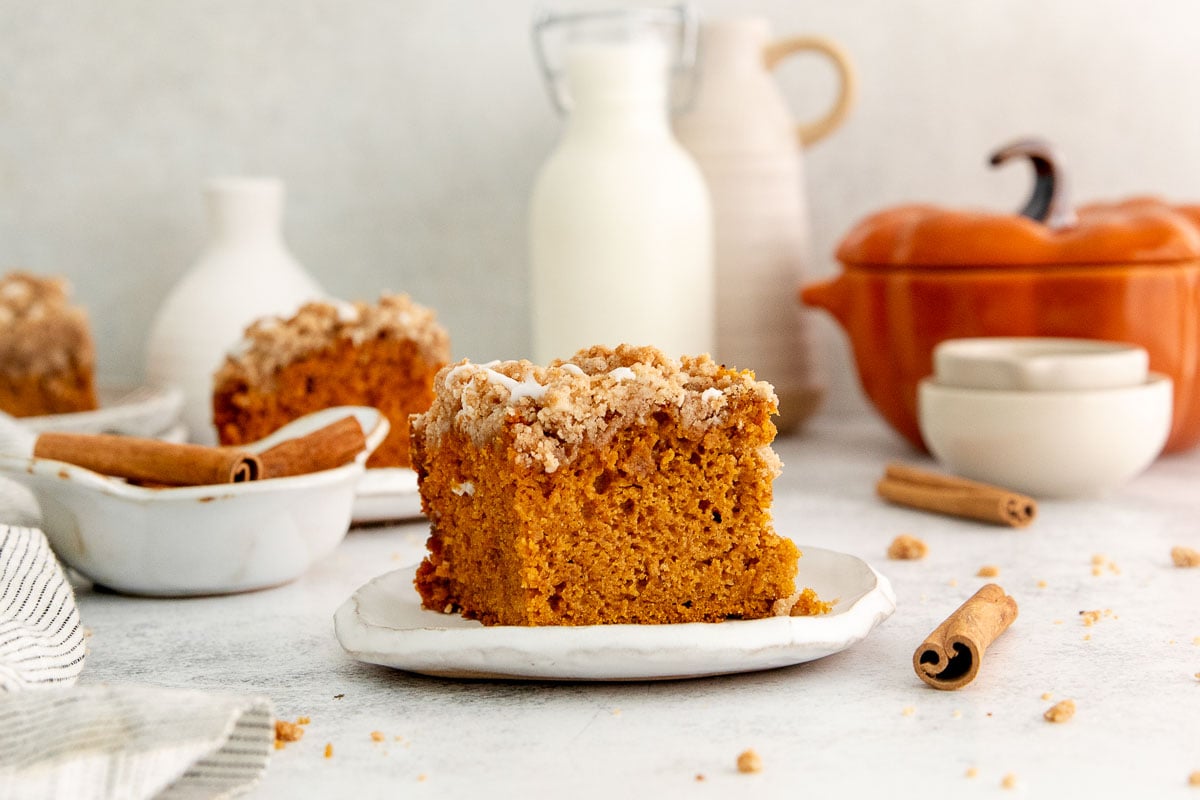
More Gluten-Free Breakfast Recipes
Gluten-Free Pumpkin Crumb Cake
Ingredients
Crumb Topping
- ½ cup (106g) brown sugar
- ¼ cup (50g) granulated sugar
- 1 teaspoon ground cinnamon
- ½ teaspoon kosher salt
- ½ cup (113g) butter, melted
- 1¼ cups (187g) gluten-free measure-for-measure flour
Dry Ingredients
- 1⅓ cups (200g) gluten-free measure-for-measure flour
- ½ cup (106g) brown sugar
- ½ cup (100g) granulated sugar
- 1 teaspoon baking soda
- ¼ teaspoon baking powder
- ¾ teaspoon kosher salt
- 1½ teaspoons ground cinnamon
- ½ teaspoon ground nutmeg
- ¼ teaspoon ground cloves
Other
- 2 large eggs
- 1 cup (226g) pumpkin purée
- ⅓ cup (80ml) milk of choice
- ½ cup (120ml) neutral oil
- 1 teaspoon vanilla extract
Glaze
- 1 cup (120g) powdered sugar
- 1 tablespoon milk of choice
- 1 teaspoon vanilla extract
- pinch of kosher salt
Instructions
- For the crumb topping: In a medium bowl, mix together the brown sugar, granulated sugar, cinnamon and salt. Add the melted butter and mix to combine.
- Add the gluten-free flour and use a fork to mix until large crumbs form. Do not use a spoon or overmix, or the mixture will become pasty. Cover with plastic wrap.
- For the pumpkin cake: Preheat the oven to 350°F. Line a 9×9-inch baking pan with parchment paper and spray with cooking spray.
- In a large bowl, whisk together the gluten-free flour, brown sugar, granulated sugar, baking soda, baking powder, salt, cinnamon, nutmeg and cloves.
- In a medium bowl, whisk together the eggs, pumpkin, milk, oil and vanilla.
- Add the wet ingredients to the dry ingredients and stir with a rubber spatula until just combined and no dry flour streaks remain.
- Pour the cake batter into the prepared pan and smooth the top. Scatter the crumb topping evenly over the cake, keeping some of the crumbs in larger pieces.
- Bake for 35–40 minutes, until a toothpick inserted into the center of the cake comes out clean.
- Remove from the oven and let the cake cool completely before topping with the glaze.
- For the glaze: In a medium bowl, whisk together the powdered sugar, milk, vanilla and salt until smooth. Add more powdered sugar if the glaze is too thin or more milk if the glaze is too thick.
- Drizzle the glaze over the cooled cake and slice into squares.
Video
Notes
Nutrition
The post Gluten-Free Pumpkin Crumb Cake appeared first on Meaningful Eats.
]]>The post Gluten-Free Vermont-Style Donut Holes appeared first on Meaningful Eats.
]]>Recipe Overview
⏱️ Time to Taste: Ready to eat in under 30 minutes.
🥣 Ease: Quick and straightforward using simple everyday ingredients!
✨ Equipment Needed: Deep-fry thermometer, 1-tablespoon cookie scoop, and a heavy-bottomed pot for frying.
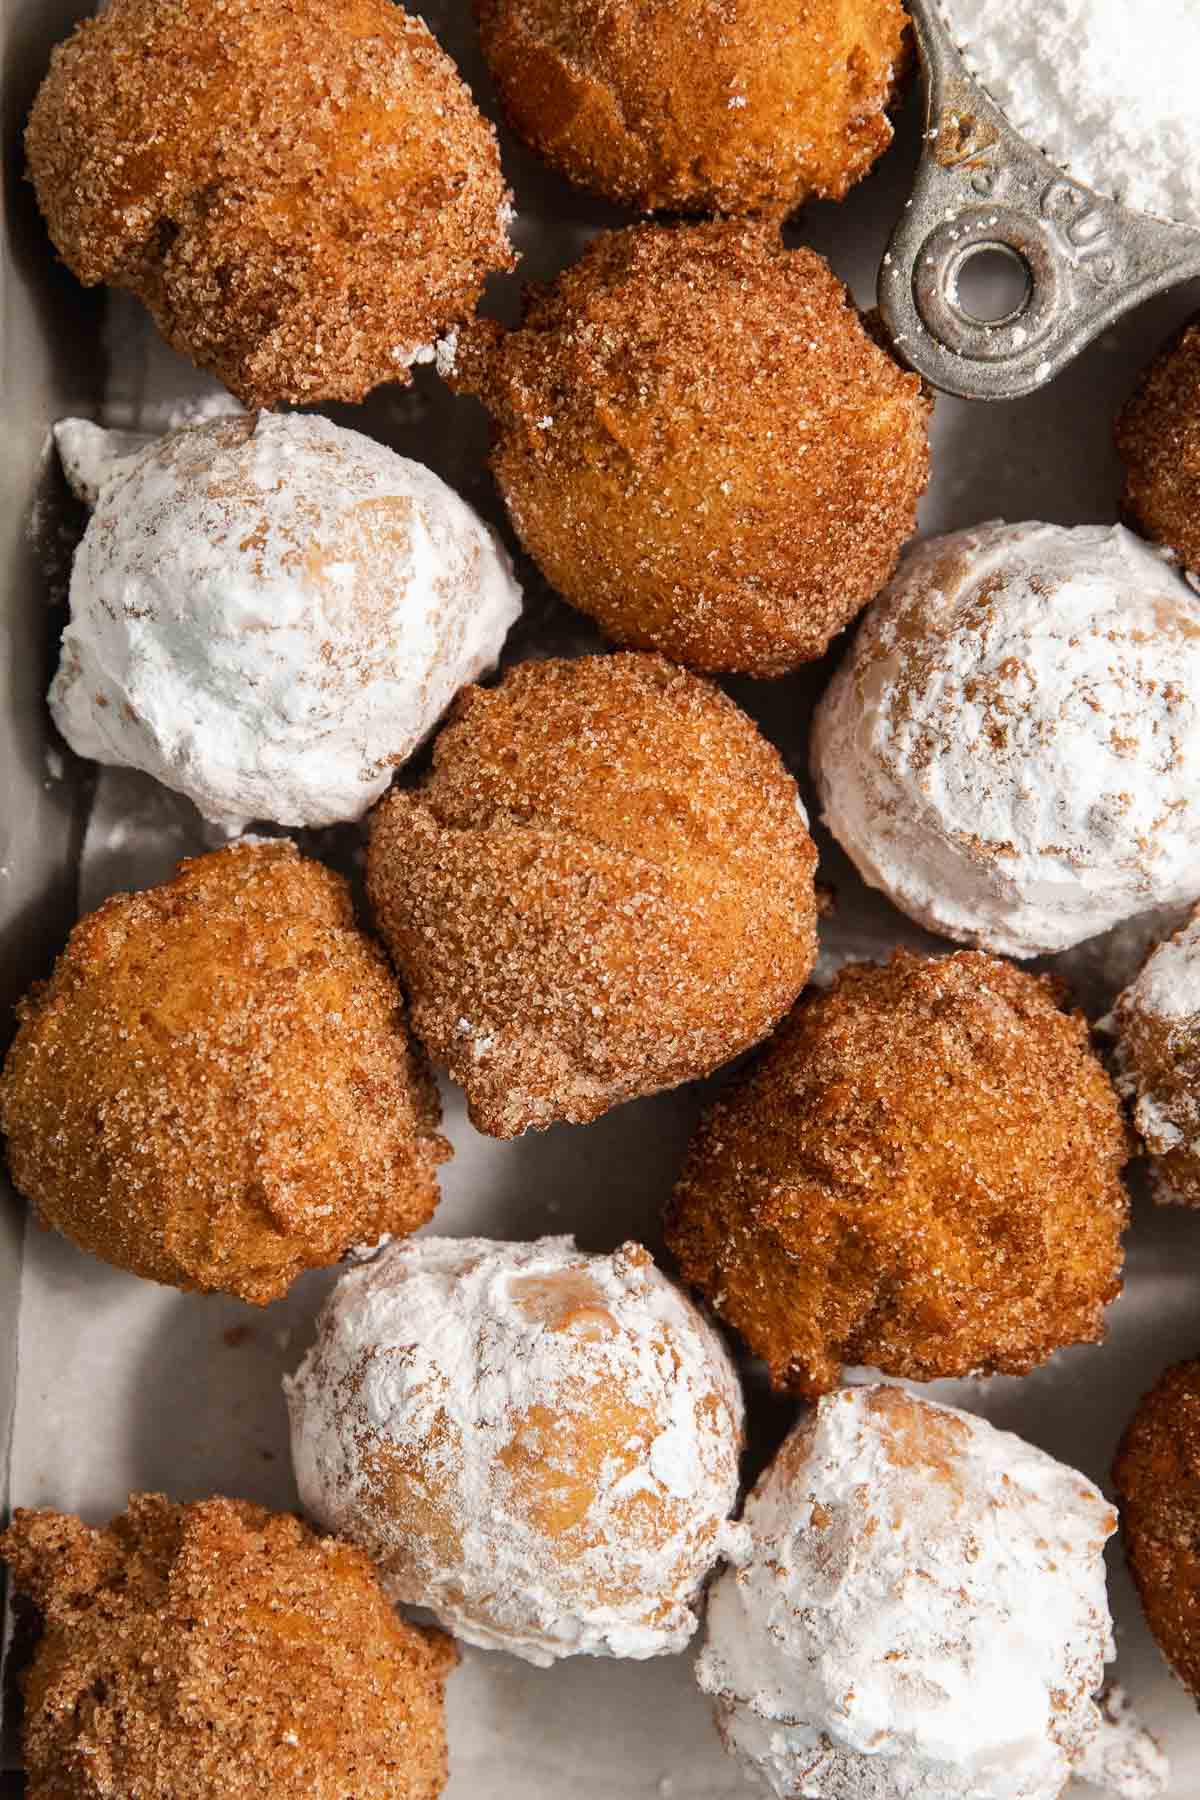
❤️ Why You’ll Love It: These old-fashioned fried donut holes are much easier to make than shaped donuts, with no rolling, cutting, or complicated shaping required! For a baked version, I love making these gluten-free mini powdered sugar donuts!
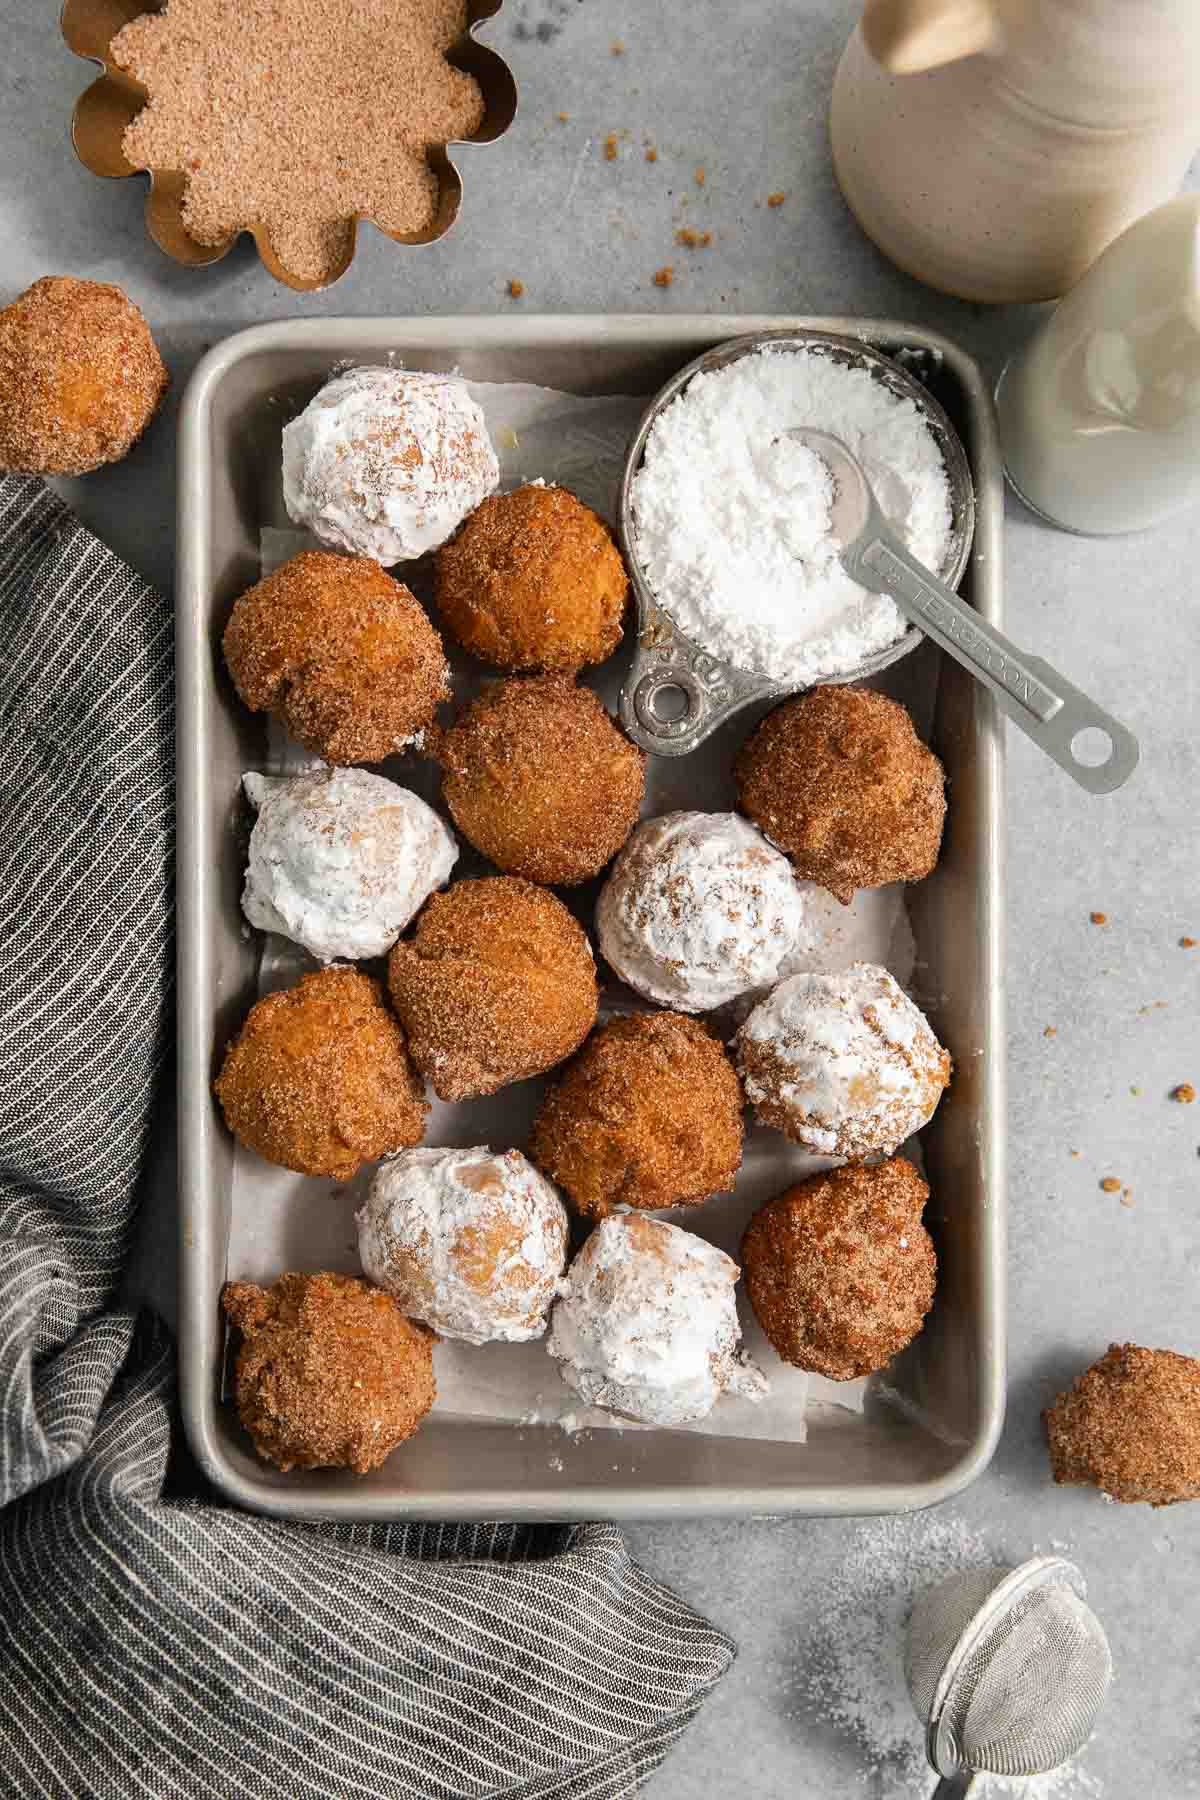
When I went gluten-free, donuts were one of the foods I was determined to recreate without sacrificing texture or flavor. After creating these family-favorite gluten-free baked donuts and my gluten-free fried yeast donuts, I’m so happy to have also recreated these childhood-favorite donut holes. They’re just as good as I remember, only now gluten-free!
Ingredients You’ll Need
Here are a few notes on some of the key ingredients to make these gluten-free donut holes. Jump to the recipe card below for the exact measurements.
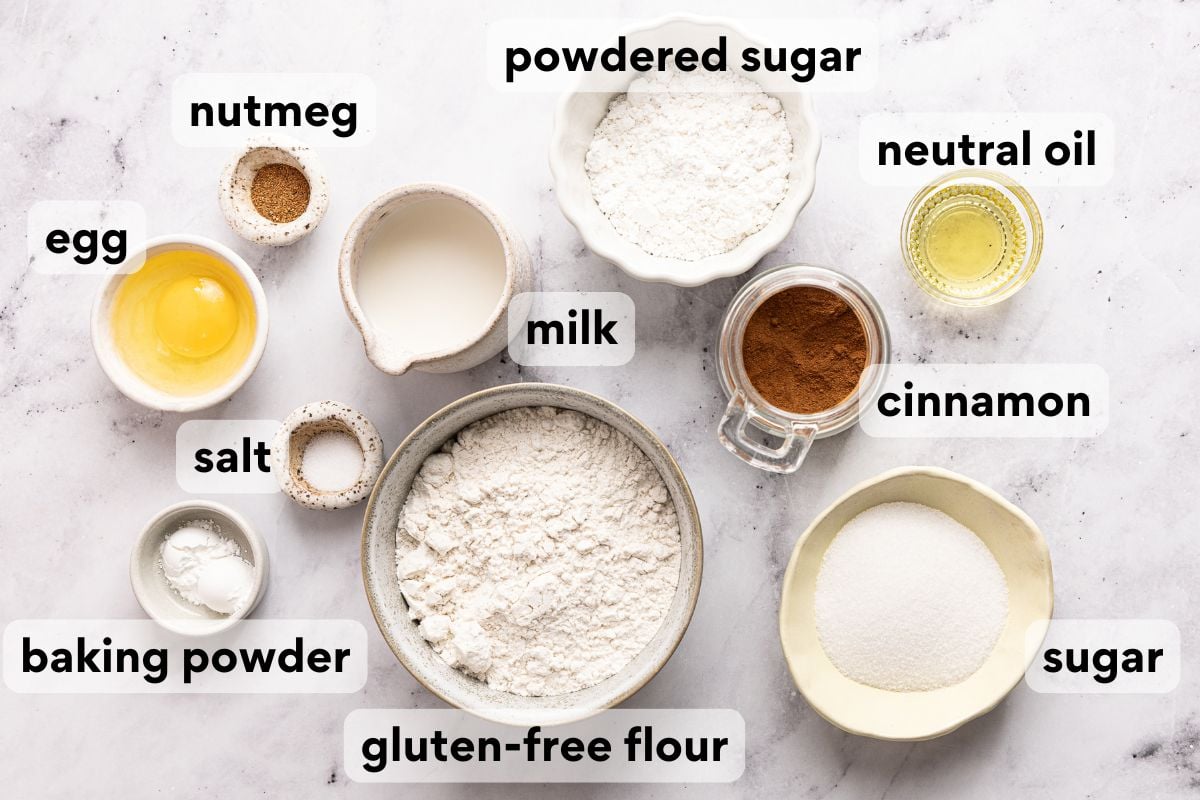
- Gluten-free measure-for-measure flour: A high-quality gluten-free flour blend gives these donut holes just the right amount of structure while keeping the centers soft and tender.
- Nutmeg: Freshly grated or ground nutmeg is the signature flavor in these old-fashioned donut holes. It gives them that classic bakery-style donut taste.
- Neutral oil: I recommend using a neutral oil with a high smoke point, such as vegetable, canola, or avocado oil. These oils can safely handle the high heat needed for frying and allow the donut holes to cook up evenly with a crisp, golden exterior.
- Cinnamon sugar or powdered sugar: I can never decide which coating I like better! Cinnamon sugar adds a warm, cozy flavor, while powdered sugar is the classic choice my kids love.
How to Make Vermont-Style Donut Holes
Here’s an overview of how to make this recipe. You can jump to the recipe for the full instructions!
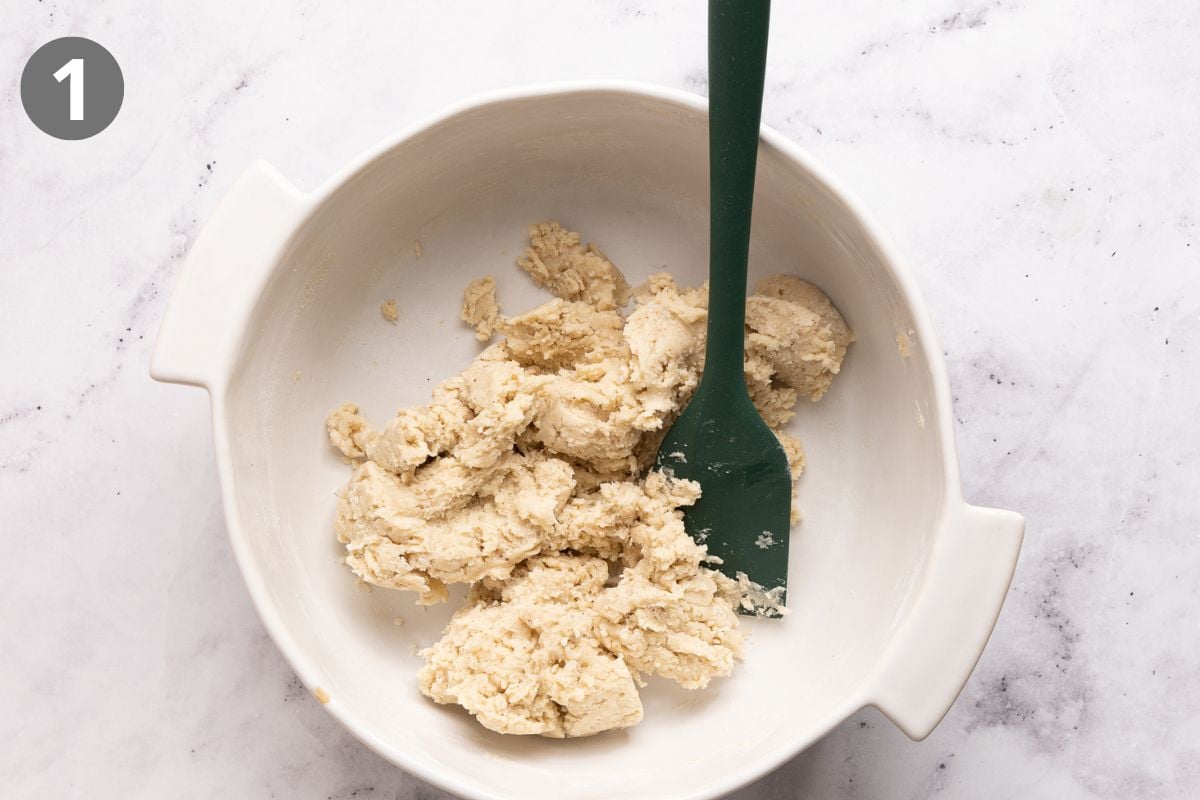
Combine and Scoop: I like using a 1-tablespoon cookie scoop to portion the batter. It makes the donut holes nearly the same size, so they cook evenly.
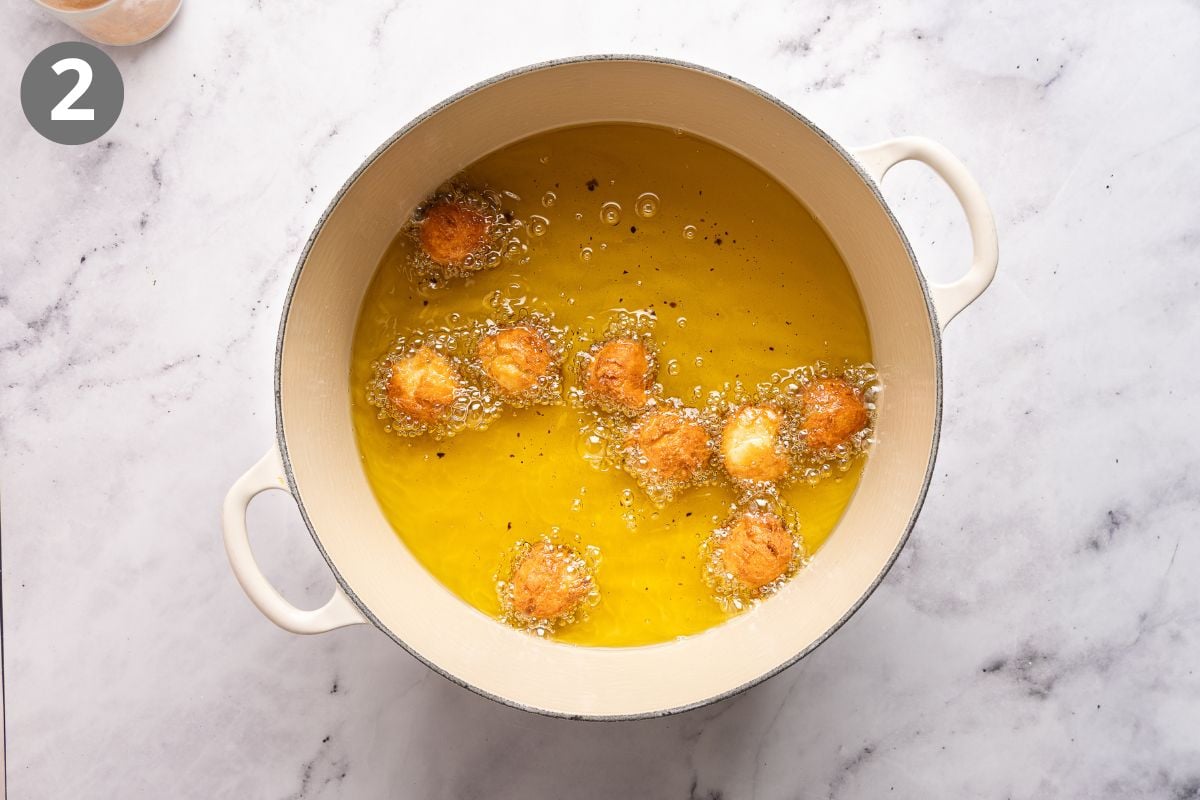
Fry in Batches: Don’t overcrowd the pot. Frying just a few donut holes at a time helps the oil maintain its temperature and gives each one plenty of room to brown evenly.
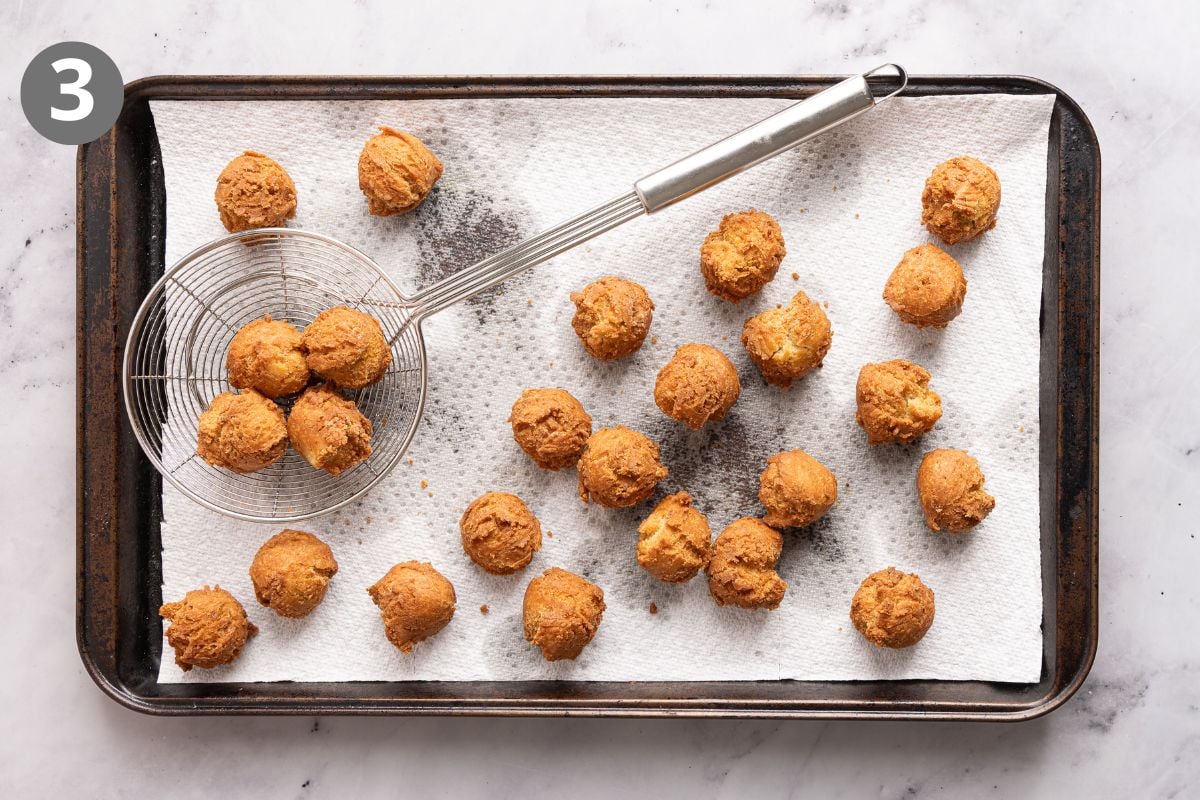
Drain Fried Donuts: Unlike many fried donuts, these donut holes are best fried at 335°F instead of a higher temperature. The slightly lower heat gives the centers enough time to cook through before the outsides become too dark.
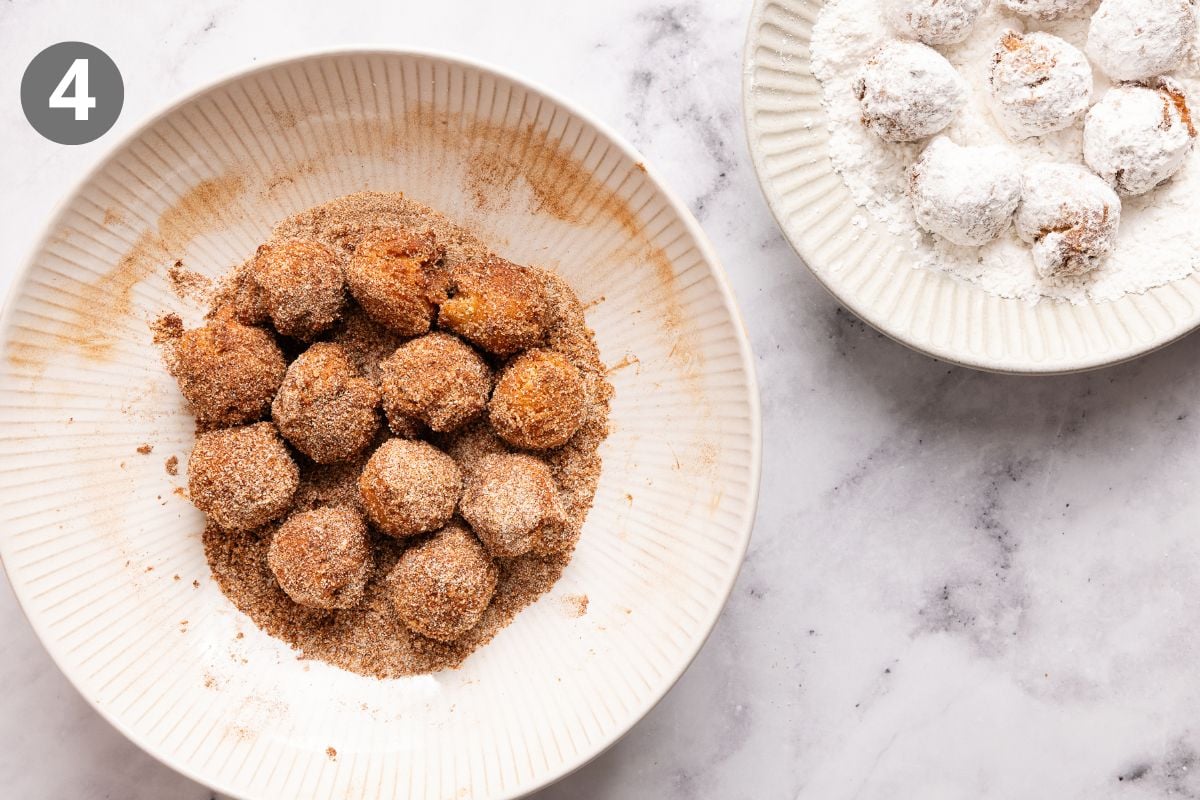
Roll in Either Sugar Coating: Roll the donut holes in the cinnamon sugar or powdered sugar while they’re still warm. The coating sticks much better and gives every bite the perfect sweet finish.
Make-Ahead/Storage/Freezing Instructions
To Make-Ahead: Since the batter contains baking powder, I don’t recommend making the batter in advance. These donut holes are best served fresh!
To Store: Leftovers can be stored in an airtight container once cooled. They will keep at room temperature for 1 day. The outside of the donut holes will soften as they sit.
To Freeze: I don’t recommend freezing these donut holes. Freezing and thawing changes the texture.
More Gluten-Free Breakfast Recipes

Gluten-Free Vermont-Style Donut Holes
Ingredients
Donut Batter
- 1½ cups (225g) gluten-free measure-for-measure flour
- 2 teaspoons baking powder
- ½ teaspoon kosher salt
- ½ teaspoon ground nutmeg
- ⅓ cup (67g) granulated sugar
- ½ cup (120ml) milk of choice
- 1 tablespoon neutral oil
- 1 large egg
Frying
- 5-6 cups neutral oil
Coating
- ½ cup (100g) granulated sugar + 1 tablespoon ground cinnamon
- ½ cup (60g) powdered sugar
Instructions
- Fill a large heavy-bottomed pot with oil, about 3-4 inches deep. Place over medium heat until a deep-fry thermometer registers 335°F.
- Line a large baking sheet with paper towels.
- In a medium bowl, whisk together the gluten-free flour, baking powder, salt and nutmeg until well-combined.
- In a separate bowl, whisk together the granulated sugar, milk, oil and egg until smooth.
- Add the wet ingredients to the dry and mix with a rubber spatula to evenly combine.
- When the oil is ready, scoop 1 tablespoon-sized holes of donut batter into the hot oil. Cook for 2 minutes, then turn over and cook for an additional 2 minutes or until they are deep brown.
- Remove the donut holes from the oil and let them drain on the baking sheet. Repeat with the remaining batter.
- Mix the granulated sugar and cinnamon in a small bowl. Scoop the powdered sugar into another small bowl.
- Once the donut holes are cool enough to handle, coat in either sugar.
Video
Notes
Nutrition
The post Gluten-Free Vermont-Style Donut Holes appeared first on Meaningful Eats.
]]>The post Gluten-Free Swedish Pancakes with Lemon Sugar appeared first on Meaningful Eats.
]]>Recipe Overview
⏱️ Time to Taste: About 50 minutes, including chilling time
✨ Texture: Thin, buttery, and lightly custardy
🌾 Flour Used: Gluten-Free Measure-for-Measure Flour
🍳 Equipment Needed: Blender and a nonstick skillet or crepe pan
🕐 Make Ahead: The batter can be prepared up to 24 hours in advance!
💡 Helpful Tip: I like to brush each pancake with melted butter as it cooks and again after it’s transferred to the plate. The butter adds wonderful flavor and helps the sugar and lemon juice soak into the warm pancakes.
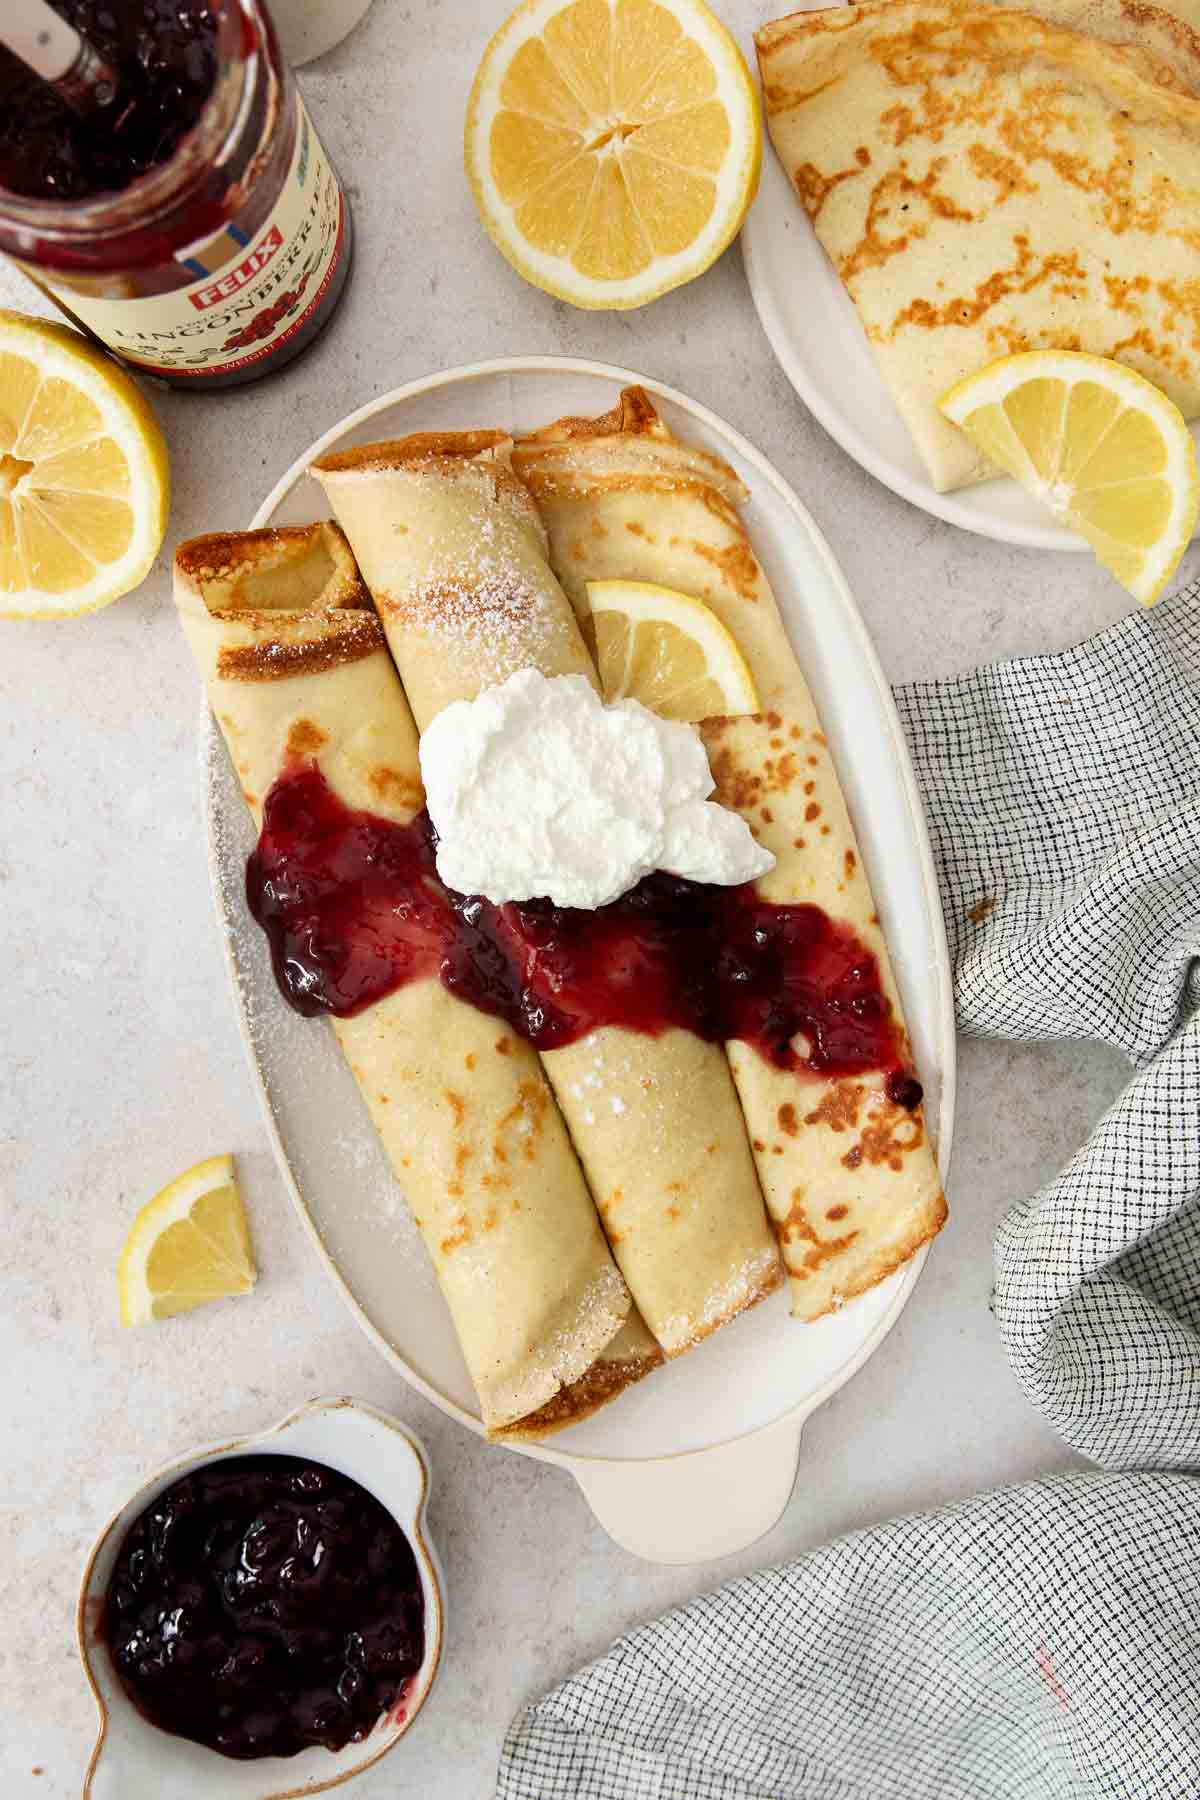
I love making these Swedish pancakes when we want something a little different for breakfast. It’s so easy to make the batter in a blender, then cook them in our crepe pan after a short chill time.
These gluten-free Swedish pancakes are delicious on their own, but I also love pairing them with savory favorites, like gluten-free quiche lorraine or sausage hashbrown breakfast casserole. They’re such a fun addition to a weekend breakfast or brunch!
Ingredients You’ll Need
Here are a few notes on some of the key ingredients to make these gluten-free Swedish pancakes. Jump to the recipe card below for the exact measurements.
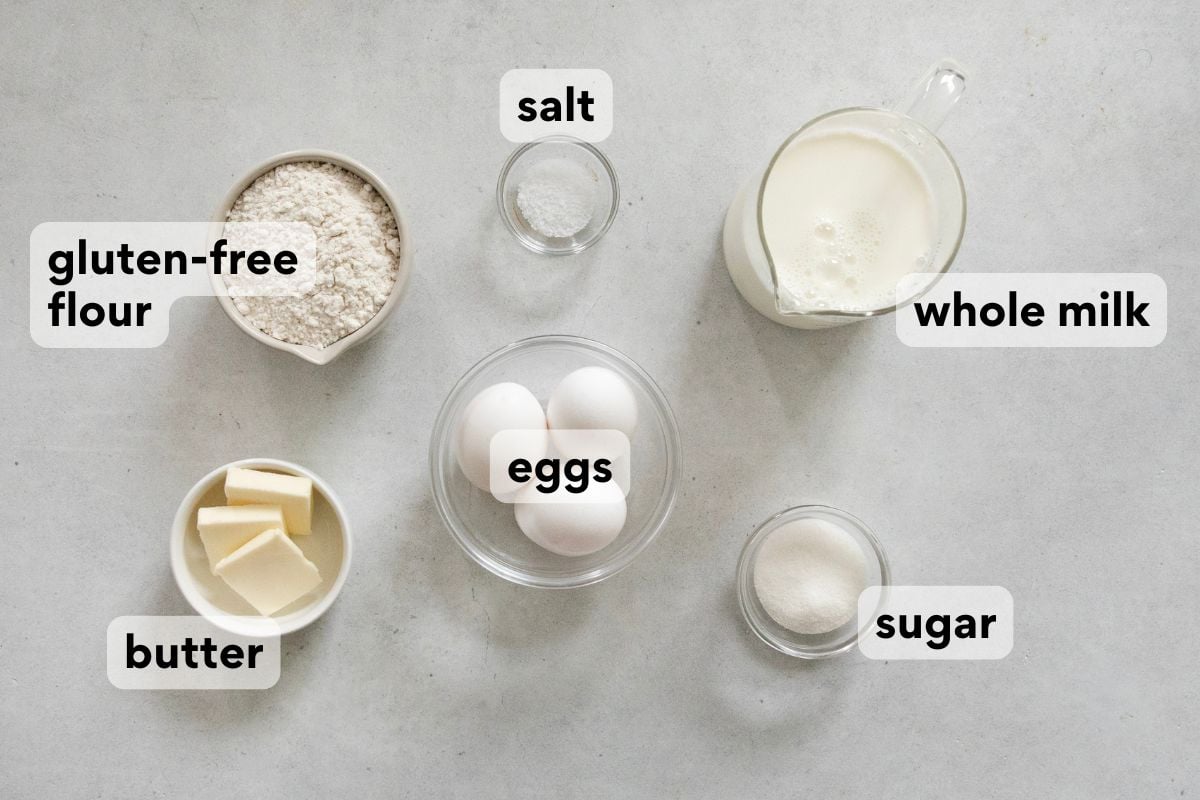
- Whole milk: Whole milk helps create the rich, delicate texture that Swedish pancakes are known for. I recommend using whole milk for the best flavor and tenderness.
- Gluten-free measure-for-measure flour: A small amount of gluten-free flour provides just enough structure while keeping the pancakes thin and soft. Be sure to let the batter rest so the flour has time to fully hydrate.
- Butter: Butter is essential in Swedish pancakes. It adds rich flavor to the batter and helps create beautifully golden pancakes as they cook.
- Lingonberry jam: Lingonberry jam is the traditional topping for Swedish pancakes and adds a sweet-tart flavor that pairs perfectly with the buttery pancakes. If you can’t find lingonberry jam, blueberry jam is a delicious alternative.
How to Make Gluten-Free Swedish Pancakes
Here’s an overview of how to make this recipe. You can jump to the recipe for the full instructions!
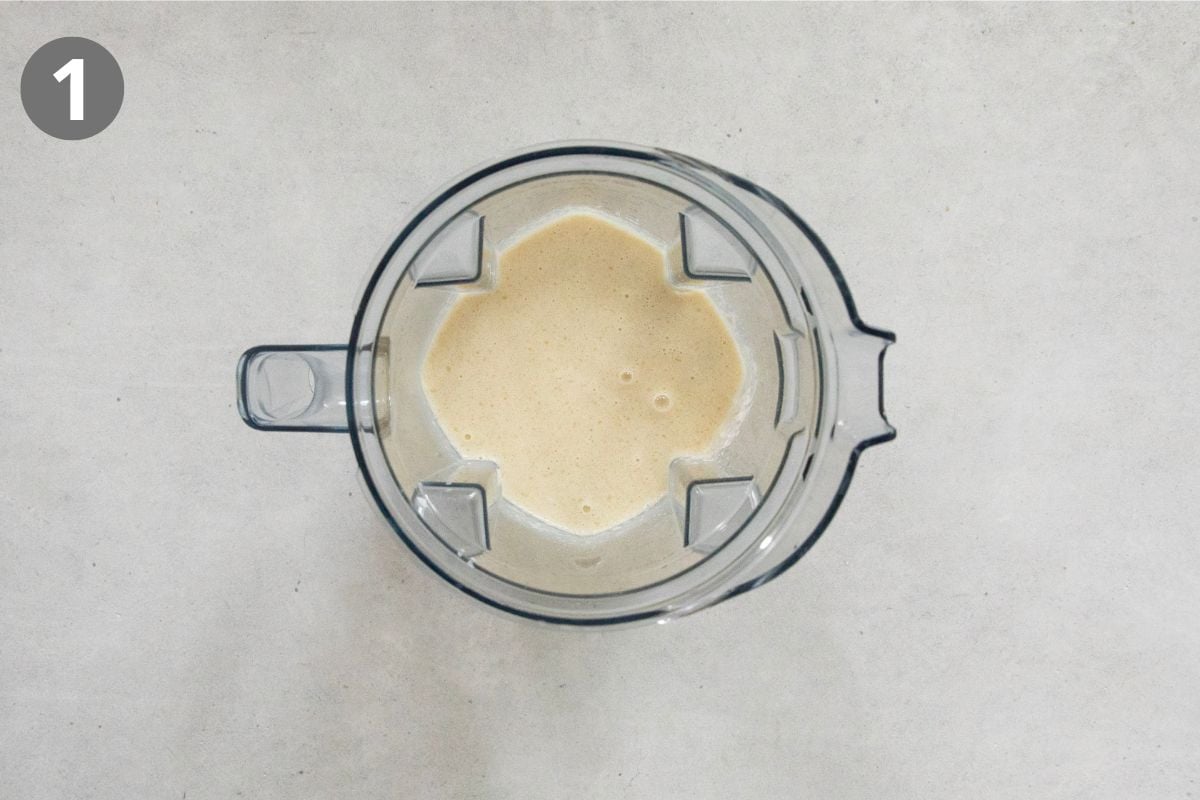
Blend the Batter: I highly recommend letting the batter rest in the refrigerator for at least 30 minutes before cooking. This gives the gluten-free flour time to hydrate and helps create Swedish pancakes that are tender and easy to flip.
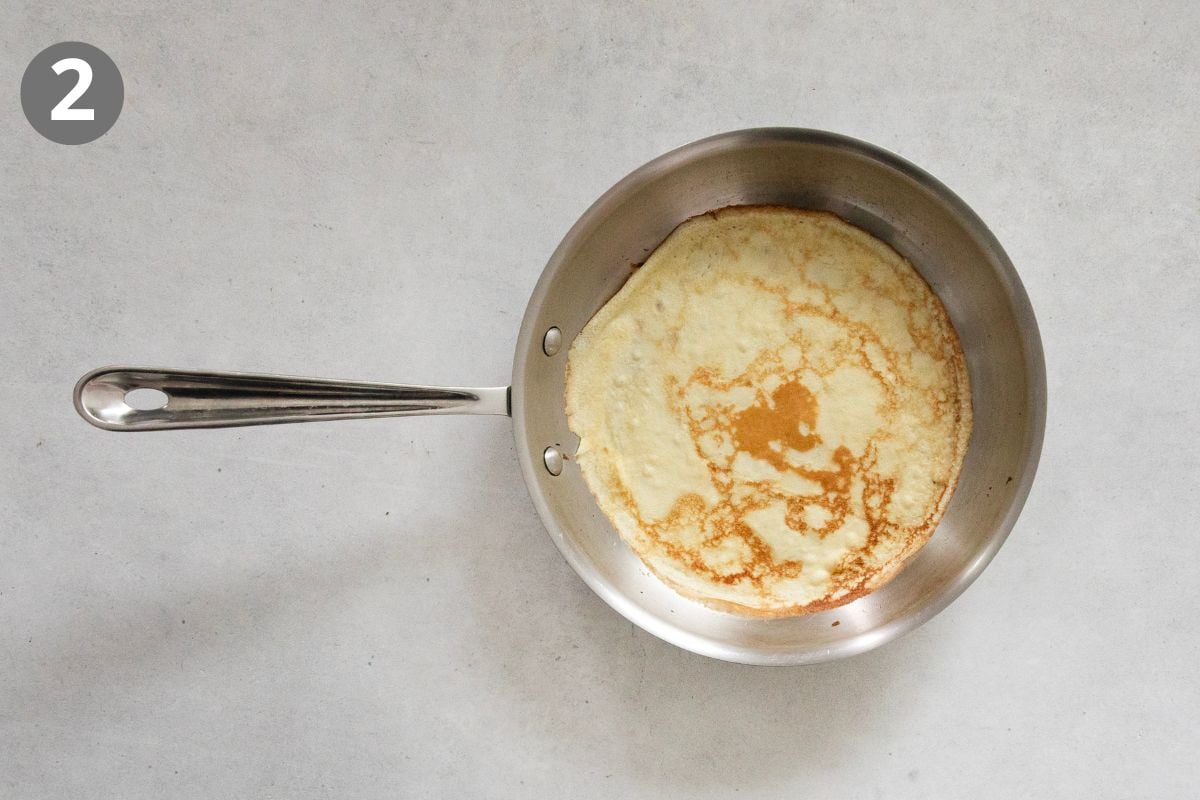
Cook the Pancakes: As soon as you pour the batter into the pan, immediately swirl the pan so the batter spreads into a thin, even layer. Swedish pancakes are much thinner than traditional American pancakes, and this quick swirl helps create their signature delicate texture.
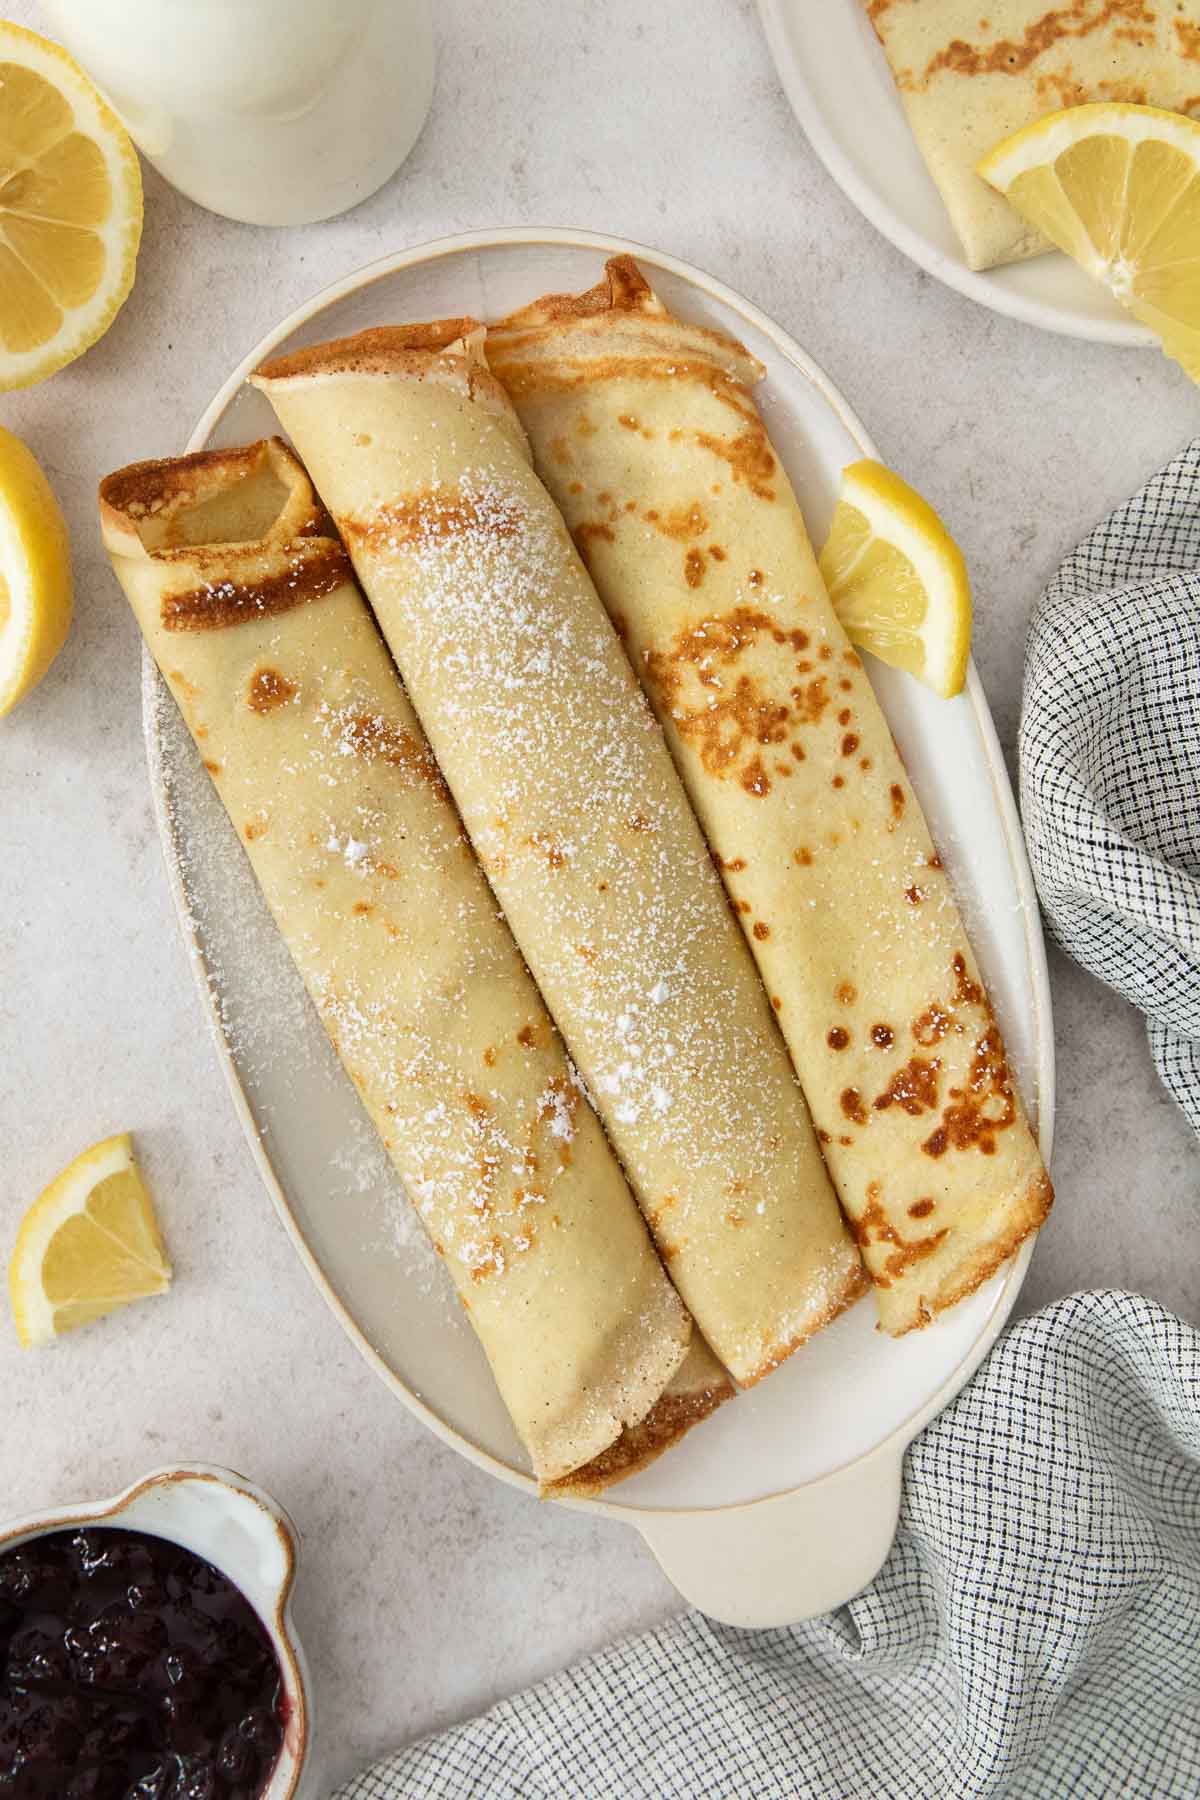
How to Serve: My favorite way to serve Swedish pancakes is with a sprinkle of sugar, a squeeze of fresh lemon juice, and rolled up while still warm. They’re also delicious folded into triangles and topped with lingonberry jam, whipped cream, or a dollop of yogurt.
Make-Ahead/Storage/Freezing Instructions
To Make-Ahead: This batter can hang out in the fridge for up to 24 hours! Just give it a little stir before cooking.
To Store: Cooled pancakes will keep in an airtight container or Ziploc bag in the fridge for up to 3 days. I place parchment paper between them so they don’t stick together.
To Freeze: These pancakes will keep in the freezer in a freezer bag or airtight container for up to 2 months. I recommend separating them with parchment paper to prevent sticking. You can reheat them straight from frozen!
More Gluten-Free Breakfast Recipes

Gluten-Free Swedish Pancakes with Lemon Sugar
Ingredients
- 3 large eggs
- 1¾ cups whole milk
- ¾ cup (113g) gluten-free measure-for-measure flour
- 3 tablespoons butter melted, plus more for cooking
- 2 tablespoons granulated sugar
- ½ teaspoon kosher salt
Toppings
- Lemon juice
- Granulated sugar
- Lingonberry or blueberry jam
- Plain yogurt
- Whipped cream
Instructions
- Add the eggs, milk, gluten-free flour, melted butter, sugar, and salt to a blender. Pulse briefly a few times until smooth. (Don’t overmix—just enough to combine!)3 large eggs, 2 tablespoons granulated sugar
- Pour the batter into a measuring cup, cover, and refrigerate for at least 30 minutes or up to 24 hours.
- Heat a nonstick pan or crepe pan over medium heat. Lightly butter the pan then pour in about ¼ cup batter. Immediately rotate the pan from side to side to form an even circle.
- Cook until the bottom is light brown, about 1-2 minutes. Flip and cook for 30 seconds on the other side. Brush the top with melted butter after flipping.
- Then flip the pancake onto a plate and butter the other side. Sprinkle with sugar and squeeze fresh lemon over the top and roll up. Or fold into triangles and serve with jam and whipped cream.
Video
Notes
Nutrition
The post Gluten-Free Swedish Pancakes with Lemon Sugar appeared first on Meaningful Eats.
]]>