What an Air Fryer Actually Does
An air fryer “fries” food without submerging it in oil. Instead, it uses rapid hot-air circulation to cook the surface and interior of your food efficiently. The result: crisp edges, browned surfaces, and tender centers—often with much less oil than deep frying.
The Simple Explanation: Heat + Fast Air
An air fryer works using two main things:
- A heating element (usually at the top) that produces high heat
- A powerful fan that pushes and circulates the hot air around the food
That moving hot air cooks the food evenly and helps create a crispy outside, similar to what you’d get from deep frying—just with far less oil.
What’s Inside an Air Fryer? (Beginner Breakdown)
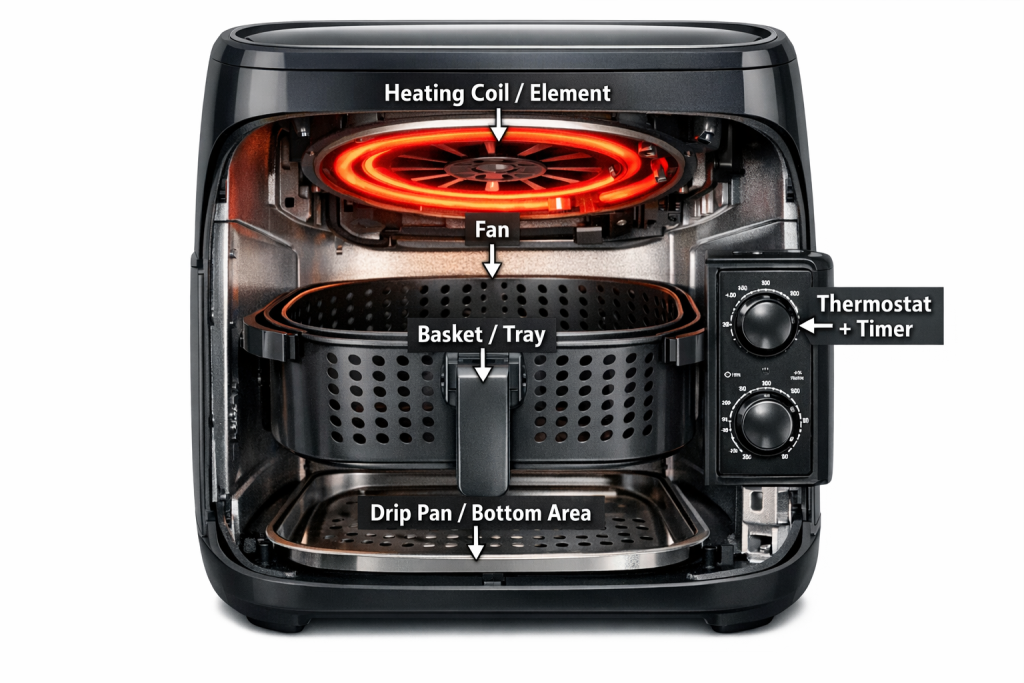
Most air fryers have these parts:
- Heating coil/element: Generates the heat
- Fan: Blows hot air around the cooking chamber
- Basket or tray: Holds food while allowing airflow underneath
- Drip pan / bottom area: Catches oil and crumbs
- Thermostat + timer: Controls temperature and cooking time
The basket design is important because it allows hot air to reach multiple sides of the food.
Why Does Food Get Crispy in an Air Fryer?
Crispiness happens mainly because:
- Hot air dries the surface of the food faster than a standard oven
- The heat encourages browning reactions (that golden “fried” look and flavor)
- A small amount of oil (even just a light spray) can boost browning and crunch
It won’t be identical to deep frying (since deep frying transfers heat differently), but for many foods it gets surprisingly close.
Air Fryer vs. Deep Fryer vs. Oven
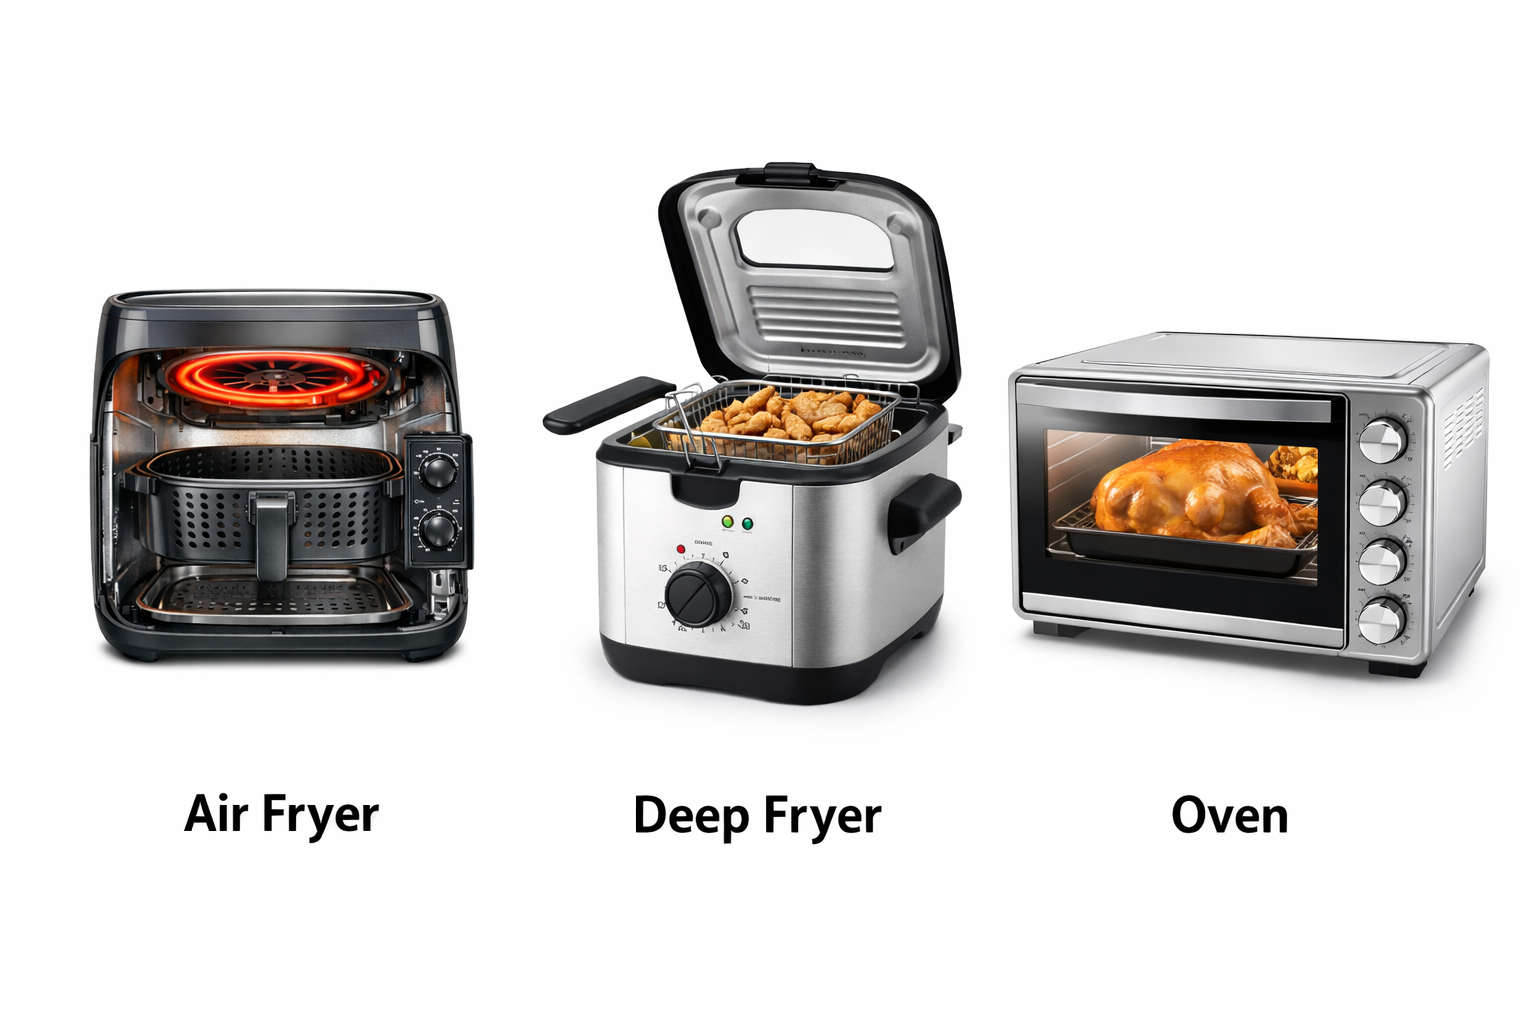
Air fryer vs deep fryer
- Deep frying uses hot oil to cook very fast and very crisp.
- Air frying uses hot air, so it’s typically less oily and easier to clean.
Air fryer vs oven
- Ovens cook with hot air too, but an air fryer circulates air more aggressively in a smaller space—so it’s often faster and crispier for smaller portions.
How to Use an Air Fryer (Quick Start)
If you’re brand new, here’s the basic flow:
- Preheat (optional but helpful): 2–5 minutes for better browning
- Add food in a single layer: Don’t crowd the basket
- Set temperature + time: Start modest, then adjust
- Shake/flip halfway: Helps even cooking
- Check early: Air fryers cook fast and vary by model
Tip: For most frozen foods (fries, nuggets), start around 180–200°C (356–392°F) and check a few minutes early.
Do You Need Oil in an Air Fryer?
Not always—but a little can help.
- For frozen, pre-oiled foods (like many frozen fries), you may not need extra oil.
- For fresh foods (like homemade potatoes or veggies), 1–2 teaspoons or a light spray can improve browning and texture.
Avoid heavy oil dumps—air fryers aren’t built for deep pools of oil.
Common Beginner Mistakes (And Easy Fixes)
- Overcrowding the basket: Leads to steaming instead of crisping
→ Cook in batches or use a rack if your model supports it. - Skipping the shake/flip: One side gets crisp, the other stays soft
→ Shake fries halfway; flip chicken pieces once. - Using wet batter: Drips and doesn’t “set” like deep frying
→ Use breading (crumbs/panko) or thicker coatings designed for air fryers. - Wrong oil choice: Some oils smoke at high temperatures
→ Use oils with higher smoke points (and use small amounts).
Is an Air Fryer Safe?
Yes—when used normally and safely.
Basic safety tips:
- Keep it on a stable, heat-safe surface
- Leave space around vents for airflow
- Don’t block the fan intake/exhaust
- Clean out grease and crumbs regularly to reduce smoke
- Use oven-safe accessories designed for your air fryer size
What Foods Work Best in an Air Fryer?
Great beginner-friendly picks:
- Frozen fries, hash browns, chicken nuggets
- Chicken wings, drumsticks (especially skin-on)
- Breaded foods (panko-coated items)
- Roasted veggies (broccoli, Brussels sprouts, carrots)
- Reheating pizza, pastries, and leftovers to make them crispy
Trickier foods:
- Very wet batter (tempura-style)
- Leafy greens (they fly around unless weighed down)
- Large roasts (space and airflow limits)
Quick Summary
An air fryer cooks food by blasting hot air around it in a compact chamber. That rapid airflow helps dry and brown the surface quickly, which is why foods get crispy with little oil. For best results, don’t overcrowd, shake halfway, and use a small amount of oil when needed.
]]>Breakfast Recipes
- Instant Pot Oatmeal: Oatmeal is a healthy and filling breakfast option that’s easy to make in the Instant Pot. Simply combine oats, water, and any toppings you like (such as fruit, nuts, and honey) in the pot and cook for a few minutes. The result is a creamy and delicious oatmeal that’s perfect for starting your day.
- Instant Pot Yogurt: Making your own yogurt at home is easy and cost-effective with the Instant Pot. Simply heat milk to a specific temperature, let it cool, add yogurt culture, and incubate in the Instant Pot for several hours. The result is a creamy and tangy yogurt that’s perfect for breakfast or as a snack.
Lunch Recipes
- Instant Pot Soup: Soup is a great option for lunch or dinner, and the Instant Pot makes it easy to cook up a big batch. Try making chicken noodle soup, tomato soup, or any other favorite soup recipe in the Instant Pot for a quick and easy meal.
- Instant Pot Pulled Pork: Pulled pork is a tasty and filling lunch option that’s easy to make in the Instant Pot. Simply season a pork shoulder with your favorite spices, add some liquid (such as chicken broth or barbecue sauce), and cook in the Instant Pot for a few hours. The result is tender and flavorful pulled pork that’s perfect for sandwiches or salads.
Dinner Recipes
- Instant Pot Chicken Curry: Curry is a flavorful and healthy dinner option that’s easy to make in the Instant Pot. Simply sauté chicken, onion, garlic, and curry powder in the pot, add some liquid (such as coconut milk or chicken broth), and cook on high pressure for a few minutes. The result is a fragrant and delicious curry that’s perfect served over rice.
- Instant Pot Beef Stew: Stew is a comforting and hearty dinner option that’s perfect for cold weather. Try making beef stew in the Instant Pot by sautéing beef, onion, and garlic, adding vegetables (such as carrots, potatoes, and celery), and cooking on high pressure for a few minutes. The result is a tender and flavorful stew that’s perfect served with crusty bread.
Dessert Recipes
- Instant Pot Cheesecake: Cheesecake is a delicious and indulgent dessert that’s easy to make in the Instant Pot. Simply mix together cream cheese, sugar, eggs, and vanilla, pour into a springform pan, and cook on high pressure for a few minutes. The result is a creamy and decadent cheesecake that’s perfect for special occasions.
- Instant Pot Rice Pudding: Rice pudding is a comforting and sweet dessert that’s easy to make in the Instant Pot. Simply combine rice, milk, sugar, and any other flavorings you like (such as cinnamon or vanilla) in the pot, and cook on high pressure for a few minutes. The result is a creamy and delicious rice pudding that’s perfect for a cozy night in.
Conclusion
The Instant Pot is a versatile and useful kitchen appliance that can help you make delicious and healthy meals with minimal effort. Whether you’re
]]>Basic Features of Air Fryers
You want an air fryer that makes all the food you crave. Most come between 5-10 quart sizes. It is best to get somewhat larger than you think you need just in case you need to cook for parties or events.
Presets are great because this makes it simple to cook the food. It adjusts the time and temperature for perfect food. You will also want to make sure that the buttons are responsive and easy to use.
Some air fryers only have a single cooking option of air frying while others can also roast, dehydrate, and rotisserie cook food. More options allow your air fryer to be more versatile, so try to get a model that can do more than simply air fry.
Consider what you can spend and try to get an air fryer in that price range. There are many models here, so you should have no problem finding an entry-level or premium model depending on your budget.
Why Cosori Air Fryers are better?
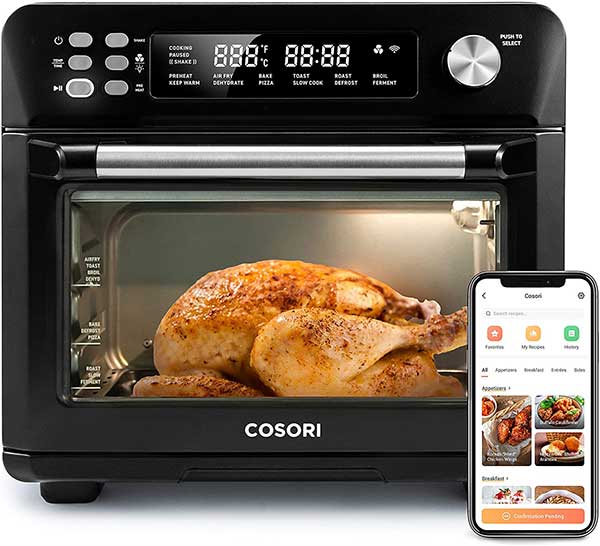
The Cosori air fryers are intended to easy to utilize. Furthermore, they are more secure for kids and older folks to use without the numerous dangers that other cooking units may have presented. What is more, it implies that whoever does most of the cooking in your home will profit by straightforward controls and a less upsetting cooking experience in general. The control board on Cosori air fryers shifts somewhat between models.
It does consistently offer more preset catches than some other brand available. What is more, Cosori air fryers are the entirety of our number one nourishments like bacon, chicken, steak, frozen food sources, vegetables and bread. For everyday cooking, anybody new to cooking or the individuals who are too occupied to even consider spending hours perusing cook books, the Cosori Air Fryer is the ideal decision.
Cosori fryers can preheat, fry, cook, barbecue and heat consummately and they are celebrated for continually creating firm food that has the pan fried flavor we love. Furthermore, you can cook scores of various plans in Cosori air fryers and expect scrumptious food without fail. The container and plate are square formed which is the better than the fryers with a round plan, as they give additionally cooking space. Also, as one layer cooking is vital, this is a significant that you are choosing which size of fryer is best for your requirements. The square plan makes the crisping container simpler to slide in or out.
Cosori air fryers are amazingly mainstream since they make fresh and crunchy food. They have a square plan for ideal use. While this plan may not look incredible, it guarantees you can undoubtedly slide the crisping crate in and out without hitting the fryer. These are valuable air fryers that are extraordinary for many plans.
Cosori air fryers have extraordinary control boards with loads of presets more than some other brand. There are catches for steak, chicken, bacon, bread, frozen food, vegetables, thus considerably more than others. In the event that you need an air fryer that takes out the mystery, at that point this is it.
Cosori and Ninja air fryers comes down to the control board while choosing the right air fryer. The two of them have comparative cooking execution, Cosori has bunches of presets that Ninja does not wave. Cosori makes it easy to prepare any food you need.
While the Cosori control board differs relying upon the model, they offer more preset catches than its rivals. Thusly, anybody can cook their number one nourishments including chicken, steak, vegetables, bacon, frozen food sources, and bread items.
Far and away superior, the Cosori air fryer is an ideal decision for everyday cooking or individuals who do not very much want to go through hours perusing recipebooks. These models can heat, barbecue, cook, and fry impeccablywhich makes them searched after for making firm food with a southern style flavor.
Also, it can cook a wide scope of plans with a flavorful taste without fail. Further, they accompany a square molded plate and bushel which offer more cooking space than the round plans.
Why Ninja Air Fryers are better?
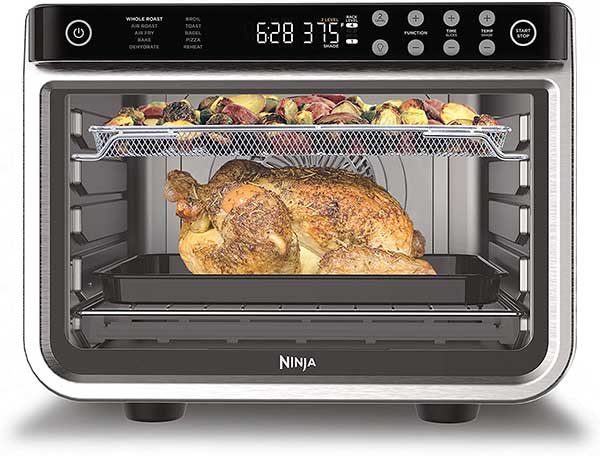
The Ninja Air Fryer has a super straightforward control board and no presets. So this is maybe intended for more experienced cooks, who are open to utilizing the air-fryers’ cook book. The formula book that accompanies the Ninja air-fryer range is awesome, simple to follow and very much idea out, so whatever you need to realize will be covered. Nonetheless, there are a few cooking alternatives including air frying, simmering and rewarming. Furthermore, an uncommon reward for the individuals who are enthusiastic about drying out food, the Ninja air fryer is an amazing parchedness unit. So that gives it huge preferred position over the Cosori air fryers for certain buyers.
Ninja air fryers are ground breaking and can prepare firm food uniformly and rapidly. Not exclusively will your food have that delightful crunch, all that will be done quickly. Regardless of whether you are making chicken, steak, or vegetables with your air fryer, you can anticipate incredible outcomes in short times.
The control board is very straightforward. You just need to essentially change the time and temperature and you are all set. In the drawback segment, you can see the issue with the control board, in the event that you need basic controls, at that point the Ninja air fryer is the best approach.
Ninja is a top level competitor for crispiest food. It is essentially in a dead heat with Ninja versus Cosori air fryers.
The Ninja air fryer offers a basic control board with no presets by any stretch of the imagination. Accordingly, it is best utilized by more experienced cooks who have no issues utilizing the formula book included.
The easy recipe book is anything but difficult to follow point by point, and very much idea out and incorporates all things needed to set up a rich dish. Something else to like about this Ninja air fryers is its numerous cooking alternatives including rewarming, simmering, air singing, and frying.
That is not all; they highlight an additional capacity that proves to be useful for the individuals who love getting dried out nourishments. Being an incredible parchedness machine gives it an edge over certain models from Cosori.
Drawbacks of Corosi Air Fryers
The manual settings alternative is not the best. What is more, numerous clients discover the temperature and clock closes simple to misunderstanding until they become accustomed to the manner in which they are set in the control board. Furthermore, air singing necessitates that you open the crate and give the food either a shake or a turn during the cooking cycle.
At the point when eliminate the crate on the Cosori air fryer, the clock delays which is something to be thankful for as you would prefer not to need to continually reconstruct the time and temperature. In any case, when you close the gadget to keep cooking, it generally adds moments to the cooking time. So, you should know about that and make any vital time changes if it influences the food you are getting ready.
The presets are incredible, yet the manual choices leave a bug to be wanted. The time and temperature catch can be befuddling and most clients will hit some unacceptable catch when they initially get this unit. You will become accustomed to it yet it takes longer than it should.
The clock can be lost in the event that you open the container to shake the fixings which you will have to do with most models; it is exactly how air fryers work. The clock will stop when you open the bushel, however then it will start timewhen you close the crate. This can lose the circumstance a piece, so it is better to attempt to change.
We return to the control board. Regarding presets, Cosori are the chosen champ. In any case, here we find that Ninja has much better manual controls and the clock does not have issues when the container is eliminated.
One of this current model’s significant disadvantages is its manual settings, which is not generally astounding contrasted with other top brands. With Cosori models, clients will in general mistake the clock and temperature catches until they acclimate themselves with the control board arrangement.
Drawbacks of Ninja Air Fryers
The main genuine burden to the Ninja is its absence of pre-set catches. This presumably limits its allure for less experienced cooks who like the choice of brisk frozen food suppers that you can fly in, set and fail to remember.
The control board is basic and truth be told that there are no presets. You can pick between other cooking strategies like simmering or drying out but there are no choices for air broiling chicken or whatever else. You will need to depend on the formula book for the correct time and temperature. That being stated, the formula book is exhaustive and this should be simple.
As far as Ninja versus Cosori, this loses hard with regards to presets. While Cosori battles with manual controls, it is lord with presets. Cosori will in general have a number of presets.
For Ninja air fryers, the absence of preset catches was a genuine burden. Thusly, it probably will not be a smart thought to choose the less experienced cooks, particularly if you love to have set and fail to remember alternatives with snappy frozen nourishments.
Cosori Vs Ninja Air Fryers – What We Think!
There are many excellent air fryers on offer at present, and all have been designed to fit the exact requirements of a wide range of customers. Therefore, before selecting which is the best model for your needs, you should think about why will be using the air fryer. You may have a household in which family of all ages like to prepare snacks and meals, and this would suit an air fryer with plenty of easy-to-use preset buttons. On the other hand, if your cooking style often involves new recipes, which need precise temperatures and timing, then an air fryer with more emphasis on manual controls may be a better choice.
For simplicity of cooking day-to-day favorites, and frozen foods, you would usually deep-fry and the Cosori Air-Fryer is certainly the best option. Cooking with between 10-20 presets owing to its quantity of presets. It has an automatic switch-off function for extra safety. It is not as good as the Ninja as far as the manual control panels go, but that is not to say. People soon get over their initial confusion and use it with ease.
On the other hand, the Ninja Air-Fryer offers useful cooking options like air fry, roast, re heat and dehydrate, which gives it an advantage for keen food dehydrators. It has more emphasis on manually controlled cooking where you use a recipe to tell you the optimal temperature and cooking time. But there are more than a 100 recipes in the manual. And it is easier to pause when you remove food for shaking or turning without having to adjust the timer. So we would say this has greater utility for more easy and delicious cooks.
Air fryers give you crispy and crunchy food like from a deep fryer but they use significantly less oil than true deep fryers. If you are thinking about your weight but do not want to lose out on crispy food, then you need an air fryer.Plus, they are so simple and versatile that everyone should have one.
You would be hard-pressed to find any food that is as delicious as fried food. And yes, we definitely respect the pleasures of barbecue. Unfortunately, food that is fried usually has plenty of oil too. There is a workaround though. Air fryers can cook food that tastes deep-fried without the need to add oil or grease. That also means when you are using them to prepare meals, cleaning up is a snap.
It is not easy to say who wins here because each brand designs its models to suit different cooking purposes. Ninja offers the best manual controlled cooking experience while Cosorihave tons of preset for easy cooking. Both brands are impressive; now it is up to you to decide based on your preference and needs.
]]>- Pressure Cook
- Slow Cook
- Rice Cook
- Saute/Browning
- Yogurt Making
- Steaming
- Keep Warm
- Cake Maker
- Egg Cooker
- Sterilizer
Some models may have additional functions such as a sterilization mode or a custom programming feature. It’s important to consult the user manual for your specific model to understand all the functions available and how to use them.
Pressure Cook function
The Pressure Cook function in an Instant Pot Electric Pressure Cooker uses high-pressure steam to cook food quickly and efficiently. When you select this function and set the cooking time, the Instant Pot will heat up and create steam inside the sealed cooking pot. As the pressure builds up, the temperature inside the pot also increases, allowing the food to cook faster.
The pressure cooking process is different from traditional cooking methods because it uses a sealed environment to trap the steam and heat. This means that less water is needed to cook the food, and the flavors and nutrients are retained in the food rather than escaping into the air or water. Additionally, because the cooking time is shorter than traditional methods, the food retains more of its natural texture and color.
Once the cooking time has elapsed, the Instant Pot will beep to let you know that it’s finished. You can release the pressure manually by turning the pressure release valve, or let it release naturally over time. With the Pressure Cook function, you can cook a wide variety of foods, including grains, beans, soups, stews, meats, and vegetables. It’s a convenient and efficient way to prepare healthy and delicious meals in a fraction of the time compared to traditional cooking methods.
Slow Cook function
The Slow Cook function in an Instant Pot Electric Pressure Cooker allows you to cook food at a low temperature for an extended period of time, just like a traditional slow cooker. When you select this function and set the cooking time, the Instant Pot will heat up and maintain a constant low temperature to cook the food slowly and evenly.
The Slow Cook function works by using a combination of low heat and steam to cook the food. Because the Instant Pot is well insulated, the heat is evenly distributed throughout the cooking pot, resulting in tender and flavorful meals. This function is particularly useful for tough cuts of meat that require long cooking times to break down the connective tissue and become tender.
One of the advantages of using the Slow Cook function in an Instant Pot is that it’s programmable, which means that you can set the cooking time and then leave it to cook without needing to watch it constantly. Once the cooking time has elapsed, the Instant Pot will automatically switch to the Keep Warm function, which maintains the temperature of the food until you’re ready to serve it.
The Slow Cook function is a great option for preparing stews, soups, chili, and other one-pot meals. It’s a convenient and easy way to cook delicious and healthy meals with minimal effort.
Rice Cook function
The Rice Cook function in an Instant Pot Electric Pressure Cooker allows you to cook rice quickly and easily with perfect results every time. When you select this function, the Instant Pot will adjust the temperature and cooking time based on the amount of rice and water you’ve added to the pot.
The Rice Cook function works by using a combination of pressure and steam to cook the rice. Once you’ve added the rice and water to the pot, you’ll need to close the lid and select the Rice Cook function. The Instant Pot will then heat up and create pressure inside the pot, which helps to cook the rice faster and more evenly.
As the rice cooks, the Instant Pot will monitor the temperature and pressure inside the pot to ensure that the rice is cooked to perfection. Once the cooking time has elapsed, the Instant Pot will switch to the Keep Warm function, which maintains the temperature of the rice until you’re ready to serve it.
The Rice Cook function is ideal for cooking all types of rice, including white rice, brown rice, and wild rice. It’s a convenient and easy way to prepare rice for any meal, and because the Instant Pot is a sealed environment, you won’t need to worry about the rice boiling over or sticking to the pot. Overall, the Rice Cook function is a great addition to any kitchen, and it can save you time and effort when cooking rice.
Saute/Browning function
The Sauté/Browning function in an Instant Pot Electric Pressure Cooker allows you to brown or sauté ingredients directly in the cooking pot, which can help to develop rich flavors and textures in your dishes. When you select this function, the Instant Pot will heat up and allow you to sauté ingredients at different temperature levels.
The Sauté/Browning function works by heating the cooking pot from the bottom, allowing you to sear or brown meats, onions, garlic, and other ingredients directly in the pot. This function is particularly useful when you want to create a flavor base for soups, stews, or chili, or when you want to sear meats before pressure cooking.
To use the Sauté/Browning function, you’ll need to add oil or butter to the cooking pot and then select the appropriate temperature level. The Instant Pot will then heat up and allow you to sauté your ingredients until they’re browned and fragrant. Once you’ve finished sautéing, you can switch to another function, such as Pressure Cook or Slow Cook, to continue cooking your meal.
The Sauté/Browning function is a versatile and convenient way to add flavor and texture to your dishes. It’s a great option for creating one-pot meals, and because the Instant Pot is a sealed environment, you won’t need to worry about losing any of the flavor or nutrients during the cooking process. Overall, the Sauté/Browning function is a useful tool for any home cook, and it can help to elevate the flavor of your favorite recipes.
Yogurt Making function
The Yogurt Making function in an Instant Pot Electric Pressure Cooker allows you to make homemade yogurt quickly and easily. When you select this function, the Instant Pot will heat the milk to a specific temperature and maintain it for a set period of time, allowing the milk to ferment and turn into yogurt.
The Yogurt Making function works by heating the milk in the Instant Pot and then cooling it to the appropriate temperature for adding the yogurt culture. Once the culture is added, the Instant Pot will maintain a consistent temperature to allow the yogurt to ferment and thicken. The length of time needed for the yogurt to set will depend on the type of culture used and personal preference.
To use the Yogurt Making function, you’ll need to add milk to the Instant Pot and select the appropriate temperature setting. Once the milk has been heated and cooled to the right temperature, you’ll need to add the yogurt culture and mix it well. After that, the Instant Pot will maintain the temperature for several hours, during which time the milk will ferment and turn into yogurt.
The Yogurt Making function is a great option for anyone who enjoys homemade yogurt or wants to control the ingredients in their yogurt. It’s a convenient and easy way to make fresh yogurt at home, and because the Instant Pot maintains a consistent temperature, you won’t need to worry about the yogurt setting properly. Overall, the Yogurt Making function is a useful tool for any home cook who wants to experiment with homemade yogurt.
Steaming function
The Steaming function in an Instant Pot Electric Pressure Cooker allows you to steam vegetables, seafood, and other foods quickly and easily. When you select this function, the Instant Pot will generate steam to cook the food in a sealed environment, which helps to retain nutrients and flavors.
The Steaming function works by adding water to the Instant Pot and then placing a steamer basket or tray on top of the water. You can then add the food you want to steam to the basket or tray and select the appropriate cooking time. The Instant Pot will then generate steam to cook the food to perfection.
As the food steams, the Instant Pot will monitor the temperature and pressure inside the pot to ensure that the food is cooked evenly and thoroughly. Once the cooking time has elapsed, you can release the pressure and remove the food from the Instant Pot.
The Steaming function is a healthy and convenient way to cook vegetables, seafood, and other foods. It’s a great option for anyone who wants to add more steamed dishes to their diet or who wants to cook quickly and easily in a sealed environment. The Instant Pot also makes it easy to clean up after steaming, as you can simply remove the steamer basket or tray and wash it in the sink. Overall, the Steaming function is a useful tool for any home cook who wants to experiment with healthy and flavorful cooking.
Keep Warm Function
The Keep Warm function in an Instant Pot Electric Pressure Cooker allows you to keep your food warm after it has finished cooking. When you select this function, the Instant Pot will maintain a consistent temperature to keep your food at a safe and warm temperature until you’re ready to serve.
The Keep Warm function works by automatically reducing the temperature of the food once it has finished cooking, while still keeping it warm enough to prevent bacterial growth. This function is particularly useful when you’re serving a meal buffet-style or when you need to keep food warm while you prepare other dishes.
To use the Keep Warm function, you’ll need to ensure that your Instant Pot is in the correct mode and that the Keep Warm function is activated. The Instant Pot will then maintain the temperature of the food until you’re ready to serve.
It’s important to note that while the Keep Warm function can help to keep your food warm and safe to eat, it’s not designed to reheat or cook your food. If you need to reheat your food, you’ll need to use a different function, such as Pressure Cook or Reheat.
Overall, the Keep Warm function is a useful tool for anyone who wants to keep their food warm and safe to eat for a longer period of time. It’s a great option for anyone who wants to serve their meals buffet-style or who needs to keep food warm while they prepare other dishes.
Cake Maker function
The Cake Maker function in an Instant Pot Electric Pressure Cooker allows you to bake cakes quickly and easily. When you select this function, the Instant Pot will generate heat and pressure to create a moist and fluffy cake in a fraction of the time it would take to bake in an oven.
The Cake Maker function works by adding the cake batter to a cake pan or silicone mold and placing it in the Instant Pot. The Instant Pot will then generate heat and pressure to cook the cake evenly and thoroughly.
The Cake Maker function is designed to create a moist and fluffy cake, similar to a traditional oven-baked cake. However, because the Instant Pot generates heat and pressure, the cake will cook more quickly and may have a slightly different texture than an oven-baked cake.
To use the Cake Maker function, you’ll need to follow a cake recipe designed for use with an Instant Pot. Most Instant Pot cake recipes will require you to add the cake batter to a cake pan or silicone mold and place it in the Instant Pot with a trivet or other elevation device. You’ll then select the Cake Maker function and set the appropriate cooking time.
Overall, the Cake Maker function is a convenient and easy way to bake cakes in an Instant Pot Electric Pressure Cooker. It’s a great option for anyone who wants to bake a cake quickly or who doesn’t have access to an oven. The Cake Maker function can also be a fun way to experiment with new cake recipes and techniques.
Egg Cooker function
The Egg Cooker function in an Instant Pot Electric Pressure Cooker allows you to cook eggs quickly and easily, whether you want hard-boiled eggs, soft-boiled eggs, or even steamed eggs. When you select this function, the Instant Pot will generate heat and pressure to cook the eggs to perfection.
The Egg Cooker function works by adding water to the Instant Pot and then placing the eggs in a steamer basket or on a trivet above the water. You can then select the Egg Cooker function and set the appropriate cooking time depending on the type of eggs you want to cook.
The Instant Pot will then generate heat and pressure to cook the eggs evenly and thoroughly. Once the cooking time has elapsed, you can use the quick release method to release the pressure and then remove the eggs from the Instant Pot.
The Egg Cooker function is a great option for anyone who wants to cook eggs quickly and easily. It’s also a convenient way to cook large batches of eggs at once, which can be especially useful for meal prep or when cooking for a crowd.
Overall, the Egg Cooker function is a useful tool for any home cook who loves eggs. It’s a great option for anyone who wants to cook eggs quickly and easily in a sealed environment, and it can help you achieve consistent and perfectly cooked eggs every time.
Sterilizer function
The Sterilizer function in an Instant Pot Electric Pressure Cooker allows you to sterilize baby bottles, utensils, and other items quickly and easily. When you select this function, the Instant Pot will generate heat and pressure to create a sterile environment that kills bacteria and other harmful microorganisms.
The Sterilizer function works by adding water to the Instant Pot and then placing the items you want to sterilize in the pot. You can then select the Sterilizer function and set the appropriate cooking time depending on the type of items you’re sterilizing.
The Instant Pot will then generate heat and pressure to create a steamy environment that sterilizes the items by killing bacteria and other harmful microorganisms. Once the sterilization process is complete, you can use the quick release method to release the pressure and then remove the items from the Instant Pot.
The Sterilizer function is a great option for parents with young children, as it allows them to quickly and easily sterilize baby bottles, pacifiers, and other items. It’s also useful for anyone who wants to sterilize kitchen utensils or other items that come into contact with food.
Overall, the Sterilizer function is a convenient and easy way to sterilize items in an Instant Pot Electric Pressure Cooker. It’s a great option for anyone who wants to ensure that their items are free of harmful bacteria and other microorganisms.
Conclusion
The Instant Pot Electric Pressure Cooker is a convenient and easy-to-use kitchen appliance that can help you save time and energy in the kitchen. Its versatility and ease of use make it a great option for busy home cooks who want to prepare healthy and delicious meals without spending hours in the kitchen.
]]>Ingredients:
- 1/2 gallon of milk (whole, 2%, or skim)
- 2 tablespoons of plain yogurt with live active cultures
- Optional: sweeteners, flavorings, or fruit for serving
Equipment:
- Instant Pot electric pressure cooker
- Thermometer
- Whisk
- Measuring cups and spoons
- Strainer and cheesecloth (optional)
Instructions:
- Prepare the Instant Pot: Begin by making sure your Instant Pot is clean and ready to use. Remove the inner pot and wash it thoroughly with soap and water. Rinse it with hot water and dry it completely.
- Heat the milk: Pour the milk into the Instant Pot, and select the “Yogurt” function. Press the “Adjust” button until the display reads “Boil.” Let the Instant Pot heat the milk until it reaches a temperature of 180°F. This will take about 30 minutes.
- Cool the milk: Once the milk has reached 180°F, remove the inner pot from the Instant Pot and let it cool down to 110°F. You can speed up the cooling process by placing the inner pot in an ice bath or running it under cold water.
- Add the yogurt starter: Once the milk has cooled down to 110°F, whisk in the 2 tablespoons of plain yogurt. Make sure the yogurt is at room temperature and has live active cultures. Whisk the milk and yogurt until well combined.
- Incubate the yogurt: Return the inner pot to the Instant Pot and close the lid. Press the “Yogurt” button again and adjust the time to 8-10 hours, depending on how tart you like your yogurt. The longer you incubate the yogurt, the tangier the yogurt will be. .
- Check the yogurt: After the incubation period, open the Instant Pot and check the yogurt. It should be thick and creamy, with a slightly tangy taste. If the yogurt is too runny, you can strain it to remove the excess whey.
- Strain the yogurt (optional): To strain the yogurt, place a fine-mesh strainer over a bowl and line it with cheesecloth. Pour the yogurt into the strainer and let it drain for 1-2 hours, or until it reaches your desired consistency. The longer you strain the yogurt, the thicker it will become.
- Chill and serve: Once the yogurt has reached your desired consistency, transfer it to a container and chill it in the refrigerator for at least 2 hours before serving. You can serve the yogurt plain, or add sweeteners, flavorings, or fruit to create your own custom blend.
Tips and tricks:
- Use high-quality milk: The quality of the milk you use will affect the flavor and texture of your yogurt. Choose fresh, high-quality milk with no additives or preservatives.
- Use a thermometer: Accurately measuring the temperature of the milk and yogurt starter is essential for successful yogurt-making. Use a thermometer to ensure that the milk is heated to 180°F and cooled down to 110°F before adding the yogurt starter.
- Use a yogurt starter with live active cultures: The yogurt starter you use should contain live active cultures, which are necessary for fermenting the milk and creating yogurt. Look for
Why make yogurt in an Instant Pot?
Making yogurt at home has become a popular trend in recent years, as more people look for ways to eat healthier and save money. One method that has gained a lot of attention is making yogurt with an Instant Pot. The Instant Pot is a multi-functional kitchen appliance that can be used for a variety of cooking methods, including making yogurt. One of the biggest advantages of using an Instant Pot for yogurt-making is the temperature control feature. The Instant Pot has a yogurt setting that can maintain a constant temperature ideal for yogurt-making, eliminating the need for a separate yogurt maker or the need to constantly monitor the temperature manually. This makes the process more convenient and efficient. Another benefit of making yogurt with an Instant Pot is the consistency. The consistent temperature and longer incubation period in the Instant Pot can lead to a thicker and creamier yogurt, which can eliminate the need for added thickeners or stabilizers. Additionally, making yogurt with an Instant Pot can be cost-effective, as it can be much cheaper than buying yogurt from the store, especially if you eat it frequently. You can also customize your yogurt by using different types of milk, adding flavors or sweeteners, or adjusting the incubation time to achieve the desired consistency.
Finally
Homemade yogurt can be a healthy option as it contains probiotics that are good for gut health. By making it yourself with an Instant Pot, you can ensure that there are no added preservatives, artificial flavors, or sugars, making it a delicious and healthy addition to your diet.
Following several methods, you can cook chips in an air fryer. In this comprehensive guide on how to make perfect air fryer chips, I will share the easiest and tastiest method of all.
Let’s explore!
How to Make Perfect Air Fryer Chips?
Making perfect air fryer chips is so effortless. Read the below steps and follow them meticulously to enjoy tasty chips.
Required Ingredients:
The below ingredients are necessary to make tasty and flavorful air fryer chips. Gather them prior to the cooking process.
Air Fryer: You can buy a premium quality air fryer of brands including Phillips, Black-Decker, NuWave, GoWise, Bella, Secura Electric, etc. from the market. All air fryer models are not the same. Although the chip-making process is the same for all models, the temperature and time settings can vary. Adjust them according to your cooking process, and keep an eye on the chips during cooking.
Potatoes: Not all potatoes will give you crispy chips. Maris Piper, Roaster, and King Edward are the best potatoes to make chips. How many potatoes to take, relying on 2 factors, 1) potato size, 2) the number of people.
Oil: Wondering to see oil in the ingredients list? Well, we know that an air fryer can cook chips without oil, but I believe the taste will be much better if you use a minimum of a few sprays. Use a spray bottle to apply oil, and don’t use too much. A low-calorie oil would be a great choice. Besides, you can add water and little oil to a bottle and spray it.
Seasoning: Seasoning them will be a good idea after spraying oil on the chips. In his case, smoked paprika can be the best option.
Colander/Saucepan/Bowl: Soaking the chopped potatoes in cold water for 30 minutes is beneficial. This will help the potatoes to remove additional starch from them. You can also rinse them in cold water. I used both processes and got the same result every time. So, I can’t tell the difference between these 2 methods. However, I prefer following the rinsing method as it is quicker.
Kitchen Roll/Tea Towel: Potatoes need to pat dry after washing. Use a clean tea towel or kitchen roll. Both are a good choice.
Step by Step Process
Step 01: Potatoes Preparing
How do you love your chips? Only peeling, or do you want to give them a good scrub and remove the skin? It all depends on your personal preference. You can slice the potatoes thin like French fries or make them thick like regular chips.
A slicer or chopper is a good option if you decide to slice them. If you don’t have these 2 items, use a sharp knife.
Thinner chips usually get cooked more quickly than thicker chips. They can burn if you don’t check the thin chips during cooking. So, it would always be best to check the potatoes in the middle of the cooking process.
After cutting, put them in a bowl and rinse them well.
Step 02: Preheating the Air Fryer
This is not a mandatory step. Avoiding it will not affect the taste of the chips. However, preheating will help you cook the chips quickly. I recommend you preheat the air fryer to 400F.
Step 03: Washing
As stated earlier, I usually don’t soak the potatoes in cold water. I prefer washing them thoroughly. This way, any excess starch will get removed from the potato.
Once washing is finished, place the potatoes in a tea towel or kitchen paper and pat them to dry.
Step 04: Oil Spraying
You can go oil-free or use oil; the decision is up to you. Choose low-calorie oil to spray. While spraying, toss the potatoes to make sure oil is covering all of them.
Step 05: Seasoning
Sprinkle your favorite seasoning. You can experience different herbs and spices. Try curry powder, paprika, or simply pepper or salt.
Step 06: Transferring to Air Fryer
Now put the prepared potatoes in the air fryer basket. Set the cooking time to 20 – 15 minutes. After 0 minutes, check the quality of the cook. Remember to give them a good shake. If you need to spray a little more oil, do it without hesitation.
After 25 minutes, if the potatoes are not cooked perfectly, pop them back into the basket and give them a few more minutes.
I suggest you put less chips into the basket at once. Thus, cooking time will be a little less, and you must cook in several batches. If you put all chips in a single batch, the hot air of the air fryer can’t pass through every portion of the chips. Thus, the quality of the food will be poor.
Once all the batches are completed, place all potatoes in a single batch and run the air fryer for a few minutes. This way, the chips will remain warm when served.
FAQ
What to serve with air fryer chips?
I love to serve air fryer chips with mayonnaise, creamy dill sauce or aioli. The creamy dill sauce has to be homemade for the best taste. My favorite when serving air fryer chips is tomato sauce or spicy sauce.
Are air fryer chips crispy?
Yes, definitely. As long as you follow the right process of cooking, the air fryer chips are crispy. Remember not to overcrowd the basket, and periodic shake is necessary.
What is the best temperature for air fryer chips?
400F is a good temperature for cooking crispy air fryer chips.
Are air fryer chips without oil any good?
Happily, YES. When air fryer chips are cooked without oil, they will be much healthier yet still taste yummy. Moreover, without oil, you won’t have to spend much time cleaning the air fryer. Also, the air fryer will remain smell-free and grease-free.
Final Thought
So, isn’t the process of how to make perfect air fryer chips so simple? You don’t have to be a professional to cook crispy chips in the air fryer. The secret is to keep the potatoes dry as much as possible, don’t overcrowd the air fryer basket, and check them halfway through the cooking process. Following the above simple steps, you can make perfect air fryer chips.
]]>But, no worries, walk through this comprehensive guide to enjoy the beauty of quick-cooking without oil. Also, I will share a few tips and tricks to let you cook yummy foods.
How to Use an Air Fryer?
Air fryers can produce tasty food when you follow the proper cooking process. Carefully follow the below headings.
Keep the Basket Less Crowded
Always keep the food in a single layer inside the air fryer basket. This way, the food will be crispier. At the same time, even cooking will be confirmed. Cook in several batches as needed.
Right Temperature is the Key
The thumb rule for selecting the right temperature is, set the temperature at least 25° F less than you would use when cooking in an oven. Moreover, your air fryer should consist of a recommended temperature list for specific foods. You can also follow the recipe from a trusted source.
Check the Progress of the Food
There is a misconception that checking the progress of the food during the cooking process is not good. But the reality is, you can do this, and it is ok to pull the basket out.
Flip or Shake the Food for Even Cooking
When cooking French fries or Brussels sprouts, shake the food halfway through to promote browning and even cooking. Also, remember to flip pork chops or chicken about halfway through to ensure proper cooking.
Dry Foods Perfectly to Make Them Crispy
You may end up with soggy foods if the food contains moisture before cooking. Use paper towels or clean kitchen towels to pat the food. The towel will soak the moisture, and you will get crispy food.
Air Frying Presets
The good news is that most air fryers have preset functionality for common foods. You must use the function appropriately when cooking time and temperatures are preset. However, I always prefer using a manual setting instead of the presets. This way, I can control the temperature and cooking time according to the food type.
How to Preheat an Air Fryer?
Well, many people think to preheat the air fryer before cooking. But the reality is, it depends.
Check your air fryer instruction manual before cooking. If it says to preheat the appliance, preheat without hesitation.
Preheating will help you cook properly. However, you might wonder, what if I don’t preheat my air fryer? The cooking process will be a little longer than usual.
Truly, I don’t usually preheat my air fryer. Food items like Brussels sprouts, Broccoli, etc., get brownish on the edges quickly and take time to become tender in the center. I usually start cooking this type of food in a cold air fryer.
How to Reheat in an Air Fryer?
Want to get the crispiness back of French fries and pizza? Use an air fryer without thinking twice. An air fryer takes only a few minutes to reheat foods. Remember to set the temperature at least 30° F less than you would use when cooking in an oven.
How to Reheat Pizza in an Air Fryer?
Air fry the pizza for a minimum of 3 minutes and a maximum of 5 minutes. Temperature settings would be 320° F. Make sure to place the pizza in a single layer. Thicker crusts will take a longer time to get reheated than thinner crusts.
How to Reheat French Fries in an Air Fryer?
Air fry the French fries for a minimum of 3 minutes and a maximum of 5 minutes. Temperature settings would be 350° F. Shake the air fryer basket after 2 minutes. Single-layer will be the best option to get crispier French fries.
Secret Tips to Keep in Mind
- Don’t keep the Grate Out of the Basket: The grate allows hot air to circulate throughout the food layers. Also, oil can’t sit on the food items.
- Air Fryer Creates Noise: When air fryers operate, you will hear a whirring sound.
- Shuffling the Food is Necessary: Without shuffling the basket every few minutes, you will not get even brownish food.
- You can Remove the Basket When the Food is Ready: The good news is that you won’t have to worry about shutting an air fryer off because it turns off itself when you remove the basket.
- Place the Basket Perfectly: Perfect placing of the basket is mandatory. Otherwise, the air fryer will not work or turn on.
- Cooking Time Depends on the Amount of the Food: You might have seen the temperature setting and cooking time of specific food in your air fryer manual. However, the thumb rule is that if you want faster cooking time, load the air fryer with less food. On the other hand, more food will take more time to cook.
- Lower Temperature will be Ideal: Most air fryer recipes need less temperature settings than their conventional rivals. Here the point is that air fryers get hot quickly and move the hot air within the layers of the food faster. So, setting it to a lower temperature will keep the food free from getting too crispy or dark on the outside. This will also ensure proper cooking inside.
Summing Up
Congratulations! Now you know how to use an air fryer. Whether you want to cook potato chips, French fries, healthier vegetable options, or traditional fried foods, air fryers are much more efficient in frying different food items.
However, the most important thing is ensuring air fryers’ right usability. If you don’t know the correct working procedure, you won’t get the best benefit from the air fryer.
Happy air frying!
]]>But if you are using an air fryer for the first time, you might be wondering how does an air fryer work. The same question also popped into my mind when I used air fryers for the first time.
Let’s learn the working mechanism of the air fryer by reading this comprehensive guide.
How Does an Air Fryer Work?
Technically, the working process of an air fryer is straightforward. Toss the food in the air fryer basket, turn the appliance on, and you will get quickly cooked food.
Air fryers consist of the below parts,
- A drawer where you will place the food
- A grate or basket which holds the food inside the drawer
- An element for heating
- A fan
- Controllers in the front of the air fryer
Learning about the parts will help you understand the working mechanism of the air fryer.
Cooking Process:
The most important thing you need is that air fryers don’t actually fry your food. According to the definition, frying is when food is cooked in hot oil. It means frying requires oil where the oil completely surrounds the food.
These appliances copycat the deep-frying mechanism when it comes to the air fryer. In the case of the deep fryer, the oil surrounds the food and touches every surface. Due to this reason, deep-fried food items are crispy.
On the other hand, the functionality of an air fryer is quite similar to a convection oven. After setting the temperature, you will need to put the food into the cooking drawer. Hot air gets created by the heating elements. Then, the air circulates through the entire surface of the food with the help of the fan.
Interestingly, for the air fryer, you will require the utmost minimal or no oil. More importantly, air-fried foods are always crispy and browned.
It would be best to think that the air fryer is basically turbocharged roasting. Using an air fryer at a low temperature, you can quickly reheat leftover foods. Additionally, frozen food can easily be defrosted with air fryers since this appliance evenly cooks different food items.
Are Air Fryers Convenient?
Well, it is obvious that the convenience of a kitchen appliance always matters.
When using an air fryer, the first thing which will disappoint you is its capacity. Since air fryers perform the following convection method, an adequate amount of space is a must so that air can circulate evenly around the food. This means, in order to get crispy and browned food, you will be unable to fill the basket up fully. Therefore, you will have to cook in small batches.
However, this is not a problem unless you must air fry foods for 2 persons. Cooking time is also important in this case. With 30 minutes of cooking time, air frying food for 2 people is good enough.
Air fryers are a deal-breaker for reheating previously fried foods. Crispy food items can become soggy if you reheat them using the microwave or the oven. Convection methods of air fryers keep crispy food items as much as crispy as they were before. Don’t you think this reason is enough to buy an air fryer?
Happily, a few models are available for large families. You can air fry more food in a single batch with these models.
The decision entirely relies on your personal preference. If the capacity doesn’t satisfy you, the reheating performance of an air fryer will surely astound you and insist you buy one.
Is it Worth having an Air Fryer?
The straightforward answer is, yes, air fryers are worth the price. Air fryers are easy to use. The cooked foods are flavorful, tasty, and yummy.
Air fryers are available in a wide range of models and designs. Before buying an air fryer, it is vital to learn the features of different models. Otherwise, you will be unable to get the most out of your selected model.
Generally, air fryers cook vegetables faster compared to the oven since they cook in smaller batches. Moreover, adding so much food to an air fryer will not be a good idea since the food quality will be bad.
While, if you need to cook food for many people, think twice before buying an air fryer. But having an air fryer in the kitchen is always beneficial as it adds versatility to your cooking method.
FAQ
Do I need oil to cook food in an air fryer?
In many cases, using oil is unnecessary for air frying foods. Many foods don’t require oil to be cooked in air fryers. On the other hand, a little oil can make many foods crispier such as vegetables.
Adding oil is necessary if you want to add a little seasoning to the food. Moreover, salt and pepper will add extra flavor and smell to the air-fried foods.
Are air-fried foods tasty?
The taste of air-fried foods depends on the food. If the food is tasty, air-fried food will surely be tasty. However, some food items, such as tater tots, chicken wings, etc., taste best after deep frying. These foods will taste less if you cook them in an air fryer.
What food items are the worst for air fryers?
Food items that are dipped in the liquid batter are not a good choice to cook in an air fryer. Fried chicken or onion rings are such food items that are the worst option for air fryers.
Summing Up
Therefore, the mystery is solved: how does an air fryer work? Cooked foods from air fryers are healthy, tasty, yummy, and flavorful. Also, you won’t have to spend many hours cooking healthy food using air fryers. This kitchen appliance is faster and more efficient enough in preparing crispy foods.
Happy air frying!
]]>Many home chefs are now preferring stale cooking fries, baking cookie dough, heating fried chicken, etc., using an air fryer. However, hearing this, don’t assume that you can cook whatever you want with the help of air fryers. Some food items are simply not possible to cook in air fryers.
I cooked and tasted different food items in the air fryer. Based on that, I prepared this list of the best things to cook in an air fryer. I discussed the worst things as well.
What are the Best things to Cook in Air Fryer?
Following are my suggestions about what foods taste best with an air fryer. Also, I shared a few tips to make the food yummy.
1. Fish
You can effortlessly cook fish filets using an air fryer. When I cooked, I used foil and kept the skin side down. Then I followed fancy heating technology to cook the fish.
Fishes, including tilapia, shrimp, and even Salmon, are a good choice to cook using an air dryer. Apply a squeeze of lemon and drizzle garlic butter to add unique flavor to the fish. The overall cooking time will be only 15 – 20 minutes.
2. Potatoes
Cooking any type of potatoes is a breeze in air fryers. Purple potatoes, roast potatoes, French fries, and potato chips will never be difficult.
Add garlic powder and toss the potatoes in oil before cooking to give extra flavor. Moreover, using rosemary will make the potatoes an exceptional side dish.
3. Leftover Pizza
We all love microwaving pizza. Everyone prepares a pizza at the parties; pizza is the most common food item that remains leftover.
Generally, when we need to reheat the leftover pizza, we microwave it. But the microwave can burn the pizza. I used the best air fryer to reheat leftover pizza in such a case.
Simply turn the air fryer on, put the pizza into the air fryer, then see the magic. The cheese will be melted with a crispy crust; everything can be done without hassle. You will never have to eat soggy pizza with an air fryer in the kitchen.
However, other leftover fast foods, such as burgers, patties, hamburgers, etc., can easily be reheated with air fryers.
4. Frozen Fries
An air fryer delivers the best result when you need to cook frozen fries. With less effort, after cooking frozen fries in an air fryer, you will get a taste like they have been deep-fried.
My frozen fries were always crispy. Also, I never experienced internal sogginess or blackened corners in the fries.
In fact, air fryers are a good investment for all types of frozen foods. This kitchen appliance will be beneficial, particularly when you are time-poor.
5. Cooking Dough
An air fryer will be a good alternative if you don’t want to turn on your microwave oven. Keep as much distance as possible between the cooking dough when you put them into the air fryer. Depending on the air fryer size, you must put in more than one cooking dough.
Follow the baking instructions shared in the package. For gooey cookies, you can go a little under. It would be best to put the dough into the freezer before cooking. This way, the dough will not spread too much.
6. Crispy Bacon
Bacon is a yummy choice for air frying.
While cooking bacon, remember to place them into the basket or rack in a single layer. Then apply high temperature for 5 – 8 minutes, resulting in deliciously crisp and browned bacon.
More importantly, you will require little oil to cook the bacon.
7. French Fries / Chips
Air fryers are best for cooking French fries or chips. Air-fried French fries are always crispy. More importantly, they contain low calories. While deep-fried French fries consist of high fat and calories.
Cut the potatoes to the same sizes and put them on tissue. Thus, the water will be soaked. Then, place them into an air fryer in a single layer. Continue air frying for 15 – 18 minutes. You can check the frying condition after 10 – 12 minutes.
Here are some secret tips – season the potatoes with paprika, pepper and salt. This will make the French fries flavorful.
What Are the Worst Foods to Cook in an Air Fryer?
As I stated earlier, cooking all food items in the air fryer would be a good idea. Here I shared a list of items that must be avoided from cooking in air fryers.
1. Red Meat
Meat requires a high temperature to cook. It is quite impossible to cook meat in air fryers. The meat will dry, and even cooking will not happen. In fact, the true taste of the meat will not come.
2. Leftover Pasta
Yes, you mustn’t reheat leftover pasta in the air fryer. If you reheat, the sauce will lose its silkiness, and the pasta will dry and clumpy. For reheating pasta, the microwave oven is the best option.
3. Brownies and Cakes
Cakes and brownies don’t really work with air fryers. Both will become rubbery or will be burnt. I would suggest you go with an oven or microwave oven to reheat brownies or cake.
Some other food items that simply don’t go with air fryers are,
- Fried chicken
- Pickle chips
- Onion rings
- Pancake
- Oreo
- Any types of glazed wings
- Items that use wet dredge
Final Words
After reading this guide on what things to cook in the air fryer, you already know that all food items don’t go well with air fryers. Some foods must be avoided, while others become tasty, yummy, and flavorful after cooking with air fryers.
Bacon, French fries, chips, etc., all become crispy, and you will get a restaurant-like taste. Moreover, these foods will be less fatty as little or no oil is required.
]]>Low-fat air fryers are excellent for cooking great chips using little or no oil. You won’t have to spend much time cooking great chips using an air fryer. More importantly, the chips will be crispy and delicious. Overall, low-fat air fryer’s chips are tempting.
However, many people are confused and look for the answer: will a low-fat air fryer really cook great chips? I will answer this comprehensive guide.
Will a Low Fat Air Fryer Really Cook Great Chips – Here is the Recipe
You will always get crisper and appetizing fries in my air obsession with low-fat air fryers. The chips will be a lower fat for sure.
In order to cook great chips, here I shared a few secrets. While preparing the ingredients for cooking, follow the tips.
Potatoes
Not all potatoes are good for chips. Choose russet when cooking French fries or chips of any type. After cooking, you will get the same flavor that you had in restaurants. At the same time, the texture and taste will be good.
Oil Options
I know different oil types are available in the market, and everyone prefers one oil type over another. For this reason, you might prefer to choose your favorite oil when it comes to cooking chips. Whatever oil type you choose; I recommend you check the smoke point.
Besides, if you don’t use oil while air frying potatoes, there is no logic to think about the smoke point.
I think neutral-flavored oil would be a great choice for air frying. Also, consider buying high smoke point oil. If you use a lower smoke point oil, you will end up with burnt fries; undoubtedly, it will be sad. I mostly prefer vegetable oil or peanut oil. Sadly, olive or coconut oil is an impractical choice for chip recipes.
Herbs
Many people don’t know that herbs can add a nice flavor to the chips. I always add herbs when cooking chips, do you? However, don’t add herbs in the beginning or middle of cooking. Add it when the chips are almost ready and you are about to stop cooking—adding them before the required time means burnt herbs.
Suggested Cooking Time
If you don’t get crispy chips after the 12 to 15-minute, cook until the French fries are crispy. Remember, all air fryers are not built the same. So, all air fryers may not give you the same crispy chips at the suggested cooking time. You may need to adjust the time of cooking crispy chips.
Finishing Tip
Are you preparing a few batches of chips? Then you might wonder how to save the chips from going cold before you eat them. In such situations, I follow the below tricks.
After cooking the final batch, I add the earlier batches with the last batch. Then put them inside my air fryer and cook them for 1 – 2 minutes, which means re-warming. This trick makes all the chips crispy.
Baking Instructions
No worries if the chips are not crispy. Simply put them into a preheated oven. Then back them for 20 to 25 minutes at 420° – 430° F. Once the chips are golden brown, they are ready to eat.
Storage and Reheating Tips
Chips taste best when eaten fresh. However, you may need to store leftovers sometimes. Use an airtight container to store the leftover chips, and you can refrigerate them for a maximum of 4 days. When reheating, put them in a preheated oven and reheat at 350° F until they are warmed enough. Besides, you can use air fryer specifically manufactured for reheating food.
How Much Oil Do I Need to Use in an Air Fryer?
There is no straightforward method available about how much oil to use when air frying. In fact, you don’t have to use any oil.
The process of air frying is so simple. Season the chops and put them into the air fryer. This way, you can cook low-calorie chips. But some may find it less tasty and flavorful because of no oil.
If you need to add oil to the chips, I suggest you go with 1 tablespoon or 1 spray of oil. This much oil is enough for cooking. At the same time, you will not get high calories or fat in the chips.
FAQ
Do air fryers make good chips?
Impressively, air fryers are good at cooking good and crispy sweet potato chips. Sweet potato contains lower starch, helping the air fryer prepare crispy and flavorful chips. Remember, the more separated potatoes, the will be crisper.
Why are my air fryers’ chips not crispy?
Your air-fried chips may not be crispy due to several reasons.
- If the potatoes are wet before putting them into the air fryer. By patting the potatoes thoroughly, you can avoid soggy potatoes.
- You might have put too many potatoes into the fryer in a single batch. In this case, divide your potatoes into batches and put them accordingly.
With the above 2 tips, I believe you can cook crispy chips without fail.
How long do chips take in an air fryer?
15 – 20 minutes is enough time for crispy chips in an air fryer. However, as stated earlier, all air fryers’ performance is not the same, so you must check the chips while cooking. Also, flip the potatoes during the cooking time for a more even cooking.
Wrapping Up
Hopefully, this guide on whether a low-fat air fryer really cooks great chips can remove all your confusion about getting crispy chips. The best thing about low-fat air fryers is that they don’t require oil to cook crispy fried chips. This recipe will be significantly beneficial if you are trying to lose weight.
]]>