Our devices are made from just three components:
- WeMos D1 Mini (lite) microcontroller
- Si7021 temperature and humidity sensor
- 3x AA Ni-MH rechargable batteries
Because we wanted to build around 10 sensors, we had to watch out a bit for the price tag on the components. We ended up at around 9 € per device, with 50% of the cost beeing the batteries.
We chose the Si7021 sensor because judging from this excellent review of common temperature sensors, it was better than the commonly used DHT22 and came in 2nd place behind the more expensive BME280.
For the power supply of the devices it was clear that we were going to run them on rechargable battery using deep sleep. Andreas Spiess made an excellent video about battery technologies for the ESP8266, where he compared different types of batteries with respect to their effective capacity. Even though a Lipo cell was rated the best battery technology for the ESP8266, we went with Ni-MH cells because they are easier to work with.
The devices were assembled such that the sensor is directly attached to the WeMos board and the entire thing is wrapped to the battery pack.
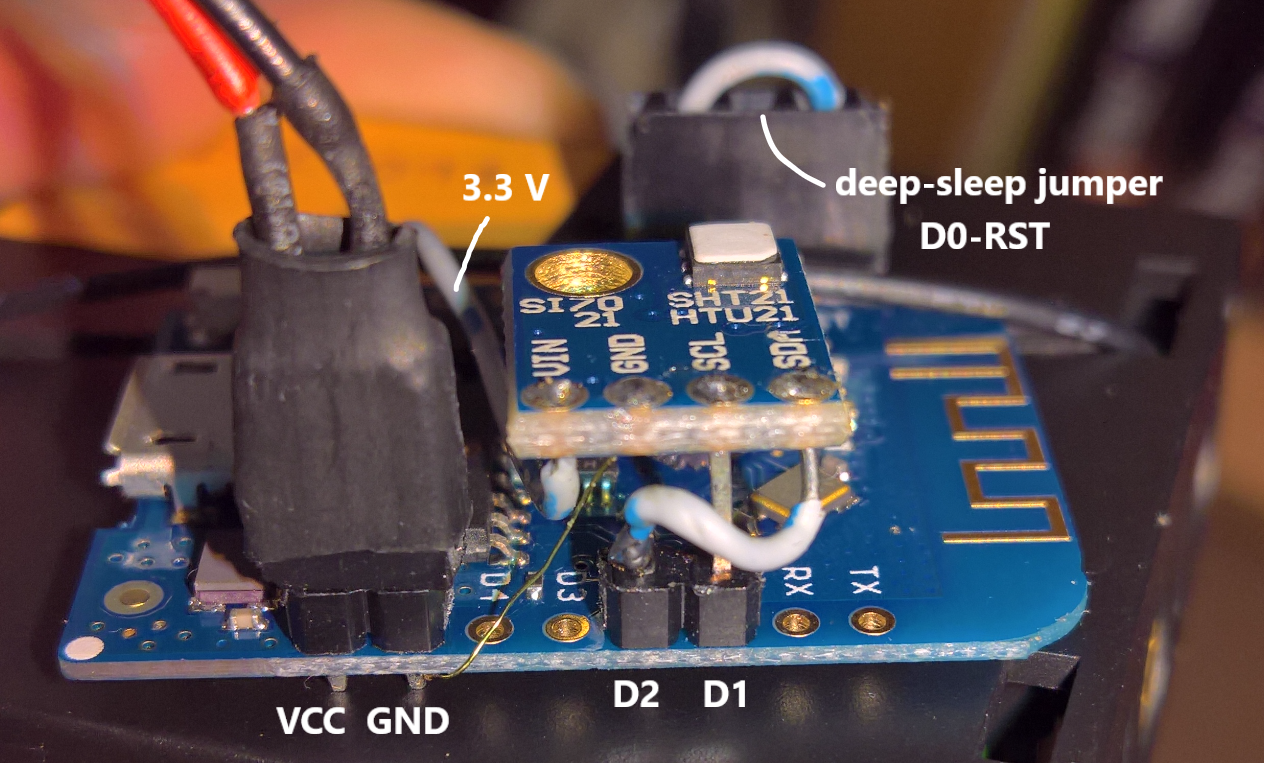
When the jumper between RST and D0 is connected, the software puts the device into deep sleep after every measurement. In this mode, it draws approximately 0.075 mA compared to 74 mA during operation. With three Ni-MH batteries of 2000 mAh, a sleep interval of 20 minutes and about 7 seconds of active time, we estimate about four months of operation without recharging. For our purposes this is good enough.
For recording our measurements and tracking the sensors and other IoT devices, we created a MySQL database. Each sensor is identified by its chip ID and connects to a mosquitto MQTT broker to report new measurements. Node-RED, running on a Raspberry Pi listens to the MQTT messages and inserts new measurements into the MySQL database.

The network of devices communicating via MQTT does not only include the temperature sensors, but also other devices such as a MQTT/433 MHz relay for remote-controlling power switches.
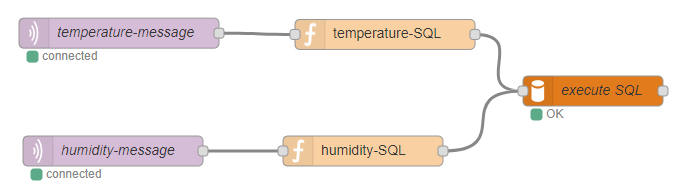
A simple flow in Node-RED is used to insert measurements into the database. The same flow also updates a devices table with the timestamp of the latest received messages. When it comes to timestamps, we do everything in UTC to avoid problems with winter/summer time.
After the devices were built and connected, we could take a look at actual measurements. To judge how accurate and precise the measurements were going to be, we put 6 devices in a box into a cupboard and left them undisturbed for 12 hours.
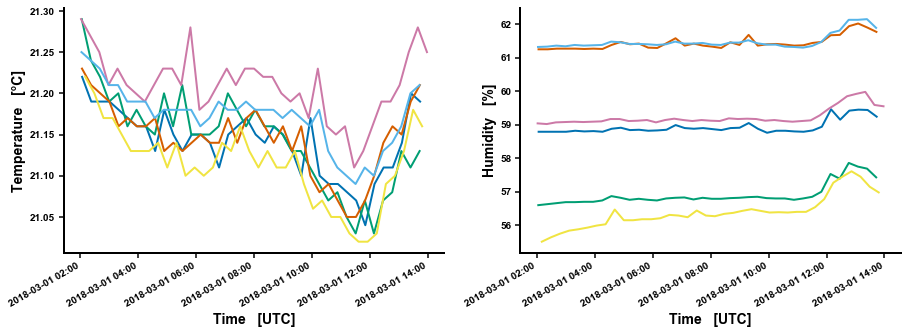
After equilibrating the sensors, we distributed them to various places in the house. We can see from the measurements that the humidity measurements are not as responsive and accurate as the temperature, but it will still be fine for our purpose.

As you can see from the figures, we already did this around new years. Could there be more to expect in an upcoming post?
]]>Using the json module, one has to write two methods, a complex_handler and a class_mapper that are fed to json.dumps and json.loads respectively.
The design problem here is that the class_mapper needs to compare a dict that is to be deserialized with the properties of potential classes in order to find the matching type. In the first level of deserialization one could potentially provide the type as a parameter to the deserialization-function, but as soon as there is a child property, the type may be unknown.
Therefore each class that is to be deserialized has to be registered into a collection of (properties) -> class mappings.
To simplify the handling, I wrote the following JsonConvert class:
import json


class JsonConvert(object):
    mappings = {}

    @classmethod
    def class_mapper(clsself, d):
        for keys, cls in clsself.mappings.items():
            if keys.issuperset(d.keys()):   # are all required arguments present?
                return cls(**d)
        else:
            # Raise exception instead of silently returning None
            raise ValueError('Unable to find a matching class for object: {!s}'.format(d))

    @classmethod
    def complex_handler(clsself, Obj):
        if hasattr(Obj, '__dict__'):
            return Obj.__dict__
        else:
            raise TypeError('Object of type %s with value of %s is not JSON serializable' % (type(Obj), repr(Obj)))

    @classmethod
    def register(clsself, cls):
        clsself.mappings[frozenset(tuple([attr for attr,val in cls().__dict__.items()]))] = cls
        return cls

    @classmethod
    def ToJSON(clsself, obj):
        return json.dumps(obj.__dict__, default=clsself.complex_handler, indent=4)

    @classmethod
    def FromJSON(clsself, json_str):
        return json.loads(json_str, object_hook=clsself.class_mapper)

    @classmethod
    def ToFile(clsself, obj, path):
        with open(path, 'w') as jfile:
            jfile.writelines([clsself.ToJSON(obj)])
        return path

    @classmethod
    def FromFile(clsself, filepath):
        result = None
        with open(filepath, 'r') as jfile:
            result = clsself.FromJSON(jfile.read())
        return result
Now we can define some classes and make them (de)serializable by decorating them with JsonConvert.register:
@JsonConvert.register
class Employee(object):
    def __init__(self, Name:int=None, Age:int=None):
        self.Name = Name
        self.Age = Age
        return

@JsonConvert.register
class Company(object):
    def __init__(self, Name:str="", Employees:[Employee]=None):
        self.Name = Name
        self.Employees = [] if Employees is None else Employees
        return
When the class definition is parsed, this will register it with the static mappings in JsonConvert.
Now we can easily serialize and deserialize our Company to a JSON-string:
company = Company("Contonso")
company.Employees.append(Employee("Werner", 38))
company.Employees.append(Employee("Mary"))

asJson = JsonConvert.ToJSON(company)
fromJson = JsonConvert.FromJSON(asJson)
asJsonFromJson = JsonConvert.ToJSON(fromJson)

assert(asJsonFromJson == asJson)

print(asJsonFromJson)
Or directly to and from a file:
filepath = JsonConvert.ToFile(company, "company.json")
fromFile = JsonConvert.FromFile(filepath)
The JSON string looks like this:
{
    "Name": "Contonso",
    "Employees": [
        {
            "Name": "Werner",
            "Age": 38
        },
        {
            "Name": "Mary",
            "Age": null
        }
    ]
}
It’s not as convenient as our beloved Json.NET for C#/.NET, but it can get the job done.
cheers
PS.: if you want to learn more about decorators, have a look at this excellent YouTube tutorial.
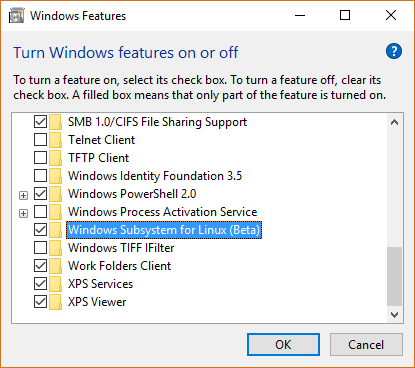
]]>First enable the Windows Subsystem for Linux in the “Turn Windows features on or off” dialog:
Then open the Ubuntu Bash and update the package index:
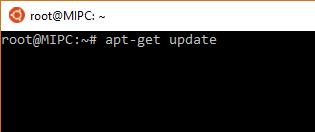
You can now proceed to install pip for Python 2:
sudo apt-get install python-pip python-dev
Now install the CPU-enabled Linux x64 tensorflow package::
sudo pip install --upgrade https://storage.googleapis.com/tensorflow/linux/cpu/tensorflow-0.8.0-cp27-none-linux_x86_64.whl
Tensorflow is now installed. With the following command, you can get the directory of the installed package:
python -c 'import os; import inspect; import tensorflow; print(os.path.dirname(inspect.getfile(tensorflow)))'
This should give something like “/usr/local/lib/python2.7/dist-packages/tensorflow”.
Now let’s cd to the directory with the example implementation of a CNN for the MNIST dataset:
cd /usr/local/lib/python2.7/dist-packages/tensorflow/models/image/mnist
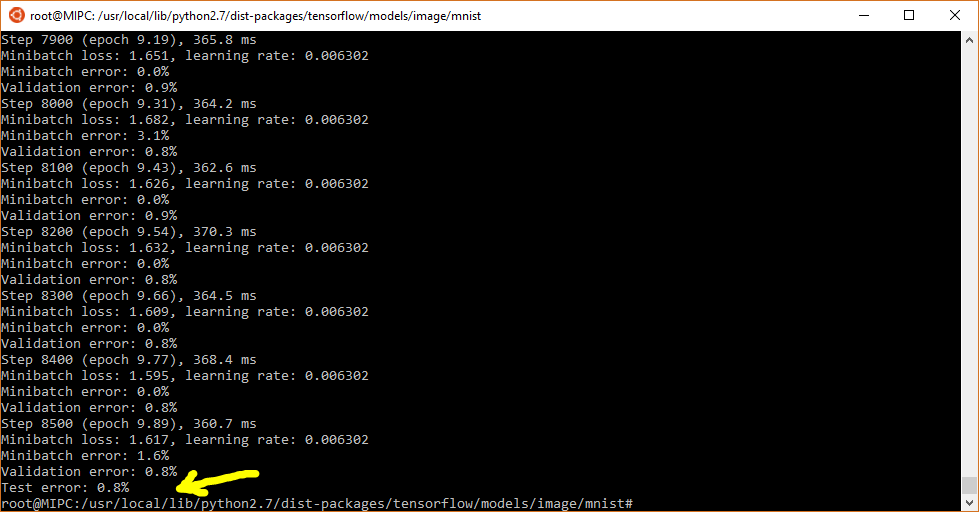
And run the convolutional neural network:

In the end, the run completed with a test set error of 0.8 %.
That’s it for now – have fun!
]]>Usually you would put a print(“…”) before each section:
#=================== import dependencies
print("importing dependencies")
import numpy
import matplotlib
...
But obviously this brings redundancy and is a lot of extra typing.
Instead of all these prints, we define a function printprev():
def printprev(n=1):
    import linecache, inspect
    for l in range(-n, 0):
        print(linecache.getline(__file__,inspect.currentframe().f_back.f_lineno+l).strip())
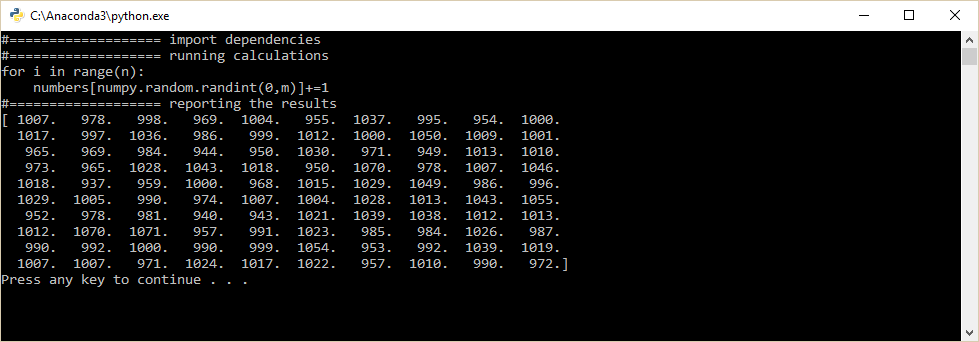
Calling this function prints your code structure, and even the code itself to the output:
#=================== import dependencies
printprev()
import numpy
import matplotlib
#=================== define variables
m = 100
n = 100000
numbers = numpy.zeros(m)
#=================== running calculations
for i in range(n):
    numbers[numpy.random.randint(0,m)]+=1
printprev(3)
#=================== reporting the results
printprev()
print(numbers)
That’s it. Let me know if you have some interesting ideas what to do with this!
cheers
In combination with the MX-FS-03V sender MX-05V receiver, I wanted to do the same thing on Windows 10 IoT on my Raspberry Pi. To use RCSwitch in a Windows Universal app, I ported the library into a C++ Windows Runtime Component.
The RCSwitch port to the Windows Universal Platform is now available on NuGet.
To use it in your IoT project, just install the NuGet package and then copy these code samples:
Create an instance of the RCSwitchIO class:
// connect sender to GPIO6 and receiver to GPIO5
RCSwitchIO rcSwitch = new RCSwitchIO(6, 5);
Turning remote power sockets on/off:
// turn device 11011 10000 ON
rcSwitch.Switch("11011", "10000", true);
// ...
// turn device 11011 10000 OFF
rcSwitch.Switch("11011", "10000", false);
In good .NET fashion, you can also subscribe to an event to listen for incoming signals:
//attach the event handler for receiving signals
rcSwitch.OnSignalReceived += RcSwitch_OnSignalReceived;

private void RcSwitch_OnSignalReceived(object sender, Signal signal)
{
   Debug.WriteLine($"received: {signal.Code} via protocol {signal.Protocol} with bitlength {signal.BitLength}");
}
However I found that receiving does not work very reliably. Initially I was able to sometimes receive signals, but a few weeks later (with a different remote) it didn’t work at all. Any help in debugging the receiveProtocol methods that handle the interpretation of interrupt timings is appreciated. You can find all source code including a test and example project on GitHub.
cheers!
]]>- der (male)
- die (female)
- das (neuter)
While rules to determine the gender of a noun exist, almost no German native speaker can name them. We can now solve this problem (determine the gender without memorizing the rules) using some simple machine learning with the Accord framework.
Let’s quickly name the steps that will follow:
- find and extract a dataset of noun-gender associations
- split into training, test and validation dataset
- extract features into something the algorithm can use
- train a Naive Bayes
- test the model with the test dataset
After quite a while of searching, I found this machine readable and CC-BY-SA 4.0 licensed XML file from Daniel Naber.
In our Universal Windows App we can then load all nouns into a List:
Words = await Parser.LoadNounsAsync("morphy-export-20110722.xml", int.MaxValue, MinLength); // MinLength = 4 letters
The next step is to split the dataset into training, test and validation sets. For this purpose I wrote a SplitRandom method that randomly selects elements from an IEnumerable and returns a List<T>[] with a specified size.
// randomly split the dataset into three almost equally sized sets
var splits = Words.SplitRandom(3);
trainingDataset = splits[0];
testDataset = splits[1];
validationDataset = splits[2];
You can look up the definitions of SplitRandom<T>() and LadeSubstantive() in the source code of the sample application at the bottom of this post.
To train the Naive Bayes, we have to select features and represent them as number so the algorithm can use them. Our assumption is that the gender of German nouns can be determined from the suffix, so for simplicity we start with the last four letters. In the sample application, I represent the letters as enums so they can be casted to int or double as required. So each instance of the Wort class can now have a Features property of type int[]:
public int[] Features
{
    get
    {
        // The Naive Bayes expects the class labels to range from 0 to k
        return new int[]
        {
            (int)GetLetter(-1),
            (int)GetLetter(-2),
            (int)GetLetter(-3),
            (int)GetLetter(-4)
        };
    }
}
Before we continue with building the model, let’s add the required NuGet packages from the Accord-framework. As we are doing this for a Universal Windows App, we can not get the original Accord-packages, but someone already published portable packages. In the NuGet package manager, you can find them by their names:
- portable.accord.machinelearning
- portable.accord.statistics
From our training dataset we can now build the feature- and label-arrays using LINQ:
int[][] inputs = trainingDataset.Select(w => w.Features).ToArray<int[]>();
int[] outputs = trainingDataset.Select(w => w.Label).ToArray();
The next step is to build and train a Naive Bayes model:
NaiveBayes bayes = new NaiveBayes(Wort.LabelClasses, inputs[0].Select(i => Extensions.LetterValues.Length).ToArray());
double error = bayes.Estimate(inputs, outputs);
Testing the model can now be done using the training dataset:
// Classify the test dataset using the model
int[][] testFeatures = testDataset.Select(w => w.Features).ToArray();
int[] testLabels = testDataset.Select(w => w.Label).ToArray();
// predict the labels
int[] testPredictions = testFeatures.Apply(bayes.Compute);
By counting the zeores after subtracting the correct labels from the predicted labels, we get the number of correct predictions:
double correctPredictions = testPredictions.Subtract(testLabels).Count(x => (x == 0)); // using Accord.Math for .Subtract() and .Count()

System.Diagnostics.Debug.WriteLine($"{correctPredictions / testPredictions.Length * 100} % success rate.");
When you run this, it generates a model with 70-75 % success rate.

In the sample application you can see how a Decision Tree performs compared to the Naive Bayes (hint: better).
You can grab the whole thing from the MSDN code gallery: https://code.msdn.microsoft.com/Predicting-Noun-Genders-ef904a12
Have fun!

The iGEM competition is an international competition in synthetic biology that debuted at MIT in 2004. Since then it has grown to more than 230 participating teams from all over the world. Over the last ten years it has significantly shaped the international synthetic biology community.
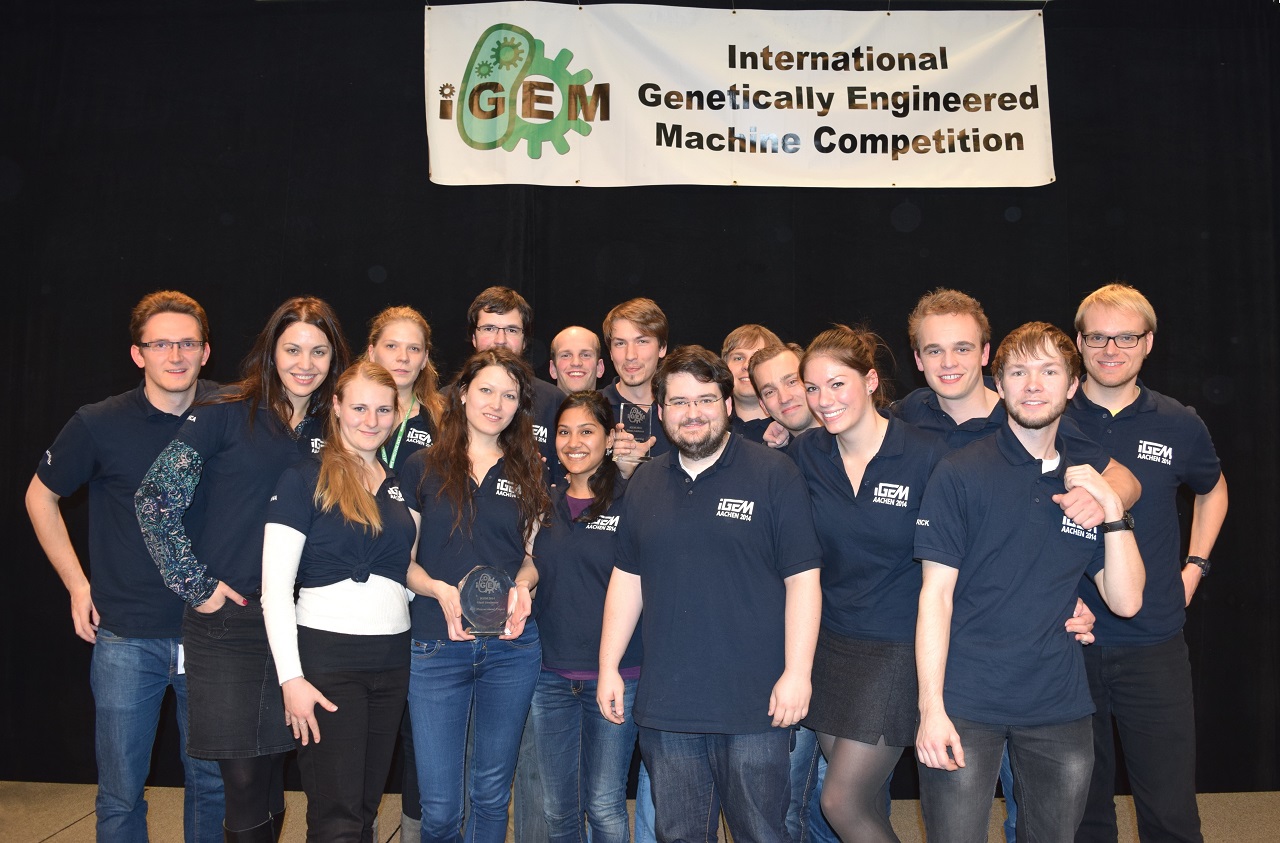
In 2013 a few friends and me heard of the competition and founded the first team from RWTH Aachen. Up until March 2014 our team grew to 15 students of Bachelor and Master programs in Biology, Biotechnology, Biomedical Engineering, Computational Engineering Science and Computer science.
After almost a year of hard work, we finished our project “Cellock Holmes – A Case of Identity” and flew to the Giant Jamboree (Finals) in Boston, MS,
We had fulfilled all criteria for the gold medal and won the “Measurement” track (category) that we participated in. Additionally we won the “Best Supporting Software” award in the overgraduate section and were awarded with a very rare “Safety Commendation” for our work on biosafety issues.
A complete documentation of our project is available at 2014.igem.org/Team:Aachen
In the coming weeks I hope to find the time and blog about several components of our project that I worked on.
]]>
With Replay Practice you can do exactly that. Choose a song, move the markers and loop a part of the song at a speed of your choice.
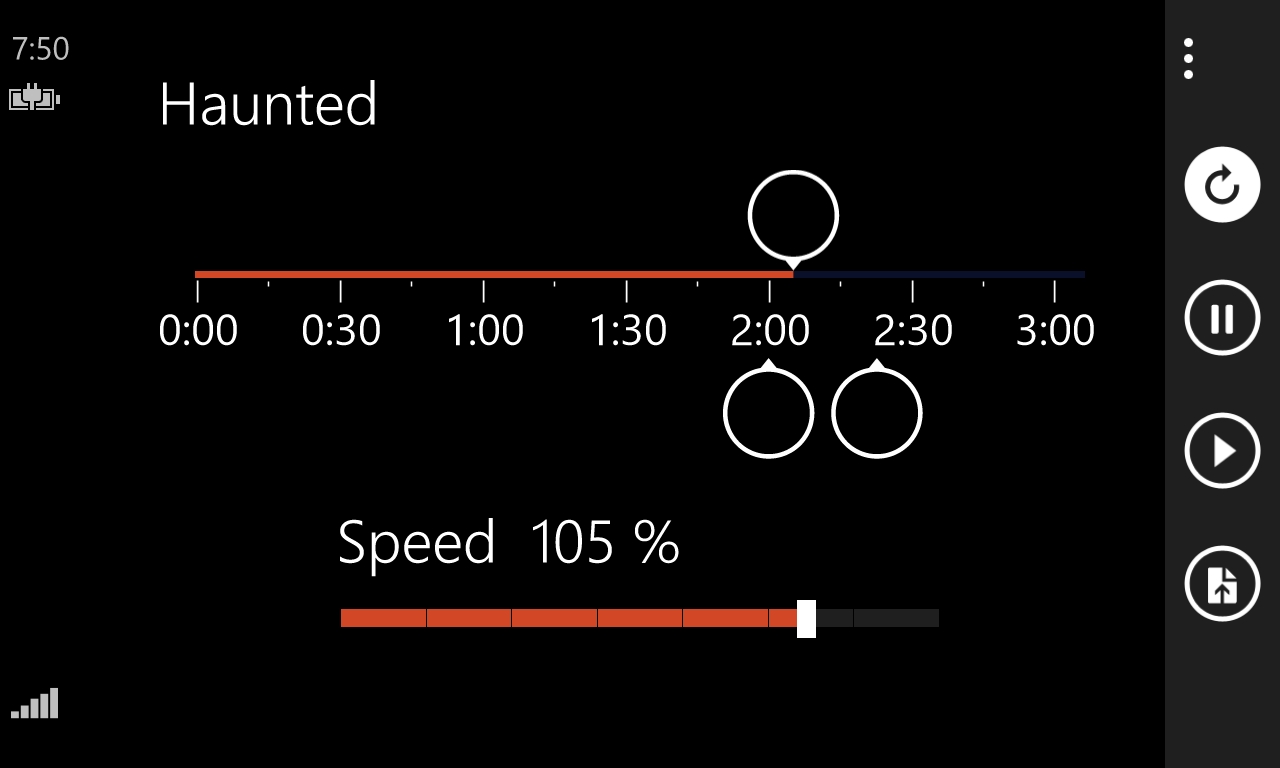
Replay Practice is available for Windows Phone 8.1 and Windows 8 !
]]>

The Arduino code to relay MIDI>Bluetooth and Bluetooth>MIDI is actually quite simple.
//======================================================authorship
//by Michael Osthege (2013)
//======================================================includes
#include "SoftwareSerial.h"
//======================================================constants
const int TX_BT = 10;
const int RX_BT = 11;
const int MIDI_TX = 1;
const int MIDI_RX = 0;
//======================================================bluetooth setup
SoftwareSerial btSerial(TX_BT, RX_BT);
//======================================================initialization
void setup()
{
    Serial.begin(31250);
    btSerial.begin(9600);
    Serial.println("Bluetooth initialized");
}
//======================================================do work
void loop()
{
    ReadMIDI();//listen on the MIDI-IN
    ReadBluetooth();//listen for Bluetooth
}
void ReadMIDI()
{
    if (Serial.available() > 0)//there's something in the buffer
    {
        char buffer[3];
        Serial.readBytes(buffer, 3);//receive it
        btSerial.write(buffer[0]);//relay it
        btSerial.write(buffer[1]);
        btSerial.write(buffer[2]);
    }
}
void ReadBluetooth()
{
    if (btSerial.available() > 0)//there's something in the buffer
    {
        char buffer[3];
        btSerial.readBytes(buffer, 3);//receive it
        Serial.write(buffer[0]);//relay it
        Serial.write(buffer[1]);
        Serial.write(buffer[2]);
    }
}
As I understand it, the MIDI protocol communicates with commands of three bytes. Therefore I decided to relay all incoming serial messages in chunks of three bytes. To test the relay, I modified the BluetoothConnectionManager of my previous example to send/receive chunks of 3 bytes as MIDI commands too. Incoming commands are printed into lines of text and simple sounds can be sent as well. You can try it out yourself in this sample application: http://code.msdn.microsoft.com/Arduino-as-a-MIDIBluetooth-1c38384a Have a nice weekend =)
]]>