The original “The Truth About Video Editing Software” in 2017 got some attention.
Many years ago, I dissected the video editing landscape here in Hollywood and told you what most editors were using. But most importantly, why? Now, before we look at what’s changed, I do encourage you to check out the original The Truth About Video Editing Software in Hollywood from 2017, to see how we got to where we were…then.
 Since 2017, desktop software has improved. New tools have now entered the market, and creating content on your phone now includes editing. There are just so many options out there, so I’ve reached out to various folks in the industry, both on the business and creative side. Some have been under FrieNDA (which is my favorite type of agreement) and some have been under the cloak of night in empty parking garages here in Southern California. But all have granular insight into the industry and where we are today.
1. Avid Media Composer
When we last left Avid in 2017, they were the undisputed software choice for film and TV picture editing here in Hollywood. Media Composer, their flagship product, had multiple versions for beginners, professionals, and enterprise users. And as a side note, they dominated the post-audio market with Pro Tools. Avid even had their own branded hardware.
Now you’ve got to consider the singularly unique place Avid was during 2017.
Media Composer looked…well, let’s face it, dated. It was designed using then-decades-old iconography and design, which was legacy from the days of helping film editors transition from analog editing to digital. Because most film and TV post-production pipelines within post facilities relied on Avid-centric workflows, updating the interface and workflows to attract new users and to grow Avid’s business heavily risked alienating existing users. As my grandmother used to say, “You’re damned if you do and you’re damned if you don’t.”
However, in 2019, Avid completed a new look for Media Composer, although they eventually acquiesced and offered the “Classic” look several years later. Avid has also since introduced UME, their new “Universal Media Engine,” which replaces AMA and thus successfully dodges another unfortunate product name (*cough* Avid ISIS *cough*).
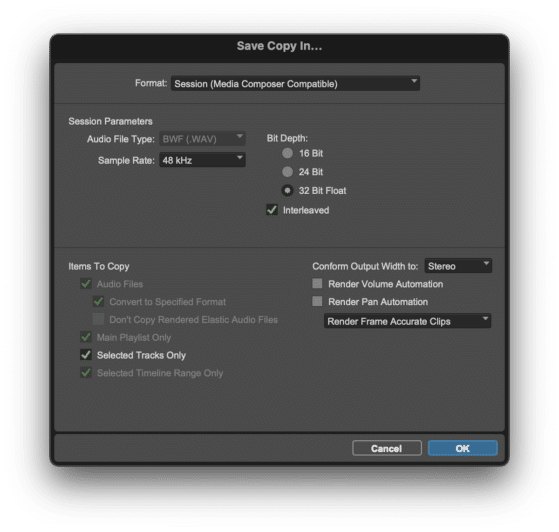
After 30 years, Media Composer and Pro Tools finally have direct interoperability.
And after 30 years, Avid finally made the round trip workflow from Avid Media Composer to Avid Pro Tools and back easy with a direct session import and export. No AAFs needed!
When the pandemic hit, the industry had to quickly adapt while working remotely, and while Avid had existing products for these distributed teams, they were either expensive or better suited for broadcast news, or they were still in beta like Avid’s cloud editing product, Edit on Demand, which was both expensive and in beta.
Despite these product roadblocks for remote work, most productions stuck with good old-fashioned Media Composer. Work-from-home editors remoted into existing Avid workstations back at their facilities, which maintained environment familiarity and access to the usual shared storage. Avid rental facilities set up racks of systems to keep post-production moving. Alternative editing solutions to Media Composer didn’t offer huge cost savings for film and TV productions, whether it be doing everything in the cloud or by switching to another editing software platform.
But by and large, if you cut with Media Composer, you stuck with Media Composer.
A review of the Academy Award nominees and winners from 2017 until now also shows that a majority of the nominees and winners were cut with Avid Media Composer. At a business level, Avid reported 15,000 to 20,000 Media Composer Cloud subscriptions in late 2017 and into early 2018.
Now, that may seem low. I mean, how can you dominate one industry with only 20,000 seats of software? But keep in mind, seven years ago, not every Media Composer user had a cloud subscription. Many users still had legacy licenses, which were not yet counted within cloud subscriptions. Now, if we fast forward to late 2023, Avid reported over 150,000 cloud subscriptions for Media Composer prior to their acquisition by the private equity firm Symphony Technology Group.
It’s pretty clear Avid remains the standard for film and TV editing in 2024. Now, what will happen now that private equity owns Avid? Well, that’s a subject for another video.
2. Adobe Premiere Pro
Premiere Pro has been part of the Adobe Creative Cloud package since its inception, giving Adobe a significant advantage in gaining users due to the existing widespread use of other Adobe apps like Photoshop and Illustrator. I mean, Premiere is right there to download and use! In 2017, Adobe also had an industry misstep to continue to capitalize on when Final Cut Pro Classic was killed off years prior. Facilities and editors had to find a new video editing solution that was ready to go and could handle workflows for film and television. And let’s face it. Final Cut Pro X wasn’t ready at the time. Now you could have moved to Media Composer, but many saw this as a nonstarter. I mean, they had already opted to go with Final Cut Pro Classic over Media Composer years prior anyway, and that decision wasn’t going to change. At the time, that really only left Premiere Pro.
And so in 2017, Premiere Pro was second, albeit distant, as a choice for film and TV editing. Since 2017, however, Adobe has continued to enhance its Productions workflow, which provides Premiere Pro editors with a collaborative experience similar to Avid’s Bin and Project Sharing, which is a mainstay in collaborative film and TV post-production. And this additional feature did gain Adobe some high-profile film and TV projects. The first Deadpool, Terminator: Dark Fate, and David Fincher’s projects like Gone Girl and his HBO mini-series Mindhunter were all edited with Premiere Pro, as was last year’s Best Picture Oscar winner Everything Everywhere All At Once. Now, if we look at Hollywood-adjacent productions like those at the Sundance Film Festival, we’ve seen Premiere Pro being used on a greater number of films over the years, and it’s now accounting for over half of all projects showcased at the festival. And even more projects use Adobe if you include other Adobe tools like Frame.io.
However, the fact remains that Premiere Pro in Hollywood has remained more unique than the standard. The general consensus is that Premiere Pro is still easily the main alternative to Avid Media Composer for film and TV work. But is that a bad thing? I mean, it’s important to remember that the market is relatively small compared to other, more lucrative media-rich markets, plus social media, where video content is produced at an exponentially faster rate than film and television. In fact, recent studies show that a majority of young Americans aspire to be social media influencers over most any other career. Film and TV are no longer the only media vehicles for visibility, let alone creative work. So for Adobe, why continue to focus heavily on a market that is no longer the main avenue that many creatives aspire to work in?
I think I’d rather take the bag of money from a faster-growing market over a case study and my logo in the credits of the film. Adobe doesn’t release much in the way of metrics for app usage. However, Adobe did report that it had approximately 12 million Creative Cloud subscriptions in 2017, and the subscriber count has grown to over 33 million in 2023. This year, however, Adobe has faced many challenges, including poor communication about how their AI is trained and emerging legal issues with the DOJ and FTC over early subscription termination fees and a complex cancellation process. As of now, it’s unclear how this will affect Adobe moving forward.
3. Apple Final Cut Pro
Those of us that were at the 2011 NAB SuperMeet knew we were seeing something special during Apple’s surprise unveiling of Final Cut Pro X, but little did we know, the fallout from this single announcement would have permanent, continuous repercussions for Apple editing software in Hollywood. Now, the Final Cut Pro X launch missteps have been chronicled extensively elsewhere, so I don’t need to rehash them ad nauseum.
But I will mention a few key points as they’re important for context to understand where we are today.
Higher-profile film and TV post-production requires a solid tech stack and software interoperability. This includes multiple hardware components as well as a trained staff to maintain it. Often, complete turnkey systems for post-production are sold by what we call Systems Integrators or VARs (Value Added Resellers). Post facilities often buy from VARs because pricing is generally better, and the VAR can build, test, deploy, and support these solutions.
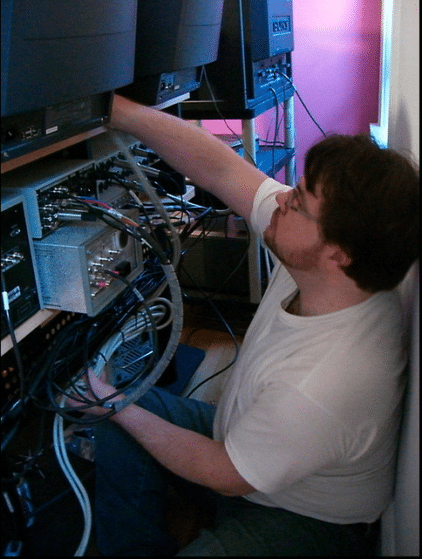
Putting the “value” in “Value Added Reseller”
Unlike Final Cut Pro Classic, Final Cut Pro X did not go through the usual sales channels. It was an App Store purchase. This meant that the VARs’ role was largely mitigated and thus professional adoption was slowed.
It would take Apple several years to get Final Cut Pro X to a level where it could be used in professional film and TV workflows. We had a perfect storm of factors that had most professional editors, and especially facilities, simply not interested in moving forward with Apple editing software. And as I said in 2017, it’s these hurdles that made Final Cut Pro X a distant third in Hollywood film and TV editing. And it hasn’t gotten any better.
In 2022, the editing community created a petition asking Apple to publicly stand by the use of Final Cut Pro for TV and film industries worldwide. Now, to their credit, Apple did respond, and they committed to the joint development of training and certification courses, plus creating an industry advisory panel and an increase in Hollywood-centric workshops for film and TV editors. So while Final Cut Pro X has matured to be a professional editing solution and has been used on a handful of high-profile projects, the window of opportunity to ascend or even eclipse the level of its predecessor has unfortunately closed. However, as a slight silver lining, Apple hardware was and still is a mainstay in the professional content creation industry, and I bet many of you have an iPhone instead of an Android.
4. Blackmagic Design DaVinci Resolve
When I last covered DaVinci Resolve, many of you predicted it would become Hollywood’s next “do all” tool. And you were…half right. Resolve has had significant updates since Blackmagic acquired it, including adding Fusion for VFX and Fairlight for post-audio, which creates a very comprehensive suite of tools. Resolve’s speed makes it excellent for transcoding, and in some specialized cases, Fusion can replace expensive legacy VFX systems.
But it’s Resolve’s color tools that have now become the industry standard for color grading. And it’s not just because of their intricate controls, affordability, and overall innovations, but because the existing color tool sets in Hollywood ten years ago were, let’s face it, lacking. Avid’s advanced color grading tool, Symphony, had very few feature updates at the time and required higher monthly costs. Lumetri, the Premiere Pro color tool, was also beginning to show its age following Adobe’s acquisition of SpeedGrade in 2011. Plus, the other color solutions on the market were either expensive or existed outside the video editing software that most creatives were familiar with, so there was a major deficit in accessible color tools, but not in creative video editing tools.
Avid and Adobe’s editorial tools had decades of nuanced development and were already affordable for most. Resolve’s video editing features were still evolving at the time. The flip side, however, is that even if Blackmagic did introduce revolutionary video editing tools within Resolve at the time, they still would have faced massive resistance from a Hollywood industry still wary of wholesale video editing changes following the failure of Final Cut Pro X to succeed. There simply wasn’t enough incentive for Hollywood to switch to Resolve for professional video editing.
But that’s not the full story. The free version of Resolve, or the one-time payment for Studio, is a no-brainer compared to continual, eternal paid subscriptions from other leaders like Adobe and Avid. Bundling the more powerful Resolve Studio with a Blackmagic camera purchase was also a fantastic marketing move. Resolve offers incredible value, especially for new editors, and it’s a well-established business tactic that getting buy-in from the younger, next generation of creatives is a fantastic way to boost sales down the road.
While the details on exact download numbers and usage are not publicized, in 2019, Blackmagic CEO Grant Petty did say that Resolve downloads topped 2 million, and I can’t see any reason why it still wouldn’t be growing. As an interesting side note, however, there’s a vast difference between the number of free users of Resolve and the number of paid users of Resolve Studio. The general consensus is that most professional film and TV creatives are going to need the features found in the paid Studio version, but most industry analysts estimate that only 5% or so of Resolve users actually pay for the Resolve Studio upgrade. So those professional creatives, at least those in Hollywood, are overwhelmingly using Resolve for color work and other side tasks, but they’re not using it as their primary video editor.
With Avid and Adobe taking the top spots as the creative editorial choices here in Hollywood, Resolve as a video editor faces steep competition, not unlike the smartphone market, with Apple and Android dominating the marketplace with no real challengers. So, however distant, that third place for video editing software in Hollywood that was previously occupied by Final Cut Pro can now easily be filled with the logo from Blackmagic Design. But like Adobe, this does beg the question: “Are the vanity bragging rights for Hollywood’s editors worth the windfall of cash to be found by capturing other markets?”
5. Everything Else
As is in life, there are no absolutes, and there will always be exceptions and outliers. Parasite won Best Picture in 2019, and it used Final Cut Pro Classic software that had been dead for eight years. The legendary Thelma Schoonmaker has used Lightworks for several of Scorsese’s movies, including Killers of the Flower Moon, which had ten Oscar nominations in 2023.
If anything, these two footnotes should reinforce that it’s not the tool, it’s the talent. Knowing the right tool makes you employable. Your talent is what keeps you employed. So what do you think we’ll see in the next seven years? Will predominantly mobile solutions like CapCut or open-source solutions make their way into the professional film and TV market? Or do you have a hot take on AI in Hollywood? I look forward to your thoughts.
Until the next episode, Learn more, do more. Thanks for watching.
]]>Generative A.I. is the big sexy right now. Specifically creating audio, stills, and videos using AI. What’s often overlooked, however, is how useful Analytical A.I. is. In the context of video analysis, it would involve facial or location recognition, logo detection, sentiment analysis, and speech-to-text, just to name a few. And those analytical tools are what we’ll focus on today.
We’ll start with small tools and then go big with team and facility tools. But I will sneak in some Generative AI here and there for you to play with.
1. StoryToolkitAI
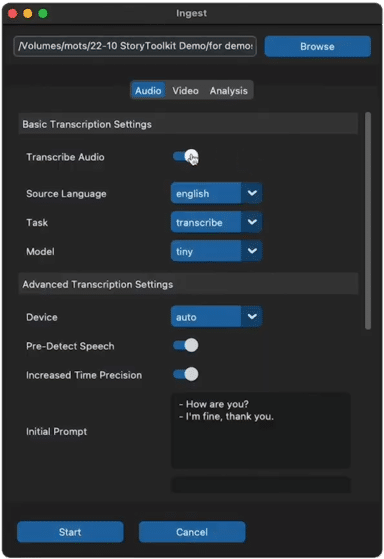
StoryToolKitAI can transcribe audio and index video
Welcome to the forefront of post-production evolution with StoryToolKitAI, a brainchild of Octavian Mots. And with an epic name like Octavian, you’d expect something grand.
He understood the assignment.
StoryToolKitAI transforms how you interact with your own local media. Sure, it handles the tasks we’ve come to expect from A.I. tools that work with media like speech-to-text transcription.
But it also leverages zero-shot learning for your media. “What’s zero shot learning?” you ask.
Imagine an AI that can understand and execute tasks that it was never explicitly trained for. StoryToolKitAI with zero-shot learning is like trying to play charades. It somehow gets things right the first time. While I’m still standing there making random gestures, hoping someone will figure out that I’m trying to act out Jurassic Park and not just practicing my T-Rex impersonation for Halloween.
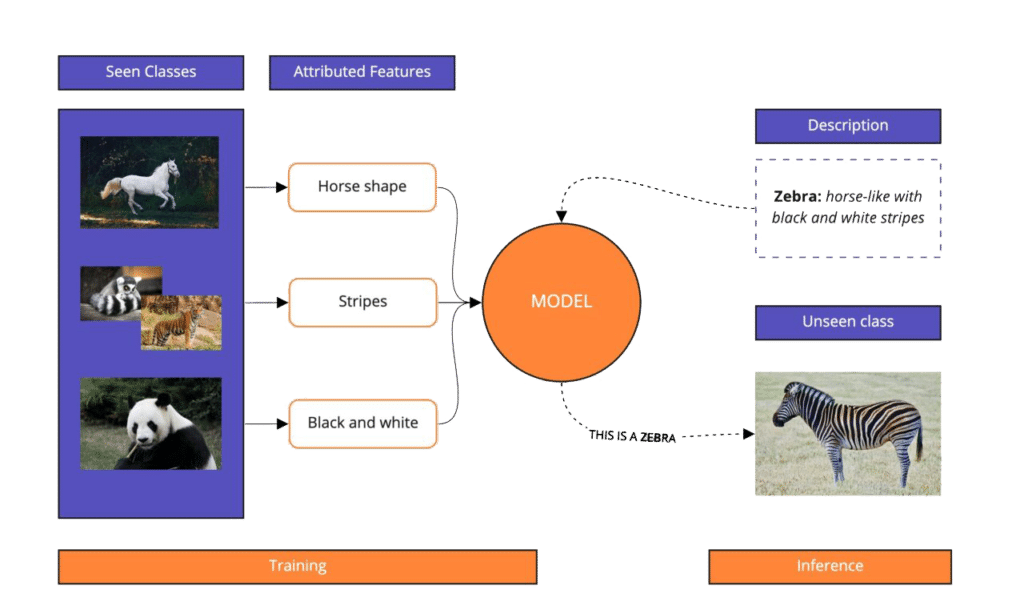
How Zero-Shot Learning Works. Via Modular.ai.
Powered by the goodness of GPT, StoryToolKitAI isn’t just a tool. It’s a conversational partner. You can use it to ask detailed questions about your index content, just like you would talk with chat GPT. And for you DaVinci Resolve users out there, StoryToolkitAI integrates with Resolve Studio. However, remember Resolve Studio is the paid version, not the free one.
Diving Even Nerdier: StoryToolkit AI employs various open-source technologies, including the RN50x4 CLIP model for zero-shot recognition. One of my favorite aspects of StoryToolkit is that it runs locally. You get privacy, and with ongoing development, the future holds endless possibilities.
Now, imagine wanting newer or even bespoke analytical A.I. models tailored for your specific clients or projects. The power to choose and customize A.I. models. Well, who does it like playing God with a bunch of zeros and ones, right? Lastly, StoryToolKitAI is passionately open-source. Octavian is committed to keeping this project accessible and free for everyone. To this end, you can visit their Patreon page to support ongoing development efforts (I do!)
On a larger scale, and on a personal note, I believe the architecture here is a blueprint for how things should be done in the future. That is, media processing should be done by an A.I. model – with its transparent practices – of your choosing and can process media independently of your creative software.

A potential architecture for AI implementation for Creatives
Or better yet, tie this into a video editing software’s plug-in structure, and then you have a complete media analysis tool that’s local and using the model that you choose.
2. Twelve Labs
Have you ever heard of Twelve Labs?
Don’t confuse Twelve Labs with Eleven Labs, The A.I. Voice synthesis company.
Twelve Labs is another interesting solution that I think is poised to blow up… or at least be acquired. While many analytical A.I. indexing solutions search for content based on literal keywords, what if you could perform a semantic search? That is, using a search engine that understands words from the searcher’s intent and their search context.
This type of search is intended to improve the quality of search results, Let’s say here in the U.S., we wanted to search for the term “knob”.
Other English speakers may be searching for something completely different.
That may not actually be the best way to illustrate this. Let’s try something different.
“And in order to do this, you would need to be able to understand video the way a human understands video. What we mean by that is not only considering the visual aspect of video and the audio component but the relationship between those two and how it evolves over time, because context matters the most. ”
Travis Couture
Founding Solutions Architect
Twelve Labs
Right now, Twelve Labs has a free plan which is hosted by Twelve Labs. It’s fairly generous. However, if you want to take deeper advantage of their platform, they also have a developer plan. Twelve Labs tech can be used for tasks like ad insertion or even content moderation like figuring out which videos featuring running water depict natural scenes like rivers and waterfalls or manmade objects like faucets and showers.
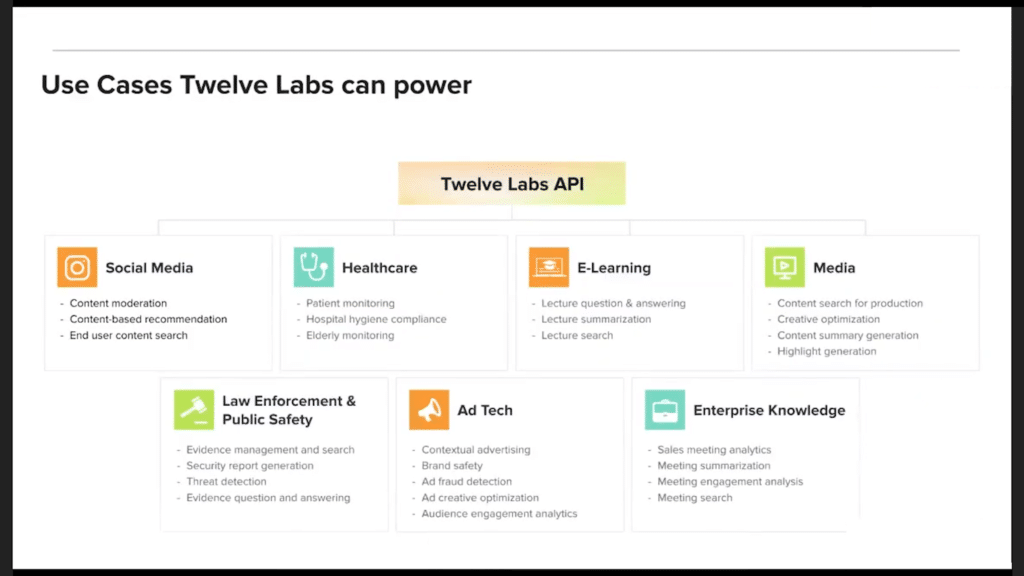
Twelve Labs use cases
With no insider info, I’d wager that Twelve Labs will be acquired as the tech is too good not to be rolled into a more complete platform.
3. Curio Anywhere
During the Production of this episode, our friends at Wasabi have acquired the Curio product.
Next up, we have Curio Anywhere by GrayMeta, and it’s one of the first complete analytical A.I. solutions for media facilities. Now, this isn’t just a tagging tool. It’s a pioneering approach to using A.I. for indexing and tagging your content, using their localized models, and if you so choose, cloud models, too.
In addition to all of this, there’s also a twist. See, traditionally analytical A.I. generated metadata can drown you in data and options and choices, overloading and overwhelming you. GrayMeta’s answer is a user-friendly interface that simplifies the search and audition process right in your web browser. This means briefly being able to see what types of search results are present in your library across all of the models.
Is it a spoken word? Maybe it’s the face of someone you’re looking for. Perhaps it’s a logo. And for you Adobe Premiere users out there, you can access all of these features right within Premiere Pro via GrayMeta’s Curio Anywhere Panel Extension. Now let’s talk customization. Curio Anywhere allows you to refine models to recognize specific faces or objects.
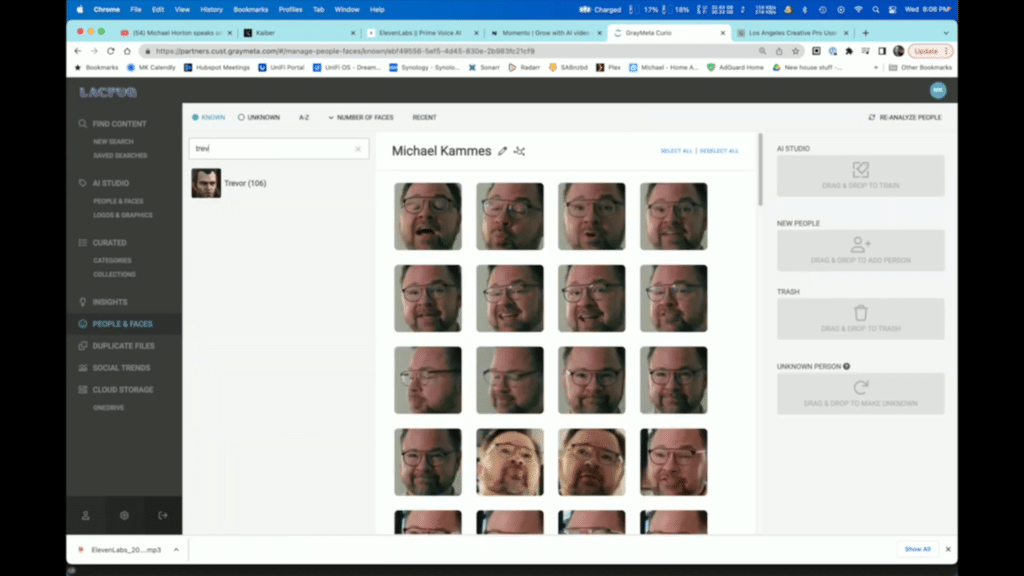
Curio Anywhere Face Training Interface
Imagine the possibilities for your projects without days of training a model to find that person. Connectivity is key and Curio Anywhere nails it, whether it’s cloud storage or local data, Curio Anywhere has got you covered. And it’s not just about media files either. Documents are also part of the package. Here’s a major win: Curio Anywhere’s models are developed in-house by GrayMeta, and this means no excessive reliance on costly third-party analytical services.
But if you do prefer using those services, don’t worry Curio Anywhere supports those too, via API. For those of you eager to delve deeper into GrayMeta and their vision, I had a fascinating conversation with Aaron Edell, President and CEO of GrayMeta. We talk about a lot of things, including Curio Anywhere, making coffee, and if the robots will take us over.
4. CodeProject.AI Server
It’s time to get a little bit more low level with CodeProject.AI Server, which handles both analytical and generative A.I. Imagine CodeProject.AI Server as Batman’s utility belt.”
Each gadget and tool on the belt represents a different analytical or generative A.I. function designed for specific tasks. And just like Batman has a tool for just about any challenge, CodeProject.AI Server offers a variety of A.I. tools that can be selectively deployed and integrated into your systems, all without the hassle of cloud dependencies. It includes object and face detection, scene recognition, text and license plate reading, and for funsies, even the transformation of faces into anime-style cartoons.
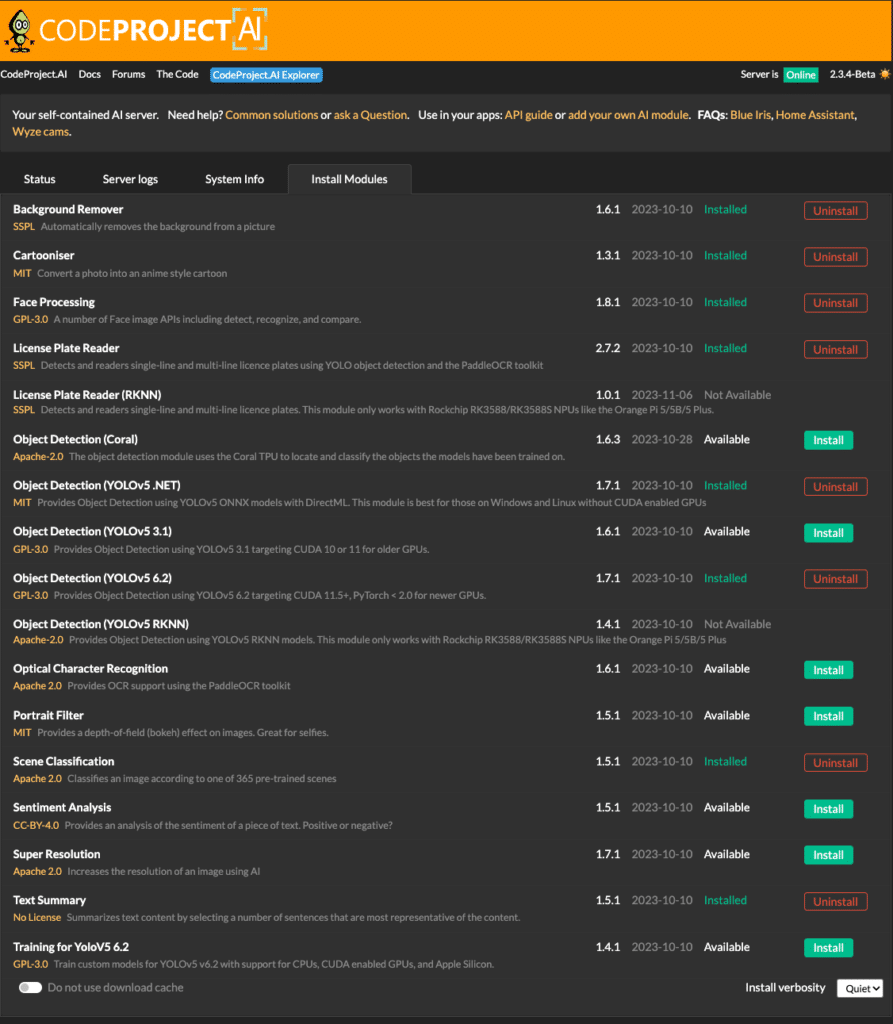
CodeProject.AI Server Modules
Additionally, it can generate text summaries and perform automatic background removal from images. Now you’re probably wondering, “how does this integrate into my facility or my workflow?” The server offers a straightforward HTTP REST API. For instance, integrating scene detection in your app is as simple as making a JavaScript call to the server’s API. This makes it a bit more universal than a proprietary standalone AI framework.
It’s also self-hosted, open source, and can be used on any platform, and in any language. It also allows for extensive customization and the addition of new modules to suit your specific needs. This flexibility means it’s adaptable to a wide range of applications from personal projects to enterprise solutions. The server is designed with developers in mind.
5. Pinokio
Pinokio is a playground for you to experiment with the latest and greatest in Generative AI. It unifies many of the disparate repos on GitHub. But let’s back up a moment. You’ve heard of GitHub, right? Most folks in the post-production space don’t spend much time on GitHub.
It’s what developers use to collaborate and share code for almost any project you can think of. GitHub is where cool indie stuff like A.I. starts before it goes mainstream. Yes, you too can be a code hipster by using Pinokio and GitHub and you can experiment with various A.I. services before they go mainstream and become soooo yesterday. As you can imagine, if GitHub is for programmers, how can non-coding types use it?
Pinokio is a self-contained browser that allows you to install and run various analytical and generative AI applications and models without knowing how to code. Pinokio does this by taking GitHub code repositories -called repos – and automating the complex setups of terminals, git clones, and environmental settings. With Pinokio, it’s all about easy one-click installation and deployment, all within its web browser.
Diving into Pinoki ‘s capabilities, there’s already a list chock full of diverse A.I. applications from image manipulation with Stable Diffusion and FaceFusion to voice cloning and A.I. generated videos with tools like K and Animate Diff. The platform covers a broad spectrum of AI tools. Pinokio helps to democratize access to A.I. tools by combining ease of use with a growing list of modules as it continues to grow in various sectors.
Platforms like Pinokio are vital in empowering users to explore and leverage AI’s full potential. The cool part is that these models are constantly being developed and refined by the community. Plus, since it runs locally and it’s free, you can learn and experiment without being charged per revision.
Every week there are more analytical and generative A.I. tools being developed and pushed to market.
If I missed one, let me know what they are and what they do in the comments section below or hit me up online. Subscribing and sharing would be greatly appreciated.
5 THINGS is also available as a video or audio-only podcast, so search for it on your podcast platform du jour. Look for the red logo!


Until the next episode: learn more, do more.
Like early, share often, and don’t forget to subscribe.
PSA: This is not a paid promotion.
]]>Is the embedded video not working? Watch on YouTube: https://youtu.be/UO6e_wMAp_0
In 2019, MovieLabs, a not-for-profit group founded by the 5 major Hollywood Studios released a whitepaper called “The 2030 Vision”. This paper detailed the 10 Principles that each of the studios agree is how they want to usher in the next generation of Hollywood content creation.
What are these 10 principles, why should you care, and who the heck is MovieLabs?
Let’s start there.
1. What is Movielabs?
Paramount Pictures, Sony Pictures Entertainment, Universal Studios, Walt Disney Pictures and Television, and Warner Bros. Entertainment are part of a joint research and development effort called MovieLabs. As an independent, not-for-profit organization, Movielabs was tasked with defining the future workflows of the member studios and developing strategies to get there.
This led to their authoring of the “2030 Vision Paper”.
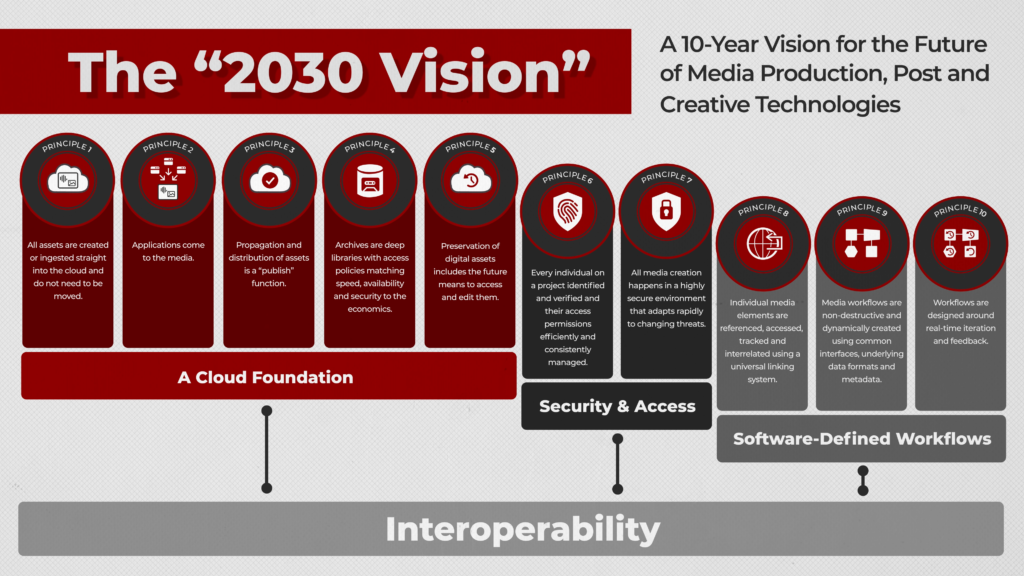
2030 Vision Overview
As Movielabs is also charged with evangelizing these 2030 goals, they’ve become the Pied Pipers for the future media workflows of the Hollywood studio system.
Now, what most folks don’t realize is that a vast majority of Hollywood is risk-averse.
Changing existing, predictable (and budgetable) workflows doesn’t happen until a strong case can be made for significant time and cost savings. Without a defined goal to work towards, studio productions would most likely continue on the path they’ve been on, and only iterating incrementally.
So, defining these goals and getting buy-in from each studio meant that there would be a joint effort to realize this 2030 vision. It also gave all the companies who provide technology to the studios a broad roadmap to develop against.
Essentially, everyone sees the blinking neon sign of the 2030 Vision Paper, and everyone is making their way through the fog to get to that sign.
The 2030 Vision Paper is directly influencing the way hundreds of millions of dollars are – and will – be spent.
So, what exactly does this manifesto say?
2. A New Cloud Foundation
The 10 core principles of the Movielabs 2030 Vision Paper can be organized into 3 broad categories: A New Cloud Foundation, Security & Access, and Software-defined Workflows.
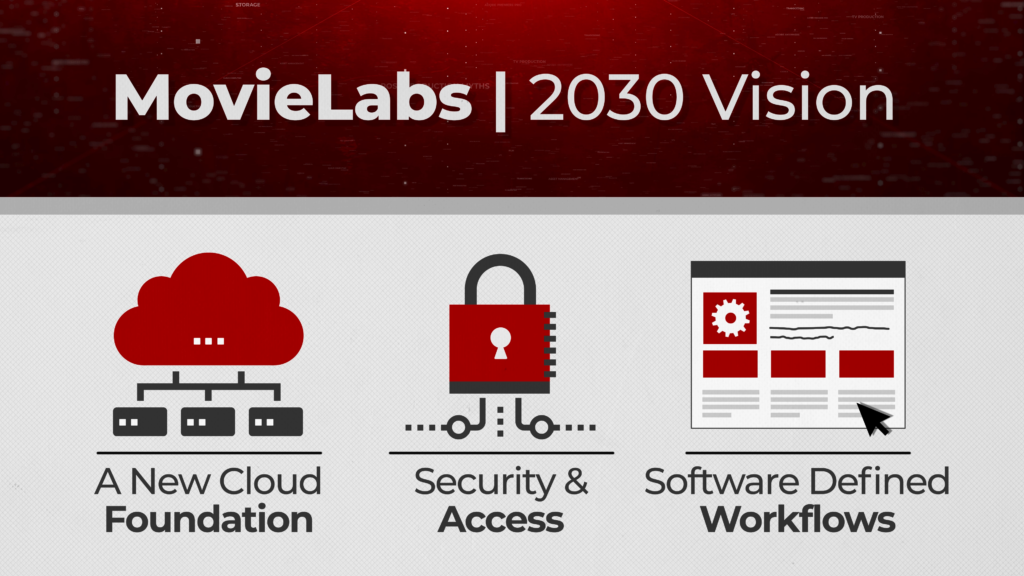
The first half of these 10 principles relate directly to the cloud.
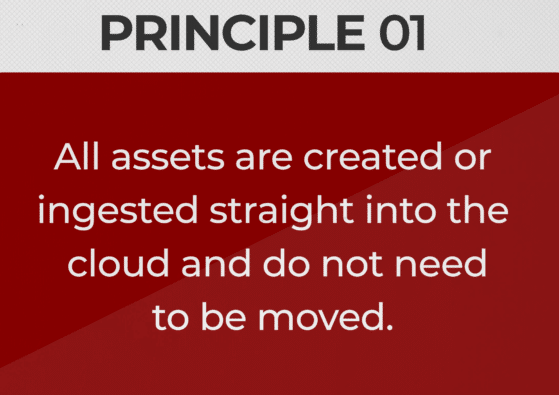
This means that any audio and video being captured go directly to the cloud – and stay there. And it’s not just captured content, it’s also supporting files like scripts and production notes. Captured content can either be beamed directly to the cloud or saved locally and THEN immediately sent to the cloud. This media can be a mix of camera or DIT-generated proxies and high-resolution camera originals, plus any audio assets.
As of now, an overwhelming majority of productions are saving all content locally. Multiple copies and versions are then made from these local camera originals. Then, the selected content is moved to the cloud. The cloud is usually not the first, nor primary repository for storage.
Having everything in the cloud is done for one big reason: if all the assets – from production to post-production – are in a place that anyone with permission in the world can access, then we no longer have islands of the same media replicated in multiple places, whether it be on multiple cloud storage pools or sitting on storage at some facility.
We’d save a metric [bleep]-ton of time lost by copying files, waiting for files to be sent to us, and the cost to each facility for storing everything locally.
Of course, having the media in the cloud does present some obvious challenges. How do we edit, color grade, perform high-resolution VFX, or mix audio with content sitting in the cloud?
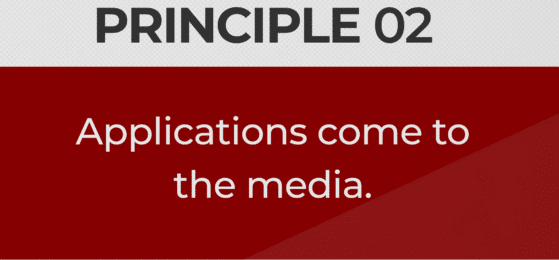
That’s where Principle #2 comes into play.
Most local software applications for professional creatives are built on the concept that the media’s assets are local, either on a hard drive connected to your computer or on some kind of network-shared storage. Accessing the cloud for all media introduces increased lag and reduced bandwidth that most applications are just not built for.
Despite this, one of the many tech questions answered by the pandemic was “What is the viability of creatively manipulating content when you don’t have the footage locally?”
The answer is that in many cases, it’s totally doable. Companies like LucidLink thrived by enabling cloud storage with media to be used and shared by remote creatives in different locations. LucidLink was the glue that enabled applications to come to the media and not the other way around.
Now, in most cases, we still need to use proxies, rather than high-res files, for most software tools. Editing, iterating, and viewing high-res material that’s sitting in the cloud is still difficult unless you have a tailored setup. Luckily, we still have 7 years before 2030 – and advancements on this front are constantly evolving.
Working with everything while it’s in the cloud also means that when it’s time to release your blockbuster, you can simply point to the finished versions in the cloud – no need to upload new versions.
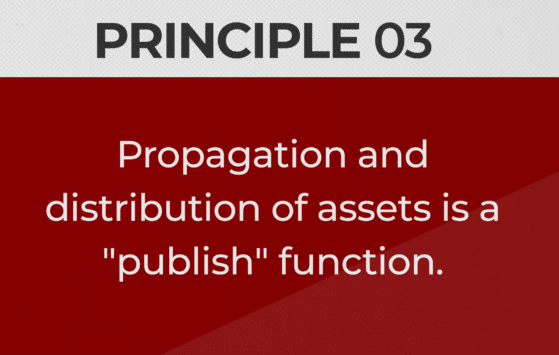
That’s where Principle #3 comes in.
This means no more waiting for the changes you’ve made on a local machine to export and then re-upload, then generate new links and metadata, as well as the laundry list of other things that can go wrong during versioning. The cloud will process media faster in most cases, as you can effectively “edit in place”.
The promise is that of time savings and less room for error.
Moving on, Principle #4 gets a bit wordy, but it’s necessary.
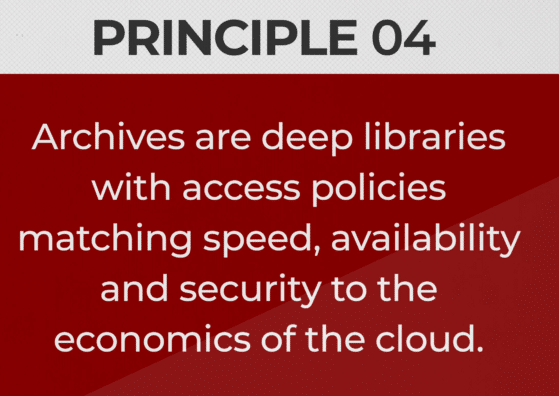
Archives generally house content that is saved for long-term preservation or for disaster recovery, and should rarely, if ever, be accessed. This is because archived material is typically saved on storage that is cheaper per Terabyte, but with the caveat that restoring any of that archived content will take time, and thus money.
This philosophy is as true for on-premises storage as it is for cloud storage. It can simply be cost-prohibitive to have massive amounts of content on fast storage when access to it is infrequent.
So, Principle #4 is saying that not everyone uses archives the same way, and if you do need to access that content in the cloud somewhere down the road, your archive should be set up in a way that makes financial sense for the frequency of access, while also ensuring that secure user permissions are granted to those who understand this balance.
Principle #4 also dovetails nicely into a major consideration with archived assets. Ya know, making more money!

Sooner or later, an executive is gonna get the great-and-never-thought-of-before idea to re-monetize archived assets. Whether it’s a sequel, reboot, or super-duper special anniversary edition, you’re going to need access to that archived content. Our next principle provisions for this.
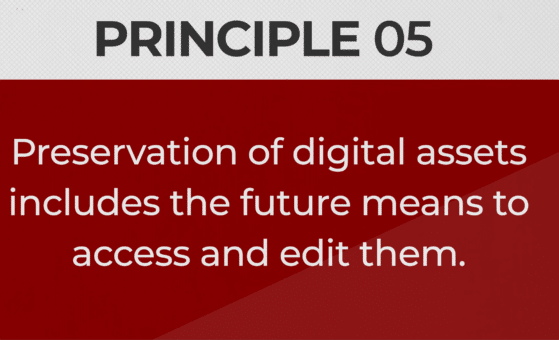
Having content in a single location that you’re allowed to see is one thing, but how you accurately search for and then retrieve what you need is, for now, a challenging problem.
Let’s take this one step further: Years or even decades may have passed since the content was archived, and modern software may not be able to read the data properly.
Some camera RAW formats, as the paper points out, are proprietary to each camera manufacturer and need to be DeBayered using their proprietary algorithms.
So, do we convert the files to something more universal (for now) or simply archive the software that can debayer the files?
We simply don’t have a way to 100% futureproof every bit of content.
What I’m getting at here is that the content has to be fully accessible and actionable – all in the cloud.
3. Security & Access
 OK, Great, stuff is in the cloud, but how do I make sure that only the right people have access to it?
Slow down, and take a breath, as Security and Access are one of the 3 areas of attention in the 2030 Vision paper.
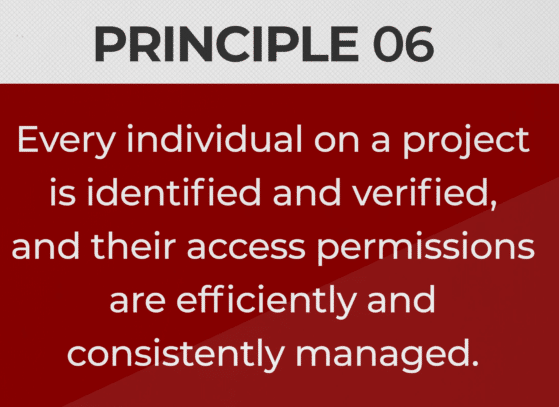
Peeling the onion layers back, this will require the industry to devise and implement a mechanism to identify and validate every person who has access to an asset on a production, which we’ll call a “Production User ID”.
This would be for all creatives, executives, and anyone else involved in the production. This “Production User ID” would allow that verified person to access or edit specific assets in the cloud for that production.
This also paves the way for permissions and rights that are based on the timing of the project.
As the 2030 Vision Paper calls out, “A colorist may not need access to VFX assets but does need final composited frames; a dubbing artist may need two weeks’ access to the final English master and the script but does not need access to the final audio stems; and so on.”
As Hollywood frequently employs freelancers – and executives change jobs – this also allows for users to have their access revoked when their time on the production is over.
In theory, tying this to a “Production User ID” means all permissions for any Production you work on are administered to your single ID. You wouldn’t have to remember even more usernames and passwords, which should make all of you support and I.T. folks watching and reading this a bit happier.
As you can imagine, accessing the content doesn’t mean it’s 100% protected while you’re using it.
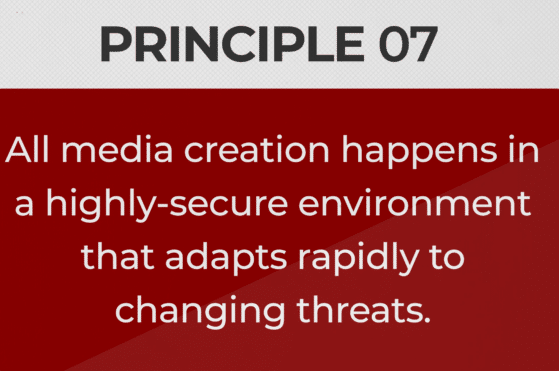 This is where I hope a biometric approach to security takes off sooner rather than later, as the addition of new security layers on top of aging precautionary measures is often incredibly frustrating. Multiple verification systems also increase the chance of systems not working properly with one another, which is a headache for everyone…and your IT folk.
Movielabs suggests “Security by design;’ which means designing systems where security is a foundational component of system design – not a bolt-on after the fact. There is also the expectation that safeguards will be deployed to handle predictive threat detection and that hopefully this will negate the need for 3rd party security audits, which is a massive headache and time suck.
The security model also assumes that any user at any time could be compromised. Yes, this includes you, executives. You are not above the law. This philosophy is also known as “Zero Trust”, and if you had my parents, you’d totally understand the concept of “zero trust”.
The last Principle in the “Security and Access” section is #8:
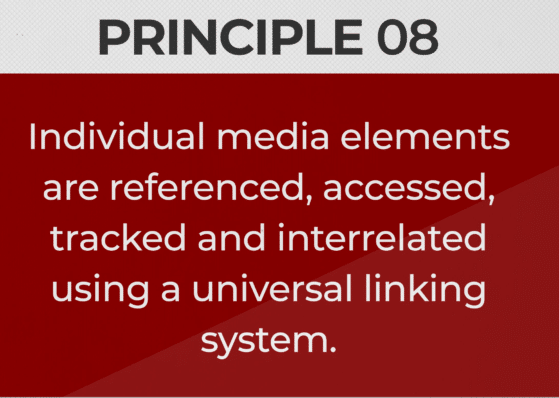 If you’ve done any kind of work with proxies, or managed multiple versions of a file, then you’ve dealt with the nightmare that is relinking files. Changes in naming conventions, timecode, audio channels, and even metadata can cause your creative application du jour to throw “Media Offline” gang signs.
And this isn’t just for media files. Supporting documents like scripts, project files, or sidecar metadata files can frequently have multiple versions.
This means that in addition to needing a “Production User ID” per person, we also need a unique way to identify every single media asset on a production; and every user with permission needs to be able to relink to that asset inside the application they’re using.
That’s a pretty tall order.
The upside is that you shouldn’t have to send files to other creatives – you simply send a link to the media, or even just to the project file, which already links to the media.
The goal is also to have this universal, relinking identifier functioning across multiple cloud providers. The creative application would then work in the background with the various cloud providers to use the most optimized version of the media for where and what the creative is doing.
Oh yeah, all of this should be completely transparent to the user.
4. Software Defined Workflows
The last 2 principles are centered around using software to define our production and post-production workflows.
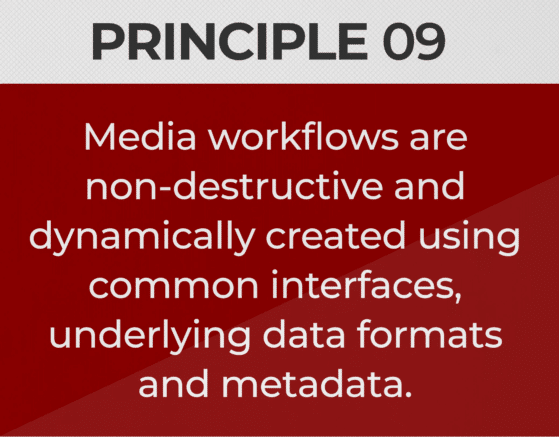 This principle covers two huge areas. The first is a common “ontology” – that is, a unified set of terminology and metadata, as well as common industry API.
Consider this: You’ve been hired to work on The Fast and Furious 27, and there is, unpredictably, a flashback sequence.
You need access to all media from the 26 previous movies to find clips of Vin Diesel, err Dom, sitting in a specific car at night, smiling. Have the 26 previous movies been indexed second by second, so you can search for that exact circumstance? How do you filter search results to see if he’s sitting in a car or standing next to it? How do you filter out if the car is in pristine shape or riddled with bullet holes after a high-speed shootout with a fighter jet?
As an industry, don’t have “connected ontologies” meaning, we can’t even agree that the term for something, say, in a production sense is the exact same thing in a CGI sense. If we can’t even agree on unified terms for things, how we can label them so you can then search for them while working on the obvious Oscar bait Fast and Furious 27?
The second ask is a common industry API or “Application Programming Interface” that all creative software applications use.
This allows the software to be built in such a way that it can be slotted into modular workflows. This is meant to combat compatibility issues between legacy tools and emerging workflows…and reduce downtime due to siloed tech solutions. While each modular software solution can be specialized, there will also be a minimum set of data, metadata, and format support that other software modules in the production workflow can understand. This also means that because of this base level of compatibility, all creative functions will be non-destructive.
Wait, you may be thinking…how in the world is this accomplished?
All changes made during the production and post-production process will be saved as metadata. This metadata can be used against the original camera files. This provides not only the ultimate in media fidelity but also the ability to peel back the metadata layers at any time to iterate.
We wrap up Principle #10:
 I get this; no one likes to wait.
When and if Principle #10 is realized, it means no more waiting for rendering, whether it be for on-set live visual effects, game engines, or even CGI in post. The processing in the cloud will negate the need to wait for renders. Feedback and iteration can be done in a significantly shorter amount of time. Creative decisions onset can be made in the moment rather than based on renders weeks or months later.
The 2030 Vision Paper also suggests this would limit post-production time – as well as budget – as more of each would be shifted towards visualizations in pre-photography.
5. Are We On Track?
Yes…ish?
There are a ton of moving parts – with both business and technology partners – that Movielabs annually checks the industry’s progress towards the 2030 vision; and Movielabs provides a gap analysis current state of the industry and the work that remains.
Without question, our industry has made advancements in areas like camera-to-cloud capture, VFX turnovers, real-time rendering, and creative collaboration tools that are all cloud-native. The Hollywood Professional Association – or HPA – Tech Retreat this year, which has become the de facto standard for must-attend industry conferences, showcased many Hollywood projects, and technology partners, like AWS, Skywalker, Disney Marvel.
The 10 principles need a foundation to build upon, and that means getting this cloud thing handled first. And that’s just what we saw.
Principles 1, 2, and 3 were the predominant Principles that large productions attempted to tackle first, with a smattering of “Software Defined Workflow” progress.
However, these case studies also reflected where we do need to make more progress, as we are already 4 years into this 2030 vision. These gaps include:
- Interoperability gaps, where tasks, teams, and organizations still rely on manual handoffs, that can lead to potential errors and inefficiencies.
- Custom point-to-point implementations dominate, making integrations complex.
- Open, interoperable formats and data models are lacking.
- Standard interfaces for workflow control and automation are absent.
- Metadata maintenance is inconsistent, and common metadata exchange is missing.
We also have gaps in operational support, where workflows are complex and often span multiple organizations, systems, or platforms.
- There’s a gap between understanding cloud-based IT infrastructures and media workflows. All files are not created equal and media needs specialized expertise over traditional IT.
- Support models need to match the industry’s unique requirements, considering its global and round-the-clock nature.
If we take a look at Change Management, we do run into fundamental problems with a move of this scale.
- This technology is new, and constantly evolving, and it’s only being spearheaded by the studios and supporting technology partners. This means few creatives have actually tried and deployed new ‘2030 workflows.’
- Plus, managing this change involves educating stakeholders, involving creatives earlier, plus demonstrating the 2030 vision value, and measuring its benefits.
I’m sure you have some input on one or more of these 5 THINGS. Let me know in the comments section. Also, please subscribe and share this tech goodness with the rest of your techie friends.
5 THINGS is also available as a video or audio-only podcast, so search for it on your podcast platform du jour. Look for the red logo!
Until the next episode: learn more, do more.
Like early, share often, and don’t forget to subscribe.
Editing & Motion Graphics: Amy at AwkwardAnthems.
]]>Not too long ago, I posted on several social media social platforms asking what questions YOU had on AI.
Reddit | Facebook | Twitter | LinkedIn
I’ve taken all of the 100+ responses, put them in nice neat little (5!) categories, and – wow – do I have a deluge for you.
1. Current AI Tools
By far, the most asked question was “what tools are available today?”
The easiest life is that of automated content analysis. For a hundred years, we’ve relied on a label on a film canister, a sharpie scrawl on the spine of a videotape case, or the name of a file sitting on your desktop.
Sure, while this tells you the general contents of that media, it’s not specific.
“What locations were they at?”
“What was said in each scene?”
“Were they wearing pants?”
This is where AI’s got your back. With content analysis, sometimes called automated metadata tagging, AI can analyze your media, recognize logos, objects, people, and their emotions, plus, transcribe what was said, and generate these time-based metadata tags. It’s a little bit like having Sherlock Holmes on your team, solving the mystery of the missing footage.
Because there is always a better take somewhere….right?
AI-assisted color grading is also starting to gain traction. With the help of AI models, colorists can quickly analyze the color palette of a video and create a consistent base grade.
This can save a ton of time when you’re dealing with various bits of media with different formats and color profiles. It does the balance pass so you can start to create …quicker.
AI can also suggest starter options for more creative color grades.
Like…adding a touch of “teal and orange”.

Colorists can also use existing content as an example to tell the AI the look you’re aiming for. Check out Colourlab.ai.
Additionally, AI tools are revolutionizing audio post-production, too. Noise reduction algorithms powered by AI can effectively remove unwanted background noise, enhance dialogue clarity, and improve overall audio quality. While this tech has been around for a while, adding AI models to existing algorithms is making these tools even more powerful.
These models also help with Frankenbiting.
Text-to-speech tools that also allow generated audio to sound like someone else – also called voice cloning – is a fantastic tool for Frankenbiting. For most of us commercially, it’s great right now for scratch narration or to replace a word or two, but it’s not quite at the point where you can easily adjust intonation. However, when that is possible, editors may possibly have a new skill to learn – crafting the performance of the voice-over in the timeline. Check out Elevenlabs.
Text-to-image and text-to-video products are rapidly being developed, just look at services like Runway, Midjourney, Dall-E, Kaiber, and a host of others. And while we can’t generate believable video b-roll on the fly (unless you like the current generative AI aesthetic) once that boundary is crossed, this will change the way editors work.
OK, instead of adding…can we subtract?
Rotoscoping tools are readily available in industry-standard tools like Photoshop. We can erase objects in near real-time and also use tools like Generative Fill for AI to “guess” what is missing right outside of the frame.
Now, Large Language Models – or LLMs – are the key for AI to understand what you want when you ask it a question. LLMs are also imperative for our next skill….text to code. Now, why is that important to you?
Many motion graphics software packages have an underlying code base you can use to script the actions you want. So, until text-to-video becomes more mature, you can use AI to generate code and scripts to tell the motion graphics tool what you want to do. Check out KlutzGPT.
All of the aforementioned model types are just a sampling of the broad categories of specific AI models. In fact, HuggingFace, a repository for various AI models and datasets, has nearly 40 categories of models for you to download, train, and experiment with to assist you on your next project.
2. Adapting to AI Evolution
“It is not the strongest species that survive, nor the most intelligent but the ones most adaptable to change”, once wrote Leo Megginson. And while he’s not wrong, I much prefer my attention span appropriate “Adapt or Die”, by Charles Darwin.
AI and its many variants are exploding. AI has already become the fastest-adopted business technology in history.
So, how can you adapt to this?
Well, the first step is to not panic.
DON’T PANIC.
If you’ve used any type of AI, you can totally see the current deficits. Whether it’s factual hallucinations or relatives with 20 fingers and 37 toes, AI will be evolving, which gives you time to learn and use AI tools as your sidekick, and not your replacement.

As AI for the general public is still in its infancy, it’s critical for us to learn about the AI models we’re utilizing. This means what data was used to train them, and who has curated that same data the models were trained on? This level of openness not only empowers us to make better decisions when selecting model providers but also fosters a culture of responsibility. We’ll discuss this a bit more later.
As with any moment in the zeitgeist, it’s imperative that we understand the difference between what’s the real deal, and what’s part of the hype machine. We’re likely to see the “AI” label slapped on many tools. Now, you may not think this is a big deal, but it can be.
To start off, it’s a matter of investment and value. You want to ensure you’re getting the whizzbang AI capabilities you’ve paid for, and not just a repackaged widget marketed as AI.
Genuine AI tools can also perform complex tasks, adapt to new situations, and sometimes even learn from those experiences, leading to more efficient processes and smoother outcomes. Non-AI tools or overhyped plugins, however, may not deliver their promised results, leading to major disappointment and potential setbacks in your project or business.
Plus, understanding the capabilities of AI tools can lead to better usage. Knowing what an AI tool can and can’t do allows you to utilize it to its fullest potential.
On the other hand, blatantly mislabeling a non-AI tool as AI can lead to wasted time or underuse.
Lastly, it’s really about ethics and transparency. Misrepresenting a tool’s capabilities is deceptive marketing, plain and simple. This is already a major problem – and a rarely policed one at that – in the tech world. It erodes trust between providers and users and can lead to skepticism about the entire field of AI.
Now, speaking of Ethics….
3. Ethics in AI Usage
As we leverage AI to push the boundaries of creativity, we’re faced with new dilemmas, around privacy, security, bias, and yes, our core ethics.
These aren’t just questions for the tech wizards or the philosophical ponderers. They’re issues that each one of us, as contributors to the creative world, needs to grapple with.
Why?
Because the decisions we make today will shape the digital landscape of tomorrow.
If we start with your creative tools, such as the ability for voice cloning and face swapping – which do have legitimate applications in our industry – they also raise ethical issues such as privacy, consent, authenticity, and accountability.
For example, voice cloning and face swapping could be used to create fake news, deep fakes, or malicious impersonations that could harm the reputation or even the safety of the original speakers or actors. Plus, bad actors could undermine the trust and credibility of the creative content and its sources.
To solve this, we need explicit consent from the original person before their voice or face is used. No more unsolicited ‘borrowing’. These technologies aren’t a license to steal.
Next, we need transparency. Any content using these technologies should have some form of credit or disclaimer, to ensure the audience knows what’s up.
Finally, accountability and traceability are key. Keeping track of source data and synthetic outputs ensures responsible use. This means finally deciding on and implementing some form of chain of custody solution, such as the content authenticity initiative.
In essence, we’re talking about a culture of responsibility in AI usage, balancing the scales of creativity and ethics.
From a macro perspective, data privacy and security have become increasingly critical ethical concerns within the AI sphere. As AI systems extensively rely on vast amounts of your personal data, the issues of data ownership and protection have exploded. To handle this, it’s imperative to establish and enforce stringent data protection guidelines.
The problem is, we’ve already been using the internet for a few decades now, and a good chunk of your data is already out there. That forum terms-of-service that you just scrolled past and clicked I ACCEPT on, has your data, which they can potentially monetize in any number of ways – including using it to train new AI models.
Now, ethical online services could certainly provide users with a user-friendly opt-out option, particularly for AI services that are deemed excessively invasive. Similar to the CAN-SPAM Act in the US and GDPR regulation in the UK, this could allow users to opt out of the use of any of their data to be used in training AI models.
There are several generative AI cases currently making their way through the U.S. legal system, including lawsuits against Stability AI, Midjourney, and DeviantArt, who are accused of mass copyright infringement. Microsoft, which owns GitHub, and OpenAI are also being sued over Microsoft Copilot’s tendency for reproducing developers’ publicly posted, open-source, licensed code. Keep tabs on these cases as they will shape how the combined art you make with AI is recognized.
Another critical point to consider is the potential for bias and discrimination in AI. The danger here is that biased data can lead to AI systems that further perpetuate those biases. The key to breaking this cycle is ensuring that the data used to train AI is diverse and unbiased and captures multiple perspectives. It’s also essential to regularly monitor AI systems to identify and rectify any biases that may sneak in.
Mandating AI model providers to publish their datasets to the public won’t fly, which means some form of audit by a 3rd party. The immediate thought here is some form of regulatory body, which I really can’t see a way around.
Transparency in AI algorithms is also an integral part of ethical AI use. It’s important for creators to understand how and why AI systems make certain decisions. As AI for the masses is a relatively new technology, we all need to become educated on the models we’re using. This kind of transparency can lead to more informed model provider choices and quite frankly encourages a sense of accountability.
Update: OpenAI, Google, others pledge to watermark AI content for safety, White House says.
4. Societal Implications of AI
The broader societal implications of AI in the creative industry extend well beyond your editing fortress of solitude. As AI continues to transform workflows and redefine job roles, it is crucial to support your fellow creatives in adapting to these changes.
One way to support creatives is through continued education and upskilling programs. As AI tools become more prevalent, editors should embrace lifelong learning and acquire new skills to stay relevant in our industry. By developing a deeper level of understanding of AI technology and its applications, editors can leverage AI to their advantage and remain valuable contributors to the creative process.
As Phil Libin, creator of Evernote and mmhmm, and current CEO of All Turtles said: “AI won’t replace any humans, humans using AI will.”

Phil’s quote, but my presentation – LACPUG May 2023
Like it or not, Democratic governance of AI is also crucial to address potential risks and ensure responsible AI development and usage.
Transparent regulations and ethical guidelines can help shape the future of AI in a way that aligns with our societal values and prevents misuse.
I know, that last statement is loaded with several gotchas, but I really don’t see another option.
Washington has historically played catch up on all things technology, but the current administration has published the “AI Bill of Rights” which speaks to many of these topics.
However as of now, they are not enforceable by law, and there aren’t any federal laws that explicitly limit the use of artificial intelligence, or protect us from its harm.
5. AI Evolution & Impact
At its core, what we do in post-production is all about storytelling, and AI, as fascinating as it is, is merely another tool in our toolbox. It’s true, AI can analyze data, identify patterns, and even suggest edits. Heck, it can generate content based on predefined parameters. But, no matter how advanced it becomes, it lacks the innate understanding of the human condition and the emotional and cultural context that you, as artists, possess.
To be clear: Don’t believe the job loss hype. AI is not about to take over our jobs. Please don’t fall for the classic “Lump of Labour” misconception that automation kills jobs. It’s simply not true. Technology serves as the spark for productivity enhancement, making people more efficient in their work. This increased efficiency triggers a chain reaction: it drives down the costs of goods and services and pushes up your wages. The net result is a surge in economic growth and job opportunities. But it doesn’t just stop there. It also inspires the emergence of fresh jobs and industries; ones that we couldn’t have imagined just a few short years ago.
In the face of evolving AI technology, the role of editors is not diminishing…but transforming. You are the bridge between the cold calculations of AI and the warmth of human connection. We infuse videos with a depth of storytelling that resonates with audiences, touches hearts, and sparks imaginations. AI cannot replace your creative intuition or your storytelling skills. It’s the human touch that adds the emotional depth, the nuanced transitions, and your profound connection with viewers. Remember that, my fellow creatives, and let’s shape the future of our industry together.
I’m sure you have some input on one or more of these 5 THINGS. Let me know in the comments section. Also, please subscribe and share this tech goodness with the rest of your techie friends.
Even if they are AI.
5 THINGS is also available as a video or audio-only podcast, so search for it on your podcast platform du jour. Look for the red logo!
Until the next episode: learn more, do more.
Like early, share often, and don’t forget to subscribe.
Editing & Motion Graphics: Amy at AwkwardAnthems.
]]>1. Team Projects
Team Projects in Premiere Pro – as well as for After Effects – has been around for quite a while. And it’s free!
Team Projects is Adobe’s solution for creatives who each have their own local edit system– either at the office or at home – and a local copy of the media attached to that edit machine. Meaning, no one in your team is using any shared storage. Everyone accesses a Project that Adobe hosts in the cloud. And because Creative Cloud is managing the Team Projects database, versions and changes are tracked.

Overview of Adobe Team Projects
Of course, this workflow does require discipline, including organizing media carefully and utilizing standardized naming conventions.
But once you’re in the groove, Team Projects is very easy to use.
Let’s take a quick look, so you can see how the flow goes.
You can start the process when you have Premiere Pro Open. Give the project a name, and then add Team members as collaborators with their email addresses. They’ll get a desktop notification through Creative Cloud that they’ve been added to the Team project.
Be sure to check your scratch disks on the 3rd tab correctly – as every team project editor will be saving their files to their own local storage.
Let’s fast-forward till we have an edit we want to share.
In your Team Project pane, you’ll see a cute little arrow at the bottom right of the pane, that tells you to share your changes in the team project.
Don’t worry if you forget, if you look sequence name tab, and see an arrow, that’s a reminder to share and upload your changes.
Click the “Share My Changes” button, and you’ll see all the stuff you’ll be sharing with your team members. Add a comment if you wanna summarize what you did. Click “Share”. Premiere Pro will then upload your changes to your Team’s Creative Cloud account.
Your Team members will then open the Team Projects they’ve been invited to through the Creative Cloud Desktop app.
Don’t worry – if any media files are marked offline in Premiere, team members can either relink to that media if they have it locally, or you can download them from within Premiere Pro via the Media Management option in Premiere.
As you can see, this is where the aforementioned Scratch disks, media management, and organization really come into play – or else you’ll be relinking all day.
Now, this is just the project, sequences, and media. What about Review and Approve with your Team? With the Adobe acquisition of Frame.io last year, Team Projects now adds review and approval capability inside Teams Projects.
Despite the fact Team Projects has been around for a while, it’s still an excellent solution that is already part of your Adobe Creative Cloud subscription, so there is no extra cost to test it out.
2. Adobe Productions
Adobe Productions is the evolution of the “Shared Projects” feature Adobe rolled out in 2017 and it differs significantly from Adobe’s Team Projects.
While the workflow with Team Projects expects each user to have their own local workstation and local copies of the media, Productions operates assuming that everyone on your team is already connected to the same shared storage. This would be akin to having all your creatives in the same building, and all of them mounting the same NAS or SAN volumes to their machine. Because everyone can access the same media at the same time, there is no need to copy media back and forth from your local drive to the shared drive. It saves a ton of time.

Overview of Adobe Productions
The trick to make this work is to have a software “traffic cop” working in the background and watching over every user opening what Adobe calls a “Production”.
A Production is essentially a sup’d up Premiere Pro project file that points to several smaller project files. The smaller project files are what each editor works with, and all changes are saved to the smaller projects within the primary Production.
The software traffic cop in Premiere allows users to work on a Project within the Production – and locking or unlocking the Project when needed to prevent over-writes or corruption of the files.
We start with starting a new Production within Premiere Pro.
We set a folder, and thus any Projects put within this Production folder will be part of the production. This is stored on the single shared storage volume everyone is using, and with the same media repository, everyone is reading from.
Now, when you load up the project within the production, you might notice the layout looks a bit odd. Let me demystify it for you.

The various icons and their function inside an Adobe Production
We’re used to “Bins” in Premiere Pro Projects. In Productions, we call it a “Folder”. Also, in Premiere Pro, we’re used to seeing “sequences.” In Productions, we call them “Project Files”.
I know that takes some getting used to. What will help, is that the Production pane in Premiere looks a lot like your folder structure at the desktop level. So, unlike Teams, where we have the media organization on disk, which can be different than the media organization within your project, Productions more closely resembles the “what you see is what you get” method when you organize at the OS level.

Adobe Productions on disk and inside Premiere Pro
We only have time for a few features here, but those who have worked in other collaborative editorial software will recognize some of the features of Productions – such as green and red icons, which tell you at a glance if the project is not in use and you can edit project or not.
 If this organization sounds familiar, it is. While Productions was a huge new feature for Adobe, this workflow was popularized prior by Avid, and their Media Composer software connected to their proprietary and 3rd party shared storage. You’ll also notice that an Adobe Production is much like an Avid Project file, in that an Adobe Production links to Adobe Project files in very much the same way an Avid Project links to Avid Bins.
3. All in the Cloud
The future, my friends, is here and Adobe has embraced it for many years now.
When deployed properly, all your Windows workstations running Premiere Pro in the cloud connect to a pool of shared storage, which is also in the cloud. As every editor has access to the same shared storage at the same time, the experience mimics that of the on-premises Productions workflow we talked about a few short minutes ago.

Overview of using Premiere Pro in the cloud
Now, you have the option of selecting and configuring your cloud workstations and appropriate cloud-shared storage, plus 3rd party collaboration tools for your cloud editing fortress, or you can use one of several companies that have already built that fortress so all you have to do is move your stuff in.
If you’re rolling your own cloud deployment, we have Adobe’s guide on Creative Cloud deployment on Virtual Desktop Infrastructures. These guides spell out requirements and best practices for deploying on AWS, Azure, and GCP platforms.
Close attention should be paid to Adobe’s notes talking about what types of machines to use, what types or tiers of cloud storage to use, what screen sharing protocols to use, and what workflows simply aren’t ready for prime time, like high fidelity color grading or surround sound audio. These guides provided by Adobe aren’t meant as a cookbook, but rather as bullet points for you cloud folks to get busy.

For all-in-one solutions, I can’t recommend BeBop Technology highly enough. They are by far the most advanced and mature platform for using Adobe in the cloud. With fast shared storage, enterprise security, plus on-demand and live review and approve tools. All you do is bring your software licenses, and BeBop does the rest. Plus, you pay the actual cloud costs, not marked-up costs by a 3rd party.
As someone who chose to work for BeBop for nearly 4 years because of just how far ahead they were than anyone else, this is by far the best all-in-one solution.
Other popular solutions include AWS’s Nimble Studio, albeit with some caveats on availability and features around the world, and that you’re pretty much on your own to administer it. AWS also has its Workspaces solution, but the Workspaces feature set really isn’t robust enough for post-production.
A slew of other companies has popped up, who simply tie into the APIs of various clouds and then present you a web front end so you can easily spin up and spin down machines. These are normally for VFX rendering or single-user usage, rather than real-time collaboration with shared storage and teams of users…all in the cloud.
You will need to accept the truth that doing anything in the cloud will have fluctuations in cost from month to month.
Working entirely in the cloud is not an “all-you-can-eat” for one price. The cloud is pay-as-you-go, and every workstation hour, server hour, and every MB stored or downloaded costs money. Expect several hundred dollars per editor in total cloud costs per month – even before your Adobe software costs.
It is, however, cheaper than renting a local edit and storage rig.
4. Remoting into the Office
I’m sure many of you have gotten into the groove of remoting into a system. That is, working from home in front of a terminal or workstation, and connecting to an editing machine back at the office. This is often the first thing facilities try when going remote because your team can use the same editing computers and storage they’ve always used. And it can work well if your home network and the office infrastructure are robust enough.

Overview of remoting into the office
This normally involves the facility creating a VPN – or Virtual Private Network – on the company’s firewall so editors outside the four walls of the facility can reach their machines behind the firewall. It also means the firewall will need to have specific ports opened, so screen-sharing protocols can do their screen-sharing thing.
One of the top screen-sharing solutions that Adobe, Avid, and others support is Teradici’s PCoIP or PCoIP Ultra protocol, now owned by HP. Great quality, killer security, and is dead simple for the end user.
Parsec, now owned by Unity, is another flexible solution with a ton of user controls.
I suggest staying away from screen-sharing protocols that are meant for IT-type usage, like Team Viewer, Apple or Microsoft Remote Desktop, and VNC, just to name a few. True, they are inexpensive but are not optimized for sync audio and video, color fidelity, or full frame rates.
Now, we have to briefly talk about the laws of Physics.
Due to the law of physics, you can’t be on the other side of the planet from your remote editing machine and expect to have a pleasurable editing experience. With few exceptions, ya gotta be on the same continent, and within about 1500 miles of the workstation to keep your sanity. For you ping nerds out there, ideally you wanna be under 60ms or 70ms roundtrip. And of course, the lower the ping number, the more likely you are to have a pleasurable editing experience.
5. Hybrids
As is the case with most so-called “standard” workflows, there are always hybrids. Hybrid methodologies address unique remote and technology scenarios, they may also address other gaps in the facility at the same time, or simply make workflows even more flexible. And while I can’t cover every single permutation, here are a few to be on the lookout for.
My first hybrid tool is LucidLink. LucidLink is cloud storage that understands the difference between the metadata of media, and the media itself, coupled with smart caching. Using that approach, LucidLink can grab the media Premiere Pro needs, but only grab *that frame* of media that is being requested. This means you don’t have to download the entire file in order to edit with it. Plus, that file caches on your system and will be played automatically when the NLE needs it instead of going back to the cloud. It’s awesome. LucidLink can work with on-premises edit machines, or with cloud VMs making it a great add-on for increased flexibility.
Next, we have Postlab, which is part of Hedge software. Postlab gives Premiere Pro editors the ability to sync project files, tasks, bookmarks, and media stored in Postlab drive to editors anywhere in the world using Postlab’s cloud servers. Postlab also locks Premiere Pro projects when in use by another team member, so nothing gets corrupted or lost.
Moving up the food chain, Asset Management could be a solution for you. Everyone struggles with how to organize, catalog, search, and retrieve their media. Well, what if you had an asset management system that could handle those chores *and* stream proxies from your storage at the office or in the cloud to your local computer running Premiere Pro at the same time? It’s much like Adobe’s former enterprise solution Adobe Anywhere, which, as luck would have it, was the first ever 5 THINGS episode way back in 2014.
IPV’s Curator product has this feature as an add-on, as does Arvato Bertelsmann’s Edit Mate product. Both are enterprise, and both are meant for much more than remote editing.
Have more remote editing with Adobe concerns other than just these 5 questions? Ask me in the Comments section. Also, please share this tech goodness of this *entire* series with the rest of your techie friends.

5 THINGS is also available as a video or audio only podcast, so search for it on your podcast platform du jour. Look for the red logo!
Until the next episode: learn more, do more.
Like early, share often, and don’t forget to subscribe.
]]>
1. Extending Your Desktop
The first method we’ll look at is simply extending your desktop, that is – having your processing computer at the office, while you work from home and remote into that machine. This has been the crutch that most facilities have relied on in the past few weeks. Let’s examine how this works.
First, this scenario assumes that you edit at a facility, where all of the networked computers and shared storage are…and that you can’t take any of those things home. This can be due to security, or other concerns like needing access to hundreds of TB of data.
In this case, the creatives are sent home, and I.T. installs a remote desktop hardware or software solution on each of the machines. The creatives then connect through a VPN or virtual private network – to gain secure access from their home editing fortresses of solitude back into the facility and attempt to work as normal.

Now topically this sounds like a real win-win, right? You get access to your usual machine and usual shared storage. Sure, you lose things like a confidence monitor (if you had one), but you should be fine, right?
The devil, as always, is in the details.
Typical screen sharing software solutions that are installed on your office editing machine are often dumpster fires for creatives. I’m not saying they are bad for general I.T. use, or when you need to remote in and re-export something, but by and large most screen sharing protocols do not give a great user experience. Full frame rate, A/V sync, color fidelity, and responsiveness usually suffer. Solutions like Teamviewer, Apple or Microsoft Remote Desktop, VNC, or most any of the other web-based solutions fail. Hard. You’ll pull all of your hair out before you finish an edit.
Moving up to more robust solutions like HP’s RGS – Remote Graphics Software – or a top of the line solution like Teradici’s PCoIP software – is about as good as you’re gonna get. The license cost may cost a few hundred dollars, too…depending on your configuration.
But here’s the kicker. They’re Windows only as a host.
While you can access the computer running the Teradici software with a macOS or Windows equipped computer – or even via a hardware zero client – the environment you create in will always be a Windows OS.
Quite unfortunately, there does not exist a post-production-creative friendly screen sharing solution for macOS.
The only solution I’ve come across over these many years is a company called Amulet Hotkey – yes, that’s their name – who take the Teradici PCoIP Tera2 card and put it into a custom external enclosure and add some secret sauce.
You then feed the output of your graphics card, plus your keyboard, mouse, and audio into the device and the PCoIP technology takes over. It’s quite frankly the best of both worlds: PCoIP and macOS.

This ain’t gonna be cheap.
Expect a few thousand dollars per hardware device, and availability at the moment may be difficult. You also going to need to do some network configuration for Quality of Service, and then decide how you’re going to “receive” the screen share at home, either on a laptop/desktop or with a zero client.
2. Islands of Media
There is no doubt that as a Media Composer user, you’ve already tried this. It’s the easiest and least expensive way to have multiple users working on Avid projects at the same time while not in the same building.
Wait a second. Let’s back-up and review how this works before we jump into the nitty-gritty.
We start off as we did before, with everyone working at the facility on networked computers and shared storage. We then begin to replicate the media from the facility on to portable drives.

Obviously, this could be a security risk and could potentially break the contract your facility might have with the content providers.
But that’s a soapbox I’ll get on later in the episode.
Replicating the media will require some serious media management. This means an accounting system to track who has what media – as well as a tight versioning schema. You’ll need to look at syncing schemas to get new media out to users, unless the editor is coming back to the facility for updated content.
This may or may not also include someone at the facility creating lower resolution proxies so editors can go home with a few TBs of media instead of dozens of TBs of media. Often this may include watermarks on the media as yet another level of accountability in the event of a leak.
Once that media is at home with the editor, there has to be a standardization on folder organization, naming conventions, and an extreme amount of attention paid to media management.
Avid has always had a fantastic way of project management. Projects link to any number of bins, and those bins contain sequences, and both point to media. This means bins are small files that can be emailed or dropboxed or otherwise shared with other users quite easily. Provided each user has the appropriate media, Media Composer can be coaxed into relinking to the media when a new bin is loaded.
This workflow does present some gotchas. Any rendered files will most like need to be re-rendered on each machine, and multiple users can’t work on the same bin or at the same time with the usual red lock/green unlock ability, so there does have to be some communication so as not to mess up someone else’s work.

Avid Bin Locking – Red Lock & Green Unlock
Obviously you’ll need to have a computer with a licensed copy Media Composer, plus the plugins you may need. Maybe you’ll have an awesome company like the reality post facility Bunim Murray who sent the editors home with their edit bay computers. Or, maybe you’ll have to grit your teeth with that old laptop collecting dust in the garage. Or, maybe – just maybe – you have the time and budget for the next few solutions.
3. Virtualization and Extending: Media Composer | Cloud VM
This next solution is new-ish to the Avid family and has traditionally only been something you did within the 4 walls of your facility, and out to your edit bays – not to your home.
Avid Media Composer Cloud | VM
BTW, trivia tidbit – the vertical line you see in many Avid naming conventions? It’s called a Pipe. Make of that what you will.
Media Composer Cloud | VM involves investing in a stack of servers at your facility and running VMs, or virtual machines, on these stacks of servers. On these VMs, a specially licensed copy of Media Composer Ultimate runs. Now, typically this is done so only everyone within the facility can access their computers, Media Composer, and shared storage from anywhere in the facility, and I.T. can administer everything from 1 location. No need to have computers in each of the bays. It’s sort of like the old tape room methodology.

As everyone is in the same facility, latency is cut down, plus, using tools like Teradici’s PCoIP software solution give the user a very fluid creative experience.
Recently, some facilities have been asking the question: “if our users are simply remoting into the VMs while they’re here in the office, why can’t they do the same at home?”
As you can imagine, quality of service and the user experience are paramount in the Avid world, so this was usually discouraged. In fact, as of this video, Avid still only recommends this for users within a facility. But that hasn’t stopped folks from trying it and using it.
So, users go home, and on their laptop or desktops, they load up their Teradici PCoIP software client, and connect via a VPN back to the facility mothership and continue working – much like we covered in option #1: Extending your desktop.
There are a few caveats, however.
This is not a “light ’em up tomorrow” solution. This requires specific servers, specific switches, and specific builds. Expects tens of thousands of dollars. It also requires upgraded licenses…not just for Media Composer, but many 3rd party software solutions and plugins either don’t handle virtualization well or want to charge you for the privilege. And playing with 3rd party storage may not be pleasant.
And since you use the Teradici PCoIP handshake to access the VMs, the virtualized environment is *only* Windows.
Ahh, ahh – stop it. There’s no crying in tech.
Teradici PCoIP, while a fantastic protocol, does have some limitations when it comes to creatives. Higher-end color grading may be difficult, as PCoIP is limited to 8bit viewing, although the newer Ultra variant does have 10bit capability. Audio is usually limited to stereo playback, and don’t expect a confidence monitor output – it’s just the computer GUIs.
But for most editing purposes, it’ll work just fine.
4. Streaming Proxies: Media Composer | Cloud Remote
This solution has actually been around for many years, but it was just called something different and was mainly found within news type deployments.
The premise is pretty elegant. If Avid MediaCentral UX – formerly branded as Interplay – was already your asset management du jour and managing and tracking your media at your facility, why couldn’t it serve up that media to you on-demand wherever you were?

And thus, Avid devised what is now known as Media Composer | Cloud Remote.
Media Composer Cloud | Remote, when coupled with MediaCentral | Production Management, allows servers at your facility to serve up real-time proxies of your on-premises media out to your remote machines.

The end-user has a full version of Media Composer and connects over a VPN back to the facility. The user checks out a project from the server, which is linked to media on Avid NEXIS shared storage back at the facility. When the local version of Media Composer attempts to access media, the local software retrieves that media from the server at the facility and streams a low res version in real-time to your local machine.

You are literally playing media in your timeline that’s being served up from hundreds or thousands of miles away – all within the familiar environment of Avid.
Here’s the best part: Your local copy of Media Composer can run on either Windows *or* macOS.
Avid Media Composer Cloud | Remote also has the added bonus of allowing remote users to work with their local media and then uploading in the background that local media back to the facility and checking it into the shared storage so others can access that media.
It’s a pretty slick solution.
However, Cloud Remote is simply a software option on top of Avid’s MediaCentral | Production Management solution. Meaning: remote editing with streamed proxies is not the main selling point of the system – it’s the asset management, automation, and collaborative features that drive companies to invest in it, with remote editing as an add-on. It’s like buying a house because it has a really cool garage.
It’s also not cheap, nor easy to administer. You’re going to need an Avid ASCR to handle it, plus stacks of servers and storage. Expect over $100K to get going.
Once configured however, it’s tech elegant and very cool.
5. Computer, Storage, and Media in the cloud: Avid | Edit On Demand
Edit on Demand was a relatively quiet beta solution by Avid, and it’s only really been viable for the past year. It’s available in early access and “by-request-only”.
In essence, Avid | Edit on Demand is accessing Media Composer software that is running in a public CSP – or cloud service provider. In this case, Microsoft Azure. The application, the NEXIS storage, and everything you need to edit with is in the cloud – and you access it via a laptop, desktop, or a zero client. It’s very similar to the method I talked about earlier: Virtualizing and Extending with Media Composer | Cloud VM. The difference here is that everything is in the cloud – not at your private facility.
Let’s take a look.
We’ll start where we’ve started every workflow: the traditional edit-at-a-facility.
We then take that infrastructure and virtualize it within the Microsoft Azure cloud – and only on Windows desktop. Editors get to use Media Composer Ultimate and they get access to NEXIS storage, so bin locking and project sharing works as you would expect it to. It’s then business as usual.

Like the other virtualized scenarios, this solution is also built on Teradici’s PCoIP, so the user experience is fantastic. Avid has also partnered with File Catalyst to enable users to upload and download content to and from the cloud NEXIS.
This type of solution allows productions to scale up and down quickly as needed and plays right into OpEx business models…which the film and TV industry is famous for. At last check, Avid was able to get these workstations and environment ready in under a week.
And because it’s in the cloud it allows users to work all around the world.
The usual caveats apply: there is no video monitor output currently, and audio is still limited to stereo audio. And no, Pro Tools is not supported in any cloud. It’s also not easy to get other applications installed on the workstation or direct administrator access to the NEXIS storage.
Pricing starts around $3000 per user per month, assuming under 200 hours of workstation a month. You can also buy hours and users in bundles, as well as TBs of storage.
And while this price is a little steep for freelancers, it certainly is the fastest way to get to scale quickly and without a large CapEx investment.
Bonus Editorial
While available technology certainly frames what can and cannot physically be done, we’re still hampered by stagnant security restrictions and guidelines, and outdated work environment expectations.
Many of the security requirements that are jammed into contracts are outdated and have not been revised, namely because no one wants to question it and potentially lose a large client. The looming worry of a hack, which is more often than not simply a password that was socially engineered, creates paranoia and the stacking of security protocols on top of more protocols.
Mark my words, you’re gonna see a serious revamp of security recommendations after this is over, and quite frankly, before this is over. I’m also hopeful that once these security guidelines are revisited and revamped, that facilites begin to realize that if you hired someone to represent your company, your brand, and generate the work that gets you paid, you’d trust them to work remote in some capacity.
Have more Avid Remote Editing concerns other than just these 5 questions? Ask me in the Comments section. Also, please share this tech goodness of this *entire* series with the rest of your tech friends….they’ve got nothing else better to do right now.
Until the next episode: learn more, do more.
Like early, share often, and don’t forget to subscribe.
]]>On this episode of 5 THINGS, we gonna get hiiiiiigh! In the clouds, with a primer on using the cloud for all things post-production. This is going to be a monster episode, so we better get started.
1. Why use the cloud for post-production?
We in the Hollywood post industry are risk-averse. Yes, it’s true my fam, look in the mirror, and take a good hard look and realize this truism.
Take the hit.
This is mainly because folks who make a living in post-production rely on predictable timetables and airtight outcomes. Deviating from this causes a potentially missed delivery or airdate, additional costs on an already tight budget, and quite frankly more stress.
The cloud is still new-ish, and virtually all post tasks can be accomplished on-premises. So why on earth should we adopt something that we can’t see, let alone touch?
Incorporating the cloud into your workflow gives us a ton of advantages. For one, we’re not limited to the 1 or 2 computers available to us locally. This gives us what I like to call parallel creation, where we can multitask across multiple computers simultaneously. Powerful computers. I’m talking exaFlops, zettaFlops, and someday, yottaFlops of processing power….and have more flopping power than that overclocked frankenputer in your closet.
Yeah, I said it. Flopping power.
It’s also mostly affordable and getting cheaper quickly.
To be clear, I’m not telling you post-production is to be done only on-premises or only in the cloud, most workflows will always incorporate both. That being said, the cloud isn’t for everyone. If you have more time than money, well then relying on your aging local machines may be the best economical choice. If your internet connection is more 1999 than 2019, then the time spent uploading and downloading media may be prohibitive. This is one reason I’m jazzed about 5G…but that’s another episode.
Now, let’s look at some scenarios where the cloud may benefit your post-production process.
2. Transfer and Storage
Alright, let’s start small. I guarantee all of you have used some form of cloud transfer service and are storing at least something in the cloud. This can take the form of file sharing and sync applications like Dropbox, transfer sites like WeTransfer, enterprise solutions like Aspera, Signiant, or File Catalyst, or even that antiquated, nearly 50-year-old format known as FTP.
Short of sending your footage via snail mail or handcuffing it to someone while they hop on a plane, using the internet to store and transfer data is a common solution. The cloud offers numerous benefits.

Hard Drive Life Expectancy
First is what we call the “five nines”, or 99.999% availability. This means that the storage in the cloud is always available and with no errors, with a max downtime of about 5 ½ minutes a year. In the cloud, five-nines are often considered the bare minimum. Companies like Backblaze claim eleven nines. This is considerably more robust than say, that aging spinning disk you have sitting on your shelf. In fact, almost a quarter of all spinning hard drives fail in their first 4 years.
Ouch.
I completely get the fact that the subscription or “rental” models are a highly divisive subject, and at the end of the day, that’s what the cloud storage model is. But you can’t deny that the cost that you get to spread out over years (also known as Opex, or operating expenditure budget) is a bit more flexible and robust than the one time buy out of storage (known as CapEx, or capital expenditure budget).
Which brings us to the next point, which is “what are the differences between the various cloud storage options?” Well, that deserves its own 5 THINGS episode, but the 2 main points to know is that the pricing model covers “availability”, or how quickly you can access the storage and read and write from it, and throughput, or how fast you can upload and download to it. Slower storage is cheaper, and normal internet upload and download speeds are in line with what the storage can provide. Fast storage, that is, storage that gives you Gigabits per second for cloud editing with high IOPs can be several hundred dollars a month per useable TB.
This is why cloud storage is often used as a transfer medium, or as a backup or archive solution rather than a real-time editing platform. However, with the move to more cloud-based applications, the need for faster storage will be necessary. With private clouds and data lakes popping up all over, the cost for cloud storage will continue to drop, much like the hard drives cost per TB has dropped over the past several years.

Cloud storage also has the added benefit of allowing work outside of your office and collaborating in real-time without having to be within the 4 walls of your company. Often, high-end firewalls and security, are, well, highly-priced, and your company may not have that infrastructure…or the I.T. talent to take on such an endeavor. Relying on the cloud for that security is built into your monthly price. Plus, most security breaches or hacks are due to human error or social engineering, not a fault in the security itself. Cloud storage also abstracts the physical location of your stored content from your business, making unauthorized access and physical attacks that much harder.
3. Rendering and Transcoding and VFX
The next logical step in utilizing cloud resources is to offload the heavy lifting of your project that requires Flopping Power.
The smart folks working in animation and VFX have been doing this for years. Rendering 100,000 frames (about an hour’s worth of material, depending on your frame rate) across hundreds or thousands of processors is gonna be finished much faster than across the handful of processors you have locally. It’s also a hellova lot cheaper to spin up machines as needed in the cloud then buying the horsepower outright for your suite.
Before you begin, you need to determine what you’re creating your models in and if cloud rendering is even an option. Typical creative environments that support cloud rendering workflows include tools like 3DS Max, Maya, Houdini, among others.
Next is identifying the CSP – cloud service provider –in this case, the big 3: Microsoft Azure, Amazon Web Services, or Google Cloud that supports a render farm in the cloud.
 Once you have your CSP selected, a user establishes a secure connection to that CSP, usually via a VPN, or virtual private network. A VPN adds an encrypted layer of security between your machine and the CSP. It allows provides a direct pipe to send and receive data to your local machines and your CSP.
From here, a queuing and render management software is needed. This is what schedules the renders across multiple machines and ensures each machine is getting the data it needs to crunch in the most efficient way possible, plus recombining the rendered chunks back together. Deadline and Tractor are popular options. What this software also does is orchestrate media movement between on-premises, the storage staging area before the render, and where the rendered media ends up.
Next, the render farm machines run specialized software to render your chosen sequence. This can be V-Ray, Arnold, RenderMan among many others. Once these frames are rendered and added back to the collective sequence, the file is delivered.
I know, this can get daunting, which is why productions traditionally have a VFX or Animation Pipeline Developer. They devise and optimize the workflows so costs are kept down, but the deadlines are hit.
This hybrid methodology obviously blends creation and artistry on-premises, with the heavy lifting done in the cloud. However, there is a more all-in-one solution, and that’s doing *everything* in the cloud.
The VFX artist works with a virtual machine in the cloud, which has all of the flopping power immediately available. The application and media are directly connected to the virtual machine. Companies like BeBop Technology have been doing this with apps like Blender, Maya, 3DS Max, After Effects, and more.
DISCLAIMER: I work for BeBop because I love their tech.
Transcoding, on the other hand, is a much more common way of using the horsepower of the cloud. As an example, ever seen the “processing” message on YouTube? Yeah, that’s YouTube transcoding the files you’ve uploaded to various quality formats. How this can be beneficial for you are for your deliverables. In today’s VOD landscape, creating multiple formats for various outlets is commonplace. Each VOD provider has the formats they prefer and are often not shy about rejecting your file. Don’t take it personally, often their playout and delivery systems function based on the files they receive being in a particular and exact format.
As an example, check out Netflix requirements.
The hitch here is metadata. Just using flopping power to flip the file doesn’t deliver all of the ancillary data that more and more outlets want. This can be captioning, various languages or alt angles, descriptive text, color information and more. Metadata resides in different locations within the file, whether it be an MP4, MOV, MXF, IMF, or any other the other container formats. Many outlets also ask for specialized sidecar XML files. I cannot overstate how important this metadata mapping is, and how often this is overlooked.
You may wanna check out AWS Elastic Transcoder, which makes it pretty easy to not only flip files…but also do real-time transcoding if you’re into that sorta thing. Telestream also has its Vantage software in the cloud which adds things like Quality Control and speech to text functions.
There are also specialty transcoding services, like Pixel strings by Cinnafilm for those tricky frame rate conversions, high quality retiming, and creating newer formats like IMF packaging.
4. Video Editing, Audio Editing, Finishing, and Grading
Audio and video editing, let alone audio mixing and video grading and finishing, are the holy grail for cloud computing in Post Production. Namely, because these processes require human interaction at every step. Add an edit, a keyframe, or a fader touch all require the user to have constant and repeatable communication with the creative tool. Cloud computing, if not done properly, can add unacceptable latency, as the user needs to wait for the keypress locally to be reflected remotely. This can be infuriating for creatives. A tenth of a second can mean the difference between creativity and…carnage.
There are a few ways to tackle editing when not all of the hardware, software, or media is local to you…and sometimes you can use multiple approaches together for a hybrid approach.
First, we have the private cloud, which can be your own little data center, serving up the media as live proxy streams to a remote creative with a typical editing machine. True remote editing.

Next, have the all-in approach – have everything, and I mean absolutely everything – is virtualized in the cloud. The software application, the storage, and you access it all through a basic computer or what we call zero clients.

Lastly, we have a hybrid approach. Serve the media up in the cloud to a watered-down web page based editor on your local machine.

Each has its pros and cons.
Both Avid and Adobe have had versions of an on-premises server serving up proxies to remote editing systems for many years. The on-prem server – a private cloud, for all intents and purposes – serves out proxy streams of media for use natively within an Avid Media Composer or Adobe Premiere Pro system connected remotely. Adobe called it Adobe Anywhere, and today the application is…nowhere. The expensive product was shelved after a few years. Avid, however, is still doing this today, using a mix of many Avid solutions, including the product formerly known as Interplay, now called Media Central | Cloud UX, a few add on modules, along with a Media Composer | Cloud Remote license. It’s expensive, usually over $100K.
Back to Adobe, I’d be remiss if I didn’t mention 3rd party asset management systems that carry on the Adobe Anywhere approach. Solutions like VPMS Editmate from Arvato Bertelsmann, or Curator from IPV are options but are based around their enterprise asset management systems, so don’t expect the price tag to be anything but enterprise.
The all-in cloud approach, meaning your NLE and all of the supporting software tools and hardware storage – are running in a VM – a virtual machine – in a nearby data center. This brings you the best of both worlds. Your local machine is simply a window into the cloud-hosted VM, which brings you all the benefits of the cloud, presented in a familiar way – a computer desktop. And you don’t have the expensive internal infrastructure to manage. This is tricky though, as creatives need low latency, and geographical distance can be challenging if not done right.
A few companies are accomplishing this, however, using robust screenshare protocols and nearby data centers. Avid has Media Composer and NEXIS running on Azure and will be available with Avid’s new ”Edit on Demand” product. BeBop Technology, is accomplishing the same thing, but with dozens of editorial and VFX apps, including Avid and Premiere.
Disclaimer: I still work for BeBop. Because their technology is the sh&t.
Some companies have investigated a novel approach: why not let creatives work in a web browser to ensure cross-platform availability, and to work without the proprietary nature that all major NLEs inherently have? This is a gutsy approach, as most creatives prefer to work within the tools they’ve become skilled in. However, less intensive creative tasks, like string-outs or pulling selects performed by users who may not be full-time power editors is an option. Avid adds some of this functionality into their newer Editorial Management product. Another popular choice for web browser editing is Blackbird, formerly known as FORScene by Forbidden Technology. This paradigm is probably the weakest for you pro editors out there. I don’t know about you, but I want to work on the tools I’ve spent years getting better at.
Alas, Mac only based apps like Final Cut Pro X are strictly local/on-premises solutions. And while there are Mac-centric data centers, often the Apple hardware ecosystem limits configuration options compared to PC counterparts. Most Mac data centers also do not have the infrastructure to provide robust screen sharing protocols to make remote-based Apple editing worthwhile. Blackmagic’s Resolve, while having remote workflows, still requires media to be located on both the local and remote systems. This effectively eliminates any performance benefits found in the cloud.

1 second in both audio and video
Audio, my first love, has some way to go. While basic audio in an NLE can be accomplished with the methods I just outlined, emulating pro post audio tools can be challenging.
Audio is usually measured in samples. Audio sampled at 48kHz is actually 48000 individual samples a second. Compare this to 24 to 60 frames a second for video, and you can see why precision is needed when working with audio. This is one reason the big DAW companies don’t yet sanction running their apps in the cloud. Creative work with latency by remote machines at the sample level makes this a clunky and ultimately unrewarding workflow.
Pro Tool Cloud is a sorta hybrid, allowing near real-time collaboration of audio tracks and projects. However, audio processing and editing is still performed locally.
On to Finishing and Color Grading in the cloud. Often these tasks take a ton of horsepower. And you’d think the cloud would be great for that! And it will be…someday. These processes usually require the high res or the source media – not proxies. This means the high res media has to be viewed by the finishing or color grade artist. These leaves us with 1 or 2 of unacceptable conditions:
- Cloud storage that can also play the high res content is prohibitively expensive and
- There isn’t a way to transmit high res media streams in real-time to be viewed and thus graded without unacceptable visual compression.
But NDI you cry! Yes, my tech lover, we’ll cover that in another episode.
While remote grading with cloud media is not quite there, remote viewing is a bit more manageable. And we’ll cover that…now.
5. Review and Approve (and bonus!)
Review and approve is one of the greatest achievements of the internet era for post-production. Leveraging the internet and data centers to house your latest project for feedback is now commonplace. This can be something as simple as pushing to YouTube or Vimeo or shooting someone a Dropbox link.
While this has made collaboration without geographic borders possible, most solutions rely on asynchronous review and approve…that is, you push a file somewhere, someone watches it, then gives feedback.
Real-time collaboration, or synchronous review and approve – meaning the creative stakeholders are all watching the same thing and at the same time, is a bit harder to do. As I mentioned earlier, real-time, high-fidelity video streaming can cause artifacts…out of sync audio, reduced frame rates, and all of this can take the user out of the moment. This is where more expensive solutions that are more in line with video conferencing surface, popular examples include Sohonet’s Clearview Flex, Streambox, or the newer Evercast solution.
However, In this case, these tools are mostly using the cloud as a point to point transport mechanism, rather than leveraging the horsepower in the cloud.
NDI holds a great deal of promise. As I already said, we’ll cover that in another episode.
Back to the non-real time, asynchronous review and approve: The compromises with working in an asynchronous fashion are slowly being eroded away by the bells and whistles on top of the basic premise of sharing a file with someone not local to you.
Frame.io is dominating in this space, with plug-ins and extensions for access from right within your NLE, a desktop app for fast media transfers, plus their web page review and approval process which is by far the best out there
Wiredrive and Kollaborate are other options, also offering a web page review and approve options.
I’m also a big fan of having your asset management system tied into an asynchronous review and approval process. This allows permitted folks to see even more content and have any changes or notes tracked within 1 application. Many enterprise DAMs have this functionality. A favorite of mine is CatDV who has these tools built-in, as well as Akomi by North Shore Automation, which has an even slicker implementation and has the ability to run in the cloud.
As a bonus cloud tool, I’m also a big fan of Endcrawl, and online site that generates credit crawls for your projects without the traditional visual jitteriness from your NLE, and the inevitable problems of 37 credit revisions.
A heartfelt thank you to everyone who reached out via text or email or shared my last personal video. It means more than you know.
Until the next episode: learn more, do more.
Like early, share often, and don’t forget to subscribe. Thanks for watching.
]]>NOTE: The eGPU Pro in this episode was a pre-release, beta model. Your results may vary with the shipping version.
1. 2018 Apple Mac Mini
What better machine to test how well an external GPU works than on a machine that has a horrible built-in GPU? Yes, tech friends, the powerful top of the line 2018 Mac Mini is built on Intel technology, which means there is a small GPU on the chip. While this GPU, the Intel UHD Graphics 630, isn’t going to break any performance records, it does provide a user with a basic way to feed their screen without a 3rd party graphics card.
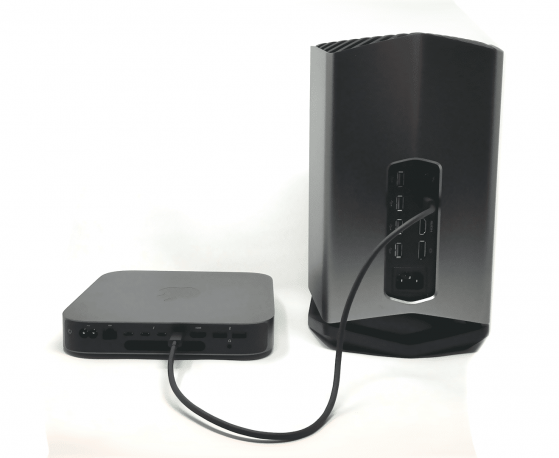
The Mac Mini also rocks USB-C for Thunderbolt 3 access. It’s this 40Gb connection that provides the bandwidth for an eGPU to shine. Slower I/O, like Thunderbolt 2 or even older connections, simply don’t provide enough bandwidth to accommodate all that a modern GPU can provide. The new Mini provides four USB-C Thunderbolt 3 ports, enough for up to 2 eGPUs. I also dig the legacy USB 3 ports, too…as we all have peripherals like keyboards and mice that still rock the legacy USB type A.
Back to throughput, the 2018 Mac Mini also has an option for a 10GigE copper connection. I know, many signify 10GigE as a sign that it’s “for professionals”. Quite frankly, 10GigE is the new 1GigE, so if you haven’t been looking into it, now would be a good time.
The Mini has many different options, from an entry level i3 processor to the midrange i5, to the i7 model that l I tested with. The units can be configured with 4 or 6 cores, and speeds of up to 4.6GHz in Turbo Boost Mode. For RAM, the 2018 Mini supports up to 64GB, although you may need to take it to an Apple store to get it installed. You can also build your system out with up to a 2TB PCI SSD.
My testing unit was the 6 core i7, with 32GB of RAM.
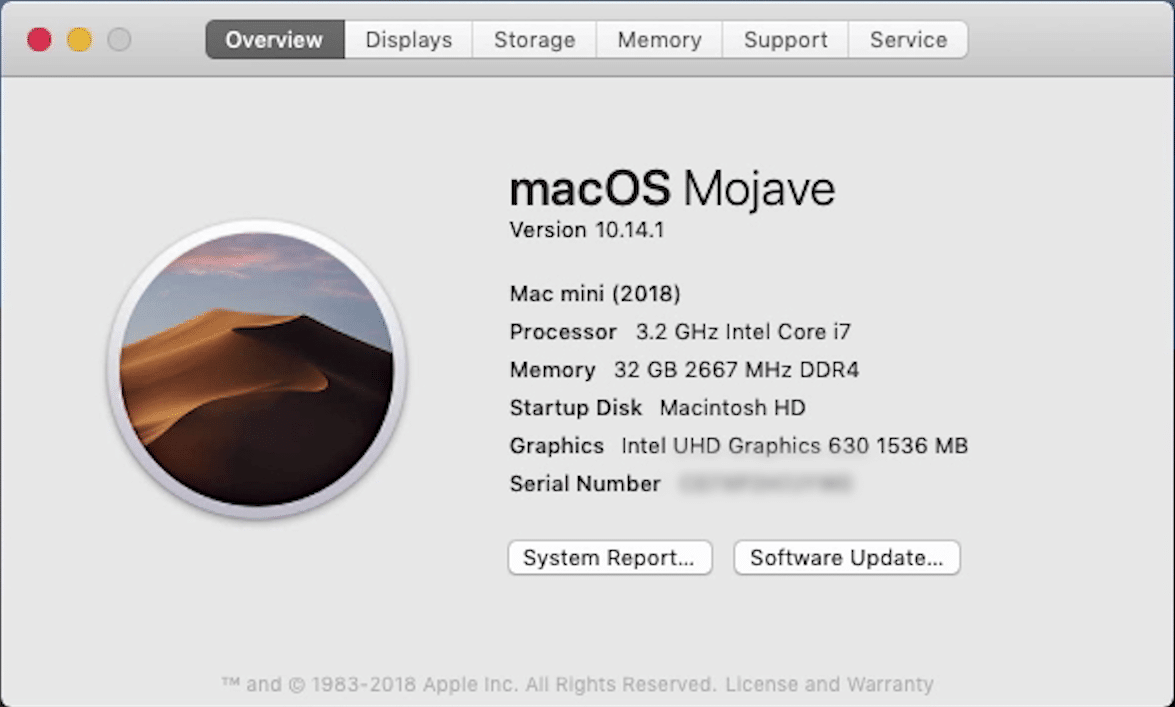
I ran some benchmarks on the Mini and compared the results with other Geekbench scores of other popular Apple machines.
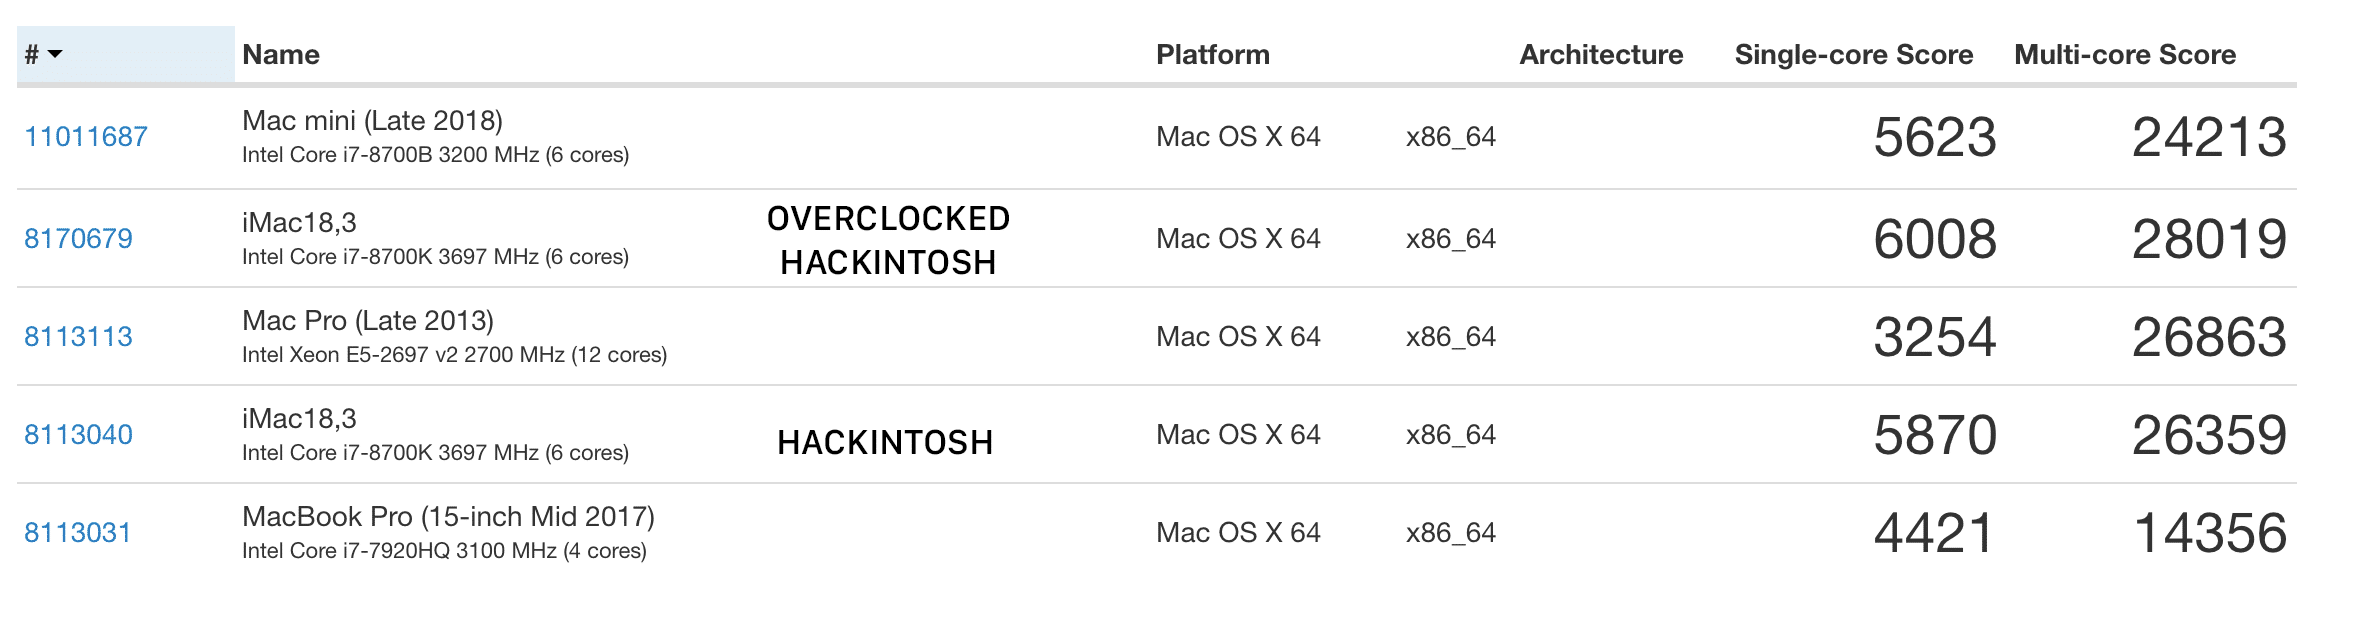
Here, we have a top of the line 2013 Mac Pro, and a maxed out 2017 MacBook Pro, plus my Hackintosh build from a few episodes back. You can see the 2018 Mac Mini is apparently no slouch when it comes to performance. Plus, it helps that the last Mac Pro is over 5 years old, too.
Let that sink in for a minute.

During testing, I was alerted to the fact that the Mini will throttle the chip speed when the unit hits 100 degrees (Celsius), so if you push the system too hard, the performance will suffer.
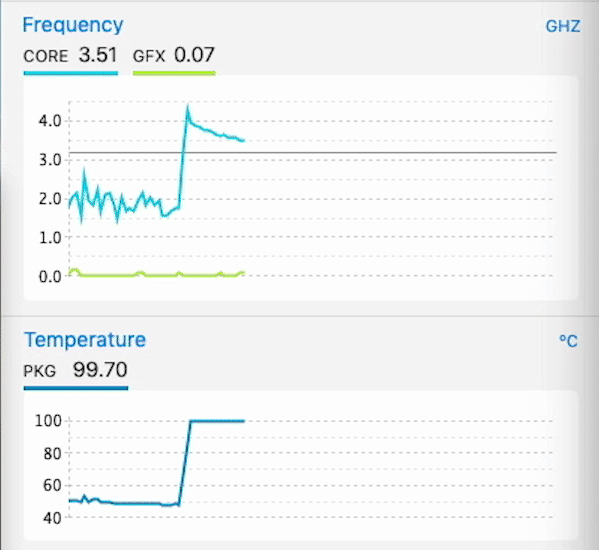
That kinda blows.
There are a ton of in-depth 2018 Mac Mini reviews out there, and let’s face it, you’re really here for the eGPU Pro and video post-production stuff…so let’s move onto that…now.
2. Blackmagic eGPU Pro
Like the non-pro model before it, the eGPU Pro from Blackmagic simplifies the addition of enhanced graphics processing by putting a GPU in an external enclosure. Also, like the previous model, the Pro has an 8GB card in it, albeit with a faster 8GB card than the Radeon Pro 580 in the previous gen. The new GPU is the Radeon RX Vega 56. Both models are meant to capitalize on the Metal playback engine, although they will apparently utilize OpenCL or CUDA. Given the future of both of those last two standards on the Mac platform….best start getting used to Metal.

The eGPU Pro also features a Display Port, unlike the non-Pro version. This allows for up to 5K monitoring if you so desire…as the HDMI 2.0 port tops out at 4K DCI at 60fps. Both units come with 4 USB 3.0 ports and a spare USB-C Thunderbolt 3 port so you can connect even more peripherals through the eGPU.
Now this sucker is damn quiet. Aside from a small, white LED indicator at the bottom of the unit, and an icon in the menu bar, you wouldn’t even know the unit is running.

The Blackmagic eGPU Pro is very quiet. The only physical indicator is a small white LED at the bottom.
The unit is a mostly a massive heatsink, so expect heat to come pouring out of the top.
The eGPU Pro ships with a 1 foot USB-C cable. This cable is VERY short, which means this unit is always going to be next to your computer.
While I didn’t test it, I understand longer USB-C cables can cause issues, so stick with the cable that came with it.

It’s imposing. So is the size of the Blackmagic eGPU Pro.
While the eGPU Pro is cool looking, it‘s pretty hefty and does take up valuable desktop real estate. It also dwarfs gear next to it, like the Mac Mini. In fact, it’s larger than a 2013 Mac Pro, among other….things.
What is uniquely different, however, is that the eGPU Pro is only certified to work with Mac OS 10.14 Mojave. I like this, as support in OS 10.13 High Sierra for eGPUs was a crapshoot at best. Interestingly enough, nothing needs to be installed in Mojave for the eGPU Pro to run – the GPU drivers are built into the OS. In fact, the eGPU Pro comes with no drivers or software to install.
I tested with a pre-shipping model of the Pro –in fact, the packaging was still for the non-pro version. As such, there was no documentation or quick start guide with the unit.
The ship date for the eGPU Pro has now slipped a month from November 2018 to December 2018; perhaps code is still being written for Resolve and FCPX, as I did find some issues. Let’s check that out now.
3. Apple Final Cut Pro X and Blackmagic DaVinci Resolve
Please check out the video for specifics!

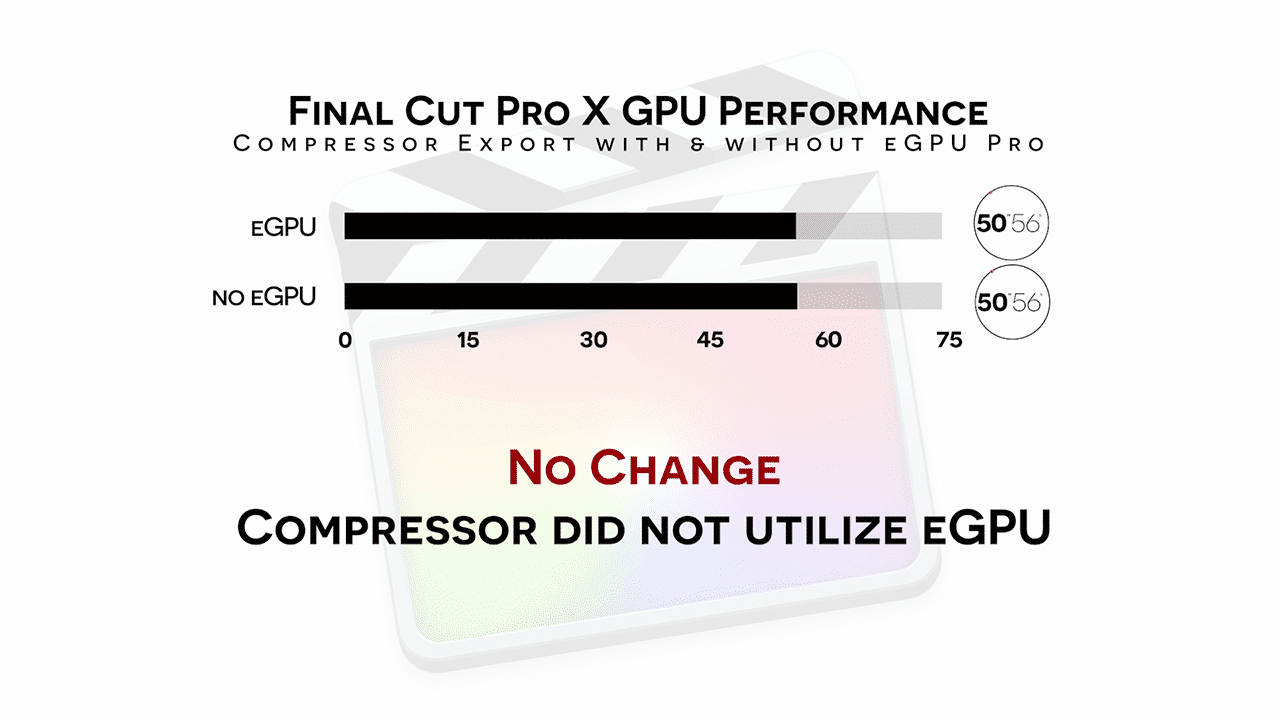


Powergrades by Jason Bowdach to bring the Resolve system to it’s knees.

4. Adobe Premiere Pro and Avid Media Composer
Please check out the video for specifics!


Avid Media Composer disables all GPU effects as the Mac Mini’s onboard GPU fails to meet Media Composer’s requirements.


5. Conclusions
Lots of data to crunch!
It’s obvious that despite the initial high benchmarks via Geekbench, the 2018 Mac Mini, on its own, doesn’t really have a fit for creative uses in Post, unless it’s used as a file server, or perhaps a lone Mac in a sea of Windows machines when you need an easy way to create ProRes files. I concede that it may work for story producers or preditors, but I find that it’s never a good practice to hit the upper limits of a new machine from day 1.
I should also note that the 2018 Mac Mini is not qualified by all NLE manufacturers.
Avid hasn’t qualified it as of now.

It doesn’t meet the minimum specs that Adobe publishes.

The Blackmagic DaVinci Resolve Configuration Guide calls out specifically that the Mini should not be used.

Apple’s requirements for Final Cut Pro X, on the other hand, are barely met by the Mini.

Personally, I’d save the $2000 this machine costs and put that towards an iMac or iMac Pro, or perhaps the highly anticipated 2019 Mac Pro.
Now, as for the eGPU, it’s important to remember that all of this is new. This was essentially a science experiment. Mojave, as of this episode, is only at 10.14.1. Apple, one of the partners in this eGPU collaboration, still doesn’t have all of the bugs worked out, as Compressor doesn’t appear to utilize it. That being said, speed increases in FCPX and Resolve are undeniable and certainly showcase the speed a good GPU can bring to the post table.
Adobe, while not part of the Apple/Blackmagic eGPU soiree, also shows speed benefits out of the box – and that’s before Adobe has done any optimization for it. That’s pretty impressive.
Avid, on the other hand, has never been a GPU powerhouse. My tests only really showed that Avid has some serious engineering to do to incorporate eGPUs into future releases.
If this eGPU Pro solution could breathe life into an old system, I might be more inclined to suggest it…however, the fact that you need a relatively recent Thunderbolt 3 enabled machine makes that “old system” label inappropriate.
Now, you can ‘roll your own’ eGPU, by using a 3rd party external chassis and compatible graphics cards. They can be parted out and purchased for under $800 on the street…$400 cheaper than the eGPU Pro. While I don’t expect an all in one solution to be the same cost as a DIY, a $400 delta is too big of a chunk to ignore.
The only real time I can suggest a solution like this is for those folks who edit on a MacBook or a MacBook Pro. Those road warriors who are on the go and editing but need to come back home base at some point and do some serious heavy lifting. But is that market large enough? Gaming and other GPU enabled applications have a much wider reach than the Post community.
Regardless, I’m excited to see if in 12-18 months NLEs have been able to start utilizing eGPUs better than they do from day 1.
Have more Pro eGPU and Mac Mini questions other than just these 5? Ask me in the Comments section.
Until the next episode: learn more, do more.
Like early, share often, and don’t forget to subscribe. Thanks for watching.
- Evaluation gear provided by Michael Horton / LACPUG
- Resolve power grades by Jason Bowdach
- RED Footage courtesy RED.com
- XAVC Footage courtesy Alex Pasquini / alexpasquini.com
- Cut Trance – Cephelopod by Kevin MacLeod is licensed under a Creative Commons Attribution license (https://creativecommons.org/licenses/by/4.0/)
Source: http://incompetech.com/music/royalty-free/index.html?isrc=USUAN1100273
Artist: http://incompetech.com/
]]>
1. Upload Tricks
You probably have media on YouTube, and you probably think that after thousands of hours, you’ve mastered the ‘Tube. But there are some little-known upload tricks and workarounds, playback shortcuts, and voodoo that you may not even know that YouTube does.
Let’s start at the beginning. Let’s say you’ve got a masterpiece of a video, maybe it’s an uncle getting softballed in the crotch, maybe it’s your buddy taking a header down a flight of stairs, or maybe, just maybe it’s the cutest pet in the world. MINE.

Lucy: the cutest, bestest pet in the world.
…and the world needs to see it, right? And you export a totally-worth-the-hard-drive-space-huge-monster-master-file so you don’t lose 1 bit of quality.
And that’s OK.
Now, in actuality, it’s not the most efficient, but let’s save that existential technology discussion for another episode.
Did you know that YouTube will actually take this massive file? That you don’t need to shrink it, recompress it, or otherwise use the presets in your transcoder du jour? YouTube used to publish a page that specified video file sizes and data rates for “enterprise” grade connections. Ostensibly, this was so companies with fat internet connections could upload massive files. After all, YouTube re-compresses all files anyway. Yes, as I’ve said many times before, YouTube will ALWAYS recompress your media. ALWAYS.
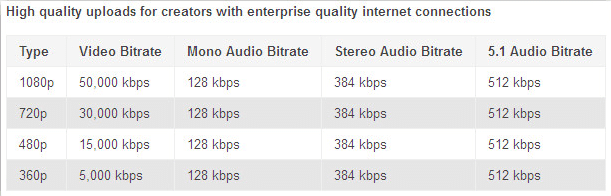
“Enterprise” video bitrates for YouTube. These are 5-6x LARGER than what YouTube recommends for typical users.
But, this page was taken down.
Why?
Because accepting larger files sizes ties up YouTube’s servers, and takes longer for their transcoding computers to chomp through and subsequently create the versions you’ll end up watching. Plus, it’s a crappy experience for you, the end user, to wait hours for an upload AND the processing. Despite this, you can still do it. In the above video, you can see I have an HD ProRes file, and it’s several GB. As I select the file and start the upload, YouTube tells me this will take several hours. That sucks. However, uploading a less compressed file means the versions that YouTube creates will be based on higher quality than the compressed version you’d normally export and upload from your video editor or one that you’d create from your media encoder.
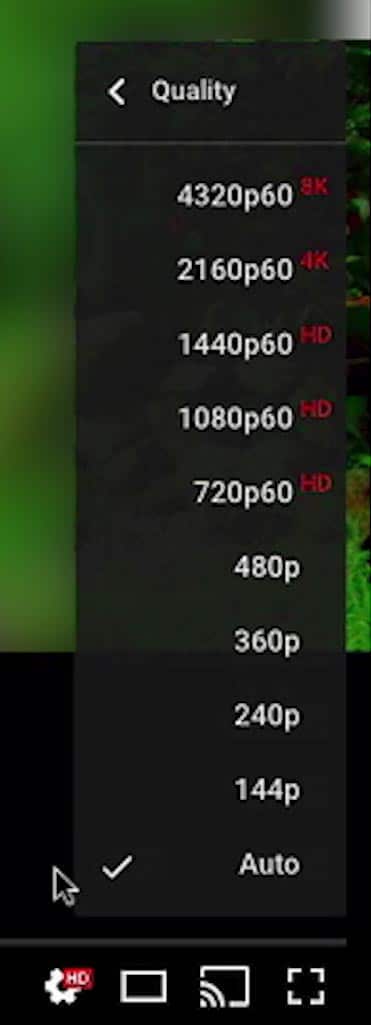
YouTube creates all of your media variants…so you don’t have to.
So what would you rather have…a copy of a copy of your finished piece? Or just 1 copy? The less compression you use, the better looking the final video will be.
More on this here: A YouTube user uploads, downloads and re-uploads the same video to YouTube 1000 times and the compression is staggering. This is called “generational loss”.
By the way, you know that YouTube creates all of your various versions, right? From the file you upload, YouTube creates the 240, 360, 480, 720, 1080 and higher versions. Are yours not showing up? Have patience. YouTube takes a little bit.
OK, back to the high res fat files. I know, the fact there is a long upload for these large files sucks, but it does lead me to the next tip. Did you know you can resume a broken upload? As long as you have the same file name, you can resume an upload for 24 hours after a failed upload. In the video above, let me show you. Here’s the file I was uploading before. As you can see, it still has quite a way to go. Oops, closed my tab. Now, I’m gonna wait a little bit.
OK, it’s been several hours, and I’m going to open a new tab and navigate back to the upload page. Now, I’ll reselect the same file. The upload picks up where it left off, and the file continues to upload.
Great for when the internet goes out.
2. Captioning Hacks
I’ve been a massive proponent for video captioning for years. Mainly for making tech information more accessible to as many people as possible, but also because it does boost the visibility of your videos via SEO, or Search Engine Optimization. Now, engines like Google not only index the tags you assign to the video but also the objective content that’s heard in the video…what’s being said.

Now, YouTube’s captioning is not foolproof. If the audio recording quality is poor, or if there are a lot of slang terms or names, the auto-captions may be wrong. However, the auto-captions are a great start, because not only do they attempt to get stuff right, but they also TIME the captions for you. After YouTube does it’s best to auto-caption, you now can either use YouTube’s built-in transcript and caption editor to fix mistakes and further stylize the timing, but you can also download that same transcript and use it in your NLE, so you can have a caption file on any other platform you like.
Many other professional VOD outlets or platforms accept closed captioning as embedded captions, or even as sidecar files. This also means you can turn the text of your transcript into an accompanying blog post. In fact, that is what I do for this web series and podcast. Another hack is that if you have scripted content or a teleprompter script, you can upload that to YouTube as well. YouTube will then time the script you have against the video you’ve uploaded, and convert the script into captions…which once again, you can download and use.
As a side note, I have a tutorial on how to accomplish this very thing, turning your script into timed captions using Youtube…check it out. It’s not only a massive time saver but also a way to boost your SEO ranking and give you content for a webpage.
3. Playback Shortcuts
Keyboard shortcuts are your friend. The mouse is wholly inefficient and only serves to slow you down. Have no fear, the smart folks at YouTube have incorporated many of the shortcuts found in your NLE into YouTube. Let’s check some of ‘em out.
Let’s start with the old reliable “J”, “K”, “L”, or rewind, play/pause, and fast forward.
J = rewinds 10 seconds.
K = play/pause.
L = forwards 10 seconds.
What about Spacebar for play/pause? You betcha.
My favorites are frame by frame playback, especially when you’re trying to deconstruct that brand new movie trailer that just dropped, or trying to emulate and reverse engineer an effect from someone else’s video. For that, use the comma key to nudge 1 frame at a time in reverse. Conversely, you can hit the period key to do a 1 frame advance. You can also add the shift key to adjust the playback globally. Shift + the period key speed playback up 25%, and hit it again to boost playback to 50% faster. The reverse is also true for the shift + comma key combo. 75% speed, 50% speed, and so on.
Here’s a good list for you to earn some muscle memory for.
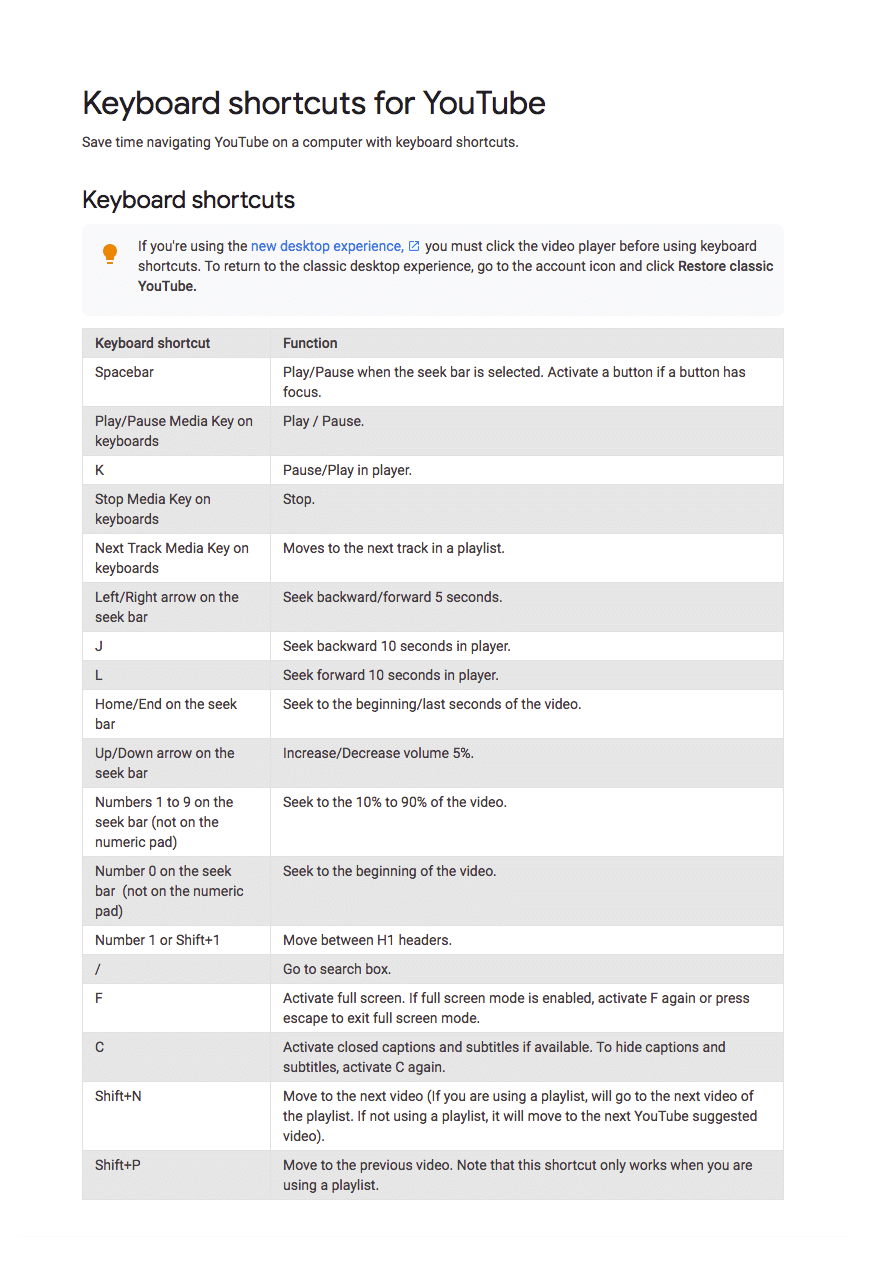
Now, if you spent any amount of time on Netflix, you’ve probably stumbled across this window, too.

Or come across this substantially more involved window: A/V Stats.
Advanced Netflix Stats: Display A/V Stats (Ctrl + Shift + Alt + D)
YouTube has something very similar; a handy-dandy “stats for nerds” window. When playing back a YouTube video, right click on the player window. From this menu, select “Stats for Nerds”.
Right click on the player window to load YouTube’s “Stats for Nerds”.
An overlay window will pop up in the upper left showing you sorts of nerd goodness. This may pacify your need for numbers, but it’s also a great troubleshooting tool for playback issues. You may notice in this overlay the heading “Volume / Normalized”.
This is something very sneaky which will we’ll go into….now.
4. Audio Secrets
A little-known secret is that not only does YouTube always re-compresses your video, it also diddles your audio work. And I don’t mean just a simple transcode, I’m talking about adjusting your audio levels and sonic dynamics. More specifically, Loudness Equalization. You can see this in the last tip, when we checked out stats for nerds, this is what the “Volume/Normalized” heading is. YouTube analyses the audio present in your video and makes a determination if the volume at certain places – or overall – in your video needs to be adjusted for a pleasurable level of playback for the viewer.

YouTube is messing with your audio!
In this example, you can see the first percentage is the volume in your YouTube player window, the second percentage is how much normalization adjustment is being applied by YouTube; or how much of the volume is being reduced. The last number is the “content loudness” value, which is YouTube’s estimate of the loudness level.
Now why on Earth would YouTube do this?
It goes back to something I mentioned earlier, and that’s user experience. If you had to constantly change the volume on your headphones, your computer speakers, or your TV for every video you watched, you’d get pretty annoyed, right? It’s also quite dangerous to have one video that’s very quiet, so you turn the volume up, only to have your ears blown off when the next video that plays is super loud. A variant of this is actually part of the CALM Act, which holds broadcasters accountable for the same thing.
You’re probably asking, “how can I stop YouTube from doing this to my mix?”
Well, just like avoiding YouTube from re-compressing your video… you can’t!
However, what you can do is minimize the audio tweaking YouTube does so as much of your artistic decision on loudness is retained. You can start by metering and mixing your audio using the Loudness Units relative to Full Scale, otherwise known as LUFS. YouTube doesn’t release exact values, and reports differ, but YouTube tends to shoot for -12 to -14 LUFS, so try and keep your audio in that ballpark to reduce the amount of tinkering that YouTube does. That being said, aiming for a specific integrated loudness doesn’t work, reliably. Experiment and see what sounds good to your ears.
LUFS metering with Izotope’s Insight.
Further reading on YouTube, audio compression, and LUFS:
- https://productforums.google.com/forum/#!topic/youtube/JQouU5gi1ZA
- http://productionadvice.co.uk/youtube-loudness/
- http://productionadvice.co.uk/stats-for-nerds/
- http://productionadvice.co.uk/how-loud
- http://swt.audio/maximising-audio-for-youtube/
5. Advertising Tips
Now, there may be a point in time when you decide to do some advertising, or perhaps make recommendations to your friends or clients on advertising. This is where Adwords can go from simple to difficult very quickly. But what if I told you about hyper-focused marketing techniques that are not too difficult?
Let’s assume you know the basics of Adwords. At a very, very high level, of the kinds of AdWords you can create, are an in-stream video ad, either skippable or not, before the start of a video or, create an in-display ad, which appears as a suggested video to the right in the YouTube sidebar of the video you’re currently watching.

There are more parameters to setup within Adwords, but you basically give Adwords a budget, and that budget is used by Adwords to bid on your ad placements on your behalf against other advertisers.
You’re probably asking, “But how do I have my ads placed on the RIGHT videos?”
Here’s where the tricks come into play. Adwords allows you to not only bid on the general types of videos you can place your ads on, like folks interested in sports, or technology, but you also have the ability to specify what exact videos and channels where your ad is shown on. Provided those videos or channels you wanna advertise on accept monetization, you can selectively choose to advertise on them. This gives you hyper-focused marketing.
Adwords allows you to selectively show your video ad on a specific video OR channel.
And what’s to stop you from doing a custom intro for each of the commercials you place? This allows you to speak to the exact users consuming the video and market directly to them. Think about that for a minute. You can reference the content in the exact video you’re advertising on. You can speak to the people who are watching that exact video. Instead of casting a wide net, you cast a narrow, highly targeted advertising bullet. We’re talking assassin type precision.
Do you have more YouTube tips and tricks other than just these 5? Tell me about them in the Comments section. Also, please subscribe and share this tech goodness with the rest of your techie friends. They should thank you and buy you a drink.
Until the next episode: learn more, do more.
Like early, share often, and don’t forget to subscribe. Thanks for watching.
]]>1. Why Build a Hackintosh?
If you spend any amount of time following Apple, you’ve realized that they are a consumer technology juggernaut. Phones, tablets, watches, headphones. This has led some to speculate that Apple isn’t paying attention to the professional market.
That is, Apple isn’t making computers for those who need a lot of horsepower for creative applications, and expandability to make the system more powerful than what the factory model ships with…or what Apple deems us as worthy of.
We also need to look at the cost. The Apple logo carries a price premium, and without much exception, Apple computers are more expensive than their Windows or Linux counterparts. And while I concede that a ready-to-roll machine should cost more than the sum of its parts, Apple tends to inflate this more than most.
Another reason to build a Hackintosh….is, well, because it’s there. Because you can. Well, physically, anyway. I’m not a lawyer, and debating the legalities of building a Hackintosh is not my idea of an afternoon well spent. However, the tech challenge in and of itself is enough for some to dig in.
Lastly, owning a Hackintosh means you’ll at some point you’re gonna need troubleshoot the build due to a software update breaking things. If you don’t build it yourself, you’re not gonna know where the bodies are buried, and you’ll be relying on someone else to fix it.
For all of these reasons, I rolled up my sleeves, grabbed some thermal paste, and went down the road of building my very own Hackintosh.
2. Choosing the Right Parts
“Look before you leap.”
When building my Hackintosh, this was my cardinal rule. See what others had done before, what hardware and software junkies had deemed as humanly possible, and follow build guides. Although I was willing to build it, I didn’t want it to be a constant source of annoyance due to glitches, and then no avenue to search for answers if things went south. Part of building a Hackintosh is being prepared for things to break with software updates – and to only update after others had found the bugs. I wanted to keep the tinkering after the build to a minimum.
More createy, less fixey.
The main site online for a build like this is tonyxmac86.com. The site has tons of example builds, a large community on their forums, and even better, users who have done this a lot longer than me.
A great starting point is the “Buyer’s Guide” which has parts and pieces that lend themselves to the power than many Apple machines have. A CustoMac Mini, for example, is closely related to the horsepower and form factor you’d find with a Mac Mini.
As I tend to ride computers out for awhile, I decided to build a machine with some longevity.
Longevity meant building a more powerful machine, and thus as close as possible to a Mac Pro. And wouldn’t you know it, there is a section called “CustoMac Pro”.
 The downside to a machine as powerful and expandable as a CustoMac Pro is that it’s fairly large. After I took inventory of all of the expansion cards I’d want to use, I realized I didn’t need everything that a CustoMac Pro afforded me. The large motherboard in the system – known as an ATX board, was simply overkill and was too large of a footprint for my work area. I could actually go with something a little bit smaller and still have plenty of horsepower.
So, I looked into the CustoMac mATX builds. M stands for Micro, and the mATX board would be similar to a full sized ATX board, but a bit smaller. I’d also lose some expandability with a smaller, micro ATX motherboard, but I could use the same processor that I would use in a full size build – in this case, a Core i7-8700K, and still get a decent amount of RAM (64GB) and have a couple of PCIe slots for a Graphics card and future a 10GigE card.
I then went through the process of combing through the forums to see if there were any guides or posts pertaining to the parts outlined in the CustoMac mATX section. And wouldn’t you know it, there was an extremely in-depth post that outlined each step in detail. (Seriously, follow this guide if you get the gear below, it outlines things I have not for sake of brevity.)
Next, I cross-referenced the parts listed with reviews online, and I also consulted various communities and folks off of the tonymacx86 site to get some independent opinions. This caused me to change a few things up, like getting quieter fans, a more stylish case, and a few minor tweaks.
At this point, I was fairly convinced the parts and accompanying guides and forum posts were going to be enough to point the way, so I pulled the trigger and bought the parts.
As the build was going to be massively based on the work that others had done before me on tonymacx86.com, I purchased the parts via the site’s referral codes. Sure, I paid a little bit more, but let’s support the community, eh?


Total: $2269.42 USD (not including tax and shipping)
Now that the parts were ordered, it was time to prep the macOS installer.
3. Building the Hackintosh
A computer won’t do much for most of us unless it has an OS. In order to get the macOS onto a non-Apple machine, we need to prep the OS appropriately.
Unibeast with High Sierra
Step 1 is to download Sierra or High Sierra from the Apple app store on another Apple computer.
Step 2 requires us to download a Mac app called Unibeast. Unibeast will take the macOS installer, and place it on a bootable USB stick along with an app called Clover, which contains the files needed to allow the OS to install on non-Apple hardware.
For Step 3, we need to format a USB stick for the OS to be on. Make sure it’s formatted as macOS Extended (Journaled), and make sure the partition size is relatively small. Unibeast recommends a 7GB partition. Larger sizes, like newer 128GB, 256GB or even larger sticks, just won’t fly – partition them into a smaller size. I also recommend a USB 3.0 stick, it’ll make things go a little bit quicker.
Launch Unibeast for Step 4 and follow the prompts to select the USB stick, as well as various options for install – such as the Clover EFI Boot type and inserting legacy graphics drivers into the install if necessary. Then, let Unibeast create your installer on your USB stick.
A note about the EFI Bootloader config: When your Hackintosh boots, it looks for an EFI partition. The EFI partition contains basic system drivers and options. If your EFI folder is borked, well, so will your build. This is where Unibeast, Clover, and your hardware need to be in sync. As you’ll see later on in the video, my EFI folder during the USB stick build was no bueno, and caused a bunch of issues.
Now that we have our macOS installer prepped, let’s get to the hardware build.
At this point, I *highly* recommend you watch the video and/or read the guide I followed.
Build notes:
- Install power supply first so as to thread cables appropriate through the case.
- Have needle nose pliers for the Noctua fan installation.
- Did your motherboard come with screws? Probably not. Then they should be in your case. Better check.
- Ensure any backplates for the processor are installed before you put the motherboard in the case. Don’t forget your heatsink spacers, too.
I then went into the system BIOS as outlined by the guide, and replicated the BIOS changes. Then, reboot!
4. Installing the macOS
As you have the USB installer from the last step, boot the Hackintosh from it and install as normal. Below are the issues I ran into.
After the OS was installed, the system booted very slowly (over 60 seconds) and upon logging in, the GUI refreshes looked odd. I also found the system didn’t recognize the NIC. As the EFI partition usually loads these drivers, I decided to swap out the drivers located on the Boot “drive” for the drivers on the EFI partition on the USB stick. As the EFI partitions are normally hidden, I used an app called EFI Mounter 3. This allowed me to mount the hidden EFI partitions on each volume, and subsequently copy the EFI folder from the USB stick to the boot “drive”.
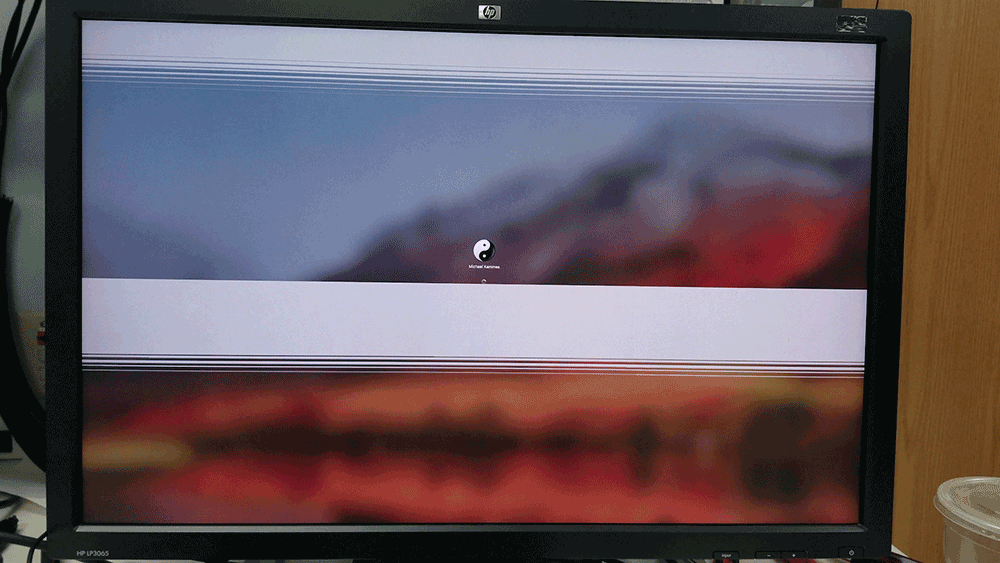
EFI Issue?
This seemed to do the trick, as the correct nVidia (web) drivers were loading, and screen refreshes looked correct. The system also booted faster. I’m not sure what happened – it may have been a Unibeast and Clover version mismatch, or just a bad USB stick creation. For whatever reason, the system was now functioning correctly.
I proceeded to then perform post-installation tweaks in the guide, including editing the config.plist so the RAM was seen properly, as well as changing the label of the Mac (for cosmetic reasons).
5. Performance and Conclusions
First, we have black and white analytics. Raw horsepower. A common tool is Geekbench. Download the Geekbench app, let it run and whammo, you get performance metrics.
I decided to compare my build against a top of the line Late 2017 iMac Pro, retailing for $13,199 (thanks Lumaforge!) as well as against a Late 2013 Mac Pro canister, with a retail cost of about $7,000 today. My build came in at just over $2500.
Here are the results of the Geekbench testing. You can see that my build beats the Mac Pro hands down, but is handily beat by the multicore performance of an iMac Pro, albeit at a price tag that’s 5x as expensive.
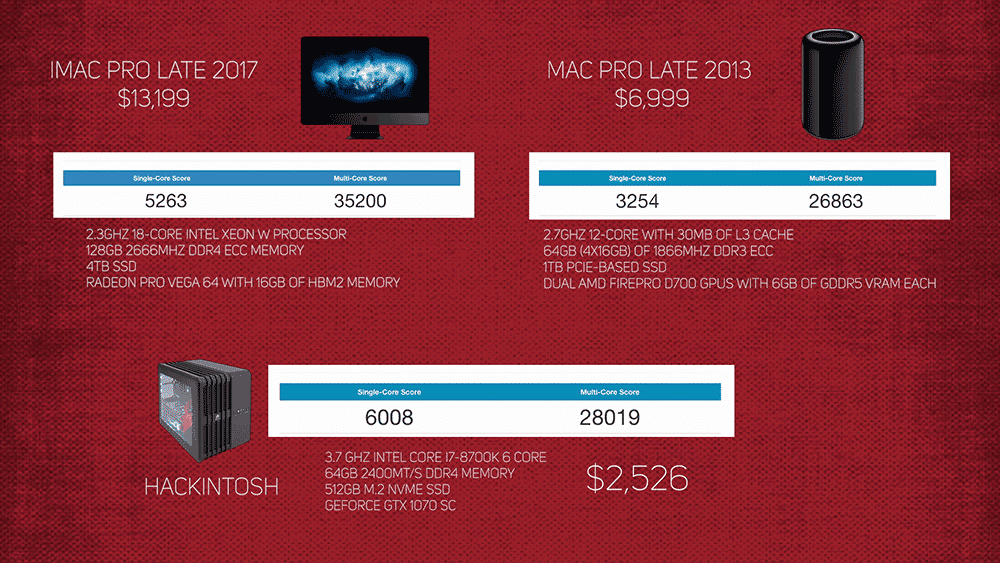
As each of these computers were built with much different parts, a straight horsepower comparison isn’t enough. So, I also benchmarked all 3 systems with Adobe Creative Cloud (Premiere Pro and Media Encoder), Apple (FCP X), and Avid (Media Composer Ultimate) software.

First, I did timeline render tests with Adobe Premiere Pro 2018. I also used Adobe Media Encoder and exported to an h.264. The results are pretty much in line with the Geekbench results. The iMac Pro was the fastest performer, followed by the Hackintosh, and then the aging Mac Pro. Remember, the shorter the time, the better (faster).
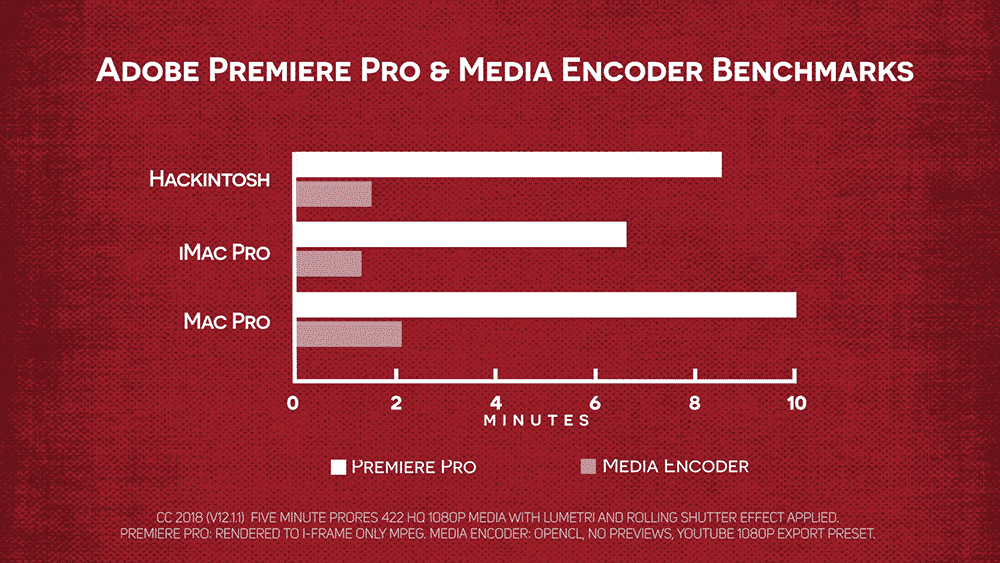
| Premiere Pro Render | Media Encoder Export | |
| Hackintosh | 8:36 | 1:27 |
| Late 2017 iMac Pro | 6:37 | 1:20 |
| Late 2013 Mac Pro | 10:25 | 2:04 |
Now on to FCP X, v10.4.2, where I expected my system to fall down due to the graphics card being nVidia as opposed to the AMD cards found inside other Apple computers. I did a timeline render benchmark, plus a Compressor encode time trial. For renders, all 3 systems were very, very fast, in fact, FCP X rendered faster than any of the other NLEs. My Hackintosh did indeed end up rendering the slowest – however all systems rendered within a few seconds of one another.
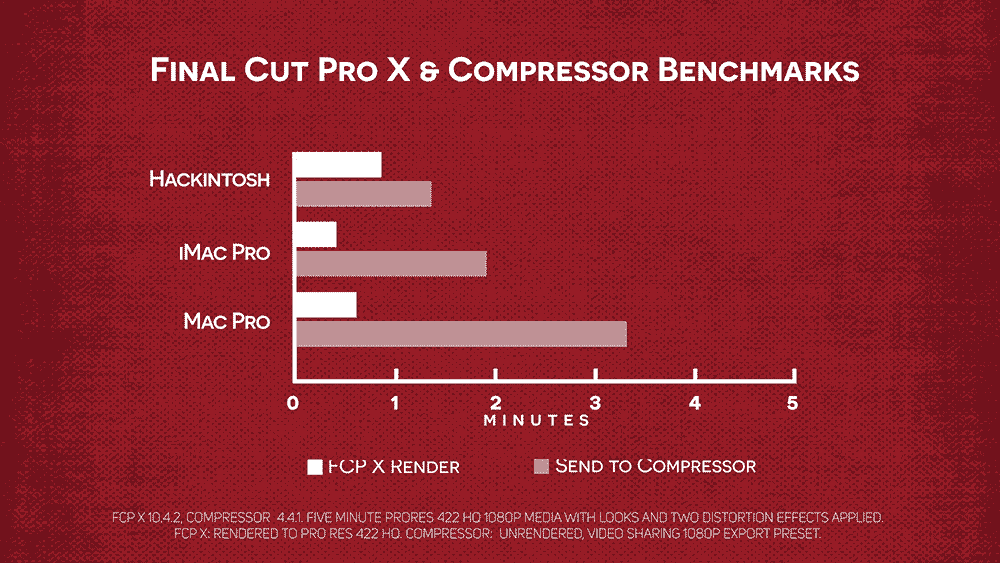
| FCP X Render | Send To Compressor Export | |
| Hackintosh | :48 | 1:22 |
| Late 2017 iMac Pro | :25 | 1:53 |
| Late 2013 Mac Pro | :35 | 3:19 |
That being said, my build exported the fastest, barely beating out the iMac Pro.

Lastly, Avid Media Composer, where I tested with the 2018.5 Ultimate version. The iMac Pro came in first again, with the MacPro actually slightly beating my Hackintosh…however, all 3 systems were within seconds of one another. Export times are largely irrelevant out of Media Composer – each system exported at exactly the same time – given Media Composer’s reliance on 32 bit Quicktime 7 for exports.
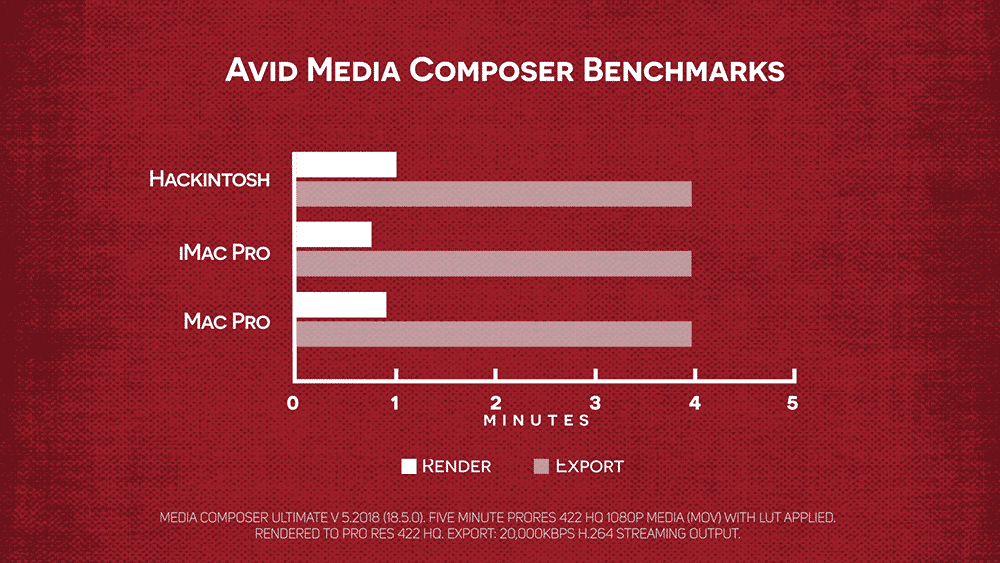
| Media Composer Render | Media Composer Export | |
| Hackintosh | 1:59 | 3:56×2 (2-pass) |
| Late 2017 iMac Pro | :46 | 3:56×2 (2-pass) |
| Late 2013 Mac Pro | :56 | 3:56×2 (2-pass) |
So, “how long did it take you to build it?”
The initial build took 9 hours. This includes research, the hardware build, the software build and initial software troubleshooting. However, in the month since I’ve built the machine, I’ve had to spend an additional 3 hours troubleshooting thermal issues, and buying 2 additional fans and installing them, bringing my total to a little over 12 hours.
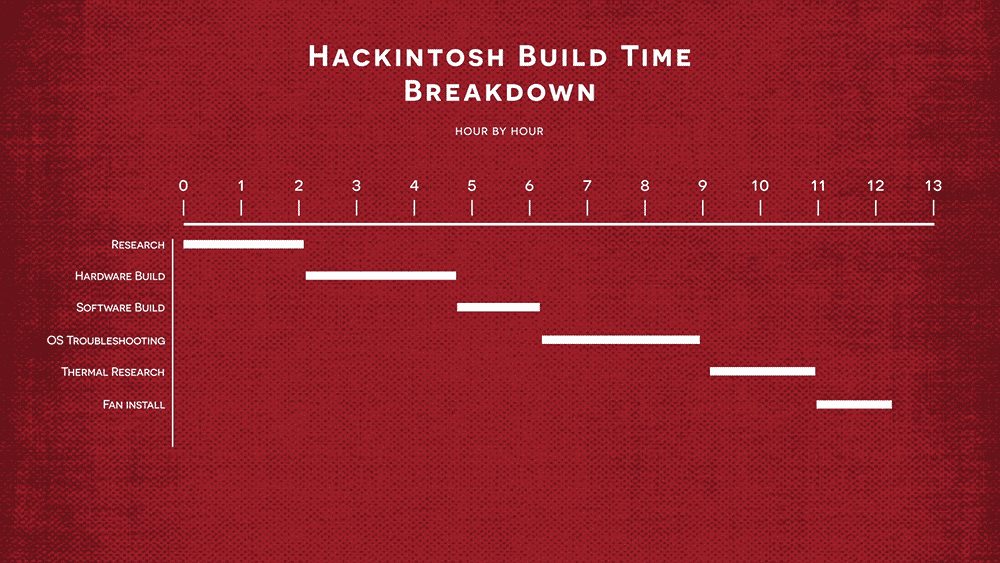
Do I have any regerts? A few.
 The motherboard I chose didn’t have Thunderbolt on board. Not that I have any Thunderbolt devices, but it would have been nice to have an option for the future. I also haven’t seen much performance gains between OpenCL and CUDA playback inside Adobe apps. I purposely went with a GeForce GTX 1070 SC as I expected performance gains with CUDA enabled. As other apps – namely Final Cut X, are optimized for AMD cards, I would have rather gone with a Vega card, use OpenCL inside Adobe, and still maximize the performance from other AMD enhanced apps.
So, “was it worth it?”
As a full-time tech nerd and part-time creative – yes. First time I’ve built a computer from scratch in over a decade, and I learned more about the underpinnings of the Mac OS than I otherwise would have.
But does this cost savings outweigh the peace of mind of a fully supported, warrantied and sexy looking piece of Apple gear? For someone who is a full-time creative professional- I’m gonna say no. You need a system that works, one that you can apply updates when needed, and easily add additional hardware and software. Time is money, and the less time you can spend troubleshooting the better.
Until the next episode: learn more, do more.
Like early, share often, and don’t forget to subscribe. Thanks for watching.
]]>My friends at LiveU asked me to do a deep dive on their Solo streaming device. I suggested, “why not a shootout between the LiveU Solo and the Teradek VidiU Pro?” – (which is another similar device).
So, is that cool with you, LiveU?

1. What do they do?
Both units have a ton of similarities; so let’s get those out of the way first so we can focus on the ooey gooey differences.
At the core of both units is the ability to take an SD or HD video source, usually, HDMI, encode the signal, and stream it out to the web to sites like YouTube or Facebook. This can be via a traditional Ethernet Internet connection, going mobile with Wi-Fi, or even streaming via a USB cellular 3G/4G connection.
Both The LiveU Solo and VidiU Pro have the ability to bond across a number of onboard connections, which gives you the ability to have an added level of not only redundancy but also throughput, to ensure your signal is getting out smoothly and at the highest bandwidth possible. Both units, however, charge extra for this feature, which I’ll get into that later.
Both units can take AC power, run on an internal battery, are small in size, and both weigh under a pound (although the VidiU Pro is less than half of that) and they easily mount on your camera or attach to your Batman utility belt.
The units also have built-in batteries so you can stream for several hours before having to re-charge. Both models also have a webpage backends to control the units…. to varying degrees.

Web Interfaces for the LiveU Solo (left) and Teradek VidiU Pro (right)
The Solo and VidiU Pro both do their jobs very well. But the devil is certainly in the details, and that’s what we’re going to tackle next.
2. Setup and Connectivity
 The LiveU and Teradek units both allow setup via a web browser on your computer or mobile device. LiveU, via the LiveU Portal and Teradek via the webserver on the unit.
LiveU is pretty straightforward. Create an account at http://solo.liveu.tv/, boot up your LiveU Solo unit (although this may take a while), and connect your Solo to the internet. Then, enter in your Solo serial number into the portal, and you’re off and running. You now can do your entire streaming configuration of the Solo signal on the webpage for your unit. Now, this is a blessing and a curse…which I’ll get into a bit later on.
 Teradek’s setup is very similar. Boot up the unit (which doesn’t take as long as LiveU), and get your unit on your local network – it doesn’t even have to access the internet at this point. It just needs an IP address so your local computers or Wi-Fi enabled cellular devices can see it. Unlike the Solo, the VidiU Pro has a web server built-in, which makes configuration a bit easier.
Why is that Michael?
Having a local webserver built-in means I don’t need to have Internet connectivity on my laptop or workstation if I’m out in the field and want to configure the unit. Yes, I know, you can use cellular devices like your phone to configure their unit, but if cellular service on location is lacking for your phone’s carrier, now what? It’s a slight issue, but I think having a web server built into the unit as Teradek does makes for an easier way of local configuration.
Speaking of cellular connections, at this point, if you’re planning on going into the great wide open and streaming via 4G connections, make sure you’ve purchased your cellular modems and chosen the right data plan – one that won’t throttle your bandwidth or cut you off at the knees during an event.
Now it’s time for the speeds and feeds and goes in and goes out part of our review.
For that, LiveU has the upper hand. With 2 USB ports, the Solo offers an extra layer of USB connectivity. Normally this would be used for 4G cellular modems, which means you can bond across 4G connections and across multiple carriers for a smoother streaming experience.
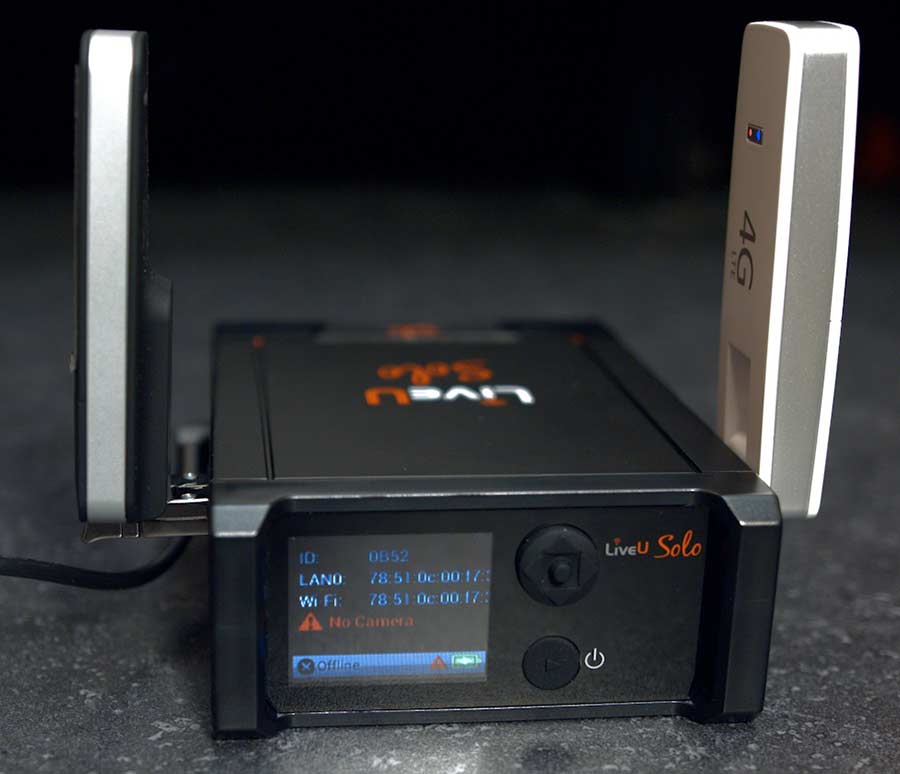
The LiveU Solo has 2 USB ports for 3G/4G cellular modems, compared to the Teradek VidiU Pro’s 1 USB port.
Plus, while the Solo itself is HDMI, LiveU does offer an SDI model for a bit of a bump in price…. so those of you with pro cameras don’t need to have another converter with you in your bag of tricks.
What Teradek VidiU Pro lacks in a 2nd USB connection it kind of makes up for with onboard recording. The Teradek unit can handle an SD or SDHC card so you can record a local copy of your incoming signal. This comes in handy if you plan to do a cut down later.

Unlike the LiveU Solo, the Teradek VidiU Pro has onboard recording onto an SD or SDHC card (class 10 or faster)
There is also a major difference in the way audio is handled. The VidiU Pro has a 1/8” audio input – maybe you’re pumping in a mic or music from another source. There is also an 1/8” jack for headphones as well. The Solo also has only one 1/8” jack – and right now, it’s inactive, designed for future expansion.
3. Flexibility and Usability
This is where comparisons get tricky because this is where we begin to see the sweet spots for each unit.
LiveU has many more built-in CDNs presets – CDNs, or content delivery networks –are the endpoints you would broadcast to in order to make your content viewable by everyone in the world, like YouTube or Facebook. The Solo has twice the amount of optimized and tweaked presets out of the box than the VidiU Pro. However, both units do allow for generic RTMP, or Real Time Messaging Protocol – which is a rather generic way of streaming online) inputs so you can manually create presets for just about any online outlet with a minimal headache. Both devices have configuration panels on the unit via joysticks, but far and away, the Teradek unit has more editable info available via the front panel than the Solo does.
I really like the small color preview window on the LiveU Solo, however. The preview window on the Solo gives me a bit more confidence that I’m sending out the right signal….and if it’s right from the camera, I can verify there are none of those pesky overlays on the image! The flip side is that I can’t test the Solo’s streaming functionality without a valid input signal. This makes the Solo a bit difficult to test if the other parts of your streaming rig, like the camera or the switcher, are not already set up. I’d love a built-in bars and tone generator with the streaming specs overlaid over the signal for this purpose.
Now, when streaming, battery life is of concern. The Solo boasts a 2-hour battery, while the Teradek boasts 3 hours.
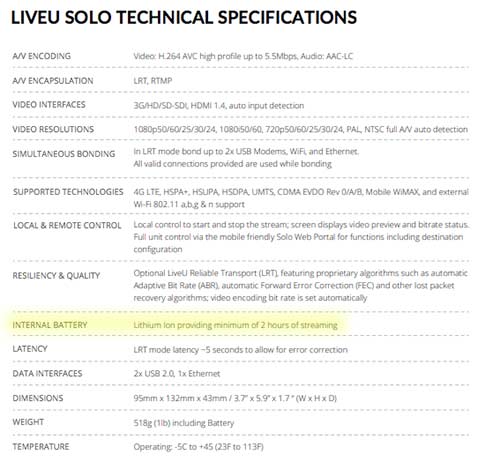 |
Teradek VidiU Pro
|

I tested this out by setting both units to their max bitrate and resolution, and streamed over Wi-Fi to the same CDN until their batteries died. My testing showed that the VidiU Pro was nowhere close to the proclaimed 3 hours of battery life, failing at 108 minutes – not even making it to two hours. To be fair, the VidiU Pro results may be slightly skewed as the unit inexplicably stopped streaming 4 times during the test for no apparent reason, which I had to then restart its stream. By comparison, the LiveU had more than 50% of its battery remaining when the VidiUPro died, and continued streaming for another 100 minutes after….with no drop-outs.
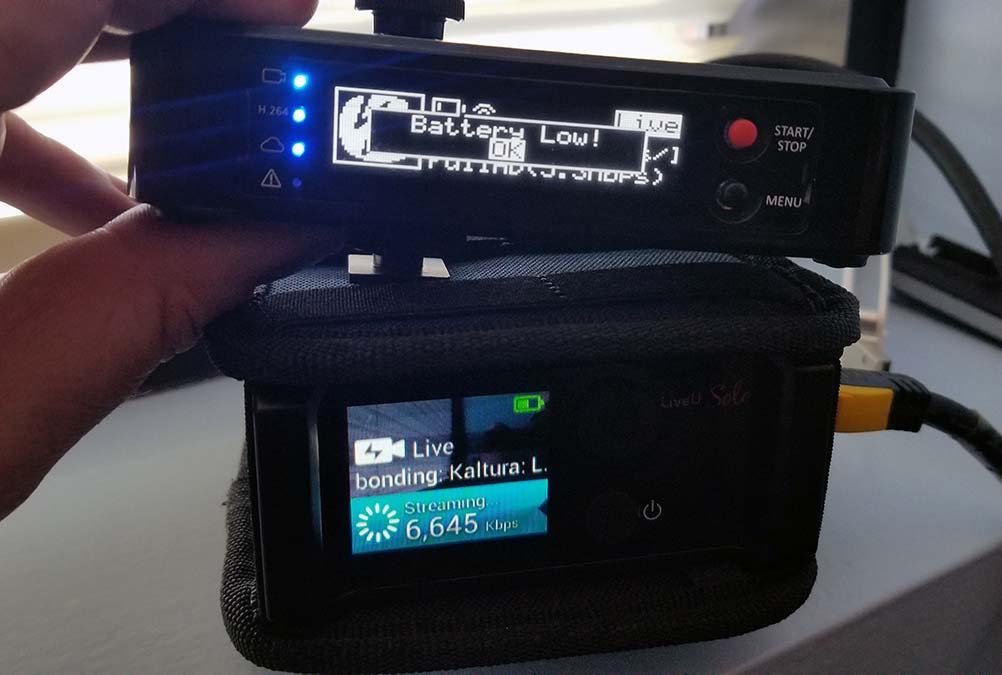
The LiveU Solo has 2x as much battery life as the Teradek VidiU Pro.
4. Streaming Quality
 The LiveU Solo and Teradek VidiU Pro both stream in an h.264 format, and deliver excellent visual quality at their respective data rates. (Editor’s Note: I was going to put side by side samples in the video, but after editing and re-compression by YouTube once uploaded, the differences were barely noticeable and subject to interpretation.)
I did find I had more flexibility with the LiveU as I can override the units presets and manually specify the data rate; the VidiU Pro forced me into one of several presets. The Solo also gives me a max data rate of 5.5Mbits, whereas the VidiU Pro tops out at 5Mbps. Quite honestly, I don’t see most folks noticing this visually unless you’re really pushing the limits of the 1080p60.
Another point on 1080p60: This is VERY important for sports, both live and eGaming based, and other content where you want the largest frame size and frame rate possible. The VidiU Pro tops out at 1080p30, and only reaches 60 frames at a 720p resolution. If your endpoint is demanding 1080p60, then LiveU is gonna be your first choice.
The Solo also encodes in an h.264 High profile, while the VidiU Pro simply supports Main profile. This means more efficient compression that should manifest in better visual quality at lower data rates. It’s also the profile that’s traditionally used for larger screen HD monitors while Main profile is generally reserved for smaller screens and less powerful devices, like tablets and smartphones.
LiveU takes a staggered approach to streaming: the data rate starts low and climbs to the intended (or available) data rate, usually within 60 seconds or so. This can be problematic for those who are running and gunning and need to go live instantaneously.
I see it as a safeguard to have a stream start smoothly while buffering. You can certainly work around this by starting a stream, but not going live on your CDN until you hit your desired data rate. VidiU Pro, by comparison, starts at the desired bitrate as soon as you start streaming.
LiveU also a cool tech called LRT, or LiveU Reliable Transport– a tech that they actually hold the patent on. This includes forward error-correcting, packet ordering (which is mandatory when bonding across multiple signals), and adaptive bitrate encoding. It’s the adaptive part I like because the audio is always made to maintain a higher priority of quality to the video, so even if the bandwidth drops, the audio quality will remain good.
Keep in mind, utilizing LRT on the Solo is an extra $45/month charge. But then again, Sharelink from Teradek, which also provides bonding across connection methods, is also an upcharge per month, depending on your bandwidth needs.
|
Live U LRT Monthly Cost
|
Teradek Sharelink Monthly Cost
|
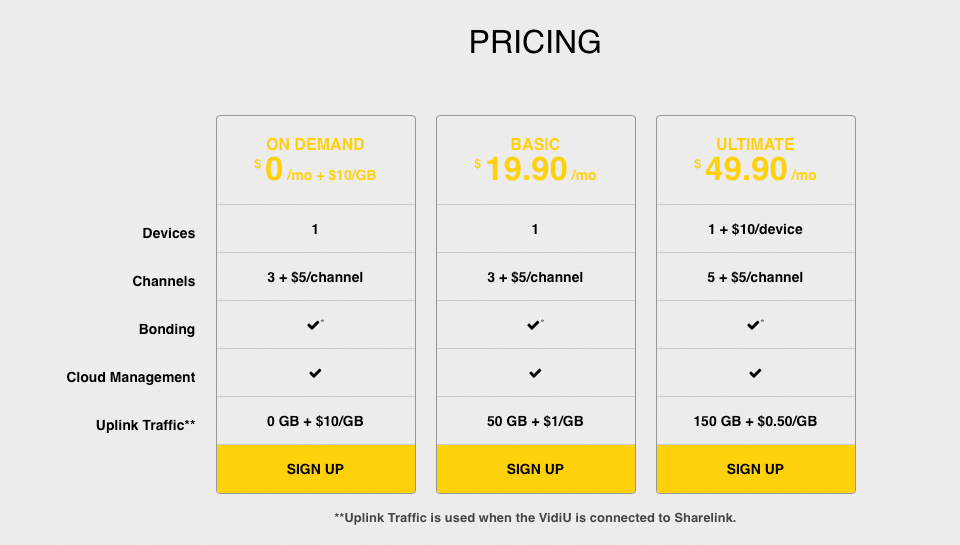
Now, in terms of streaming reliability during my testing, the VidiU Pro stopped streaming for unknown reasons a handful of times, four in fact, during a nearly two-hour stream test – while the Solo never stopped streaming until I told the unit to do so.

The Teradek VidiU Pro stream was interrupted multiple times for no apparent reason, while the LiveU next to it ran without any issue.
I was able to replicate this behavior during other shorter tests as well. I wish when the VidiU Pro ran into a streaming issue, it would try and correct itself…better? Whenever the stream was interrupted, I had to manually restart the stream on the Teradek unit.
5. Conclusions
It’s obvious both of these systems will serve you well. However, with the extra USB port for a cellular modem, the granular control over streaming bitrates and h.264 high profile setting, the larger choice of built-in CDNs, the awesome LRT tech, fantastic battery life, and not one interrupted stream during my testing, the Solo is the best choice when streaming is your number one concern. It’s simply meant for mission-critical streaming in broadcast situations. If I had to choose one portable unit to encode and stay on the air, it would be the Solo.
Now, the Teradek VidiU Pro unit is part of a larger, much broader Teradek ecosystem which includes many of their other hardware apps, and their software solution bonding – Sharelink. More web portal control, the ability to record onboard the unit, and make changes from the device make the VidiUPro a great Swiss army knife. But the shortened battery life and interruptions during streaming make the VidiU Pro seem to be a jack of all trades, but a master of none.
Have more questions about the LiveU Solo vs the VidiU Pro other than just these 5? Ask me in the Comments section. Also, please subscribe and share this tech goodness with the rest of your techie friends. You can also stalk me online if you’d like, too, I’m easy to find.
My thanks to LiveU for their financial support and sponsorship of this episode.
Until the next episode: learn more, do more.
Like early, share often, and don’t forget to subscribe. Thanks for watching.
]]>When I cut the cord a few years ago, I still needed to find a way to enjoy video media without simply relying on Netflix and YouTube. And buying many of the other subscription-based apps, like HBO GO, would simply jack up my monthly charge…which is why I canceled cable in the first place!
I looked at all of the OTT options out there, including AppleTV, FireTV, and various gaming consoles. Roku caught my eye as an inexpensive way to find and consume content, as it had thousands of public and private channels – much more than most others, and already a wide viewership. In fact, as of June this year, nearly 40 million Americans used their Roku at least once a month. It’s the #1 OTT platform out there. Roku has also just gone public, which means the company is going to accelerate even more quickly.
While I was thrilled with the amount of content I had easy access to with Roku, it wasn’t long before I wanted to get on the bandwagon and create my own channel for 5 THINGS.
The Roku channel paradigm is pretty simple. A channel is much like an EDL – it simply points to where the media is externally and streams it when told to play, so channels are traditionally lightweight, as they only contain few images, and code to link to your media elsewhere.
This seemed simple enough. However, when I started to create my own channel, there were only 2 ways to do it yourself.
First, was to use the site like instanttvchannel.com, which is a Cloud-Based Roku Channel Production System. Through a series of dropdowns and prompts, you could create your very own Roku channel. The problem I had was you had to pay per month as long as the channel was active, anywhere from $5 to $50 per month, and your account may have an InstantTV splash screen on launch, amongst other gotchas.
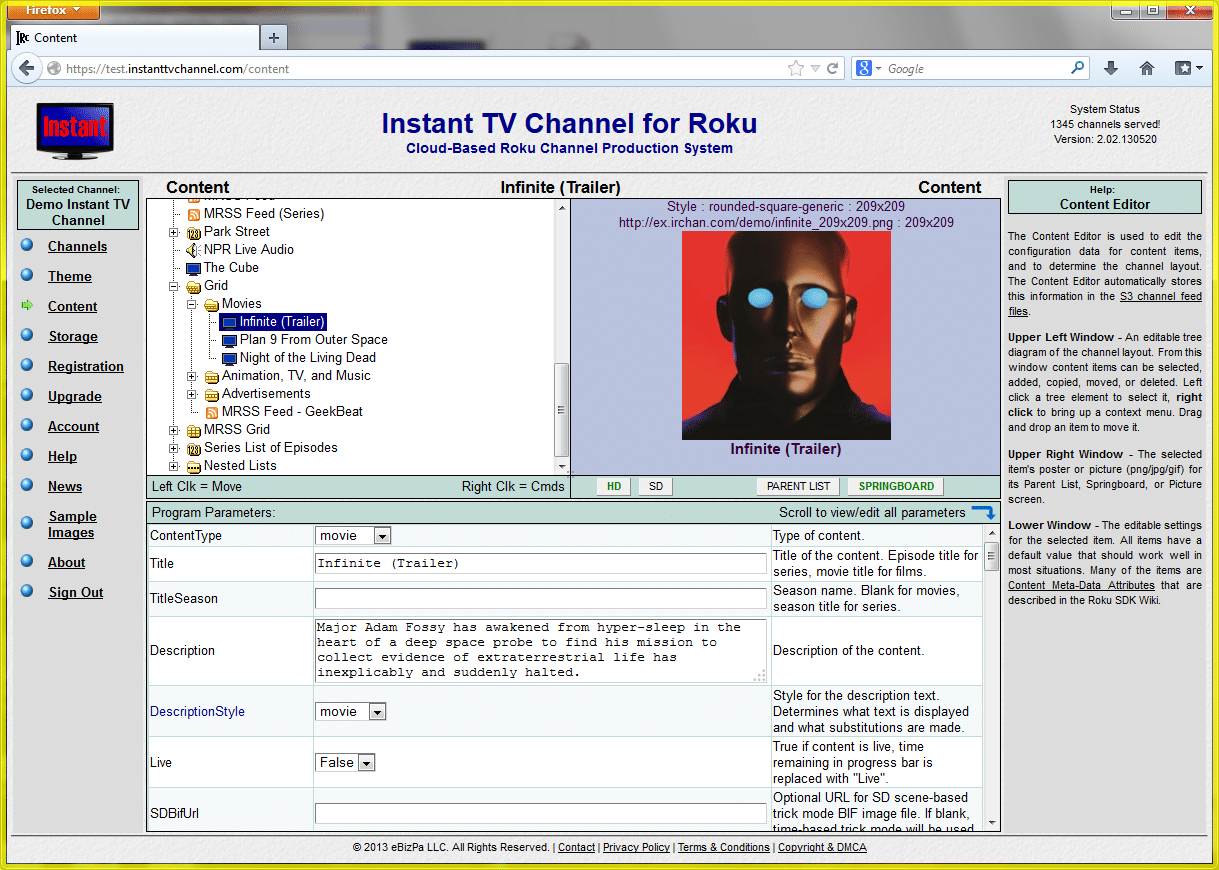
instanttvchannel.com
The second way was to develop against the Roku software development kit, or SDK. Programming for a Roku is channel is based around the BrightScript coding language, which is a bit like Javascript mixed with visual basic. Now, I could learn Brightscript and code from scratch, or, I could take some basic templates already configured for base levels of functionality and augment them as needed with modules of code.
So that’s what I did. It still relied on some coding and lots and lots of testing, and I spent a ton of time on forums and help guides. But it was the best choice since I wasn’t going to develop Roku channels full time. It took about 100 hours of work, and the purchase of an old SD Roku model for testing on legacy gear to get my first channel up and running.
And then there were the updates.
Several hours per month, after each new episode, and creating and testing versions for SD and HD Roku models.
But you fine folks are in luck. Last year, Roku introduced a 3rd way, known as “Direct Publisher”, which gave novice creators the ability to create a channel without writing a single line of code and have it work across most any modern Roku player.

Hallelujah!
And thus, how to create a channel with Direct Publisher is what I’ll show you today.
2. How do I use Roku’s Direct Publisher (walkthrough & tutorial)
Since Direct Publisher is from Roku, you need to start off by creating an account with Roku. If you already have a Roku unit, then you probably already have an account. Sign in.
- Navigate to the developer homepage, and under “My Channels”, you’ll want to click “Manage My Channels”.
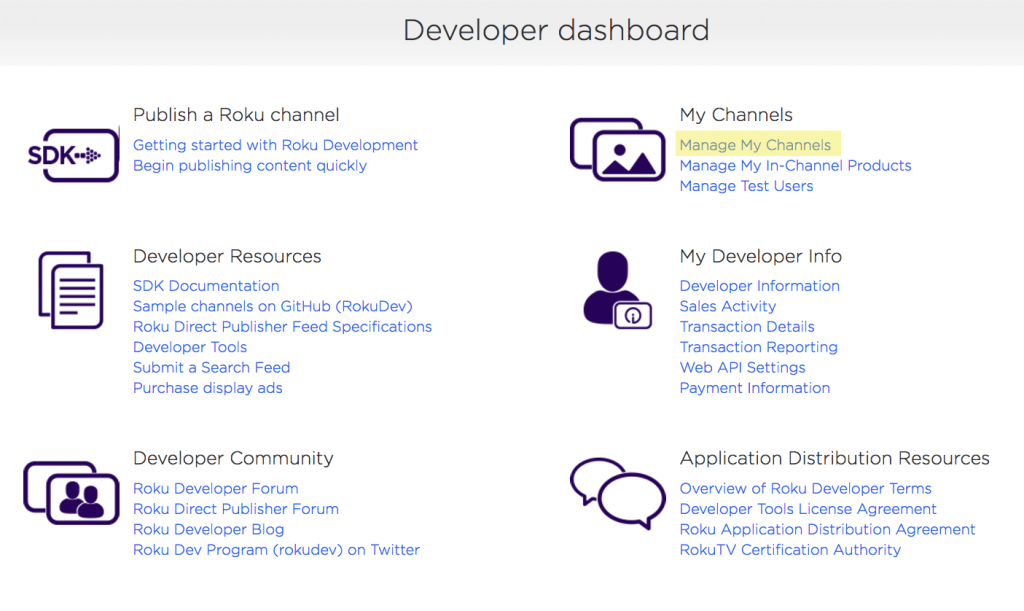
- Click “Add Channel”. As you can see, we have the aforementioned Developer SDK and Direct Publisher methods. You’ll want to select Direct Publisher, and give it a descriptive name, and click “Continue”.
- Next, you’ll be prompted for a few various options. Where in the world your channel will be available, what language the channel is in, if your channel is intended for children or adults, and a channel vanity code. The vanity code you can pass to potential subscribers so they don’t need to search the store for your channel. Give them the vanity code, and they can enter it into their account to immediately get your channel.
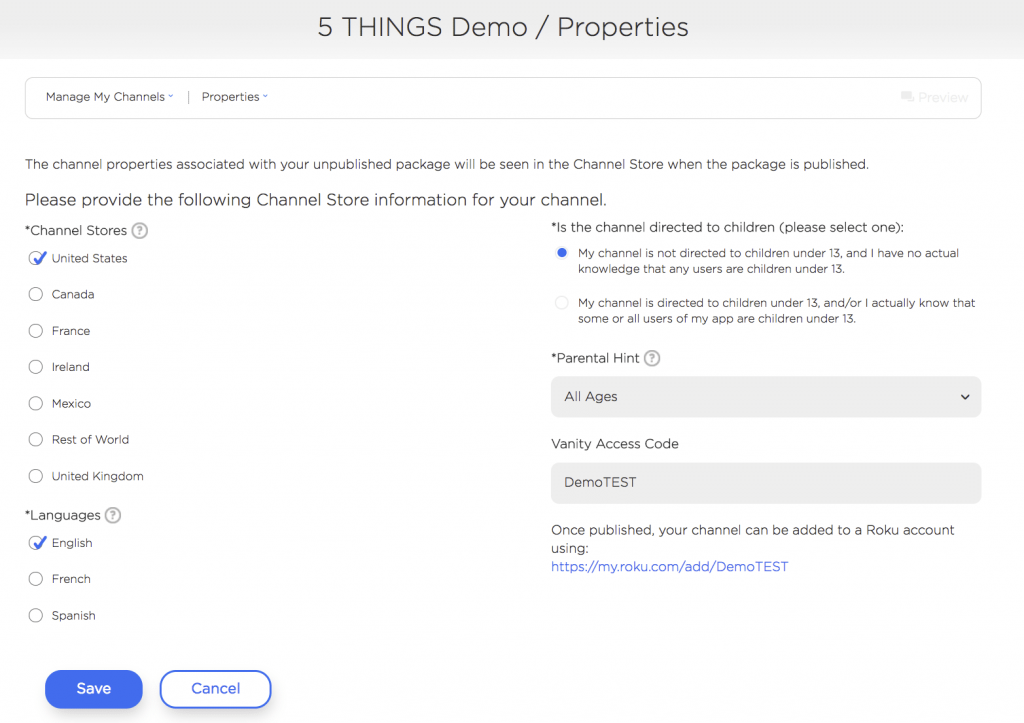
- Next, you’re presented with your Feed URL. This is where you may want to pause and watch the rest of this episode because we’ll need to determine your Feed URL via other methods. Jump to “#4: How do I update my channel” for how to determine this, and them come back. Now that we’re back, I’m going to cut and paste my Feed URL, and now tell Roku what format my videos are in. I’ll explore the various media types later in this episode. However, I’m going to select “Specified in feed” so I can dynamically change the media type at any point in time.
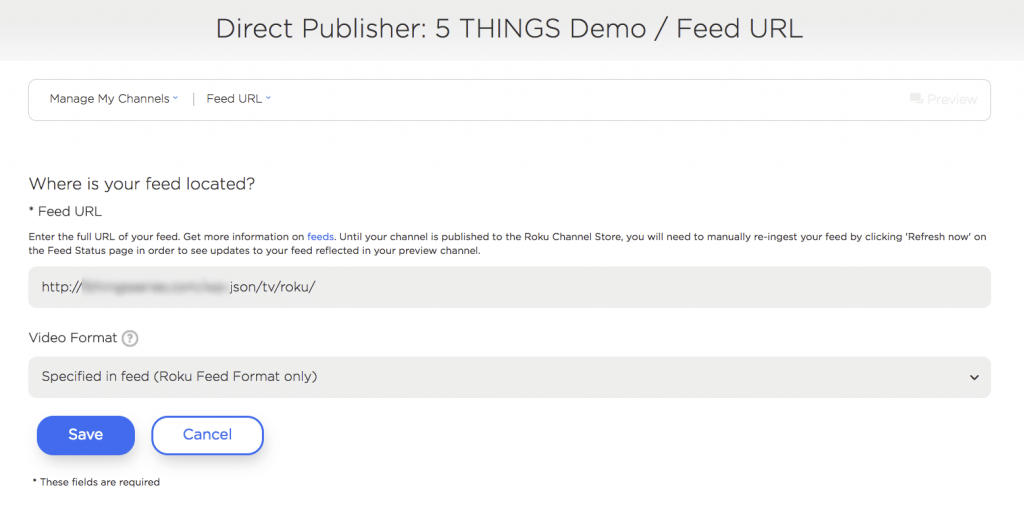
- Next, we’re at the branding page, and this is where you’ll upload custom graphics for your channel. It’s important to adhere to the graphic specs, or the page layout won’t look right. Roku will automagically make all of your graphics work on SD, HD, and UHD models of Roku, so don’t worry about creating various versions and resolutions. You also can choose your branding colors to complement your style.
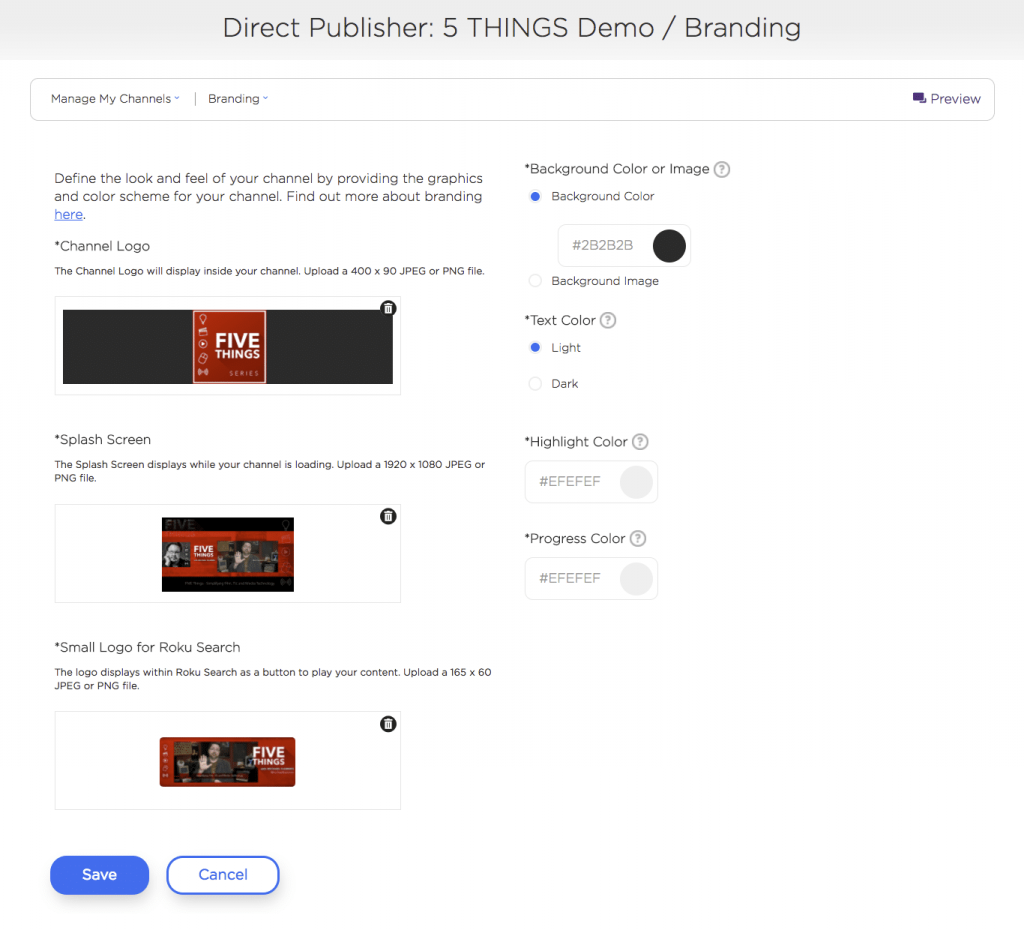
- Page Layout: One thing to remember is that while Direct Publisher makes things easy to get started, it does somewhat limit the layout of your channel. That’s the tradeoff. If you want total control over your layout, then you’ll need to build your channel from the Roku SDK.

- Next, we need to define categories. Since we’re going to define the categories in our feed, we’ll select “from feed”.
- Now, we need to enter in our all-important metadata. Channel name, It’s Description and Web Description, your channels’ category, and the uber-important keywords. Plus you’ll add a channel poster image.
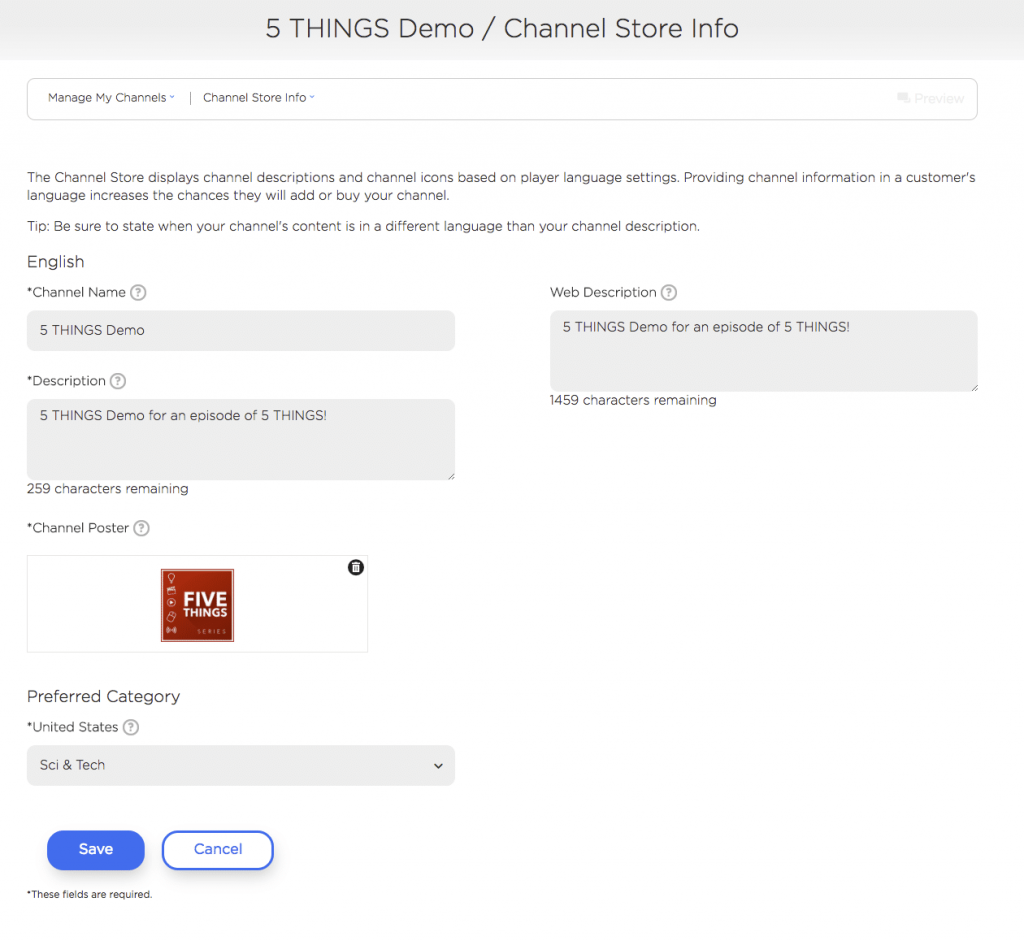
- On the next screen, are ya making money off of this thing? Most likely when you’re starting out, the answer is no, so select as such.
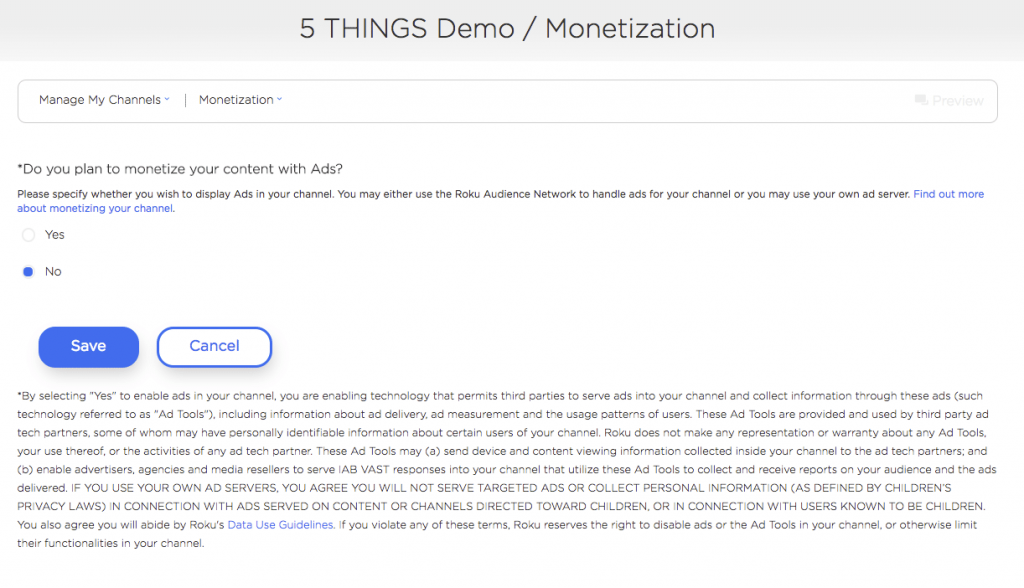
- Next, upload a screenshot. Roku can autogenerate this if your feed URL is ready, if not, upload a 1920×1080 JPG or PNG file.
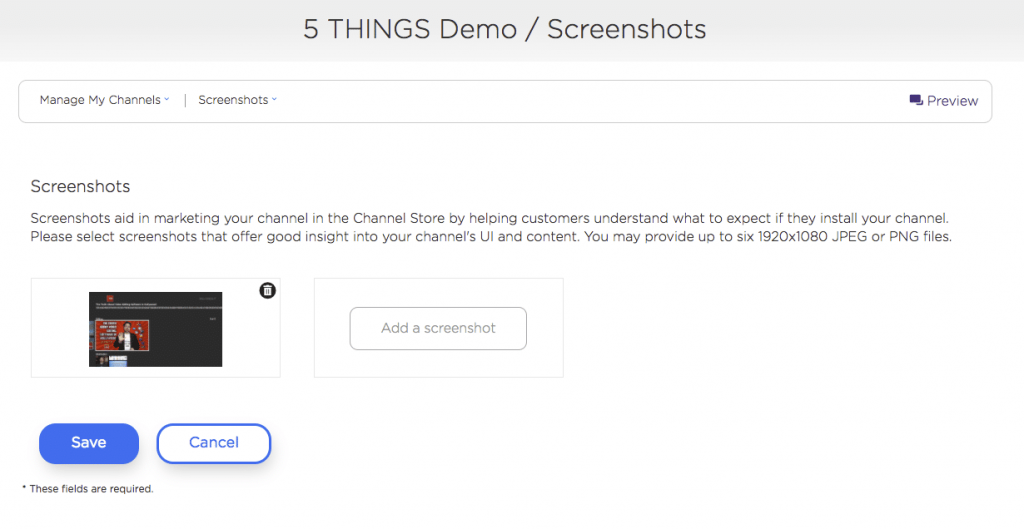
- We’re now at Support Information, where you need to enter how Roku can get in touch with you, but also where do you want to drive viewers to get in contact with you or see more about your channel and your projects.
- Click Continue, and you’ll see a summary of your channel. There are icons next to each section you’ve filled out, so you can see where you may have goofed. Often you’ll see problems next to Feed Status. Not all errors are show stoppers, and many of the errors you may encounter are easily found in the Direct Publisher Roku Forum.
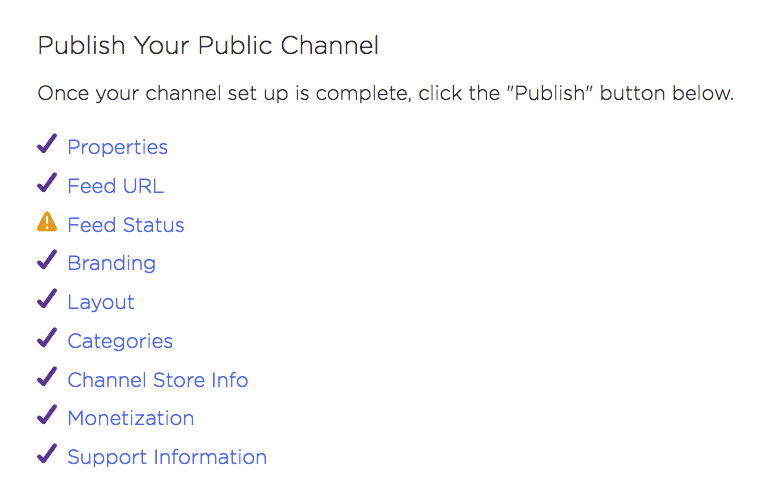
- Once things are good, click the link towards the top of the page so the channel gets published to YOUR account. This is NOT public just yet, it’s just pushed to your Roku account so you can beta test. Add the channel.
- Now, move to your Roku unit, and you’ll want to navigate to Settings – System – System Update. This will have Roku not only look for updates to your software online but also add any channels.
- Once the Roku unit is updated, you can open the channel and start testing.
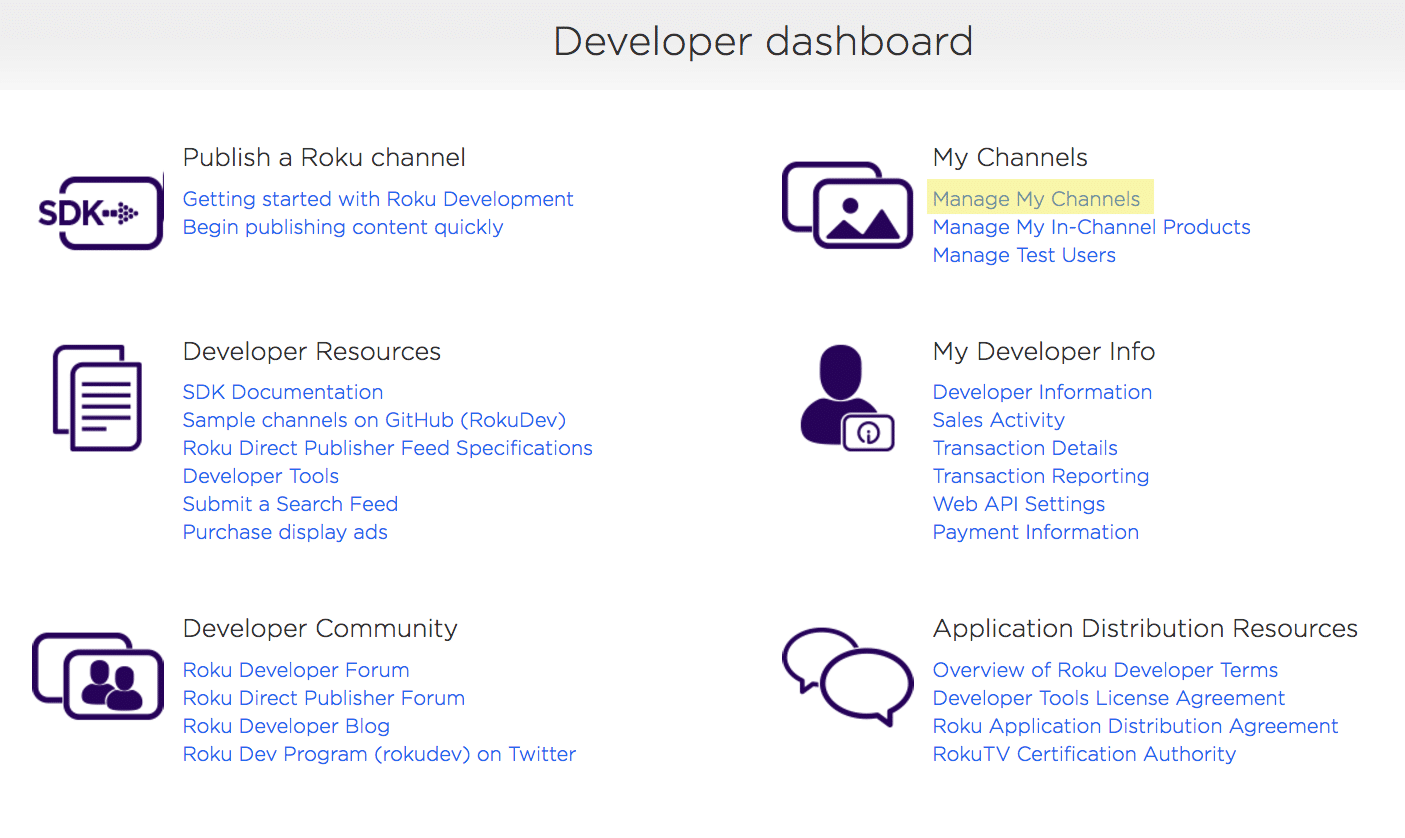


BOOM, you now have the framework for your first Roku Channel. Now, we need to add some content.
3. What kind of media do I need to create for Roku?
If you’re going to promote yourself on Roku, ya need content right?
One immediate issue that many novice developers encounter is that any Roku channel you create cannot link to YouTube videos, which, of course, is a popular place to house your media. Doing so violates the YouTube terms of service, and Roku has been cracking down on channels doing these sorts of things..…plus, YouTube doesn’t offer direct links publically to their media anyway. You can, however, use a Vimeo Pro Account, as they offer up direct MP4 links to your media.
That being said, using a single, self-contained MP4, M4V or MOV for that matter, can be problematic. It’s very difficult to create a single file that works well for streaming to every device, given bandwidth and resolution.
Now, more advanced streaming formats that include segmented files at various quality levels, otherwise known as adaptive streaming, are preferred over standalone files. The end player can decide what version will play smoothly, given the available bandwidth at any point in time, so you get the highest quality file possible with no buffering errors. Microsoft Smooth Streaming, MPEG-DASH, and Apple HLS all follow this basic methodology.
Of these 3 options that Roku supports, I chose Apple HLS. Mainly due to the fact a majority of my audience uses Apple devices, and HLS is fully supported on iOS devices. You need to host this on a cloud provider or on your website. I choose to use my existing Amazon S3 bucket, but as you’ll see later, you may want to host it on your own website.
As a side note, be sure to compare the cost of CDN hosting on Amazon S3 vs how much traffic you can have on your website. Some web-hosts may bill you for traffic overages, and hosting all of your media on your website may push you over the edge. This is why I use Amazon S3.
If you hadn’t noticed, I caption all of my episodes. Roku accepts SRT caption files, as well as media with embedded captions. I use SRT as my main format and convert them into a VTT format, and I’ll explain why in a few minutes.
I’m also a big fan of BIF files or Base Index Frame files. These are graphic thumbnails that the user sees while rewinding and fast-forwarding through each episode. It’s a visual indicator of where the user is, not just a timestamp. I use BIF Video File Creator, now free, to create the BIF files from my final video edit. I also upload these to my Amazon S3 account.
Lastly, I create a thumbnail of my episode, much like you would do for YouTube. In fact, I now use the exact same thumbnail I create for YouTube, as Direct Publisher will automatically size it for older SD players – something that the old SDK method couldn’t do.
4. How do I update my Roku channel? (walkthrough & tutorial)
Roku’s Direct Publisher takes updates in 2 ways: via an MRSS feed, or via JSON. Now, you’re probably saying,
“Michael! You said there was no coding!”
There isn’t!
Many online apps or website templates can generate MRSS feeds of a blog post. However, JSON offers a deeper level of integration…and there are apps and website plugins that communicate to the Roku mothership via JSON.
Now, if you use WordPress as your website development environment, then you’re aware of all of the plugins to give your site more functionality. Recently, a plugin became available called WP Smart TV by Rovid-X Media. This plugin can use your WordPress site to house all of your media for your Roku channel and can push all of the updates to your Roku channel via JSON. No coding!
For me, this was an instant workflow savior. It saved me hours of time per month in coding, testing, and manually creating artwork; plus it centralized my data and media. Let me show you how it works:
- Log into your WordPress Installation, click on plug-ins, and “add new”.
- In the Keyword search box, type “WP Smart TV”. Once the plugin shows up, click “Install Now”. For this demo, I am using v1.3.1 of WP Smart TV.
- Once installed, click “Activate”.
- You may also want to install the Jetpack plugin, which is a plugin that speeds up image loading. It also can fix the error message on the Roku developer portal where Roku cannot load thumbnails. Some WordPress hosts block loading images to Roku, and this gets around it.
- On the left-hand side of your screen, you’ll now see a heading for “WP Smart TV”. Click it. You now will see the options for your Roku JSON feed. Under General Settings, you can select your type of posts you’re making, that best coincide with your content. Click Save.

- Under “Roku Settings”, You have options to limit the amount of posts that show up on the channel per category, as well as settings for any advertisements you may have. I highly recommend reading the documentation on Recipes, so you can have more granular control over the order in which your categories show up on the channel.
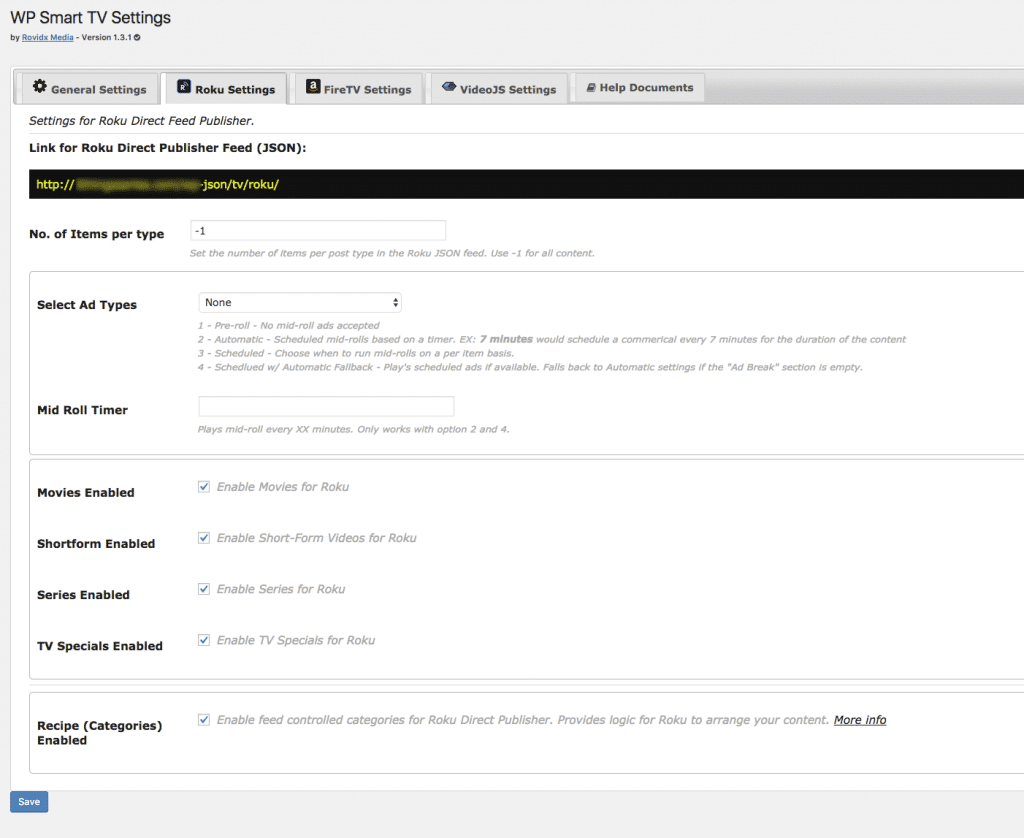
- Note the URL at the top of this section. THIS IS IMPORTANT. This is the Feed URL that you will cut and paste into the Feed URL prompt we covered in the last step. This is how WordPress, WP Smart TV, and your Roku channel talk to one another. Click Save.
- WP Smart TV also supports other OTT devices like FireTV, for Roku we can skip over this. We can also skip over the VideoJS settings as we are not monetizing this channel in this demo.
- Lastly is the HELP documents tab, which I highly recommend reading.
- In order for WP Smart TV to add content to your feed, you’ll need to create a Video Post. On the left side of the screen is a heading called “My Videos”. Click it.
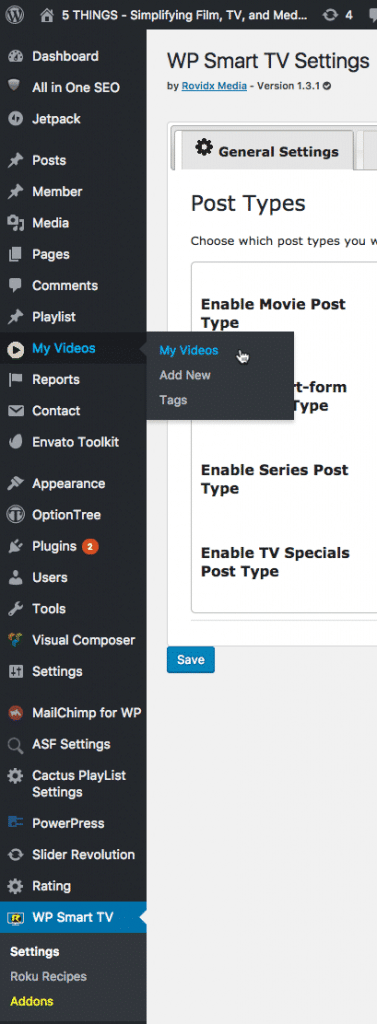
- From here, you’ll want to add a new video.
- Immediately, you’ll see the options for your Roku Media. You’ll need a new video post for every video file you want on your feed. I know, if you have a large catalog of videos, this may be tedious… but it’s much better than coding. Put in your duration, your video format, your video quality, and the location of the media. As we talked about in the “How do I create Media for Roku” section, add in the media URL here.
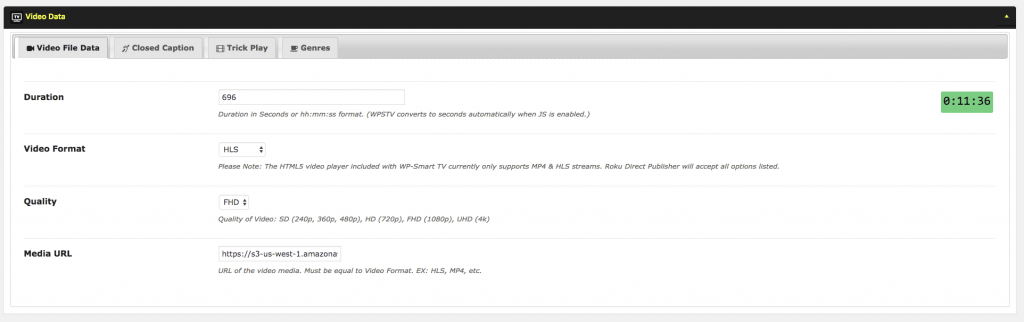
- Add Closed captions if you have them, and their language and type. Currently, VTT is accepted, so I convert my master SRT files to VTT with any number of free web-based tools. The captioning tab is optional and can be left blank.
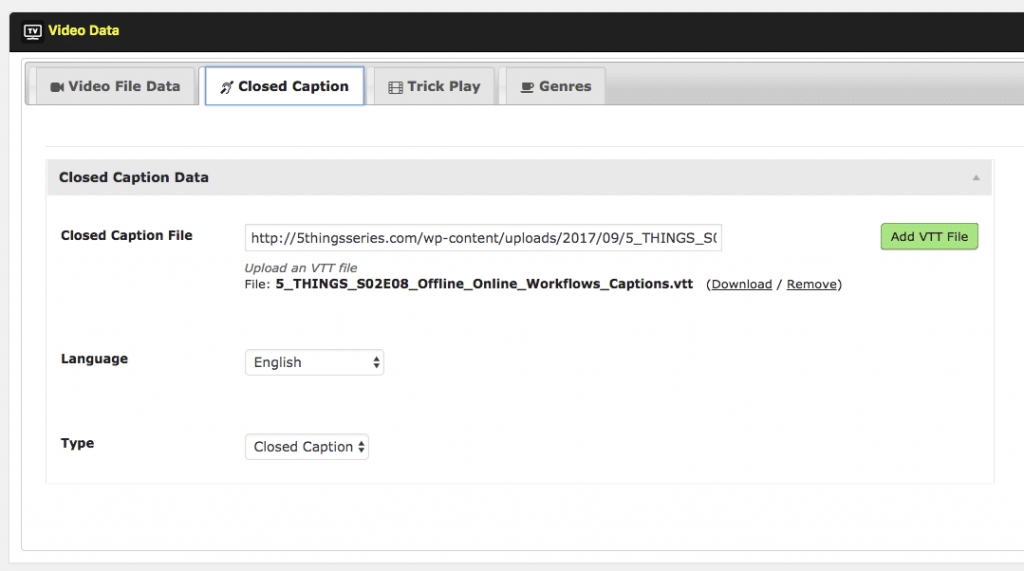
- Trick Play is used for the BIF files, which we covered earlier.
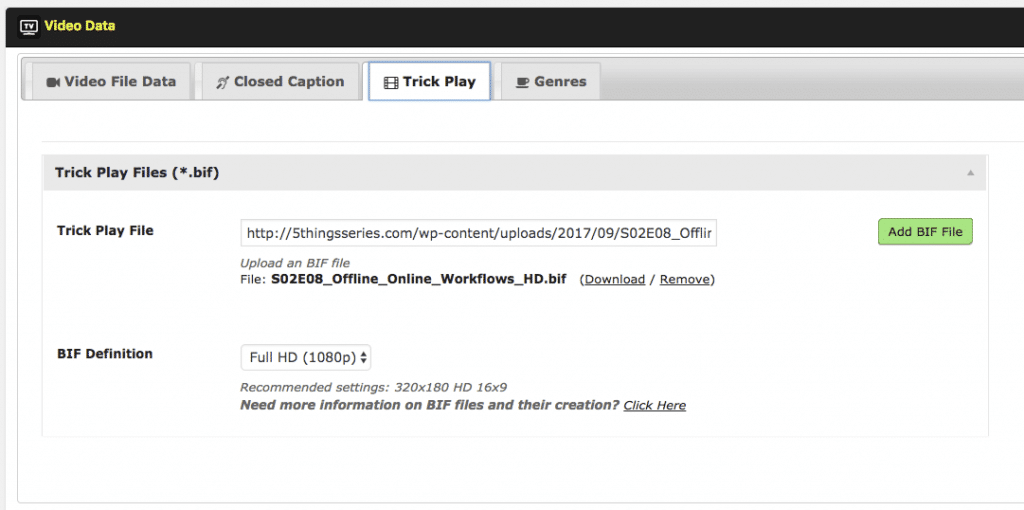
- Now, click Genres to further categorize your media, and use the custom fields for advanced control if you developed against the SDK.
- Be sure to upload a Featured Image for your post, as this is the thumbnail for the post.
- Also, enter a description at the top so viewers know what the episode is about.
- Click Publish.

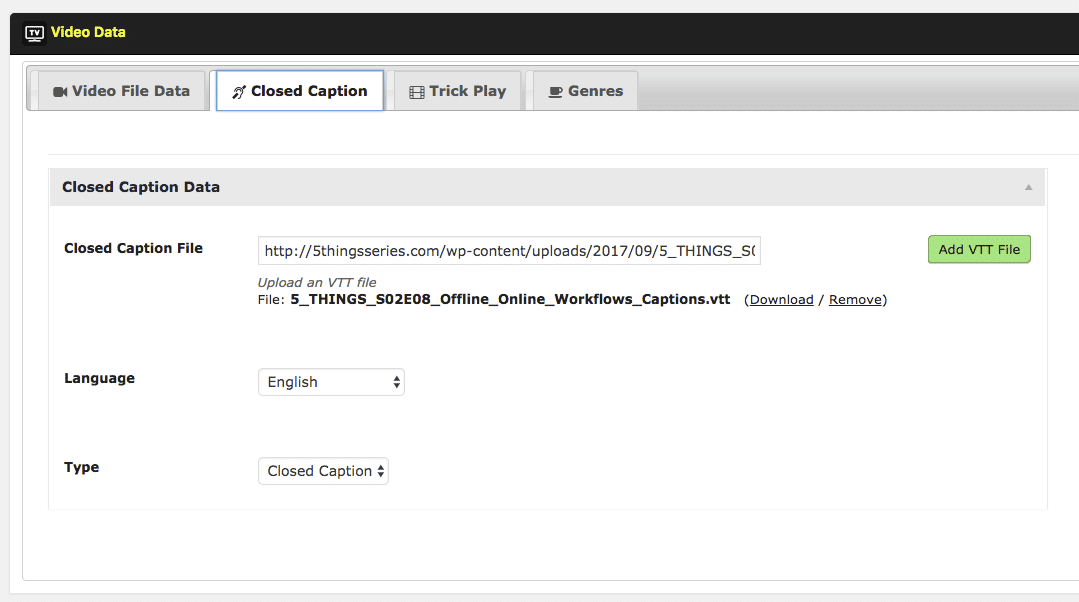
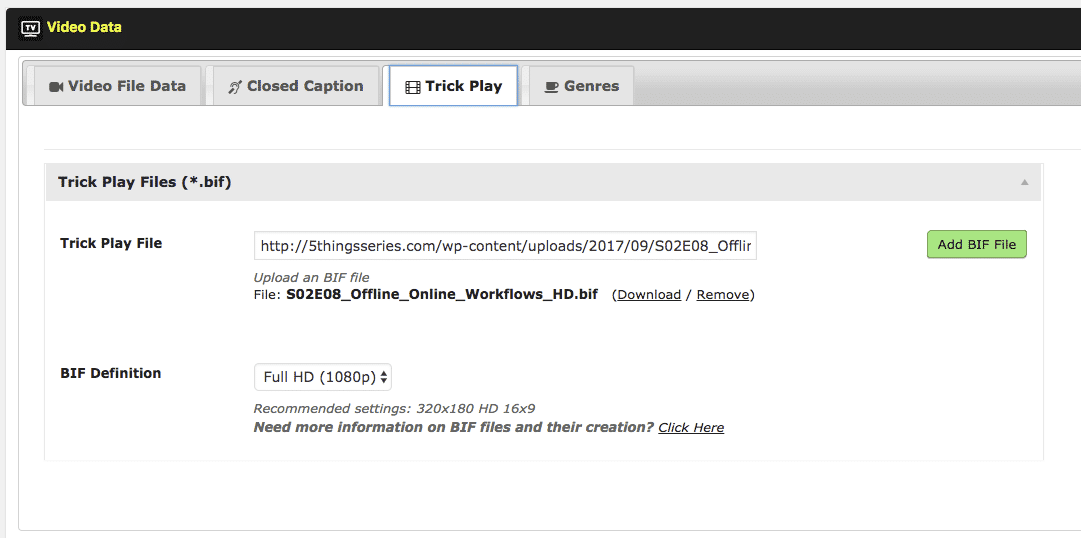
Congratulations, you now have your first video for your Roku channel.
Every time you make a change to your Roku channel, you’ll need to go back to your Roku Developer page and refresh the feed. This is only temporary. Once your channel is published and is made public, the updating will occur automatically.
5. What else do I need to know?
First, ya need to buy a Roku player. You gotta know how the thing actually works, so you know how to design your channel. You also need to test your channel. As of now, there isn’t a way to 100% test your channel via SDK, via a 3rd party website, or by Direct Publisher without one. So check out the current models, and see which one works for you.

Also, this ain’t “Field of Dreams”.
Just because you build it, doesn’t mean people will flock to it. So, you need to promote it. This includes Roku themed channel sites, as well as on Roku user forums, plus on your other sites, like YouTube, Vimeo, and other social media channels.
Now, as mentioned earlier, Direct Publisher does have a framework for ads and thus ad revenue, so you can conceivably make money off of your channel. But if you’re not making much on YouTube, do you really expect to make more on Roku? Roku is big, but not YouTube big.
To be clear, I don’t recommend it as your sole point of distribution. But in the huge marketplace reality where there is competition for eyeballs everywhere, branching out into a realm that has less than, let’s say, YouTube, means you have another audience to engage with. And 40 million eyeballs per month ain’t bad.
Until the next episode: learn more, do more.
Like early, share often, and don’t forget to subscribe. Thanks for watching.
]]>The AJA Helo, in a nutshell, does 2 distinct things: it records an SD or HD video signal and also streams a signal to just about any streaming service you can find. Pretty simple, right?
But before I get too much deeper, let’s take a quick look at where the Helo may work for you in a production environment.
Here we see a typical small production setup. We have our cameras…and we have our capture device that takes in the cameras and other video sources….next we have the switcher which cuts between angles, adds graphics, and mixes audio…..and now we have our streaming device to get out to the internet, and lastly, the web host or CDN that takes our signal and shares it with the world.
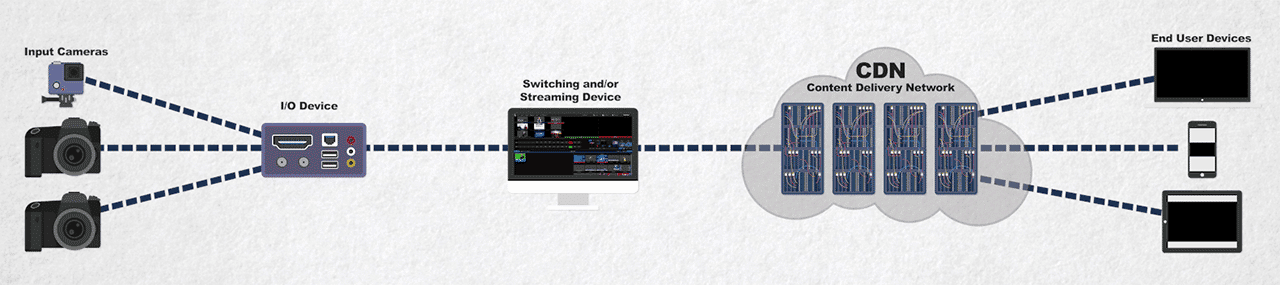
A traditional live production workflow.
The Helo is that streaming device, and as an added bonus can also be a recording device. Let’s take a look at how the Helo does this.
First, the unit has 2 separate encoders. This allows the Helo to encode the incoming signal in two discreet ways – one as a local copy, and one in your streaming format du jour. This is pretty cool because it means you’re not stuck with an archival version that was optimized for live streaming – it can be recorded at a higher frame rate and frame size so you can edit it after the event.
This recorded copy can either be written to a local USB drive or RAID, to a network mount point, or even to an SD card. As the encoder is limited to h.264, and tops out at 20Mbps, all of these onboard storage methods provide plenty of bandwidth with which to record the incoming signal. 20Mbps is pretty cool; as it’s a higher data rate than most other portable encoders out there.

The rear of the Helo, with both SDI and HDMI sources (only 1 can be used at a time)
Speaking of the incoming signal, the Helo has an SDI and an HDMI spigot, however, only 1 can be used at a time. Aside from embedded audio on these inputs, there is also an unbalanced 1/8” jack if you’re into the second system audio kinda thing. Now, the Helo handles signals up to 2K at 60 frames, however, it tops out recording and streaming at 1080p60.
1080p60 – now, this is really important.
1080p60 is often requested for sporting events and gamers where higher frame rates and frame sizes are needed. Many other portable encoders on the market will top out at 720p60, or at 1080 with slower frame rates.
The Helo has the ability to stream to virtually any of the platforms you’d want to stream to via RTMP and RTSP. RTMP will cover a vast majority of the popular CDNs, including YouTube, Facebook, and Twitch.
What the Helo does lack is out of the box are pre-baked CDN presets. However, you can easily create those manually inside the box for re-use. Thus, you do need to understand what the CDN you’re using is looking for. Luckily, a simple Google search for the RTMP settings for the popular platform you’d like are usually widely published.
2. How do I use the Helo?
Download the latest firmware and utilities for your Helo at https://www.aja.com/products/helo#support
A few things you need to do, handy person.
As the unit is new, firmware updates have been coming frequently. So, go to the AJA website and download the latest firmware. With this being the IBC 2017 season, look forward to new firmware announcements. Also, you’ll want to download the AJA eMini Setup Utility and install it. This will allow you to update the unit’s firmware to get the latest features and bug fixes.
Now, let’s get the unit some juice with the included power supply, and connect the supplied USB cable to the unit; and plug the other end into your computer. Launch the Setup utility on your computer and update the unit’s firmware.
OK, now we need to get a signal to the unit via HDMI or SDI.
If using this for streaming, this will come from your switcher’s output, or even the output of your camera if your production is more of a “set it and forget” type of affair. Don’t forget your separate audio line if your audio is coming in from somewhere else.
Now, the unit also has an HDMI, SDI and Audio output as well, so you could route these outputs to a monitor and mixer to check things, or, place the Helo in front of your switcher in order to have a clean recording from your camera– also called an ISO of your signal; albeit in an h.264 format.
On the rear of the unit is the LAN port, where you’ll want to run an Ethernet cable to the Helo and out to your router or switch so you can do the initial setup and control the Helo. There is no WiFi on the unit, or a way to use a portable USB LTE modem, so you’ll need to ensure you have a hardwired line.
Back in the eMini Setup, there is a button to launch the web page that controls the unit. Your unit should be set to DHCP, so it should grab an IP address from your network when you plug it in.
You should probably at this point decide that if you are going to record the incoming signal, where is that recording going to land? If it’s on a USB drive, that drive should be USB 2.0 or 3.0, and be formatted as ExFAT or FAT32.These are cross-platform, folks, not Apple HFS or Windows NTFS. This can be a RAID as well. If you’re going to an SD Card, make sure those are only formatted as ExFat. Lastly, if you’re going to a network mount point, ensure you’re using NFS or CIF protocols.
3. How do I control the Helo?
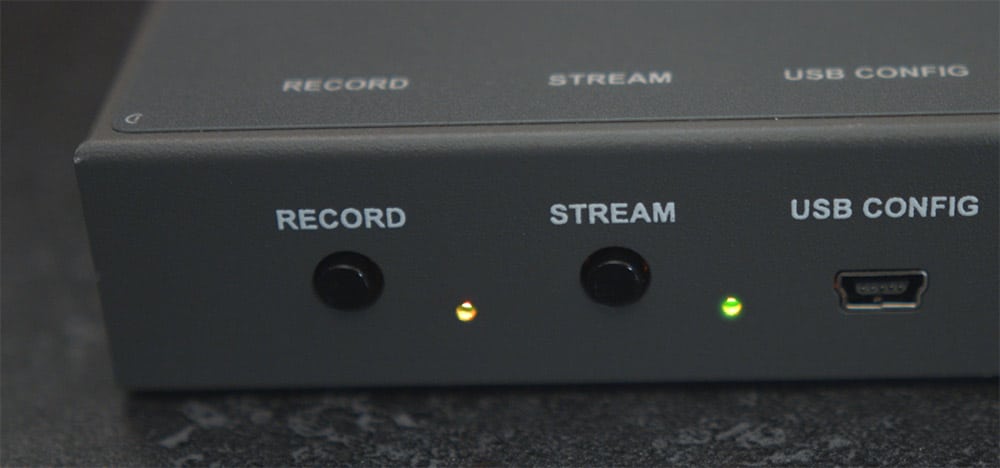
Front buttons on the Helo to trigger recording or streaming independently
We’ve got two ways to control the unit. We’ve got end-user controls and then the way *I* like.
The end-user control consists of physical buttons on the Helo for recording and streaming, so you can engage or disengage each of the functions independently of one another. Very simple, and very handy if nontechnical folks are going out to record or stream an event.
And now the way I LIKE to handle things – my way.
The Helo gets setup and can be controlled via your web browser; this is actually where you set up the parameters of the end-user controls. Now, while the web browser access makes things easy and AJA gets points for functionality, their graphical interfaces have never been the most eye-catching. Function over form. If you’ve ever used other AJA converters and recorders, like the FS series or Ki Pro Family, then the interface will be very familiar.
It’s from here you can monitor the status of the unit, and see a summary of the parameters that have been selected and saved on the unit. At the top of every page is a current graphical representation of the recording and streaming status of the unit, and you can use the mini icons here to bounce back and forth between the recording and streaming functions.
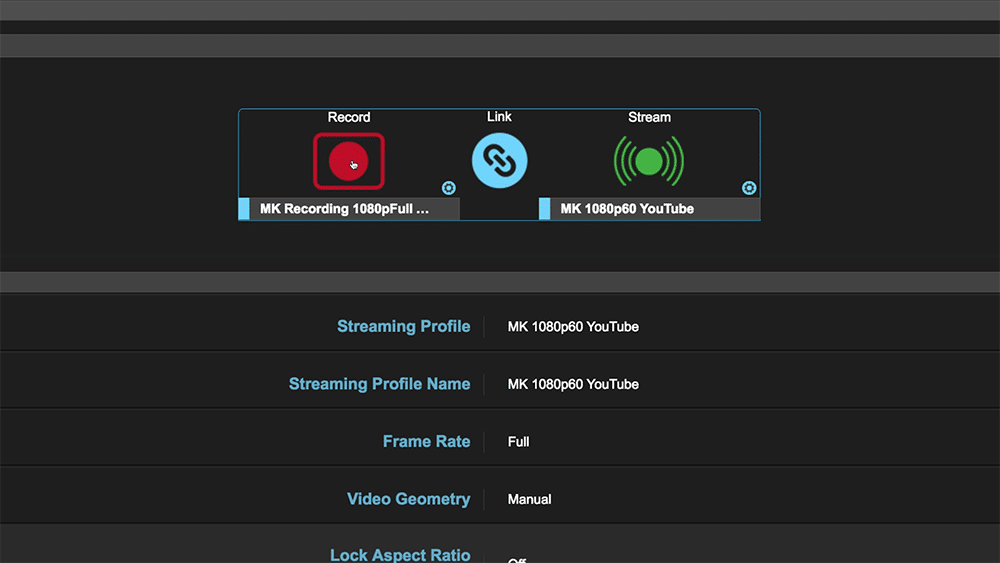
AJA Helo web interface shows the current status of the unit.
If I haven’t beat this into your head already, this is also where you can independently alter the recording and streaming parameters of the Helo, and then save them, which AJA calls Profiles.
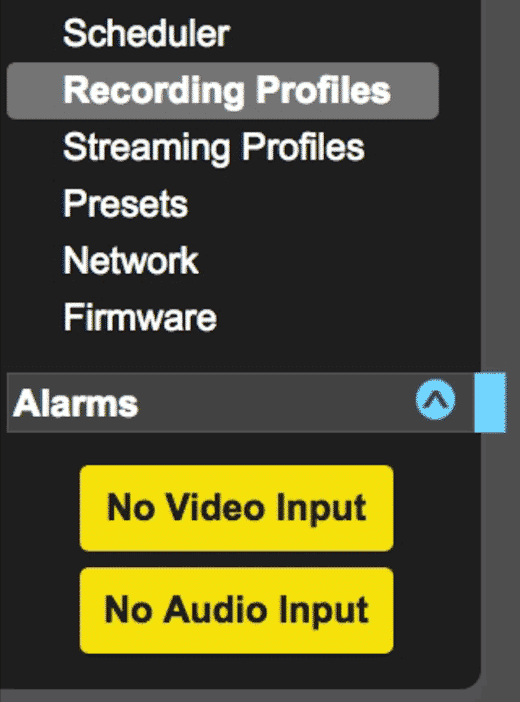
Alarms on the Helo
This is where things can get a little confusing.
The Helo has Profiles for recording and streaming – 10 profiles for each. However, these profiles are not the same as Presets, which are system-wide groups of settings that you can save to the Helo.
For example, you may have a recording profile for 720p, and a streaming profile for 1080p. These are controlled independently, but a preset would configure both streaming and recording profiles in 1 setting – a preset.
Through this methodology, you could mix and match profiles to create specific presets. Perhaps you could use this for various physical streaming locations, coupled with various camera gear and the available bandwidth at that location.
Of the myriad of controls for each encoding parameter, there are some of note. You can change the level of your h.264 encode, from constrained, to baseline, to main, and to high. You can also de-interlace if the unit is getting an interlaced video signal, Plus, you can set the naming convention of your recorded clips, and you have the option of MOV or MP4 wrapped h.264 clips or simple TS streams.
**While not mentioned in the video, the video quality slider (bitrate) displays both a green and red area. The green area is the recommended encoding bitrate(s). Red areas are not recommended bitrates, either because they are too low or too high. If you attempt to set the recording bitrate outside of the area, the Helo will override your input bitrate and instead move it into the green area. This is the Helo adhering to the Kush Gauge. Unfortunately, this happens behind the scenes (as of 2.0 beta firmware). So, keep that recording bitrate slider in the green.
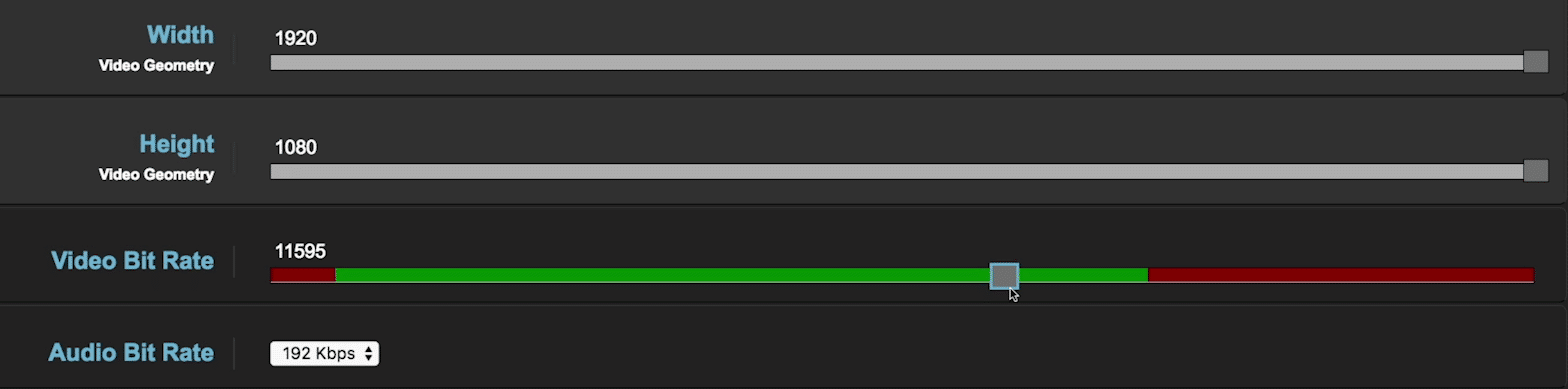
AJA Helo Video Bit Rate – stay within the green area!
What I dig is the easy “oh &$*# what’s wrong menu” on the left-hand side, where you get immediately notified of any errors that may be happening.
Lastly, if you don’t want to use the hard buttons on the front, or use the webpage, Helo can take a calendar entry, like a Google calendar appointment or an ICS file to automatically trigger recording or streaming at a predefined date and time. Very simple.
4. How is the quality?
I’m very impressed with the image. More so with the streaming than recording, but I’ll get into that in a minute.
Often when you compress a video signal down, one of the first things to be lost are the details in the blacks. I find that if you keep your data rate high enough while still adhering to the specs of the CDN you’re using, the details in the darks translate very well from the Helo.
I did over 3 dozen recording and streaming tests, encompassing various record times and at multiple recording and streaming bitrates, with no hiccups attributed to the unit. I did find with very early firmware issues that I would sometimes get a frame or 2 video hit while streaming on YouTube, but that seems to have been rectified with newer firmware versions.
This does bring up an important point: and that is, always do a test from the location you’re streaming from before the day of the event. Congested networks and limited upload speeds can cause you to drop frames while streaming. Just because the unit can stream at 20Mbps, doesn’t mean you should do it.
As far as recording, I’m not a fan of recording into h.264. I figure if I’m going to record an ISO, or record the output of the switcher, I want something that’s high enough quality that I can manipulate the image in post, whether that be a color pass, or maybe even a re-edit…or even for archival purposes. H.264’s tend to fall apart after subsequent encodes.
On the flip side, if you don’t plan on doing any manipulation of the recorded video, you now have a great looking recorded h.264 that won’t take forever to upload for VOD later.
I’ve posted some examples of how the recorded image looks immediately below (click on the resolutions below in the chart). You can download ‘em and see how they look.
| Source | 1080p23.98 (ProRes 422 HQ) | |||
|---|---|---|---|---|
| Helo Record Frame Size and Frame Rate |
1080p23.98 | 720p23.98 | ||
| Type of Recording | Color and Resolution |
Motion | Color and resolution | Motion |
| 1000Kbps | 1080p2398 to 1080p2398 1000Kbps | 1080p2398 to 720p2398 1000Kbps | ||
| 2500Kbps | 1080p2398 to 1080p2398 5000Kbps | 1080p2398 to 1080p2398 2500Kbps | 1080p2398 to 720p2398 2500Kbps | |
| 5000Kbps | 1080p2398 to 1080p2398 10000Kbps | 1080p2398 to 1080p2398 5000Kbps | 1080p2398 to 720p2398 5000Kbps | 1080p2398 to 720p2398 5000Kbps |
| 6000 – 10000Kbps | 1080p2398 to 1080p2398 10000Kbps | 1080p2398 to 720p2398 10000Kbps | 1080p2398 to 720p2398 6000Kbps | |
| 11000Kbps+ | 1080p2398 to 1080p2398 15000Kbps | 1080p2398 to 1080p2398 14000Kbps | ||
| Source | 1080p29.97 (ProRes 422 HQ) | |||||
|---|---|---|---|---|---|---|
| Helo Record Frame Size and Frame Rate |
1080p29.97 | 720p29.97 | ||||
| Type of Recording | Color and Resolution |
Motion | Color and Resolution |
Motion | ||
| 1000Kbps | 1080p2997 to 1080p2997 1000Kbps | 1080p2997 to 720p2997 1000Kbps | ||||
| 2500Kbps | 1080p2997 to 1080p2997 2500Kbps | 1080p2997 to 720p2997 2500Kbps | ||||
| 5000Kbps | 1080p2997 to 1080p2997 5000Kbps | 1080p2997 to 1080p2997 5000Kbps | 1080p2997 to 720p2997 5000Kbps | 1080p2997 to 720p2997 5000Kbps | ||
| 6000 – 10000Kbps | 1080p2997 to 1080p2997 10000Kbps | 1080p2997 to 720p2997 7000Kbps | 1080p2997 to 720p2997 7000Kbps | |||
| 11000Kbps+ | 1080p2997 to 1080p2997 15000Kbps | 1080p2997 to 1080p2997 20000Kbps | 1080p2997 to 1080p2997 15000Kbps | 1080p2997 to 1080p2997 20000Kbps | ||
Keep in mind, when you stream to a CDN, that is, after the Helo has encoded the video, the CDN may transcode your media further, so your image may take another hit in quality. Thus, it’s best practice to always test what the end signal looks like before going live.As a side note, and while it’s not aesthetic, the unit will get hot while recording and streaming. There is no fan, so the unit dissipates heat through the chassis….don’t freak out.
5. Who should use the Helo?
Portable switching devices like the TriCaster by Newtek are fantastic. But in addition to the switching, audio mixing, and graphics capabilities, they often are handling recording and streaming as well. This is a lot to burden 1 machine with. I like to spread out the points of failure if possible, and the Helo helps with that.
Newtek’s TriCaster Mini
The Helo is also a hardware encoder, rather than the software encoder that portable switchers or software switchers use, and hardware encoders traditionally mean better visual quality – and less potential for hiccups due to a computer system and it’s OS and everything else that the computer is doing.
The small footprint of the unit also makes it portable and lightweight for the aforementioned remote broadcasts. For sporting events and gamers, the larger frame size of 1080 and the progressive 60 frames ensure you’re getting as much info per frame as possible without compromising. Lastly, and something many users overlook is the value of support.
For years, AJA has had world-class support, and knowledge of not just their products, but how their product fits into typical workflows. It’s important to have that backup behind you when you jump into new gear. It’s also great for folks who handle events that need to be streamed but may not have uber technical people at the event. Churches and schools are a great example. The hard buttons on the front make it totally simple to operate.
Have more workflow questions on the web series? Maybe some improvements? Ask me in the Comments section. Also, please subscribe and share this tech goodness with the rest of your techie friends.
Until the next episode: learn more, do more.
Like early, share often, and don’t forget to subscribe.
Learn more about the AJA Helo: https://www.aja.com/products/helo
]]>1. YouTube needs compressed video
 Now, if you came to my live show, you may have already seen this.
Did you know that you don’t have to upload a compressed version of your project to YouTube? You can actually upload much larger files like ProRes and DNx and YouTube will accept them.
Yeah!
Of course, who would want to actually do this? Well, I do, mainly because I’m vain and…
Let’s back up.
YouTube does have their “recommended upload encoding settings”. And your NLE and transcoder probably have a YouTube preset as well. Both of these typically recommend an h.264. However, if you shot on a higher end camera, h.264 is a huge hit in quality from the original file. Plus, no matter what you upload to YouTube, YouTube will recompress it again.
Let me repeat, WHATEVER YOU UPLOAD TO YOUTUBE, YOUTUBE WILL RECOMPRESS IT. There is no way around it.

Google Datacenter
These presets exist because not only do they make your upload time shorter, but it also taxes the transcoders over at YouTube less. Think about it: YouTube has over 86,000 hours of video uploaded daily, and all of those files need to be transcoded to the various flavors YouTube can display, so they want to maximize their computing and storage resources. It’s a win-win…you get a quicker upload, and YouTube can turn around the file faster.
…Unfortunately, this means you take a hit in quality because you’re dumbing down your high-resolution file down to h.264.
So, if you have the bandwidth, and you have the time – in some cases a 10x increase in time – upload your ProRes or other high res masters. You will see a quality increase, and you can thank me later.
2. Bare drives are safe for storage
 FALSE!
Those caddies for drives were made for technicians to easily mount drives and to clone and dupe several drives at a time. However, I’m seeing them pop up more and more on editor’s desks.

Ways to destroy drives
This is crazy!
Bare drives are not floppy disks. You can destroy the drives in many ways. You can shock it, drop it, get it dirty, and wear the connector.
The first issue, scariest, most damaging and easiest to do is, ESD or electrostatic discharge. And don’t tell me you ground yourself before every touch. Maybe you ground yourself before you remove it from the bag, but then you move about the room, you roll your desk chair, you pick up static. And for the record, just touching metal isn’t good enough, you have to touch grounded metal, so the metal legs of your desk ain’t going to do it.
The second is a no-brainer, you can drop it. Now maybe you’re saying, “but I can drop an enclosed drive too!” Yes, but even the most basic of drive enclosures have some form of shock buffer and if they don’t then you should not trust your sensitive data on those either.
The most overlooked is finger oils. Touching the circuit board of a drive with your bare hands is going to transfer oil to it. This oil can break down the drive’s components, but more likely will become a bonding agent for dust buildup that will insulate components and cause them to eventually heat up and fail. In addition, your finger oils can create electrical connections between components.
Lastly, that hard drive connector was never made to withstand many inserts. It was meant to be connected a few times. It’s not USB. The more you use it, the more it wears, the cheaper the drive, the fewer times it can be connected.
“But Vince, we always have another backup.”
 This one is laughable. How long will it take for you to access that backup? I’ve been to facilities where that backup bare drive is safely stored offsite and a cut need to go out tonight. You’ve just shocked your bare drive and now you have to spend a few hours of time retrieving the backup. A team of AE’s editors and producers are on the clock for those few hours of retrieval.
Now I know you’re saying “bare drives are cheap and convenient, and I don’t have to keep all those power supplies around.” So you’re going to start acting like a technician and stand on an antistatic mat, with an ESD wrist strap and wear ESD gloves. Plus you’ll keep isopropyl alcohol on hand just in case.
But even if you did that, drives out of enclosures are still more susceptible to vibration and the drives little vent holes are more likely to attract dust and dirt. That’s right enclosures have vibration dampening and obviously provide a further barrier to dirt.
Bottom line, handling a bare drive is akin to Russian roulette.
3. You can’t create ProRes on Windows
 Apple makes ProRes, so there is no reason for them to make it available on a Windows or Linux platform, right?
Kinda. Unless you show them the money.
Yes, Apple developed and owns ProRes. And Apple is very protective of this wonderful codec. Apple licenses 3rd parties to use ProRes. And Apple is very selective on who get’s this great honor. Normally, its hardware implementations of ProRes – that is, done on a dedicated hardware chip as opposed to in software. This could be a camera or a capture card As Apple itself doesn’t make any hardware encoders to create ProRes, this wouldn’t introduce any competition to them.
If it IS done in software, then it’s normally in a software solution, which would not otherwise compete with a potential Apple software sale or, is a higher end piece of software that makes buying a Mac to accomplish the ProRes transcode a viable option.
Now, there is a market for unauthorized implementation of ProRes on Windows. You’ve probably seen them advertised on forums while Googling a tech question. Many of these companies are now out of business because Apple lawyers don’t mess around.
On top of that, with unauthorized implementations, there is no guarantee the file will have the same visual quality that an authorized implementation may have. It also isn’t guaranteed to play everywhere, or have a long shelf life of the creating software disappears. If you’re in a post-production environment that needs to generate media that goes through QC, you may fail QC by using one of these unauthorized apps.
Apple maintains a list of Apple ProRes Authorized Products. Sadly, they don’t break it down by OS, so it’s not always clear what platform Apple has authorized.
So, yes, you can create ProRes on Windows, but it’s probably gonna be expensive or unauthorized. So choose wisely.
4. Editors only need to know how to edit
Editors today need to know how to edit in every popular NLE on both Windows and OSX. They need to have at least a basic understanding of how the systems work and how data gets in and out of them.
In addition, Editors need to have a basic understanding of sound clean up and color correction. This is at a minimum, Editors should have a thorough knowledge of Photoshop and After Effects.
What? Vince, You’re crazy! I do fine without any of that. Maybe you do. But when a producer needs a problem fixed and the editor in the bay next to you can come to the rescue, who do you think they are going to hire back first next season?
You need to be a swiss army knife. Yes, it’s great for cutting, but it can do all this other stuff in a pinch.
Today many producers have smaller budgets and they are looking for one-stop shops. All this knowledge allows you to be that shop for smaller indie projects and development presentations. And when those producers grow and move on to bigger better content they are going to bring their savior, their swiss army knife with them.
But wait, if I’m going to do all that I need more money. Maybe, but with computers making edit decisions and post being farmed out to other countries, the only way to stay competitive is to offer everything they need in one stop.
Now you’re probably saying, that’s a lot to learn, where do I start? I’d start by exploring all that your current NLE can do. Become an expert with the color correction tools, both curves, and hue wheels. Jump into the sound capabilities and examine the EQ. Break back into that effects drawer, notice the star wipe is gone. It blew my mind and I had to create one in After Effects.
After you’ve become an expert at your NLE of choice, then become an expert in a competing NLE.
Ask your AE’s about their workflow, and teach them yours.
Keep moving from program to program and before you know it, you’ll be creating star wipes in seconds.
5. Video needs to be action and title safe
OK, everyone knows what title safe and action safe are, right? Refresher: Some NLE’s call them “guides”. These guides are a holdover from the days before flat-panel televisions when CRT tubes are what every household had. CRT tubes curve, which caused portions of the video on the screen to distorted or not even visible. Action safe – the largest guide – was meant as a guide for tv and filmmakers to know when action may not be visible to end-users TVs. Don’t go past that guide for important action, and you’re OK.

Title safe and action safe (click to enlarge)
Title safe, as the name implies, did the same for titles. It’s a smaller area as due to the curvature of the edges of the tube, text can appear distorted. So, the rule of thumb was to keep the titles in this area.
But, you may ask, “Michael, how is this even relevant now that everyone has flat panels?”
And you’d be right.
And then you might ask “But if don’t need to use the guides, can I go right to the edge of the screen?” And I’d give you a mean side eye.
Even flat panels have what they call over-scan, or areas of the video image that the end user doesn’t see, and how large this area is can, unfortunately, differ from manufacturer to manufacturer…and country to country.
You obviously don’t want anything important in this area for fear it may be lost. And in terms of aesthetics, having anything important near here is usually discouraged against.
So, nowadays (and I’m looking you, YouTube folks), keep everything within action safe. All modern flat panels can display it, and you won’t run off of the screen. As for personal preference, I like keeping text still within title safe, as I find it easier to read than having the text extend to the end of the screen.
Until the next episode: learn more, do more.
Like early, share often, and don’t forget to subscribe. Thanks for watching.
Special Thanks: Vince Rocca
Online: http://vincerocca.com/
YouTube: VinceRocca
]]>5 THINGS Post Production Workflow PDF
5 THINGS Distribution Workflow PDF
1. Pre-Production
5 THINGS sprang from my love of technology, but also the realization that the proliferation of creative tools has clouded the understanding of much of the underlying reasons for that technology. I also knew that this was a niche concept in a niche market, so I’d have to go it alone, so much of the workflows behind 5 THINGS come from me.
First, it starts with coming up with an idea. Something that not only interests me but is also a hot topic in the industry.
I also consult with Moviola, who has sponsored the series this season and also premieres the episode as a webinar once a month. Moviola wants to ensure that the episode topic is relevant to their viewers, so that gives me some framework to ensure the episode is applicable. The one webinar a month paradigm also gives me a timeframe to plan production and post-production by.
It’s then brainstorming time, writing out the 5 major questions of the video, along with ideas for b-roll for each point.
I have a word doc template that I then begin to populate with the ideas in a narrative and conversational fashion. I then simply start dragging my knuckles across the keyboard and grunt approvingly as the episode starts to take shape. This is what will become my script and teleprompter feed. Because much of what I talk about is reliant on exact speeds and feeds, it’s important that my tech info be as correct as possible, so I traditionally don’t ad-lib the episode as much as I’d like.
It’s also at this point that I’ll call on some industry friends – other creatives and technologists, and sometimes manufacturers, to discuss some of my viewpoints to ensure the info I’m pontificating on is accurate.
 Lastly, it’s time for the cutaways. Being raised on media, quite often my normal thought process recalls clips from movies and tv shows and many of the cutaways are simply a natural extension of my cognitive process. I can’t help it, it’s how I’m wired.
Put all of this in a blender, and I get six to ten pages of tech goodness.
Now, it’s time to shoot.
2. Production
I shoot 5 THINGS at my home office. A modest 13×13 room that allows me to do 5 THINGS on nights and weekends. However, a room of this size does present some challenges.
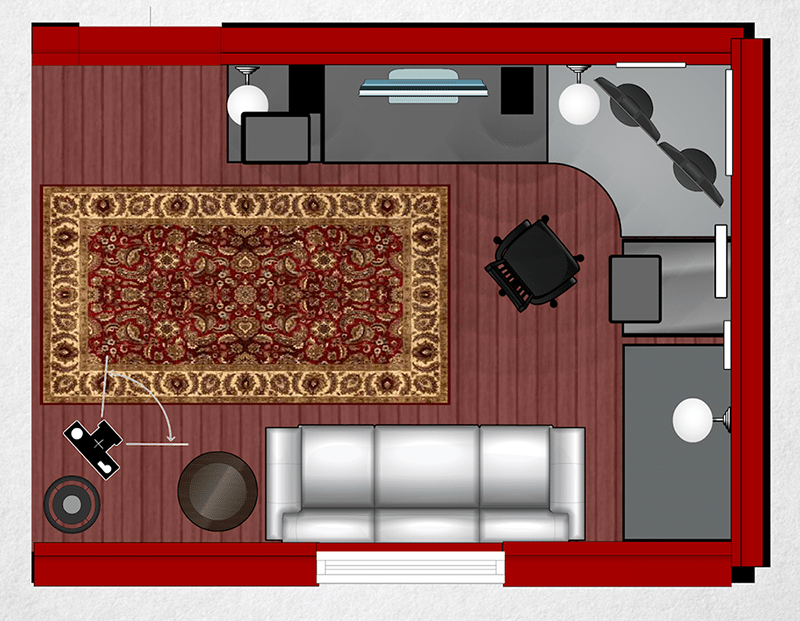
13″x13″ room layout; camera and light at bottom left.
First, let’s start with the look. Given the shortness of the room, having multiple cameras set up would be tricky. So, I decided to shoot with a 4K camera, and release in HD. This allows me to have a medium shot and a close-up from one camera. This also means my production lighting requirements were reduced, as I didn’t need to take into account lighting for other angles.
I wanted a shallow lens for a little bit of bokeh; a traditional video lens would have most everything in focus, and the frame would be very busy. The Sigma 1.8 18-35mm was a great choice. It’s also a fast lens so I don’t need a ton of hot lights in a small production space.
So, I needed a camera that could shoot 4K, and had removable lenses, and wouldn’t break the bank. I choose a Blackmagic Design Production Camera 4K.
Next was the teleprompter. Given the small size of the camera, and the less than constant use, I choose a modest prompter – the Flex Line from Prompter People. Easy to set up, and lightweight so I didn’t need a heavy-duty tripod. It’s also adjustable and had a large enough monitor that I could plug my laptop into it and run the prompter. Prompter People also has the Flip-Q software to run the teleprompter.
Prompter People also has a sister lighting company called Flo-light. The lights are very inexpensive, but not the most rugged. A 220AW, with some diffusion, and situated directly behind the camera lights my face just fine. It’s not as artistic as I’d like, but the room constraints somewhat limit my options.
Speaking of lights, I also have a 1500 lumen LED light behind me, a simple clip-on light to an old boom stand. This not only gives me a hair light, but the white ceiling becomes a great faux bounce card to illuminate the room.
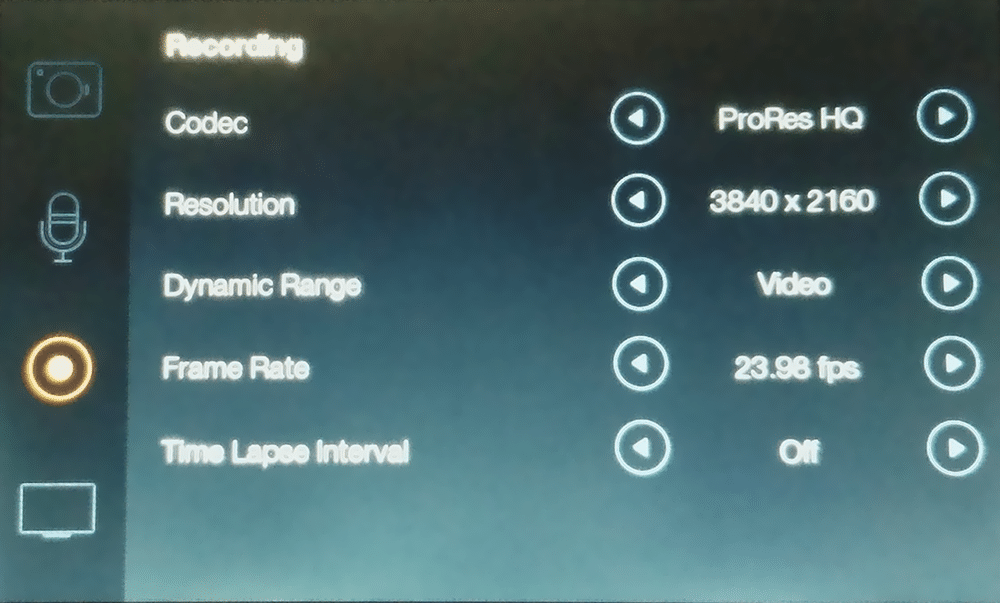
Blackmagic Cinema Camera Recording Settings
Now, because I am a one-man production band, I need to see the shot while I’m in front of the camera. I use the cameras HD-SDI out to an HDMI converter and run that that 27” computer monitor. This allows me to check framing, lighting, and that the camera is actually recording.
As for sound, I use a Sennheiser wireless lavalier mic transmitter and receiver and run the signal directly into the camera. As I do cut sound for indie projects on occasion, I do have some dampening up around the room. Sadly, it’s not enough, and if you listen to the audio version of this episode, or with headphones, you can still hear the slight reverb in the room.
Lastly, I gotta put on my face. That includes makeup.
 I then shoot, and the footage records directly to an SSD in camera. I record in ProRes 422HQ at UHD resolution at 23.98. I like the film look 23.98 gives, coupled with the short depth of field with the lens. Plus, most of the episode is a talking head, so there isn’t a need for a higher frame rate. As a fringe benefit, the media files take up less space and is easier to stream for viewers. As for dynamic range, I shoot in a video look as opposed to film, to reduce the amount of time in post spent on color.
3. Post Production
As yes, the warm bosom of post production. It’s home, ya know?
During this segment, feel free to follow along with this handy dandy post production workflow flowchart.
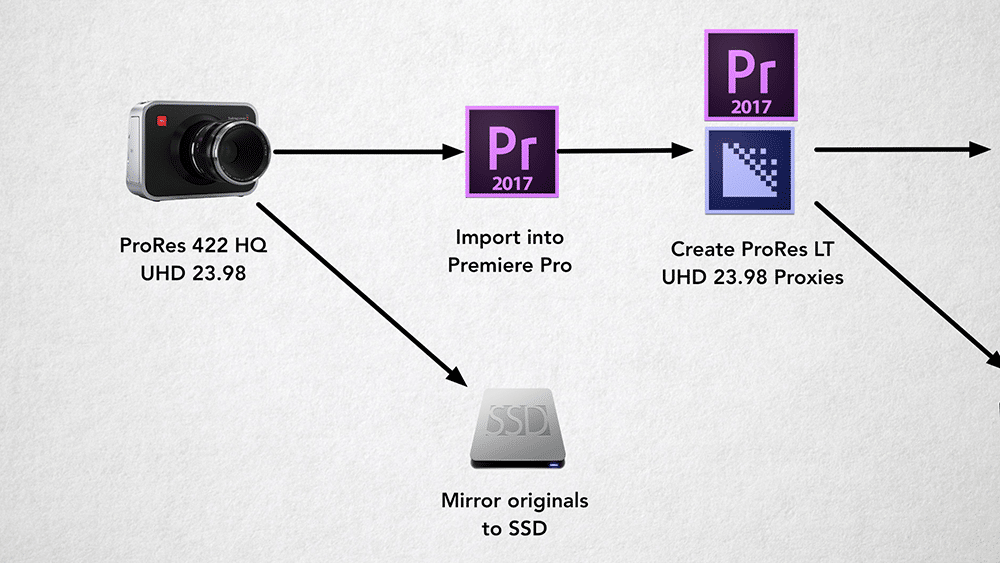
Ingest and Offline workflow for 5 THINGS
As soon as I’m done shooting, I take the raw camera SSDs and mirror the footage to a second SSD; for backup.
Once mirrored, I take a Premiere Pro template I’ve created for the 5 THINGS series and ingest the UHD ProRes 422HQ footage into the project. Given the newer proxy workflow in Premiere Pro, I no longer need to manually create proxies and relink during the online – Premiere does it for me. I flip the files to ProRes LT at UHD, maintaining the 23.98 frame rate. I’m often asked why I don’t offline in a smaller codec or at a smaller frame size. The answer is pretty simple: I don’t need to. The amount of footage is small enough that I don’t need to save a ton of space, and I like the UHD resolution so I know how much I can safely punch in for my HD deliverable. It also gives me the media format I’ll ultimately archive to.
What?!
Yeah, I wrestled with this decision for a while….but let’s be honest here, this is a web series. There is little reason I need to have uber high res masters of the raw footage after the episode is complete. My final output will be from the camera masters, and the need to go back to the originals is slim and none. Plus, archive storage constraints are always a concern. I would not recommend this for most folks, especially broadcast professionals, but for me, I was willing to live for the quality tradeoff for archival material.
By now, the proxies are created, and I transfer them to a several-year-old (and soon to be retired) Synology 1512+ 20TB NAS. This offers me a backup of the media and redundancy in the event a drive fails. I also keep the raw media on the SSDs until the project is done. I also put the proxies and portable bus-powered SSD – a 500GB Glyph; this allows me to edit anywhere, easily.
 My main edit system, until recently, was a 2013 MacBook Pro. It had an nVidia GeForce 750M GPU, and had 16GB of RAM. Starting with this episode, I’m using a new 2017 MacBook Pro with a CalDigit USB-C dock.
I’d run the HDMI out to a consumer 42” UHD monitor, which I used a Spyder Pro to calibrate the color on.
I can now begin to select my takes and assemble my cut. I mark my good takes in Premiere and do a string out.
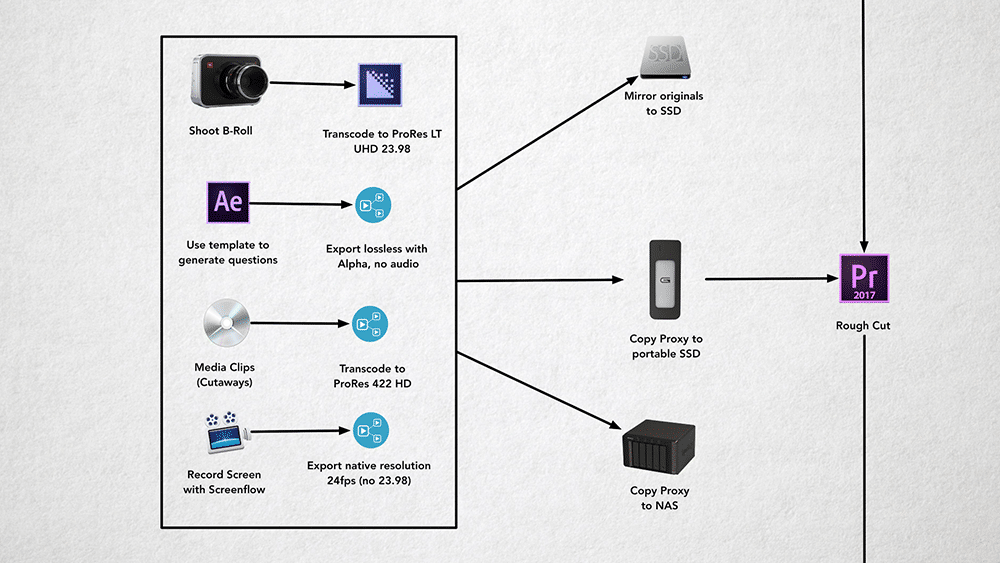
Supplemental Media Workflow for 5 THINGS
Once my talking heads are strung out, I go into After Effects and generate the questions before each segment, as well as the lower third factoids. I attempted to work with the Live Text option from After Effects to Premiere, but too often I found I needed to adjust the parameters of the text that live text didn’t give me options to. So, I do the questions and lower thirds in After Effects, and export them with an alpha channel, then use them in my Premiere sequence. I also use Light Leaks from Rampant Design as transitions between segments.
 Next, I track down the film and TV cutaways I need, and re-wrap them with a Quicktime wrapper or flip them to a more edit-friendly format. This is also the stage where I’ll incorporate footage or effects from other NLEs. I’ll also use Telestream’s Screenflow for screen recordings. ScreenFlow allows me to zoom in to screen recordings without much loss in quality, so I can point out features or details in whatever I’ve recorded. I’ll also use Boris FX Sapphire plugins for the dirty video effects. Sapphire plugins are very intensive, so having all of the media in a more edit friendly format makes previewing the effects that much easier. Of course, during this time, I’m backing up all of my media up to their respective data parking lots.
Once the rough cut is done, I render the sequence and export a ProRes file using the rendered previews. Why? Using previews allows me to go back into the sequence and make changes and fix mistakes without having to re-render the entire sequence during export.
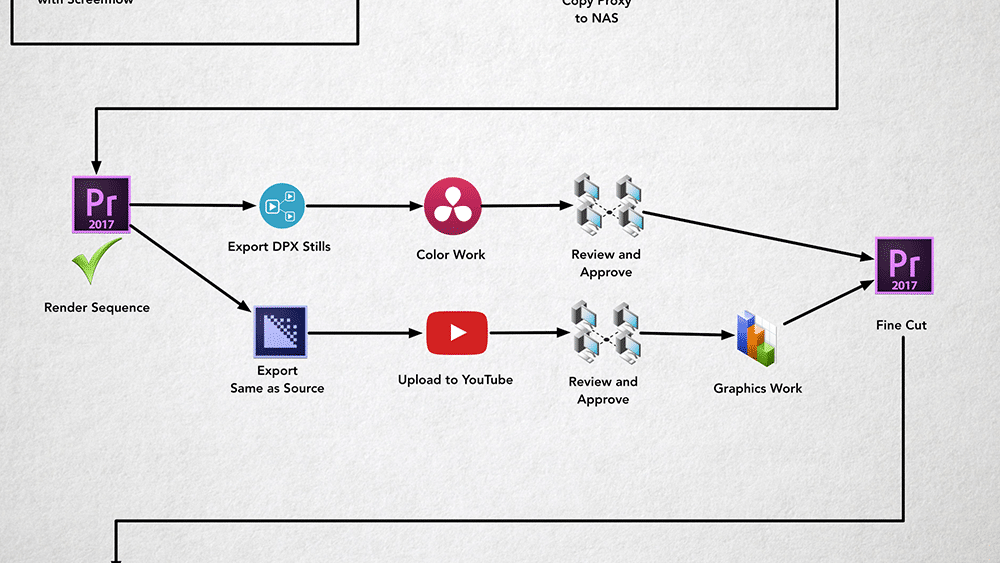
Color and Graphics work workflow
After the render, I’ll export the sequence in Adobe Media Encoder, same as source, and upload it to YouTube, as unlisted. Why? Rendering to an h.264 takes up a lot of CPU resources. I want to continue working. Same as Source is a quick export, h.264 is not. YouTube will take ProRes files no problem, the upload will just take longer and in the background.
I then share this unlisted link with my friends at Moviola for input, as well as for Thomas, the motion graphics dynamo at Moviola, so he knows the timing for his motion graphics. Thomas will do 3-5 motion graphics per episode if needed, to add a bit more eye candy than just my overactive hand movements.
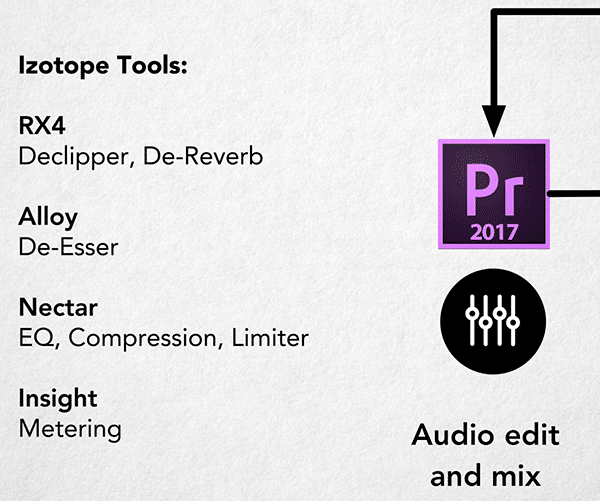
Izotope tools used in 5 THINGS
Color is not one of my strong suites. Because of this, I’ll often enlist the help of Jason Bowdach at Cinetic Studios to do a corrective grade on my talking heads. I shoot him over a few DPXs of my talking head, and he rescues me from the daredevil red hue that comes from this room.
I use several Izotope tools for any audio cleanup I may need, and to EQ and compress my audio for ease of listening.
It’s now time for the conform, and the proxy workflow in Premiere makes this very easy. I simply toggle from low res to high res, and just as before, I’m ready to render.
I take the rendered sequence and export the cut from Adobe Media Encoder using Previews, and I now have my master file.
4. Distribution
 This is where things get really hairy, and where I spent a huge chunk of time, and I would kill to automate this. During this segment, feel free to follow along with this handy dandy distribution workflow flowchart.
I currently have 5 distribution points for 5 THINGS: Moviola, YouTube, my website, Roku, and iTunes.
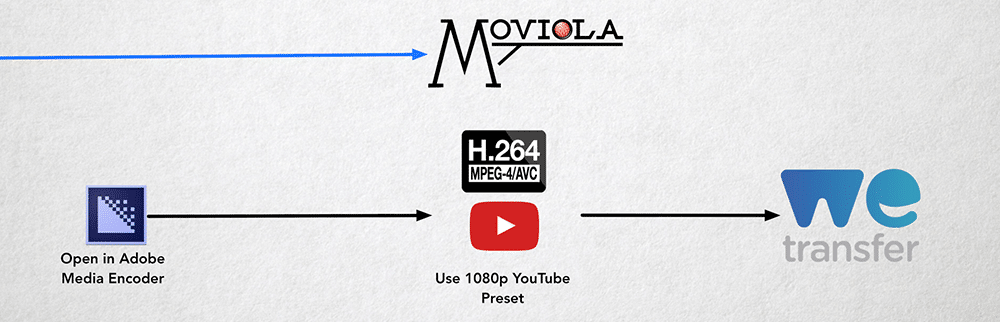
Distribution via Moviola Workflow
Moviola is relatively simple. I generate an h.264, using a slightly tweaked Adobe Media Encoder YouTube 1080p preset. Moviola has a proprietary VOD platform, so the best I can do is give them a high-quality file delivered via the web that they can work with. Moviola handles all of the metadata for their system.
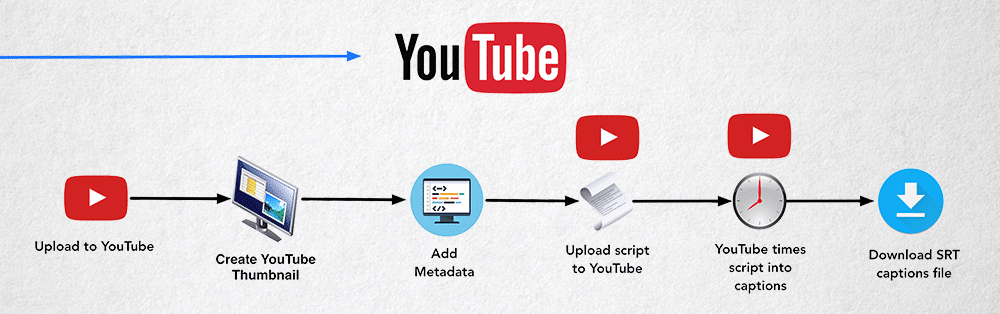
YouTube, as I mentioned earlier, gets a ProRes file. While this lengthy upload happens, I start to work on thumbnail artwork, which will become the basis for every distribution platform. I’ll also begin to enter in metadata on YouTube and do some research on what kinds of keywords are working for similar videos.
I’m a huge proponent of education and being accessible to as many people as possible.
To this end, I ensure 5 THINGS gets captioned. It also reportedly helps with S.E.O., although to what extent I don’t know. I have a workflow hack that gets YouTube to take your script and time it to your video for you; free. This becomes your captions. After YouTube times the captions, I download the SRT caption file, as I’ll be using it for all subsequent encodes.
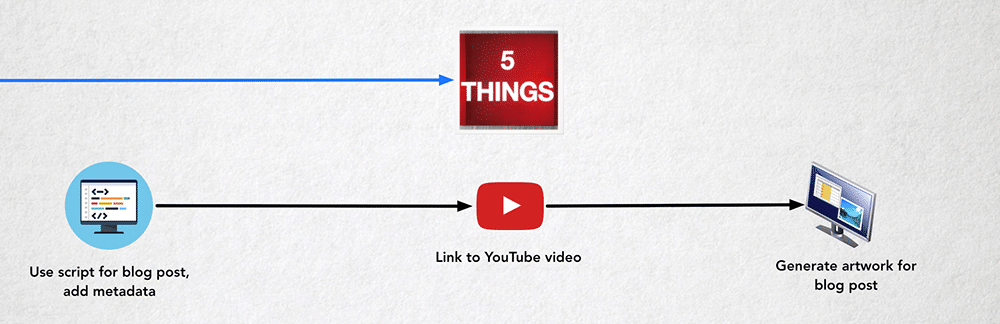
5 THINGS website workflow
I then take the transcript of the episode and use it as the basis for a blog post at staging.5thingsseries.com. This allows a visitor to read the information in the event they don’t want to watch or listen, as well as, again, being good for S.E.O. I take screen grabs from the video to punch up my potentially dry transcript. As the video is already on YouTube, I simply embed the video at the top of the blog post so viewers can watch on my site or on YouTube.
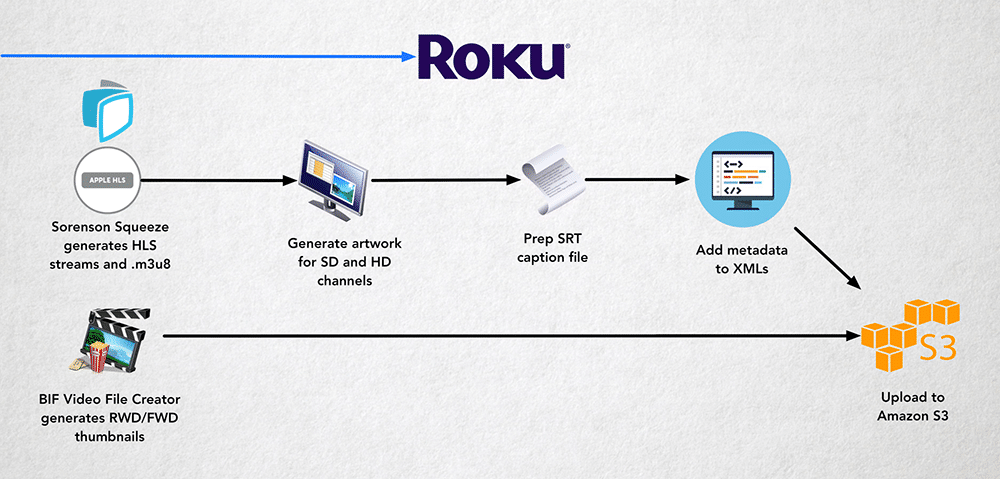
Roku Workflow for 5 THINGS
 Now Roku is a difficult beast. As Roku is finicky about channels linking to YouTube videos, I need to go to the lengthy process of creating streamable media for my Roku Channel. I choose to go with Apple HLS for the streaming media format for Roku as it’s the most flexible and forgiving on various platforms. This generates segments of each episode in varying degrees of quality, so the end user’s player can automagically switch between resolutions depending on their available bandwidth.
Generating this media format – plus the m3u8 manifest file – is something not a ton of encoders do easily. I settled on Sorenson Squeeze, because it creates the media and generates the m3u8 playlist file. However, there is a slight gamma shift, which means I need to do some small tweaks to the color on encode.
BIF files for Roku
This is obviously not ideal. Tests with earlier versions of Compressor 4 yielded several errors, so when time permits I intend to experiment with newer versions of Compressor to streamline the process and to potentially move from Sorenson to Compressor.
While the encode is happening, I take the master ProRes file and run it through a little program on an aging PC called BIF Video File Creator. A BIF file, or Base Index Frame, is a file that Roku uses to show thumbnails of frames as you rewind and fast-forward through the episode. It’s a little eye candy that makes scanning through an episode easier for the viewer.
For graphics, I take the thumbnail that I created for YouTube and resize it to fit the graphics requirements for my standard definition and high definition Roku channel.
5 THINGS Roku Channel
My Roku channel pulls all of its data from external resources via XML. This makes it easier to update, and easier to use a 3rd party media host like Amazon S3. Thus, I need to hard code the episode metadata into the XMLs, as well as then link to the media, caption files, and thumbnails of the episode. I then upload all of these files to my Amazon S3 bucket.
It’s then Q.A. time, and I load the channel up on both my Roku 3 and Roku 1 to ensure HD and SD look and play in an acceptable manner, and that the thumbnails, captioning, and BIF files perform as expected.
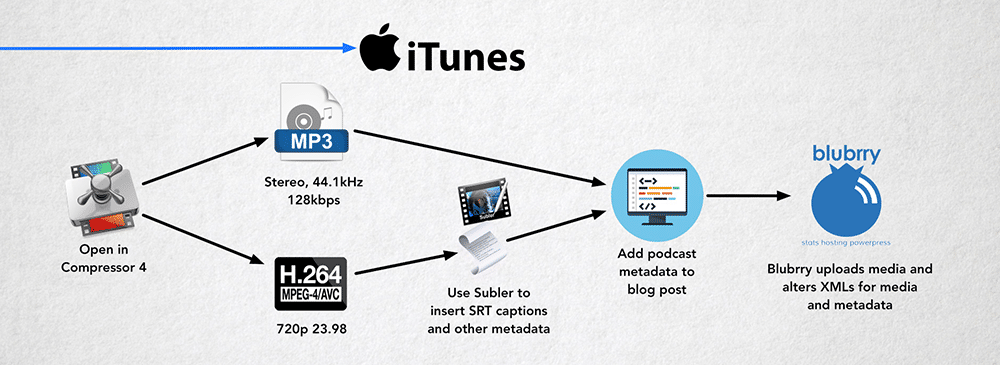
iTunes workflow for 5 THINGS
Next, it’s iTunes, which is a new addition for 5 THINGS, in fact, it may still be under development when this episode premieres. I have 5 THINGS as 2 podcasts – 1, the video as you watch now, and 1 that is just the audio portion of the episode, as I’ve had requests from folks who want to listen on car rides or during other activities where watching isn’t possible. I use Compressor to generate the 720p h.264 files for the video portion, as well as the MP3 version for the audio podcast.
I use a great app called Subler to insert the SRT caption file into the 720p podcast file, as well as insert the plethora of metadata into the file.
 BluBrry has a fantastic WordPress plugin that maps metadata from your blog post directly to iTunes. This allows me to upload my iTunes media to Blubrry and have 1 place for the metadata to pull from for both podcasts… so at least that portion is somewhat automated.
5. Improvements
There is always room for improvement… and so there are several things I’d change.
One is more dynamic lighting, rather than just a boring, and somewhat evenly lit and occasionally blown out face.
I’d also love even more motion graphics to illustrate the tech talk I’m making on camera. Less of me, more of the things I’m talking about…without a basic slideshow or a Ken Burns effect over a still image.
Automation for distribution is a biggie. The various platforms all requiring specific media formats and metadata. Most online distribution platforms that connect to these VOD outlets are really not meant for the indie person such as myself, so a 3rd party service really isn’t in the cards for now.
Lastly, I wanna work with you. Wanna be a part of 5 THINGS? Hit me up. Episode suggestions, comments, or offers of collaboration are always welcomed.
Have more workflow questions on the web series? Maybe some improvements? Ask me in the Comments section. Also, please subscribe and share this tech goodness with the rest of your techie friends.
Until the next episode: learn more, do more.
Like early, share often, and don’t forget to subscribe. Thanks for watching.
]]>
 But before I start, I do need to set a disclaimer. I also work for Key Code Media, who sells many of the tech solutions that I talk about on 5 THINGS. And wouldn’t ya know it, we sell a heck of a lot of Avid and things that play with Avid…including Adobe, and Apple, for that matter. I don’t want any of you think I’m a paid shill, so I got clearance
from this guy…ya really gotta watch the video above to see.
1. Avid Media Composer
A large part of understanding one’s popularity is to examine WHY it’s popular. And that requires sharing the most brief of history lessons.
OK, do you remember a time before Internet connected cell phones? Now, try and remember how our daily lives changed when most everyone had one of these devices.

It was a definite shift in how we consumed media. Now, imagine that, only with the CREATION side of media. This was Hollywood in the early 90’s. Digital video cameras were still very new, and limited to standard definition. There were many companies toying with building digital editing software, but none really took hold. That is, until Avid Media Composer came along in the early 90’s.
By building a digital editing platform, based on the terminology and methodology the experienced film editors knew, Avid was able to make the industry adoption of their technology much easier. Thus, we already have 2 reasons Media Composer was popular: it appealed to the sensibilities of the user base, and it was one of the few solutions out there.
Avid also built around their ecosystem, including not only their own shared storage, but having the top audio editing system in the industry; Pro Tools, by then Digidesign, giving users a complete solution tech partner to work with. We call this the “one throat to choke” paradigm.
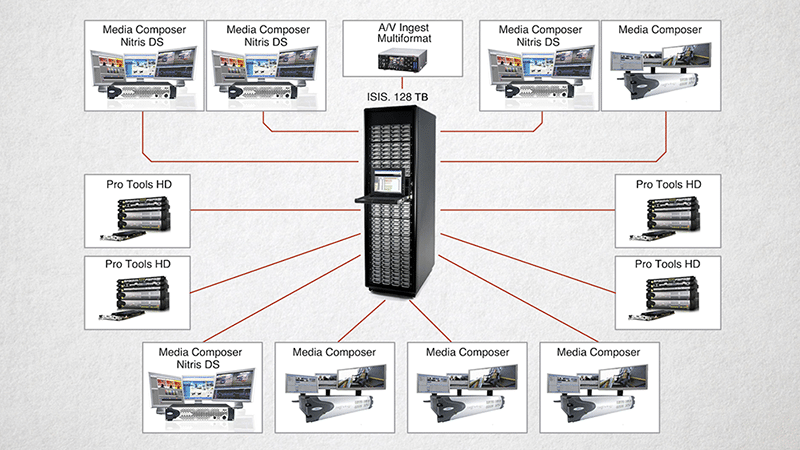
Many facilities already invested in a complete end-to-end Avid infrastructure.
By the time other NLE’s were in a useable state for film and TV projects, Avid had a massive head start. This meant a decent-sized user base in the Hollywood market, facility infrastructures (and thus lots of money already invested in hardware and software) that were built around Media Composer, in addition to workflows that incorporated both legacy film-based material, tape acquisition, and newer digital formats. Avid also had project sharing by the early 00’s, something that only recently other NLE’s getting right. For all of these reasons, Avid had the Hollywood market cornered. And all of this played into one of the greatest untold truths about Hollywood technology.
Hollywood is predominantly risk-averse.
If something worked last season, why change it for this season? Changing it messes with budgets and timelines and generally upsets the natives.

And that’s why today, Avid is still used on a vast majority of all feature films and broadcast television here in Hollywood. Existing customer investment in infrastructure, experienced talent pool – both available and already on staff, documented workflows with other departments, a complete ecosystem, and a risk-averse industry. If you plan on getting a job tomorrow out in Hollywierd, working in broadcast television or feature film, Media Composer needs to be your strongest software tool.
2. Apple Final Cut Pro X
Initially, I was going to share why Final Cut Pro Classic was popular, but then I realized that it now holds little relevance, as the software has been End of Life’d for 6 years now. Let that sink in. In the past 6 years, we’ve had:
Two presidential elections…three Transformers Movies…eleven iPhone Models…and we could have gone to Mars and back three times.
Now there are, of course, some Final Cut Pro Classic holdouts, but why don’t we cut through a little bit of Apple History, and look at Final Cut Pro X.

Final Cut Pro X got out of the gates miserably.
Its predecessor, Final Cut Pro, had gained prominence in the industry, and many broadcast TV facilities in Hollywood had switched over to or, had been started as a direct result of the low cost of entry for the software. That being said, although common, Classic was still in the minority in Hollywood compared to Media Composer when Final Cut Pro X was launched. Estimates vary, but to say 15-20% of TV post was cut on Classic would not be a stretch.
X lacked many features of Classic, and many of its features went against the editing methodology that most professional film and TV editors were accustomed to. It also meant many of the workflows, hardware, and technology that made them efficient were now in question.

Apple’s launch of Final Cut Pro X also meant Final Cut Pro Classic was killed, and that caused many facilities to instantly see their investment in infrastructure have a finite shelf life. Facilities now had 2 choices: throw caution into the wind, and gamble on brand new software which lacked the things they knew, or, move to another platform, which could be expensive in terms of hardware, software, and tech infrastructure, as well as re-training the talent they had on staff.
This, uhhh, was slightly upsetting for the industry…and thus the awesome power that Final Cut Pro X had (and still has) was eclipsed by the product launch. This stalled the adoption considerably.
By 2017, the price point for powerful, standalone NLE systems – both hardware and software – were around the same price; give or take. This was not the case 10-15 years prior, when Media Composer was tens of thousands of dollars more expensive – and one of the main reasons users flocked to Final Cut Pro Classic in the first place. Now, the cost is not as much of an issue.


Features edited with Final Cut Pro X, both by Jan Kovac.
It’s only been recently that Hollywood has dipped its toe in the Final Cut Pro X water. Only a few feature films, including Focus and Whiskey Tango Foxtrot, have been cut on it.
In stark contrast to Avid, Apple seems to enjoy adoption success into markets outside of Hollywood. And from a purely financial perspective, this makes sense. There are many more editors and hobbyists outside the Hollywood market than professional editors in it.
Thus, Final Cut Pro X, in Hollywood broadcast television and feature film projects is in the extreme minority, with little upwards momentum in the industry.
3. Adobe Premiere Pro
 Adobe Premiere has been around almost as long as Avid Media Composer, but it wasn’t until a rewrite around 2003, that Adobe renamed it “Premiere Pro”, and Adobe simultaneously expanded their reach from the consumer market to a more professional one. And when I say “professional”, I mean professional markets outside of Hollywood. It wasn’t until the next decade that Premiere Pro finally made inroads into the Hollywood market. And what was that event?
It’s what I call the “Final Cut Pro Fog”.
Apple killed Final Cut Pro Classic.
…and it left those facilities and users entrenched in it lost and wondering what to do and where to go. Do they go back to Avid? Or, do they look at what is the most similar to Final Cut Pro Classic, in terms of editing paradigm, hardware requirements, and talent pool?
Enter Premiere Pro.
Adobe pushed hard during the early days of Final Cut Pro X to grab the user base that felt abandoned by Apple. But it wasn’t all smoke and mirrors. Adobe added more and more features to the product to further convey to the market that they were innovating. It also helped that After Effects and Photoshop were already a staple in the Post community, and thus most facilities already owned – or should I say rented – Premiere Pro software. The rental model Adobe adopted also gave Adobe a way to push updates more often, without waiting for the quarter’s end or tradeshows like NAB. This kept Adobe relevant and industry newsworthy.
Lastly, Premiere Pro could run on the same systems that ran Final Cut Pro Classic, or even Media Composer.
This brings us up to the present day, where Adobe continues to add features like Team Projects and shared projects to make collaboration seamless for those who have worked in Avid environments.

Features edited with Adobe Premiere Pro.
Despite all of this momentum and development on the part of Adobe, adoption for feature film and broadcast television has been slow. Only a few TV shows – mostly cable- and a handful of feature films have been cut on Premiere Pro. Premiere has still has not reached a Hollywood adoption rate of Final Cut Pro Classic, so we’re looking at somewhere around 10% – but the gap is closing. By stark contrast, alternative professional markets, and a massive chunk of indie films have moved to Premiere Pro.
Premiere, while not nearly as relevant in feature film and broadcast television as Media Composer, is the 2nd most utilized NLE in Hollywood, and you’d be wise to learn it as it becomes more widely adopted.
4. Everything Else (Lightworks, Edius, Pinnacle Studio, Hitfilm, Blackmagic Resolve)
There are many other alternatives that can edit a piece of video just fine. I’ll address them here briefly, but to expect to get a job by concentrating on these is pretty foolish.

First is Lightworks, which has been around as long as Avid. In that time it’s cut several huge films, including “Pulp Fiction”, “Moulin Rouge”, “28 Days Layer”, “The Kings Speech” and the more recent “Wolf of Wall Street”. It’s got a free version and a paid version. While fantastic for the price point, it’s still not making many new waves in the Hollywood market, and I’m not aware of any current broadcast TV shows utilizing it.

Edius, which had a decent footprint in the broadcast and TV news industry, has drastically lost market share over the past decade or so, mainly due to lackluster marketing, and the proliferation of other tools – like Avid Media Composer – that are geared specifically towards that sector of the industry. As you can guess, it has virtually zero presence in Hollywood.

Sony recently sold their consumer based Vegas software, so now the trajectory of the software is in flux, in addition to not being used for much in the professional Hollywood realm.
Other apps, which are more consumer in nature, include Pinnacle Studio, and Hitfilm Express. Both are great for your kid’s tee-ball game, but won’t get you a job in Hollywood.
 The one unique tool that I get asked often about is DaVinci Resolve, now owned by Blackmagic. Resolve has made massive strides in the TV and film industry thanks to a tremendously powerful and very inexpensive grading tool. The price point of free or $1000, now down to $300, is downright astonishing. Plus, unlike other professional NLE companies, there is not a “rental” fee.
Recently, Blackmagic incorporated traditional creative editorial tools into Resolve, as well as a powerful audio engine via the acquisition of Fairlight. The latest version also has the ability for shared projects, considered by many to be the killer feature for professional film and TV post production.
However, as of now, the editorial side is so new, that many folks are holding their breath to see what happens elsewhere…and will the superior grading of Resolve be enough to force editorial’s hand to switch over…or, will Resolve remain a grading tool, and only be used for editorial on smaller independent projects. When you start with nothing, it’s easy to make great strides, so it will be interesting to see how Blackmagic can innovate once the Resolve editorial features reach parity with the industry leaders.
5. The Future
Ahh yes, the question I get asked the most.

Avid corporate has had some challenges.
 First, Let’s look at Avid. A company in flux, who has had financial reporting problems, has a stock price a tenth of what it was back in 2005, and has had significant layoffs.
As for Media Composer, Avid needs to walk the line between overhauls and refreshes without alienating their current user base, who is traditionally less accepting of change, given that their livelihood depends on it. This stalls newer, younger users who can’t identify with the user interface or operation.
Yes, they dominate the film and TV space in Hollywood, but is that niche of the industry as a whole enough to sustain the company?
Even if Avid as a company went away, it would make zero sense for the new owner to kill Media Composer, and with how risk-averse Hollywood is, there would be Media Composer systems running for many years to come. If your goal is to get a job in Hollywood in the next few years, there is zero reason to not get your Avid chops in order.
 As for Apple, they seem to be content for Final Cut Pro X to be used everywhere else but Hollywood. Ease of access via the App store, a relatively low price point, and some really badass editing tools for the novice editor make it a great tool in your editing toolkit. Do I see it ascending to the level that Final Cut Pro Classic had in Hollywood? No. The industry landscape is different from the early 00’s – the cost of entry across the board has become commodity priced.
It wouldn’t hurt to learn it, but it won’t get you much work in feature film or broadcast television. Aside from bragging rights, I don’t think Apple minds this – there is much more money to be had outside of Hollywood than in it…and they’re already making money by selling most of Hollywood overpriced computers, anyway.
Adobe Premiere Pro, however, seems to be trending upward as an editorial tool more than anyone else in the industry. Updates are fast and furious, it runs on Mac or PC, and follows the common and comfortable editing paradigms the industry was founded on. Its entire suite of tools also adds added functionality that you just don’t find with other editorial solutions, and it’s already installed on most machines due to their complete suite of tools.
Now, in the process of writing this episode, I took the opportunity to consult some fine colleagues in the industry to ensure I was on the right path. As Avid, Adobe, and Apple either don’t release exact sales numbers, or don’t filter out by geography or industry, I’ve had to get a little creative.
 Quick FYI for this next part to make sense: A vast majority of broadcast TV and feature film production facilities in Hollywood get their editing gear from one of two places: Resellers, who can sell all of the gear, integrate it, and make it all work together, or, rental facilities who own the equipment, but rent it out to productions and support it.
I contacted several other resellers in the Hollywood area, as well as several rental facilities, and asked them to give me some insight as to what THEY were seeing.
No surprise, across the board, Media Composer was the dominant player in broadcast television and feature film, by a wide margin, encompassing 80-90% of the market. However, once you move out of this niche market, Adobe became much more common, with Final Cut Pro X bringing up the rear. Also, out of the aforementioned Final Cut Pro Classic Fog, Adobe seems to have won the switcher award, as more folks in Hollywood moved from Final Cut Pro Classic to Adobe Premiere Pro, rather than to Media Composer or Final Cut Pro X.
This is probably the most important thing I came across: is that a vast majority of facilities that have Media Composer are not adding new seats. They plug along with what they have, and only buy updates when it’s absolutely necessary…and often they’ll sit on older versions because upgrading doesn’t give them enough new tools to warrant the change.

Now, these same facilities, while not buying many new seats of Media Composer, are adding seats of Creative Cloud at a rate must faster than that of Avid.
Lastly, and I can’t stress this enough. Hollywood is NOT the only place to work, and broadcast television or feature films are not the “end all, be all” of creative visual storytelling. Hone your storytelling skills using whatever you can get your hands on – and I mean everything – and then find what sector of the industry satisfies you creatively. And then focus your technical chops on the tools found in that area. But be open to learning more tools, because the days of basing your editing career on one software solution are long gone. The video editing realm is only widening, and learning more is the only way to remain employable
Until the next episode: learn more, do more.
Like early, share often, and don’t forget to subscribe. Thanks for watching.
Special Thanks: Resellers and Rental facilities (you know who you are).
]]>
Great to meet-up with folks at NAB 2017!
We’re back after a break for NAB. I’m still regaining my voice, and wanted to thank everyone who stopped and chatted with me at NAB….as well as attended or tuned in to the panels I was a part of plus the live episode of 5 THINGS thanks to Lumaforge. To everyone who reached out and chatted at the show, you ROCK. I love hearing from you. PLEASE, stay in touch.
Snap back to reality, and today we’re delving into what certainly sounds like a good topic, Prepping for post audio.
1. Track Layouts
How much time have you spent cleaning up problems and mistakes from onset? Or from other editors on your project? Often, audio folks have to do the same thing. Reorganizing work from the creative edit is usually the first step in post audio. You can help alleviate this in a few ways, and it will help you in your rough mix.
First, organize your audio. I know when it comes to video, you traditionally checkerboard your video, collapsing into as few tracks as possible. But when it comes to audio, we want extreme separation and organization. This means separating audio into the minimum of 3 categories, and thus sets of tracks.
In post, we call these FX, MX, and DX, or Effects, Music, and Dialogue tracks. This is a good start, as audio folks routinely need to create stems, or isolated mixes, of each individual sound type. What is typically preferred, however, is to arrange even deeper. This would include audio tracks for each character’s dialogue, and separate tracks for voice over.
It may also include organization by sound effects types, like soft effects…such as ambiance, vs. hard effects, like a door slam. Not only does this help post audio, but it does allow you in video post to easily find and change the audio without soloing and hunting around for the right piece of audio.
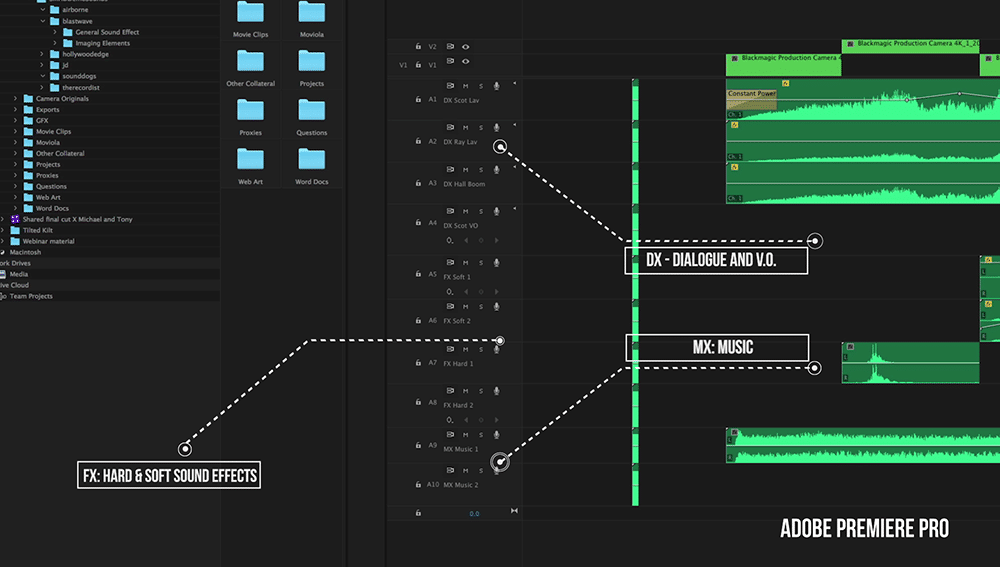
Track labels: DX (Dialogue), FX (Hard and Soft Effects), and MX (Music)
What should also be done is to adhere to odd-even pairing. This means putting stereo tracks on tracks 1 and 2, 3 and 4, and so on.
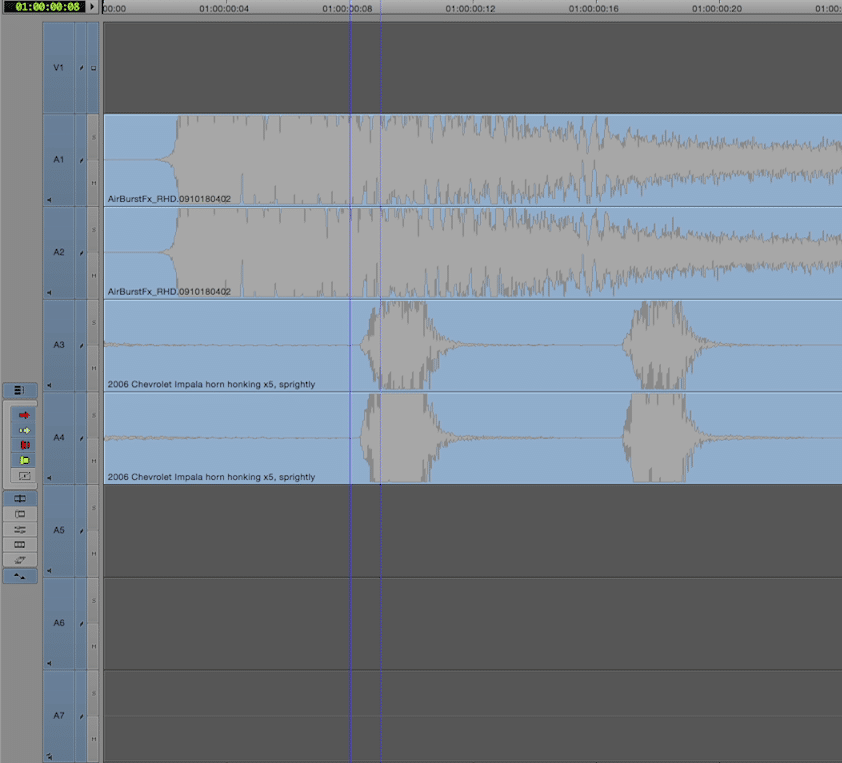
Correct audio track layout: odd-even pairs
Avoid even-odd pairings, such as tracks 2 and 3, and 4 and 5.
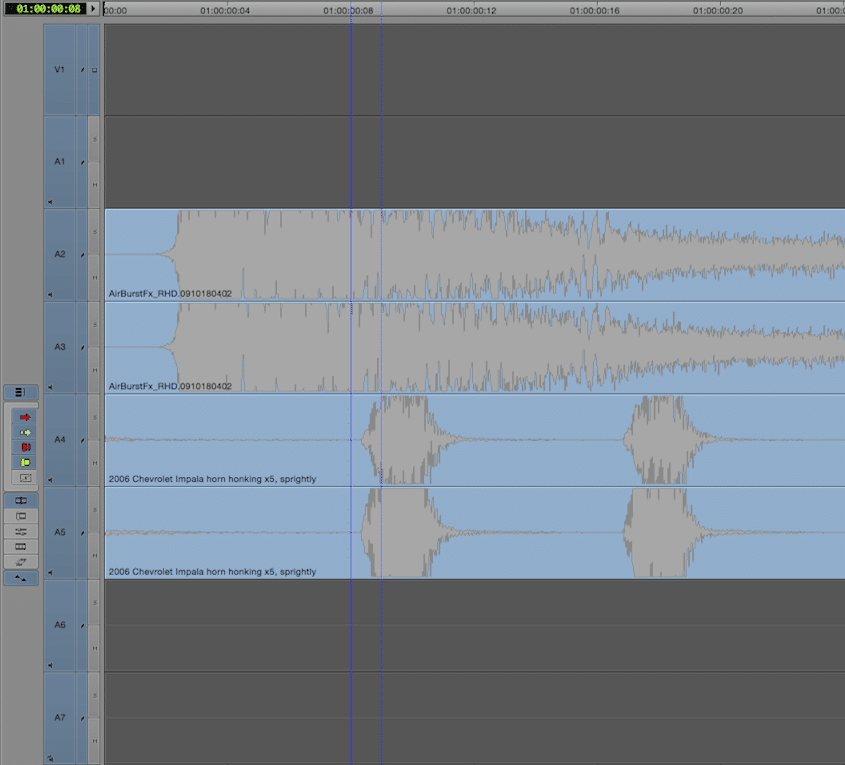
Incorrect audio track layout: even-odd pairs
This also includes not putting mono files on stereo tracks.
As an aside, nothing is wrong with having stereo tracks and mono tracks in the same sequence.
Lastly, if you process or render any audio files – whether you send them to another application, or simply apply a permanent effect, don’t forget to leave the original on the timeline with the volume down or muted. If you export the sequence for post sound and have rendered effects, the sound folks are then stuck with your permanent mix, which may need to be changed down the road. It’s like you getting a compressed video and having little way to get back to the original file. In fact, many audio folks will simply skip your effects entirely by ignoring them when importing them into the audio session.
Help the entire project out and keep the original around. Be cautious when using tools like Plural Eyes to sync audio, often using this tool to sync second system audio can remove the original audio for the scene….and your sound folks may need access to that.
2. Video and Audio Sync
Sync, sync, sync. You fickle mistress. Sync is a problem that will have you chasing your tail. Here are a few things you can do to ensure your sync is spot on.
First, is a head pop or a two pop. I’m sure you’ve all see the countdown to 2 before.
History lesson: It used to be used when audio existed on magnetic tape stock, and the picture was on celluloid. Getting these 2 mediums to proper and consistent playback speed could be challenging, so this countdown – called the academy leader – was placed ahead of the film. The audio – a single frame long 1kHz tone – was placed on mag stock to be audibly heard for 1 frame when the picture showed a frame of 2. If the tone and frame of 2 didn’t match up, something was out of sync.
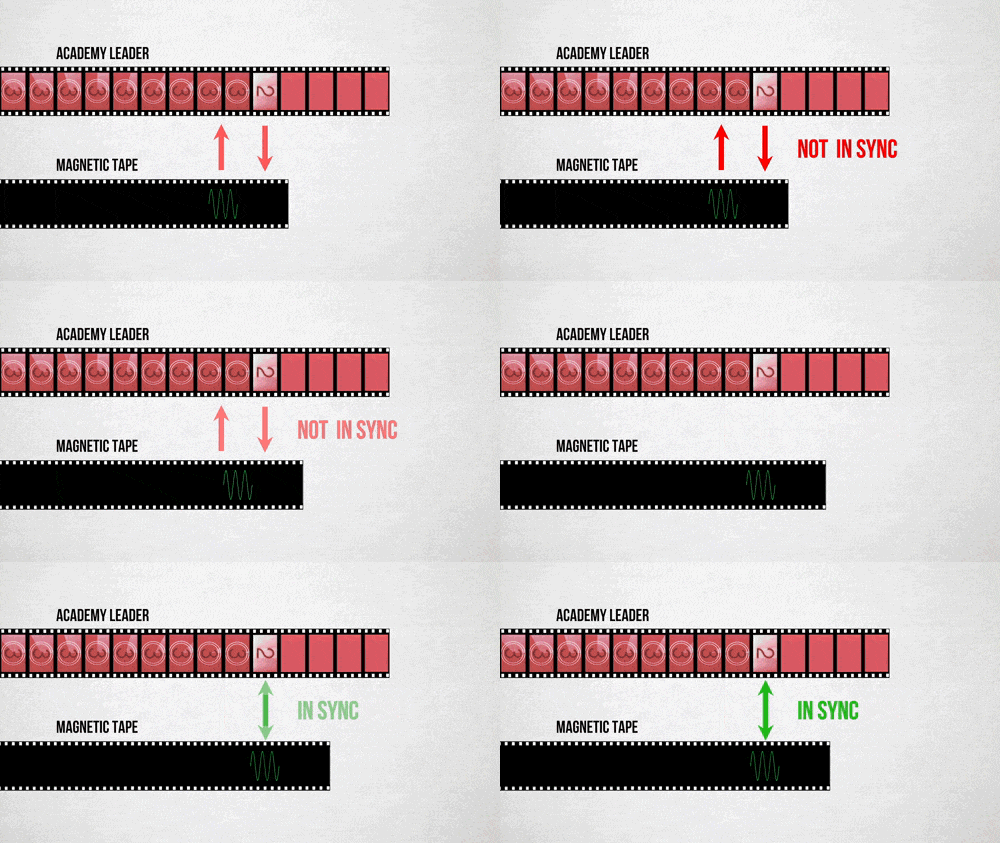
Dual System Film Sound Sync
Why have the pop at 2 you may ask? This was because the FFOA or FFOP, also known as First Frame of Action or Picture, started 2 seconds after the pop.
At the tail end of the film, an identical pop was placed 2 seconds after the LFOP or LFOA – which is the last frame of action or last frame of picture.
While we no longer need to be as concerned about dual system playback, we still need sync points to ensure exports are OK and remain in sync. Often, this can simply be a flash frame 2 seconds before FFOA with a 1kHz tone, and the same flash frame and pop 2 seconds after the LFOA. Usually, your project will have the 2 pop at 00:59:58:00, with FFOA at 1 hour.
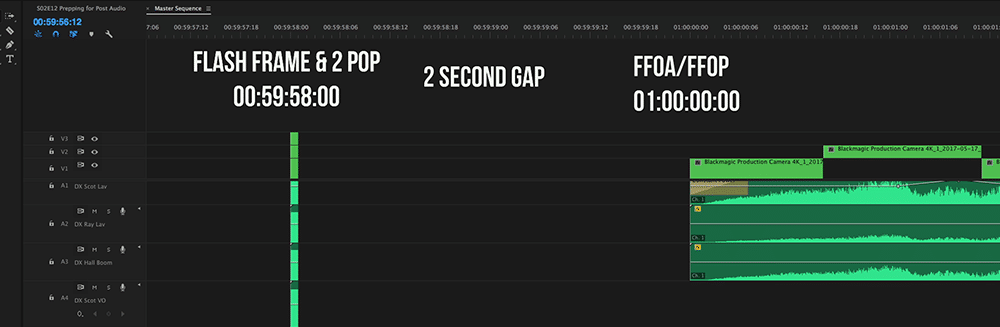
Traditional audio and video track layouts for sync.
3. Video Export
Most everything that post audio does is based off of mix to pix. So it’s imperative that the video arrives to your audio team with a few key things.
First, as I mentioned in the last point, make sure you have your flash frame or academy leader countdown at the tops and tails of your piece.
You’re gonna have to put a time code window burn on the video for sync. Now, this timecode needs to match the sequence timecode and frame rate. Make sure you’re using a timecode reader filter set to sequence timecode, and not a timecode generator, or a reader that is pulling clip timecode.
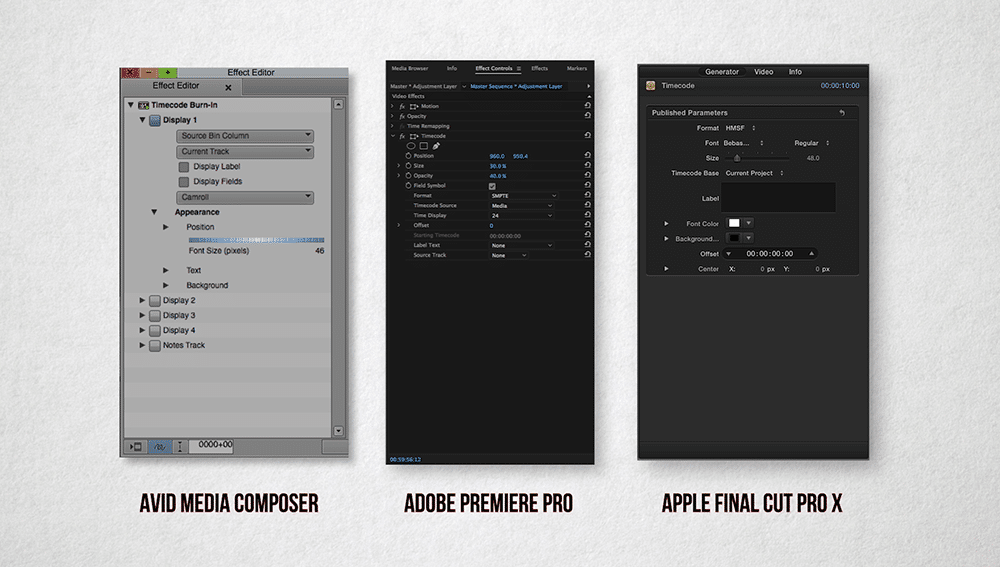
Timecode filters and effects in Avid, Premiere, and FCP X
Put the time code window burn in a place that will not prevent the sound editors or foley folk from judging footsteps, and lip sync. Often, this means having the window burn near the bottom or top of the frame and off to one side, often with a level of opacity. If the video is letterboxed, then put the window burn in this black area. This is important: be sure to check with the sound team to see their exact requirements.
Timecode window burn suggested placement, with opacity
Now, when you export the video for post audio, each facility will have their own requirements. Normally, this is a DNxHD or ProRes export. These files will be larger than h.264 files, but post audio systems work best with non long GOP encoded files – so the less compression, the better. We want the audio workstations horsepower to go toward mixing, not trying to play back the video file. Most facilities are still mixing to SD or HD video, as opposed to 4K or larger. Again, we want to minimize strain on the DAW.
It’s also beneficial to export the video file with the complete mix you’ve done. Audio folk will often use this as a guide, as often it gives us insight into what the director liked for that sequence.
4. OMF and AAF Exports
Most NLE’s have the ability to export the sequence for post audio. This is usually in an OMF or AAF format. OMF, or Open Media Framework, is an older, dated format, and has several limitations. OMF tops out at a 2GB file size, which often means you need to export multiple OMF files for larger projects. OMF also loses the volume automation and names of the tracks when exporting and importing from one application to another. AAF, on the other hand, remedies all of these issues. Use AAF whenever possible.

AAF export settings with 5 second handles in Premiere Pro.
If your NLE supports nesting of sequences, then you’ll want to un-nest these portions of your timeline. The OMF or AAF that contains a nested sequence will do a “mix” of that nested portion, and post sound won’t get the individual sound files.
Needless to say, this is very, very, bad.
Post sound will also want handles – that is, extra head and tail on the clips that are exported. This helps with fades and smoothing out audio from clip to another. I prefer 5-second handles if possible. This is easily selected during the OMF or AAF exports from your NLE.
For those of you using FCP X, you have a bit more work ahead of you. First, you need to properly assign your roles. Next, FCP X doesn’t export OMF or AAF natively. But, you have a few options to work around this. Most common is to use the X2Pro application. There are 2 flavors, X2Pro, and X2ProLE, but I highly recommend the full version. It works by exporting a fcpxml from FCP X, and running this file through the X2Pro application.
The other workaround is to use Logic. If you have Logic on your Mac, you can export an XML from FCP X, open this exported XML in Logic, and Logic can export an AAF for post audio…so this workflow may result in the loss of some very important metadata.
5. Odds and Ends
Just as editorial should have tight communication with production, post audio should have tight communication with you. Talk with them early, and make sure to ask for their deliverables doc. Send them notes on problematic scenes, notes on temp audio, music, etc.
What’s also beneficial is to put room tone on the tracks for that scene. While not imperative, it does save time in post audio from having to hunt down bits of room tone from within dialogue takes.
Dialogue, a vast majority of the time, will be mono. There is no need to double up mono dialogue tracks to create a faux stereo track in video post. If production used lavs and a boom, keep them mono in the timeline so post audio can use both at their discretion.
Check and see what type of system audio post is using. Is it Mac based? Is it Windows? This will help determine how to format the drive you are handing off to them, so they can actually read it. Or, do they want the media via online sites, like Dropbox or weTransfer?
Check your output before you hand it off, and compare it to the deliverables doc. Does the timecode of the window burn match the sequence timecode – at the start and at the end? Did you include a reference mix? Did the post sound facility request you export your feature in smaller chunks? Double check to minimize downtime due to mistakes.
Have more prepping for post audio concerns other than just these 5 questions? Did I miss something? Hit me up in the Comments section. Also, please subscribe and share this tech goodness with the rest of your techie friends….especially at parties.
Until the next episode: learn more, do more.
Like early, share often, and don’t forget to subscribe. Thanks for watching.
Special Thanks: Charles Dayton, and the Sound Design Facebook Group.
X2Pro and FCPX footage: MacBreak Studio Ep 334- Final Cut Pro X to Logic Pro X
]]>
While the next episode of 5 THINGS is in production, I wanted to give you a quick update on other 5 THINGS news. So let’s get to it:
NAB, the National Association of Broadcasters convention kicks off next week. It’s the annual tech nerd pilgrimage and business card exchange, and I’ll be there Friday, April 21st to Thursday, April 27th. I have a few appearances I’d like to clue you in on.

Teradek – Fishbowl Panel Discussion. Wednesday, April 26th, 11:30am. C6025
1. Post Production Panel Discussion – Streamed!
First is the Teradek Post Production Panel, in conjunction with Pro Video Coalition.
We affectionately call it the fishbowl, for somewhat obvious reasons, as we’re encased in a clear plexiglass stage in the middle of Central Hall. I’ll be on the panel with Woody Woodhall, Graham Sheldon, and Scott Simmons. If you’re at NAB, check it out Booth C6025 on Wednesday, April 26th at 11:30 am Pacific.
Not going to NAB? Go to provideocoalition.com or teradek.com for streaming info. I think it will be posted online after the show as well. If I get the link early enough, I’ll update this post with the info. Update-LIVE Link: https://www.provideocoalition.com/event/teradek-nab-2017-live-show/
2. 5 THINGS – a live episode!

5 THINGS – a live episode, followed by a panel discussion.
Also on Wednesday the 26th, I’ll be doing a 5 THINGS episode LIVE thanks to the kind folks at Lumaforge.
Come by at 2:30 pm Pacific at the Courtyard by Marriott. Lumaforge has 3 days of panels and speakers so I HIGHLY recommend registering ASAP at lumaforge.com/nab.
As if a live episode of 5 THINGS wasn’t enough, I’ll be sticking around to be on another panel discussion immediately following, this time with the brilliant Oliver Peters and Bill Davis. Scott Simmons again will round out the panel.
3. Parties and Meet-Ups

Blue Collar Post Collective (BCPC) and #Postchat Meet-up – Sunday, April 24th – O’Sheas at the LINQ Promenade.
There are a few after parties and meet-ups that I do recommend if you dig 5 THINGS.
First one is the joint Blue Collar Post Collective and #Postchat meet-up on 6 pm on Sunday. We’re again at O’Sheas, at the LINQ promenade. Just a bunch of creative post people getting out from a dark edit bay.
I’ll also be hitting the 16th annual Supermeet on Tuesday the 25th hoping to win something. Hundreds of thousands of dollars of awesome prizes are to be raffled off, plus a whole host of speakers and demos. I think a few tickets are left, so register at Supermeet.com and I’ll buy you a drink.
4. Rampant Dance
My friends Sean and Stephanie over at Rampant Design have a fun challenge going on. Do a little dance, make a little video, and win some way cool stuff. Plus, you get some free effects out of the deal. Check out rampantdance.com for more info, and then head over to rampantdesign.com and let your mind explode with all of the nifty stuff they’ve got.
5. Let’s Meet-up!
Lastly, I’d like to meet up with YOU. I’ll be on the show floor quite regularly. Let’s talk tech, and let’s talk media. No really, I wanna meet you in person….hit me up online and let’s meet up and chat.
5 THINGS will be back in May with a new episode, so until then, learn more, do more.
Like early, share often, and don’t forget to subscribe. Thanks for watching.
]]>
When does Post actually begin?
Since we’ve moved from celluloid to digital, the answer to this query has quickly moved to production. In fact, over the past 20 years, a new position has emerged – the DIT, or Digital Imaging Technician, as a direct response to the need to coordinate between digital acquisition and subsequent post-production. In fact, the DIT is such an instrumental part of the process, that the DIT is often the liaison that connects production and post together.

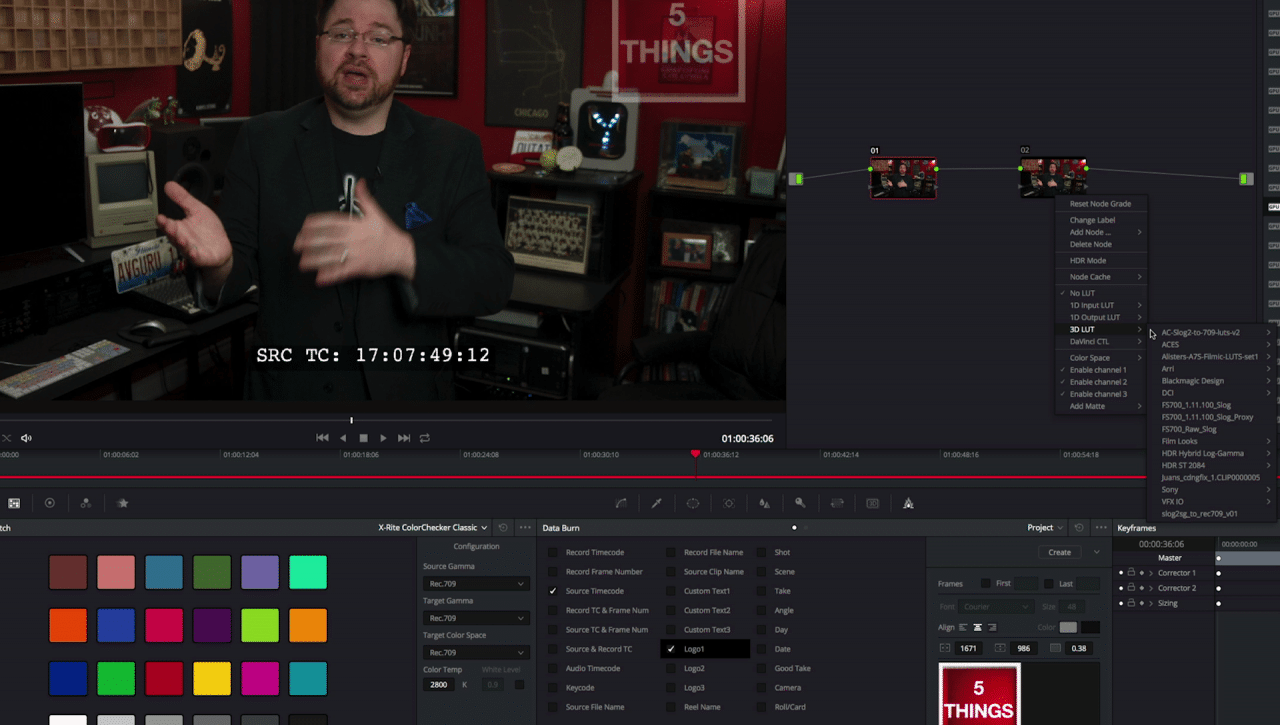
Adding a watermark, timecode window burn, and LUT inside Blackmagic Resolve
Now, this can vary depending on the size of the production, but the DIT will not only wrangle the metadata and media from the shoot and organize it for post, but they may have added responsibility. This can include syncing 2nd system audio to the camera masters. This may also include adding watermarks to versions for security during the dailies process or putting a LUT on the camera footage. Lastly, the DIT may also create edit ready versions – either high or low res – depending on your workflow. A very common tool is Blackmagic Resolve, but also tools like Editready, Cortex Dailies, or even your NLE.
Now, having the DIT do all of this isn’t a hard and fast rule, as often assistant editors will need to create these after the raw location media gets delivered to post. What will your production do? Often, this comes down to budget. Lower budget? This usually means that the assistants in post are doing a majority of this rather than the folk’s onset.
As for the creation of edit-ready media, this speaks to the workflow your project will utilize. Are you creating low res offline versions for editorial, and then reconforming to the camera originals during your online?
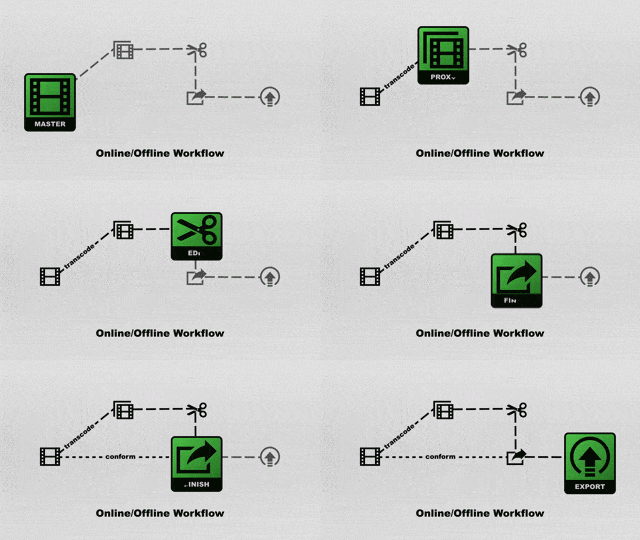
A traditional offline/online workflow
Or, are you creating a high res version that will be your mezzanine file that would work with throughout the creative process?
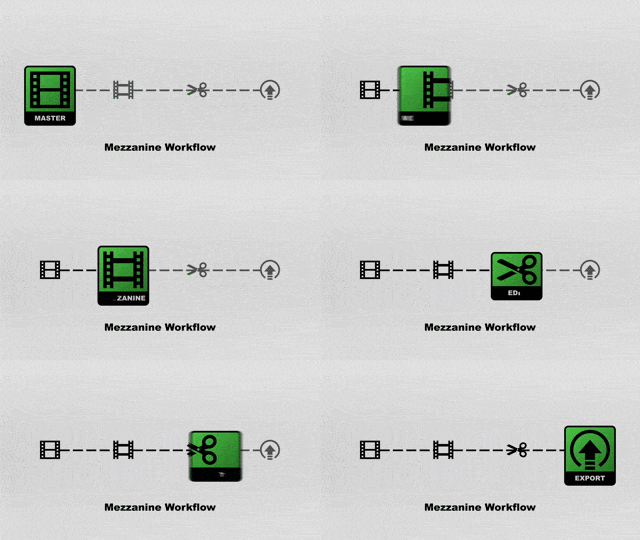
A mezzanine format workflow
OK, now on to actually creating edit-worthy media.
This can be challenging for several reasons.
You need to create media that is recognized by and optimized for the editorial platforms you’re cutting on. For Avid Media Composer, this is OPAtom MXF wrapped media. This media is commonly DNxHD, DNxHR and ProRes. What these have in common is that they are non-long GOP formats, which makes them easier for Avid to decode in real time.
The go-to has been the 20-year-old offline formats of 15:1, 14:1, or 10:1.

These formats are very small in size, are easy for computers to chomp through, but look like garbage. But if it means not spending money for larger storage or new computers, it’s tolerated. Recently, productions have been moving to the 800k and 2Mb Avid h.264 variants so they can keep larger frame sizes.

You can create this media through the import function, using dynamic media folders, or consolidate and transcode within Media Composer itself.
Adobe Premiere is a bit more forgiving in terms of formats. Premiere, like Avid, will work best with non long GOP formats like DNxHD, DNxHR, and ProRes, but also introduces Cineform, which is a fantastic codec. Premiere Pro also can utilize media wrapped in a QuickTime MOV wrapper, as well as MXF wrappers – both the OPAtom and OP1a flavors. Premiere also has the newer proxy workflow to auto-generate low res media when imported into your Premiere project using Adobe Media Encoder.
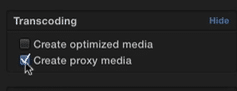
Final Cut Pro X can create proxies during ingest.
Apple Final Cut Pro X, for obvious reasons, it going to work best with ProRes files, but will also play just about anything in an Apple QuickTime MOV wrapper. FCP X will also prompt you to create proxies when you import media to aid in the offline/online process – so just sit back and wait, or let FCP create the proxies in the background.
So, how do we create this media for your NLE du jour? Well, using the NLE you plan on creating with is the obvious choice. What better tool to use than the one you’re editing with? But this solution does have some problems.
First, your edit system is tied up. In multi-editor environments, this can be a logistical challenge when you’re short on systems…and time.
Second, NLE’s are not meant to be transcoders. Can they? Yes. But that’s not where they excel. Due to this, they may be pretty slow at transcoding to create your edit media, and they routinely don’t have as many options as a full-featured transcoder.
This is where dedicated transcoders come into play. However, the usual suspects are fairly limited. Adobe Media Encoder, Apple’s Compressor, Sorenson Squeeze, and EditReady are common tools in an editor’s toolkit. And they are really good at transcoding one standalone file into another. Unfortunately, these tools are usually pretty poor at understanding camera card hierarchies.
What?
Camera Card Hierarchies. Ever looked at the card structure of the media you shot?

Yeah. Often there will be folders, XML files, thumbnail, and other ancillary data files. Now, this is where your NLE is actually better than your transcoders – often NLEs understand this camera card structure and can pull all of the appropriate metadata and media during a conversion. Often traditional standalone transcoders are good at single files or files with self-contained metadata – like a MOV or AVI file, and sometimes MXF.
If you’re creating media for Avid, this becomes even more difficult, because the formats Avid works with best– OPAtom MXF wrapped media – isn’t commonly supported. And if you need to create ProRes, you better hope you’re using a Mac or have some special way of creating it on a PC.

Now, I don’t know about you, but I want the most flexibility with the media I shot, and I don’t want to risk losing metadata because my transcoder doesn’t understand it.
This is where more enterprise tools come into play – Like Root 6’s Content Agent, whose Card Agent application allows for reading camera card hierarchies, creating sub-clips handing of spanned cards and media, renaming, and yes, transcoding to any flavor your need for editorial. You can also map metadata from the card to various metadata fields inside your NLE.

Card Agent, an add on for Root6’s Content Agent.
Telestream’s Vantage solution also has Camera Ingest, which also understands several camera card hierarchies and can transcode to just about any format you need.

Camera Ingest, an add-on for Telestream’s Vantage.
These solutions are also much more facility-based tools – as they can handle transcoding later in post, through intelligent media analysis and automation. They really become the center of your media creation tasks, as opposed to just handling ingest from production.
2. Transcoding for Review & Approve, and Audio
Creative Editorial is not an island. Interaction with other departments needs to not only exist but be as smooth as possible. This is why you’ll need to create media for other departments.

Where Review & Approve lies in the Post Production process
Review and Approve is a common way to solicit feedback from other production folks. Review and Approve can take on many different forms. For some, this is still a DVD, which may or may not have a watermark or a timecode window burn. It can take the form of a web-based interface, where a viewing can add annotations at certain times, and approve or reject cuts. Common tools include Akomi, Frame.IO, Kollaborate, Wipster and several others. You have a bit of liberty here with quality. Most production peoples understand that for sake of expediency, a lower quality file can be used for this type of usage. Veterans are also used to the aforementioned low res proxies used for offline editorial. Also, many viewers are watching on mobile devices with a slower connection, so a lower bitrate h.264 is often acceptable.
Some 3rd party review and approve sites will create mobile device formats these for you, and then playback based on the viewers’ available bandwidth – much like YouTube – but some others need you to generate a file in the format they want. As always, it’s best to check with the end location for the list of their requirements.
The rub here is that this media file needs to come for your NLE. Why? Well, virtually all transcoders don’t understand your Avid, Premiere, or FCP project files, so you HAVE to use the NLE.

Adobe Media Encoder can link to a premiere Pro Sequence without having the editor export a flattened sequence.
The notable exception is Adobe, whose Adobe Media Encoder understands a Premiere timeline. Just make sure you’re using the same machine or another station that has the same exact plugins, fonts, and of course, every bit of the same media.
Post Audio workflows are pretty baked in. For years it was legacy OMF, or the much more robust AAF format from your NLE, along with embedded audio and handles. Your video would then be a single video track with a specially placed timecode window burn – after all, you don’t want your timecode window burn to block things like should or feet – both of which are needed to determine things like timing for footsteps.
Often, you’ll want to add additional things like watermarks, a 2 pop and tail pop to verify sync, along with the editor’s audio mix for reference. The video format differs from mix facility to mix facility, but most are ProRes or DNx formats. These usually top out at HD as most audio systems can’t handle 4K playback AND all of the horsepower needed for audio sync and playback. For long form projects, or projects where editing and post audio are going on simultaneously, exports may be broken up into sections or reels for ease of manipulation.
3. Transcoding for VFX and Color
VFX can vary as well. Normally, VFX wants the highest quality version you can generate. Normally, this requires you to go back to the camera originals and generate image sequences – often DPX or Open EXR in nature – so the VFX artists can work with each frame individually. Often, VFX will ask for certain naming conventions for the frames. They’ll also usually request a ProRes or DNx file as a reference, along with timecode window burns with reference metadata so you can match back to the timeline or source media. They may even request an AAF or XML of your NLE timeline. On lower budget projects, a high res ProRes or DNxHD or DNxHR file may be acceptable. As always, ask the VFX house for their deliverables doc – don’t guess.

Where VFX lies in a post production workflow
For color, most colorists prefer to work with the camera originals – which means either they (or you) need to relink back to the original camera files. Depending on your agreement with the colorist, you may need to do the reconform, then handoff the confirmed sequence to the colorist, or they may be responsible for the re-conform. This can be a difficult process – especially if your metadata didn’t make the translation between the production media and edit ready media because you used an ill-equipped transcoder. Other colorists may prefer – and when I say prefer, I mean tolerate – a flattened high res export from your timeline after re-linking back to the camera originals. This export could be a high bitrate ProRes, DNxHD, DNxHR, or Cineform format. Some may even request an image sequence, much like the VFX house, along with any reference DNX or ProRes cuts and an AAF or XML of the sequence.
4. Distribution
Distribution is a very tricky thing. New platforms are emerging, and current distribution outlets are evolving their spec. Thus, you can’t GUESS at what they want. You need to request their deliverable doc. And I assure you, they have one. Let me repeat:
Wherever you’re going, they have a deliverable doc. Ask for it. Now.
For your final export, again, ProRes or DNX are again common formats. This is your master mezzanine file. You now have 1 high res file from which to generate all other subsequent deliverable files. No need to go back to the NLE project file, unless you need a picture change.
This is also where common transcoders can fall short. Generating a DNx or ProRes is relatively easy, but generating a DCP for a theater, or an IMF package for Netflix – those will require non-common tools and someone who knows how to drive them.

QC can cause issues if the final file isn’t exported correctly.
Often, you’ll need to pass QC. QC isn’t just about visual quality and audio levels. Often, QC is checking things like closed captioning, as well as mapping of certain audio channels, and placement of metadata with the final deliverable file. This is often handled by your transcoder. These “unseen” bits can cause you to fail QC, which can be an expensive and time-consuming process.
This is where the tools I mentioned easier – Root 6’s Content Agent and Telestream’s Vantage also shine. They have granular control over the metadata, codecs, and wrappers so you can ensure your end product not only looks good but also meets the QC standards your end outlet specifies.
5. Tips
Let’s face it, money is always a factor. But don’t forget to look at your TIME. Time is money. And while transcoding using your NLE is free because you own the software and hardware, how many hours are you losing due to prepping for post? How many hours do you lose generating various versions for 3rd parties? How much time do you lose re-encoding because the quality or format wasn’t right? Hell, how much time do you spend just waiting? That time adds up. Your time is worth money.
A basic post-truth is that you can’t increase the visual quality of your footage by transcoding. Simply transcoding your compressed camera footage to a better codec won’t make it look any better – it can only make it easier for your computer to handle. Check out a recent episode to see the finer details of this often-confusing post myth.
Uncompressed, Camera Originals and RAW are all different things – try not to confuse them. Uncompressed anything in today’s day and age is virtually never used because it’s overkill for 99% of the work out there, and the storage requirements and throughput needed are crazy. Plus, transcoding to an uncompressed format when you shot in a compressed format is like the last tip I had – you can’t add quality that isn’t there. Camera originals are pretty much exactly what they sound like and RAW is a codec that the camera will record, and is different from camera manufacturer to camera manufacturer.
Have more transcoding in post concerns other than just these 5 questions? Ask me in the Comments section. Also, please subscribe and share this tech goodness with the rest of your techie friends….they’ll appreciate it (trust me)
Check out the rest of this series and all of the other great learning content at Moviola.com.
Until the next episode: learn more, do more – thanks for watching.
]]>
1. What components do I need for live streaming?
Getting started is pretty easy. Thanks to platforms like Facebook and YouTube, you can do it with a few clicks from your phone. But that won’t help you much when you want to up your production value. Here is what you need to get started.
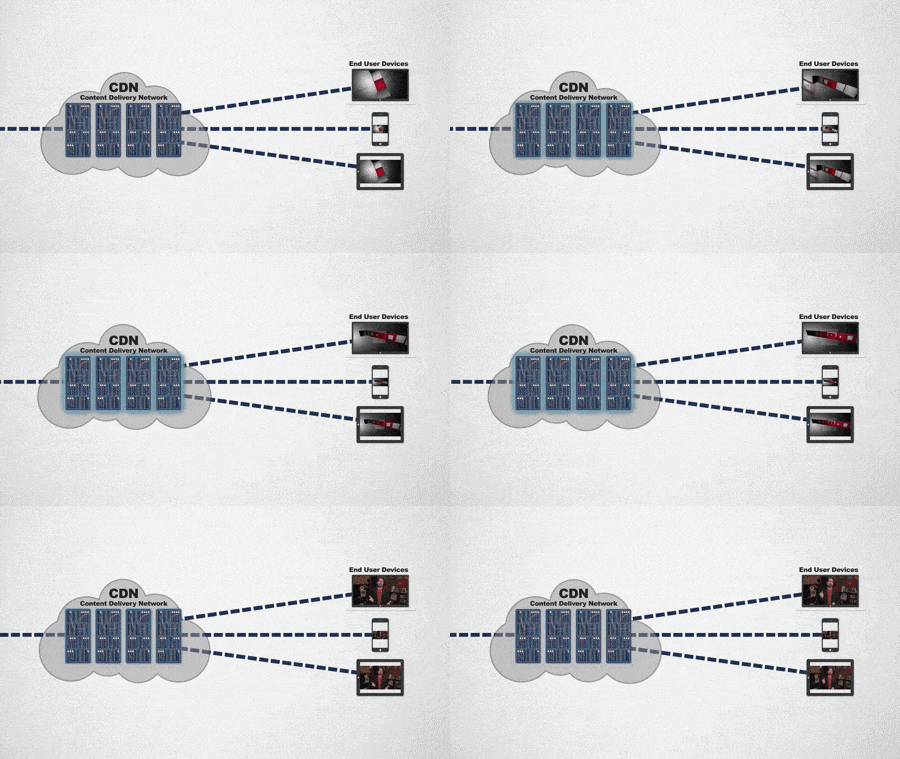
Live Streaming from your CDN to end users
To successfully plan your setup, we need to work backward and follow the old credo of “begin with the end in mind”.
So, the last part of live streaming is “how do I get my video to viewers”? This is normally done through a CDN – a content delivery network. A content delivery network takes your video stream, and not only pushes it out to your legion of fans but also does things like create lower resolution variants, also called transcoding and transrating. A good CDN also supports different platforms, such as streaming to mobile devices and various computer platforms. A CDN also takes the load off of your streaming machine. Imagine your single CPU being tasked with sending out specific video streams in specific formats for every user?

OK, now that we have our CDN, we need to send a high-quality signal to it. I’ll address the specifics of that later in the episode, but suffice it to say, for a successful broadcast, you’ll need a decent Internet connection with plenty of headroom.
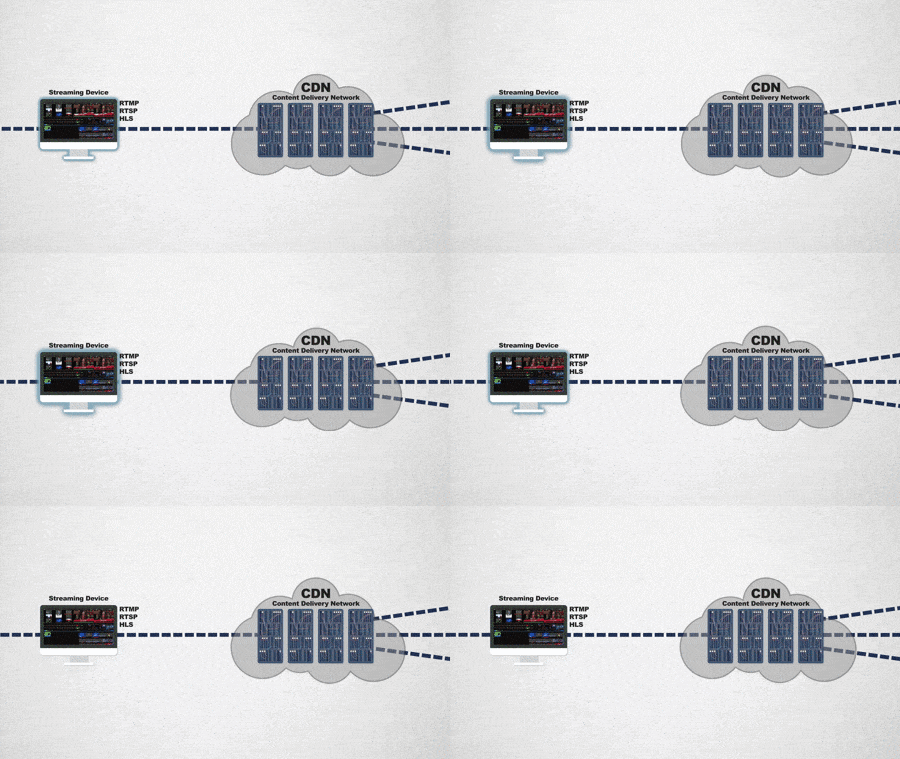
Live Streaming to a CDN
All CDNs will provide you with a protocol – that is, the way in which they want to receive the live feed for your broadcast. Now, this is different than the protocols that your end device will use – as a good CDN will take care of that mumbo jumbo translation for you….but only if you get the video to them in the right format.
These upload streaming formats can include HLS, RTSP, RTMP, and Silverlight formats. The end game is that your software needs to be able to stream to the CDNs mandated format for it to be recognized.
Speaking of software, this is one of the most critical decisions to make.
Will your streaming software ONLY stream, or will it also do production tasks as well, like switching between multiple sources, playing prerecorded video, adding graphics, and more? Of the utmost importance is “does your software support the camera types you’re sending it?”
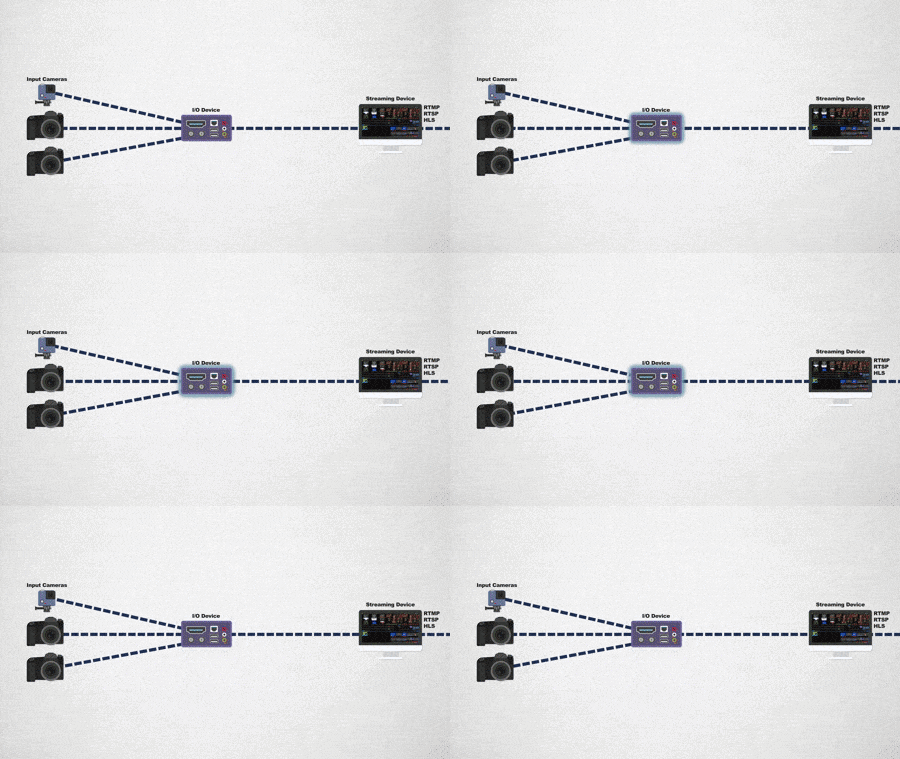
Cameras to I/O device to Streaming Device
….which leads up to the beginning of your broadcast chain… “what kind of cameras are you using?” Are you using USB cameras? Or, are you using cameras with HDMI or HDSDI outputs? If the latter, then you need an I/O device on your computer which can not only take all of the inputs you want but also in the frame size and frame rate you want.
You’ll quickly see that the successful technical implementation of a live stream is based on each part playing with the others seamlessly.

A complete live streaming workflow
2. CDNs?!
In case I wasn’t clear, your CDN choice is one of the most critical decisions. Your CDN will dictate your end users experience.
Here are some things to look for in a CDN.
Does your CDN allow an end user a DVR like experience, where they can rewind to any point in the stream and watch? Does this include VOD options to watch later after the event is over?
Many CDNs have a webpage front end, where you can send users to watch the stream. However, most users prefer to take the video stream and embed it in their own website so they can control the user experience.
Also, “is this a private stream?’ If so, ensure your CDN has a password feature. Speaking of filtering viewers, does your CDN tie into your RSVP system – or, are you using your CDN’s RSVP system? This is another way to create a more personalized experience for the viewer – as well as track who watches – and get their contact info you can follow up with them after the event if needed….as well as track the streams metrics – so you can improve the content and experience for the next live stream.
CDN’s can’t do all of this for free. This is why most CDNs restrict video stream quality on free accounts. This means your upload quality may be throttled, or the end users viewing quality or even total viewer count may be limited. The stream may also have pop-up advertisements at predefined intervals, or before the stream starts.
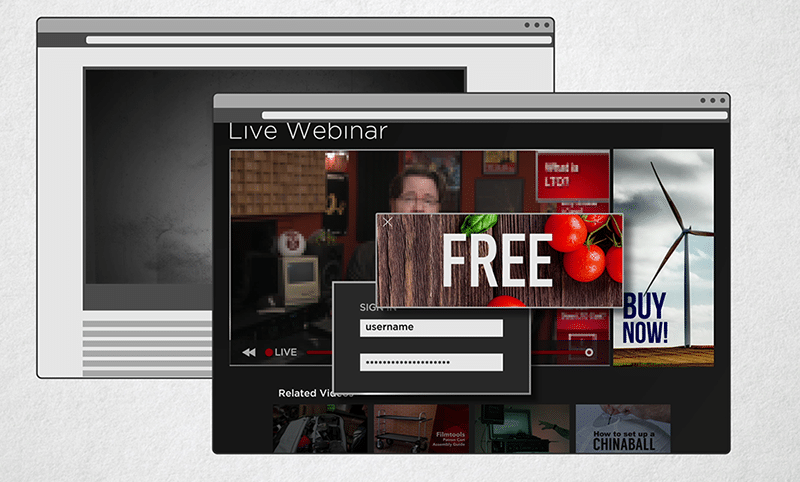
CDNs may throttle visual quality, allow for password protected streams, and also present the end user advertisements.
Lastly, a good CDN also does cool things, like introducing chat windows and interaction with other viewers, social media interaction, real-time effects and graphics like lower thirds, and custom ad insertion.
Often, I get asked, “what kind of bandwidth do I need to get a video stream up to my CDN?” I’ve got you covered with a quick reference chart:

SD, HD, and UHD/4K requirements for live streaming (click to enlarge)
I cannot stress enough that you should stream with a wired connection if at all possible, and ensure you have plenty of overhead – I ballpark 40% more than these minimums. If you saturate your upload pipe from the first minute, dropouts will certainly happen with any kind of network congestion.
3. Common Software Solutions
Normally most folks will try out a software production switching and streaming solution before moving on to a dedicated hardware solution. This is where we’ll start.
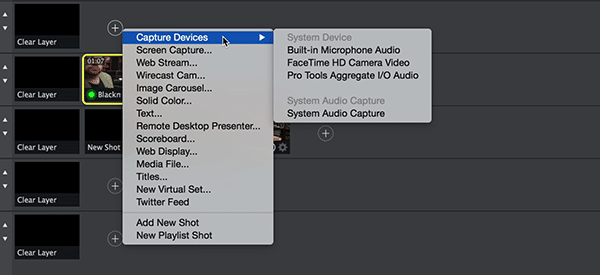
I/O options inside Wirecast
Arguably the most popular software solution out there is Wirecast by Telestream. Wirecast studio and the Pro versions support capture and streaming in SD and HD formats, on both Mac and PC. They also take in network IP cameras and other data based video sources. They also support streaming to multiple CDNs so you can attract viewers on various platforms – including Facebook and YouTube.
Wirecast also has some basic editorial ability, plus titles and chromakey tools. But most importantly, Wirecast supports a ton of I/O devices and camera types that it can switch between, so getting compatible cameras within your budget isn’t tough to do.

Streaming destinations inside OBS
OBS Studio, or open Broadcaster Software Studio is very popular, namely because, well, it’s free. It’s cross-platform on Mac/PC/Linux and is normally the first choice of gamers. OBS can take multiple inputs, however, the number of input devices that is supported and format types is limited. The recording format to your system is also in a flash format, which commonly results in sync issues.
But hey, it’s free!
We also have vMix, which is a Windows based streaming and switching software. It can stream to 3 different destinations, or 1 destination if doing multi-bitrate formats.

Streaming destinations inside vMix
vMix also uses a few different encoders, including ffmpeg and Flash Media Live Encoder, and traditionally streams via RTMP.
It too allows for switching between sources, playback of video files, recording at the same time as streaming, and your standard complement of transitions. It also supports NDI and can interface with 3rd party hardware to plug your cameras into.

These 3 solutions don’t possess a way to get “traditional” cameras in – that is, ones that spit out HDMI out HDSDI. For this, we need I/O devices, such as capture cards. These normally include those made by AJA or Blackmagic, or even Bluefish or Matrox. As always, check the tech specs before buying gear that needs to talk to one another.
4. Common Hardware Solutions
The larger your production gets, the more you’ll realize you need something a bit more robust, and tools that more easily allow for multiple people to handle the show. This is where hardware solutions come into play. Again, let’s look at all-in-one solutions first.
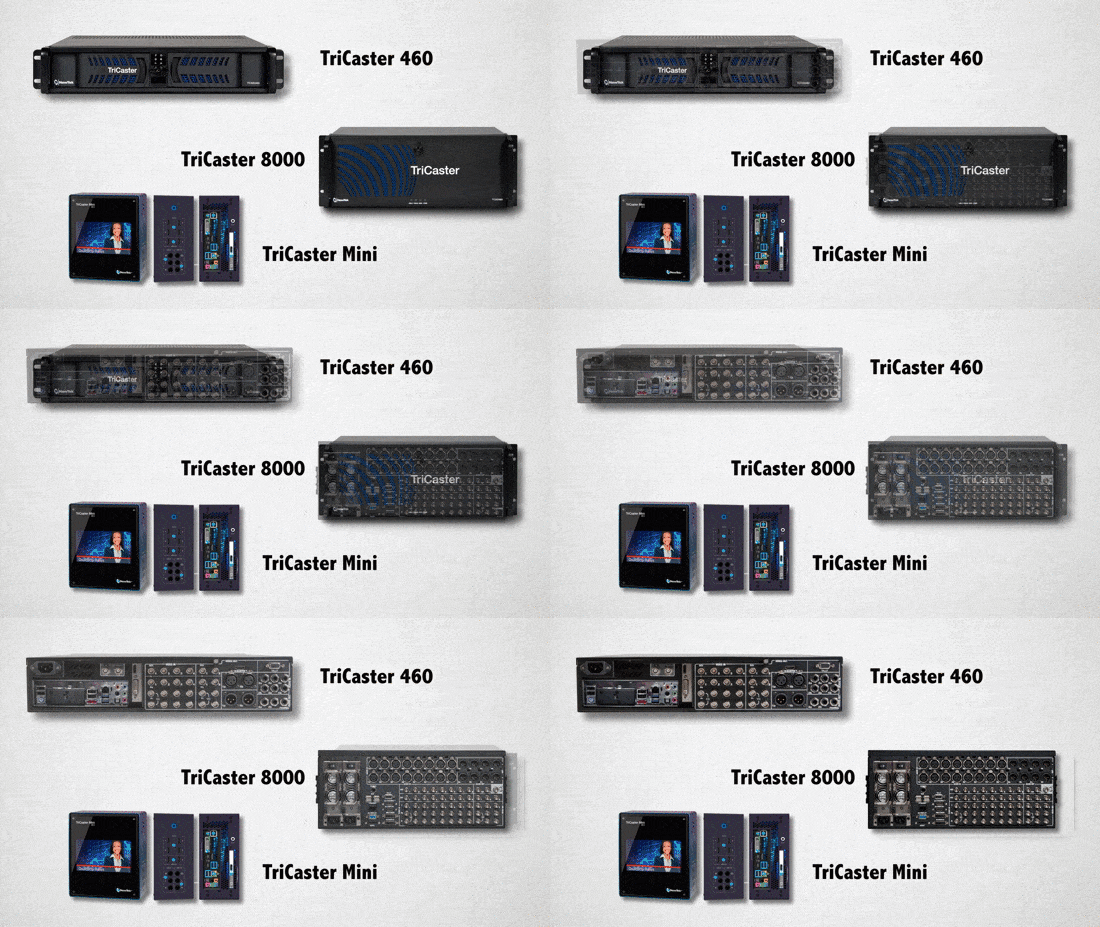
Selected Newtek TriCaster Models Front and Rear
Far and away, the most popular hardware system is the TriCaster line by Newtek. The TriCaster family can stream to a multitude of CDNs, and even has presets built-in for many of the popular ones. In addition, the TriCaster units take in SDI or HDMI formats, have professional audio connections, plus network NDI inputs. They also switch video, do titling, have video effects on every channel, and record camera isos – all in one box. The units also have a control surface for ease of use. I’ve been blown away the scale at which the TriCaster family has been used – everything from high school sports to million-dollar broadcasts.
Telestream also has the newer Wirecast Gear Family – which are hardware versions of the Wirecast software family. These give you the software ability found in Wirecast Pro, without having to buy a 3rd party I/O device. You also get New Blue Titler for generating graphics and titles. The various models start at $5000, but really take the guesswork out of the hodgepodge of live streaming gear. One throat to choke, as they say.
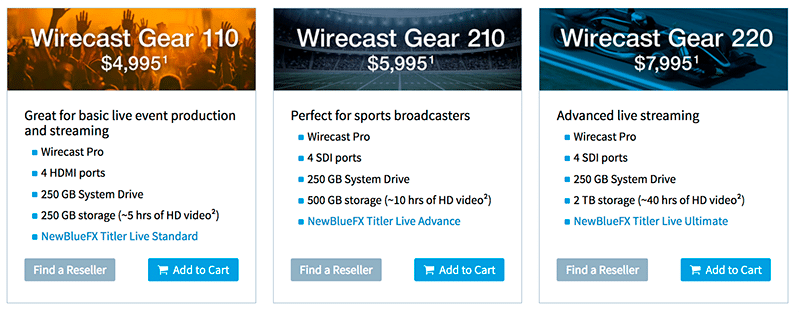
For dedicated streaming only devices, Teradek is pretty popular. Teradek has a ton of various streaming devices, and several of them can push to RTMP capable CDNs.
We also have tools like LiveU, which uses cellular connections to stream, instead of relying on a hardwired or wifi signal, which allows you to be a bit more mobile.
I also dig Haivision, which is a bit more enterprise, but has amazing video quality at a decent bitrate, albeit at only SD and HD formats.
I’ve also been waiting for the AJA Helo to start shipping, in fact, it should ship within a few weeks of this broadcast. It doesn’t bother with any of the video production tools – it’s designed to just stream – and lock in the streaming settings so to start streaming, you hit one button.

AJA Helo Diagram
There are a ton of solutions out there, so my advice to you is to make sure everything plays together first before you click that BUY button.
5. Considerations and Tips
If your CDN has restrictions on data usage, or you’re just trying to be judicious with your bitrate, broadcasting at 720p @23.98 or 30 is fine for a vast majority of viewers. Most viewers -especially those on mobile devices- won’t be able to tell the difference. The only caveat to that is with gaming – where you want the fastest frame rate possible.
Don’t expect sync across all devices and platforms. CDNs need to create the video streams appropriate for the end viewer. And depending on where they are located in the world – and what provider they are using, whether it be an ISP or a cellular carrier, and what device they are using, the stream will be delayed. This delay could be a few seconds up to 30 or so…and this, unfortunately, you don’t have much control over.
Aspect Ratios: Common issue with streaming game play
Live streaming is primarily based on video standards. That is, UHD, HD, SD, etc. Many gamers, or folks trying to use a desktop as a video source, might see stretching of an image, or black bars on the top or bottom or sides of the computer screen. This is most likely because your computer signal isn’t a standard video aspect ratio, and it’s being distorted to fit into a video standard.
Lastly, the most common complaint during live streaming is audio. Dips in volume can cause fiddling with the viewer’s volume knob, and too loud can cause ear piercing distortion. Audio should not be an afterthought – think about using a compressor, and keep that signal audible and yet under control.
……..
Have more live streaming concerns other than just these 5 questions? Ask me in the Comments section. Also, please subscribe and share this tech goodness with the rest of your techie friends.
Until the next episode: learn more, do more – thanks for watching.
]]>
This is a very, very common question. It doesn’t matter what forum you contribute on, or troll on, this question is always asked. If I take my compressed camera footage, like an 8bit h.264, and convert it into a more robust codec, like 10bit ProRes or DNX – will it look better?
And it does topically make sense. If I put something small into something bigger, well, that’s better right? Unfortunately, the math doesn’t support this. Transcoding to a better codec won’t add quality that wasn’t there to begin with. This includes converting from an 8bit to a 10bit or greater source, or even converting from compressed color sampling value like 4:2:0 to something a bit more robust like 4:2:2.
Think of it this way.

Putting the same quality file into a larger file won’t make it visually “better”.
Imagine this glass of eggnog is sum quality of your original video. Adding rum or not is strictly your call. And you decide you want more of it. So, you pour the eggnog into a larger glass.
You’re not getting more eggnog, you’re just getting a larger container of the same amount of eggnog, and empty space not occupied by your eggnog is filled with empty bits.
What transcoding will do, however, is make your footage easier for your computer to handle, in terms of rendering and playback. Less compressed formats, like ProRes and DNX are easier for the computer to play than, say, an h.264. This means you can scrub easier in your timeline and render faster. Now, this is mainly due to long GOP vs non Long GOP which I discuss here.
In fact, if you wanna get REAL nitpicky, ProRes and DNX are NOT lossless codecs – they’re lossy, which means when you transcode using them, you will lose a little bit of information. You most likely won’t notice, but it’s there…or should I say, NOT there?
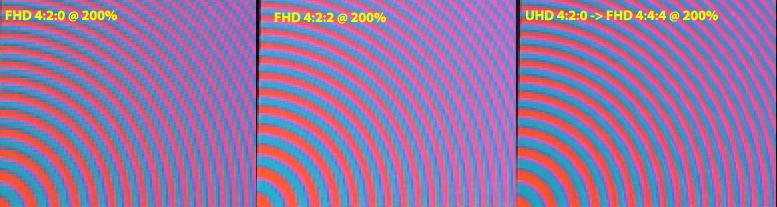
Interesting read. Click here.
Now, there is some validity to a unique situation.
Let’s say you shoot with a 4K camera. Perhaps it samples at 8bit color depth with 4:2:0 color sampling. By transcoding to a 1080p file, you can dither the color sampling to 4:4:4, and dither the sample depth to 10bit. However, as you’ve probably surmised, this comes at a loss of resolution – from 4K all the way down to HD.
More resources:
- CAN 4K 4:2:0 8-BIT BECOME 1080P 4:4:4 10-BIT? DOES IT MATTER?
- When 420 8bit becomes 444 10bit from Barry Green
- Discovery: 4K 8bit 4:2:0 on the Panasonic GH4 converts to 1080p 10bit 4:4:4
2. Log formats are the same as HDR

The two go hand in hand, but you can do one without the other. Let me explain.
HDR – when we talk about acquisition – Involves capturing material with a greater range of light and dark – stops – as well as color depth. It’s a combination of multiple factors. Shooting in a log format – whether it’s Slog, log-c, or another variant, is used to gain as much data as possible based on the limitations of the camera sensor.
So, let’s say you have a camera that only shoots in SDR – standard dynamic range – like Rec.709 – which has been the broadcast standard for almost 27 years.
But camera tech has gotten better in the last 27 tears. So, how do we account for this better ability of the camera within this aging spec? We can shoot in a log format. Log reallocates the limited range of the SDR of the camera’s sensor to the parts of the shot you need most. Log simply allows us to use more of the cameras inherent abilities.
So, while you get the extra abilities that the camera’s sensor allows, it doesn’t give you the complete HDR experience.
Now, if you shoot with a camera that isn’t constrained to Rec.709 and offers a log format – you now have the best of both worlds – greater dynamic range, and a format that allows you to exposure this extra realm of color possibilities.
3. You can grade video on a computer monitor

Color is a funny thing.
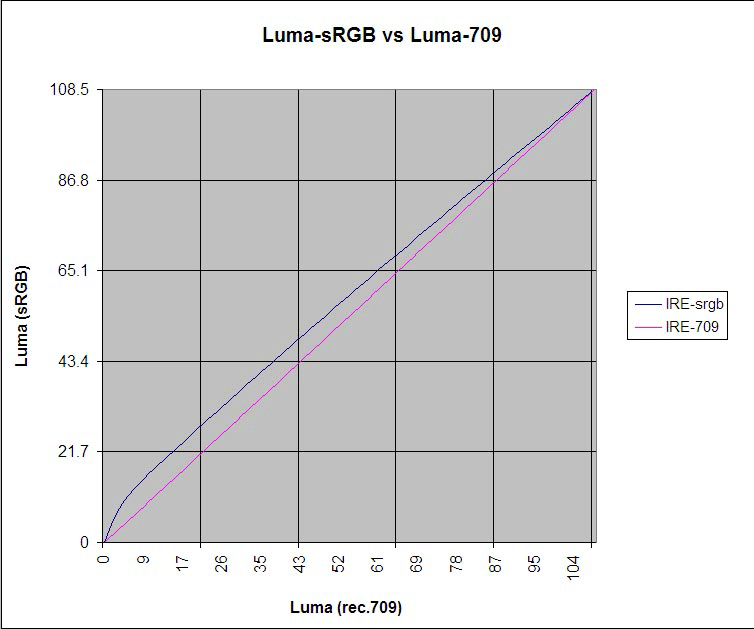
Luma of sRGB vs Luma of Rec.709
Oddly enough, it happens to change depending on what device you’re looking at it on. Imagine that? That’s why grading color on a similar device as to those who are consuming it is so important. So, it stands to reason that if you’re grading a TV show, you grade on a video monitor. If most of your views will be racked up on YouTube, well, then I’d grade on a computer monitor. To be more specific, it boils down to more than just color accuracy. Computer monitors don’t have true blacks as they are backlit, and many video monitors are moving towards OLED technology, which is not backlit. Also, their gamma curves are different – and this overall resultant contrast range is simply different from video monitors.
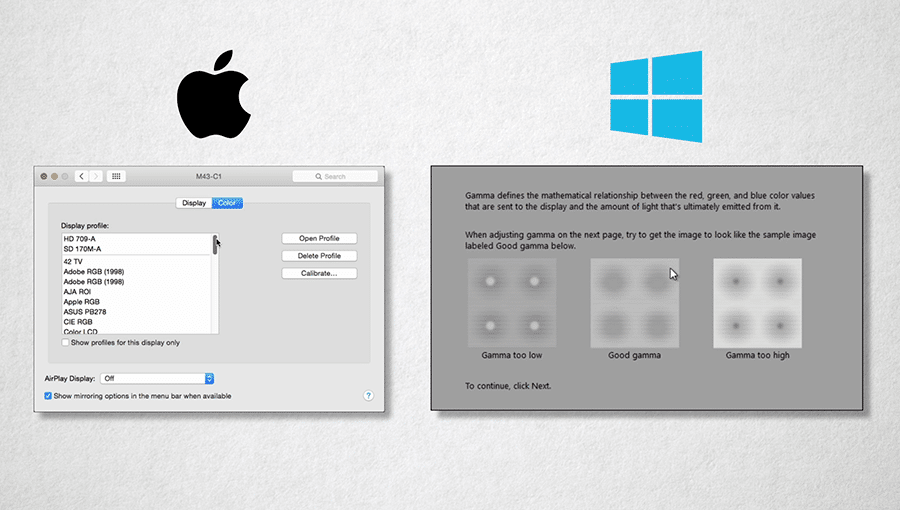
Color Management by OS
Sure, various computer monitors do have profiling to try and counteract this. Computer monitors are usually sRGB devices, while most video monitors are usually Rec. 709. And while their primaries are the same, we run into color management issues. With rec.709, you know what’s coming out on the other side of the pipe. When we introduce computer monitors, we’re not only dealing with the color management the OS is doing, but also the hocus pocus the computer monitor is doing to emulate video. That’s just too many cooks in the kitchen.
I’ll admit that given the split methods of consumption of media nowadays – that is, viewing TV shows online, and viewing web videos on your TV, it’s very difficult to get one grade to rule them all. On top of that, we have a wide variety of monitor types – from TFT and IPS LCD to LED to OLED to those aging plasmas. But the logic still stands – grade for the main medium your content will be consumed on…and then check the grade on the alternatives.
4. You can fix audio distortion


The camera sensor can’t handle all of the information; the sky is blown out.
The camera sensor can’t handle all of the information; the sky is blown out.
This happens commonly on location. The talent yells or talks louder, and the recording gets blown out.
The best we can hope to do is triage this – you’re not going to fix it. Well, why is that, Michael?
When dialogue is overmodulated, the incoming signal is too powerful for the device recording it. This means that the information you’re trying to record gets lost at peak values. Think of it in terms of video. Let’s say you set your exposure for a great shot of the ocean, but the sky is blown out – there isn’t much you can do to get that detail in the sky back. It’s simply too much information for the camera sensor to handle….much the same as audio overmodulation is for the device recording it.
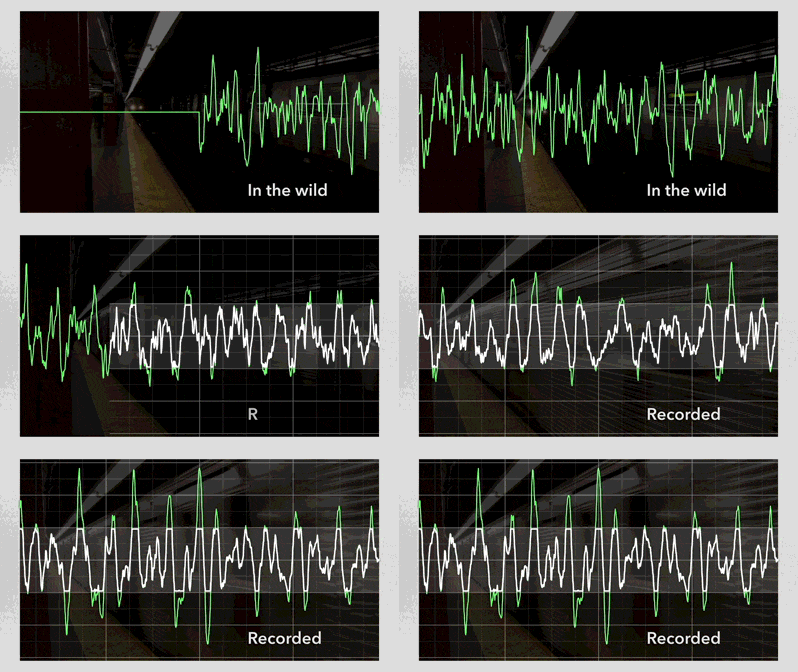
Take a look at the graphic above.
Here we see the audio as it occurs in the wild.
This is what it looks like after it’s recorded.
You can see the peaks – the high volume – is lost.
Now, if the overmodulation is slight, it may be partly salvageable.
Many audio plugins try and guess what information may have been lost during the clipping.
However, often the restored portion of the dialogue lacks clarity and detail and can introduce distortion. This then leads to the question, “does this treated clip sound better, or just sound different?”
It’s normally at this point in the conversation that one should start looking into alt takes or trying to reconstruct the words needed manually …and if enough of the dialogue is FUBAR’d, arrange an ADR session.
5. Storage is the same as capacity
Very often, I speak to those who tell me, “Well, we plan on shooting almost XXTB of material, so XXTB of storage should be enough.”
And while the XXTB number changes, the common assumption is the same – the storage you buy is the capacity you get. This is unfortunately not the case.
Let’s break it down.
Ever seen this notice on those hard drives you buy?



This is essentially accounting for the difference of 24 bytes between marketing 1 kilobyte and how large a kilobyte is in reality. It’s legalese…and for you number nerds, base 8 vs base 2 math.
For everyone else, this means you get 930GB available for every 1 TB. That’s a 7% loss before you’ve even installed the drive.
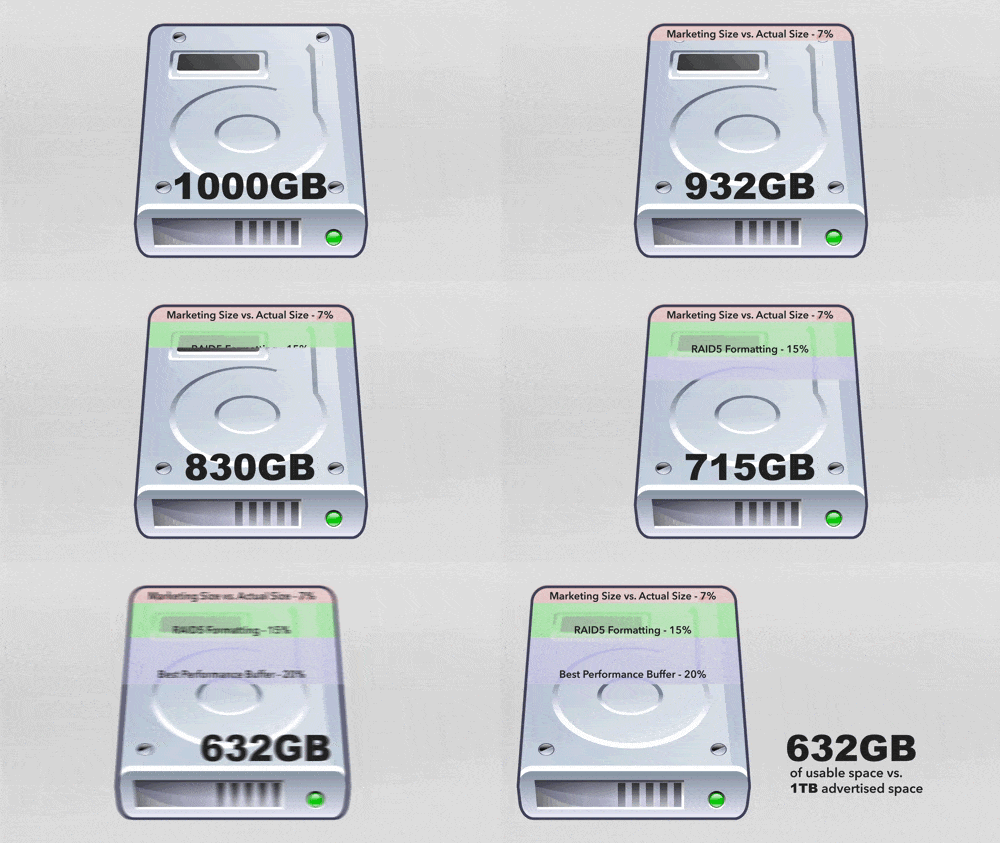 And we’re just getting started.
Now, we want a RAID – that is, redundancy in the event one of our many drives fail. There is a sacrifice for this redundancy: space. The most common RAID formats in video nowadays are RAID5 and RAID6. RAID5 will consume 1 entire disk, and RAID6 will consume 2 entire disks. Obviously, this can be a huge bite in space depending on how many disks are in your array. If you have a basic 3 drive array, RAID5 will cost you 33% of your space. In a more common 12 drive array, you’ll only lose 8% of your storage. RAID6 will double that – again, you’ll need 2 drives.
But let’s go conservative so as not to scare you to much, and assume RAID5, and ballpark a 15% loss in space.
This puts our drive space at about 790GB free. We’re already 21% down!
Lastly, the best practice for spinning drive performance is to not fill the drive up past 80%. Performance hits are common after you eclipse the 80% capacity mark.
This brings our grand total to 632GB useable on a 1TB drive for best performance. That’s a loss of almost 40%!
……..
Have more post myths other than these 5? Ask me in the Comments section. Also, please subscribe and share this tech goodness with the rest of your techie friends.
Until the next episode: learn more, do more – thanks for watching.
]]>
Various flavors of tape used for offline (and sometimes tape online!)
Like most things in the media industry, the term originates from the analog days of yore. We shot stuff on film. Now, cutting and splicing film, unless done really carefully, can easily cause damage. So we used workprints – film copies of the original negative – that could be manipulated without running the original stock. This would be the offline edit. Once the offline creative edit was completed with the workprint, the points at which the film was cut – the frame numbers – were then applied to the master footage – your online. This is also nowadays called the conform. Over the years, the workprint became videotape – 2”, ¾”, VHS, and in some cases, Laserdisc…but all of these formats still were still offlines for the film online.
Towards the late 80’s, there began a movement to replace the creative analog editing that had been done for the past few decades… with computers. The NLE – non-linear editor- was born.
And today, now that film is fading away, we apply the same paradigm to digital footage inside our computers. We perform creative edits with low-resolution versions of the high res master footage. And once our creative edit is done, we tell our NLE to look at the high res footage instead of the low.
2. What are some examples?
If we focus on how offline/online is used today, it invariably involves a discussion on codecs, and you know there are few things in this world I like more than a good codec discussion.
This means taking the OCM – original camera masters – and creating low res versions, often called proxies – for the creative team to edit with. The low res versions typically don’t look nearly as good as the original, but they take up less storage space and are easy for the computer to handle.
A traditional offline/online workflow
The quality of the proxies usually lies below what we call “broadcast quality”.
Broadcast quality is just as it sounds – the quality at which something will or will not be broadcast, per the standards of the broadcaster. And this is somewhat subjective. Over the years, “broadcast quality” has become a moving target, and the transition from SD to HD and HD to UHD has thrown a wrench in the works…. and this doesn’t even account for theatrical quality. Suffice it to say, ”broadcast quality” is essentially “what the distribution partner asks for”.
Generally speaking, any format you work with that is beneath broadcast quality is considered “offline”, and any resolution at or above broadcast quality – or, the original camera masters themselves – is considered your online version…. a vast majority of the time. High-end feature films with larger budgets can walk this line, but it’s a rarity.
Here are some places to start.
Common Offline |
Common Online |
| 15:1, 14:1, 10:1 (Avid SD) | 2:1, 1:1 |
| DNx36 -115* | DNx 145+ |
| ProRes 422 Proxy, LT | ProRes 422+ |
| DNxHR LB | DNxHR SQ – DNxHR444 |
| h.264 below ~2.5Mbps | Cineform: High or Better |
| OCM (Original Camera Masters) |
It’s important to remember offline proxy resolutions don’t need to match the resolutions of the originals. We can do a standard def offline for an HD or 4K master. Unscripted reality television shows often cut in standard def, such as the 15, 14, and 10:1 listed here. They are small in file size – which really adds up to storage savings with thousands of hours of footage… and the format is easy for computers to decode – especially when dealing with multicam.

Scripted shows with less footage, or feature films, may move to DNx for their offline. Bad Robot, for example, often works in DNx115 for movies like Star Trek. Deadpool and Gone Girl used ProRes. Less random footage and less mutlicam angles make for less media to have available…which means less storage.
Folks who are editing on mobile devices, or editing remotely, may choose to use even smaller files that can be transmitted easily over the net, like non-complex h.264 files. Web-based editing solutions like Media Composer Cloud or MediaCentral | UX or Forscene rely on this.

Avid Media Central | UX and Forscene
3. What are the benefits?
The benefits of an offline/online can be summed up in 1 word: cost.
Working with an uber high res master or the originals themselves requires a beefy computer to chomp through the wide array of formats we have out there today. Offline media is less CPU intensive, and thus inexpensive computers – or older ones – can be used.
This directly relates to the concept of a “pleasurable editing experience”. If the editing application can easily process the footage, then the responsiveness of the app is increased. When you are gliding over your hotkeys, the app and media are responding. In terms of sanity and pure job enjoyment, a responsive system is worth its weight in gold.

Back to tech, we also don’t need a large amount of fast storage to house all of the high res content. If we utilize an offline workflow, we can spend less money on this nearline storage – and we can connect more machines to the same shared storage. Smaller files = less storage and smaller pipes.
Speaking of storage, offline workflows allow your systems to connect to the network and shared storage inexpensively. Instead of connecting via costly fibre or 10GigE connections and the expensive switches they need, you can use more common connection methods, like single GigE and less expensive switches.
If we’re looking at standalone systems, you now can use smaller sized drives, and not have to focus so much on a blazing fast RAID system. You can also connect via slower or older connection methods, instead of trying to get every last MB of speed from that Thunderbolt or USB 3 connection.
Offline also allows for portability. You can now cut on a laptop with a single attached drive – or even using the internal drive (in fact, that’s how I cut this series). You can temp in effects without having massive render times.
It’s also much faster to export preview copies. Now, while the quality might not be great, exports are traditionally faster – so it’s quicker to get the review and approve copies out to the creatives you’re collaborating with.
4. What are the downsides?
You can’t have sweet without the sour, and offline/online workflows are no exception. Expect a few hiccups if you’re looking into this for your next project.
Time. Creating low res versions of your master files requires transcoding. This can either be accomplished with your editing system, like Avid Media Composer, Adobe Premiere Pro, or Final Cut Pro X, or a 3rd party transcoding solution.

Example of a Camera Media Hierarchy: XDCAM
This causes several problems. 1) it ties up your editing machine with transcoding, so there isn’t a heck of a lot you can do while it’s chewing through the content, and 2) if you don’t use your NLE, then you’re using a 3rd party tool that needs to understand your camera originals. Many transcoders don’t understand card hierarchies or all camera codecs. If you’re tight on time, this can be a major drawback.
Speaking of transcoding, you need to ensure that you’re consistent with your frame rates and metadata when creating your proxies. Many NLEs conform from the offline to the online-based on basic metadata and timecode. If you don’t retain the metadata, or change the frame rate, the online conform tool may not be able to successfully find and relink to the original media.
If you decide to use multiple applications on your project, maybe Avid for creative editorial, and Resolve for your conform and color, expect to deal with conforming issues. What I mean by that is it’s very rare for NLE project files to be 100% interchangeable with every other NLE or grading application. This means relinking from the low res to the high res may be problematic. This is another reason that you should always test-drive your workflow before starting a project to ensure it’s gonna work.
Now, a low res version, if the visual quality is poor enough, may not be acceptable to edit against. Checking lip-sync, checking focus, or even checking any resizing you may have on the image can be difficult. Also, preview copies for review and approve will be visually poor, which some demanding clients aren’t thrilled with.
Lastly, with independent projects, funding can often run out towards the end of the post process. If you run out of money, and can’t afford to do your online, you’re now stuck with your masterpiece…in low res. This is why many productions pay upfront to enable themselves to edit with a broadcast quality version so they can always do a decent quality export.
5. Is there a hybrid?
Indeed there is! We call this a mezzanine file.
While offline requires a low res version to edit with, and a high res version to link back to, and going pure online allows you to use the camera originals, many productions go with a mezzanine file. A mezzanine file is a high-quality master from which everything is derived from. In post, this would be a high-res master that is not the camera original.
A mezzanine format workflow
For example, lets say you shoot on a RED or an Arri camera. They produce some very high bandwidth files. What if you were to create broadcast quality versions from this footage –edit with that – and then output with it? You create high-quality masters that retain enough quality through the editorial and color process and are less compressed enough that most systems can edit them.
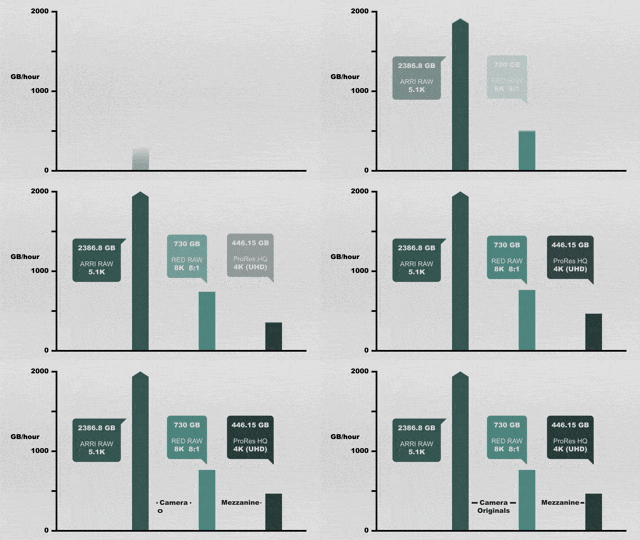
Massive data rates for camera originals compared to a mezzanine file
This means that you have the time savings by not having to deal with an offline/online workflow, and ensures you can output at any time. While you do need some time on the front end to create the mezzanine files prior to edit –keep in mind, this is at the beginning of the post process, where stress is traditionally lower than the stress at the end of a project – when you’re racing to conform and deal with the issues inherent to conforming.
……..
Have more offline and online concerns other than just these 5 questions? Ask me in the Comments section or track me down on social media. Also, please subscribe and share this tech goodness with the rest of your techie friends.
Until the next episode: learn more, do more – thanks for watching.
]]>So, how many of you are ready to argue?!
Quite frankly, regardless of the information I share today, if you’re a Mac person, you’re probably gonna stay Mac. If you’re a PC person well, I suspect Bill Gates is gonna get some of your money. If you’re a Linux user, well, none of the major NLEs work on you, and you’re normally relegated to high-end finishing applications, like those from Autodesk or for power Resolve users…in which case, this episode probably isn’t for you.

Ahh, that new Mac Pro smell.
Your decision on your platform is most likely rooted in personal user preference or system simplicity, over more black and white factors, like cost. And that’s OK. If you create all day, you should be comfortable and enjoy the environment you work in. I’ve got nothing but love for each and every platform – as long as you know what you’re dealing with.
If you’re going Apple, I think you know you’re going to be restricted on your internal options, including processors and GPUs, and you’ll also be paying a premium for that Apple branding. But you do get somewhat turnkey options, which can simplify the buying process.
If you’re PC, you’ll have a ton of more options at a lower price point, but often you’ll have to contend with multiple manufacturers to build your system, and for support if something goes wrong. You’ll also lose out on some software packages, like FCPX, and the ability to easily make ProRes.
2. CPU
The heart of any system is the processing power the system has. You can throw a ton of RAM and a high-powered graphics card into a system, but without a decent CPU- central Processing Unit – the system won’t accomplish much. See, a vast majority of software solutions – editing or otherwise – will use CPU power first and only use the graphics card if they can. So, we need to choose our processor carefully.
Intel is usually the first option we look into to – they have a ton of various processors. But the 2 families you’re gonna want to look into are the Intel Xeon and the Intel Core i5 and i7 processors.
Of the many differences, I’ve got a few to look out for.

Level 3 Cache
Xeons have additional batches of memory that are used to speed up certain applications. Often, and with new systems, this memory is referred to as L3 or Level 3 cache. This additional memory is much more than what an i5 or i7 processor may have, which helps the Xeons to perform better in higher demanding workstations.
Xeon chips also support ECC RAM – Error Checking and Correction RAM… we’ll get more into RAM later. ECC RAM can help prevent crashes and data corruption.
Xeons also support more cores and multiple CPUs. This means you can build a monster processing system with more engines compared to other processors.
When we start to examine i5’s and i7’s, things can get hairy. A basic rule of thumb is that an i7 will outperform an i5 in a majority of situations. Why? i7’s also have a larger amount of the aforementioned cache than an i5, which will make repetitive tasks a bit quicker.
We also have hyperthreading: that is, the ability for the processor to appear to the OS and applications as if are twice as many cores as there actually are. I7’s can scale-out further via hyperthreading than the i5, so you can build a beefier system without as many limits.

Hyperthreading visualized.
For those of you who like to tweak your systems, i5s and i7’s support overclocking, so if you want to squeeze more power and performance out of your system, you can do it without paying as much.
I5’s and i7’s also have onboard graphics ability – which means they can act as your GPU as well. However, the performance as great as a standalone GPU, and we normally add on a GPU for more performance.
As far as price, Core i5 and i7’s are usually cheaper than Xeons, too.
If we translate all of this data to the major manufacturers of video editing qualified computers, such as Dell, HP, and Apple, a vast majority of the workstation options have Xeon processors. This includes the higher-end models of the HP Z Series, the Dell 7000 Series, as well as the canister Mac Pros.
If we move to systems that are more multipurpose, or more portable, and that are a bit easier on the wallet, then we get into the Core i5 and i7 processors. You’ll find these on Apple laptops and iMacs, and the more midrange HP Z series and Dell systems. If I was building a system, I’d go with Xeon processors, followed by i7’s and lastly, i5’s.
3. GPU and RAM
To *over*simplify things, GPU is a fancy term for Graphics card. Over the years, many editing systems have learned to take advantage of graphics cards in addition to the CPU. Why? Well, GPUs offer dedicated processing power separate from the CPU, which is already being used by everything else on the system. GPUs also have the ability to process certain things faster than a CPU – so why not use them?
The 2 major GPU players on the market are Nvidia and AMD. Each of them has cards with a ton of horsepower, but the cards are only as effective as the language they speak, and if the application you’re working with can speak that same language.
Nvidia is a proponent of CUDA, which is nVidias proprietary framework. Their cards fly when the host application can use CUDA to communicate with them. And while Nvidia cards do understand the open-source OpenCL as well as CUDA, the performance between the two isn’t on par with one another with Nvidia cards.
AMD cards, on the other hand, rely on OpenCL. As mentioned, OpenCL is open source, and thus, more widely adopted.
If you’ve got a Mac – you’re stuck with what you’ve got in the box. New Mac models, including Laptops, MacPros, and iMacs, have AMD cards in them, or, the onboard graphics ability that comes with i5 and i7 chips.
With PCs, HP and Dell both have options for AMD or Nvidia based cards.

Have it your way: GPU options with HP and Dell.
If I were building a system, I’d focus on what applications support GPU acceleration, and then factor that into my decision. For example, Adobe products are faster on Nvidia based systems via CUDA than via OpenCL. FCP X is coded to use OpenCL, and since most Apple systems have AMD cards in them, it’s easy to see why. Avid has tended to rely on CPU over GPU, however, Media Composer does use OpenCL on both Nvidia and AMD cards.
I’d also look into GPUs that have at least 3- 4GB of onboard RAM. This may be tough on some laptop systems, but more and more applications are taking advantage of GPU, and you don’t want to be obsolete too soon.
Speaking of RAM, Your system will need RAM, too – not just your graphics card. Your motherboard and processor will dictate what kind of RAM you get, and they’ll also dictate the layout of the RAM – meaning, what slots the RAM goes in, do they have to be run in matched pairs, etc. It is imperative that you match your RAM speeds, amounts, and manufacturers if possible. Mismatching can cause system instability or even cause it not to boot properly. Most editing systems want a minimum of 8GB, however, I think it would be a bad idea to get a system with anything less than 16GB minimum, and more like 32GB or 64 more if you can afford it.
4. Boot “Drive” and Internal Storage
The basic rule of thumb is to keep your applications on your startup drive, and your media elsewhere. Not only does this protect you – if your boot drive fails, you don’t lose your media, but it also keeps the boot drive working with your OS and applications for best performance – without having to also serve up media. Because of this, we can go with a smaller size boot volume.
Nowadays, most systems have SSD options – solid-state disks. No moving parts mean more reliability and faster performance. This does come at a cost per GB hit, however. SSDs can cost 5-10x as much as the same size spinning disk. But as I mentioned earlier, we want performance over capacity on your boot volume. Thus, go with an SSD over a spinning disk.
I know, not all of you can have multiple drives, and thus you’re willing to compromise. OK, I gotcha. In that case, you want a hard drive that spins at a minimum of 7200 RPMs. Many desktop or bargain bin drives spin several thousands of RPMs lower, which will make video playback painful. Many of the drives also tend to spin down when not in use to conserve power. This is also very bad for video-centric applications.
Western Digital, for example, tends to classify spinning drives by color: green, red, purple, blue, and black. You can check out more on choosing the right drives here. In a nutshell, try and always go with enterprise drives, or as Western Digital calls them “black” drives. They last longer, spin faster and deal with higher temperatures better.

Cheatsheet on drive colors and abilities.
When we look at Apple based internal storage, again, we’re somewhat handicapped. MacPros use flash-based memory – which is like a souped-up USB memory stick directly on the computer. They may also have Fusion drives, which is a hybrid between spinning disk and solid-state. Both of these solutions are better than spinning disk, and I recommend them…as if Apple gave you much of a choice.
For those of you looking to really amp up your system, you can look into PCIe based storage, either SDD (Solid State Drive) or Flash-based. These systems run even faster than traditional SSDs. However, not all systems support it, so it’s important to check your computer specs to see if the system will even boot from it. They’re also more expensive. More often than not, an SSD as your boot volume is a great balance of cost and size.
Now, many of you will want to have additional internal storage – a RAID. And this is great, you don’t have to worry about external cables and ports, and everything is in the box. This is used commonly as a work volume or scratch volume inside your system. However, when we look at PCs, most systems only support software RAID 1 or RAID 0. While RAID1 gives you a 1:1 copy of your media in the event a drive dies, RAID 0 gives you all the speed and none of the protection. These RAIDs are also done at the software level, which means your OS has to handle the media writing to and from the RAID, which is why an Internal RAID isn’t always the fastest. Often, getting a PCIe RAID card to handle all things RAID is a good way to go – it takes the added strain off of the OS and may also introduce additional RAID formats, like RAID5 and RAID 6.
5. What Would You Choose?
I get this quite often. Let’s see what you think.
I’d go Mac. Yes, it costs more than a comparable PC, and it’s a closed ecosystem with little internal expandability. However, all major NLEs and complementary applications run on Mac OS, including FCP X. You also don’t have to deal with the ever-present ProRes issues – that is, ProRes can’t be created natively on PCs without expensive software or unsupported workarounds. Also, although I am a tech at heart, a guy’s gotta sleep, and buying a turnkey system just makes my life easier. Lastly, if I need to contract anyone to create on my system, chances are users out here in Holly-weird will be familiar with it.
To be more specific, I’d go with an iMac for my type of work. While nice, I don’t need the extreme processing a souped-up $9000 Mac Pro has. I’d also choose an iMac that the major NLEs qualify – that includes the GPU.
If PC, I’d go with an 8 or 12 core Xeon based machine, with a recent processor. I’d stick in 64GB of RAM, and an Nvidia GPU with at least 6GB of onboard VRAM if not more. I’d also put in an SSD boot drive. Of course, if money were no object, I’ll bump all of these specs up.
Have more concerns other than just these 5 questions? Ask me in the Comments section. Also, please subscribe and share this tech goodness with the rest of your techie friends….especially at parties.
Until the next episode: learn more, do more – thanks for watching.
]]>Way before I got into the tech pontification racket, I was an audio editor, I sat in heavily padded rooms listening to the same bits and pieces of audio over and over and over. I was trying to squeeze the most intelligibility out of audio clips as humanly possible. Often, just like picture editing, it was more triage than pure creativity.
And through those editing sessions as well as working with some fantastic auditory cowboys, I’ve come up with some tips to help you in post.
An important tip right from the beginning is that audio cleanup differs slightly from project to project. Different mics, different environments, and different on-camera talent change the exact settings and techniques for each project. A good chef starts with a recipe, and seasons to taste.
With that said, the first step is always Equalization. EQ is the most common audio manipulation tool in both audio and video editing applications. Knowing where components of human speech lie in the frequency spectrum is the basis for knowing what to adjust.
The first tool we’ll use is a parametric EQ. We’ll need to understand 3 things when working with this tool: first, the frequency (expressed in hertz and Kilohertz), the gain or volume (in decibels), and the Q – which is how wide the changes to the volume and frequency will be.

Understanding EQ Parameters
Next, we need to know where the components of human speech fit in. I’ve got this handy dandy chart to use as a guide. While all speech is slightly different, it does give you a starting point on what frequencies to adjust.
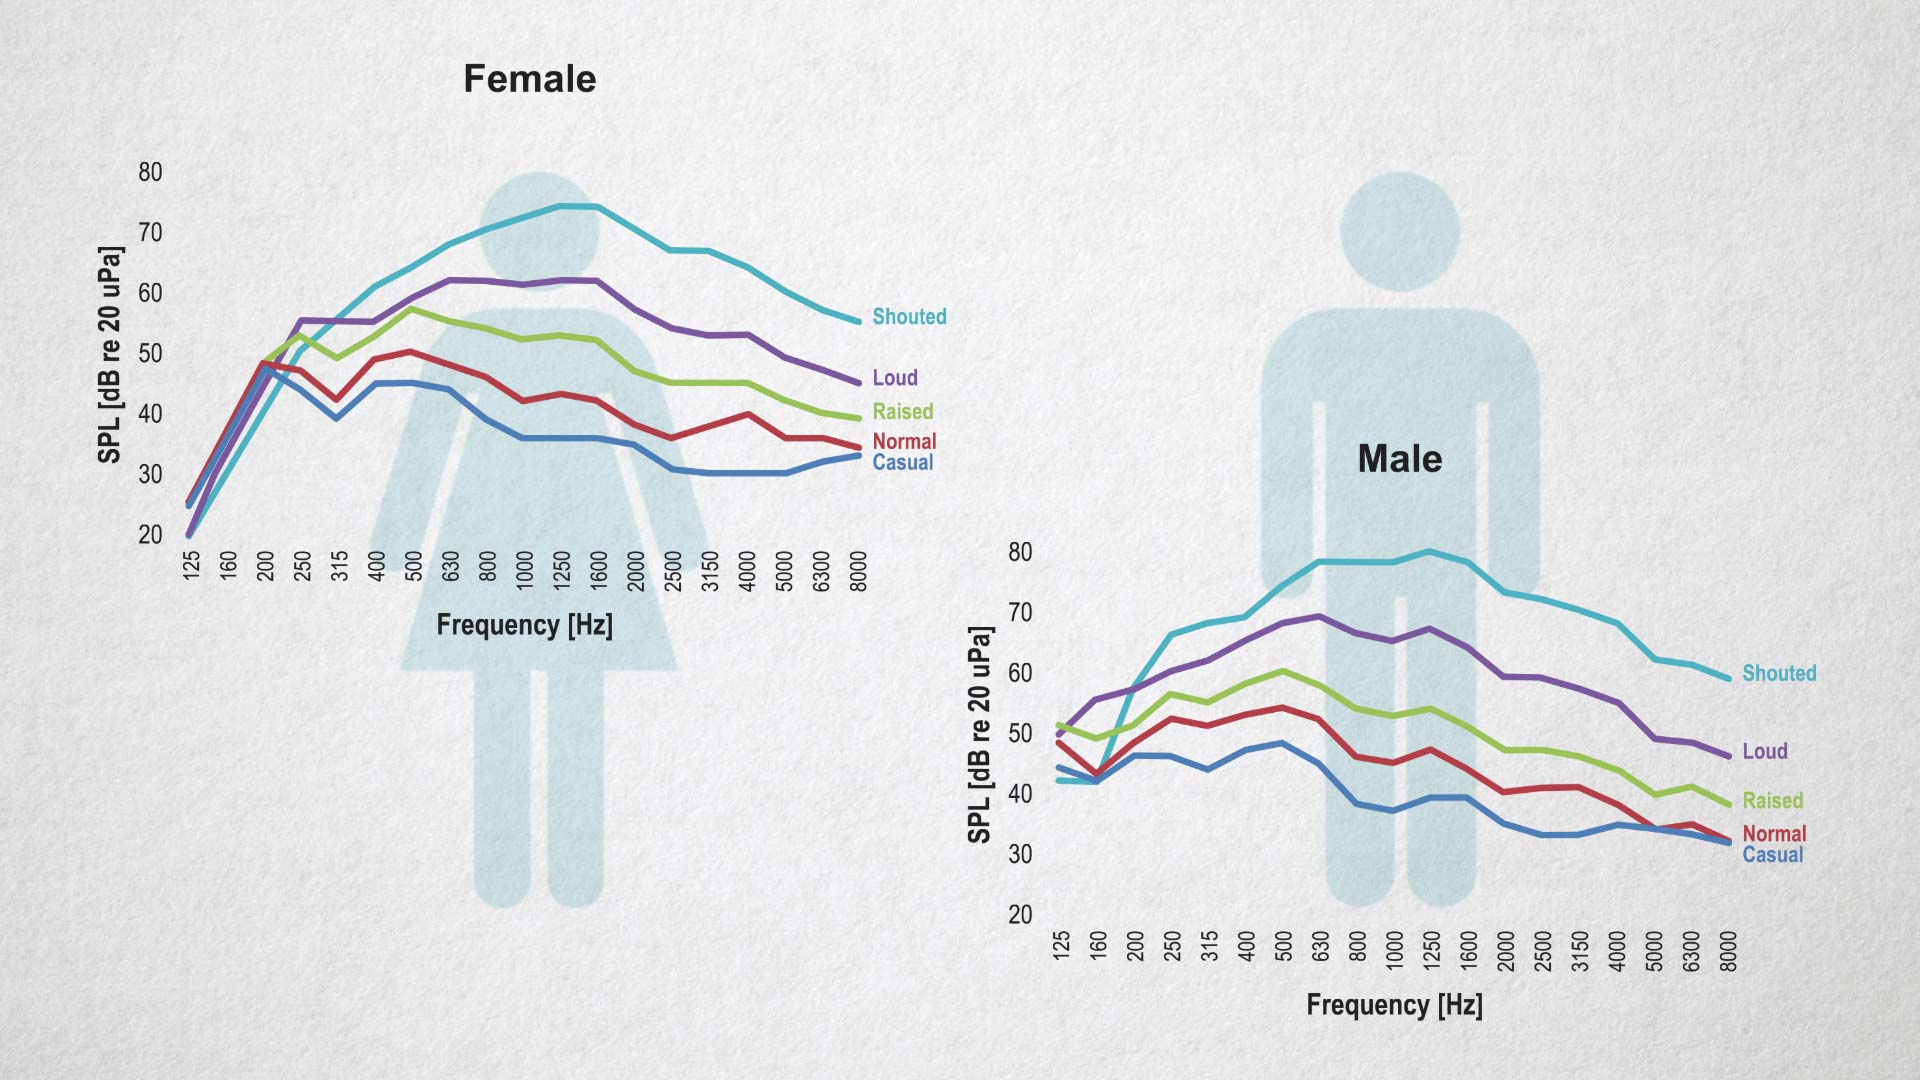
Where male and female speech falls in the frequency spectrum.
You can add intelligibility of words by boosting the frequencies of where most consonants are spoken. This usually falls around 1.75kHz. Adding a boost of +3dB and a Q of 1 can help out some. Experiment in this area and see what works for your clip. Again, season to taste.
With some voices, move the frequency to adjust up to the next octave of most consonants, that is, 3.5kHz. Do your magic there, but be sure to either choose 1.75kHz or 3.5kHz, not both.
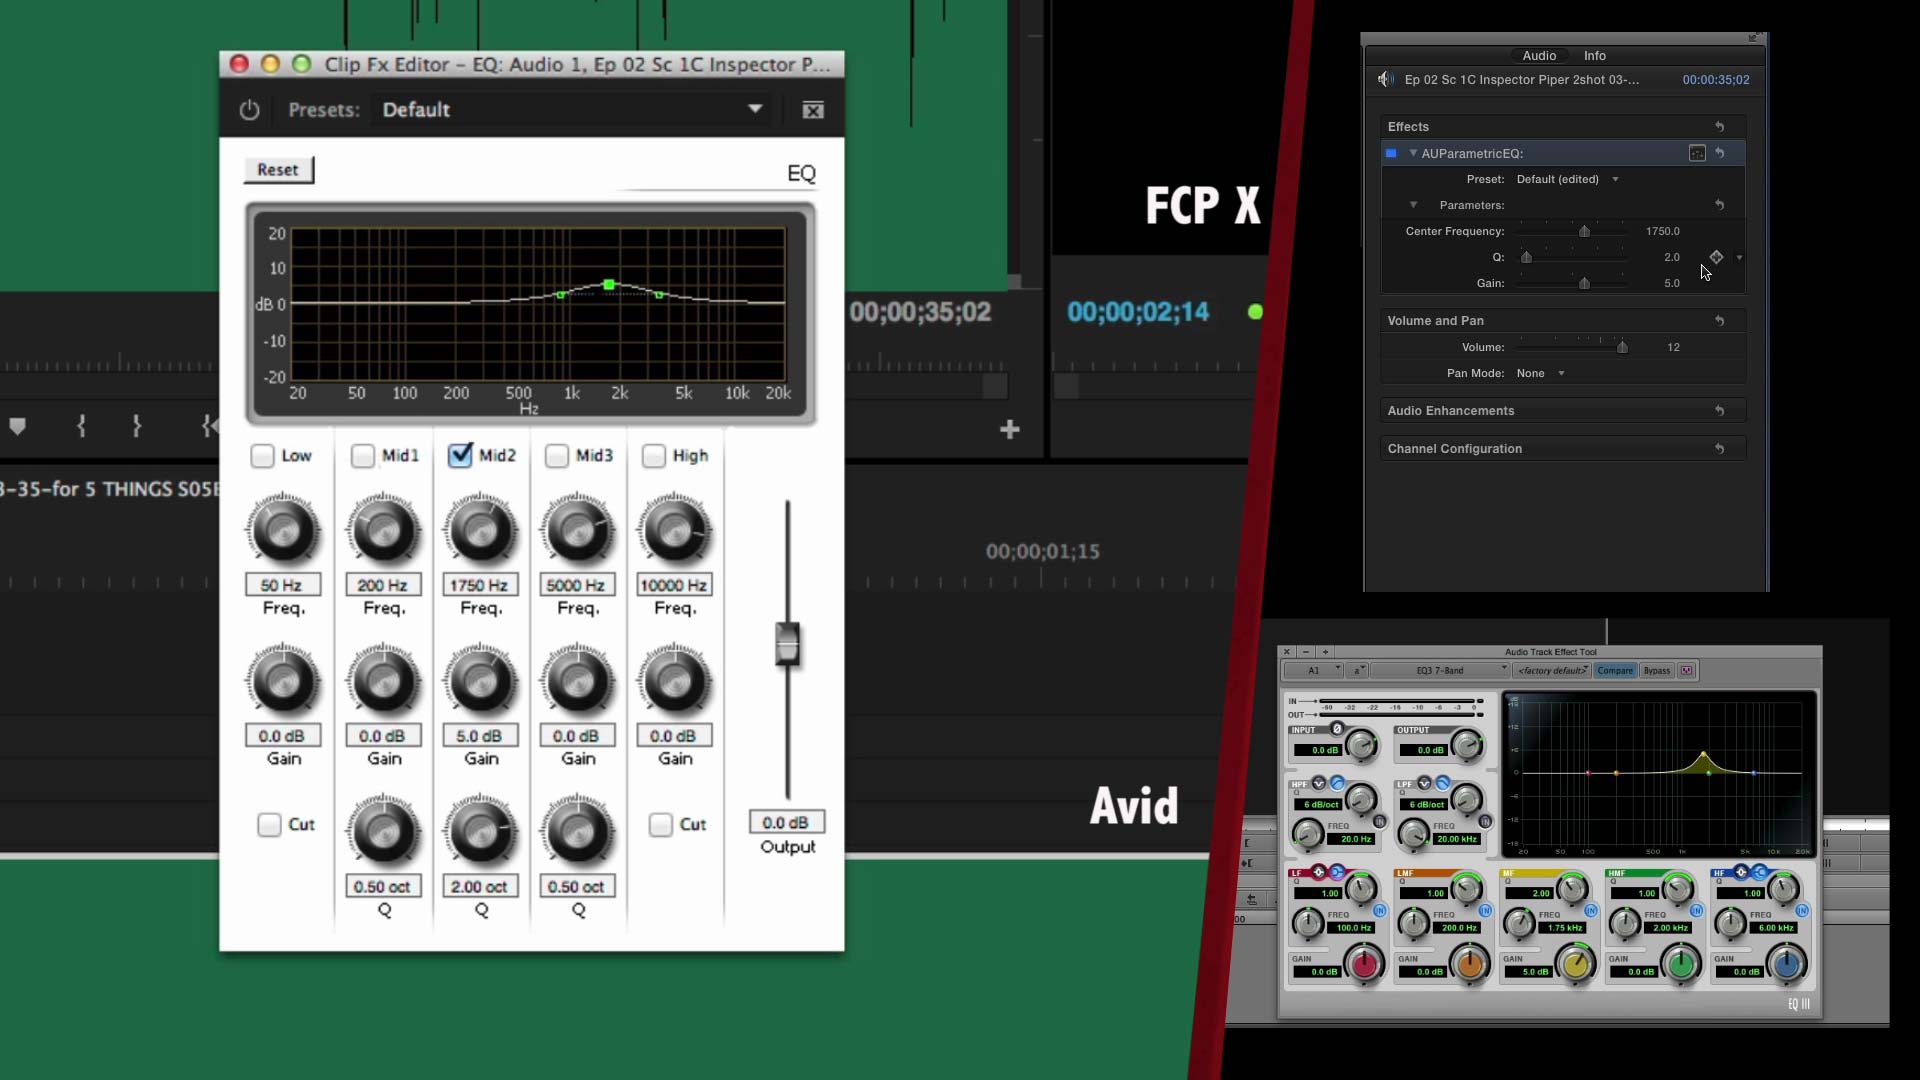
Helping out consonants in Adobe Premiere Pro, Avid Media Composer, and Apple FCP X.
We also should use de-essers to reduce the amount of Sibilance in our dialogue. We want to remove those wet, spitty “S” sounds, so they sound, well, less spitty. Most NLEs have filers built-in or, these filters are available by 3rd parties.
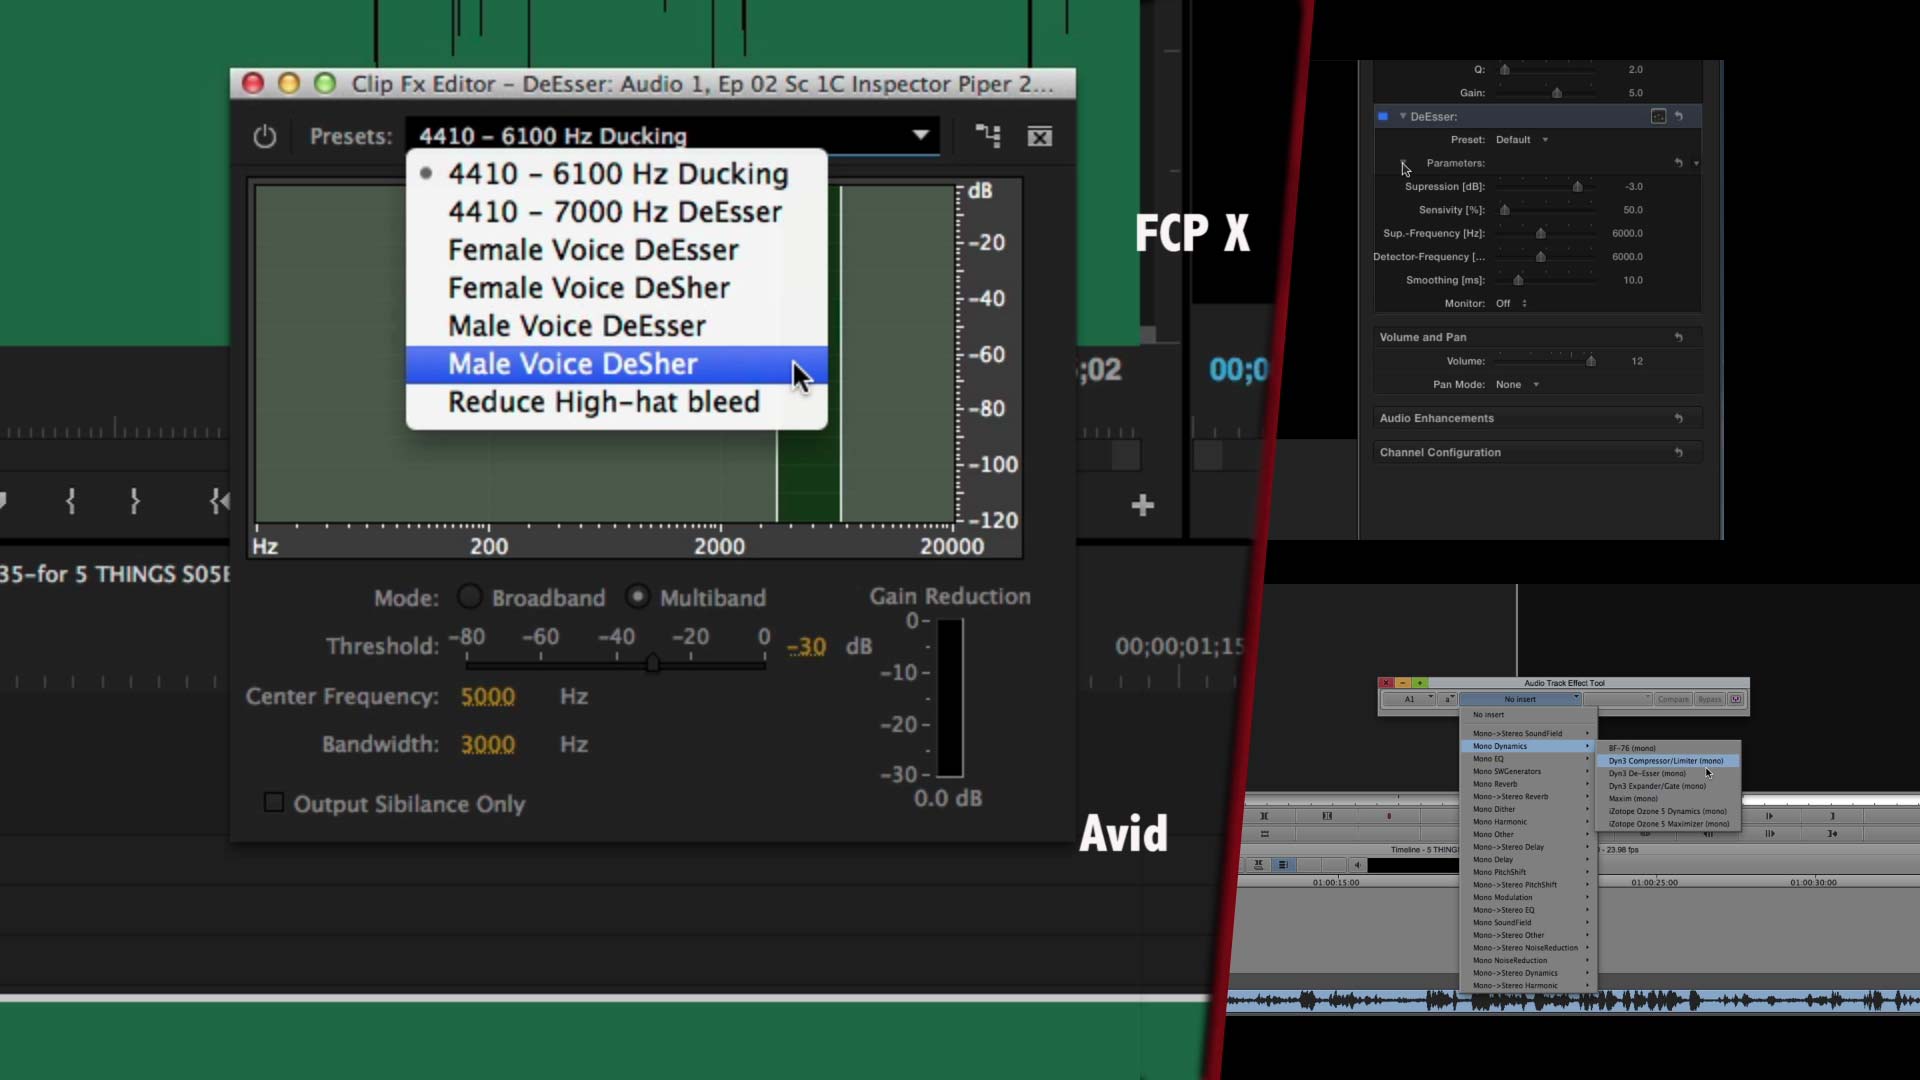
The de-esser, built into Adobe Premiere Pro, Avid Media Composer, and Apple FCP X.
Lastly, as if “S’es” weren’t bad enough, we often get poppy on mics when we use P’s and B’s. We can reduce these by selecting them in your waveform and using a high pass filter at 150Hz or so. Again, season to taste.
2. Noise Reduction
More often than not, you’re going to get audio that was recorded in less than ideal conditions. We can rely on our old friend EQ to help here, too.
First: A common issue is that your shooting location can be boomy. While this won’t help with reverb – I’ll cover that later- you can minimize some boominess by adjusting the frequencies between 200 to about 400Hz. A -3dB dip and a Q of about 2 or 3 is a good start. I’d set the negative gain as high as possible until you find the exact offending frequency, then return to -3db and experiment from there.

Reducing BOOMSTICKiness.
If the dialogue has some noise in the lower ranges, try using a high pass filter – that is, a filter that only lets the high frequencies through. For bros, try a sharp highpass around 130Hz, and for the ladies, start around 200Hz.
If there is noise in the higher frequencies, try another type of filter called a low pass, which is – you guessed it – a filter that only allows low frequencies to pass. Start around 8Khz. And adjust from there.
The availability of noise reduction tools has become widespread. Many NLEs have at least some noise reduction built-in, and 3rd party tools have dropped in price. Many incorporate many of the techniques and tools we’ll discuss today but also have used some variant of noise print identification.
This concept involves teaching your plugin what you consider to be undesirable audio – such as an air conditioner or hum. Once the system is taught that this is bad, the plugin can then reduce audio that shares those same characteristics.

Izotope RX De-Noiser
3. Reducing Reverb
Reverb is everywhere. You’ve probably enjoyed it while in the shower, as the hard tiles and surfaces in the bathroom give your angelic voice a beautifully produced sound. But often, we don’t want that in our dialogue. Reverb, or its cousin echo, can make our dialogue-less clear, and differences between reverbs can instantly take a viewer out of a scene. Let’s see what we can do about that.
The first thing you need to realize is that reducing – let alone removing – reverb is one of the hardest things in post audio to do. More often than not you’re only making subtle changes and hoping it’s enough. Also, you’re often combining techniques for that little bit of improvement, so it’s easy to get lost along the way.
There are some tools to know.
First, subtle use of a gate– that is, audio filters that only allow audio at a certain volume to pass – may work for you. A good way to think of a gate for you video people is that’s it’s the audio equivalent of a luminance key.
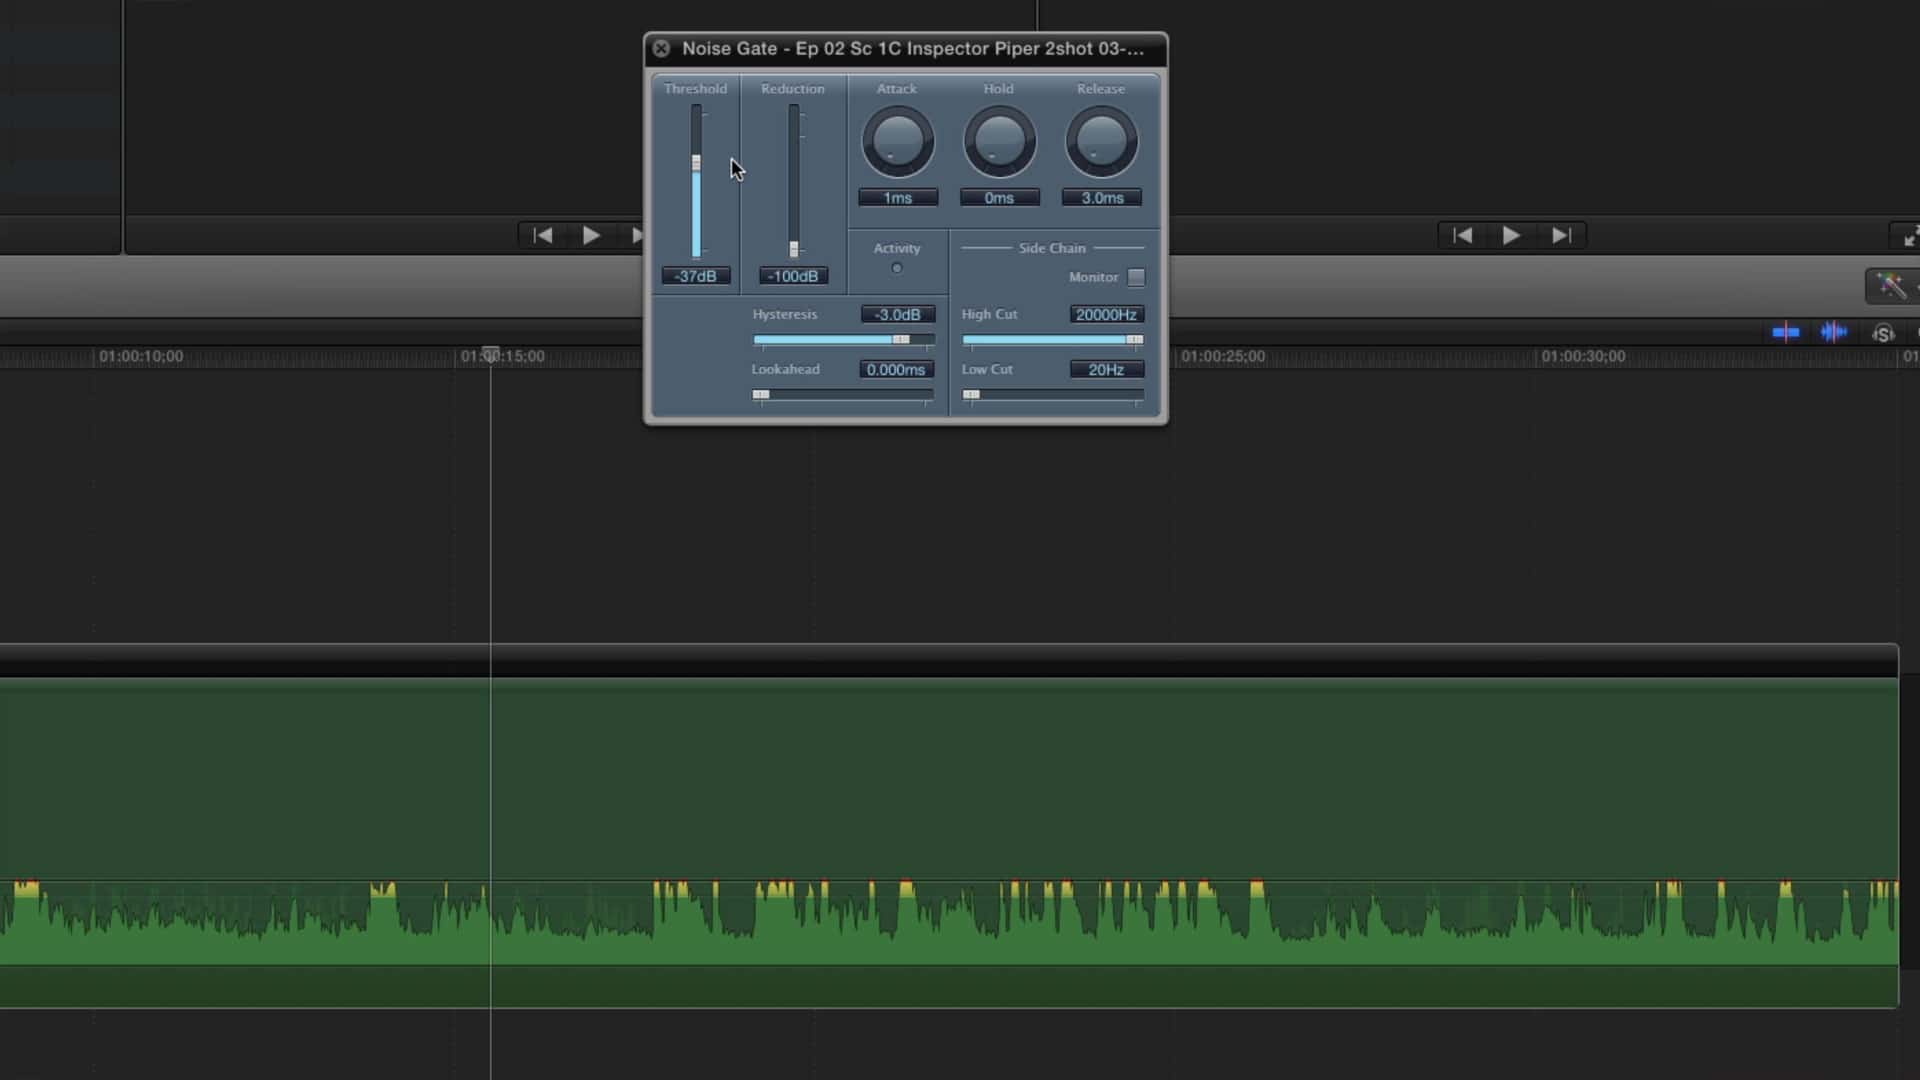
Example of a gate found in FCP X.
Also, expanders are incredible tools. Expanders are filters than increase the volume difference between loud and soft sounds. For noise and reverb, you’ll want to experiment with downwards expansion to lower the relative volume of the softer sounds, in this case, the tail of the reverb.
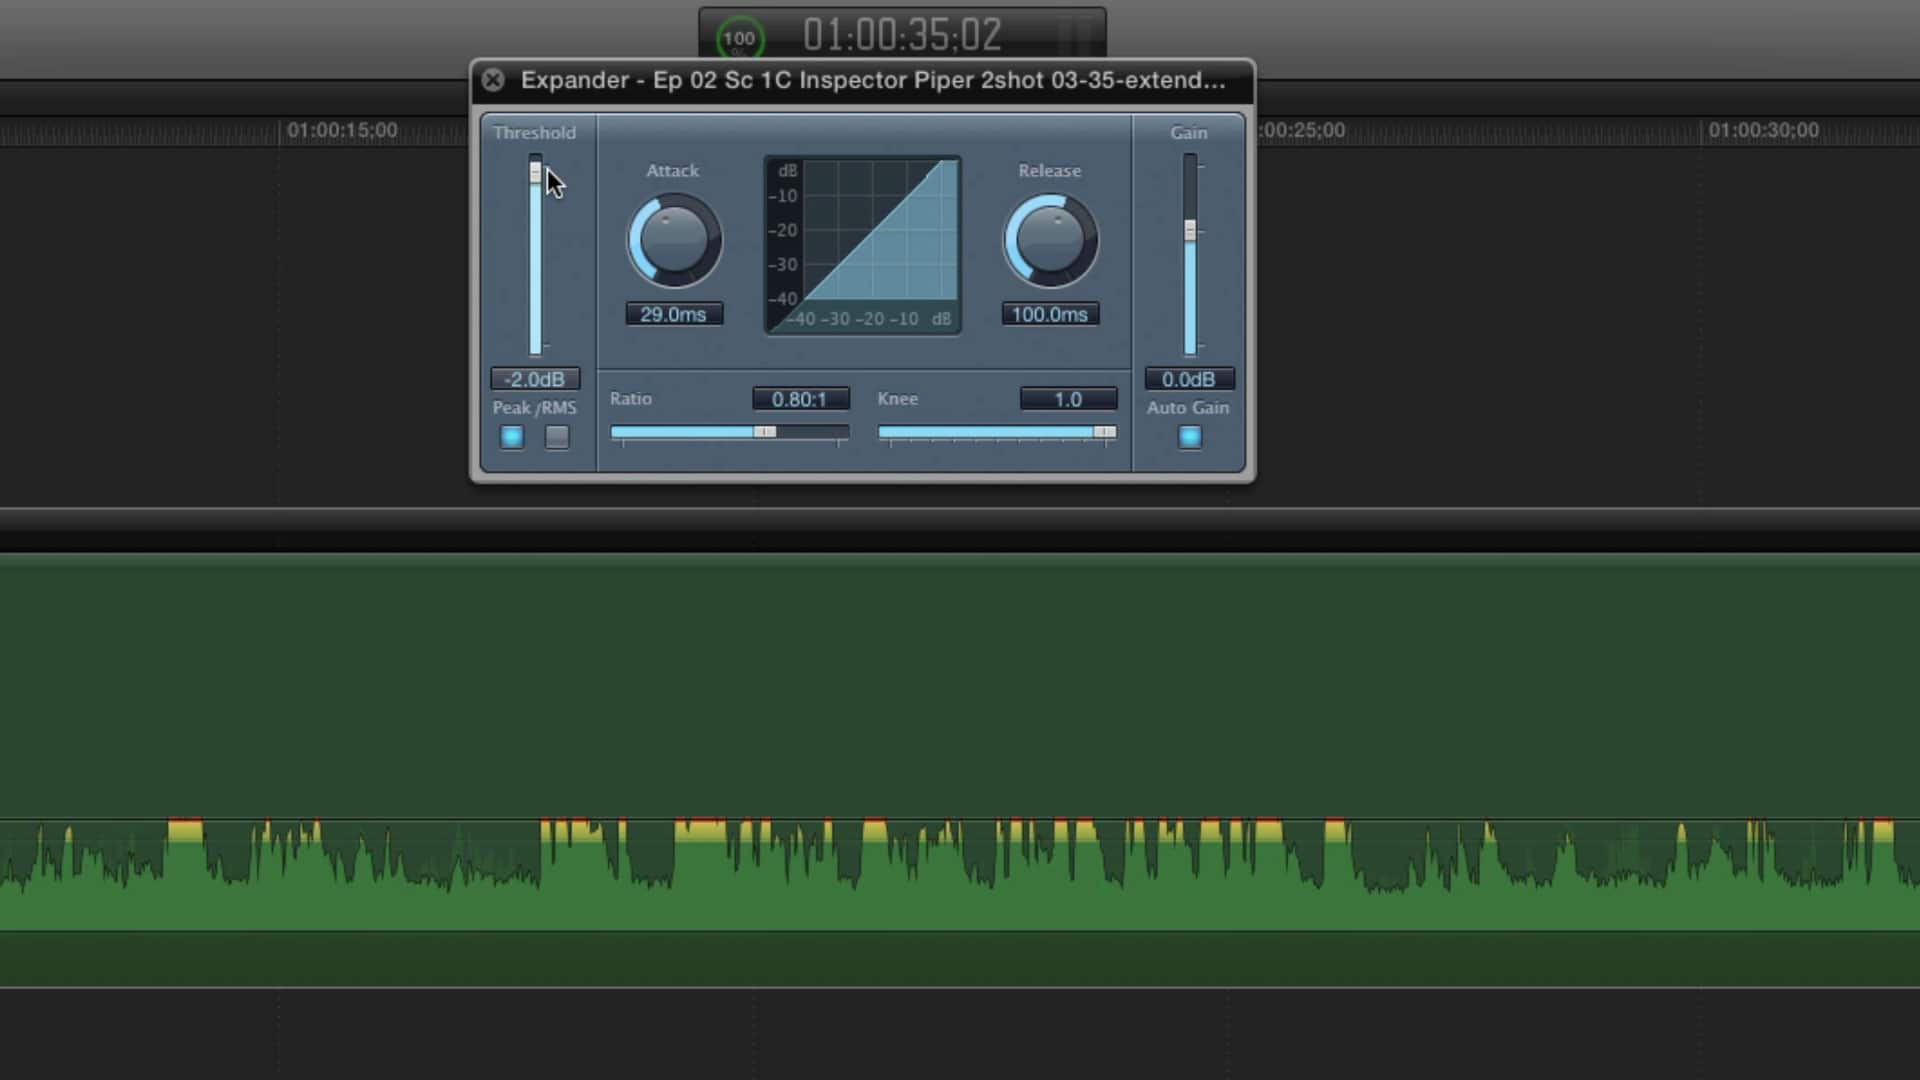
Example of an expander found in FCP X.
Now, 3rd party plugins are a great way to augment the tweaks you’re already making. I’ve used Zynaptiq Unveil on several projects and it’s pretty good, although you need to tweak it a bit more. Izotope has a de-re-verb plugin in their RX package that’s good and pretty intuitive.
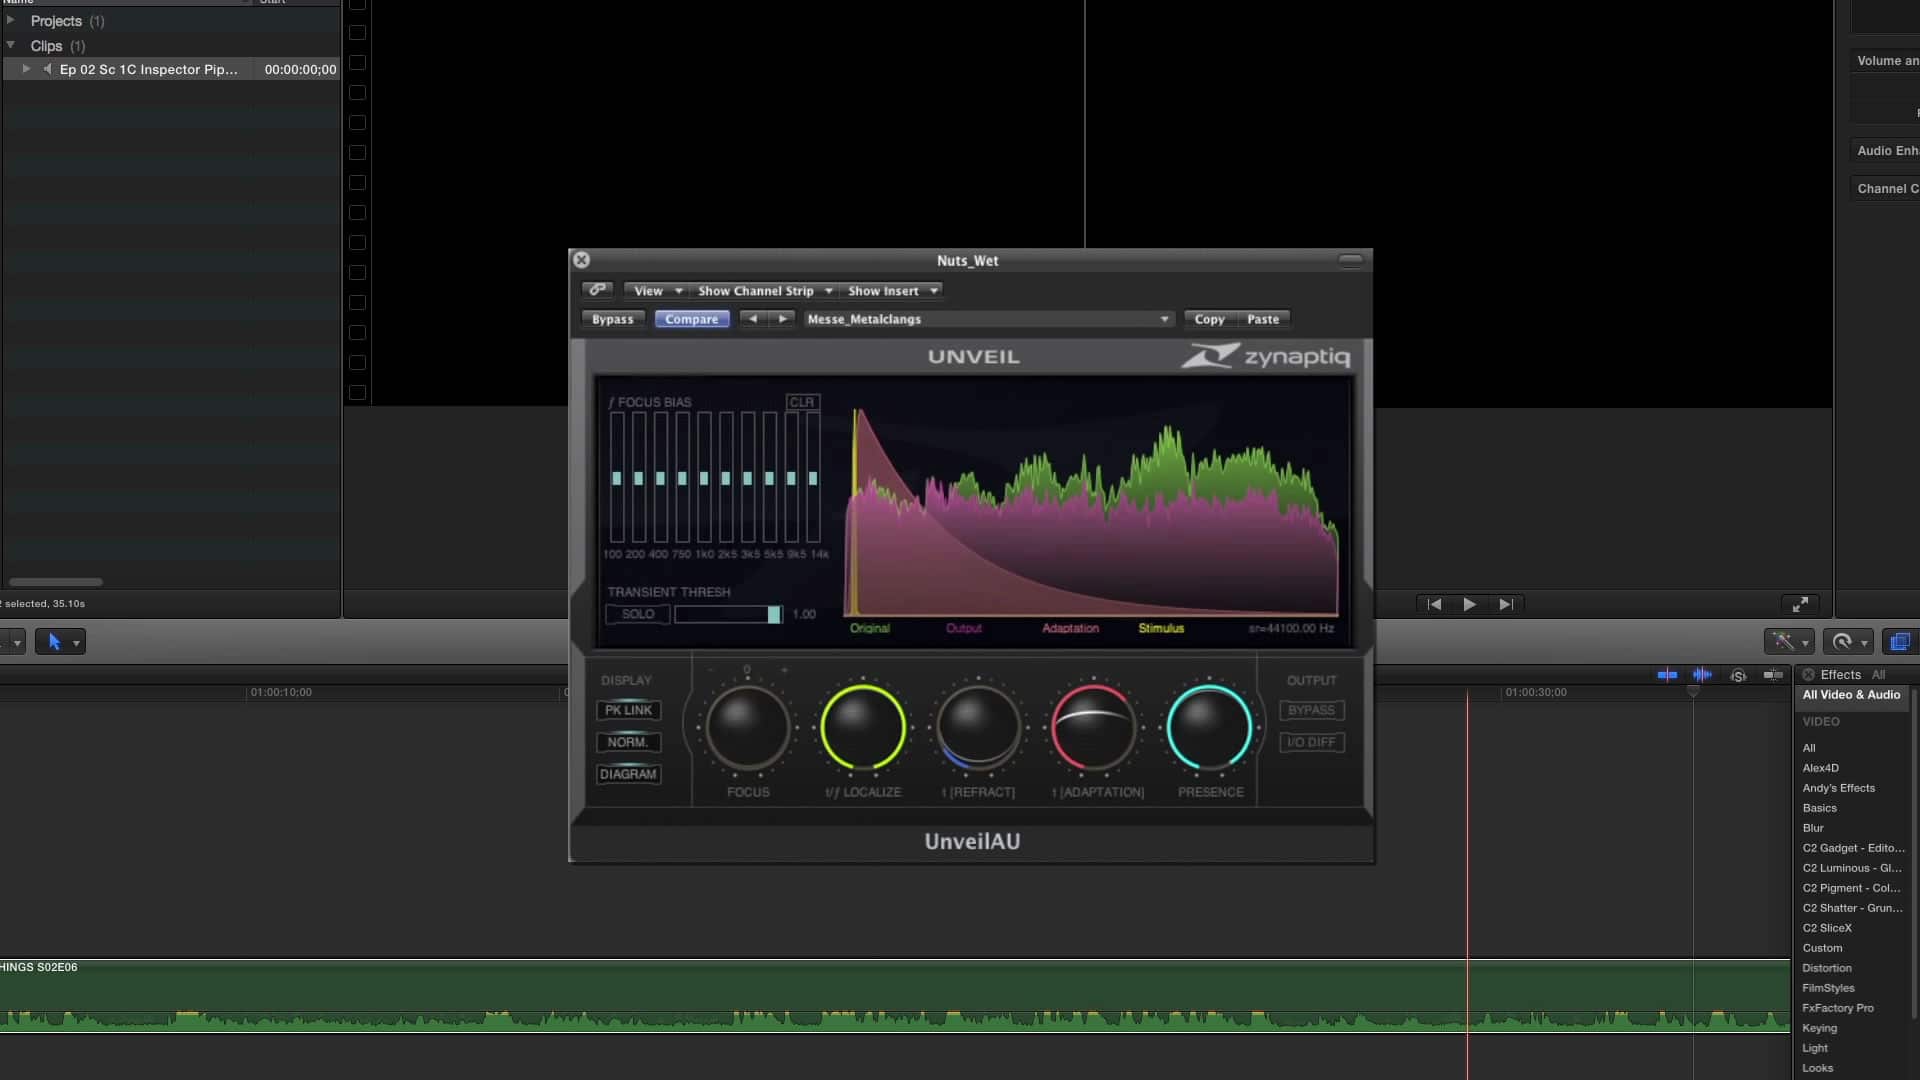
Unveil, a de-reverb plugin by Zynaptiq.
I can’t stress this enough: improving your audio using these tools to reduce reverb – even with otherwise pristine dialogue – will be slight at best.
4. Levels and Placement
Dialogue should not be competing with other elements of your mix. After all, the dialogue is being said for a reason, and we need to ensure that it’s heard. There are some things we can do to that end.
Unless there is a specific aesthetic reason not to, dialogue should be mono and panned dead center. Why? First, having the dialogue into a specific place in the sound field helps it not be muddied with other audio in the same field. Separation. It also causes the viewer to focus front and center. If the dialogue was off to the side or changed depending on what character was talking, you may be inclined to pay more attention or even look to that side. We want you front and center in most situations. Secondly, all sound systems can always play mono, so you’re guaranteed compatibility across systems.
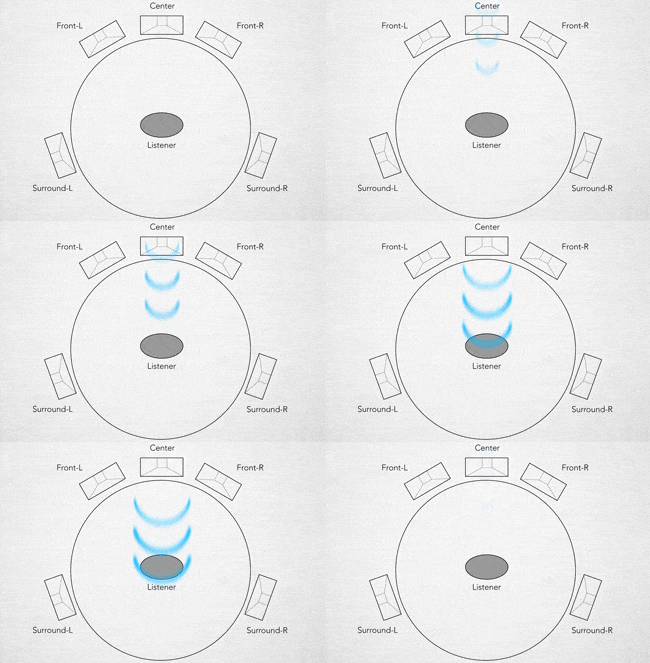
Keep your dialogue centered.
If going to TV, then we have a little thing called standards, which contains the requirements each network has to guarantee the finished programs they’re delivered will look, sound, and play properly. To get started, look up the PBS Redbook online.
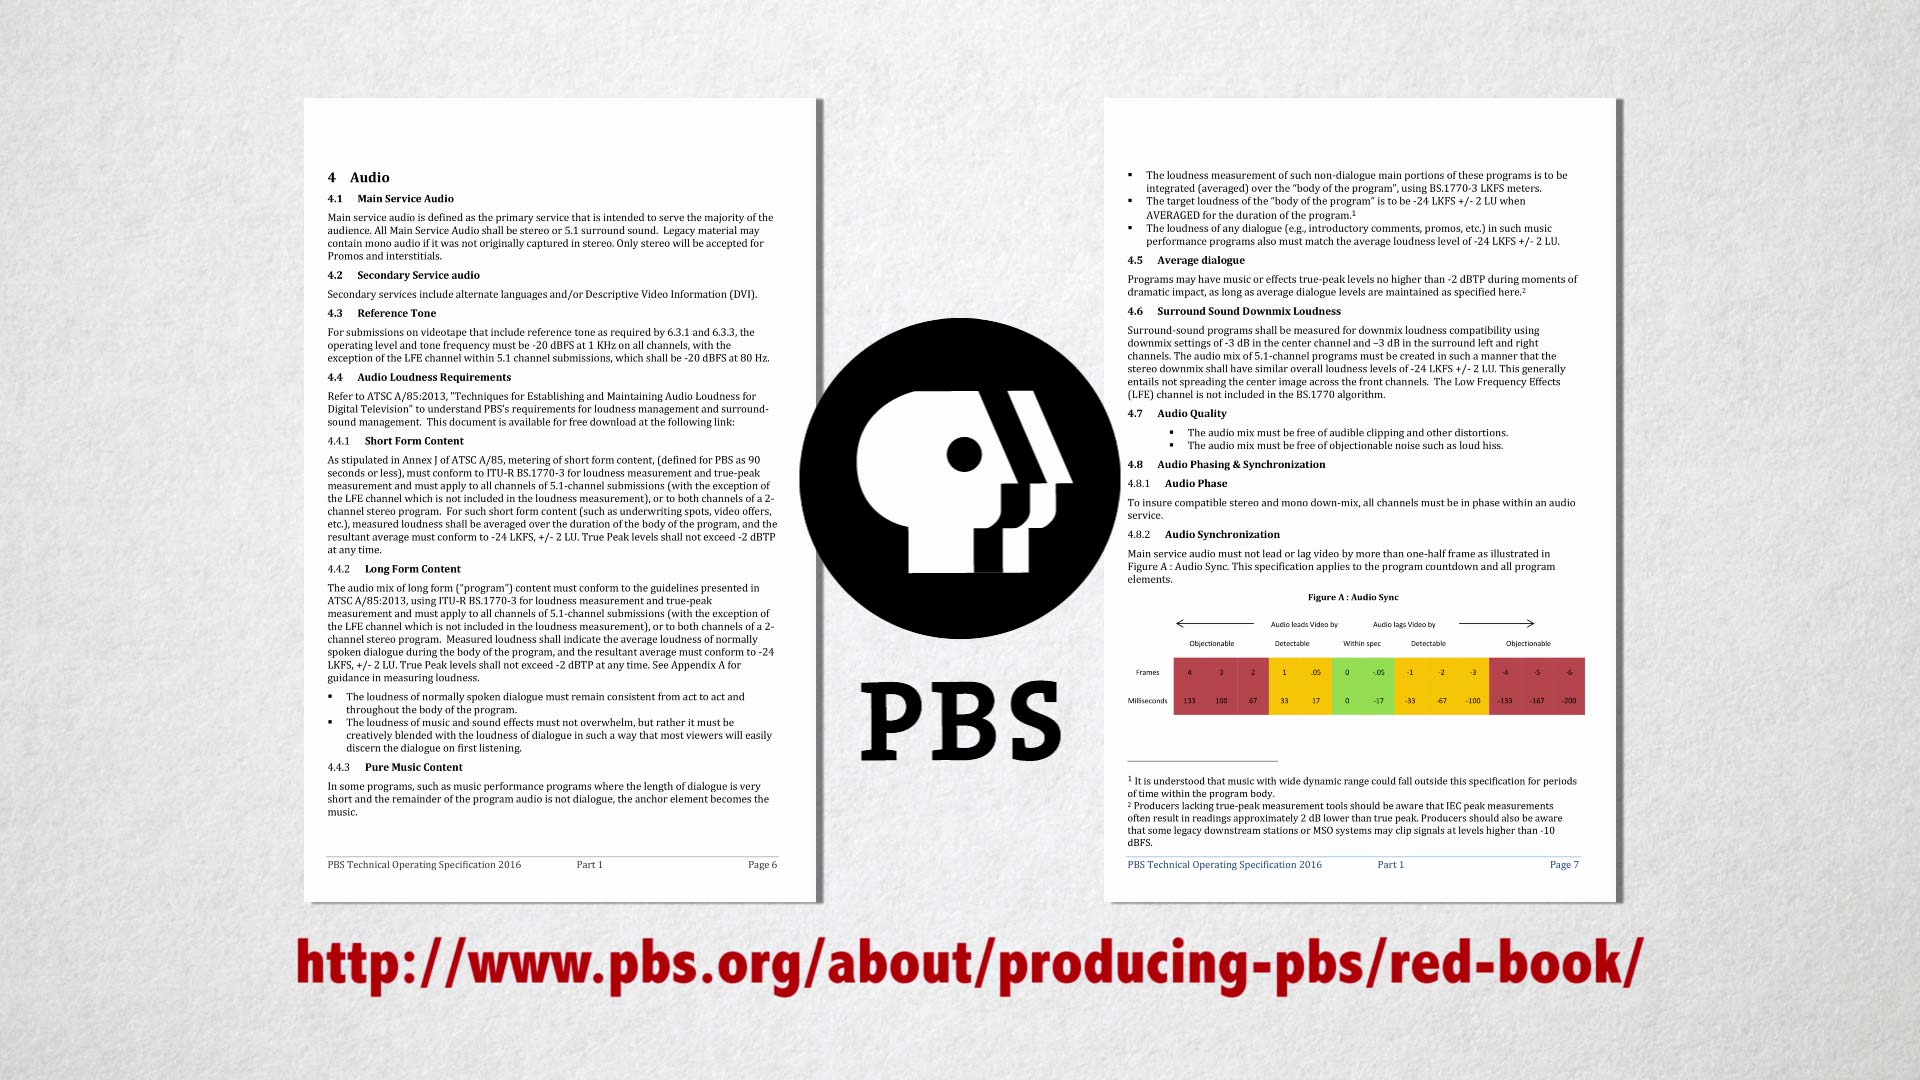
PBS Red Book.
Within these specs are audio levels. While this doesn’t tell you where your dialogue needs to be exactly, it does tell you how loud and how soft your overall mix can be, and obviously, your dialogue has to fit within that. Normally, this is -24 dBfs and true peak -12 dBfs.
Not sure what dBFS – decibels full scale is? Check this out. And keep in mind, dBFS is NOT dB; which is the usual volume indicator in your NLE. These values are also very close to what VOD platforms like Netflix will want. However, always ask for the deliverables spec when delivering to these outlets, as their specs can change which could cost you money and time if you fail QC.
More often than not, your work is going to end up on the public web. This presents several problems: Mainly, what are people watching on? Is it a smartphone and a pair of headphones, or a smart TV hooked up to a home theater system? Because of this, there is no set standard. This means we need to find a common denominator so that the fewest amount of viewers will have to adjust the volume knob on their devices.
I normally aim for my web mixes – that is, YouTube, Vimeo, etc, to be peaking at -2 or -3dB. This means dialogue should not exceed here at peak. Often we can accomplish this by using a compressor, which is included in most NLEs.
Again, we want to maintain high enough volume so what you’ve designed is understood, but not have such dynamic range that things are missed….or have viewers constantly changing volume.
5. Last Tips
Here are some rapid-fire tips that may help you as well.
First, listen at the same volume in your editing fortress of solitude. If you’re constantly fiddling with the volume knob on your speakers, you’re never going to get an accurate idea of your mix and how elements relate to one another – which is the basis of any good mix. You can pick up an inexpensive sound meter at Radio Shack and play tone through your speakers to set your volume levels.
Secondly: Your editing room. While not all of us can have sound dampened edit bays, consider doing something to your creative cave. By dampening the room with uneven surfaces, blankets, rugs, or even Auralex pads, you can reduce the reverb and slapback in the room, and thus not cloud your judgment. This is similar to why color grading bays having neutral colors and lighting – anything they can do to remain objective, the better.
Lastly, remember that not all audio tweaks are better. Accept the fact that something’s just sound different, not necessarily better.
Have more sound concerns other than just these 5 questions? Ask me in the Comments section. Also, please subscribe and share this tech goodness with the rest of your techie friends.
Until the next episode: learn more, do more – thanks for watching.
Bonus:
Thanks to Izotope, we have this:
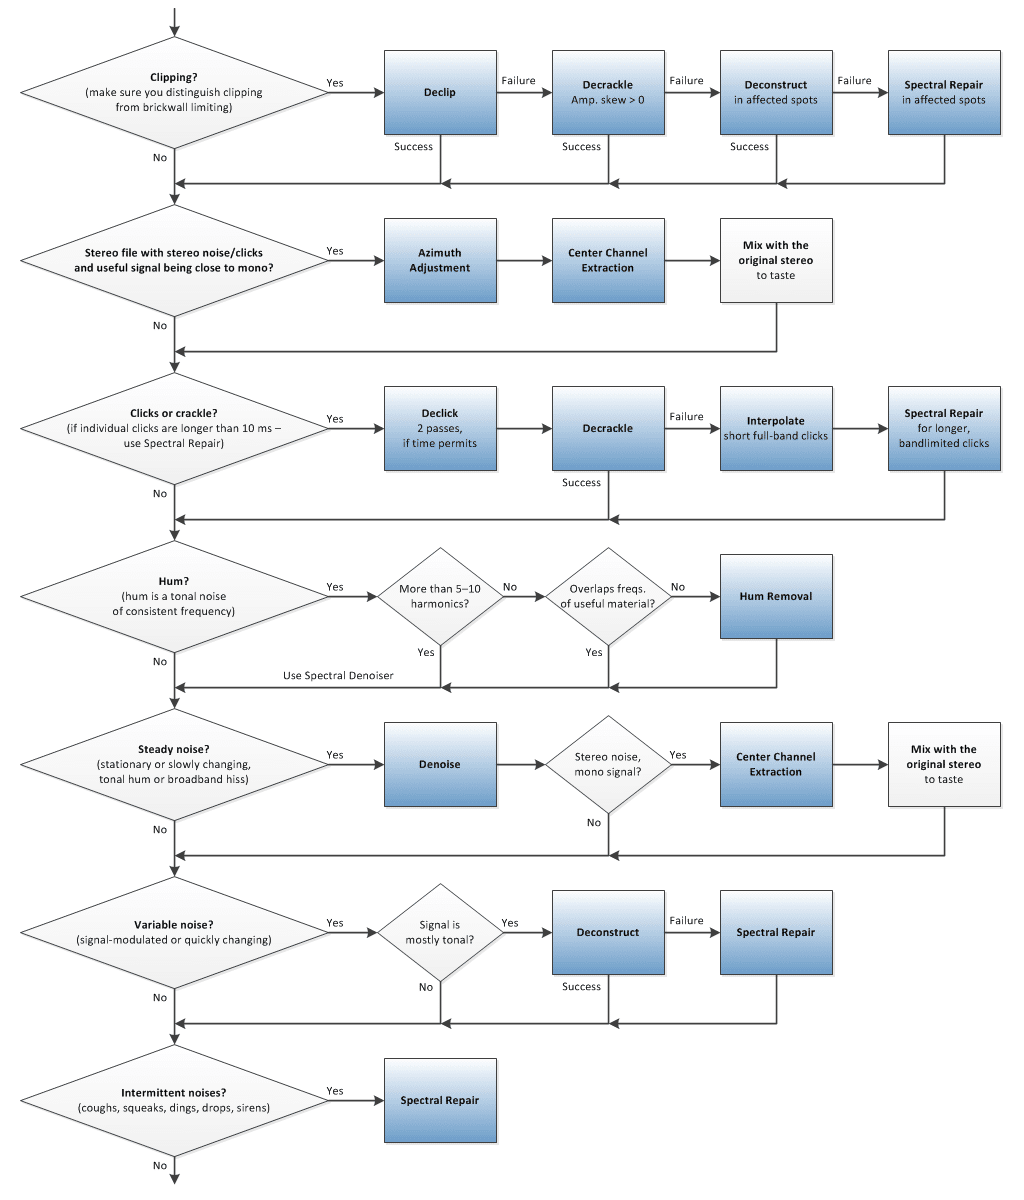
Audio Issues: Use this flowchart to troubleshoot
]]>
Ahh yes, Archive, the thing we rarely think about.
Archive is a lot like that high school yearbook you’ve got tucked away. You only look at it when someone from your past crawls out of the woodwork, and many memories of that time have faded.
The good part is that when you need it, it’s THERE. And that’s exactly what you want from an archive. Archiving, for the media realm, is based on reliability. It’s the bank safe and final resting place of your media, so nothing bad can ever, ever happen to it. It’s not, I repeat, it is not on your SAN. Or your NAS. Or that locally attached storage. All of those are volatile and have fairly limited shelf lives. Studies have shown that after 4 years, 20% of hard drives out in the wild are doorstop fodder, so we need to come up with an alternative solution. Enter Archive.

Hard Drive Life Expectancy
2. Where does Archive fit in?
When we look at various storage theories that involve archive, we come across the concept of tiered storage. Tiered storage speaks to the relative importance of media combined with how fast you can access it.
While the lines in the sand of storage waver depending on your industry, we can draw some basic guidelines for folks working with video-based media. Let’s discuss the various tiers of storage and how archive relates to the rest of your storage.
Tier I is your fast storage. This is your storage that must deliver the most throughput and speed. This is where availability is paramount overcapacity. For VFX people this may be flash storage, for video people, this is usually your DAS – Direct Attached Storage, or, on your SAN. Some companies will try to push NAS solutions for Tier I video solutions, which I believe to be a way to get cheaper solutions to unsuspecting folks, but that’s my tech cross to bear.

Tier I storage options
Next, we move to TIER II. Tier II is where you need capacity over availability. This is normally a holding pen for rarely used media, or after projects are done… but you have a decent chance of using the projects and media in the immediate future.

Tier II storage options
Often, film and TV projects use Tier II for the high res masters, while they edit with low res proxies off of TIER I; they then relink to the high res on TIER II for output. This is where NAS solutions usually fit in.

Traditional offline/online workflow for film and TV projects.
I’m also seeing facilities beginning to use LTO for TIER II, especially in reality television. Capacity is paramount in these scenarios with severely reduced daily usage.

An emerging offline/online workflow for film and TV projects using LTO.
Archive is commonly referred to as TIER III in most scenarios. In enterprise-based deployments, archive can be TIER IV or even TIER V. In either case, it’s the last stop for your media. This is where reliability is valued over availability or capacity.

Tier III storage options
Often, Archive takes the form of LTO, cloud storage, or optical storage. These formats need to have massive amounts of redundancy and be less sensitive to the effects of father time. As you will most likely never access most of the content again, you need it somewhere where you don’t have to worry about it.
3. What Archive options are there?
As mentioned, Archive usually takes the form of LTO, Cloud, or Optical storage.
Cloud is a fancy-schmancy way of saying “someone else deals with it”. This usually means a 3rd party with a data center with many machines and a whole lotta storage. So many of both, in fact, that if any machine or storage pool goes down, they have redundant systems to safeguard against data loss. Often, they call this the five 9’s, that is, 99.999% uptime.
This could be as simple as FTPing your media to a 3rd party web host, or as involved as a managed archival platform running on Amazon S3 or another managed cloud provider.
Normally, the cost of storing the data is cheap, but the retrieval of that same data is the expensive part. Also, the paltry bandwidth you may have to your facility will greatly reduce the availability of your media. In many cases, that’s not a huge deal – after all, this is archival, where immediate availability is the lowest priority…but it is something to provision for if you’re looking at consolidating the tiered storage methodology.

Cloud storage considerations
Next, we have LTO tape. If you’re unfamiliar, check out our last episode on LTO, tons of great info. In a nutshell, each LTO-7 tape can hold to 6TB – and over 2x that if the data is compressed. With read times from the tape approaching 300MB/s, and a shelf life of 15-30 years, LTO is a fantastic option. Single LTO-7 readers are under $5000, and autoloaders, multislot libraries, and robots are great workhorses if you’re serious about having an archive strategy.

LTO storage considerations
Lastly, we have Optical. This is a way of using older Blu-ray disc technology to store data. It’s kinda like that old CD changer you had in your car. It’s a magazine of Blu-ray disks that data can be housed on.

Sony ODA.
Sony, one of the leaders in optical technology, have ODA – Optical Disc Archive. Gen 1 of ODA is shipping with 1.6TB cartridges, and read speeds approaching 140MB/s, with write speeds about half that.

Optical storage considerations.
Gen 2 of ODA, which is due to be released later this year is approaching double of every Gen 1 spec…at about the same price.

ODA Gen 1 vs Gen 2.
The bonus is that Optical solutions are random access –which means you can instantly start pulling the media back once the cartridge is loaded. This is different than LTO tape, where the drive needs to fast forward and rewind to find the data on the tape.

Data retrieval time of LTO vs Optical.
Lastly, as Sony claims, ODA discs last upwards of 50 years, and can actually function after being submerged in salt water for several weeks.

ODA submerged in saltwater.

ODA still works!
4. How do I plan for Archive?
You may think Archive is a set it and forget it scenario. Copy it off, and move on. But oh no, there are things you need to do to ensure that just because you’ve got it, you can actually find it…if you ever need to.
Time isn’t kind to our memories. Out of sight, out of mind. Thus, having a way to catalog the media so you can find you put it is paramount. This can take the form of an archive format-agnostic asset management, or, software specific to the medium you plan to back up to. Meaning, if you use Sony ODA for optical, you use the software that comes with ODA.
I’m a big fan of an agnostic asset management system, not only can it track and reconcile data on any of your Tiers of storage, but it can also automate the writing and retrieval of your archival material. Also, most asset management systems have pretty industry standard databases, so you still have the record of the archival data, even years down the road if any of your tech partners go out of business.
Next, if you’re not using the cloud, where is your media physically being kept? On a shelf next to your TIER II, or housed offsite? Here in California, we never know when the big one will hit, so many folks with ship LTO backups out off state. Flooding and fires also don’t play well with storage. This is where safes become an option, or, again, contemplate moving your stuff offsite.

Burnt.
Now, this can get expensive. This is where you may want to consider charging clients for archival. Offset your cost by making it a service. You can offer backing up not just the final cut and elements, but perhaps all of the originals as well.
5. How much does Archive cost?
Buying your own archive storage is priced differently than a cloud archive model, which is more a rental model or per month cost. So, I’ve averaged prices out over 4 years. After 4 years, 80% of hard drives out in the wild still function, so it’s a good ballpark number to compare from.

Cost comparison of various storage options.
What this doesn’t take into consideration are the costs for the infrastructure to use these storage mediums. LTO drives can be under $5000, while the tapes are under $200. Optical systems are still newer and start around $6500.
And while the initial outlay of thousands of dollars may seem steep, consider the cost of data retrieval from a cloud archive on top of the reoccurring monthly cost of a rental model, which will only rise as you archive more and more data.
Have more archive concerns other than just these 5 questions? Ask me in the Comments section. Also, please subscribe and share this tech goodness with the rest of your techy friends. Archive is a great party starter.
Until the next episode: learn more, do more – thanks for watching.
]]>Let’s face it, asset management isn’t sexy. Very few people work their butts off in the hopes they can, one day, administer asset management. However, the need for asset management is only growing on a daily basis. Truth: we’re not deleting media – we’re only acquiring more of it, and we need to find it and send it to more places.
Wait, I’m getting a little ahead of myself here. What is asset management?
In the media realm, it’s any system you use to tag, catalog, and track your bits and pieces of media and ancillary files. In fact, just using your Mac OS Finder or Windows Explorer is “asset management by OS”. Sure, it’s rudimentary and basic, but it is a way to track and find files.

“Asset Management by OS.”
Specialized software to tag, find, and retrieve files from various storage locations is pretty common at this point. I mean, metadata is indexable and thus searchable. But…what If I were to tell you that GOOD asset management can talk to and work with multiple hardware and software solutions directly? That it can interface with non-media based technology, like business apps? That it can automate routine processes, like transcoding and media movement and outbound delivery? And the really good ones can find data not just by the terms you search for, but can extrapolate results based on context and similar search terms?
…and this is why the sharpie marked hard drives or stack of post-its on your shelf just don’t cut it anymore. And this is also why we have the holy trinity of asset management – DAM, MAM, and PAM.

Yeah, that’s specific.
2. Whats the difference between MAM, DAM, and PAM?
No doubt while looking into asset management you’ve heard these terms. We’re no strangers to acronyms in the Media and Entertainment space. DAM, MAM, and PAM. Ahh yes, the jokes practically write themselves.
A safe bet is to use the term “DAM” – Digital Asset Management. This all-encompassing term covers the subcategories of MAM – Media Asset Management and PAM – Production Asset Management. Please forgive the gross oversimplification, but let’s think of it like a fast food burger joint.
DAM covers every process related to keeping the restaurant running and thriving. But perhaps we can get more granular than that. That’s where MAM and PAM come in. PAM covers the inbound shipments of the food, scheduling of the workers, how the workers interact with customers, and the QC of the service. MAM covers the actual food prep and usage…the nitty-gritty low-level food processes that you normally associate with the heart of a burger joint. However, those lines have now blurred – the same reason you may find a shift manager at the burger joint manning the deep fryer.

The division of labor between MAM and PAM
MAM and PAM extensibility with other applications, commonly via watch folders, XML or even APIs, allow MAM and PAMs to branch out and create a Venn Diagram of ability. Also, from a pure marketing standpoint, no one wants to acronym their way out of a potential deal, so, again, the lines have blurred.
In addition, many MAMs and PAMs are geared for different segments of the industry – or even other industries outside of the Media and Entertainment market. This creates different feature-sets, which blur the distinction between ‘AMs even further. In fact, if we look at one of the more specific DAMs, such as Avid MAM and Avid PAM – they actually flip the usage – PAM is used by the editors for creative purposes, while MAM handles much of the advanced automation and business processes.

Avid Interplay MAM and PAM.
This is why I prefer to stick with the DAM moniker, and only differentiate when we’re talking about specific products that have MAM or PAM in their name (like Avid). However, some tech purists will want use to use MAM if just discussing the media and entertainment market.
Psst, here’s the secret – if you’re not discussing a product with DAM, MAM, or PAM in its name, forget it! The lines have blurred to the point that it’s all asset management and the real challenge is….
3. What options should I be looking for?
Glad you asked.
First and foremost is “how will it make your creative team more efficient?” This will certainly surround the creative tools they use. Thus, if you’re using tools like FCP X, Avid’s solution probably wouldn’t be a great fit. If you have an extensive image library but are looking at an asset management system that doesn’t have a wide range of support for image formats, well, then you should probably look elsewhere. So, choose a tool that works with the creative tools you use.
You should also look into the automation tools. What repeatable tasks consume much of your creative’s time? Is it transcoding? Then look into a solution that can either transcode itself or talk to 3rd party transcoding systems to handoff the task.

Content Agent, by Root 6

Vantage by Telestream
And what about those transfer services like Aspera or Signiant? A DAM that can package, send and track those files would save your team some time.

Aspera Orchestrator
What about archiving and media movement? Automating the writing of media to backup or archival storage and then being able to retrieve it saves a ton of time.
Many of us use disparate tools for review and approve – that is, having members of our team or the end client review cuts and versions. If this is served up in conjunction with your DAM, you can now track changes and notes.

Akomi, by North Shore Automation
Speaking of tracking, what about tying into your billing or accounting systems? If done right, you now have a central location to track time spent on the project AND the media associated with that project.
While this is still a touchy subject, many facilities can benefit from having a cloud-based solution, as the team may be spread out geographically. Can your solution be decentralized? Many solutions still involve an on-prem solution.

“De-centralized”
Here is an often-overlooked one – how is it customized? Can a member of your team learn to program or script for your DAM solution, or, do you need to contract the manufacturer or reseller? Here’s the secret – this is where a lion’s share of your funding and time will go. In-depth and specific automation isn’t quite drag and drop just yet, and the labor costs per hour– plus annual support renewals based on a percentage of the sales price – are often glazed over.
4. How do I plan for Asset Management?
First, realize that a massive subject like asset management needs to start with small decisions. I’ve seen client after client become so overwhelmed with trying to get their arms around the whole thing that they lose sight of the end goal.
First, and I say this with no allegiances; track down a solution provider and integrator. The aforementioned scope of choosing a robust asset management system can be a full-time job. Manufacturers will swear to you their system can do just about everything. The devil is ALWAYS in the details and rarely all shake out in the research stage. Sync up with a solutions integrator as they have experience and know what works in scenarios like yours and what doesn’t, but more importantly, what workflows can and should be augmented to be more efficient and work within the confines of an asset management solution.
OK, that being said, make a list. Pick out 10-15 things the DAM system MUST do. And be detailed. Details like, “It must be able to read an Adobe project file and parse the media within it.” This is much different than a DAM utilizing an Adobe project file, which could simply mean the DAM can track it, not do anything more meaningful with it. Be specific.

Be specific.
This will help eliminate the products out there that are not a good fit. But you need a starting point.
Next, determine a ballpark budget, and remember, this budget needs to cover the DAM software solution including hardware, storage, and custom coding and deployment and support renewals. There is no sense in wasting time looking at solutions that all in will destroy your budget.

Real world example of a DAM solution.
Be forward thinking. Where do you see your business in 5 years or more? The core of your asset management system is your important data and all of the metadata surrounding it. Expand your mind and begin to consider how you can leverage the automation and media in the years to come so you choose a solution that can grow as you grow. A DAM isn’t a solution you can easily replace. Automation gets lost during migration, and data can’t always be translated 100% between systems.
Lastly, poll others in your industry to see what they use – or ask manufacturers for case studies or names and numbers of clients who have deployed that particular solution. Get real-world feedback, not just marketing slicks. I said it before, but it bears repeating – the devil is ALWAYS in the details.
5. How much does Asset Management cost?
There are dozens of solutions out there. Heck, NAB had nearly 40 exhibitors this year that listed Asset Management in their product offerings. Some are monthly, some are bought outright, so this will be broad strokes.
Professional DAMs that have base levels of functionality can be under $1500. Many of these are decent at finding stuff by various bits of metadata and may have some logging built in. Axle is a good one, works in a browser and makes getting started with Asset Management pretty simple, although there is not a ton of extensibility for automation and usage by 3rd parties.

Axle
CatDV by Squarebox is a VERY popular option, it’s desktop solution is great for logging and cataloging. Its larger offerings are extensible enough to handle enterprise deployments – albeit with a healthy amount of scripting. It’s one of the most popular DAMs in the M&E space.

CatDV
When we get into larger solutions that transcend the “find it and present it” methodologies, we usually look at $50K starting, just for the software. You still need a server and scripting work. Common solutions include Levels Beyond, eMAM, Primestream, and Cantemo Portal. These all require some heavy lifting on the labor side to get it working with your particular setup.
Enterprise DAMs can be $150K – up several hundred thousand. Avid Interplay MAM or PAM, and Dalet are popular in this space. Heck, even Adobe has one, although it’s veiled in secrecy for enterprise customers.
I guess this begs the question, “If every MAM can be a PAM and every DAM can be a MAM, can every PAM be a DAM?”
This is the tip of the iceberg. What about cool tech like phonetic or facial recognition inside of DAMs? Maybe we’ll save that for a future episode.
Have more asset management concerns other than just these 5 questions? Ask me in the Comments section. Also, please subscribe and share this tech goodness with the rest of your techie friends….especially at parties.
Until the next episode: learn more, do more – thanks for watching
]]>1. What is VR?

“Whoa, it’s like I’m REALLY on camera talking about stuff!”
I’m pretty sure by the time you clicked play on this video, you already have a pretty good idea as to what VR is, so I’ll make this as quick as possible so we can get into the good tech stuff.
I’m not gonna focus on CGI based VR nor things like panoramic stills or really hardcore things like stereoscopic VR. To keep this episode manageable, we’re gonna stick with mono live action based VR. Wanna get you home in time for supper.
VR, virtual reality, is an immerse visual and audio experience, sometimes consisting of live action and many times being partly computer blended. The viewer – and as of today, the person wearing the headset – is placed within an environment and can interact to some degree with that environment.
There is a fine line between VR and AR – augmented reality. AR, as the name implies, augments our existing environment – Iron Man’s Heads up display or HUD in his helmet is a very basic example of this. Virtual reality transports you somewhere different – even if it’s just your neighbor’s house …when they’re home, of course.
VR can be 360 degrees, or, in some cases can be less than that. – not only does this help the creators focus the story within a certain visual space, but it also helps hide many of the tricks used in production to get the shot.
I won’t bore you with talking about the bajillions of dollars poured into the industry, nor the marketing fluff surrounding VR, and we’ll just get to the tech goodness of the medium.
2. How do I shoot VR?
So ya wanna shoot VR, do ya? Break out that credit card. You’re gonna need a lot of cameras. At least 3-4 if using fisheye lenses, 5 minimum, 6 or more with more standard lenses. These cameras also have to be in a camera rig that positions your camera du jour “just so”, as to allow for the maximum amount of coverage with just enough overlap so you can stitch the angles together in post.
Quite frankly, you can use just about any camera out there, but not all VR rigs fit all cameras. Go Pros and Nikons are common weapons of choice, and higher end folks will use a batch of RED cameras, or the 16 camera rig by Google Jump or the all in one Nokia Ozo. Jaunt also has a fantastic rig, but their tech and workflow are a bit different than what we’ll be covering today – but check them out.

A custom RED VR rig, Google Jump, and Nokio Ozo rigs.
You also need to decide if you’re shooting cylindrical or spherical. Meaning, is most of your action happening in the landscape around you, or, above and below you? If it’s more of a limited field of view, you can forgo the cameras at the sky and floor of your shot, and instead use those cameras to get increased resolution within the landscape of your shot, thus shooting cylindrical. This also gives you a slight advantage if you need to hide the tripod, or lights from above in your shot.

Hiding the camera rig and tripod with user navigational controls.
Otherwise, when you absolutely, positively need to get every single thing in the shot, you go spherical.

Cylindrical vs Spherical.
You’re also gonna need a healthy serving of fast, quality memory cards for your cameras. You can’t afford to save a few bucks on substandard cards and lose data…1 lost shot and the entire sequence is, well,…shot. You’ll also need card readers, camera batteries, and storage space. After all, you’re recording and storing an exponentially larger amount of data.
OK, so you’ve got your rig, you’ve got your cameras, you’ve got your lighting magically hidden so it’s not in the shot, and you’re ready to record. Not so fast there, Lawnmower Man. A few things you need to know.
First, make sure all cameras are recording in the same way. Meaning – same codec, same frame size, and frame rate, same exposure, same white balance, etc. Try and shoot in a flatter look, too – so when you do start color grading, it’ll be easier to balance the cameras in post. Lastly, if you can, jam sync all of the cameras for common time code. Any difference between the cameras, from a visual or metadata standpoint, will not be easily solved in post. Seriously, spend the time and get it right on set.
There are some basic guidelines for shooting. As we’re focusing on tech, I’ll skip the more artistic guidelines.
First: Talent: Don’t get to close to the camera.
Anyone closer than 6 feet to the camera rig can get really distorted. Be careful.

Stitching issues caused by parallax and proximity. (click to enlarge)
Also, the knee-jerk reaction is to try and record your talent in stereo or with surround sound mics. Don’t . Record the talent in mono as you’ve normally done, and manipulate it in post. It also somewhat future proofs you as VR technology begins to more easily incorporate perceptual audio into post workflows and presentation technology.
3. How do I edit VR?
Well, just like, and I can’t believe I’m saying this, regular old 2D Video, the line between production and post has blurred. Post is starting on location, and VR is no exception.
You’ll need to get the data off of the cards, hence the reason I mentioned needing a bunch of card readers. You’ll want to be incredibly organized with your data, including naming conventions, and organizing by card and take, and using software solutions to assist.
Kolor is a very popular option – they specialize in data wrangling for VR and also handle some stitching and other post processes for VR productions.

Autopano Video by Kolor, attempting to auto-stitch VR angles.
Whatever solution you use, make sure the solution has checksumming built in. You can’t afford to have a bad card copy from a Finder or Explorer drag and drop.
You’ll need sizeable, and reliable storage. If multiple editors, look into a robust SAN or NAS solution. You can check out our previous 3 part series on “choosing the right shared storage” to find one that works best for you.
So you’ve got your clips, now you need to sync them and stitch this video together into a flat equirectangular image that you can view on your computer screen….An equirectangular image is commonly used in maps of the Earth, as we’ve tried to represent the spherical earth on a flat map since…well, forever.
Now, creating this equirectangular image is tricky. This is where the aforementioned Kolor comes into play.
Kolor can use timecode and other clues from the files to start attempting to stitch them together. More often than not, you’ll need to tweak the stitching, as we’re not at a point where it can be done 100% successfully in an automated fashion, although the all in one shoot – stitch –upload solution by Jaunt comes pretty close.

All-in-one Jaunt VR solution.
From here, you render out a single video file, and then begin the process of forming a narrative or experience inside your NLE du jour.
For editorial, this will certainly include a hefty amount of time hiding seams or talent crossing the stitch areas, reducing camera jitter, or fixing production issues from on-set by rotoscoping. Its honestly more triage than pure creativity with some of your early projects…as well as learning what kind of pacing, transitions, and text work in VR vs. old HD video.
For creative editorial, more often than not, the picture editing is done in Premiere, using tools like the Skybox solutions from Mettle.

Skybox 360/VR Tools by Mettle, shown inside Adobe Premiere Pro.
I expect Premiere usage for VR to continue given the new VR playback features inside the planned Summer 2016 update to Premiere.

VR features inside the planned Summer 2016 release of Adobe Premiere Pro.
That being said, Tim Dashwood‘s 360/VR plugin is pretty groovy for FCPX.

Dashwood 360/VR Toolbox, shown inside FCP X.
As a general rule, transcoding to a proxy format to make editorial a bit less painful is a good way to go about things. The inflated resolution from all the stitched angles can kill performance on older computers.
4. How do I view VR?
What you’re telling me you want folks to actually consume what you’re serving? You’re so demanding. We have a few ways, and all involve an HMD – or head-mounted display. Let’s start with the most common: Your smartphone.
This is the easiest way to dip your toe in the murky VR waters. Many devices, such as this View-Master here, can accommodate your cell phone – using your mobile device as the VR video player. Google Cardboard is a very popular sub $20 solution to get you started, and with a quick Amazon search, you’ll find you a ton of other very similar alternatives.
One of the major drawbacks with using smartphones for VR is effective resolution, the visual quality is severely lowered when the phone is pushed up against your face.

“Screen Door Effect” due to proximity to the viewing device. Via vrvisiongroup.com
You can actually see the pixels on the screen – and this negates some of the realism promised to us by VR advocates. There is little doubt, however, that this issue will decrease as mobile screen technology improves.
If you wanna step up in the world, we can move to a more robust solution… That is one that is powered by a workstation. Tethered devices, like Oculus Rift, and the Sony Morpheus, rely on the horsepower that a larger computer can deliver. Of course, these HMD units are several hundred dollars and still require the computer to power them. Most likely, we’ll see this methodology find itself useful in the gaming market where you already have the console to power the headset.
Lastly, we have YouTube 360 – which, as the name implies, is YouTube but with 360 videos. You can play these on whatever device supports YouTube and 360 Videos– your mobile device or console. The YouTube 360 channel has close to 1.2 million subscribers, so the interest is definitely there.
5. What’s the future?
Ahhh yes, the question everyone has been asking. So, here’s my 2 cents.
We’ve been looking for more immersive video since the first flickering images appeared on the first makeshift CRT. Color was more real than black and white, and HD was more real than SD. VR is simply another step in that immersion evolution. Where I believe VR may be able to capitalize on this, is that not only is it more visually immerse, but unlike the linear 3D it’s commonly compared to, VR is emerging as an individual interactive experience, an almost choose-your-own-adventure in some respects. This is the kind of immersion people are looking for.
Certainly, non linear applications, like Gaming, Tourism, Health Care, Education, Marketing, and the Adult industry are easy fits, and these industries collectively earn way more money that the film and TV industry ever will. But will audiences wildly adopt headsets or tethered systems by eventually paying for it in theaters, and paying for them for their home TVs? And will the consumer demand force the hand of the studio system to mass-produce cinematic VR content to supply the consumers? I’m not sold….but it’s pretty cool anyway, huh?
Have more VR concerns other than just these 5 questions? Ask me in the Comments section. Also, please subscribe and share this tech goodness with the rest of your techie friends.
Until the next episode: learn more, do more – thanks for watching.
]]>1. What is LTO?
For a Limited Time Only
You have a License To Operate…
Lettuce, Tomato, and Onion.
No, tech friends, it’s yet another F*CKING storage medium, because, you know, spinning disk, solid-state, optical drives, and the cloud just didn’t keep us busy enough. It’s magnetic tape, and it’s the least sexy sibling in the storage family (and yes… there are sexy storage family members.)
It’s been around since the late 90’s. Linear Tape Open was initially used to backup Excel docs and your credit card numbers in data-centric business centers.

We promise.
It’s only been over the past 8 or 9 years or so that the capacity, speed, and file accessibility has allowed LTO to be used in the realm most of us are familiar with…that is, with rich media.
Initially, folks used proprietary and expensive software to write data onto an LTO tape in a TAR format. The TAR format is a way of wrapping many files together – much like a ZIP file, only TAR retains user and file permissions. While TAR was great at wadding all your files up for retrieval at a later date, it could be quite a pain to retrieve any 1 file – often times the entire TAR file had to be scanned – or in some cases, the entire TAR had to be restored and all of the data extracted – for your one single file.
And so it was, in the year of our Lord 2010, LTFS was brought to the tape masses. LTFS, or Linear Tape File System – enabled LTO tape drives to be seen and somewhat utilized at the OS level, kinda like a USB or thumb drive would appear on your system…with some caveats. As LTFS emerged on the scene as a way to bypass many of the hurdles of tape usage, it was the capacity and speed of the LTFS format that made the format very attractive. GB and TB of data could fit in your hand, could run at speeds far surpassing Firewire 800, and it cost 6x less than the cheapest hard drives out there.
Today, we have LTO-7; clocking in at 6TB per tape and reaching speeds of up to 300MB/s.

LTO Development Timeline
2. Why should I care?
As is with most tech things nowadays, the price is the overriding factor. LTO-7 is cheaper than the cloud, as well as even the cheapest bargain bin hard drives.
It’s difficult to compare cloud storage, which is based a rental model, vs buying drives outright, which is a 1-time cost. So, I’ve averaged prices out over 4 years. After 4 years, 80% of hard drives out in the wild still function, so it’s a good ballpark number to compare from.

Comparing cost of storage mediums over 4 years.
Another key statistic not represented is that data on an LTO tape can be compressed, thereby gaining 2 or more times the storage capacity on the same LTO tape.
When we also look at read and write times, LTO-7 has a theoretical max speed of 300MB/s. This is much faster than USB 2.0 and any flavor of Firewire, as well as almost 3x faster than standard office ethernet connections. I’ll admit, even though it’s twice as fast as the last generation of LTO-6, it’s becoming less impressive, with newer computers coming stock with USB 3.0, eSATA and Thunderbolt ports…but it still smokes your few MegaBytes a second up to the cloud.

Comparing the throughput of LTO-7 vs common connection methods.
Now, I’m sure all of us have had the unfortunate experience to lose a beloved hard drive. Either due to age, or knocking a can of cherry coke onto the drive. (true story) Hard drives are volatile punk bastards and often leave this mortal coil way too soon.

Whoops.
While the cloud is undeniably the most reliable and immune to random bouts of Cherry Coke, the aforementioned upload and download speed to the cloud severely impacts the usefulness of the medium. You also get dinged a bit more on retrieval of that cloud-stored media, which could seriously hose your budget. LTO tape, on the other hand, takes a licking and keeps on ticking.
LTO is rated for 15-30 years of shelf life – which makes it an ideal candidate for secure, long-term backup and archival. Plus, many insurance companies often will lower insurance rates for on-location work if the media from the shoot is retained on LTO tape. As a bonus, many studios and networks often have a deliverables list with LTO tapes listed as a mandatory format.
3. What are the downsides of LTO?
As I hinted to a few minutes ago, the read and write speeds are no longer as attractive as they were even a few years ago. While they’re good, they’re not as fast as a newer Thunderbolt or SAS RAID. The upside is that every 2-3 years, a new version of LTO comes out, and speed usually increases dramatically from version to version.
LTO specs, as developed by the LTO Consortium – detail the roadmap and specifications that all magnetic data tape manufacturers adhere to. Part of these specs outline that each LTO drive must be able to read tapes that are 2 generations older. This means that an LTO7 drive purchased today (finger) can read media from an LTO 5 tape from 2010.

LTO specifications allow for backwards compatibility of 2 LTO generations.
While as a user you can certainly hang onto that LTO-7 drive so in 10 years you can pull that old media back, most users will want to migrate the data to a newer tape format for the increased data capacity and compatibility. This can be challenging with new versions to the LTO format every 2-3 years. So, do you migrate, or like that old Floppy, Zip or JAZ drive you may have, do you just hang on to the reader?

Each generation of LTO tape can hold ~2x that of the previous generation (uncompressed).
Back to LTFS: using LTFS to make tape usage easier is not 100% foolproof. While drivers to use LTFS are free to download, some OSes have a helluva time reliably reading and writing directly to tape. Thus, we require middleware – custom software – to bridge the gap from OS to tape. Often, these pieces of software have a price tag, from a few hundred to a few thousand dollars or more.
In addition, the hardware – a single tape drive, will also be over $2000 at the bare minimum.
4. What tech do I need to use LTO?
Utilizing LTO requires 3 things, as much as I wish it was 5. An LTO drive, software to read from and write to the drive, and blank media. These can either be purchased individually or in the case of some turnkey systems, as a bundle.
These single drives typically connect via SAS, which means you’ll need a SAS card inside your computer – yet another cost.

SAS HBA (Host Bus Adapter), SAS Cable, and a SAS LTO drive.
However, companies like mLogic make drives like mTape– which is one of the first Thunderbolt LTO drives. It’s an IBM drive inside but connects via a Thunderbolt cable.
Keep in mind, these are single drives. When we get into large volume scenarios, we then have the option of multislot libraries, capable of automatically rotating tapes with less manual intervention.
We now need the glue which ties all of this together…the software.
Backing up something is useless if you can’t find it later. The software that bridges the gap between your brain and the data you want to find is the most important choice in your LTO strategy. For example, basic software solutions, such as PreRollPost by Imagine Products offers the inherent ability to write and retrieve media to and from LTO, but it also adds several fields – tags – which allow you to further associate your raw data with searchable terms.

PreRoll Post
On the more robust side, we have solutions such as DNA Evolution by StorageDNA. While you can also write, and retrieve data and add tags, DNA Evolution also works with many NLEs to automate project and media archival, handle offline and online workflows with LTO, as well as interact with asset management.

StorageDNA’s DNA Evolution conforming (offline to online) from an Avid generated cut list (ALE).
In heavy media-centric environments, the ability to find data by how the media was used, and not just by the basic attributes of the raw file can drastically reduce search time. When you have hundreds of TB or even PB, it’s cheaper than enterprise spinning disk, and almost as easily accessible.
Many solutions, including DNA Evolution, also come as an all-in-one solution – the drive as well as the software. One throat to choke as we say.
5. How much does LTO cost?
Single HP, Quantum, and IBM LTO drives traditionally run around $3000 or so. I’ve found some as low as $2000, but these are usually no-name brands that make my Spidey Sense tingle.

My Spidey Sense is tingling.
Software to make them go can start as low as $500, as is the case with software like PreRollPost. On the more professional side, the software can go for $10,000 or more depending on the functionality of the software, and how it plays in your entire infrastructure and your workflows.
Turnkey solutions, such as DNA Evolution start around $8000 and scale from there, dependent on the hardware and software options. More often than not, the choice of what system to go with hinges on the pay now, or pay later philosophy. Do you want to pay less, and spend more time manually moving and tracking media and sifting through the data to find what you want? Or front load with more sophisticated software to reduce the labor involved later?
Have more LTO concerns other than just these 5 questions? Ask me in the Comments section or continue to stalk me online. Also, please subscribe and share this tech goodness with the rest of your tech friends.
Until the next episode: learn more, do more – thanks for watching.
]]>I love me some acronyms and today is no different. While yes, it does stand for High Dynamic Range, it takes on different meanings depending on where you lie in in the production process. If during acquisition, it’s more appropriately called HDRi or High Dynamic Range imaging. If it’s used to talk about monitoring, then we call it HDR….and that’s what I’ll be using through the rest of this episode.
Regardless of acronym semantics, at both points, you’re dealing with a wider range of luminance and color tone than what you’ve traditionally dealt with – and the challenge is handling HDR with as much color and detail as possible as it makes it way through production and post.

The immediate rub is that most cameras can’t capture, and most monitors can’t display this wide “spectrum” of visual depth.
Well, why is that you ask? See, human eyes can perceive about 20 stops of dynamic range, and possess the ability to see about 9 stops of this at any one time. Think of looking into the shadows of your bedroom – you can focus on the shadows and begin to see more detail within those shadows as your eyes adjust.
Most consumer cameras can’t capture this wide array of 20 stops and usually expose right in the middle. This often means you’ll lose a ton of visual detail in your shadows and bright spots during both acquisition and exhibition.
As is with most things digital, there is a compromise between what we want, and what we get, and thus you need to compromise on your shot.
So, in concept, HDR is fantastic. More visual data for a more immersive experience. More better pixels – not just more of them.
We’ve been robbed for years, and I think it’s high time we took back what we’ve been denied. Now, how do we go about that?
2. How do I shoot HDR?
The short answer is that you’re most likely gonna need a new camera. I know, you’re still making payments on that Betacam, but older sensors just can’t capture the rich goodness HDR allows for. Some popular, newer cameras, like the C300, Alexa, Amira, Sony F 3/5/7/55/65, red epic, dragon, BMD cc, etc… All good enough.
Now, normally this is accomplished by shooting in formats that support the amount of dynamic range HDR plays with – such as Log-C, as well as the CODEC the footage is recorded in. And while, yes, it’s technically possible to shoot HDR in rec. 709, you’re best shooting in a format that has a greater dynamic range.
This amount of “greater dynamic range”, however – is still in flux. Standards, people standards. Many cameras tout “high dynamic range”, but the label “high” is somewhat arbitrary, and very much based on other factors, not all of which the camera controls.
Sony, RED, and ARRI have really been leading the higher dynamic range charge. Some HDR features are now trickling down into prosumer cameras as well. However, due to the lack of standardization, the ability for consistent image manipulation can vary. Not only does their dynamic range capture ability vary, but they shoot with different looks to retain the data that was acquired, which means accurately taking what was captured in the field and working with it in post can vary from camera to camera.
3. How do I edit HDR?
Now you’ve got it, how do you work with it?
As we are still in HDRs commercialization infancy, robust HDR support is not quite as robust as we’d like. However, Adobe did introduce their first iteration of HDR support inside Premiere’s Lumetri panel last September, which includes HDR capable scopes, and support for several of the standards for HDR data retainment.

FCP X, v 10.2, doesn’t currently have support for HDR. Although, FCP X has 3rd party workflows from Magic Lantern and Alex4D, among others.

Avid Media Composer, as v8.5 supports HDR spaces. When a user selects a new project, Dolby Vision, Sony S-Log3, BBC/NHK and ACES profiles are available. Color transformations are handled automatically once an HDR color space is selected.

It’s still a good practice to follow a more traditional offline/online model, bypassing the need for HDR during editorial. This allows you to really exploit your HDR content during the color phase, using tools as Resolve 12.2, which does have HDR support.

Many folks are shooting HDR in addition to a larger UHD or higher frame size, making the processing requirements for your editing system even greater – so an offline/online workflow works on multiple levels.
HDR support is still the wild, wild west, and NLEs are no exception. For now, we simply have to wait for a bit more updates and standardization.
Other techniques to give the faux HDR look involve locking off a video camera, and recording at different exposure levels, and layering them in post. There are also plugins and filters to approximate the HDR look. When looking into plugins, keep in mind, you need to SHOOT in an HDR format to get true HDR – some plugins or filters just fake it. But of course, how can you TELL it’s being faked without a monitor to view it on? Good Question.
4. How do I watch HDR?
What good is HDR if we can’t see it?
Just like 4K, 3D, HD, and even color video, what good is this new format if you can’t consume it?
Sadly, unless you buy a new monitor – you’re not going to see the massive benefit of your HDR. While, yes, HDR gives the creative latitude in post to craft more pretty pictures (just like 4K and re-centering does for an HD release), the full extent of that HDR work won’t be noticeable without an HDR capable monitor.

As I mentioned earlier, Luminance is one of the largest differentiators between HDR and non-HDR content. With monitors, we refer to this luminance measurement in terms of “nits”. A single nit is about equal in brightness to a candle. Traditional television monitors can display up to several hundred nits but isn’t helped by the fact that the traditional HD color space – Rec. 709 – can only handle around 100 or so nits. To really consume HDR content, you’ll need several times that.

Remember the standardization issues I mentioned earlier? Yeah, they continue into exhibition as well. Dolby Vision, Philips, Technicolor, BBC – among others – are developing their own presentation technologies – making the nit standard for HDR consumption to vary, from 400-800 nits, up to the reported theoretical max of 10,000 nits that Dolby Monitors can handle. Which, quite frankly, will blind you. We did see several TVs this year at CES capable of around a 1000 nits, so the future is NOW.
And while the current standards purport to take nit variations into consideration, it still means different viewing experiences on different technologies.
Lastly, just like 4K, no traditional broadcasters in the US are pumping out HDR on cable television. However, some VOD outlets are currently in the first stages of HDR distribution. This year will be huge for HDR, and I’m sure we’ll see many changes and more titles added to VOD outlets.
5. What is the future of HDR?
Fortunately, we’re already on our way there. As mentioned, cameras are beginning to be widely available with an increased amount of dynamic range and NLEs are beginning to handle this range. Most new televisions coming out this year support some form of HDR, and the nit count for viewing monitors is only growing, albeit incrementally.
However, just like acquiring UHD or larger is still used for folks who are ultimately watching SD and HD– HDR still adds another tool to your creative toolbox to enhance your storytelling ability.
The good thing for you is that the ability to deal with HDR in post – both from an editing, grading, and workflow standpoint will certainly require someone with your skills, so you best get learning.
I want to thank the otherworldly Juan Salvo at the Colour Space in New York for the metric ton of color knowledge he shared with me for this week’s episode. Mind that extra “u” in ColourSpace kids…it stands for…Juan.
Have more HDR concerns other than just these 5 questions? Ask me in the Comments section or stalk me online. Also, please subscribe and share this tech goodness with the rest of your techy friends….especially at parties.
Until the next episode: learn more, do more – thanks for watching.
]]>
This 3 part series consists of:
Part 1: SANs, NASes, Bandwidth, and Connections.
Part 2: Drives: Size, Spindles & Protection (RAID)
Part 3: Management, Permissions & Support
On this episode, we’ll be wrapping up our exciting storage adventure with part 3 in this 3 part series, and examining Storage, with Management, Permissions, and Support. We’ll be holding off on ODA, LTO and Cloud storage for a future episode.If you’ve missed part 1 or Part 2 of 5 THINGS on storage, I highly suggest you go back and get your tech on…lots of good stuff.
Let’s get started. Wadsworth Constant be damned.
1. Why do permissions matter?
Permissions are the fundamental building blocks of using shared storage. It’s the reason you can read from a SAN or NAS, and it’s the reason you can write to a SAN or NAS. With improper permissions, your access may be restricted, you may corrupt your own media, or your NLE will simply refuse to use the storage. We can classify permissions into one of two categories: File-level locking, or Volume (also known as Block level) locking. Each has their place, and each has their own considerations. Let’s look at these.
First, we have Volume, or Block level, locking. This is the fastest way of sharing storage, and the least expensive. Volume level allows multiple users to mount the drive or volume and READ from it, but only ONE user can write to it. This is great for NLEs that don’t support concurrent editors opening and using the same project at the same time. (we’ll get more into that in question 2). It also forces some manual file management and organization. Honestly, I like this method – It gives you the most throughput and it causes editors to think about file management and make conscious decisions of media usage as opposed to one big bit bucket to dump footage into.
Once we move into file locking, the price goes up, and so does the file count, usually. File level is what we commonly refer to as one big bit bucket. Every user, if given permission can read and write to the same volume. While this is the easiest in terms of access, it becomes very unwieldy when it comes to media management. No one wants to delete media because someone else may be using it. Performance is also decreased because of the extra layer of checking that goes on during usage. The plus side is that this is the basis for all shared projects – such as Avid or Adobe Anywhere.
Now, while File Level locking is the underlying technology behind shared projects when projects are shared via a NAS protocol, no management is responsible for taking on different users using the same project and media at the same time. This leads to corrupt files and projects. Don’t assume file level locking allows for shared projects. Don’t try it.
2. How do I share my projects and media?
Currently, and I stress currently, one1 out of the big 3, support this out of the box. Avid has supported this for almost 15 years. This is one the reasons it’s the de facto standard here in Hollywood for feature films and television. When using Avid shared storage – ISIS – multiple concurrent editors can open the same project at the same time. The only restriction is what is called bin locking. Everyone can read the bins, but only one can write to it. Thus, only one user can be editing a timeline at any one time. This aside, shared projects allows almost simultaneous sharing of cuts and media. If ISIS is out of your price range, several other manufacturers have spoofed the AVFS – the Avid Video File System.
Premiere supports shared projects (although, when this feature is introduced, it becomes a “Production”), however, this is dependent on shared storage as well as using the Adobe Anywhere solution – which I outlined in Episode 1 of 5 THINGS. Anywhere allows the sharing and receiving of changes to a production by several concurrent users. As of December 2014, this is ONLY available with an Anywhere solution.
FCP X, like FCP 7 before it, does not support multiple concurrent editors opening the same project at the same time and making changes to it. Final Cut Server followed a check in, check out methodology for FCP 7, however, Apple canned that product, so it didn’t get much screen time.
3. What management features should I be looking for?
Glad you asked.
Obviously adding and removing users from utilizing the volumes is necessary to prevent misuse or the accidental deleting or moving of files. This includes granting or restricting use of volumes to users.
Checking the status of the drives: including free space and health is paramount.
Another great feature is the ability to grow and shrink volumes. Let’s say you allocate 5 TB each for your editors. One Editor never uses up more than 2TB. But another editor is always running close to 5TB. Perhaps you want to re-allocate some space to the second editor. Some shared storage solutions would require you to move all of the data off of Editor 1’s volume, delete it, create a new, smaller volume, then copy it back. This is a major pain. More robust shared storage solutions allow for the ability to dynamically increase the size of the volume….or, if the solution is really good, shrink it as well.
As we discussed in Episode 2 on shared storage, RAID protection is of paramount importance. Perhaps you want to have an added layer of redundancy for your projects – to be more protected in a catastrophe – let’s say, RAID 1 – for your projects. However, your raw media is backed up elsewhere, so you would not be dead in the water if the media was lost. In that case, the media may be a RAID 5 – or even RAID 0. This can help free up more space.
Throttling is also a great feature to have. Perhaps you only want to allow offline editors a fraction of speed, but your online editors need more bandwidth to accommodate higher video bitrates and track counts. Being able to set these on a per-user basis, as well as monitor performance in real time – is a fantastic feature.
Other beneficial features may include interoperability with backup, archive, or TIER II storage solutions, migration tools to move to larger storage, diagnostic or testing tools to verify speed and connection integrity, or deployment tools to aid in the connection of new clients, including drivers, client software, etc. Also, the ability to run other apps on the computer running the storage, sure as a render or transcode volume, or asset management software.
4. What kind of support do I need?
Many shared storage companies have a spares kit – which may include a spare Hard drive and caddy and may even include a spare power supply. I highly recommend getting this with any solution. It seems to be Murphys Law during crunch time, and how long can you afford to be down? As we’ve discussed in previous episodes, professional shared storage solutions don’t use off the shelf hard drives – so running to the local electronics store to get one isn’t an option.
Many shared storage integrators may have their own support plans – including a technician on call to remote into the system and troubleshoot…or perhaps a spare unit or replacement parts on hand if needed.
Lastly, our shared storage has a ton of moving parts. A higher probability of something going wrong. Many users have Tier II storage in conjunction with their fast, edit storage. This ensures that if your media is backed up to the TIER II storage, you won’t be dead in the water if your edit storage goes down.
5. What shared storage solutions do you recommend?
Yes, the question I get asked the most frequently. Here are my top 3 solutions.
As I’ve said many times before, I prefer the one throat to choke philosophy. If you’re in an Avid environment, go with an ISIS. The management tools are deeper than any other editorial shared storage solution out there. The deployment tools are built in and accessible via a web browser. It’s one of the most stable storage solutions I’ve ever worked with.
Avid ISIS 5500 Primary Engine — 32TB System with System Director Function. Includes 1 Year ExpertPlus w/ hardware Support: $38,000
If you’re in a mixed environment or looking to save a few bucks, I’m a big fan of Facilis. The Avid project sharing was ironed out a few years ago, and the throughput, when used as a SAN, is better than most solutions out there. You can also choose to work with Ethernet or Fibre connected clients. In addition, the management is dead simple.
Facilis Terrablock 24EX/16 – 32TB (16x2TB): $22990
A newcomer is Platform by ProMax. In a relatively short time, they’ve developed a very solid product at a very attractive price point. They’ve also done something not many other solutions do: they utilize the horsepower on the shared storage server that is not being used for file management, and offload processes to them, such as Asset Management, or cross platform After Effects rendering. The price point, as mentioned, is also very attractive.
ProMAX Platform Studio [X] T1-8 $6995
ProMAX Platform Studio Module SHARE 32TB $6995
ProMAX Platform 4 Port 1GbE Expansion Card $695
(Platform systems are a la carte, so this price can scale)
Did I miss anything about Management, Permissions, and Support? Or anything in this 3 part series? Let me know in the comments, via Twitter, or on Facebook, and please, share this series with your friends. I plan to be back after the holidays with new Episodes of 5 THINGS.
As always, thanks for watching.
Have you checked out the 2 prior episodes on shared storage? You should!
This 3 part series consists of:
Part 1: SANs, NASes, Bandwidth, and Connections.
Part 2: Drives: Size, Spindles & Protection (RAID)
Part 3: Management, Permissions & Support
]]>This 3 part series consists of:
Part 1: SANs, NASes, Bandwidth, and Connections.
Part 2: Drives: Size, Spindles & Protection (RAID)
Part 3: Management, Permissions & Support
On this episode, we’ll be continuing with on our exciting storage adventure, and examining Drives: Size, Spindles & Protection (RAID), in part 2 of our 3 part series. We’ll be holding off on ODA, LTO and Cloud storage for a future episode.If you’ve missed part 1 of 5 THINGS on storage, I highly suggest you go back and get your tech on.
1. What do I need to know about drives?
At any trade show and any electronics store, you’re going to drowned in a sea of storage options. Each of these solutions (and I use the term solution lightly), at their core, rely on the ability of a storage medium to receive, save, and deliver data as fast and as reliably as possible. But what separates the bargain bin drives from the enterprise ones? Let’s take a look at some of the factors.
Size
The bigger the better, folks. More storage equals more space for your important media. 2, 3, and 4 TB drives are pretty common nowadays. What you need be aware of is that a larger capacity does not necessarily mean faster storage. Four 1 TB drives striped together can deliver more throughput than a single 4TB drive. Don’t let the size fool you.
I/O
Each drive I/O interface has its own quirks and own thresholds, but for our discussion, it’s main limiting factor is how much data the connection allows to flow through it at any one time. SATA or SAS are the most common interface nowadays for single drives or small arrays. These interface types typically allow for more throughput than most any single drive could ever deliver. Thus, a SAS or SATA connection is rarely your bottleneck, until you get into many “striped” drives (an array). Once you get into this realm, we move to other, more robust I/O interface solutions. However, as we discussed in Part 1, a fatter pipeline to and from the array may NOT be what you need.
RPMs
Aside from capacity, The most common analytic is RPMs, or the rotational speed of the platters inside the hard drive. The faster the RPMs, the better. Commonly, speeds of 5400 RPM, 7200RPM, 10,000 RPM and 15,000 RPM are the numbers you’re most likely to come across. 5400 RPMs are never recommended for media usage, the speed just isn’t there for a pleasurable editing experience. 7200RPM is the generally accepted baseline for media usage.
Disk Buffer / Disk Cache
Next, we have the Disk Buffer – also known as the Disk Cache or Cache Buffer.
This is where data is stored on the drive temporarily before it’s read from or written to the spinning platters. This allows time for the disk to “catch up” if the requests for reading and writing cannot be met immediately, or if the data is being frequently accessed. However, it mainly makes the reading to and writing from a drive more efficient, organize, and causes less wear and tear on the spinning platters. Bigger is usually better.
MTBF (Mean Time Between Failure)
Lastly, we have MTBF (Mean Time Between Failure). This is muy importante. The lower the MTBF, the less robust the drive is, compared to others with “enterprise” branding. This means the drive may fail earlier in its lifetime of expected use, compared to an enterprise-class drive with a higher MTBF. This also comes at a price premium – better parts, higher tolerance, and more strict QC. If you want the steak, you gotta pay for it, lest you get ground chuck.
Now, those of you who are using Solid State Drives, or as is the case with the new Mac Pro -Flash Memory, many of the terms we’ve discussed are not applicable. However, spinning discs are still the overwhelming option for additional storage, due to its large capacity and lower price point. We’ll dive into SSDs on a future episode.
Many of these terms can be confusing, and many manufacturers have given various grades of drives consumer-friendly names to more easily get you the drive you need. Let’s examine one such naming schema, those used by Western Digital.
Western Digital uses colors to signify what drives are best used for each scenario.

Black drives are enterprise-class, are usually the fastest, and have the lowest MTBF. They can operate in warmer temperatures (drive arrays can get toasty) and due to these extras, are the most expensive in the bunch. While I use Western Digital as an example, drives with specs which are similar to WD’s Black classification are what you WANT in a mass storage solution. These are not your father’s hard drives, are typically NOT the ones you see in the weekly electronics flyer. You need to seek them out. These are excellent as single drives and also work well in a striped environment.
2. How do I house my drives?
Now, we need a chassis to house the drives. There is a sea of options out there. However, when you buy a shared storage SOLUTION, the solution provider (manufacturer or vendor) has already factored in all of these drive variables and incorporated these factors into building or tweaking a drive chassis in order to create a turnkey package *just* for you. More generic chassis that come without drives are somewhat less optimized, as to minimize compatibility issues. Normally, creating your own JBOD (Just a Bunch Of Drives) involves using these universal chassis, and is typically not the first choice in a demanding, production atmosphere.
These solutions, if done right, rely on a battle-tested combination of hardware components. Off the shelf components, put together because the cables fit, will never deliver the performance a tuned system can. If possible, avoid product scattershot.
3. What is a RAID and why should I care?
RAID, RAID, RAID. Oh, how you complicate thee.
A RAID is a Redundant Array of Independent (sometimes inexpensive) Disks. It’s a way of combining multiple physical drives to appear as 1 volume to your computer. More disc spindles RAIDed together equates to more options for performance, throughput, and data redundancy.
Take this scenario: suppose a drive fails (MTBF) once in 1 million operations. We don’t know *when* it will happen, we just know it probably will – and before 1 million total operations. Where this happens is up to chance, environment, and usage. Now, let’s say we RAID two drives together as one because that would yield twice as much space and speed. This obviously increases the risk of MTBF. Plus, if ONE (yes, ONE) drive starts to smoke – you’ve lost all of your data because you spanned the disks together. You can’t edit with half of every bit and byte gone. Given this truth, now multiply this by 4 drives. Howabout 16 drives or more? Russian Roulette, geek-style. Combining drives in this manner is known as RAID 0. This RAID level delivers the largest amount of throughput and capacity, but absolutely no support for preserving data if one drive dies. This absolutely bites when it comes to DATA AVAILABILITY.
The loss of one drive in a RAID 0 array could be a massive problem for the video editor (you just lost the entire movie, no problem… right?!?).
Since this is not acceptable in most circumstances, other RAID data-protection and performance formats have been developed that ensure there is some REDUNDANT distribution of data across multiple disks. While there are as many as the day is long, let’s examine those you will probably find out in the wild when dealing with video shared storage solutions:
RAID 1
If RAID 0 doubles your storage, then conversely, RAID 1 cuts the cumulative size in half. Why? RAID 1 (AKA “mirroring”) ensures that in the event of the rapture and half of all of the drives in your array blow chunks, that you don’t lose any of your data because a 1:1 copy of the data has been made on that extra storage. This can cause a slight hit in throughput (after all, your data is being written twice), and as outlined, a massive hit in storage space. Those of you who have used Avid’s Unity (not ISIS) have used RAID 0 or RAID 1 for years – it’s all Unity supported. Most other shared storage solutions also offer RAID 0 or RAID 1 as well.
RAID 2, 3, & 4
Outdated, or yielded unnecessary by RAID 5. Move along. BTW, whatever happened to Leonard Parts 1-5?
RAID 5
Probably the most popular RAIDset out there. It balances throughput and redundancy, with minimal overhead. This achieved through parity. What is parity you ask? When data is written, parity data is introduced and written with your video data across the drives. In the event a drive fails, this parity data is combined with existing media to recreate the lost media. As one can imagine, this decreases performance slightly: not only while the initial parity data is created and written, but if a drive dies, the array needs to recreate the media for usage in real time. All this being said, RAID 5 allows the speed benefit afforded by multiple drives acting as one, along with good redundancy. As a bonus, if a drive dies, most shared storage chassis can rebuild the lost media once a correct drive is inserted into the chassis to replace the dead drive – restoring your array to its former glory. Just give it until tomorrow, it usually takes a bit of time and you will see a modest performance hit during the rebuild process. But hey, it’s not gone!
RAID 6
Very similar to RAID 5, although the user has one more guard at the gate: 2 drives worth of parity are written, instead of 1. If a drive does die, there remains 1 drive still spinning and keeping the array functional. Same basic performance and storage hits as RAID 5. RAID 6 is slightly less common when seeking out Video RAIDs.
I usually ballpark a 12-20% hit on storage space AND throughput for your shared storage solution to handle a RAID5. This varies by manufacturer, but the 12-20% plays heavily into my storage formula at the end of this article.
I know; no one wants to lose space, but it’s better than losing half of your space with RAID1 or having no redundancy, a la RAID 0.
Other less popular RAID formats include RAID 0+1, RAID1+0 (AKA RAID 10), RAID 0+3, RAID 3+0, etc. Consult your local storage geek if you *really* want to delve into these.
It should be noted that a RAIDSET can be created at either the hardware level or at the software level. In Windows or on OS X, for example, you can RAID drives (usually RAID 0 or 1, rarely RAID 5) from within the OS. This is a software RAID, and while it works, it’s usually not as fast or bullet-proof as a hardware RAID 0 or 1, which (if available) is done on the chassis which contains your drives or the host card in your computer. Most hardware RAID controllers are designed specifically for RAID 1, 5 and 6. Hardware RAID is faster than software RAID for managing the layout of data and parity bits.
4. How much storage do I need?
Now for my patent pending formula.
Let’s take a 1 TB drive. Small, and easy on my math-challenged brain.
As you probably know, marketing 1TB does not equate to 1TB usable storage. This hard drive loss is due to base 2 math rather than base 8. Thus, when you begin to multiply bits, bytes, kilobytes, megabytes, gigabytes, etc…you end up with less than 1TB. And of course, marketing wins: 1TB is easier to sell than 930GB. So, we’re saddled with a 7% loss. Keep that number written down.
We now need to initialize the drives and format them into a RAID. Let’s say we go with RAID 5. The best balance of speed and redundancy. RAID 5 in hardware can be between 12-20% in loss of space due to the aforementioned redundancy. Again, this is different for each manufacturer, so no need for the math hate mail. Let’s use 15%, and subtract that from 930GB. This comes out to approx. 790GB. So, now we’re down 210GB from the advertised size.
As I mentioned earlier, performance (throughput, in this case) can decrease as the drive fills up, if the data is written sequentially on the disc(s). Some shared storage manufacturers (Facilis comes to mind) scatter the data across the drives, so a user never sees a performance hit; as performance is equal regardless of the amount of free space. That’s in the minority, so the magic number before a noticeable loss in throughput seems to be around 80%. Thus, we subtract another 20% from the 790GB. This comes out to 632GB.
That’s right. Of that shiny new 1TB drive, once introduced into a RAID 5 RAIDSET, and given some room for performance, we have nearly a 40% space loss.
5. What solutions do you recommend?
I should preface this again with the disclaimer that these storage solutions are uninfluenced decisions based on my experience.
As I mentioned earlier, I prefer the one-throat-to-choke philosophy when choosing solutions, especially storage. Thus, on a desktop level, I am a fan of G-Tech and Sonnet, with CalDigit as a distant 3rd. All are relatively inexpensive, have decent support, are readily available.
I’m often asked about Drobo, Synology, Qnap and other, more generic storage. I like these solutions when ease of use is paramount, you’re looking for storage that can be used in many different scenarios, and when you can tolerate less than optimal performance. These solutions tend to sacrifice peak performance and Quality of Service for ease of use and trying to work in every use case, not just the media space. They typically don’t have management software to handle multiple editors using the same media at the same time, which can cause havoc when projects and media are being used by multiple editors. That being said, I’ve had a Synology unit at home or several years, and use it on a daily basis as a home media server, and as a repository for high res media files when I’m onlining.
Once we get into the more enterprise storage solutions, the playing field fills up quickly. To complicate things further, many of the factors in choosing these storage solutions rely on the software or sharing ability on top of the drives we’ve just spent time discussing…..so, we’ll save that for the next episode.
Did I miss anything about Size, Spindles & Protection? Have another Red ale to recommend? Let me know in the comments, via Twitter, or on Facebook, and please, share this series with your friends. Stay tuned for Part 3: Management, Permissions & Support. Same bat time, same bat channel.
As always, thanks for watching.
Have you checked out the prior episode on shared storage? You should!
This 3 part series consists of:
Part 1: SANs, NASes, Bandwidth, and Connections.
Part 2: Drives: Size, Spindles & Protection (RAID)
Part 3: Management, Permissions & Support
]]>This 3 part series consists of:
Part 1: SANs, NASes, Bandwidth, and Connections.
Part 2: Drives: Size, Spindles & Protection (RAID)
Part 3: Management, Permissions & Support
What we won’t be covering is cloud, LTO or ODA storage. Simply spinning disk. However, I may cover these in a future episode. Let’s stick with local and shared storage for now. Now, some of you may know my affinity for good scotch and craft beer. In fact, a past episode had a case of a current favorite brew in the background. Thus, it was suggested that I do an episode while enjoying a libation – and so here we are. Today, I’m enjoying Laphroaig.
So, while I pour myself a dram, let’s get ready to make 3 backups with episode 1: SANs, NASes, Bandwidth, and Connections.
1. What is a SAN and a NAS?
Before we jump into the geeky goodness, let’s make sure we’re all following the same nomenclature.
SAN: Storage Area Network.
A SAN, or Storage Area Network, is centralized storage that multiple computer systems can connect and use. Historically SANs were fibre channel based, however, by using different protocols over Ethernet, a SAN doesn’t HAVE to be Fibre based. Many times SANs have a proprietary connection method to each client machine which optimizes the performance between the two. They typically appear as local volumes, as opposed to network volumes. Which leads up to our next term:
NAS: Network Attached Storage.
A NAS is also a centralized storage pool and has historically been based on Ethernet connectivity. A NAS usually uses built into the OS protocols for client computers to connect to the storage. This means it’s easier to connect and to use the storage, but often performance is decreased because of the fast and loose protocols.
As I mentioned, there are 2 predominantly used physical methods of connecting many computers to the same storage: Ethernet and Fibre Channel. These physical transmission methods of Ethernet and Fibre Channel carry data in various protocols over the physical cable. Fibre channel commonly uses the iSCSI protocol, while Ethernet commonly uses AFP, SMB, or CIF. iSCSI needs an initiator (the client computer) and the server (the target). These are usually developed by 3rd parties and are not stock on your computer. AFP, SMB, or CIF shares are Windows and Mac protocols that virtually every machine should understand. Another way to differentiate is if the shared storage shows up on your computer as a “network volume” or “local storage”.SAN volumes usually appear as local volumes where NAS solutions appear to the computer as network shares. Many shared storage solutions are mixing the protocols found on Fibre Channel SANs and utilizing Ethernet to transmit them. This where the blending of the 2 technologies and 2 transmission methods converge.
The endgame is that when both of these topologies (when configured and deployed correctly) can be run long distances, are somewhat flexible, and most importantly, can be used for utilizing mass storage in the video realm. The big difference to the end user is sustained bandwidth.
2. What is bandwidth and why is it important?
Bandwidth – also known as throughput – is the amount of constant data your computer can read and write to and from storage and is paramount for video recording and playback. Too little bandwidth – or poor sustained bandwidth – causes your video to stutter or even refuse to play. In addition, this latency can cause the responsiveness of your NLE to tank. This is why choosing the correct Fibre Channel or Ethernet solution is so important.
Let’s take a look at the bandwidth you’ll find via Ethernet and Fibre Channel.

Now, first thing you’ll notice is that real-world throughput differs from theoretical throughput (20%-30%)
Kind of like that bag of life-shortening potato chips you picked up at the grocery store. Is it ever really filled to the top? Or the Miles Per Gallon (MPG) you’re supposed to get in your car that you never quite reach. Real world performance vs mathematical performance. Never forget they are not identical and can vary from solution to solution. An assumption we have to make with these numbers is that the storage’s drives and chassis can actually HANDLE the throughput the transmission method can handle- but we’ll dive into that more in-depth in the next episode.
If the storage can handle it, I normally ballpark 20-30% off of theoretical max for a more real-world ballpark estimation. ALL shared storage solutions are a little bit different. However, for sake of discussion, and to be safe when planning your facility, let’s say 30%. You always want to plan for the worst when designing a workflow and plan for future expansion. In addition, all of these connections have the ability to be bonded, that is, the aggregate speed of the multiple connections yield more throughput than a single connection. This ability, of course, is based on the SAN or NAS, the switch, and the Fibre or Ethernet card in your system supporting it. Never assume any of them handle aggregation– verify. If they do, then you now have an opportunity to potentially almost double your theoretical bandwidth highway. This is a very good thing. Now that we know how wide our highway is, let’s see how many cars we can fit on it.
3. How much bandwidth does my video take up?
When it comes to bandwidth, the video industry is actually in an excellent place right now. Acquisition codecs, like h.264 (Canon 5D, 7D), XDCAM, P2, and to some extent, RED, take up a small amount of bandwidth, while still delivering decent quality. In fact, for most editorial needs, bandwidth needs to each system have not grown very much in the past decade or so. I showed this chart similar to this a few weeks back, but it’s just as applicable now. Let’s look at old Standard Definition (SD) video data rates for example.

Ten plus years ago, broadcast networks would play material to air that had been onlined at 1:1 uncompressed or frequently at 2:1. The video data rate of SD at 1:1 is 22 megabytes (MB) per second. The current broadcast quality HD Avid codec (DNxHD 145) is actually less, clocking in at about 18MB/s. Even DNxHD 220x – the least amount of compression before going uncompressed in the Avid realm- is only about 27 MB/s. Thus, we can take advantage of the drops in storage pricing, and the advancement of computing power and use only slightly more than same bandwidth we were using for Editorial back in the SD days.
4. How many streams of video can I play?
Now that we know our connection methods, how much data we can push and pull down each pipe, as well as the data rates of popular CODECs, now we can see how they all fit together to best plan out your network topology.
So, let’s now match up our cars (CODECs) against our highway (throughput). Below we see codecs vs bandwidth (remember, bandwidth calculated at less than theoretical max, which is a better approximation of real-world performance)

So, what does this mean? Clearly, most codecs can easily fit through the pipeline 1GigE provides.
Fibre Channel becomes the obvious solution when uncompressed HD or higher resolution, less compressed CODECs come into play. Thus, for most video-centric editorial applications, an Ethernet-connected solution – single or bonded (even better) – can handle the job. This, of course, takes into account your computer is fast enough to decode the streams….the act of getting the data to and from your computer is different than the ability of the editing system to decode and display it.
5. What else do I need to know about Bandwidth?
I would add that not all Ethernet solutions are created equal. Sustained throughput is the name of the game, and off-the-shelf or I.T. centric solutions almost never handle video properly. Basic Ethernet topologies are relatively inefficient, and it is very common to have peaks and valleys with the transmission of data. These valleys can cause dropped frames. Video-centric shared storage solutions tweak the communication between the client machines and the server to optimize the video editing experience and maintain editing responsiveness. I cannot stress enough to look into video shared storage solutions, as opposed to basic Windows or Mac networking protocols. Talk to a video professional.
A Pinto can get onto a race track, doesn’t mean it performs well, ya know?
In closing for the 1st entry in this 3 part series, (1 for 3 may be good in baseball, but not in Post, and certainly not when choosing a shared storage system) I cannot stress enough that if you’re considering a SAN or NAS, consult a Video Shared Storage specialist. While I pour myself another glass -Did I miss anything essential about SANs, NASes, Bandwidth, and Connections? Have a suggestion on good Reds, Stouts, Porters or Scotch? Let me know in the comments, via Twitter, or on Facebook, and please, share this series with your friends. Stay tuned for Part 2: Drives: Size, Spindles & Protection (RAID). Same bat time, same bat channel. As always, thanks for watching.
Be sure to check out the complete series on shared storage – 3 episodes!
This 3 part series consists of:
Part 1: SANs, NASes, Bandwidth, and Connections.
Part 2: Drives: Size, Spindles & Protection (RAID)
Part 3: Management, Permissions & Support
]]>1. What is a codec?
A codec is an abbreviation for “compressor-decompressor”. In the most basic descriptions, it’s the specific algorithm used to encode and decode a video stream. It’s for both creating and playing back a media file. But when working with digital media, the codec is only half of the equation. A codec is delivered in a wrapper – a digital coating that encompasses the codec filling.
That digital coating tells your playback device what application should be used to read the codec inside because that application most likely understands the codec inside. Let’s look at it in another way.

Here we have a can. Of something. Probably delicious. This can is our wrapper, and it contains tonight’s dinner. However, It has no markings – we don’t know what’s inside of it….the essence. We do know, however, that a can needs a can opener to open up the can to see what’s inside. The can opener is the media player. Once we open the can, we can examine the contents -or the codec, and choose the best decoder tool with which to handle what’s in the can. In this case, we have soup. Unfortunately, I don’t have the right tool with which to partake in this feast. Thus, I need to find the right decoder for the codec -in this case, a spoon – so I can consume the soupy goodness.
As you can see, it’s imperative to know both the wrapper and the essence inside to properly handle soup…err, media.
In Post, the terms codec and wrapper are often misused or used interchangeably. How many times has someone asked you for a QUICKTIME? Or an AVI? Again, that’s akin to asking for a can….not what the can contains. As you discuss media decoding at your next party, start to use both terms, like “h.264 Quicktime” or “animation in an AVI wrapper”.
2. What do I need to be aware of when choosing a codec?
Codecs and Wrappers are generally found in 3 places: acquiring, editing, and delivering.
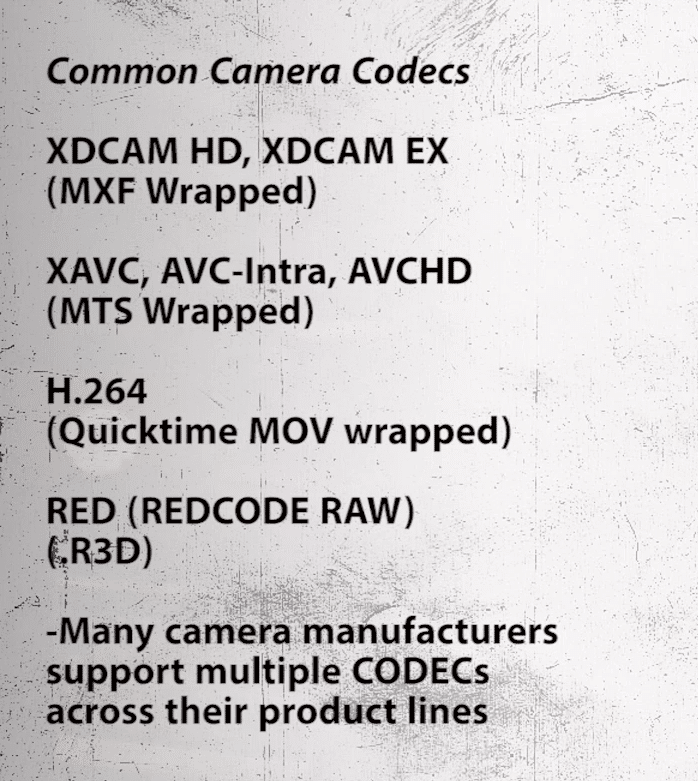
When we are acquiring, you normally don’t initially choose a codec and wrapper. They choose you. Why do you ask? Often, you choose a camera because of the look it has – or because that’s the camera your buddy will lend you. These cameras have encoders built-in, which traditionally only record to one or two different codecs and wrappers. Thus, you need to handle whatever format the chosen camera gives you.
Most consumer or prosumer cameras record in formats that initially look good but perform horribly in post. Like h.264. Small file size, pretty decent image quality, but they break down in post rapidly.
Many NLEs can’t decode several streams of h.264 efficiently, and rendering can be a pain. This is where you have more flexibility to choose your codecs. You can transcode – or flip – these camera original files into more edit-friendly codecs. Like Quicktime wrapper ProRes. Or MXF wrapped DNxHD.

Editing friendly codecs take advantage of larger file sizes by compressing the data less. This means the computer has to work less on interpreting each frame of data. This is what is known as inter vs intraframe encoding. Interframe encoding means the computer needs to look at several neighboring frames to form a complete image of each individual frame. Intraframe means the data for each frame is self-contained within the encoded frame. The latter is obviously easier on the computer – but again, takes up more space. This often times means you need a greater amount of storage and a faster way of getting the data to and from your computer.
Once the project is done, and it needs to be delivered – again, the codec and wrapper choose you. Depending on where you are delivering the file to, you need to hit the deliverable’s specs. If it’s Broadcast, you have Redbook standards to conform to, lest your media fails QC – and you have to regenerate and resubmit. If delivering to an online provider, such as Netflix, Hulu, and to some extent YouTube, they each have specs you must hit, or risk poor image quality, or the file being rejected.
3. What codec should I edit with?
Many NLEs have their favorites. Some are robust enough to handle several different codecs and wrappers, while others are quite a bit finicky. Let’s highlight a few of the best practices in several of the popular NLEs. Let’s start with Avid Media Composer.
Avid’s codec du jour is DNxHD. DNxHD is a lossy, HD frame size codec, developed by Avid. When Media Composer is directly handling DNxHD, Avid wraps the DNxHD in an MXF wrapper.
 Avid Media Composer
I’ve often been asked – again, at parties – why an MXF wrapper? The simple answer is that the MXF wrapper – the container – has much more flexibility in the spec. An MXF can contain several different essences, ancillary metadata, etc. So, while it isn’t easily played outside of Avid, the assumption is that if you’re already using the media with Avid – why not use Avid to view it? Avid also excels with SD footage. Old school editors will remember the OMF wrapped media. Avid still handles SD material, and uses the same Avid Meredien codec as it always has – only now it has unified the media to also be an in MXF wrapper. XDCAM is also handled by Avid very well, namely because XDCAM is an older spec, and Media Composer has had many years to perfect its usage and playback.

Final Cut Pro 7 and Final Cut Pro X
Next, we look at Final Cut Pro 7 and Final Cut Pro X.
Final Cut Pro 7 always played with ProRes the best, namely because Apple created the codec. Older codecs like DV25, DV50, and DVCPro HD also worked well but tended to break down more easily in post when doing color and effects. FCP X, given the greatly enhanced playback foundation, can play most media formats much easier than most other NLEs out there. However, Apple will still render in ProRes if you let it, and you’ll get more streams and more real-time effects when using ProRes over, say, H.264.

Adobe Premiere Pro
Lastly, we have Adobe Premiere. Adobe is a bit of a swiss army knife – it has no allegiance to Avid’s DNxHD or Apple’s ProRes. However, Adobe has realized the same thing I talked about earlier: Intraframe codecs perform better that interframe ones. Adobe also is the most open in terms of playing in the same sandbox as the other NLEs. The result is that Premiere works exceptionally well with Avid DNxHD and Apple ProRes. Just be aware that on a PC, you can work with ProRes, but need to render in another codec, like DNxHD.
Thanks, Apple!
There are some basic rules to abide by.
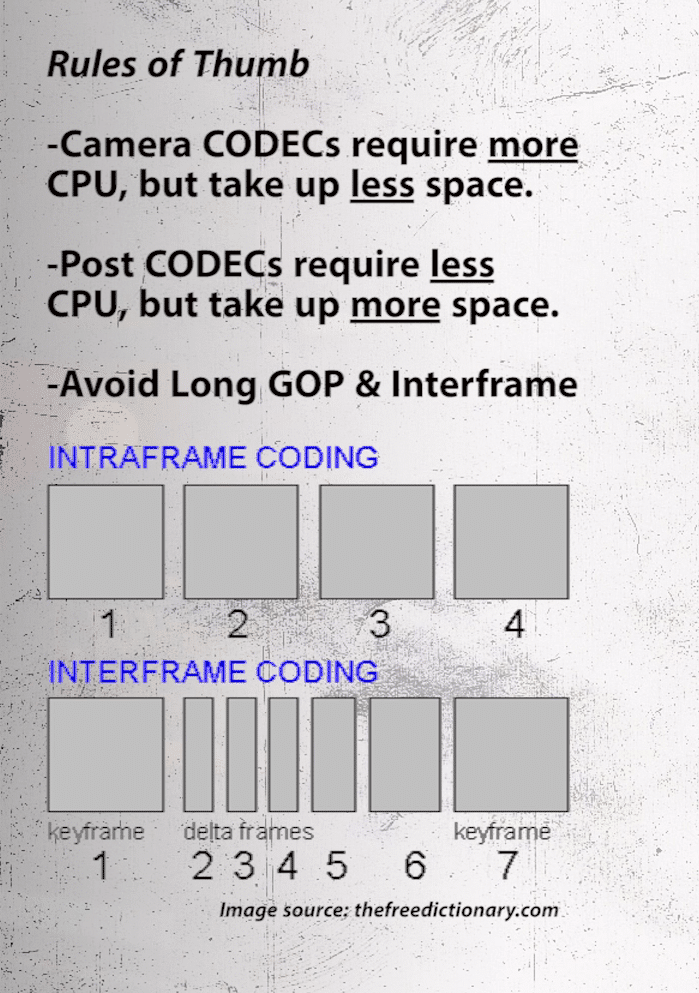 There is almost no reason to ever, ever work with uncompressed HD footage. Can you? Sure you can work with the uncompressed footage. Will you need massive amounts of storage space and very fast storage? Yes. And the visual quality will most likely be imperceivable. Don’t use it unless you have a reason to – like very high-end effects work. Again, mid to high bitrate ProRes and DNxHD will work in almost all cases.
Most camera original codecs suck in post. H.264. Sucks. AVCHD Sucks. All of these look good initially but break down in post, both visually and by system performance. The only real modern exception has been XDCAM. It’s a common acquisition codec and is handled pretty well by modern computers. It’s not as robust as DNxHD or ProRes when it comes to flexibility for effects and color in post, but the file size tradeoff and the ability to go from camera to edit can make up for it in quick turnaround scenarios.
So, when it comes to camera codecs, transcode FROM them, or record directly into an edit-friendly codec – as we’ll talk about right now…..
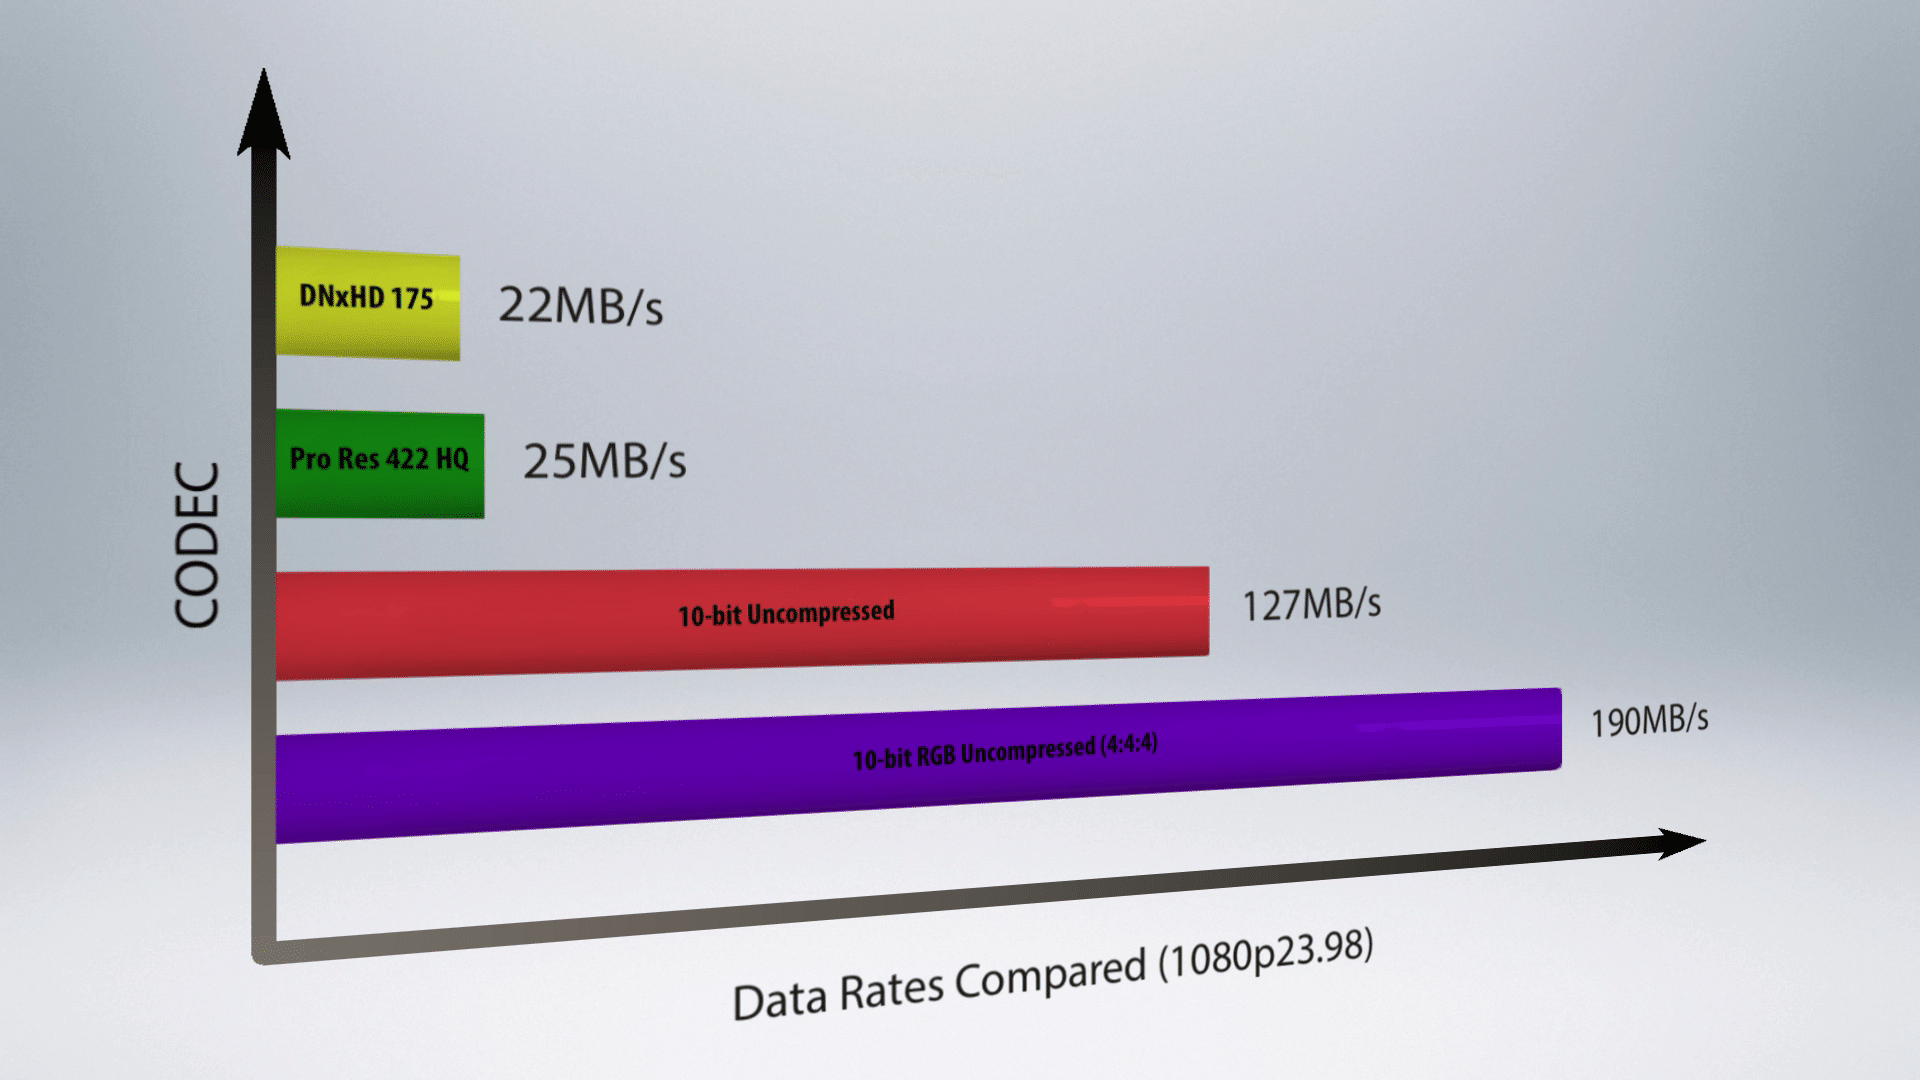
4.How do I convert from one codec to another?
Earlier, we talked about acquisition codecs, and this is largely being based on the camera you choose. There is a way to hotwire these cameras into recording to formats you want. Often times, cameras have HDMI or HD-SDI outputs, often called “baseband”. Many 3rd party recorders, such as the Ki Pro family from AJA or the field recorders from Atomos, or any one of the Cinedeck recorders can take these uncompressed baseband signals, and record them into edit friendly codecs -often Quicktime wrapped ProRes, or Quicktime or MXF wrapped DNxHD. Not only do these solutions bypass the need to transcode the files into edit friendly codecs later, but as mentioned, the baseband signal is often pre-compression, resulting in a better source image as it’s being recorded.

These types of baseband encoders run anywhere from several hundred dollars to several tens of thousands of dollars. If a baseband recorder is not in your budget, then you’ll need to take the hit in image quality, and use software to transcode the compressed camera footage to make the editing experience a bit more pleasurable. There are dozens of solutions out there – from Apple’s Compressor to Adobe Media Encoder, Telestream’s Episode family – up to enterprise solutions like Telestream’s Vantage, Rhozet Carbon Coder, Root6’s Content Agent – all solutions that not only flip the files for you, but add additional features, such as greater control of the essence of the file, QC, logic-based encoding decisions, and distributed encoding among multiple machines.
Another shortcut is to change the wrapper, but not the codec inside – in the hopes that another player will understand it. MPEG Streamclip is a great tool, as are MP4Tools and AVITools.
A great tool I use daily is “Media Info” – available for Mac or PC. This app digs into the wrapper and codec and gives you all of the dirt on the file. This can be a lifesaver when troubleshooting decoder and codec issues. VLC is a free player that has great compatibility and can usually play most media files you’re likely to run into.
5. How do I get the best look for ______?
Often I’m asked: “When outputting, what is the best possible codec for BLANK”? And there isn’t an easy answer. First and foremost, wherever you are delivering to, follow their format guidelines. Chances are, you are not the only one who has ever had this query. Seriously. Don’t try and out think the distribution hub. You’re at their mercy. Second, I’ve always found the best success has been to base your encoder settings off of existing presets in your software transcoders. No, this isn’t cheating. Often times these profiles produce excellent results or at least get you in the ballpark. Also, not all software transcoders are built equally. You may need to try several solutions to find which one handles your project the best. Something else to keep in mind is that there is also the law of diminishing returns. Simply jacking the data rate of a file up doesn’t mean it will look better. Each codec has their own thresholds
Years ago, there was a job title known as a “Compressionist”.
They melded the science and math of encoding with the art of good visuals. This job has largely been eradicated due to what I perceive to be the public’s tolerance of substandard image quality and the proliferation of template-based encoding applications… However, one size does not fit all, and different stories and shooting styles call for different settings. Experiment and learn, and create the best quality image within the parameters of the deliverables you need to generate.
The realm of codecs is as wide as it is confusing. Have more codec concerns other than just these 5 questions? Ask me in the Comments section. Also, please subscribe and share this tech goodness with the rest of your techy friends….especially at parties.
I plan to be back in 2 weeks with another 5 things. Until the next episode: learn more, do more – thanks for watching.
]]>
1. What is Nexidia’s Dialogue Search?
When not being used by the Government to monitor your phone calls, office conversations, or noises in the bathroom, the underlying technology in Nexidia’s Dialogue Search can be used to index the audio within your sound and video files and create a searchable database of those media files. This gives you, dear viewer, the ability to search for the details of your content. Not just subject keywords, but the actual content – verbatim- within the media. Ooey gooey, chocolately good Metadata.
This technology can either be used as a standalone searchable database or, it can be integrated into your NLE du jour or Asset Management system.
 Many of you may be familiar with Phrase Find, which was a scaled-down version of Dialogue Search, available as a plugin to some versions of Avid Media Composer, or within MediaSite by Sonic Foundry. But we’re getting a little bit ahead of ourselves. Let’s see where Dialogue Search is most beneficial.
2. Where is Dialogue Search used?
Nexidia’s technology has many use cases. But as it pertains to post-production, it’s fantastic for logging. Let’s consider Reality Television. Many cameras, sometimes recording for most of the day. This is a massive amount of footage to comb through for that one scathing soundbite. Imagine being able to search across this and instantly find that sound bite you need. Or the components you need to create that epic Frankenbite. It’s a tremendous time-saver.
In terms of Metadata, Dialogue Search provides a way to find media in your archives without having to rely on the manual input of search terms. Many manual input terms in asset management cover broad topics or people….not phrases or quotes. Instead of searching by these concepts as most do, you now have a much more granular way of searching content – in only a few seconds, and with little or no manual input of metadata.
The next place it shows great promise is that of closed captioning. Closed captioning is an expensive process, and due to the new FCC regulations, mandatory for many content providers. The technology behind Dialogue Search shows great promise for auto-generation of captioning. However, at this point, it is not accurate enough for the strict guidelines for captioning. However, it is accurate enough to be used in Nexidia’s QC product – which can analyze an existing caption file, compare it to the media file, and retime the captioning to match the media file. This drastically reduces the number of your deliverables that are rejected, as well as again conforming to the FCC regulations.
I know, many of you are wondering about Phrase Find -will it come back as an option for Media Composer? As of v8 of Media Composer, Phrase Find is not available – there are licensing issues that Nexidia and Avid are still sorting out. No timetable has been set for a definitive yes or no. Depending on who you talk to on both camps, discussions are either going well or horrible. Unfortunately, we’re just going to have to wait..and see.
3. How does Dialogue Search work?
The current Oxford dictionary lists over 170,000 words in the English language -not including obsolete and derivative words, regional terms, and slang. It would be wholly inefficient and quite impossible to maintain an accurate database of words. So the fine Ph.D. level folks at Nexidia broke down the individual sounds that we make as we form words, and used those discreet sounds as a blueprint for all speech – thus making it possible to search for any word or sound – even those which are not found in the dictionary.
It turns out that all American English words are made of up one or more of 40 individual sounds, called Phonemes. Combinations of several of the individual 40 sounds form every word we use. (all of you Brits across the pond will be happy to know you’ve got one more over us Yanks with 41 distinct phonemes…so you’ve got that AND better tea)
Each language has its own individual phonemes. Nexidia has created indexes for several languages for Dialogue Search, with more in development.
- U.S. English
- U.K. English
- Latin American Spanish
- Castilian Spanish
- German
- European French
- Italian
- Dutch
- Modern Standard Arabic
Nexidia Dialogue Search – whether it’s direct from Nexidia or part of the Phrase Find add-on component inside some versions of Media Composer indexes media files and creates a database of all of the individual sounds. This allows the user to search for any word they can think of, and Nexidia will match up the word you’re searching for, with the Phonemes that make up the word. Since the media files are indexed as soon as they are added, the amount of time to search for a word happens in seconds.
Dialogue Search not only plays the clips at the point in which your word shows up, but it also can export results as XML or AAF so you can populate the results into your NLE. Nexidia also has advanced interoperability with CatDV and a Panel for Adobe Premiere.
4. How accurate is it?
Searching for a word isn’t a yes or no proposition. A poor recording, background noise or slurred speech can certainly skew results. That’s why the Nexidia technology scores and rates the probability that the word you are looking for is actually being spoken. Nexidia also allows the user to define what constitutes an accurate score, and which ones are bunk.
Let’s see an example: [Please review the live demo above]


As you can see, in the right environment, it’s fantastic. As the recording fidelity decreases, however, so does the accuracy. It’s also heavily dependent on the speaker.
Those who tend to talk fast (which I am very guilty of) or those who are not speaking in their native tongue can also skew results. However, the way I look at it is that ANY harvested metadata with which to search by is a bonus.
5. How much does it cost?
Like many software technologies nowadays, Nexidia has both Annual and Perpetual licensing models, and all are based on tiered pricing options, consisting of how many “active hours” can be searched as well as how many users -plus annual support. To reduce cost many facilities reduce the number of active hours that are searchable – for example, you may only want to index the current season of your show – not every season.
First, let’s look at Perpetual Licensing:
| Tier | Media Hours | Seats | Base Price | Annual Support |
| Tier 1 | 1,000 | 5 | $9,995 | $1,795 |
| Tier 2 | 2,000 | 10 | $19,995 | $3,595 |
| Tier 3 | 10,000 | 25 | $49,995 | $8,995 |
| Tier 4 | 25,000 | 50 | $99,995 | $17,995 |
| Tier 5 | Unlimited | Unlimited | $249,995 | $44,995 |
All seats are floating as well and thus based on concurrent users- not the total number of anytime users.
There are also adds on for your unique needs:
| Options | Price |
| Additional 500 hours | $7,495 |
| Additional 10 seats | $4,995 |
| Additional user seat | $600 |
| Unlimited user seats | $49,995 |
| Tier Upgrade Prices | = Upgrade – Current Tier |
Annually, the pricing structure is based on the same methodology:
| Tier | Media Hours | Seats | Base Price | Annual Support |
| Tier 1 | 1,000 | 5 | $3,895 | $1,795 |
| Tier 2 | 2,000 | 10 | $7,795 | $3,595 |
| Tier 3 | 10,000 | 25 | $19,995 | $8,995 |
| Tier 4 | 25,000 | 50 | $38,995 | $17,995 |
| Tier 5 | Unlimited | Unlimited | $95,995 | $44,995 |
…and there are add ons, just like the perpetual licensing.
| Options | Price |
| Additional 500 hours | $2,875 |
| Additional 10 seats | $1,995 |
| Additional user seat | $240 |
| Unlimited user seats | $19,995 |
I know, for the average user, it’s a bit expensive. But on the facility level, if we factor in the cost per hour of a logger or editor, over the course of a year, or the hundreds of dollars an hour for transcription services or the time spent combing through archives for footage, Dialogue Search becomes a cost-effective and efficient way to get your projects done quicker.
Have other tools to analyze audio? Or how about other tools to harvest quality metadata? Ask me in the Comments section. Also, please subscribe and share this nerd goodness with the rest of your nerdy friends.
I plan to be back in 2 weeks with another 5 things. Until the next episode: learn more, do more – thanks for watching.
]]>1. Why 4K?
The reasons to shoot 4K are pretty decisive. In a world of HD, SD and horrible handheld cell phone video, 4K allows flexibility with re-framing shots for current HD distribution methods. Most importantly, it allows for changing your story – visually – in post.
Let’s take Interviews, for example.
Often we have wide shots and close-ups. This usually requires 2 different cameras, additional lighting, manpower, and all the accouterments that go along with a multicamera setup.
 Many of these scenarios can be rectified with a single 4K camera, allowing for a simultaneous wide shot as well as a Medium Shot or Close Up. This lowers production cost and time onset.
A common tool nowadays is stabilization. Handheld cameras, and run and gun setups often generate footage that is…well, far from a Steadicam shot. Stabilization in post can help alleviate some of this jitter. The increased frame size means the reframing that takes place during stabilization can still generate a smoother, HD output.
Many other scenarios can benefit from a 4K image size. Imagine all of the blown calls in your favorite sports ball game that could have been rectified with a sharper freeze frame.
Having more pixels in your image also allows for higher image fidelity, ultimately allowing for greater, more granular control of color and VFX while in post-production.
4K is also a way of preserving the longevity of your project. 4K acquisition alone ensures that your content can be more easily repurposed in the future and have a much longer shelf life than HD or SD content.
2. Why not 4K?
Plenty of reasons to pass, or at least pause, on going all in 4K. First is cost. 4K acquisition will require a new camera, as well as all the parts and pieces needed to complete your rig. If you intend to work natively in 4K in post, you’ll probably need an upgraded NLE to handle it, including a CPU, GPU, and storage – more about that later. You’ll also need a way to view 4K- both on your computer screen as well as your video screen – and a 4K I/O device to handle it. A significant technology upgrade.

A vast majority of end-users can’t view 4K. While 80% of American homes have HD capable TVs, only 60% of these homes consume HD content, let alone 4K. This means that plenty of folks still consume SD content. Most computer monitors aren’t used at HD resolution, and can’t even handle 2K, let alone 4K. Reports show that the average resolution of a computer screen is 1366 x 768. Mobile devices typically have resolutions even less than that.
Even if your audience DID have 4K capable monitors, no major broadcasters in the US are actively broadcasting in 4K. Their satellite and cable systems infrastructure – including your way overpriced set-top box – can’t handle transmitting or decoding 4K signals. Theaters are one of the only places that can view 4K – if the theater is even equipped for it. Only about a quarter of US theaters can currently project 4K.
The online providers who do support 4K, Netflix, for example, require a larger pipe to your house for you to view the content. Here in the states, we are gouged on the pittance of bandwidth afforded to us. The current struggle over Net Neutrality may also penalize viewers in the future who need the additional bandwidth.
Lastly, there is a constant debate over whether the human eye can even perceive 4K in real-world scenarios. We certainly can discern 4K from HD, but if we’re sitting on the couch watching our 4K TV from 8 feet away, can our eyes really tell the difference? The International Telecommunications Union says that viewers with 4K content can sit twice as close to the TV than HD sets without a perceivable difference in quality. What good is that when we’re getting larger screens so we can sit farther away? The reality of a drastic visual difference in your living room has not yet been solidified.
3. How do I shoot in 4K?
 I’m not going to turn this into a 4K camera review, but suffice it to say, you’re going to need to buy or rent a 4K camera. Depending on which camera, and what codec you shoot in, you’re going to need appropriate storage. This could be anything from newer, faster, and larger memory cards, to Solid State hard drives. You’re also going to need faster and larger storage to offload your footage onto. And it’s got to be portable. Unless you’re a throwback to the film era and are very conservative with your shooting ratio, you’re gonna run out of space on your memory cards or solid-state drives very quickly.
Here are some comparisons of frequently used 4K acquisition codecs, along with more routinely used SD and HD codecs. I’ve also added more edit-friendly codecs to the chart for comparison.
This is where you hit pause and scrutinize my math.

Many shoots often have DITs onset to offload then wipe the cards or drives and get them back to the camera operator. Often these DITs are also creating edit worthy proxies in addition to adding metadata to the clips.
If you’re moving from tape or thinking of moving to an offline/online workflow for your 4K project, you should seriously consider having a DIT onset.
You’ll also have to get used to blocking your shots a little bit differently. Why? True 4K has a different aspect ratio than HD. True 4K is 1.9:1, while HD is 1.78:1. Also, many cameras that shoot 4K have an increased sensor size from their HD counterparts -which means what fits within your frame in 4K will be different than what your viewfinder sees in HD.
4. How do I edit in 4K?
First, you need to determine if you are working natively in 4K through post, or doing an offline /online workflow – that is, editing in a lower resolution, then reconforming to the 4k after the creative edit. If you’re looking to work native, expect to invest a bit more. Your CPU may not have the horsepower to decode and work with 4K in Real Time -and give you a pleasurable editing experience. Upgrades can also include a newer GPU. Many NLEs have begun offloading much of the brute force needed to play video off to the graphics cards. Also, expect to put more RAM in your system.
How fast and how much do you ask?
That all depends on the 4K codec you’re working with. But rest assured, any computer more than a couple years old doesn’t stand a chance.
Oh, and as I mentioned earlier, you’ll need a larger format computer and video monitor, capable of handling 4K. You’re playing with fire by working on 4K, but being able to SEE in 4K.
You’re also going to need disk space and bandwidth. This means bigger disks and more of them. Depending on your 4K codec, you may need uber-fast storage: such as RAIDs connected by SAS, Fibre, or 10GigE. Think of these connection methods if you’re shooting in DPX or ProRes 4:4:4:4. For more highly compressed files, such as XAVC, you’ll need less speed to and from your system, but an extra faster computer to compensate for the additional compression. There’s a tradeoff for these smaller files – the computer has to work harder to play them back – which means your computer has to be even faster.
Here is the codec data rate chart I showed earlier, this time with the bandwidth available by commonly used connection types. Lots of data here. It’s OK, you can hit pause, I’ll wait.

The one constant is that any 4K recording scenario, you’re going to need more disk space. Period.
Next, we need to choose our editor. Currently, Avid Media Composer only has an HD timeline, and can only output HD, however it can handle an HD frame size extraction of a 4K image – using frame flex. Current versions of Adobe Premiere and Final Cut Pro X can handle 4K as well…FCP 7 – not so much. Sony Vegas and Grass Valley Edius can also handle 4K.
The key to any successful 4K workflow is knowing what codec you’re shooting in. This dictates virtually every subsequent tech conversation about your project and how to see it through post.
5. What else do I need to know?
Don’t freak out. I repeat don’t freak out. HD is FINE for a vast majority of applications.
Some broadcasters still air material that originated in standard definition. As long as you review where you want your project to end up and ensure the deliverables don’t HAVE to be 4K – you’re golden.
Most importantly, however, is the simple truth that has been around since the dawn of modern cinema. Technology does not tell your story. Gear does not make you a better storyteller. Focus on that first and foremost, and let technology complement – not lead – your story.
This is just the tip of the 4K iceberg. Have more 4K concerns other than just these 5 questions? Ask me in the Comments section. Also, please subscribe and share this tech goodness with the rest of your techy friends.
I plan to be back in 2 weeks with another 5 things. Until the next episode: learn more, do more – thanks for watching.
]]>This episode we’ll be looking at one of my favorite new technologies: Adobe Anywhere. Let’s get started.
1. What is it?

Yes, I’ll start out basic for those few who are uninitiated. Anywhere is Adobe’s Enterprise class solution for collaborative and remote editing. I know, marketing gobbledegook, right? Here’s what it boils down to: Multiple editors can now open the same project (now called a Production) at the same time. They use the same media and timelines within that production, as well as share and receive these changes from other editors – on demand. No shuttling around bins or project files. Multiple editors, working together in real time.
So that addresses the collaboration, what about ‘remote’ part of the equation? Remote, in this case, is the ability to utilize the Production’s media and timelines outside of the 4 walls of your facility and away from where the media is housed. This means that with any place that has a decent internet connection, you can log in on your own computer and edit the media as if you were sitting next to the storage. How this differs from most is that there is not an offline/online media or proxy workflow.
Adobe Anywhere plays a real-time stream of the high res media to your system. Anywhere throttles the quality of the media being streamed to your system to accommodate the available bandwidth you’ve got. All rendering is done on the Anywhere system and streamed out to your remote system when you hit play.
 2. How does it work?
Adobe Anywhere relies heavily on GPU processing, as well as redundancy, to maintain a high quality of service to those client systems who are requesting the streams. This is accomplished by 3 GPU accelerated monster servers
These 3 GPU accelerated servers -called Mercury Streaming Engines are accompanied by at least 1 traffic cop, known as the Collaboration Hub. These 4 systems enable the core functionality of Adobe Anywhere….and this core system supports about a dozen users.
….but there is a lot more to it than that. Unlike some other remote collaboration solutions, like Avid Interplay Sphere, Adobe Anywhere relies heavily on 3rd parties to complete the build-out of a fully functional base system. This means having a fast, centralized storage pool that can be utilized by the Anywhere servers. This needs to be some beefy storage; a Drobo and a USB drive ain’t gonna cut it.
Next, you’re going to need Asset management. I know, not the most exciting topic, but in almost all cases – completely necessary, especially for those who are utilizing the remote editing functionality. See, Adobe has a written a robust REST API and has relegated many of the creature comforts of media management to 3rd party applications accessing the API.
You’ll also need a decent internet connection both up and down from the facility where Anywhere is living, as well as from the remote site where you’ll be editing. And don’t forget a VPN, lest you invite unscrupulous folks to partake in your media.

3. What is the performance like?
For the product being a year old, pretty good. Snappy and responsive, rarely any lag during shuttling or quick keyboard combinations. I’m finding 25mb/s (~3MB/s) to be a good baseline for a remote editing system. Your local coffee shop probably won’t deliver the speed you’re going to need, so choose your fortress of editing solitude carefully. Oh, if you’re doing multi-cam, you’re in luck. Because all rendering is being done on the Anywhere system, all media streamed to your editing system is one, single video stream. This is transparent to the editor, but drastically reduces the amount of data needed to be streamed to your computer.
Currently, Anywhere supports Premiere Pro CC, Prelude CC, and there is a tech preview of After Effects currently available.
There are some other caveats, however. Plug-ins need to be on the client system and all of the Adobe Anywhere servers, as well as any fonts. Also, exports from your timeline are performed and saved on the Adobe Anywhere servers, not on your local machine. Also, a big one is being able to actually look at the centralized storage pool when you’re remote…this cannot be done without Asset Management.
4. Where do I get it?
A license to use Adobe Anywhere, much like the rest of the creative Adobe applications, is at least partly subscription-based. However, this subscription – as well as the server software to install on the aforementioned collaboration hubs and render nodes – is only available through a sanctioned Adobe Anywhere integrator…like our sponsor, Key Code Media. Given the complexity of a full deployment, Adobe has set up rigorous requirements in order to ensure that these systems are deployed by integrators who know what they are doing.
5. The question I get asked the most – How much does it cost?
Let’s go on the assumption you’re building a system from scratch that supports a dozen users. First off, you’ll need a Creative Cloud plan. This can be as little as $360 a year, depending on your plan. The Adobe Anywhere subscription part of the equation is $999 per each user, per year. The Adobe Anywhere server software is, as of now, free – but again, only available to integrators.
If we now look at the hardware needed to run the Anywhere software, the minimum you’re going to need to spend for a qualified, Adobe sanctioned 4 server system will be $60,000. I’ve been involved in the building, integration and support of several Anywhere deployments. The weakest link has always been the least expensive servers for the Collaboration Hub and Render Nodes. Go with a name brand, like Dell or HP. Skip Supermicro. You’re going to pay a bit more, but the availability of parts, the warranty, and support far outweigh the initial savings on cheap parts. You’ll thank me later.
We now need to add sanctioned storage to the mix. Adobe has qualified storage, such as Isilon, Quantum, Harmonic, and other enterprise storage platforms. These solutions will easily be $70,000+. I have no doubt that less expensive storage, at some point, will be qualified, but even those systems will be $20,000+ minimum. Keep in mind folks, you need fast video storage, not fast data storage, which tends to thin the herd out quickly.
Asset Management is an often overlooked component. If you were at NAB this year, many manufacturers had Panels for Anywhere access. Vizrt, Apace, Levels Beyond, and Axle – among others. These solutions range from $12,000 up to $50,000 or more.
Lastly, none of these numbers include additional infrastructure additions, like switches, VPNs…or other overlooked costs, such as installation or training.
As you can see, $150,000 for a complete, turnkey entry-level Anywhere system is not uncommon.
Most deployments will easily be an additional $75,000 if not more.
There is a ton more info on Adobe Anywhere. Have more queries than just these 5 questions? Ask me in the Comments section. Also, please subscribe and share this tech goodness with the rest of your techie friends.
I plan to be back in 2 weeks with another 5 things. Until the next episode: learn more, do more – thanks for watching.
