If flour is the bones and sugar is the heart, then leaveners and flavours are the soul of your baking. These are the small-measure ingredients that do all the heavy lifting.
In this guide, we’re looking at how to turn a dense batter into a light, cloud-like sponge, but we’re also going a step further. We’re exploring how to layer flavours through infusions, citrus oils, and acidity to make sure your baking don’t just look incredible, but smell and taste like they’ve been gathered straight from a professional kitchen.

Baking Powder vs. Soda
This is where most of us get a bit confused. Both create bubbles, but they work in very different ways.
- Baking Soda (The Reactor): This is powerful stuff. It needs an acid (like buttermilk, lemon juice, or even cocoa powder) to wake it up. The second they meet, bubbles start forming. This is why you need to get your batter into the oven quickly before all that “lift” fizzes out!
- Baking Powder (The Reliable): This is a bit more self-sufficient. It’s actually a mix of baking soda and a dry acid. Most are double acting, which means it bubbles once when it hits the liquid and again when it hits the heat of the oven.
Vanilla & Salt
In my kitchen, I don’t just add sweetness, I add depth.
- The Vanilla Standard: If you can, reach for vanilla bean paste over essence. Those tiny black specks aren’t just for show, they carry the oils of the bean that give you a deeper vanilla flavour.
- The Salt Secret: It sounds a bit backwards, but sea salt is sugar’s best friend. It wakes up the flavour of chocolate and caramel. I often like to finish my baking with a tiny pinch of flaky sea salt.
Substitutes
| If you need… | And you only have… | The Substitute |
| Baking Powder | Baking Soda | Use 1/4 tsp baking soda + 1/2 tsp cream of Tartar for every 1 tsp needed. |
| Baking Soda | Baking Powder | Use 3x the amount of baking powder. (Just note it might change the browning a bit). |
| Vanilla Bean Paste | Vanilla Extract | Use a 1:1 swap. You’ll lose the speckles, but the flavour is still there. |
Beyond The Extract
While a bottle of vanilla is a staple for a reason, the best flavours often come from the ingredients themselves. Here are a few ways to layer your flavour to make your baking feel a little more special.
The Art of Infusion
Baking isn’t just about what you drop into the bowl; it’s about what you steep. Think of this like making a cup of tea for your cake. If your recipe calls for milk or melted butter, you can use that warmth to extract flavor from the source.
Letting a few sprigs of lavender or some tea leaves sit in your warm milk for 10 minutes adds a hint of flavour that a bottle of essence just can’t mimic. Just remember to strain the liquid before it goes into your batter!
Citrus: The Secret is in the Skin
When we want a lemon cake, many of us reach for the juice, but the real flavour actually lives in the skin. The juice provides the acidity (which helps your cake rise), but the zest holds the essential oils that provide that bright, citrus hit.
- The Gatherer’s Hack: Before you start mixing, try rubbing your citrus zest directly into your sugar with your fingertips. The sugar acts as a gentle abrasive, releasing the oils and favouring your entire baking from the inside out.
Acidity: The Secret Brightener
Just like salt, acidity (think lemon juice, vinegar, or buttermilk) acts as a highlighter for other flavours. It doesn’t just help the baking soda react; it cuts through the richness of the butter and sugar so the cake doesn’t feel too heavy.
A squeeze of lemon or a spoonful of yogurt doesn’t always make a cake taste sour, it just makes the other flavours, like berry or vanilla, feel a lot more vibrant and bright.
The Chocolate Enhancer
This is a classic hack that never fails to impress. If you are making anything chocolate-heavy, add a teaspoon of espresso/coffee powder or a splash of cold coffee to the batter.
Think of coffee as a magnifying glass for cocoa. It doesn’t make the cake taste like a mocha; it simply deepens the darkness of the chocolate and makes it taste “more like chocolate”, if that makes sense. I use this hack without fail, every time I’m baking anything chocolate!
The Infusion Table
| To get this flavour… | Steep this… | In your… | The Baker’s Note |
| Floral & Fresh | Lavender or Rose petals | Warm Milk | Only use a little! 10 minutes is plenty to keep it from tasting soapy. |
| Bright Citrus | Large strips of Lemon zest | Melted Butter | Use a vegetable peeler for wide strips so they’re easy to fish out. |
| Warm Spice | Whole Cinnamon sticks | Warm Cream | Cracking the sticks open first releases way more flavour. |
| Woody & Earthy | Fresh Rosemary or Thyme | Neutral Oil | Gently warm the oil with the herbs, then let it cool. |
| Deep Toffee | Used Vanilla Bean pods | Sugar (stored) | Bury used pods in your sugar jar to give a vanilla infusion for when you use it it next time. |
A Quick Rule of Thumb
- The Warmth: You don’t need to boil your liquids, just a gentle warm-up is enough to wake up the oils in your herbs and spices.
- The Strain: Always remember to strain your liquids through your Fine-Mesh Sieve before adding them to your batter. You want the flavour, not a mouthful of rosemary needles or cinnamon bark!
- The Time: Most infusions only need 10–15 minutes. If you leave herbs in too long, they can start to taste a bit grassy rather than fresh.
Lift & Flavour FAQs
Q. How do I know if my baking powder is dead?
A. Don’t risk a whole cake on old baking powder! Drop half a teaspoon into some hot water. If it fizzes up instantly, it’s good to go. If not, it’s time for a new box.
Q. Why did my cake rise and then sink?
A. This is usually a “too much of a good thing” situation. If you use too much baking powder, the cake rises too fast before the flour is strong enough to hold it up. It’s like blowing up a balloon until it pops.
Q. Can I leave out the salt?
A. You can, but your baking will taste a bit flat. Think of salt like the volume on a radio, it doesn’t change the song, it just makes the flavours louder and clearer.
Q. Can I use any herb for an infusion?
A. Most woody herbs (like rosemary, thyme, or sage) and floral petals (like lavender or rose) work beautifully. Just be careful with soft, leafy herbs like parsley or cilantro, they tend to go a bit savoury and limp when heated. Stick to the aromatics that smell like they’d pair well with a bit of sugar!
Q. If I add lemon juice for flavour, do I need to change my baking soda?
A. Great question. Because lemon juice is an acid, it will make your baking soda react faster and more vigorously. If you’re adding a significant amount of juice (more than a tablespoon), you might find your bake rises very quickly. Just make sure the oven is ready to go the moment the wet meets the dry!
Q. Why can’t I just use more vanilla essence instead of bean paste?
A. You can, but essence is often alcohol-based, and a lot of that flavour evaporates in the high heat of the oven. Vanilla bean paste (and the beans themselves) contain the natural oils of the pod, which stick to the fats in your baking and stay fragrant even after the timer goes off.
Q. Do I have to use coffee in chocolate recipes?
A. Not at all, but once you try it, it’s hard to go back! If you’re worried about the caffeine, a decaf espresso/coffee powder works exactly the same way. The goal isn’t a caffeine kick; it’s just about using those bitter notes to make the cocoa taste more intense.
Q. My citrus sugar feels wet after rubbing in the zest, is that okay?
A. Yes, that’s exactly what you want! That moisture is the essential oil being released from the zest. It might make your sugar look like damp sand, but it will dissolve perfectly into your butter and distribute that flavour way better than if you just tossed the zest in at the end.
]]>
If flour is the bones of your baking, butter is the delicious soul. It’s what carries the flavour and determines if your pastry is going to be flaky and melt-in-your-mouth. Knowing when to reach for the butter and when to grab the oil is a real baker’s secret.

Salted Butter vs. Unsalted
This is probably a very common question. Does it really matter?
- Unsalted: It gives you total control, and is the professionals choice. Different brands of salted butter have different salt levels, so by using unsalted, you get to decide exactly how much salt goes in.
- Salted: This is a home classic, and my personal favourite. So, if it’s all you’ve got when a recipe recommends unsalted butter, don’t sweat it. It works perfectly fine. Just leave out the extra pinch of salt the recipe asks for.
Butter vs. Oil
- Butter for Flavour & Lift: Use butter for that classic taste. Since it’s solid at room temperature, it’s what gives you flaky pastry layers and light, airy sponges.
- Oil for Moisture: Oil stays liquid even when it’s cold. This is why oil-based baking like carrot cake or muffins stay incredibly moist for days, even if you keep them in the fridge.
The “Secret” Fats
- Greek Yogurt & Sour Cream: These add fat plus a bit of a tang. That acidity helps break down the flour, giving you a cake that is nice and tender.
- Buttermilk: This is a bit of a magic wand. It reacts with your baking soda to give your baking a better rise and a lovely balanced flavour.
Subtitutes
| If you need… | And you only have… | What to do… |
| 1 cup Melted Butter | Neutral Oil | Use 3/4 cup Oil. (Oil is 100% fat, so you need a little less). |
| Sour Cream | Greek Yogurt | Use a 1:1 swap. Just make sure it’s the full-fat stuff. |
| Buttermilk | Regular Milk | 1 cup Milk + 1 tbsp Lemon Juice. Let it sit for 10 mins until it curdles. |
Butter FAQs
Q. What does room temperature butter actually look like?
A. It shouldn’t be greasy or melting. It should be cool to the touch, but your thumb should leave a little dent when you press it. If it’s too soft, it won’t hold those air bubbles we need for a light cake.
Q. Can I use Margarine?
A. For many home bakers, margarine is fine to substitute for real butter if needed, especially as a dairy free option. However note, margarine contains a lot of water and vegetable fats that don’t behave the same way under heat. If you want that golden, professional finish, stick to the real stuff!
Q. Why did my eggs make the butter look curdled?
A. Butter is fat and eggs are water, they don’t naturally want to be friends. If your eggs are too cold, they shock the butter and make the mixture split (I talk about this in my Baking 101 guide. If this happens, just whisk in a tablespoon of your flour to help bring the team back together!
Spiced Rose Shortbread

Now that you know what room temperature butter looks like, here is a delicious recipe using just that, room temperature butter. My Spiced Rose Shortbread has a delicately spiced shortbread base, topped with fluffy rose flavoured marshmallow. You can find the recipe here.
]]>
In the kitchen, sugar is much more than just a way to make things sweet. It’s actually a bit of a multitasker, it keeps your cakes moist, helps your cookies get that perfect crunch, and creates those lovely airy bubbles when you’re creaming it with butter. Choosing the right sugar is the best way to control the final texture of your baking.

The Pantry Lineup
Not all sugars are created equal. The size of the crystal and the amount of molasses involved change everything.
- Caster Sugar: This is the gold standard for baking, and my personal preference. Because the grains are so small, they dissolve into the butter much faster when you’re creaming. This gives you a finer, tighter crumb and a more professional feel.
- Brown Sugars (Light, Dark, and Muscovado): These are the moist sugars. They still have molasses in them, which adds a beautiful toffee flavor. Use these when you want a cookie to be chewy or a cake to be fudgy.
- Icing Sugar: This is sugar ground into a fine powder. It dissolves instantly, making it the only choice for smooth buttercreams, glazes, or a snowy dusting over a tart.
Quick Tip: If you need caster sugar and only have regular granulated sugar, pulse it in a blender for a few seconds. DIY caster!
Sugar Substitutes
Run out of the specific sugar the recipe calls for? Here are some substitute suggestions for the Tribe.
| If you need… | And you only have… | The Substitute |
| Caster Sugar | Granulated Sugar | Pulse granulated sugar in a blender until it’s fine but not powdered. |
| Brown Sugar | White Sugar | Mix 1 cup White Sugar + 1 tbsp Molasses (or Treacle). Rub it in with your fingertips. |
| Icing Sugar | Granulated Sugar | Blend 1 cup Sugar + 1 tsp Cornflour on high until it’s a fine powder. |
Sugar FAQs
Q. Why did my brown sugar turn into a rock?
A. Brown sugar goes hard when the moisture evaporates. To stop this, keep it in an airtight jar or container. If it’s already a brick, tuck a slice of fresh bread in the jar for a few hours, the sugar should breathe in the moisture from the bread and soften right up.
Q. Can I just use less sugar to be healthier?
A. Be a bit careful here! Sugar turns into liquid in the oven. If you cut it out too much, your cake might end up dry or tough because that liquid isn’t there to keep the flour soft.
Q. What is ‘Creaming’ exactly?
A. In the bowl, sugar does something purposeful when creaming. Those fine crystals work their way into the butter, creating millions of tiny pockets that hold onto the air. In the oven, those pockets breathe and grow, which is the secret to a cake that’s perfectly light and soft. I touch on this in my Baker’s Glossary over on Baking 101.
]]>
Think of flour as the backbone of your baking. You don’t need to be a scientist to get it right; you just need to know which bag will give you a soft, melt-in-your-mouth cake and which one will give you that chewy, crusty loaf of bread.

It’s All About the Protein
The main thing that sets flours apart is something you can’t actually see – Protein. When flour meets water, that protein turns into Gluten.
- High Protein (More Gluten) = More strength (think chewy, sturdy bread).
- Low Protein (Less Gluten) = More tenderness (think light, fluffy sponge cake).
The Flour Lineup
These are the three bags I often rotate through my pantry:
- Plain Flour (All-Purpose): The ultimate all-rounder. If a recipe just says “flour,” this is usually the one. Perfect for your everyday cookies, muffins, and cakes.
- High-Grade Flour (Bread Flour): This is the powerhouse. It has more protein, which creates the strength needed to hold onto those yeast bubbles. Use this for your breads, pizza dough, and cinnamon buns.
- Self-Raising Flour: The ultimate shortcut. It’s just plain flour with the baking powder and salt already mixed in. Great for scones and quick baking.
Quick Tip: Run out of self-raising flour? Just whisk 1.5 teaspoons of baking powder into 1 cup of plain flour. Problem solved.
The Specialty Lineup
Every now and then, a project needs something a little different:
- Pastry or Cake Flour: This is super low in protein. It’s the secret to those incredibly soft, velvet textures you find in professional bakeries.
- Wholemeal or Rye: These use the whole grain, so they’re much heavier but packed with flavour. I’ve heard you can swap out 20% of plain flour for Rye in a chocolate chip cookie recipe. It adds a slight “nutty” flavour that’s hard to beat.
Now that you’ve picked your flour, make sure you’re measuring it correctly! See our guide on ingredient conversions to ensure your ratios are perfect.
Flour Substitutes
We’ve all been there, you’re halfway through a recipe and realise the bag is empty. While the real deal is always best, these community-tested swaps should keep the baking moving.
| If you need… | And you only have… | The Substitute (Per 1 Cup) | Why it works |
| Cake Flour | Plain Flour | 1 cup Plain minus 2 tbsp + 2 tbsp Cornflour. | Cornflour softens the flour for a tender crumb. |
| Self-Raising | Plain Flour | 1 cup Plain + 1.5 tsp Baking Powder + 1/4 tsp Salt. | You’re just doing the mixing yourself! |
| High-Grade | Plain Flour | Use 1:1, but knead for longer. | You have to work the dough harder to find that strength. |
| Wholemeal | Plain Flour | Use 1/2 cup Wholemeal + 1/2 cup Plain. | Using 100% wholemeal can make cakes a bit like bricks. |
A Note on the Sieve: If you’re making a DIY swap, sift the ingredients three times. It sounds like a lot, but you want that baking powder perfectly distributed so you don’t end up with a lopsided cake!
Not sure if your Baking Powder is still active enough for these swaps? Check out the Potency Test in the storage guide over on Baking 101.
Flour FAQs:
Q. Can I use Plain Flour for bread?
A. You can, but your bread will be softer and less chewy. It won’t have that classic sourdough or artisanal structure.
Q. Can I use High-Grade for cakes?
A. Be careful here. If you use high-grade in a delicate sponge, it can turn out a bit tough or bready. If you must use it, be very careful not to over-mix the batter.
Q. Is High-Grade the same as Bread Flour?
A. In New Zealand and Australia, yes! If you’re looking at a recipe from the US or UK, they’ll call it Bread Flour. Same thing, different name.
Q. How do I know if my flour is still good?
A. Give it a sniff! Flour should smell neutral or slightly sweet. If it smells sour or musty, it’s time to toss it. Check out more of my Storage & Shelf Life tips!
Q. What’s the deal with Bleached vs. Unbleached?
A. It’s basically just time vs. chemistry. Unbleached flour ages naturally and has a slightly off-white look. Bleached is treated to be whiter and finer. Bleached could be use to make a nice bright-white, delicate cake.
Q. What if I don’t have scales?
A. If you aren’t using digital scales, don’t scoop the flour directly with your cup, it packs it down too tight. Instead, spoon the flour into the cup and level it off with a knife. It’s much more accurate!
Q. Why is my flour lumpy?
A. Flour is like a sponge, it loves to soak up moisture from the air. This is why it’s important to keep your flour in an air tight jar or container. If you see lumps, definitely give it a sift, or you’ll find flour pockets in your finished baking.
Q. Can I use Gluten-Free flour as a 1:1 swap?
A. It depends on the blend. Some “measure-for-measure” GF flours are great for cookies or muffins, but because they lack gluten (the glue), they often struggle with the structure of tall cakes or crusty breads. If you’re swapping, look for a blend that contains Xanthan Gum, which helps mimic that missing stretch.
A Final Thought from the Bench
Flour is a living thing, it changes with the weather and the seasons. Don’t be afraid to trust your hands. If a dough feels too sticky, add a dusting more; if it’s too dry, a splash of milk. At the end of the day, you’re the boss of the bench, not the bag!
]]>
Baking is a dialogue between chemistry and craft. While a recipe provides the words, your technique provides the punctuation. This guide is designed to strip away the guesswork and establish the fundamental habits that turn a good baker into a master of the bench.
Baking 101 is a work in progress. Consider this a living resource that I will continue to refine and expand. I welcome the Tribe to contribute, so if you have a ‘must-know’ tip for the community, please share it with me at dane@bakergatherer.com. Your insight might just be the next addition to our digital Handbook.
Last Updated:

The Golden Rules of Preparation
The most common failures in baking happen before the oven is even turned on. Mastering these three habits will solve 80% of your baking hurdles.
- The scale over the cup: In my kitchen, I use digital scales. A “cup” of flour can vary by 30g depending on how it’s packed; a gram is always a gram. Accuracy is the secret to consistency.
- The Emulsion Rule (Room Temperature): Unless a recipe specifically calls for cold fat (like pastry), your butter, eggs, and milk are considered best to use at room temperature (But if you’re like me, I always like to keep my butter and milk chilled, regardgress). This allows them to bond into a smooth emulsion that traps air. Cold eggs will split a creamed butter mixture every time.
- Ovens aren’t considered equal: Every oven has a personality. Use a standalone oven thermometer to find your ‘hot spots’ and ensure 180°C actually means 180°C.
- Read twice, bake once: Read the entire recipe before you touch a bowl. Understanding the sequence is just as important as the ingredients.
Lining Your Baking Tins
A successful bake begins with how you treat the baking tin. A poorly lined tin leads to torn edges and uneven rises.
- I advocate for the “Fringe Method” for round tines and the “Cross Method” for square. These techniques ensure your baking paper sits flush against the metal, preventing the batter from sticking to the sides or pleating.
For a step-by-step guide to these techniques, visit my Tin Conversion Guide.
Quick Trouble Shooting
- My cake peaked and cracked: Your oven was likely too hot, or you used too much leavening agent.
- My cookies spread too thin: Your butter was likely too soft, or the dough needed a chill in the fridge before baking.
- My cake sank in the middle: You likely opened the oven door too early, causing a sudden temperature drop before the structure was set.
The Essential Pantry Staples
You don’t need a massive pantry to be a great baker; you just need a few reliable basics that play well together. Here are the staples I always try to have on hand:
- The Flours: I keep Plain (All-Purpose) for most things, High-Grade for bread, and Self-Raising for when I need that extra bit of convenience.
- The Sugars: Caster sugar is my go-to for light cakes, Dark Muscovado adds a lovely fudgy moisture, and Icing Sugar is essential for those final flourishes.
- The Fats: Unsalted butter gives me total control over salt. I also keep a neutral oil (like Grapeseed) for moist muffins and Full-Fat Greek Yogurt for adding a nice tang to sponges.
- The Lift: Fresh Baking Powder and Baking Soda (replace every 6 months for maximum lift).
- The Flavor Boosters: Sea Salt flakes, Vanilla Bean paste, and a whole Nutmeg for grating.
- The Chocolates: Blocks or bars with at least 50% and 70% cocoa solids. They melt beautifully and taste much richer.
Top 5 Kitchen Essentials
It’s easy to get distracted by fancy gadgets, but you can bake almost anything with just these five “best friends” on your bench:
- Digital Scales: Honestly, these are a game-changer. They take the guesswork out of “cups” and make sure your bake turns out the same way every time.
- Sturdy Whisk: You want something with a bit of backbone. A flimsy whisk makes your arm do twice the work, but a strong one makes beating eggs a breeze.
- Silicone Spatula: My favorite tool for getting every last drop of batter out of the bowl and for smoothing out buttercream for those perfectly imperfect swoops.
- Heavy-Duty Baking Tins: Thin tins tend to warp in the heat, which leads to burnt edges. Investing in a couple of light-colored, heavy-duty tins ensures your cakes bake evenly.
- Fine-Mesh Sieve: It’s an extra step, but sifting your dry ingredients makes the difference between a dense, clumpy cake and one that’s light and airy.
More Guides, Tips and Tricks
Baking Conversions
This library of conversions will be an asset for bakers of any skill level. Your new “go-to” for translating favourite American recipes or scaling a classic Kiwi bake. View Conversions Guide here →
Tin Conversion Guide
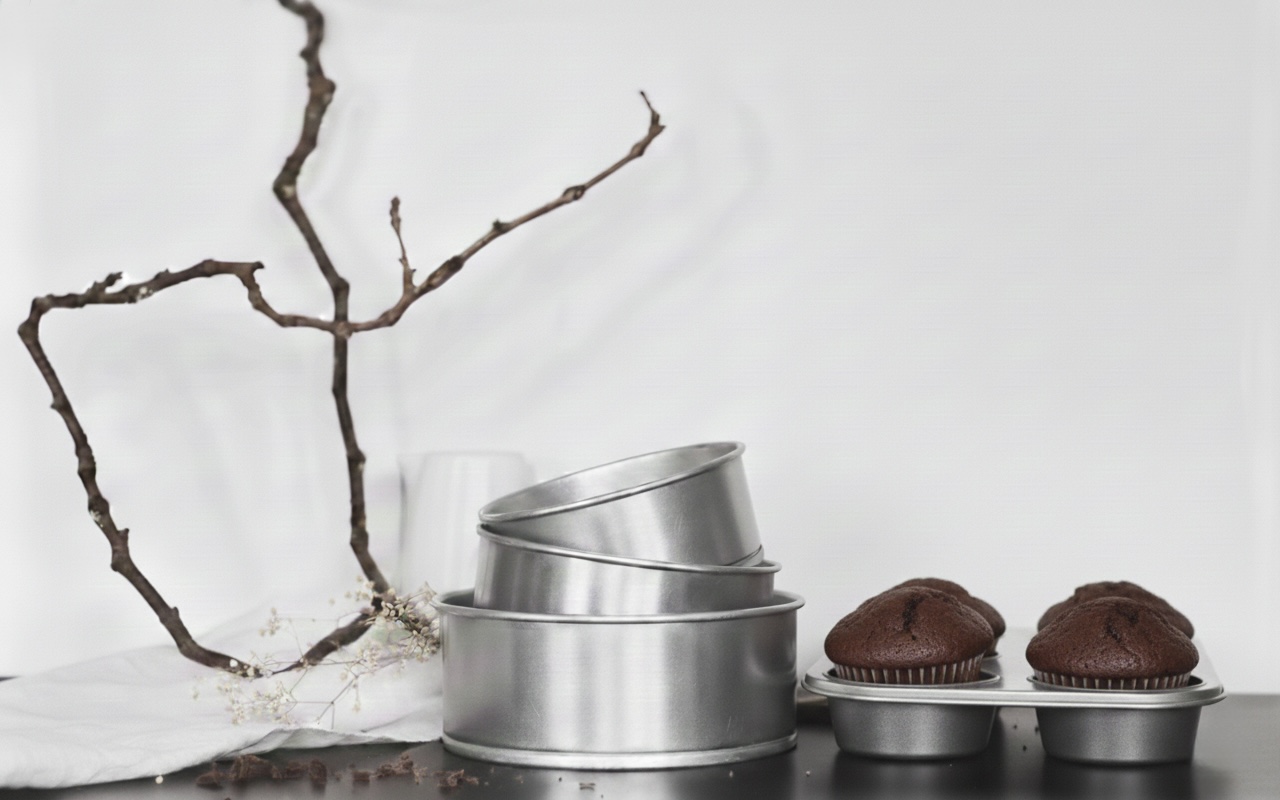
Never be limited by the size of your cake tin again. Learn how to scale any recipe to fit the vessels you have on hand with simple, reliable math. View the Tin Conversion Guide here →

Egg Size Guide
An egg is never just an egg. Understand the weight differences between grades and how to ensure your emulsions are perfectly balanced every time. View the Egg Size Guide here →
Baking Substitutes
In building this guide, I’ve dug through old manuals and asked around to find the best ‘plan b’ options for when your pantry falls short. Substitutes are great in a pinch, but remember: the original ingredient is usually the hero for a reason!
Note: Substitutes are an art of necessity, not a choice of quality. Whenever possible, stick to the primary ingredient to preserve the intended texture.
| Missing Ingredient | The Substitute | A Side Note |
| Cake Flour | 1 cup Plain Flour minus 2 tbsp + 2 tbsp Cornflour. | Sieve three times to ensure the cornflour is fully integrated. |
| Self-Rising Flour | 1 cup Plain Flour + 1.5 tsp Baking Powder + 1/4 tsp Salt. | Whisk thoroughly to make sure rising agents are well intergrated. |
| Buttermilk | 1 cup Whole Milk + 1 tbsp Lemon Juice or White Vinegar. | Let sit for 10 minutes until it slightly curdles before using. |
| Brown Sugar | 1 cup White Sugar + 1 tbsp Molasses or Treacle. | Rub together with fingertips until the color is uniform. |
| Sour Cream | Equal parts Greek Yogurt or Crème Fraîche. | Ensure it is full-fat to maintain the intended moisture levels. |
| Egg (for binding) | 1/2 mashed Banana or 1/4 cup Applesauce. | Best for dense bakes like muffins; avoid in delicate sponges. |
| Dutch Process Cocoa | Natural Cocoa + 1/8 tsp Baking Soda per 3 tbsp. | This neutralises the acidity to mimic the “Dutch” profile. |
| Heavy Cream | 3/4 cup Milk + 1/4 cup melted Unsalted Butter. | This works for baking moisture, but note: it will not whip. |
Storage & Shelf Life
One of the greatest joys of building this community is the exchange of knowledge. I’ve reached out to other bakers who have spent decades at the bench, to gather their non-negotiables for keeping a pantry at its peak. This is now the “Tribe’s Guide” to ensuring your ingredients are as ready as you are.
The Airtight Rule
The consensus from the community is clear: paper bags are for transport, not for storage.
- Flours & Grains: To keep things fresh (and to keep those pesky pantry moths at bay), move your flours into airtight glass jars or containers as soon as they’re opened. It looks beautiful on the shelf and protects your hard-earned ingredients.
- Sugars: We’ve all dealt with rock-hard brown sugar. The Tribe’s favorite hack? A “sugar saver” stone, or simply a slice of fresh bread tucked into the jar overnight. The sugar absorbs the moisture from the bread and becomes soft and usable again by morning.
The Cold Storage Secret
I was surprised to learn how many professionals utilise their freezers for more than just ice cream.
- Nuts & Wholemeals: Because whole-grain flours (like rye) and nuts have higher oil content, they can turn bitter if left in a warm pantry. Keeping them in the freezer extends their life and keeps those flavors sweet.
- Active Yeast: To keep your yeast “alive” and ready to work, the fridge is its best friend. A common tip shared by the Tribe: always “bloom” your yeast in a little warm water before you start your dough. If it doesn’t foam, it’s telling you it’s time for a fresh jar.
The “Potency” Check
When you’re not sure if that tin in the back of the cupboard is still up to the task, try these shared tests:
- Raising Agents: Drop a half-teaspoon of baking powder into hot water. If it bubbles up instantly, you’re good to go. For baking soda, use a splash of vinegar. If it’s flat, your cake will be too.
- Spices: The general rule of thumb from our experienced bakers is that ground spices lose their “soul” after about six months. If you can, buy whole nutmeg or cinnamon sticks and grate them as needed—the aroma in your kitchen will be the only proof you need.
Do you have a storage secret passed down to you, or a hack you’ve discovered through trial and error? This is an open document, and I’d love to add your wisdom to this list. Reach out to the bench at dane@bakergatherer.com.
A Baker’s Glossary
In the kitchen, certain words carry specific technical weight. Understanding these terms is the difference between following instructions and mastering the craft.
The Techniques
- Creaming: Beating room-temperature butter and sugar together until the mixture is pale, fluffy, and increased in volume. This isn’t just mixing; it’s aerating the foundation of your cake.
- Folding: A gentle motion used to incorporate delicate ingredients (like whipped egg whites or sieved flour) into a heavier batter without deflating the air you’ve worked so hard to create. Use a spatula to cut through the center, lift, and turn.
- Blooming:
- For Yeast: Dissolving yeast in warm liquid to ensure it is active.
- For Cocoa: Mixing cocoa powder with hot liquid to release the full intensity of the chocolate flavor.
- Rubbing In: Using your fingertips to merge cold butter into flour until the mixture resembles fine breadcrumbs, the secret to flaky scones and shortcrust pastry.
- Blind Baking: Baking a pastry shell without its filling. You weigh the pastry down with “baking beans” or rice to ensure it stays flat and crisp before the wet filling is added.
The Textures
- Soft Peaks: When you lift your whisk from egg whites or cream, the mixture forms a peak that gently curls over at the tip.
- Stiff Peaks: The mixture stands straight up without collapsing when the whisk is lifted. Essential for meringues and stable pavlovas.
- Ribbon Stage: Beating eggs and sugar until the mixture is so thick and pale that when you lift the whisk, the batter falls back into the bowl in a slow “ribbon” that holds its shape on the surface for a few seconds.
The language of baking is universal. Once you understand the ‘why’ behind the word, you can pick up a recipe from any corner of the globe and feel right at home.
The Science
- Emulsion: The blending of two liquids that don’t naturally mix (like oil and water). In baking, we achieve this by adding room-temperature eggs slowly to creamed butter.
- Mise en Place: A French term meaning “everything in its place.” The act of weighing all ingredients and prepping your tools before the first step of a recipe begins. It is the hallmark of a calm, curated kitchen.
Have I missed something, or something isn’t quite right? This is an open document, and I’m always looking to learn more from those who have been at the bench longer than me. Send me an email here, dane@bakergatherer.com.
]]>
A recipe is a blueprint, but the tin is the foundation. Changing the size or shape of our baking tin isn’t just about whether the batter fits; it’s about how heat travels through the shape, size and material of the pan.
When you swap a 20cm round tin for a 20cm square one, you aren’t just changing the corners, you are increasing the surface area by roughly 25%. This guide is designed to help you navigate those shifts with ease, ensuring your favorite bakes come out perfectly, regardless of the tin.

Baking is spatial geometry. When you change the shape, you change the way heat travels to the heart of the cake.
THE CORE PRINCIPLES OF VOLUME
Before you pour, consider these three rules for tin swapping:
- The Two-Thirds Rule: Regardless of the shape, never fill a tin more than two-thirds full. Batter needs room to climb; if it hits the ceiling too early, the structure will collapse.
- The Water Test: If you are unsure if a recipe will fit a new tin, fill your original tin with water, then pour that water into the new one. If it fills to the same level, you’re safe.
- Surface Area vs. Time: A shallower, wider tin bakes faster than a deep, narrow one. If you are spread thin, drop your temperature by 10∘C and start checking for doneness 10 minutes early.
Dane’s Tip: If you’re not sure if your batter will fit? Fill your tin with water using a measuring jug. If the tin holds 6 cups of water, it will safely hold 4 cups of batter (leaving room for the rise).
SHAPE SHIFTING: COMMON CONVERSIONS
Use these shortcuts to swap shapes without doing the long-form math.
Round to Square
Square tins hold more volume than round ones of the same “width.” To keep your cake height consistent, move down one size when switching to square.
- 15cm (6″) Round = 13cm (5″) Square
- 20cm (8″) Round = 18cm (7″) Square
- 23cm (9″) Round = 20cm (8″) Square
- 25cm (10″) Round = 23cm (9″) Square
The Loaf Tin Logic
A standard 22cm × 12cm loaf tin is a versatile beast.
- It is roughly equivalent to an 18cm Round tin or a 15cm Square tin.
- A standard loaf tin usually holds about 6 cups (1.5L) of batter.
- Note: Loaf tins are deeper; expect to increase your bake time by 10–15 minutes.
Muffin & Cupcake Swaps
- A standard 20cm (8″) Round cake recipe will typically yield 12 to 15 standard cupcakes.
- Bake cupcakes at the same temperature as the cake, but reduce the time to 18–22 minutes.
THE VOLUME REFERENCE MAP
Based on a standard depth of 5cm (2 inches).
| Tin Shape & Size | Approx. Volume (Cups) | Best Replacement |
| 15cm Round | 4 Cups | 1 loaf tin (22cm × 12cm) |
| 20cm Round | 8 Cups | 18cm Square tin |
| 23cm Round | 11 Cups | 20cm Square tin |
| 20cm Square | 10 Cups | 23cm Round tin |
| 23cm Square | 14 Cup | 33cm × 23cm Rectangular pan |
A NOTE ON MATERIAL
Dark vs. Light Tins The “Home Baker” needs to know that the finish of your tin matters as much as the size.
- Dark or Non-stick Tins: These absorb more heat. If your cake edges are burning before the middle is set, reduce your oven by another 10∘C.
- Professional Aluminium: This provides the most even heat distribution and is the gold standard of the Baker Gatherer kitchen.
Lining your baking tins
A perfectly converted recipe deserves a perfectly lined tin. If your baking paper isn’t flush against the sides of the pan, your cake will struggle to climb or, worse, develop “pleated” edges (Unless that’s your desired aesthetic).
The Round Tin: The “Fringe” Method
Don’t fight the curves. To get a seamless fit for round cakes:
- The Base: Trace the bottom of your tin onto baking paper and cut exactly inside the line.
- The Collar: Cut a long strip of baking paper slightly taller than the tin’s sides.
- The Fringe: Fold the bottom 1cm of that strip upward. Snip small “V” shapes into that folded edge every 2cm.
- The Install: Grease the tin, press the fringe into the bottom corner so it sits flat, and then drop your base circle on top to lock it in place.
The Square Tin: The “Cross” Method
Corners are the enemy of clean releases. Skip the folding and bunching:
- Cut two long strips of baking paper exactly the width of the tin’s base.
- Grease the tin and lay the first strip across, leaving “handles” hanging over two opposite sides.
- Lay the second strip perpendicular to the first.
- This creates a double-layered base and perfectly clean corners, with built-in handles to lift the bake out safely once cooled.
Dane’s Tip: Always grease the tin before the paper, and the paper before the batter (If you like). Double-greasing ensures the baking paper stays still while you spread the batter, and peels away like silk once baked.
Looking for more tips and tricks in the kitchen? Check out Baking 101, designed to strip away the guesswork and establish the fundamental habits that turn a good baker into a master of the bench.
In the chemistry of baking, an egg isn’t just an ingredient; it’s a measurement.
When baking, precision starts before the oven is even on. From NZ Grade 6 standards to the ‘Jumbo’ impact of a Grade 8, discover why the size of your egg is the secret to a perfect rise.

In New Zealand, we typically bake with Grade 6 eggs, which weigh approximately 53g–58g. However, many recipes online (mine included) ask for, or use Grade 7.
- The Problem: Using a Grade 4 egg when a recipe calls for Large can lead to dry cakes and poor structure.
- The Rule of Thumb: If a recipe doesn’t specify, assume 50g-60g of liquid egg (roughly a Grade 6 or 7).
- Pro Tip: If you only have Jumbo eggs, whisk them in a bowl first and weigh out exactly what you need.
Dane’s Tip: Most of my recipes are tested with Grade 7 eggs. If you only have Grade 8s, whisk one in a bowl and use a tablespoon less to avoid rubbery baking!
Quick Size Guide
| Grade | Name | Min. Weight per Egg | Best Use |
| Grade 4 | Pullet | 43g | Best for soft boiling; too small for most cakes. |
| Grade 6 | Standard | 53g | The “Golden Standard” for NZ baking recipes. |
| Grade 7 | Large | 62g | Great for rich custards or heavy doughs. (My personal preference when baking) |
| Grade 8 | Jumbo | 68g+ | Use when a recipe specifically calls for “Extra Large.” |
FAQs
Q. How do I know if my eggs are still fresh?
A.Try the Float Test. Put your egg in a glass of water. If it sinks and lays flat on its side, it’s very fresh. If it stands up on one end, it’s getting older but is still fine to bake with. If it floats to the top? Toss it, it’s past its prime.
Q. Can I use egg whites from a carton?
A. Carton whites are convenient, but they are pasteurised. This means they can be a bit temperamental when you’re trying to whip them into a big, fluffy meringue. They work fine for adding protein to your baking, but for a Pavlova or a soufflé, I would recommend cracking fresh eggs.
Q. Why do my eggs need to be at room temperature?
A. Cold eggs are the enemy of a smooth batter! When you add a cold egg to creamed butter, it causes the fat to seize up and split, giving you a curdled look. Room temperature eggs emulsify perfectly, creating a smooth, strong structure that holds air much better.
Q. What happens if I use a large egg when the recipe asks for jumbo?
A. It many be infrequent that you’ll come across a recipe requesting a jumbo size egg. However, In a single-egg recipe, like a batch of cookies, you probably won’t notice a thing. But if you’re making a sponge cake that calls for four eggs, using a smaller size means you’re missing out on about 40ml of liquid. This can make your cake turn out dry or stop it from rising properly. If your eggs look small, it’s always safer to weigh them!
Q. I forgot to take my eggs out of the fridge! Is there a quick fix?
A. We’ve all been there. Just pop your cold eggs into a bowl of warm (not boiling!) water for about 5–10 minutes. This will take the chill off and get them to the perfect bench temperature while you’re gathering the rest of your ingredients.
Q. Does the colour of the shell matter?
A. Not at all. Whether the shell is white, brown, or even blue, the inside of the egg is the same. The colour is just down to the breed of the hen. Focus more on the freshness and the weight rather than the colour of the shell!
]]>


This caramel sauce it super easy to make and can be mastered by anyone at any skill level. You can drizzle this caramel sauce over ice cream, use it as a filling for cakes and pastries, or simply enjoy it straight from the spoon (I’ve been there, so no judgement here).
My personal go-to caramel sauce recipe, it’s easy, thick, creamy and very versatile. You’ll want to have a jar of this caramel in the fridge at all times to elevate any dessert or baking project at a pinch.
Can I make this a Salted Caramel Sauce?
Absolutely. Simply add 1/2 – 1 Teaspoon of your favourite salt at the end of the recipe. Stir through and allow to dissolve before serving.
Can I make this a Spiced Caramel Sauce?
Totally. When warming the cream, add in 1 Tablespoon of Golden Syrup and 3 Teaspoons of Mixed Spice. Pour this cream into the sugar mixture when the recipe says.
How long will the Caramel Sauce keep for?
If kept in an airtight container or jar in the fridge, your caramel can last up to 3 weeks. On cakes or inside pastries, you caramel will be fine for 3 or so days.

Easy Caramel Sauce
Ingredients
- 300ml Cream
- 270g Caster Sugar
- 1 Teaspoon Vanilla
- 120ml Water
Instructions
- To Start, add the sugar and 120ml of water to a large pot and bring to the boil. Once bubbling, allow to boil for approximately 8 minutes, turning deep amber in colour. Do not mix or swirl while bubbling.
- While the sugar is bubbling, gently warm the cream and vanilla in a separate saucepan.
- Once the sugar mix has reached a deep amber, remove from the heat and slowly pour in the warmed cream. Whisking in the cream quickly, be careful as the sugar mix will froth, rise and be very hot. Once the cream has been added, continue to whisk until bubbling subsides, then set aside to cool and thicken. Easy!


Taking what we already know and love about the classic kiwi shortcake, it’s time to experience a taste of paradise with this pineapple and coconut Shortcake.
The tropical hit of pineapple pairs perfectly with the creaminess of coconut, transporting you to a sunny beach with each bite. This shortcake is also super easy to make and can be whipped up in no time! So, get ready to share this recipe around and treat yourself to a tropical escape.
Should I use fresh or canned pineapple?
If you have fresh pineapple, then go for it. If you have canned, this is also a great options because its convenient, already pre-cut, and you probably have a couple of cans in your pantry. If you use fresh pineapple, keep an eye on the ripeness (sweetness), and/or add a little more sugar if necessary when pineapple is slightly under ripe. I’ll leave the final decision up to you!
Is it possible to give a bigger coconut punch?
If you love coconut, then a possible way to increase the coconut flavour without adding more desiccated coconut is to add a little coconut extract to the dough. The current recipe suggests 1 teaspoon of vanilla extract, so feel free to swap this out or go half and half with the coconut and vanilla extract. Easy!


Pineapple and Coconut Shortcake
Ingredients
Dough
- 300g Self Raising Flour
- 100g Caster Sugar
- 80g Dessicated Coconut
- 130g Butter – Room Temperature
- 1 Egg
- 1 Teaspoon Vanilla Extract
Filling
- 500g Pineapple Pieces
- 50g Caster Sugar
- 1 Tablespoon Cornflour
Instructions
- To start, preheat your oven to 180℃ bake, then line a square 20cm baking tin with grease-proof paper and set aside.
- To make the dough, add the butter and sugar to a medium sized bowl and beat with a hand-held mixer until combined and smooth. Finally, beat in the egg and vanilla until incorporated. Fold in the flour and coconut with a spoon until a dough comes together, then set aside.
- To make the filling, chop up the pineapple pieces and add them to a bowl (draining juice out). Mix through the sugar and cornflour and set aside.
- To assemble, press ⅔ of the dough into the base of prepared baking tin. Pour over the pineapple mixture, then crumble the remaining ⅓ of dough over top. Feel free to sprinkle a little more dessicated coconut over top to give a little more texture.
- Bake for about 45 minutes, or until golden and baked through. NOTE: After 30 minutes or so, you may want to cover with tin foil if the top of the shortcake begins to darken too much.


What’s more red than strawberries, red velvet!
But what if we could combine the two together? Now that’s exactly what I thought by taking the morrishly popular red velvet cupcake and giving it a strawberry surprise. And since strawberries pair well with vanilla, and with chocolate, why not bring them all together in one red cupcake.
Perfect for any occasion, birthdays, valentines or simply weekend baking for those who love both red velvet and strawberries. Taking what we already love about the red velvet cupcake, I didn’t want to change this too much, all I wanted to do was top it off with a subtle strawberry buttercream made from freshly made strawberry coulis. You can find the link to my Berry Couli recipe here!
Do I have to make my own couli, or can I buy it?
If you’d prefer to buy rather than make, that is absolutely fine. However it is super easy to make at home yourself, all you need is 500g of fresh or frozen berries and some caster sugar. It takes around 15 minutes to make, so I’ll share the recipe for my Berry Couli here.
Can I add more strawberries to the cupcake?
You’re more than welcome to. Personally I wanted to keep the red velvet cupcake just as it was and give the strawberry flavour through the buttercream. However you could dice and add small pieces of strawberry to your cupcake batter, just keep an eye on any changes to bake time. Alternatively you could use a tool such as an apple corer to remove a small portion of the cupcake’s centre once baked. This could then be filled with extra coulis for an extra strawberry surprise.
>> Strawberry Coulis Recipe here! <<


Strawberry Velvet Cupcake
Ingredients
Cupcake
- 120g Self Raising Flour
- 80g Caster Sugar
- 1 Tablespoon Cocoa
- ½ Teaspoon Baking Soda
- 140g Butter – Room Temperature
- 2 Eggs
- 2 Tablespoon Buttermilk
- 1 Teaspoon Vanilla Extract
- ½ – 1 Teaspoon Red Food Gel
- 1 Teaspoon White or Cider Vinegar
Buttercream
- 150g Butter – Room Temperature
- 340g Icing Sugar
- 2-3 Tablespoons Strawberry Couli (See recipe link above)
Instructions
- To begin, preheat the oven to 180°C and line a cupcake tin with 12 paper cases.
- In a medium sized bowl (or using a free-standing mixer), add and mix together the flour, sugar, cocoa and a pinch of salt (leaving out the baking soda). Then add in the eggs and butter and beat for about 1 minute, or until nicely combined.
- To this mixture, add in the buttermilk, vanilla and red food gel. Beat again for another 30 seconds until incorporated.
- Using a small bowl or ramekin, add in the baking soda. Then add in the vinegar, giving a slight mix through. Then, working quickly, add this mixture into the cupcake batter while baking soda and vinegar are still fizzing. Fold this through by hand until incorporate.
- Fill paper cases about two-thirds full and bake for 18-20 minutes or until the cake springs back when touched or skewer comes out clean. Remove from the oven and allow to cool completely before icing.
- To make the buttercream, beat the butter with a hand-beater or in a free-standing mixer for 5 minutes, scraping down the sides occasionally.
- Sift the icing sugar in to a bowl and add to the butter in two stages, beating for another 3 minutes between each addition.
- On a slower speed, add in 2-3 tablespoons of strawberry coulis, then bring the mixing speed back up and beat for another few minutes. Taste the buttercream and keep an eye on its consistency, if needed you can add more coulis to give a touch more flavour.
- Once the cupcakes have cooled completely, pipe a swirl or blob of buttercream on top. You can then drizzle more coulis over top if you like, or make a slight well in the centre of the buttercream and fill with coulis (as I've done in the photos above). Enjoy!