Kevin Indig writes Growth Memo, which goes out weekly to more than 29,000 founders, in-house leads, and marketing leaders. He spent 10 years as an operator and leader at Shopify, G2, and Atlassian, and now advises Meta, Airbnb, and Reddit on growth.
The Memo runs on original research into how search and AI are changing — Kevin, in his own words, swims in data all day.
The work isn't done when you hit 'publish'
"Publishing is only half the job — you also need a repeatable way to distribute your work. Buffer makes that much easier, and keeps a good post from disappearing after publication day," says Kevin.
You spend days on a piece, it goes out, it gets one good day of attention, and then it's gone. Kevin's fix is to stop treating a Memo as one post and start treating it as a week of them — the same logic behind repurposing long-form content, applied to a newsletter.
"A single Memo gives us several things to share. We might pull out a chart, a finding, or a question worth discussing," he says.
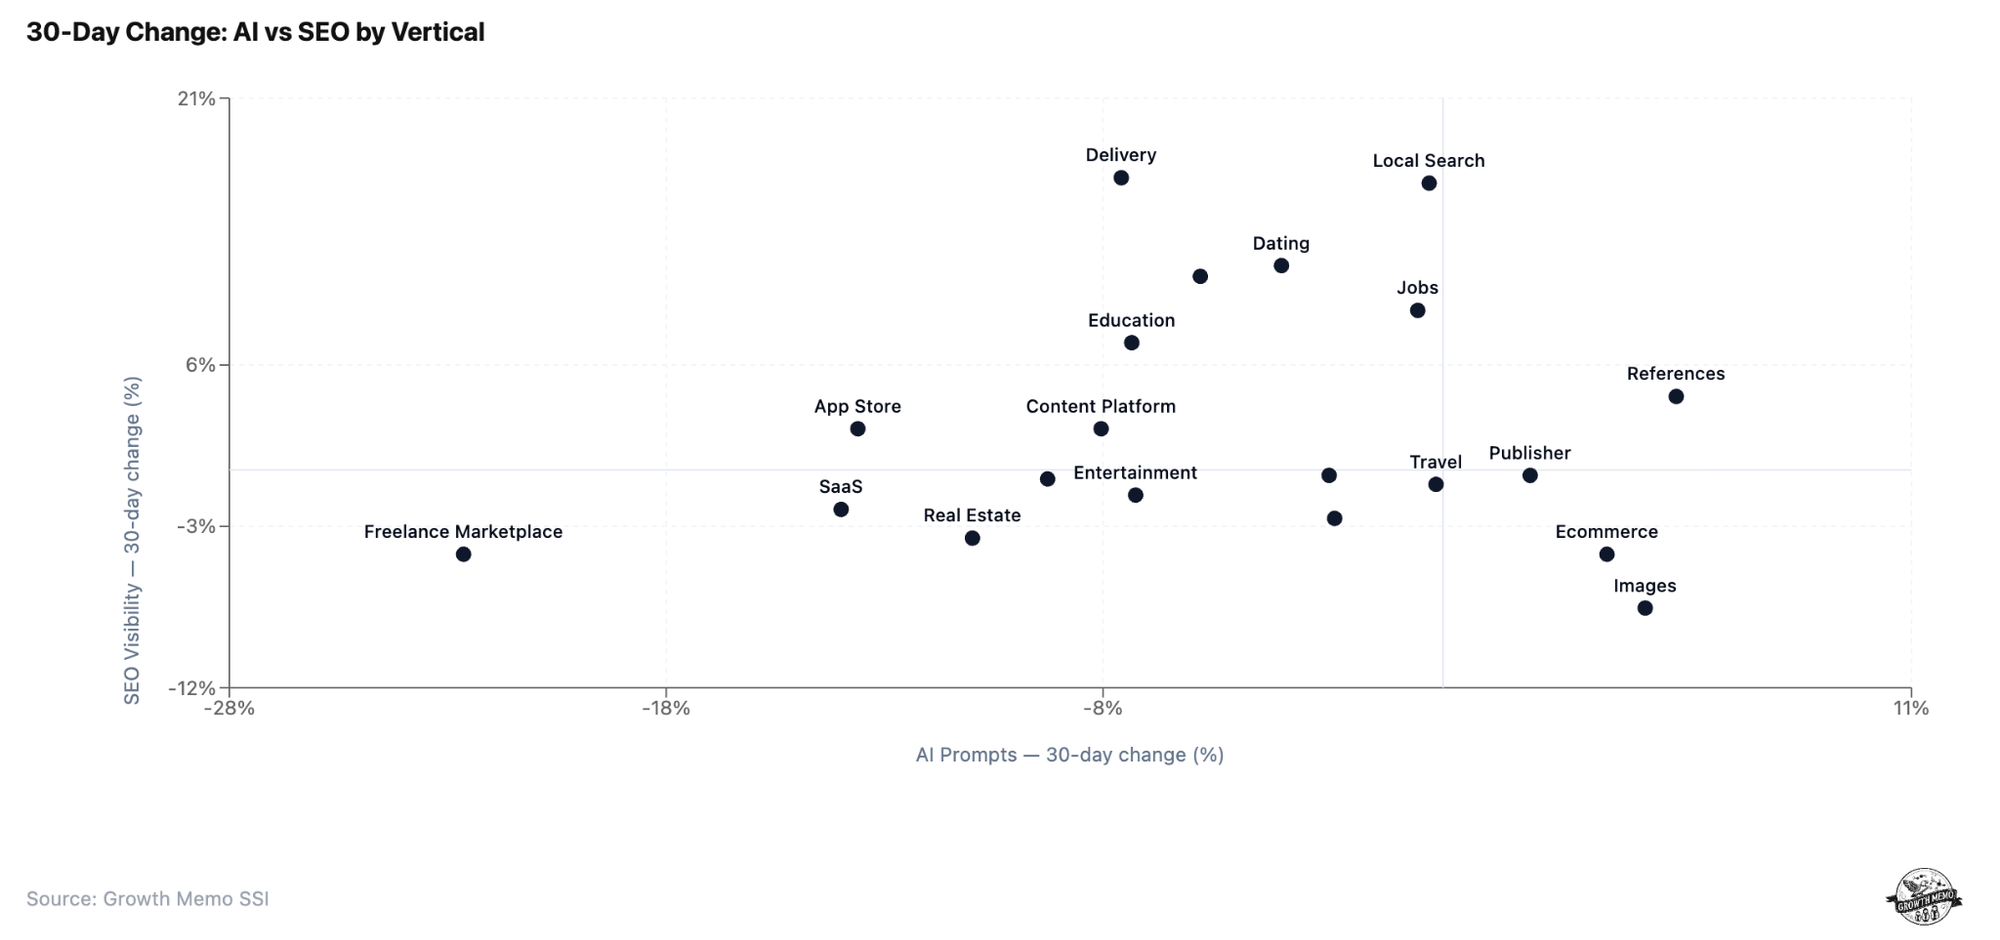
Substack Notes is where ideas get tested
On Substack Notes, Kevin posts short takes, charts, videos, and teasers for Memos that haven't gone out yet. He also uses Notes to test a topic before committing to a full article.
A fully researched memory takes an entire week of his time, while a Note only takes a few minutes. It's well worth investing in the latter first, he says.
The ideas themselves come from his original research, his client conversations, and the patterns he sees in the data. The Notes that perform well often get an entire newsletter.
Buffer handles the distribution
Kevin and his team prepare the posts around the newsletter, and Buffer schedules them from there. Scheduling is essential for Kevin, who is rarely at his desk. Some weeks he's traveling; some days are booked end-to-end with clients.
With Substack Notes now available as a channel in Buffer, Kevin can batch prep his ideas to go out too.
"Buffer makes sure every Memo gets distributed without requiring me to be online for every post. If I had to put a number on it, I'd say Buffer saves me 2–3 hours a week."
Using Buffer with Codex
Kevin's favorite Buffer feature is the Model Context Protocol (MCP) integration, which lets AI tools connect directly to a Buffer account. He points Codex, OpenAI's coding assistant, at his own post history to see which posts landed and pull ideas for what to write next.
"I love the MCP. Being able to connect Codex to Buffer, understand which posts perform well, and get inspiration for what to post next is unbeatable," he says.
His advice for Substack creators
For writers still deciding whether they need a tool at all, Kevin's advice is to start where your readers already are, build a routine you can keep, and check what's working so can repeat (or move on).
It's advice that applies whether you're just starting on Substack or 30,000 subscribers in. Kevin's version of it happens to run on a scheduling queue and a coding assistant — but the routine is the part that does the work.
Danny Hieber, Ph.D., studies how words spread. A term can start in a tiny group and then, slowly, get repeated hundreds, thousands, even millions of times in different places by different people. Eventually, it becomes part of a language, and nobody remembers where it started.
He promotes his newsletter in the same way.
Danny is the linguist behind Linguistic Discovery, a weekly newsletter about the science and diversity of language. He explains the field to a much larger audience on Substack Notes, Threads, X, Facebook, Instagram, TikTok, and YouTube. He has more than 1 million followers across those platforms, including 320K on Instagram and 217K on TikTok.

"Every time I finish a newsletter issue, I pull out all the interesting tidbits, graphics, examples, quotes, and concepts/terms covered, and turn them into dozens of smaller pieces of content — microposts (Substack Notes, Threads, X, Facebook), carousels (Instagram), and short-form videos (TikTok, Instagram Reels, YouTube Shorts)," says Danny.
Each of those pieces ends with a call to action pointing back to the issue it came from: "If you want to learn more about [topic], check out this newsletter issue." Then he schedules the batch in Buffer and lets it go out over the following weeks.
Danny keeps up that many platforms alongside his full-time work as a linguist, which includes working with Indigenous communities to document and revitalize their languages. That's no mean feat, and Buffer is how he manages it.
Buffer as the distribution center
"I think of Buffer like my content distribution center: all my content gets scheduled there, and then Buffer sends it to all my platforms, or notifies me to post," he says.
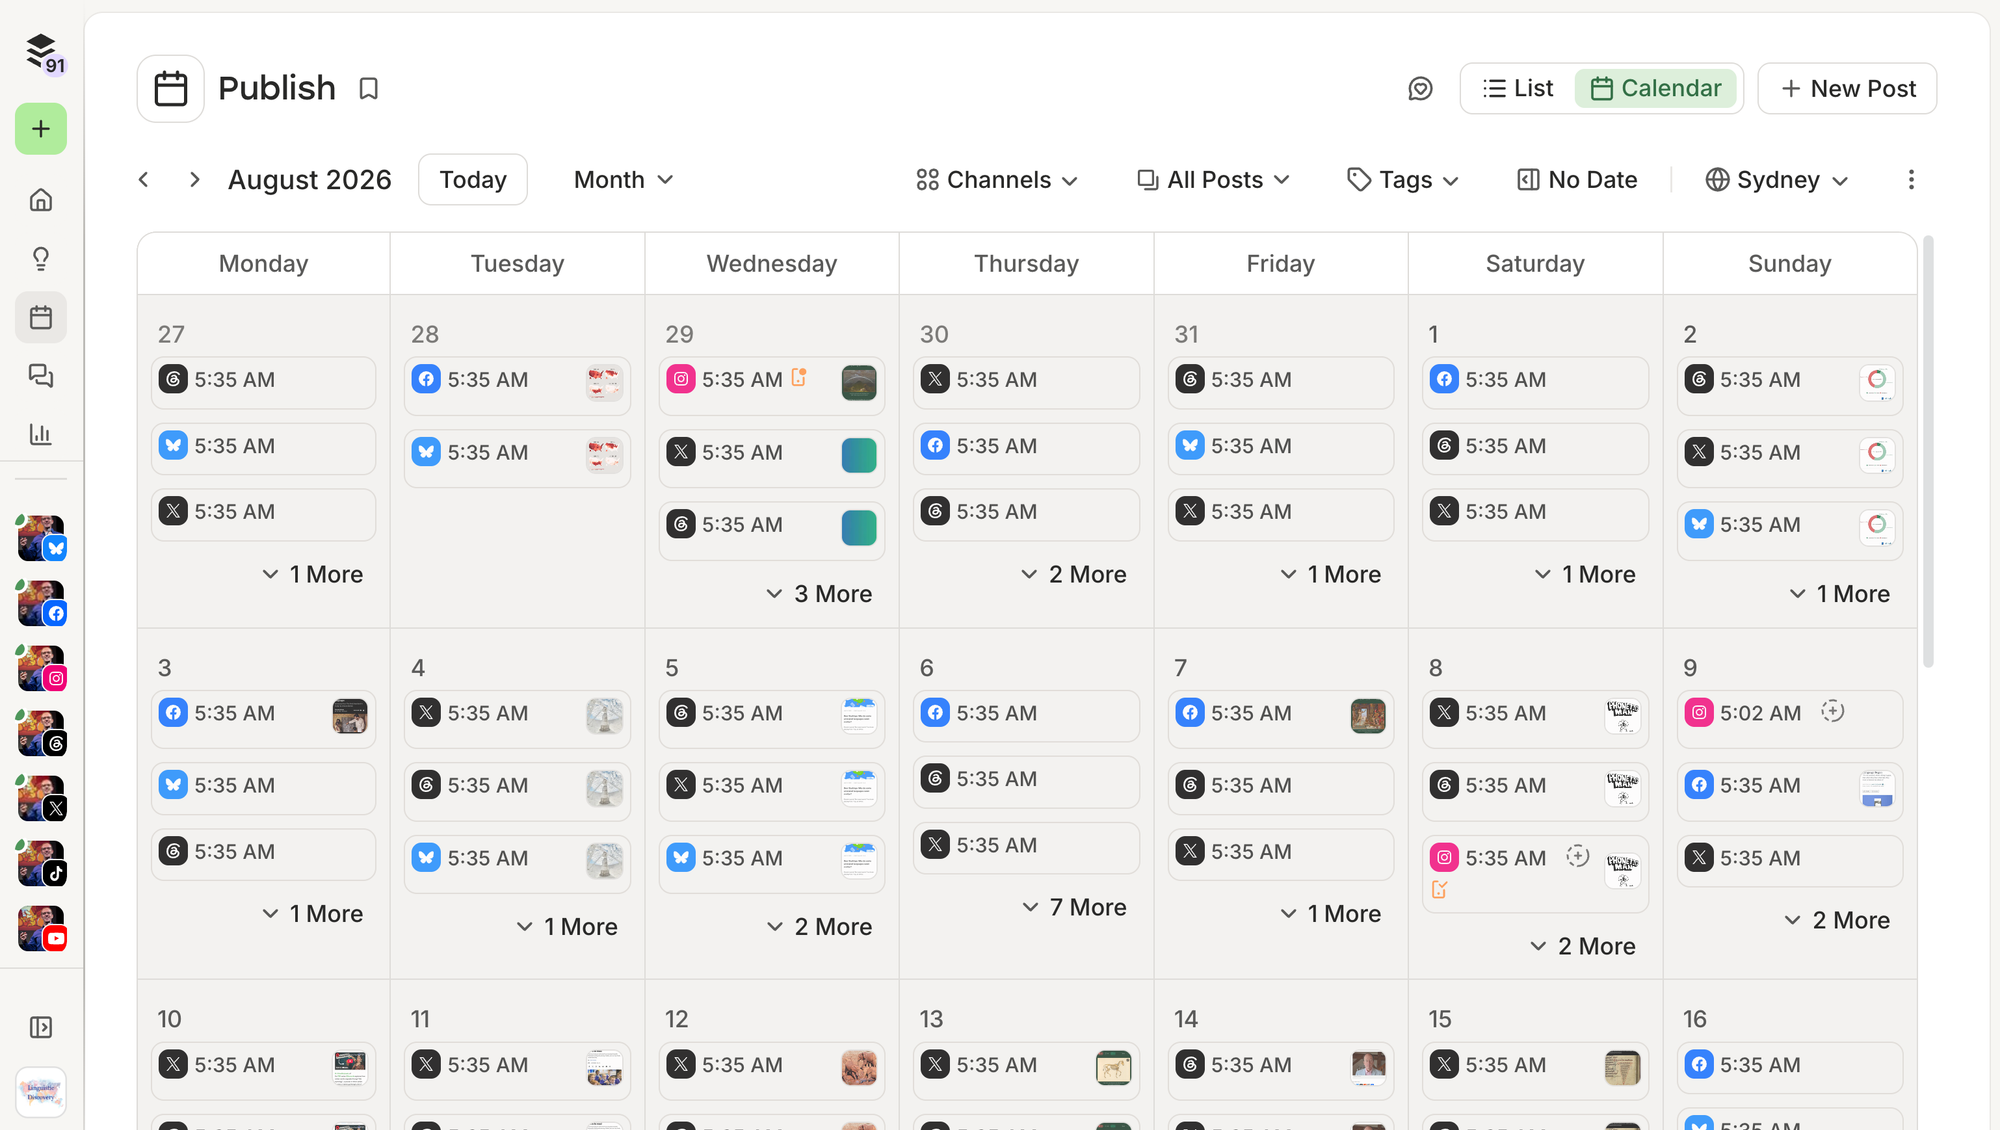
For the posts that can't go out automatically, Buffer handles most of the work. "Even when Buffer can't post directly for you because a post requires manual features, it still makes the process as quick and painless as possible by handing you everything you need to post when it notifies you — images, text, links, and other info."
He also replies to comments from inside Buffer. "I'm also a huge fan of Buffer's recent Community feature, because now I can manage all my comments in one place."
As a result, Danny rarely needs to open the platforms themselves.
"What I love about Buffer overall is that it saves me from hardly ever having to open the social media apps themselves — hours of distraction and doomscrolling avoided!"
Consistency and peace of mind
"It might seem strange to say, but Buffer has done wonders for my mental health. It frees me from the stress of feeling chained to my content schedule, and the need to check in on my content every day," Danny says.
At any given time, he might have several weeks of content in the queue. "I no longer have to worry about missing a day or two because I trust that Buffer will send the content out for me. It's greatly reduced my feeling of burnout."
"Before using Buffer, my content schedule never felt sustainable. Finally, it's allowed me to be more consistent in my posting, which builds trust with my audience and is rewarded by the algorithms."
His advice to writers still on the fence is about creative freedom rather than efficiency. "Buffer gives you the creative freedom to capture ideas as you have them without worrying about the logistics of scheduling and posting — just throw it in your queue and forget about it."
On using Substack Notes
Danny has been deliberately changing what he posts on Substack Notes. He used to share a lot of news and new research. Now he posts far more of his own ideas.
"I realized that most of my Substack readers follow me not so much for the latest news and research, but for what I have to say about it. My strength as a writer, and the reason people value my newsletter, is my ability to explain and synthesize, not because I'm aggregating links."
Now that he can schedule Notes in Buffer, they go into the same queue as everything else he pulls from an issue.
That queue is about to get more to work with. Danny is in the early stages of a pop linguistics book, and he plans to post much more book-related content over the next year.
Josh Allan Dykstra is a keynote speaker and self-described optimistic futurist who has spent 20 years on one problem: making work not suck. He's worked on it as an author, an entrepreneur, and a tech founder, for clients including Microsoft, Amazon, CHANEL, and the State of Colorado.
These days he hosts Hello Tomorrow, a Substack podcast about the global systems that shape ordinary life, and he's finishing his second book, Work Will Kill Us All: An Optimist's Guide To The Future.
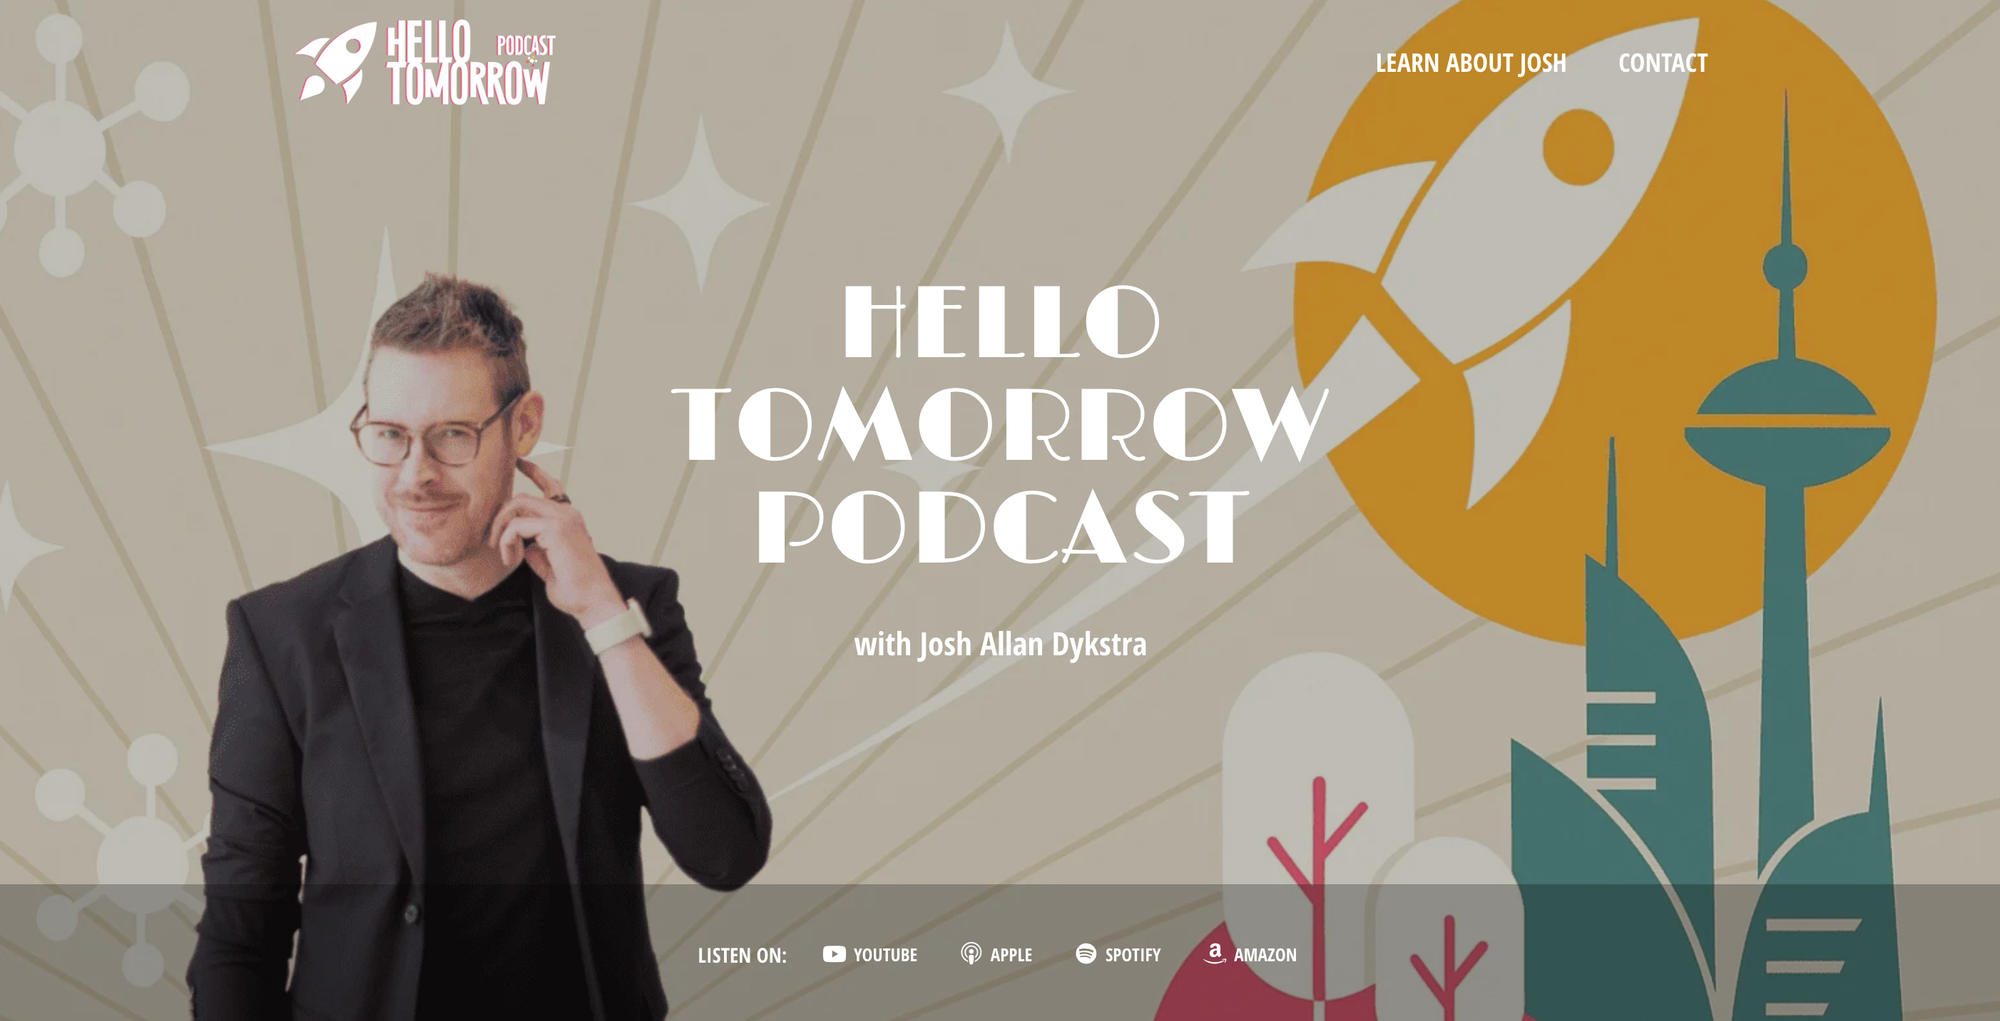
He has nearly 48K followers across Instagram, X, LinkedIn, and TikTok, including 20K on Instagram
All of which is a lot to fit into a week.
"I post something every workday, sometimes multiple things a day, and generally take one day to batch a month of content at a time into Buffer to make that happen."
One missing channel
Everything Josh publishes has run through Buffer for a while now, with one exception: the channel hosting his podcast.
"All my content gets delivered via Buffer, except Substack... until now!"
He's started crossposting his image and video content from Instagram and TikTok over to Substack Notes, mostly as a test: he wants to know whether the audience he's built on Substack wants the same things his Instagram and TikTok audiences do.
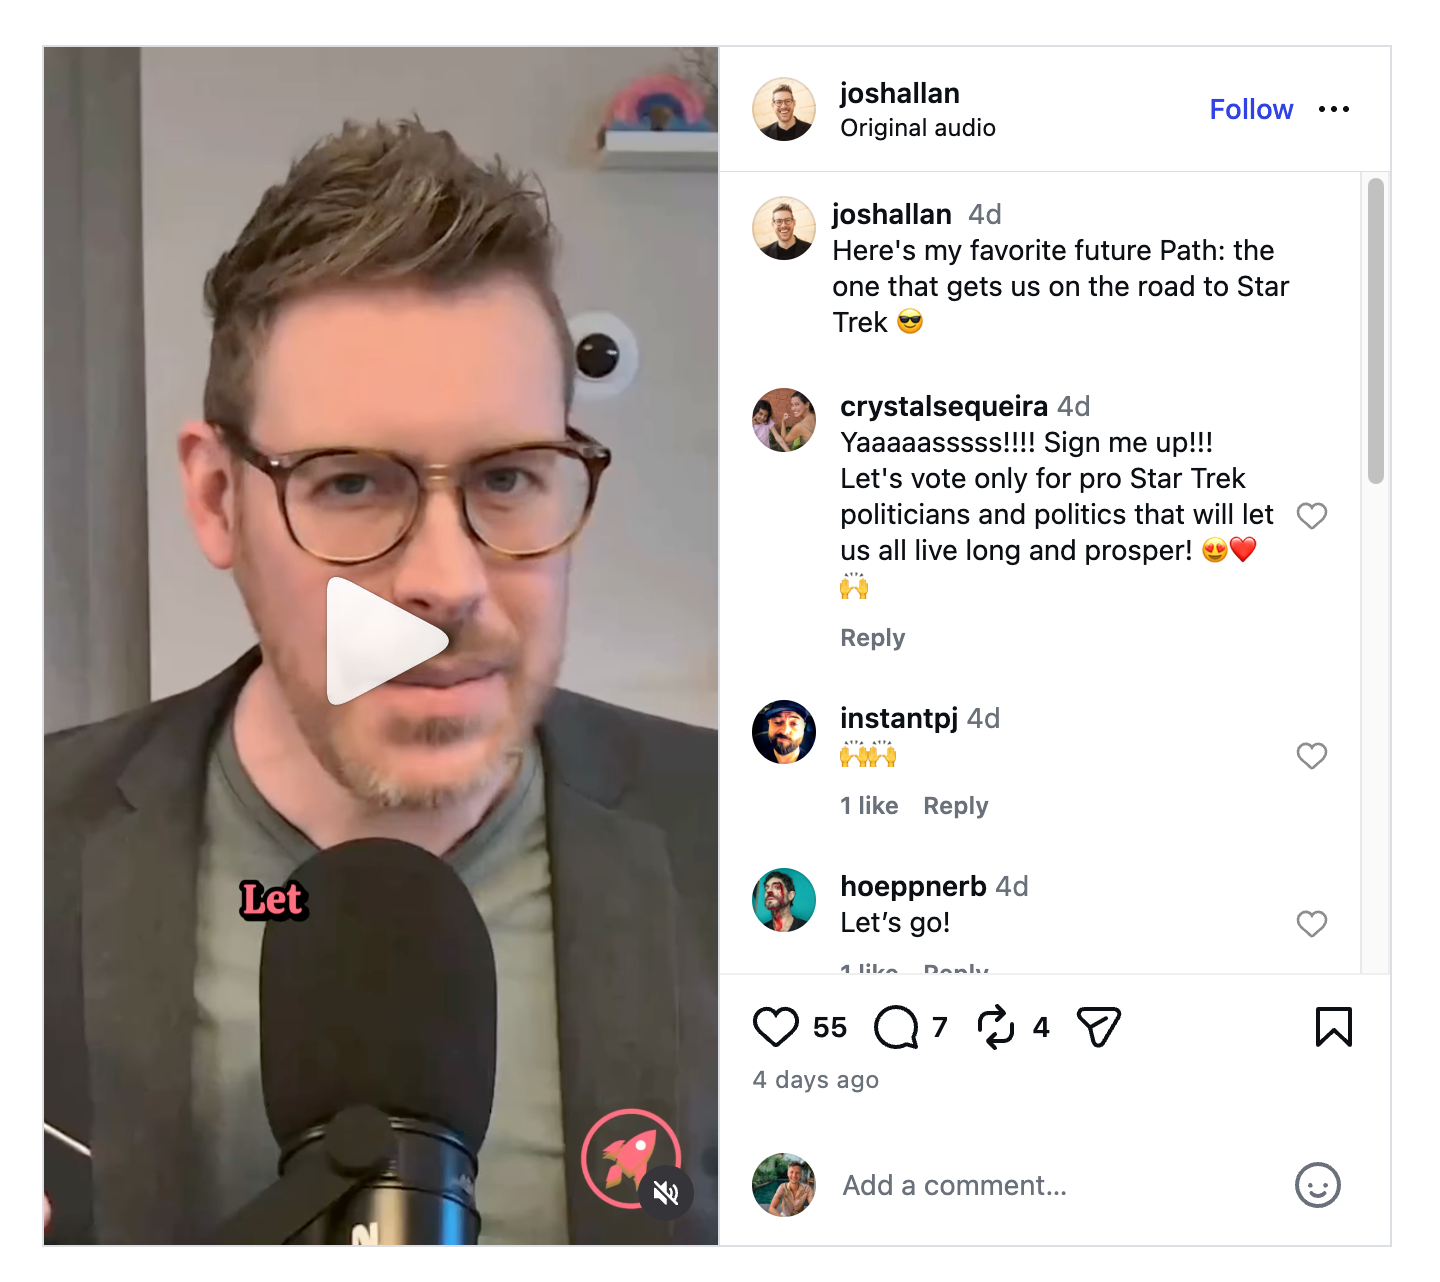
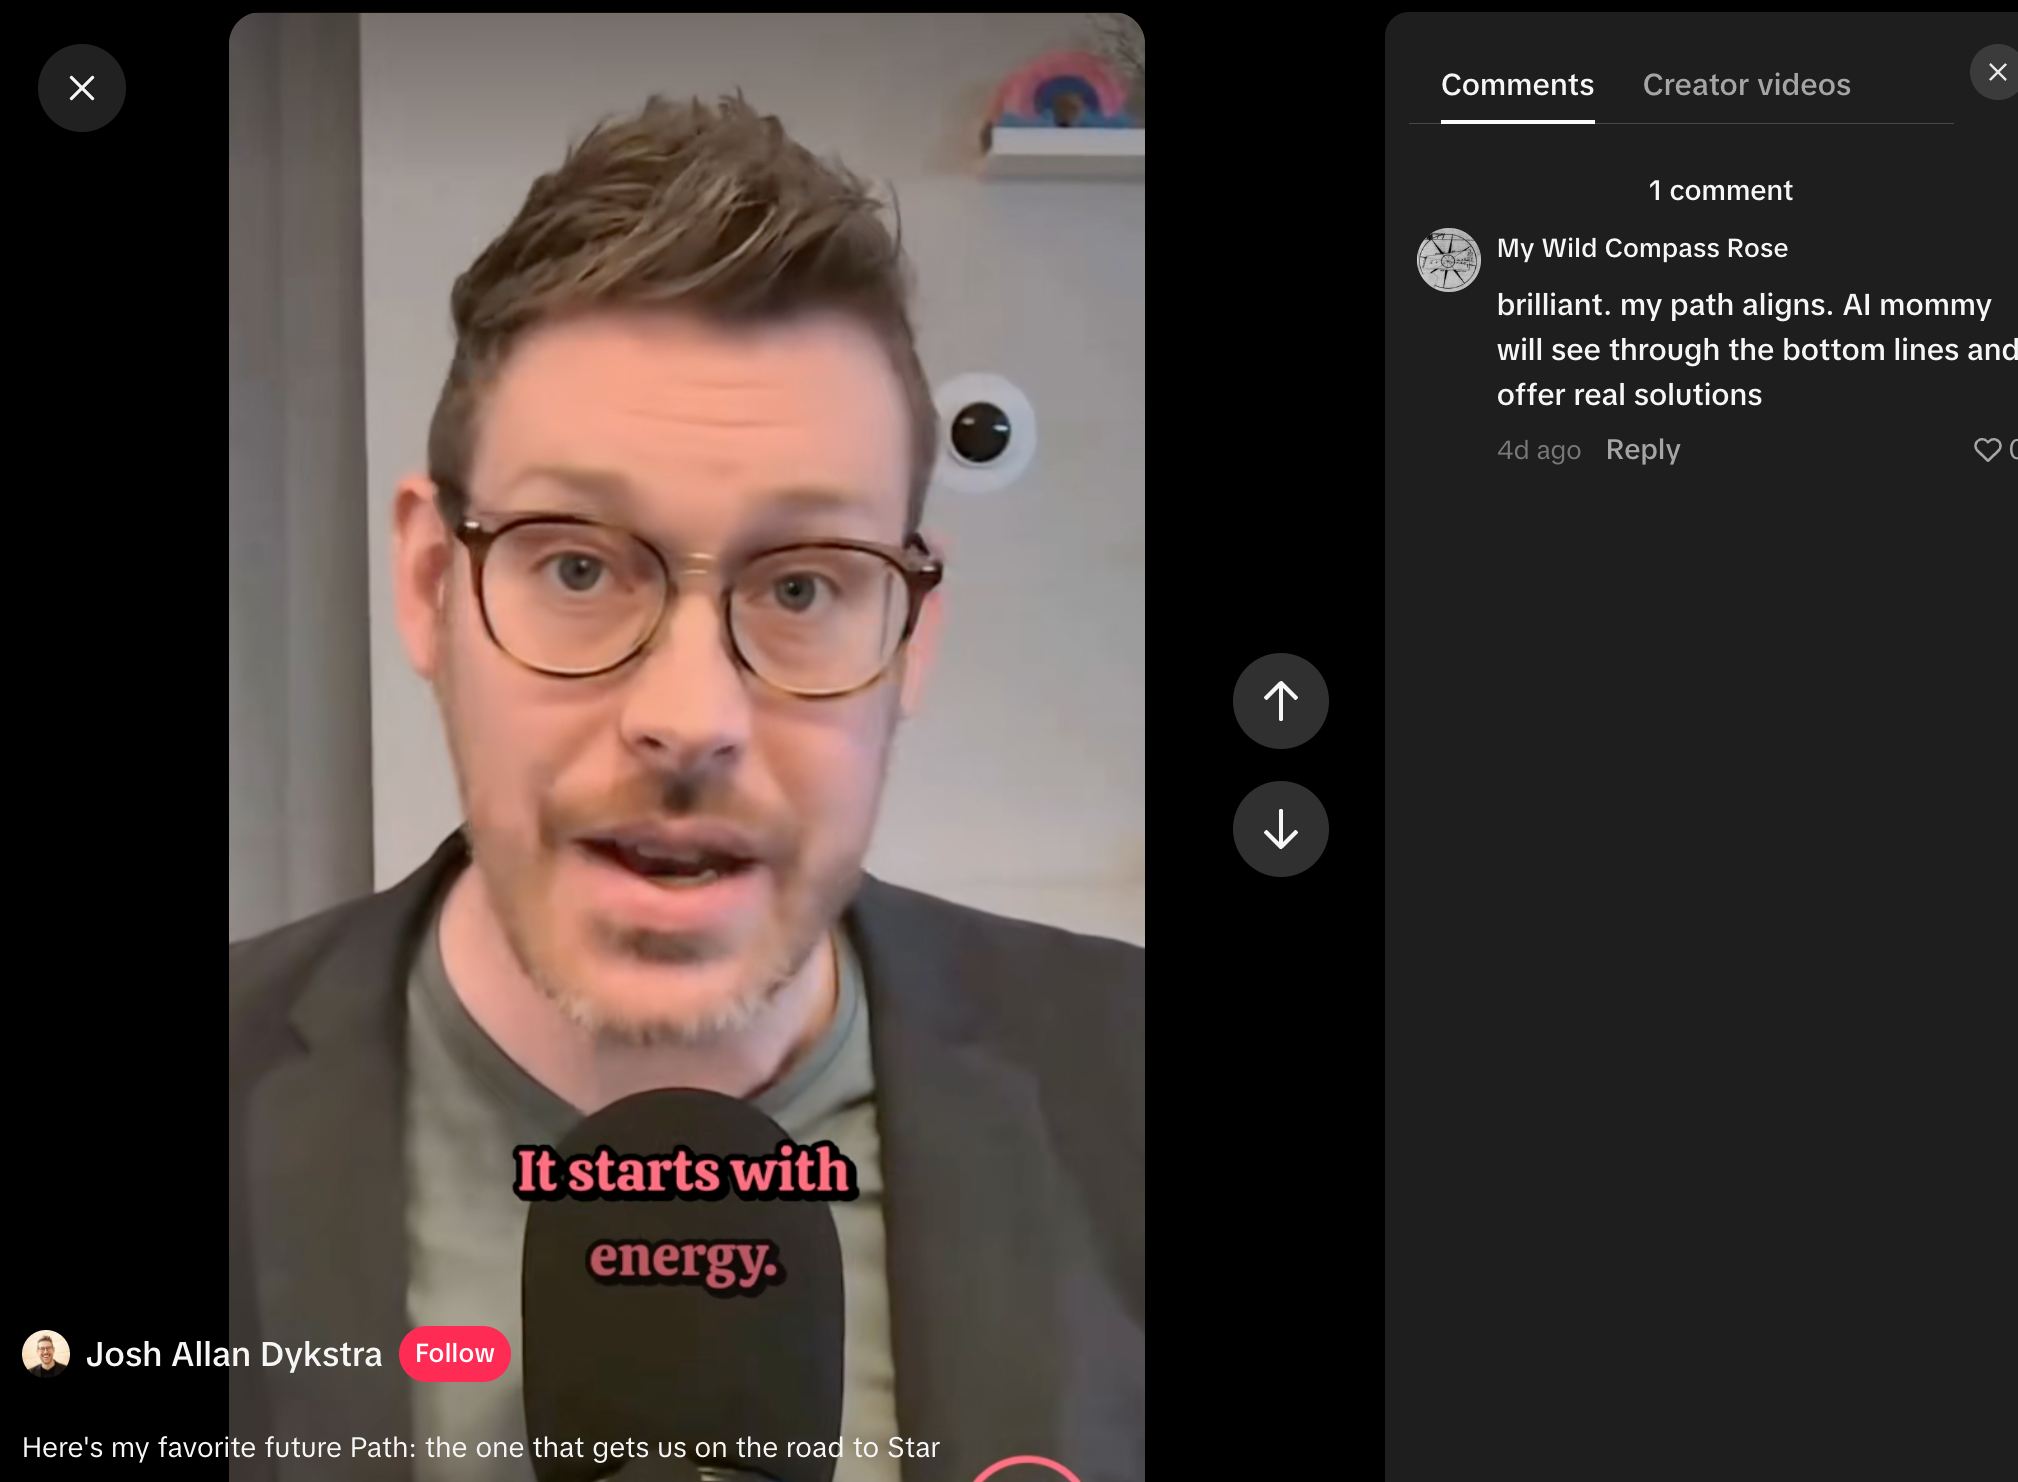
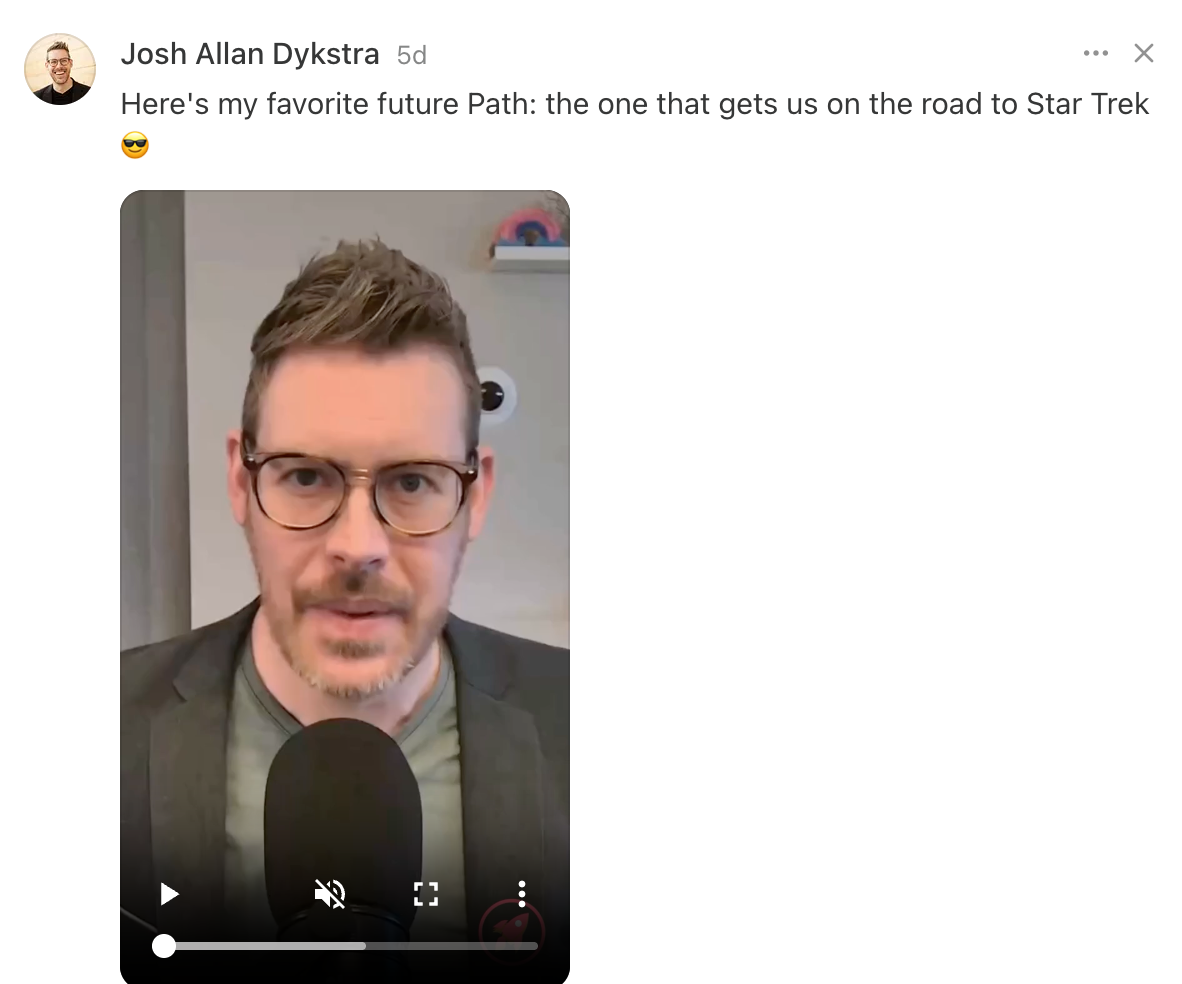
Whatever he learns will shape how he promotes the book.
Twenty years of writing, one year of video
Josh has been publishing words online since 2005. Video is a much newer habit.
"While I've been posting words online for a very long time, I've never really posted video until this year, so that's been a sharp learning curve," he says.
He picked up short-form video about the same time that he started the podcast and began writing the book, and says keeping a cadence across all three has been tricky. Even having a little friction removed with Buffer's smaller features goes a long way.
"The internal crop tool for images is very helpful; I'm always very grateful that I don't have to leave the tool to make a small dimension tweak for Instagram."
The results since using Buffer
Josh's Instagram following has gone from 500 to 20k in six months. He's clear-eyed about Buffer's part in that, though: "the time saved by using Buffer is the main benefit for me."
That time goes into a book out this fall, and into finding out whether Substack Notes wants his video. His advice to other creators is shorter than the rest of this article:
"What are you waiting for?! If you're cross-posting at all, this will save you TONS of time."
It's one of the most-requested integrations we've ever shipped, with over 1,100 upvotes on the request. Little wonder, given the explosive growth we've seen on the platform over the past year.
Substack is fast becoming a powerful way for creators and brands to share, grow, and earn. So we're delighted to share that Buffer is now connected to Substack Notes.
Starting today, you can schedule, crosspost, and analyze your Substack Notes alongside your other social channels in Buffer.
Buffer 🤝 Substack
Substack's growing fast. The platform now counts over 50 million total active subscriptions, with paid subscriptions more than doubling in the past two years.
And Notes — the short-form, in-network posts Substack launched back in 2023 to help writers reach new readers — has become one of the best ways to grow on the platform. But like most short-form formats, it rewards consistency. That's where Buffer comes in.
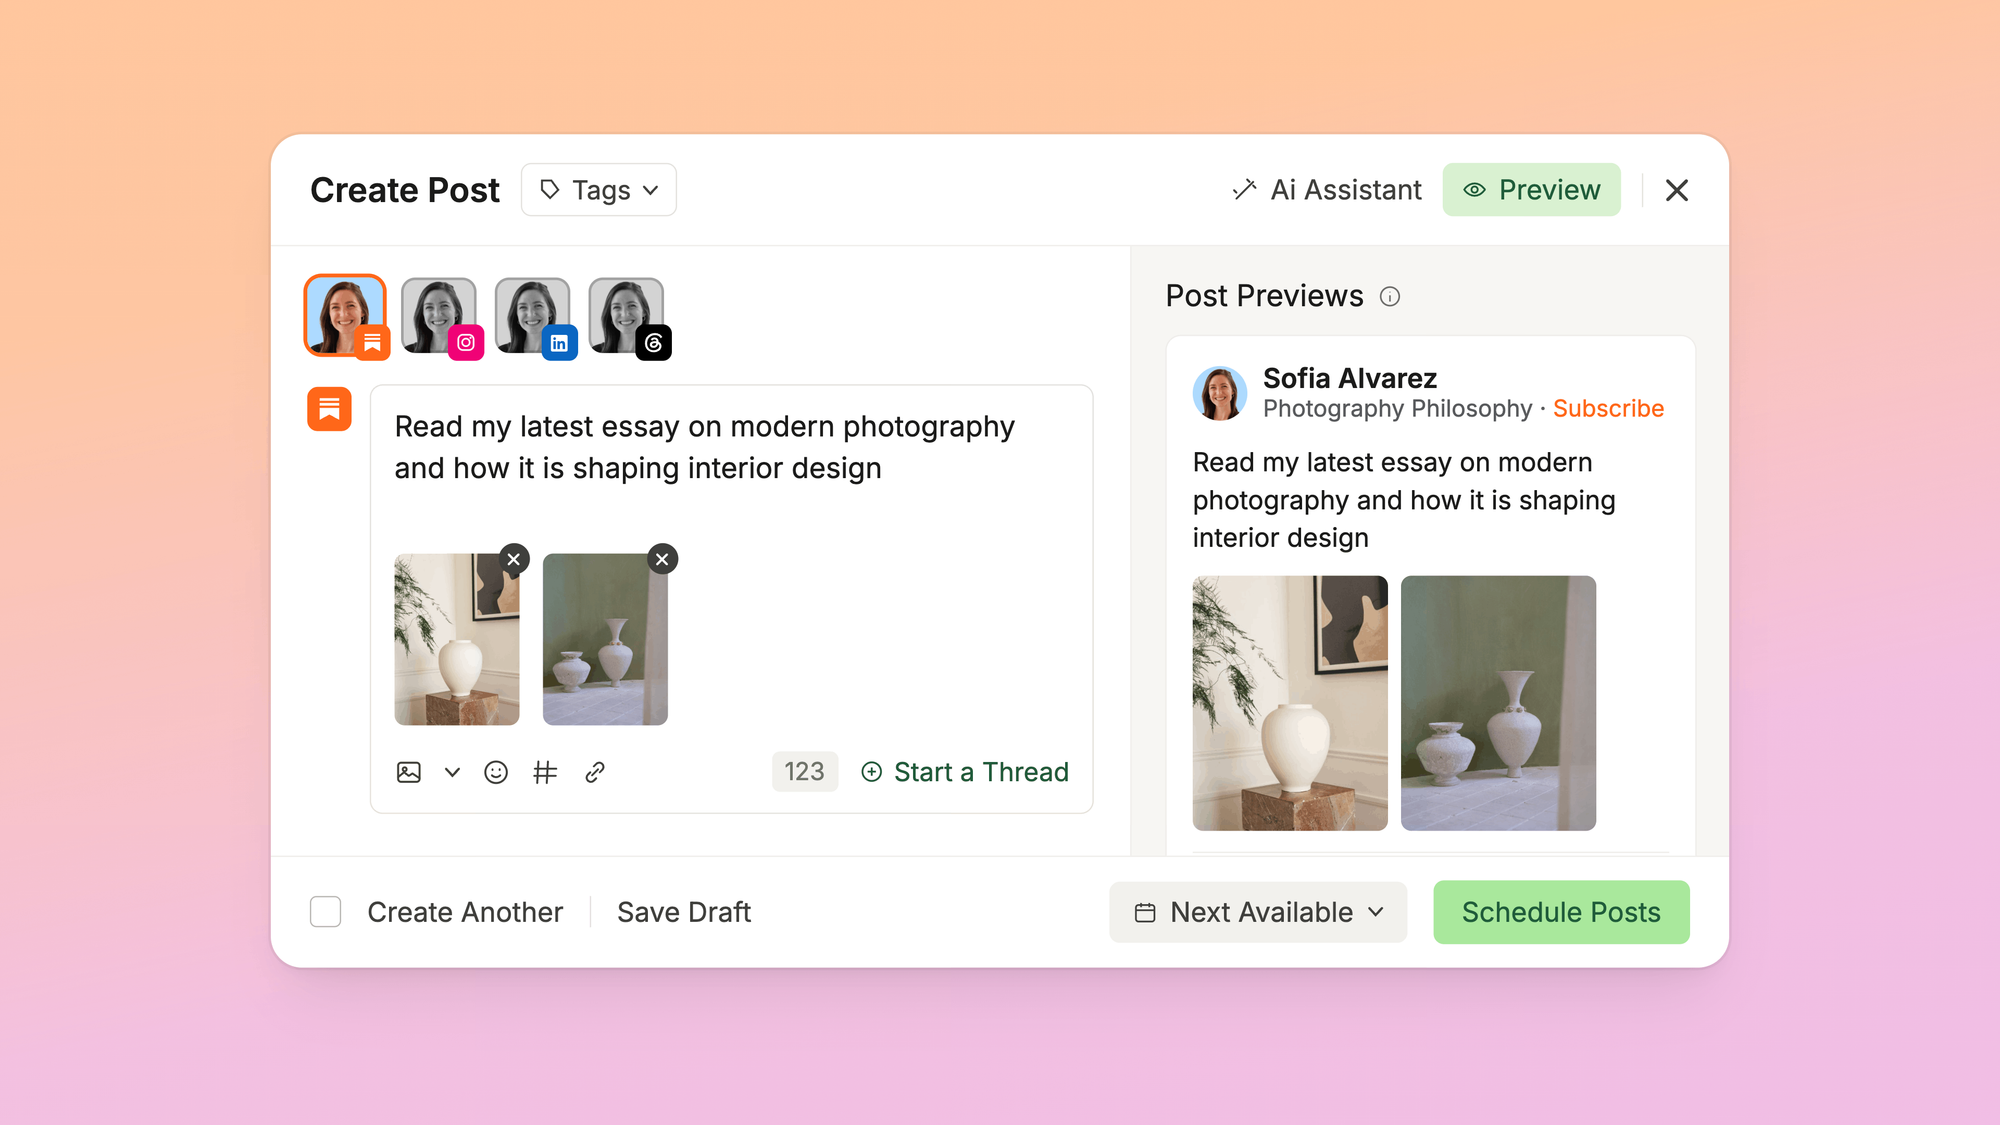
Once you connect your Substack account to Buffer, you can:
- Schedule Notes at the best times. Plan your Notes in advance and post them when your audience is actually around, right alongside your other channels.
- Crosspost to your other platforms. Write once, share your post to X, LinkedIn, Threads, Bluesky, and more.
- Give your old posts new life. Connect your Substack as a feed in Buffer, and your published posts are ready to reshare across social. It's perfect for driving more traffic to your evergreen posts.
- See what's actually working. Buffer shows you which Notes bring in subscribers — free and paid — plus impressions, engagement, and more, so you know what to write more of.
- Bring in your team. Collaborate on drafts and schedule across multiple Substack accounts, no more emailing or Slack-ing back and forth.
- Use it with agents. Substack Notes support works with Buffer's MCP, so you can analyze, plan, and schedule Notes through your AI tools too.
How Substack creators are already using it
A handful of Buffer customers have already been posting to Substack.
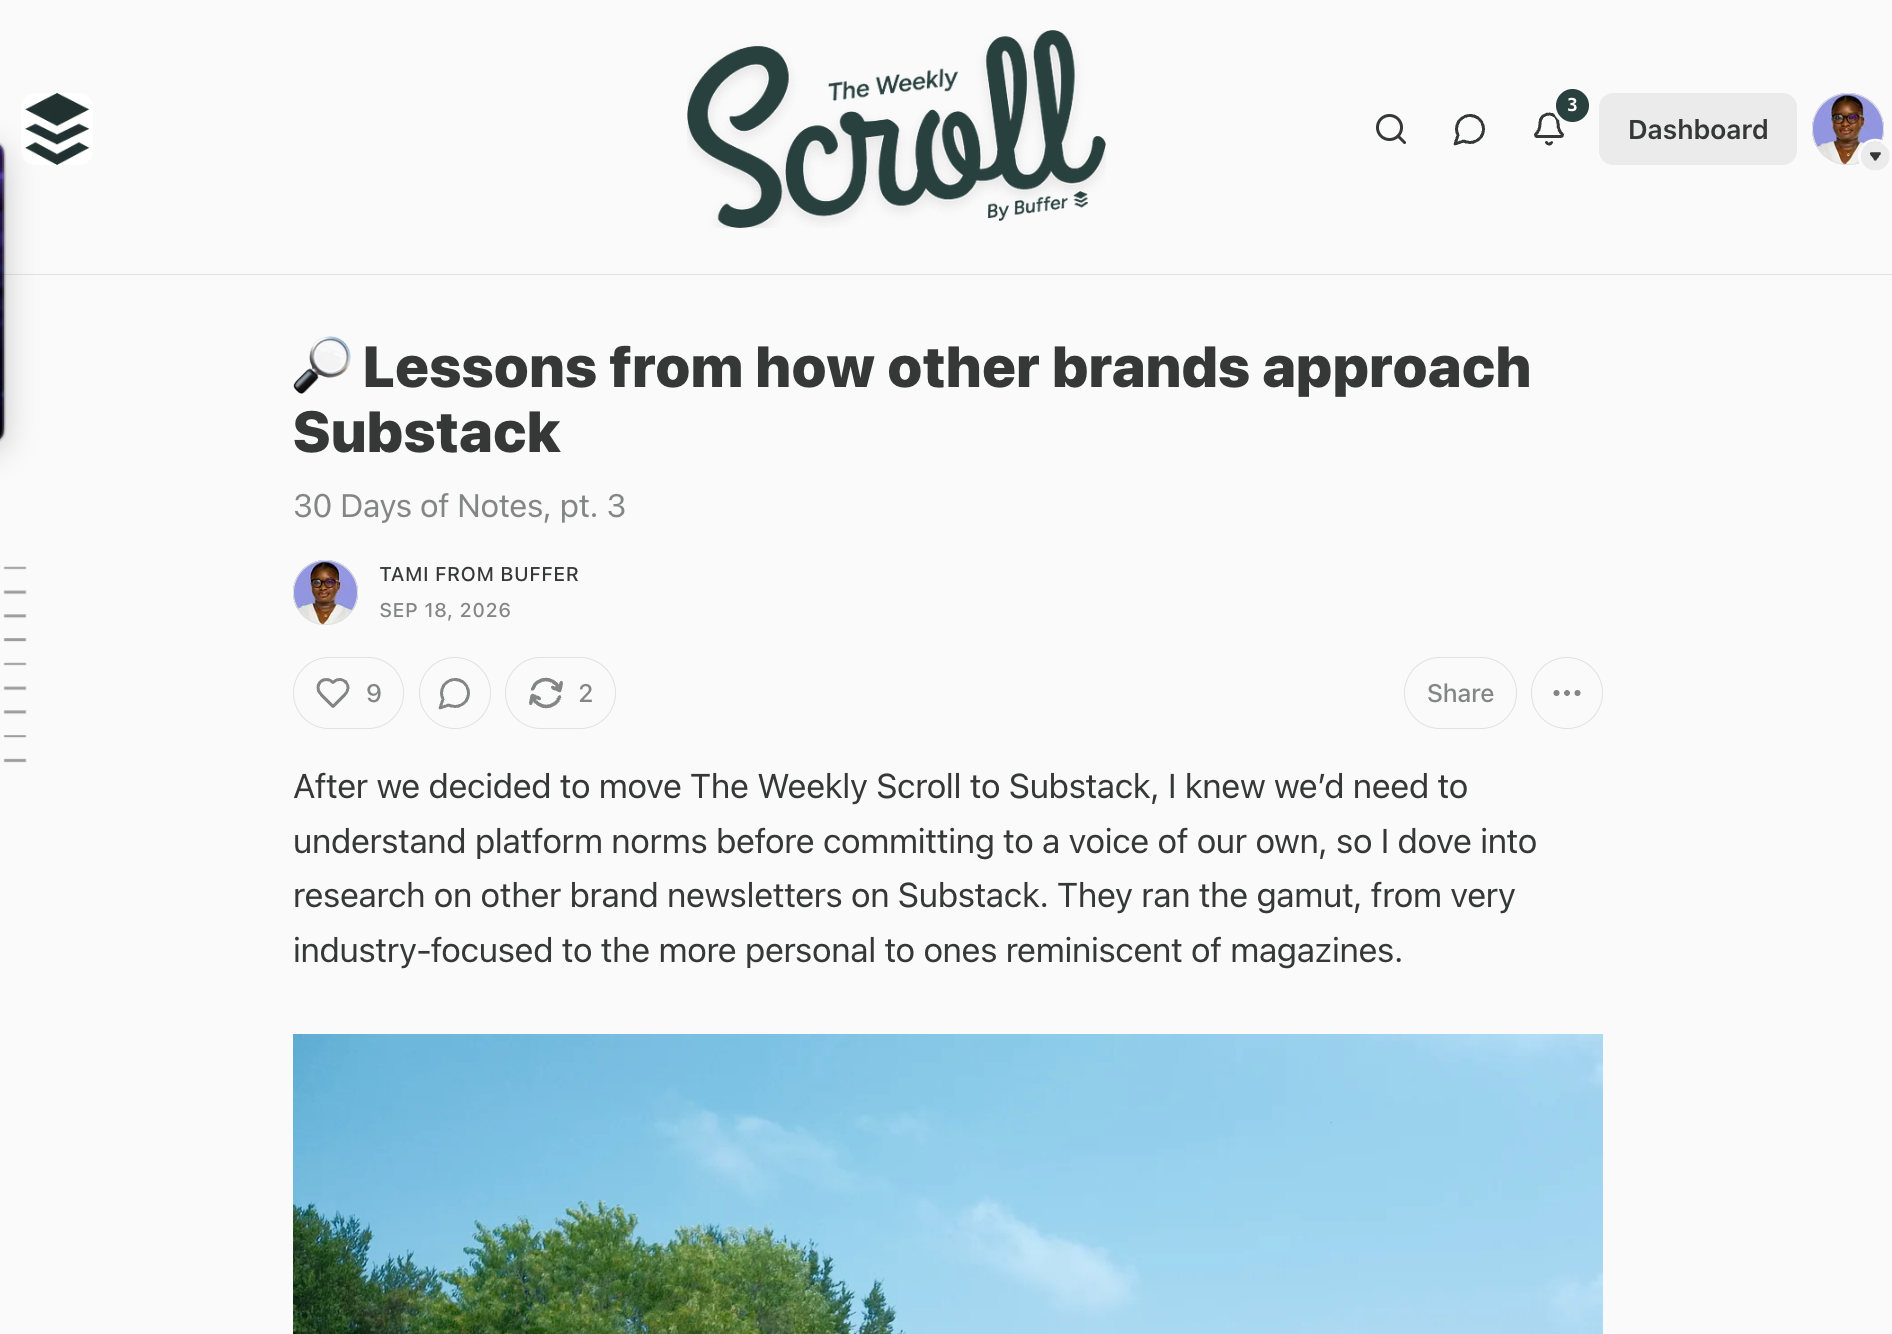
Kevin Indig writes Growth Memo, a weekly newsletter on SEO, AI search, and organic growth, read by over 29,000 founders and marketing leaders. Buffer handles distribution so every issue gets shared without him needing to be online — he estimates it saves him two to three hours a week, and he uses Notes to test ideas before turning them into full articles.
Daniel Hieber writes Linguistic Discovery, exploring the science and diversity of language. He treats Buffer as his content distribution center: every newsletter issue gets broken into microposts — Substack Notes, Threads, X — scheduled out over the following weeks, each one pointing back to the full issue.
Josh Allan Dykstra hosts Hello Tomorrow, a podcast about the systems that shape our daily lives. He's just started crossposting his Instagram and TikTok content to Substack Notes to see how his audience there responds, and puts it simply: "If you're cross-posting at all, this will save you tons of time."
Follow the Buffer team
A bunch of us on the Buffer team are already posting on Substack. Follow along:
- Amanda — @marochko
- Pierre — @pierrelp
- Hailley — @hailleymari
- Arek — @arekpn
- Tami — @tamiloreooo
- Mw — @guldenmw
- Juliet — @julietchen
- Mike — @mikeeckstein
- Danny — @danmulc1
- Brandon — @brandonlucasgreen
- Simon — @simonheaton
- Joe — @hitherejoe
- Mel — @melpoh
- Steph — @stephmifsud
- Julia — @juliabreathes
- Sabreen — @sabreenhaziq
Get started
Connect your Substack account, and your next Note could be on the calendar in a couple of minutes. It's free, with team features on paid plans.
]]>The best times to post on Instagram in 2026 are Thursday at 9 a.m., Wednesday at 12 p.m., and Wednesday at 6 p.m., based on Buffer's analysis of 9.6 million Instagram posts. Wednesday is the best day overall, while Friday and Saturday are the weakest.
But the best time to post on Instagram isn't a single slot every day. It shifts by day, and the gap between these high engagement times and lulls is more of a chasm than a crevice.
There are a lot of factors that decide how a post performs, but the one that often feels make-or-break is when you hit publish.
Totally fair. With more brands and creators investing in Instagram than ever in recent years — and audiences spending more time on the app — the competition for feed space is fierce. You don't want to pour hours into a post, only to share it into an Instagram dead zone and hear... crickets.
Sharing Instagram Stories, reels, feed posts, and carousels at the right times is one of the easier wins in your social media strategy. If your content lands on your audience's feed while they're online to engage with it, it's more likely to succeed. Head of Instagram, Adam Mosseri, even suggests posting 30 to 60 minutes before your audience is likely to come online.
Engagement is one of the strongest signals the Instagram algorithm uses to decide what to surface. Likes, comments, shares, and reposts tell the app your content is worth showing to more people.
Posting consistently matters, too. Audiences are generally receptive to regular content from brands and creators, so showing up on a predictable schedule, timed to when your followers are active, gives you the best shot at building momentum. Tools like Buffer can help you plan and schedule posts so you're always showing up at the right time, even on your busiest days.
We analyzed the engagement of 9.6 million Instagram posts as part of Buffer's State of Social Engagement 2026 report (which examined 52 million posts across 10 platforms from more than 200,000 accounts between January 2024 and December 2025) to pin down the best times to post on Instagram, backed by real data.
Let's dig into when to post on Instagram, plus how to figure out your own best time, whether you're a creator, a social media manager, or a small business owner trying to make every post count.
Key takeaways
- Thursday at 9 a.m., Wednesday at 12 p.m., and Wednesday at 6 p.m. are the top three time slots to post on Instagram, based on Buffer's analysis of 9.6 million posts.
- Wednesday is the single best day to post on Instagram, followed by Thursday and Tuesday. Midweek consistently outperforms the rest of the week.
- Evening hours (6 p.m. to 11 p.m.) generate the strongest engagement on every weekday except Thursday.
- Thursday is the exception. Morning posts (7 a.m. to 9 a.m.) outperform evening slots on that day alone.
- Friday and Saturday are the worst days to post on Instagram, with engagement dropping across every time slot.
- Your mileage may vary by industry. Morning posts may work better for some niches (like retail or media), while afternoon slots tend to outperform for others (like finance or hospitality). Use these benchmarks as a starting point, then lean on your own data to fine-tune.
- Reels may follow slightly different peak windows than static feed posts or carousels. If reels are a big part of your Instagram strategy, it's worth experimenting with early morning and midday slots on top of the evening windows highlighted above.
📊 About this data
- Sample Size: 9.6 million Instagram posts (part of a 52M+ post study).
- Scope: 200,000+ accounts across 10 platforms.
- Timeline: January 2024 – December 2025.
- Metric: Median engagement rate (Likes + Comments + Shares + Saves / Followers x 100).
Jump to a section:
- Is there a best time to post on Instagram?
- The best times to post on Instagram in 2026
- The best time to post on Instagram at a glance
- The best time to post on Instagram for every day of the week
- The best day of the week to post on Instagram
- Worst times and days to post on Instagram
- Best time to post on Instagram by content type: reels, carousels, and stories
- Set your best times to post on Instagram automatically with Buffer's scheduling tool
- How to find your followers' most active times
- FAQs about the best time to post on Instagram
- More Instagram resources
Is there a best time to post on Instagram?
Yes. Buffer's analysis of 9.6 million Instagram posts shows that specific time slots consistently outperform others, with Wednesday and Thursday yielding the highest engagement, and evening hours (6 p.m. to 11 p.m.) winning across most days. Content quality still matters most, but timing meaningfully shifts reach.
Here's why: Instagram's algorithm rewards relevance, but recency still dictates your initial reach. When you post while your audience is actively scrolling, you build early momentum, and that momentum signals to the algorithm that your content is worth surfacing to more people.
The patterns we uncovered were the most surprising part. Evening hours consistently outperform mornings across most days of the week, with one Thursday-shaped exception (more on that in a moment).
Timing isn't as critical as it was in the chronological-feed days (R.I.P.), but it still plays a role in your social media marketing strategy.
Phew. Let's look at what the data actually shows.
🌏 No timezone troubles: To make this data easier to understand, our data scientist normalized the times so they apply to any timezone — no manual converting needed. These times already apply to your timezone. Whether you're in EST (Eastern Standard Time), PST (Pacific Standard Time), MST (Mountain Standard Time), or IST (Indian Standard Time), the times apply to you.
The best times to post on Instagram
The best times to post on Instagram in 2026 are Thursday at 9 a.m., Wednesday at 12 p.m., and Wednesday at 6 p.m.
These findings align with broader industry research, which consistently points to midweek (particularly Wednesday and Thursday) and late afternoon-to-evening windows as the highest-engagement slots on Instagram.
| Rank | Day | Time (Local) |
|---|---|---|
| 1 | Thursday | 9 a.m. |
| 2 | Wednesday | 12 p.m. |
| 3 | Wednesday | 6 p.m. |
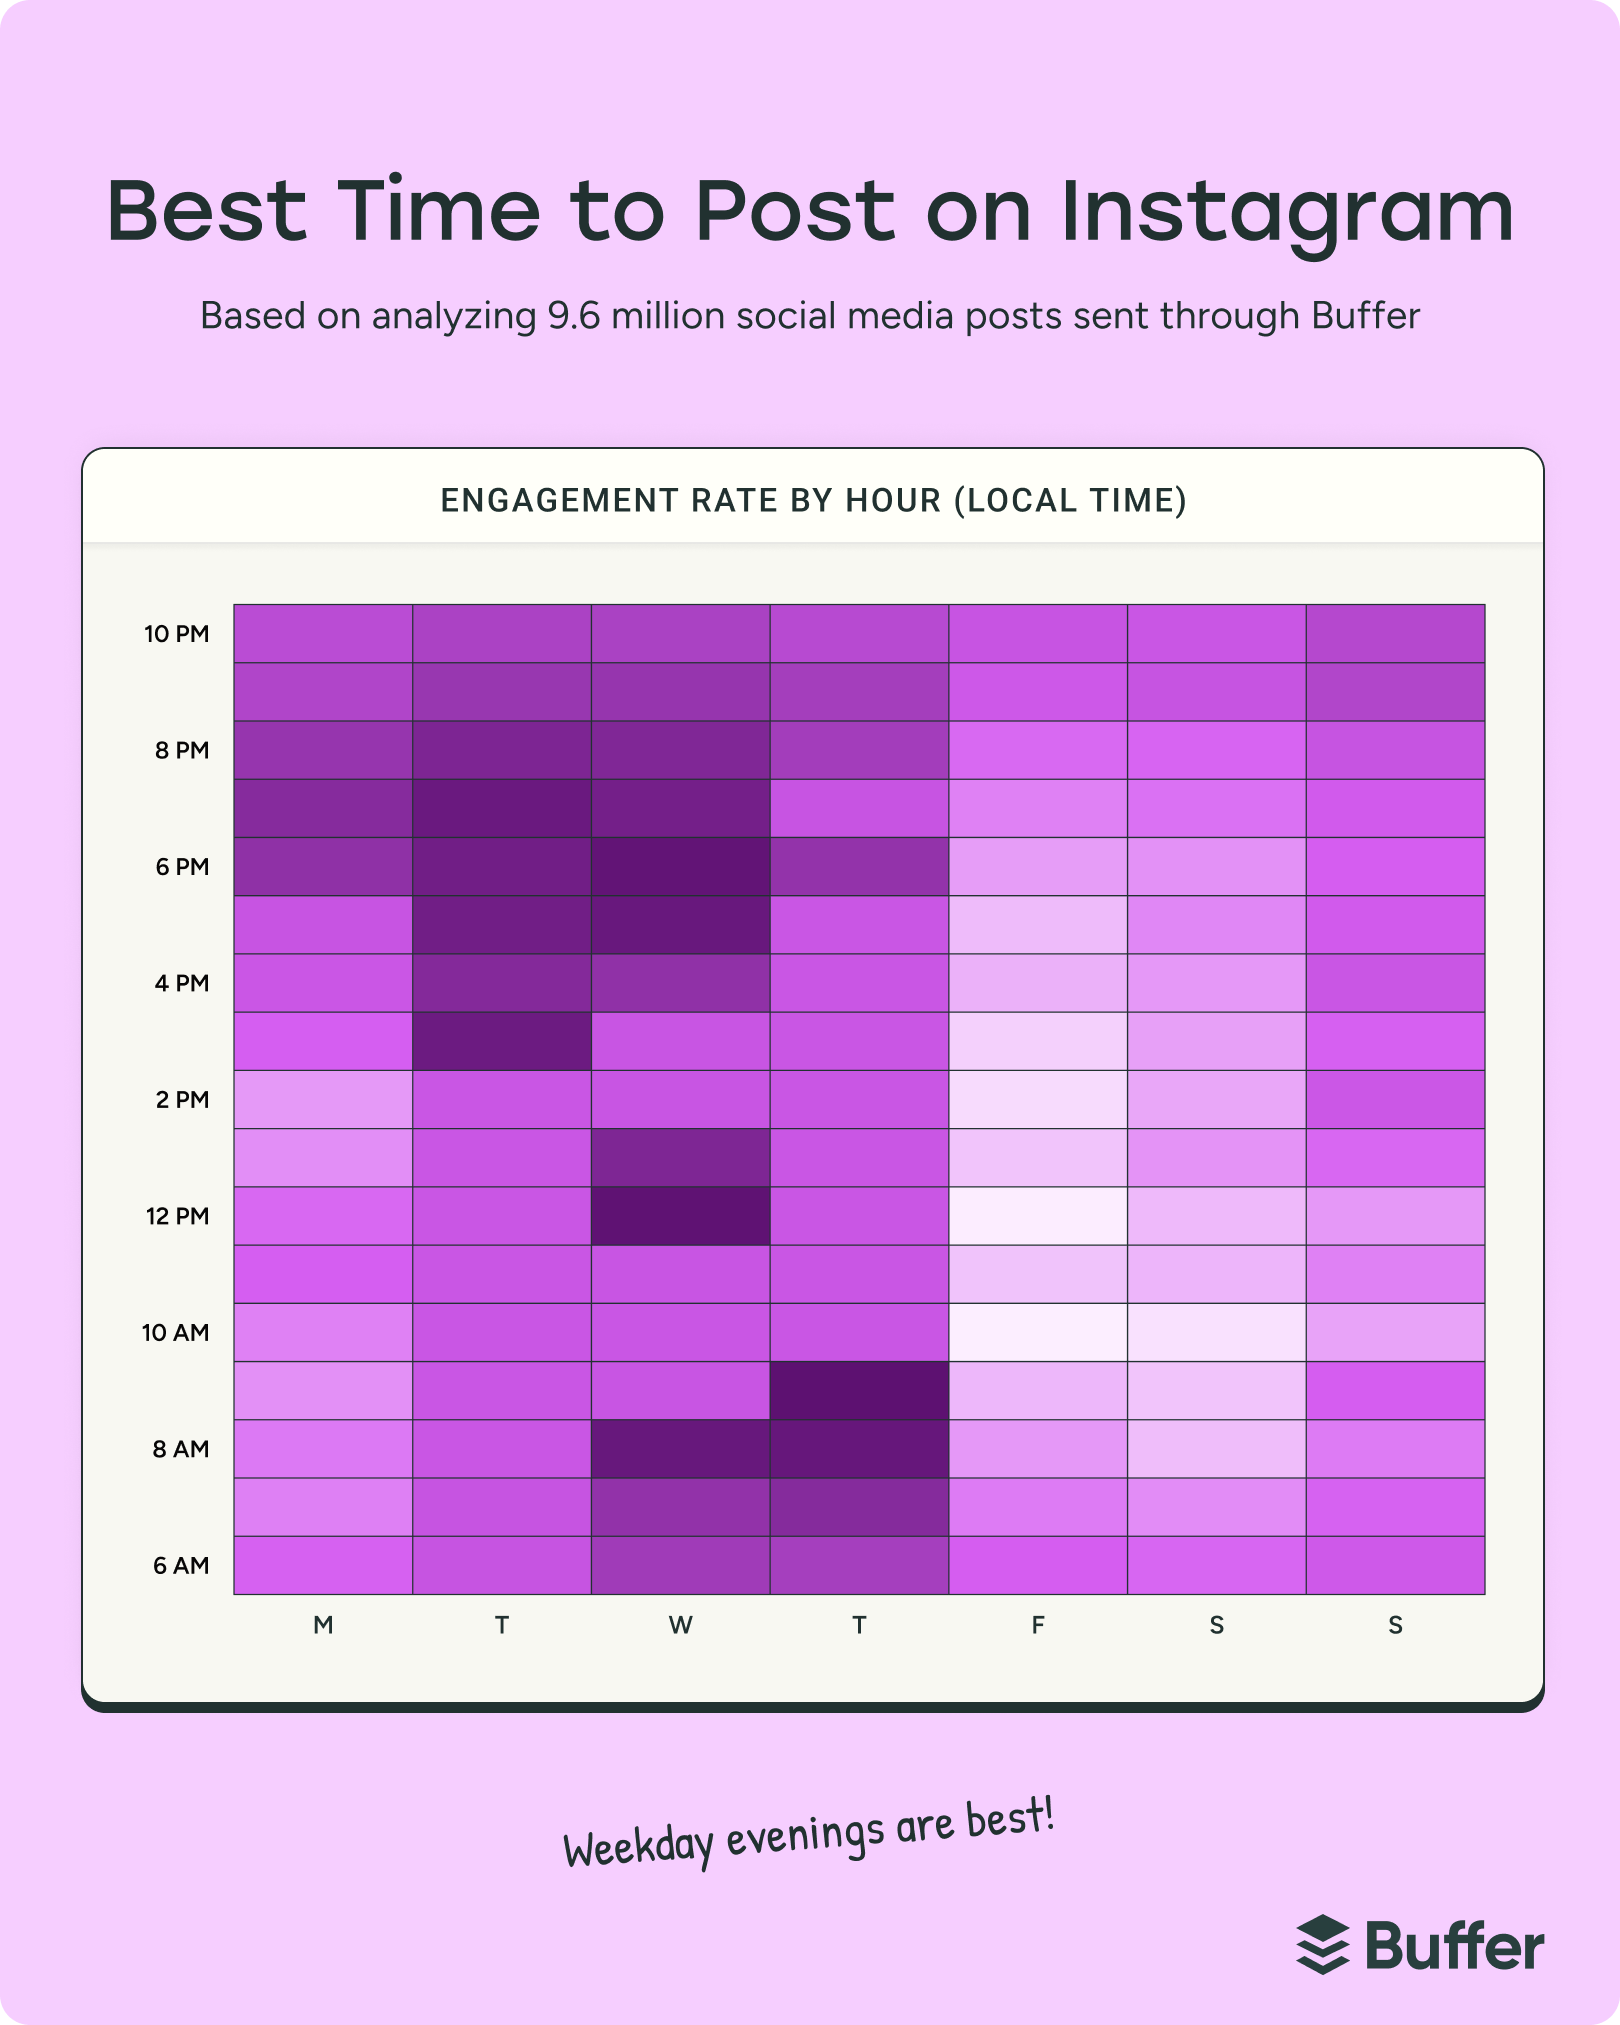
Our latest data shows evening hours (6 p.m. to 11 p.m.) see the strongest engagement across all timezones. Build your schedule around those hours.
This tracks, considering over a third of Instagram users are 25 to 34 years old, according to Statista's audience demographics. This age group is most likely to check the app in the evenings to unwind after work. Things pick up in the early afternoons on some weekdays. There's also a notable midday spike on Wednesdays around noon. (Who doesn't love a lunch hour scroll?)
Morning hours (6 a.m. to 11 a.m.) are the worst times to post, with one notable exception: Thursday mornings at 9 a.m. show surprisingly strong engagement.
💡 The Thursday 9 a.m. anomaly: We don't know exactly why Thursday at 9 a.m. breaks the evening pattern, but our best guess is end-of-week planning energy. People check in on creators and brands while they map out their weekend.
As you'll see from the heatmap graph above, the best Instagram posting times vary depending on the day of the week. The darkest slots represent the time slots with the highest engagement.
The light-colored to white blocks are the time slots with the lowest engagement, showing the posting times that are best avoided if you're after the best possible engagement and reach.
The end of the week and weekends look different from weekdays. Friday and Saturday are the worst days to post content, with significantly lower engagement across all time slots. If weekends are part of your posting strategy, evening hours (8 p.m. to 10 p.m.) on Sunday offer your best bet for catching weekend scrollers.
The best times to post on Instagram at a glance
| Day of the Week | Best Time(s) to Post | Engagement Tier |
|---|---|---|
| Wednesday | 12 p.m., 6 p.m., 8 a.m. | Highest |
| Thursday | 9 a.m., 8 a.m., 7 a.m. | Highest |
| Tuesday | 7 p.m., 3 p.m., 5 p.m. | High |
| Monday | 7 p.m., 6 p.m., 8 p.m. | Moderate |
| Sunday | 9 p.m., 10 p.m., 8 p.m. | Moderate |
| Friday | 10 p.m., 9 p.m., 6 a.m. | Low |
| Saturday | 9 p.m., 10 p.m., 8 p.m. | Low |
Source: Buffer's State of Social Engagement 2026 report (9.6M Instagram posts analyzed, Jan 2024 to Dec 2025). Times apply to your local timezone.
If you'd rather see the why behind each day, and not just the top three slots, here's the day-by-day breakdown.
The best time to post on Instagram for every day of the week
Best time to post on Instagram today
The best time to post on Instagram today depends on the day you're reading this. Here's the quick version: find today below, post in that window, and you're working with the data instead of against it.
- Monday: 7 p.m., then 6 p.m. or 8 p.m. Evenings, once everyone's back from the workday.
- Tuesday: 7 p.m., then 3 p.m. or 5 p.m. Mid-afternoon rolling into the evening.
- Wednesday: 12 p.m., then 6 p.m. or 8 a.m. Your single best day. The lunchtime scroll is real.
- Thursday: 9 a.m., then 8 a.m. or 7 a.m. It's the one day mornings beat evenings.
- Friday: 10 p.m., then 9 p.m. A quieter day overall, so keep expectations in check.
- Saturday: 9 p.m., then 10 p.m. or 8 p.m. Another slow one, so save your big posts for midweek.
- Sunday: 9 p.m., then 10 p.m. or 8 p.m. The strongest weekend slot, as people wind down before Monday.
If today happens to be a Friday or Saturday, don't force your best content out just to fill a slot. Those are the two weakest days in our data — it's absolutely fine to hold your strongest post for Wednesday.
Best time to post on Monday in 2026
The best time to post on Instagram on Monday is 7 p.m., followed by 6 p.m. and 8 p.m. Monday evenings are when audiences settle back into their Instagram feeds after the workday, making the 6 p.m. to 8 p.m. window your strongest play to start the week.
Best time to post on Tuesday in 2026
The best time to post on Instagram on Tuesday is 7 p.m., followed by 3 p.m. and 5 p.m. Tuesday is the third-strongest day of the week overall, and its top slots stretch from mid-afternoon into the early evening. If you only post once on Tuesday, aim for 7 p.m.
Best time to post on Wednesday in 2026
The best time to post on Instagram on Wednesday is 12 p.m., followed by 6 p.m. and 8 a.m. Wednesday is the highest-performing day in our data, with three strong slots across the day. The midday spike is unusual (most days don't see a noon peak) and lines up with the lunchtime scroll.
Best time to post on Thursday in 2026
The best time to post on Instagram on Thursday is 9 a.m., followed by 8 a.m. and 7 a.m. Thursday is the most counterintuitive day in the dataset: it's the only weekday where mornings outperform evenings. Aim for 7 a.m. to 9 a.m. for your strongest engagement.
Best time to post on Friday in 2026
The best time to post on Instagram on Friday is 10 p.m., followed by 9 p.m. and 6 a.m. Friday is one of the two weakest days to generate enagagement overall, so treat any Friday slot as a hold-the-line day rather than your prime time.
Best time to post on Saturday in 2026
The best time to post on Instagram on Saturday is 9 p.m., followed by 10 p.m. and 8 p.m. Saturday and Friday share the weakest engagement of the week, so save your high-stakes posts for midweek and use Saturday evening for lighter content.
Best time to post on Sunday in 2026
The best time to post on Instagram on Sunday is 9 p.m., followed by 10 p.m. and 8 p.m. Sunday evenings are the strongest weekend window, with audiences scrolling as they wind down before Monday.
The best day of the week to post on Instagram
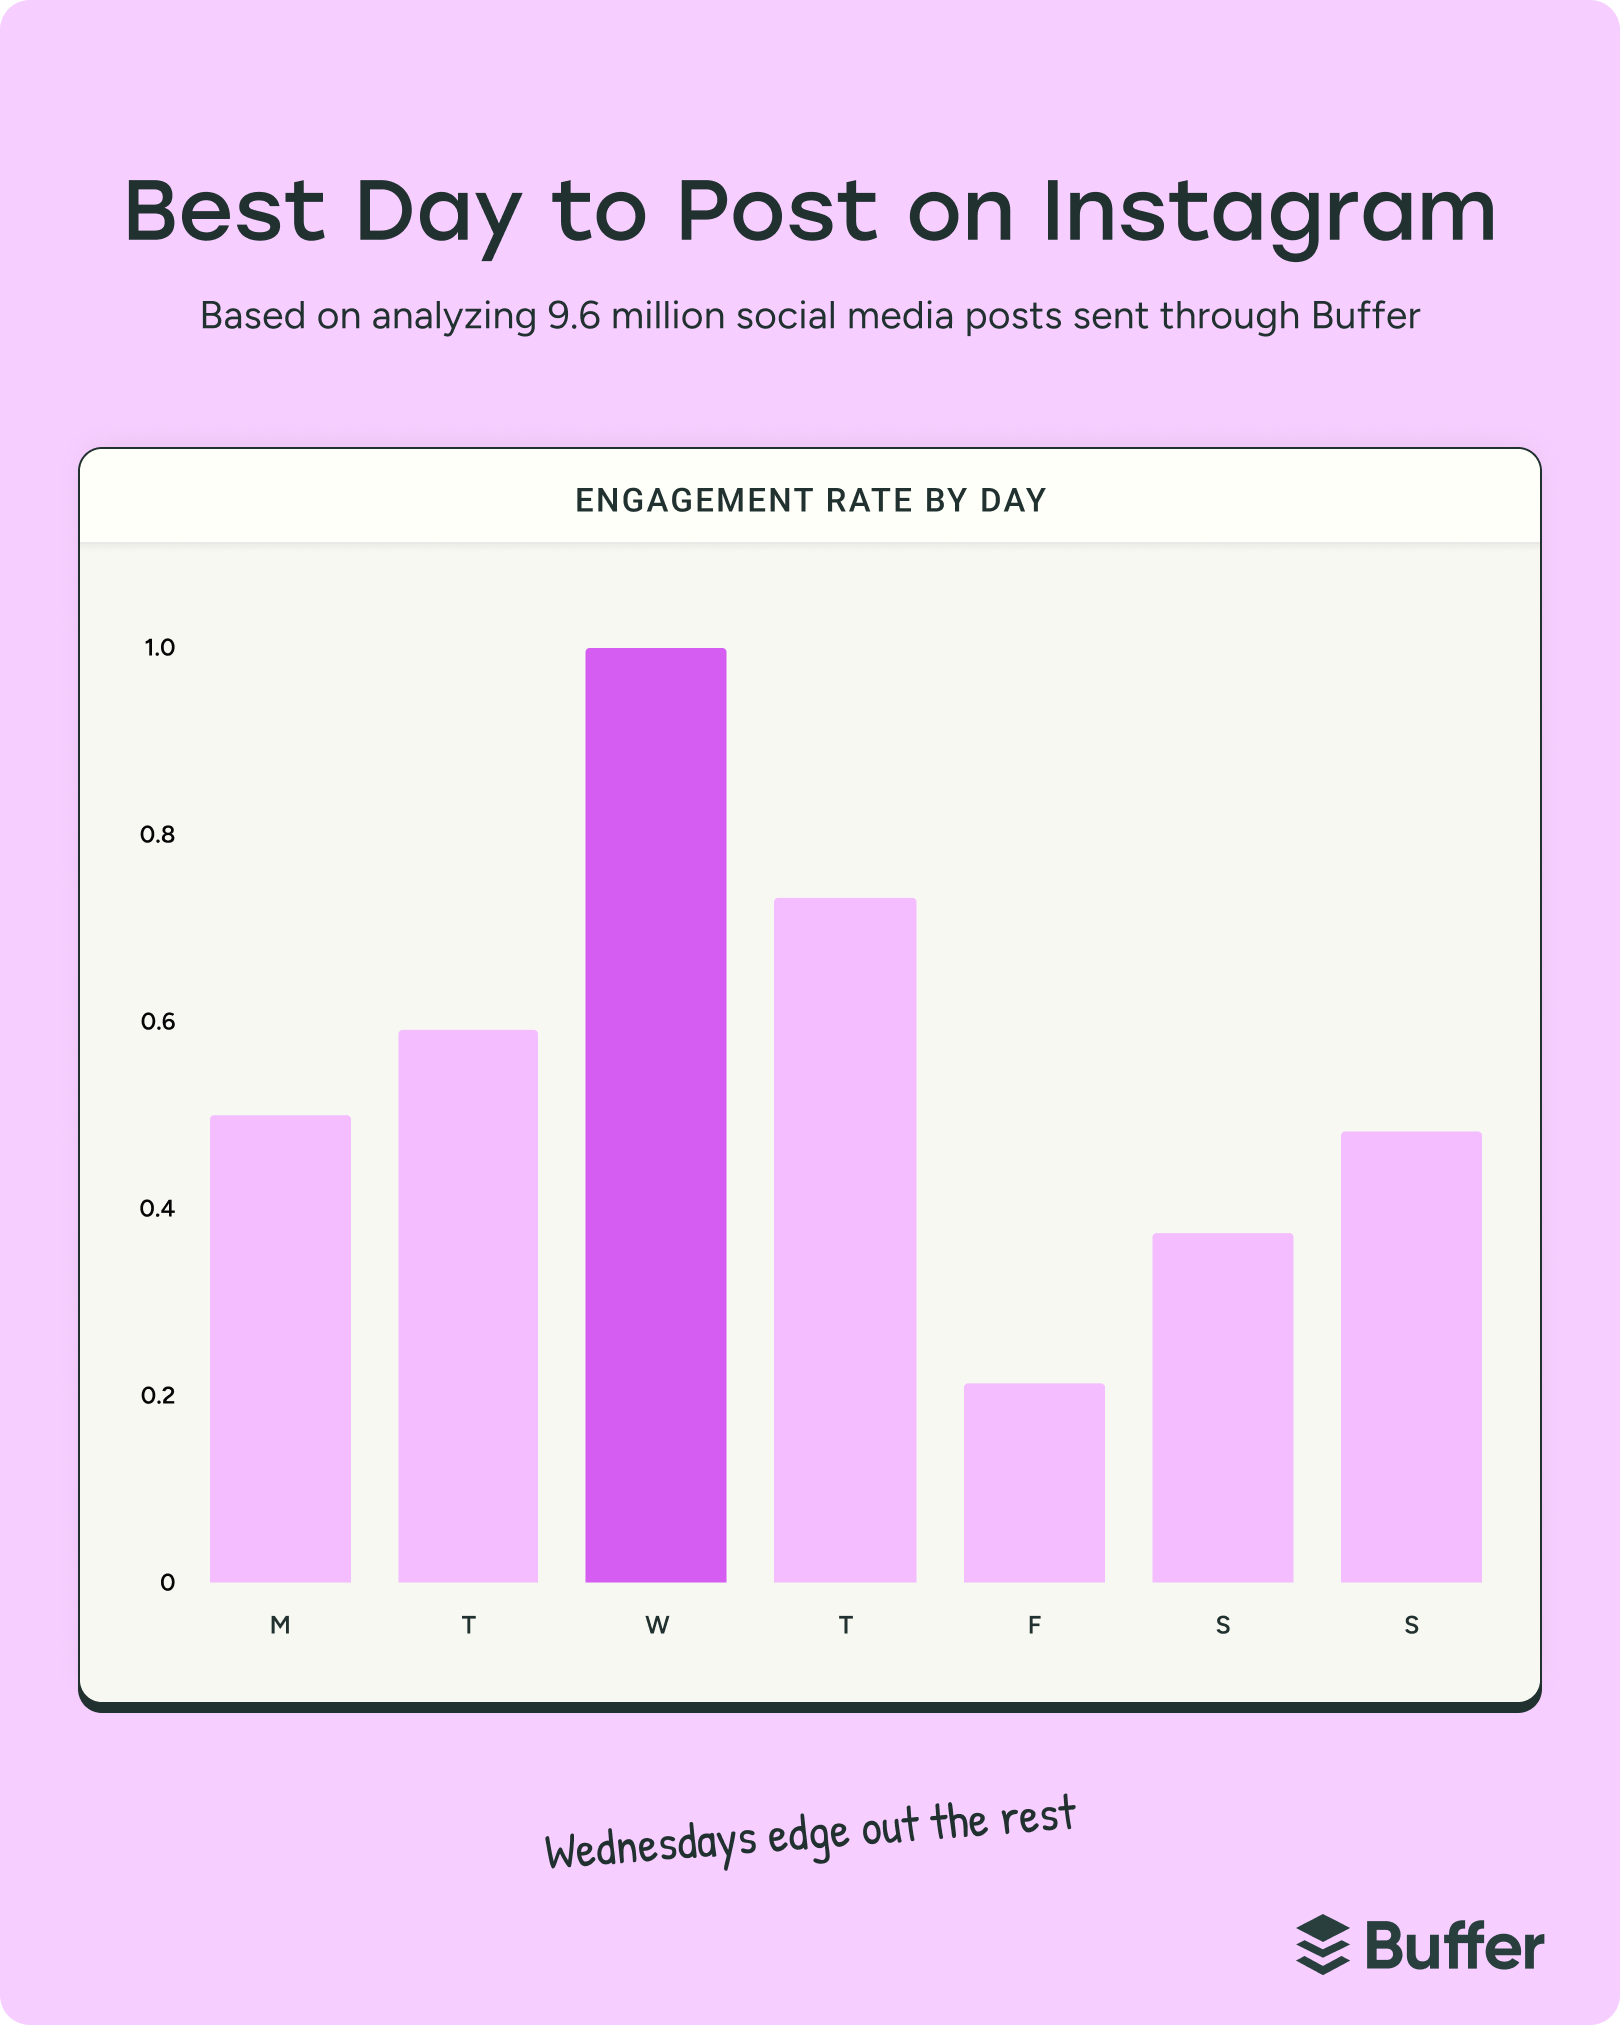
Wednesday is the best day to post on Instagram, followed closely by Thursday and Tuesday. These midweek days consistently show the highest engagement rates across multiple time slots.
Comparatively, the worst days to post on Instagram are Friday and Saturday. Weekend engagement drops significantly, making weekdays your best bet for maximum reach and engagement.
Worst times and days for Instagram engagement
The worst times to post on Instagram are between 1 a.m. and 5 a.m. on any day, and on Friday and Saturday in general.
A few patterns from Buffer's 9.6M-post analysis:
- Overnight (1 a.m. to 5 a.m.): Lowest engagement across every day of the week. Don't post on Instagram while your audience is asleep.
- Friday and Saturday: Lowest-performing days overall, all time slots.
- Weekday mornings (6 a.m. to 11 a.m.): Generally weak, with one exception: Thursday, 7 a.m. to 9 a.m.
If you're after maximum reach and the most engagement, save your best content for midweek.
Best time to post on Instagram by content type: reels, carousels, and stories
People treat different segments of the Instagram app a little differently, which means it's worth thinking about how reels, carousels, and stories fit into your posting schedule.
An update on the algorithm by Head of Instagram Adam Mosseri offers some useful insight on this front. "People tend to look for their closest friends in stories, use explore to discover new content and creators, and be entertained in reels," he said in a reel.
People are looking to be entertained at certain times of day, and catch up with friends, family, and their favorite creators at other times.
In our analysis, we reviewed all post types together rather than segmenting by format. The high-level takeaway is that the same peak times apply across content types, with small format-specific notes below.
Best time to post Instagram Reels
The best time to post Instagram Reels is in the evening, between 6 p.m. and 11 p.m., with Wednesday and Thursday as your strongest days. These are the same peak windows that hold across the rest of our data.
Quick caveat: we looked at all post types together rather than splitting the numbers out by format, so these aren't reels-only slots. But the evening posting makes particular sense for reels. Per Head of Instagram, Adam Mosseri, reels are where people go to be entertained, and that mostly happens once the workday's done, and there's time to actually sit and watch.
The signals the algorithm values most are also worth considering here. Instagram's most important signal in 2026 is sends per reach (how often people DM your reel to a friend). To me, these behaviors feel way more likely in a moment of downtime, rather than during the midday rush.
So if you only post one reel this week, aim for a Wednesday or Thursday evening. Then let your own numbers take over — check Buffer Insights or native Instagram analytics after a few weeks to see whether your audience breaks the pattern.
Best time to post Instagram carousels
The best time to post Instagram carousels follows the same midweek pattern: Wednesday at 12 p.m., Wednesday at 6 p.m., and Thursday at 9 a.m. Carousels tend to perform well when readers have the time to swipe through, which lines up with daily routines like their lunch break, mental break, and post-work windows.
Best time to post Instagram Stories
The best time to post Instagram Stories is daily, ideally one to two times per day. Stories disappear after 24 hours, so consistency matters more than picking the perfect slot. Mosseri has recommended sharing one to two stories daily as part of a healthy weekly cadence on the platform.
Set your optimal times to post on Instagram automatically with Buffer's scheduling tool
If, like me, you fancy working smarter, not harder, you can set these recommended times directly in Buffer, no manual entry required.
You can automatically set these recommended times for Instagram and your other social media platforms. Pretty handy, no? It'll take you less than a minute to set up:
- Hover over Instagram on your channels list on the left, and click on the three dots at the top right to see more options.
- Choose Manage Posting Times.
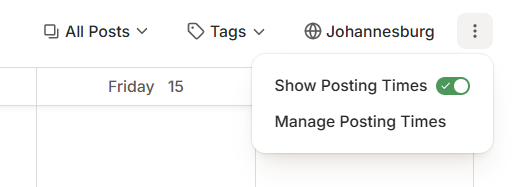
- Under Posting Slot, click the Generate New Posting Slots button, then Use Recommended Times.
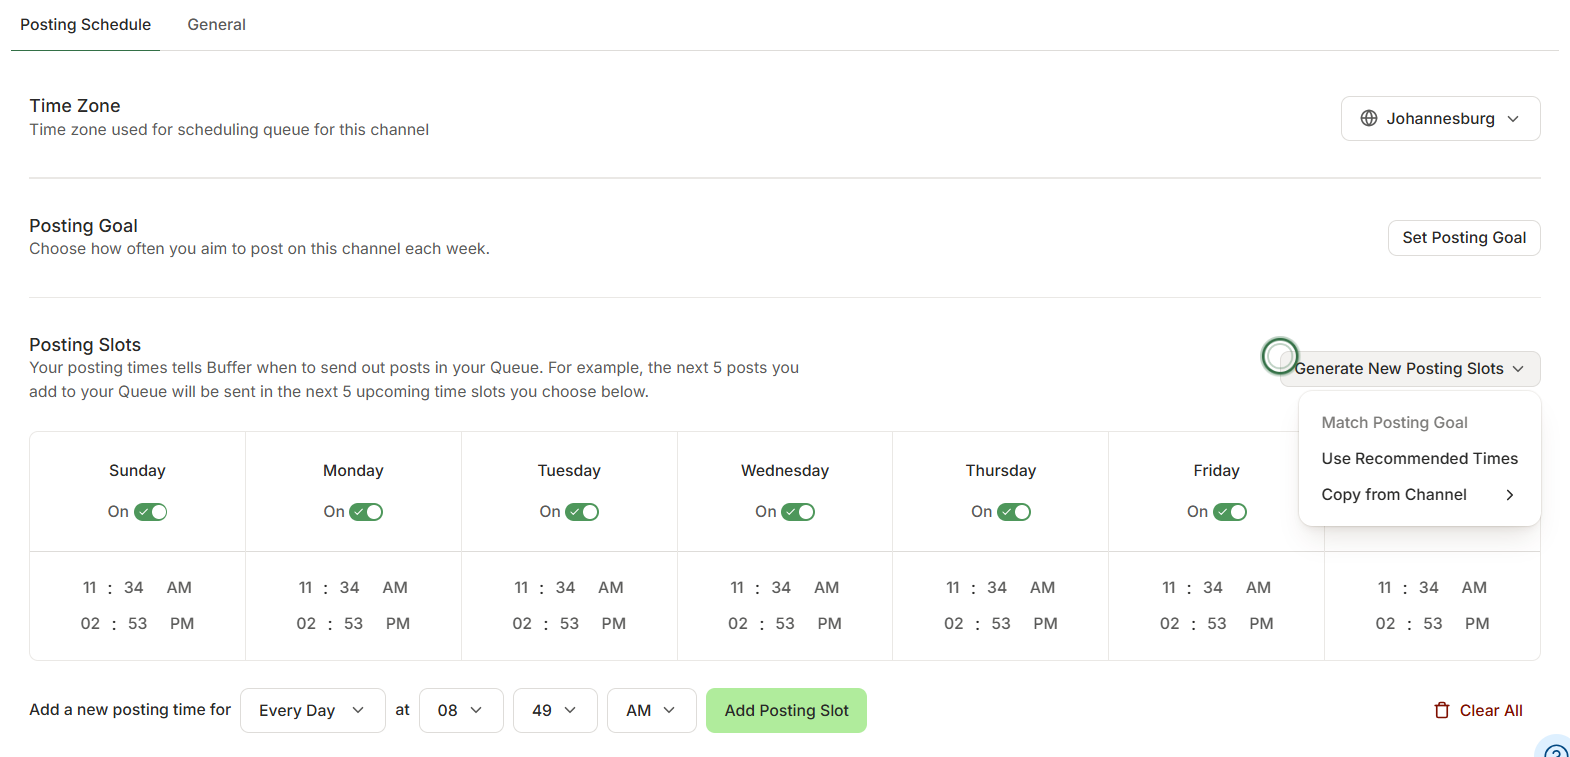
The schedule will automatically update to include the optimal posting times for the week, based on our latest analysis of millions of Instagram posts.
Here's a video tutorial showing you how to customize your posting schedule:
The next time you schedule a post, you can pick one of these high-engagement slots without a second thought. No more guessing! You can set your Instagram posting times in Buffer for free — it takes under a minute.
How to find your followers' most active times on Instagram
To see when your followers are on Instagram, it's worth checking Instagram Insights. The in-app analytics surface when your specific audience is most active, which often differs from the platform-wide averages.
For example, my personal Instagram audience's activity level is pretty steady on work days and on the weekends. Their most active times are between 6 p.m. and 9 p.m.
For Buffer's Instagram following, things look a little different. They're most active on the platform between 3 p.m. and 6 p.m.
Instagram Insights, the native Instagram analytics tool, can help pinpoint some good times to post on Instagram.
Note that these are times your followers are using Instagram, not necessarily when they are most likely to engage with your content. It's absolutely worth experimenting with these slots, but don't treat them as the be-all and end-all.
To get stats for your own audience via the analytics baked into the app, head over to Instagram Insights on the mobile app. You'll need a professional Instagram account, a Creator or Business Account, to access these numbers.
- Go to your Instagram profile and click on Professional dashboard just below your bio.
- Tap on New followers.
- Scroll to Follower active times to pinpoint your followers' best time to post moments.
You can also access Instagram Insights via the web version of Instagram. To find yours:
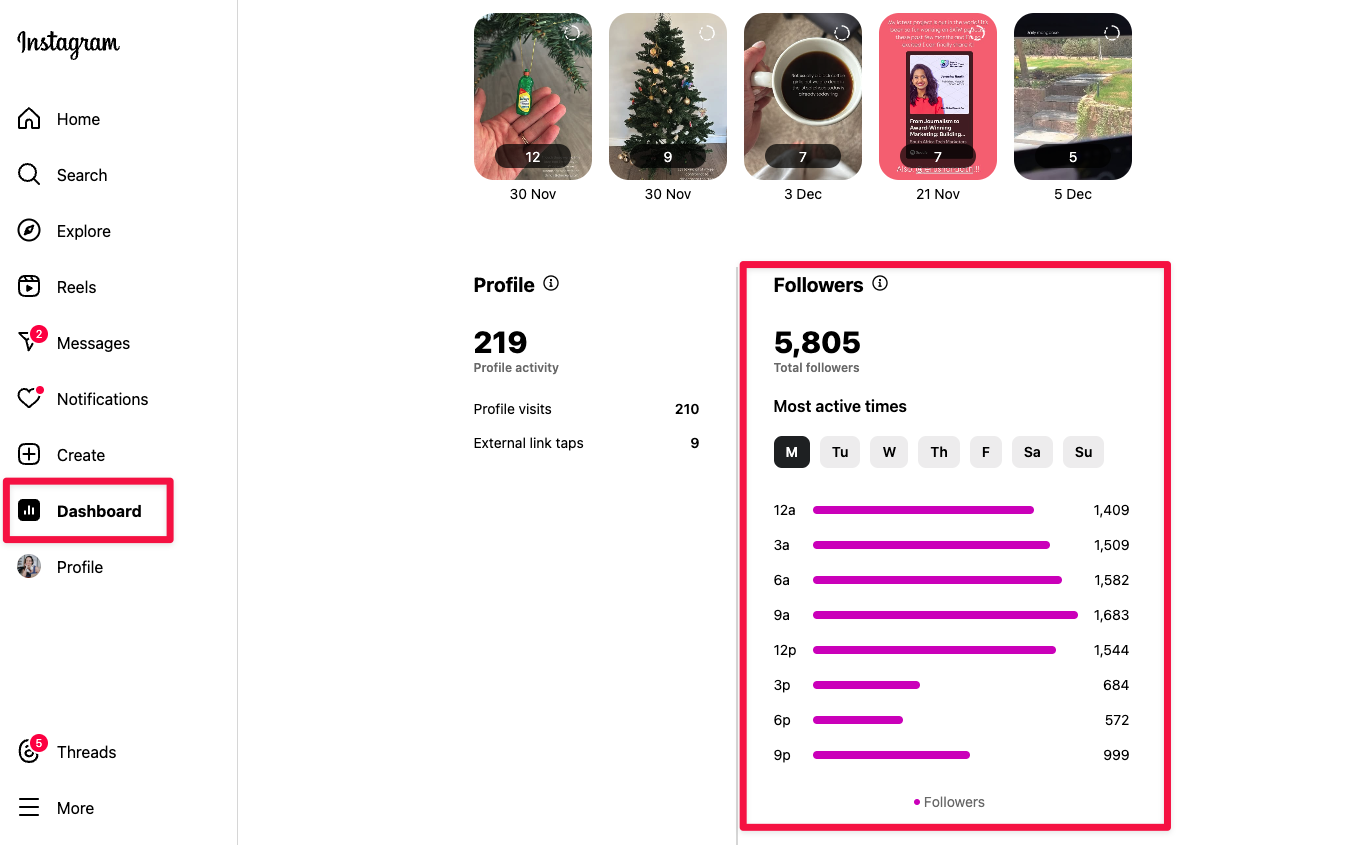
- Log in to your Instagram account in your browser via instagram.com.
- Click on Dashboard on the left-hand side of the screen.
- Under the Insights dropdown, select Account.
- Scroll down to Followers to see your audience's most active times (i.e., your ideal posting times).
FAQs about the best time to post on Instagram
How did you calculate the best time to post on Instagram?
We analyzed 9.6 million Instagram posts from 200,000+ Buffer accounts (January 2024 to December 2025), measuring median engagement rates across time slots to avoid skew from outlier posts and large accounts. This is part of Buffer's State of Social Engagement 2026 report, which examined 52 million posts across 10 platforms.
Why focus on engagement? Reach is important for growth, but engagement tells us when your audience is most likely to interact with your content. The Instagram algorithm now prioritizes 'sends per reach' (how often people DM your post or reel to a friend) as a critical ranking signal.
What is the Instagram algorithm's #1 ranking signal in 2026?
Per Head of Instagram Adam Mosseri, sends per reach (how often people DM your post to a friend) is now the platform's most important algorithmic factor, especially in reels and discover feeds.
We measured median engagement rates, so results aren't skewed by outlier posts or large accounts, which makes this advice applicable whether you're just starting out or have an established following.
Does the time you post on Instagram matter?
Yes, posting time on Instagram matters. Our analysis of 9.6 million Instagram posts shows that content posted at specific times had significantly higher engagement rates.
Evening hours (6 p.m. to 11 p.m.) consistently outperformed other time slots, with Wednesday and Thursday showing the strongest overall performance.
But timing can't save a weak post. Think of it as the cherry on top of your strategy, not the cake itself.
When is it best not to post on Instagram?
The worst times to post on Instagram are between 1 a.m. and 5 a.m. on any day, and across Friday and Saturday in general.
Morning hours (6 a.m. to 11 a.m.) are the weakest weekday windows, with one exception: Thursday mornings show surprisingly strong engagement.
The most obvious answer is overnight: posts shared between 1 a.m. and 5 a.m. tended to get the lowest engagement, no matter what day of the week it is. Rule of thumb: don't post on Instagram while your audience is asleep.
What is the worst time to post on Instagram?
The worst time to post on Instagram is between 1 a.m. and 5 a.m. across every day of the week, when engagement consistently bottoms out.
Friday and Saturday are the worst days overall, with significantly lower engagement than weekdays. Avoid posting on Friday lunchtime and Saturday morning if engagement is your goal. The pattern tracks with audience behavior: people are asleep overnight and tend to step away from the app during weekend mornings and commutes.
Is it better to post early or late on Instagram?
Late is better. Evening hours (6 p.m. to 11 p.m.) outperform mornings on every day except Thursday, where 7 a.m. to 9 a.m. is the strongest window.
This aligns with when most Instagram users (particularly the 18 to 34 demographic) are winding down from work and actively scrolling.
What is the best time to post on Instagram today?
The best time to post on Instagram today depends on the day of the week. Here's a quick reference:
Weekdays:
- Monday or Tuesday: 7 p.m. or 6 p.m.
- Wednesday: 12 p.m., 6 p.m., or 8 a.m.
- Thursday: 9 a.m., 8 a.m., or 7 a.m.
- Friday: 10 p.m. or 9 p.m. (though engagement is lower overall)
Weekends:
- Sunday: 9 p.m. or 10 p.m.
- Saturday: 9 p.m. or 10 p.m. (also a weaker day)
What is the best day of the week to post on Instagram?
Avoid Friday and Saturday if engagement is your goal. Weekend engagement drops significantly, making weekdays your best bet for reach. The best day of the week to post on Instagram is Wednesday, followed by Thursday and Tuesday. These midweek days consistently outperform the rest of the week across every time slot in our data.
What is the best time to post Instagram Reels to get more followers?
The best time to post Instagram Reels is during evening hours (6 p.m. to 11 p.m.) on Wednesdays and Thursdays, in line with overall peak engagement windows. Per Head of Instagram, Adam Mosseri, reels are where people go to be entertained, so the evening wind-down is when your audience has time to actually watch.
When is the best time to post on Instagram across different timezones?
The best times to post on Instagram are the same regardless of your timezone. Buffer's data scientist normalized the data, so 12 p.m. Wednesday means 12 p.m. local time wherever you are.
We've heard this question from readers everywhere, from the US to the UK, India, Australia, Canada, and beyond. Whatever your country or timezone, these times apply. If the best time to post on Instagram on Wednesday is 12 p.m., that's 12 p.m. in your timezone, whether you're based in California or Calcutta.
How often should I post on Instagram?
Post on Instagram 3 to 5 times per week (reels, carousels, or photos) plus 1 to 2 stories daily, per Buffer's analysis of 9.6M posts. This is the sweet spot for reach without overposting.
Social media post frequency is important. Regularly showing up on any of the major social media platforms is often the best way to grow.
Another 2025 Buffer study showed that the more often you post on Instagram, the higher the reach you get per post. We found that 3-5 posts on Instagram per week (reels, carousels, or photo posts) was the sweet spot for maximum impact for your efforts.
Instagram Stories, which disappear after 24 hours, offer a helpful, lightweight way to stay consistent on the platform. Post an Instagram Story at least daily to stay top-of-mind for your followers.
Head of Instagram, Adam Mosseri, has made similar recommendations. He suggests posting reels, carousels, photos, and stories every week to grow your social media presence, with one to two Instagram Stories daily and a couple of feed posts weekly. That should be enough for consistent Instagram engagement and reach.
Experiment with your posting schedule to find the cadence (along with the time to post) that works best for your target audience, specific followers, and different industries.
Your checklist for high-performing Instagram posts
Figuring out the best time to post on Instagram for maximum reach is one piece of your Instagram marketing strategy, not the whole thing.
As we unpack in our guide to the Instagram algorithm, a huge number of factors decide whether your content performs well when you post on Instagram. Here's our checklist for high-performing Instagram content:
- Make the most of Instagram's new features: The platform loves showcasing its new features. Using them when you post on Instagram could mean getting your content in front of new audiences.
- Experiment with content types: Regularly trying out a new type of content when you post on Instagram will help you figure out what resonates the most with your audience. Plus, it's a great way to repurpose your content.
- Prioritize authentic engagement: Rather than wasting time on Instagram algorithm hacks, focus on meaningful engagement with your followers. Reply to comments and messages (you could boost engagement by 21%!), reshare their mentions of you, and interact with them on their own content. The algorithm now prioritizes 'sends per reach', so encourage your audience to share your posts with friends.
- Analyze to see what's working: Use Instagram Insights to build your social media presence and see which of your posts have had maximum engagement and reach. Buffer's Insights will also help you uncover your best posts in just a few clicks.
What's actually worked for you when figuring out your best posting times? Tell us @buffer. I read every reply.
Get started with Buffer for free.
More Instagram resources
- 13 Trending Sounds on Instagram (+ How to Use Them)
- 24 Free Instagram Tools to Help Grow Your Account
- How to Make Money on Instagram: 12 Tried + Tested Ways That Work
- I'm Growing on Instagram After 10 Years — Here’s What I'm Doing Differently
- The Complete Guide to Using Instagram Stories to Boost Engagement + Stay Top of Mind
- 13 Ways to Get More Followers on Instagram (Tried & Tested)
- How the Instagram Algorithm Works
Every creator or business’s social media strategy looks different. Some lean into video, while others prefer to use words or pictures to tell the story. Some create new or repurposed content for each post, while others have a mix of new posts and those they recycle on a schedule.
And then there are agencies that have to manage multiple accounts across it all.
Me? I’m a text-based, new content LinkedIn gal who dreams of starting her own YouTube channel (maybe someday).
Whichever kind of creator or business you are or manage, there’s a social media management tool out there for you. In this post, I’m comparing two of them, complete with hands-on testing across publishing, analytics, inbox management, and team workflows.
Buffer is built around getting content published quickly and flexibly for anyone, from a solo creator to a growing team, with no learning curve and a free plan that has no strings attached. RecurPost is built around the idea that a lot of social media content should keep running behind-the-scenes, with libraries that auto-loop and Instagram DM automations.
Here’s what I found.
Key takeaways
- Buffer has a free-forever plan that includes three channels, 10 social posts per channel (refillable anytime), basic analytics, API access, and 24/7 email support. RecurPost has no free plan, only a 14-day free trial. On RecurPost's entry-level paid plan ($9 per month), support is knowledge base only, and there are no shareable calendars.
- Buffer’s Team plan ($12/channel per month) has unlimited users. RecurPost’s Agency plan includes 3 seats, and each additional seat costs $20.
- RecurPost’s evergreen content libraries are a mature content recycling system with looping and optional end dates. Buffer has a recurring posts feature in beta, but it’s simpler: set a single post to repeat on a schedule rather than a rotating library of multiple posts.
- Buffer's Community inbox covers comments and mentions across a wider set of platforms, but no DMs. RecurPost's inbox covers comments and DMs on fewer channels.
- RecurPost has strong Instagram DM features. It gives you lots of customization options to set which posts to automatically DM people on, and what to say. Buffer doesn’t offer DM support.
- Buffer's API and MCP come with a developer ecosystem. You’ll find beginner-friendly docs, active builder channels in the Discord community, a Developer Advocate on staff, and stories from builders for inspiration. RecurPost also has both an API and an MCP, but neither is mentioned on the marketing website, and there are no real resources to help builders. Most people would never even know they exist.
- RecurPost’s analytics reporting goes deep. Agency plan teams can create detailed, deeply customizable reports and delivery for clients. Buffer analytics include AI-powered takeaways to easily understand the data, plus Markdown export for deeper analysis in Claude or ChatGPT.
- Buffer's AI Assistant is unlimited on all plans for content creation and idea generation. RecurPost includes 100 AI credits per month, after which you buy more as a paid add-on.
Jump to a section:
RecurPost vs. Buffer at a glance
| Buffer | RecurPost | |
|---|---|---|
| Free plan | 3 channels, 10 scheduled posts/channel | 14-day free trial only |
| Starting paid price | $6/channel per month (Essentials) | $9 per month (Starter) |
| Social channels | 3 on Free, Essentials, and Team plans start at 1 and scale with channels added | 2 on Starter, 5 on Personal, 20 on Agency; Additional profiles are available at $4/profile |
| Pricing model | Per channel | Flat plans + add-ons for additional channels, users, and features |
| AI features | AI Assistant available on every plan for content creation and idea generation, reply suggestions, and insights; connect to Claude and ChatGPT via MCP | 100 credits per month included for content creation and 10 credits per month for image generation, additional credits available for purchase |
| Content recycling | Recurring single posts | Evergreen libraries with looping and optional end dates |
| Unified inbox | Comments and mentions across 10 platforms, no DMs | Comments and DMs available on 4 platforms |
| Instagram DM automation | Not available | Keyword-triggered or blanket rule automations |
| Reports | PDF, CSV, and Markdown exports on paid plans | White-labelled PDFs for reporting |
| API and MCP | Available on all plans, including Free, with strong supporting resources | Available but not marketed, no supporting resources |
| Boost post | Not supported | Supported through Meta Ads Manager as a paid add-on |
| Team approval workflows | Enforced per user, all content types | Library posts only, not mandatory; one-offs excluded |
| Customer support | 24/7 via email, also active on social media and Discord, for all plans | Email and chat on paid plans from Monday to Friday, closed Indian public holidays |
Let’s look at these a little closer.
Plans and pricing
RecurPost and Buffer use different pricing models — one scales per channel, the other is flat-rate with add-ons for channels, users, and additional features.
Buffer pricing (billed monthly, annual saves ~20%)
- Free: 3 channels, 10 scheduled posts per channel (refillable at any time), 1 user, AI Assistant, API and MCP access, analytics, community inbox
- Essentials: starts at $6/channel per month for unlimited posts, 1 user, analytics including exports, first comment scheduling
- Team: starts at $12/channel per month for unlimited posts, unlimited users, approval workflows, custom permissions
Buffer has a tiered pricing model within each plan and includes volume discounts for more than 10 channels. The more channels you use Buffer on, the more affordable each one gets. The Team plan includes unlimited users, so you can have two or 22 people, and it won’t impact your monthly budget.
See Buffer’s full pricing guide here →
RecurPost pricing (billed monthly, annual gets you two months free)
- Starter: $9 per month for 1 user, 2 social accounts, 10 posts per account per day, knowledge base support only
- Personal: $25 per month for 1 user, 5 social accounts, 20 posts per account per day, email and chat support
- Agency: $79/month for 3 users, 20 social accounts, 80 posts per account per day, everything in Personal plus client workspaces, password-free account onboarding, custom reports, internal and external approval workflows
- Enterprise: Custom pricing
If you post to X/Twitter, the platform isn't available during the free trial. Once on a paid plan, basic tweets are included, but posting tweets that contain a URL and X analytics require a paid credit top-up. There’s no inbox support for X.
One good thing to know about RecurPost’s pricing is that, if you need more accounts than a plan provides, you can add them à la carte instead of jumping up to the next plan. Extra accounts come at $4 per month each. For extra users on the Agency plan, it’ll cost $20 per month per additional seat.
There are also add-ons available for more daily posting slots, boosting posts with Meta Ads Manager, and additional AI credits.
See RecurPost’s full pricing guide →
What this means in practice
Let’s look at how costs compare across a few scenarios for solo creators and teams.
| Buffer | RecurPost | |
|---|---|---|
| 1 user, 3 channels | $0/mo (Free) | $13/mo (Starter) |
| 1 user, 4 channels | $24/month (Essentials) | $25/month (Personal) |
| 3 users, 8 channels | $96/mo (Team) | $79/mo (Agency) |
| 5 users, 20 channels | $160/mo (Team) | $119/mo (Agency, with additional paid users) |
| 10 users, 35 channels | $210/mo (Team) | $279/mo (Agency, with additional paid users and channels) |
If budget is the sole criteria, the tools look different depending on your team size and the number of channels you manage.
RecurPost does not have an equivalent to Buffer’s Free plan, so if you’re a solo creator with three channels or fewer, then Buffer comes out on top. Add another channel and it’s almost the same.
For teams, RecurPost works out more cost-effective for fewer channels and team members. As the number of channels and team members needed goes up, Buffer ends up being the more affordable of the two.
Bear in mind this doesn’t take into account any RecurPost add-ons beyond accounts and user seats that aren’t included in the plans. If you run out of AI credits, want to boost Instagram or Facebook posts, or need more calendars to share with clients, among other things (more on all this later), you’ll need to spend more.
Scheduling and publishing
RecurPost's entire scheduling is built around the assumption that you’ll be posting evergreen content continuously. Buffer assumes you're mostly creating something new.
Buffer's composer gets you from idea to scheduled post quickly. Write your post, customize per platform, and schedule. The queue handles timing: set your posting slots once, and new posts drop in automatically. On the Team plan, anyone who needs a post approved hits “Save and Request Approval”, and a team member with full access either edits, rejects, or approves and sends it to the queue.
Just like the posts themselves, the posting slots are also customizable per channel. You can choose your own or let Buffer suggest the best times to post for each channel based on our data. These are flexible and can be changed at any time.
One of my favorite (and most used) spaces in Buffer’s publishing tools is the Create space. It’s a board for saving your ideas before you’re ready to turn them into a ready-to-publish post. My Create space is full of ideas that include:
- A transcribed voice note to capture an idea before I lose it, saved here from the Buffer iOS app
- A URL I wanted to write about, saved here using Buffer’s browser extension
- Topics to explore more deeply based on things I’ve already posted about, saved here using a custom app I built with the Buffer API
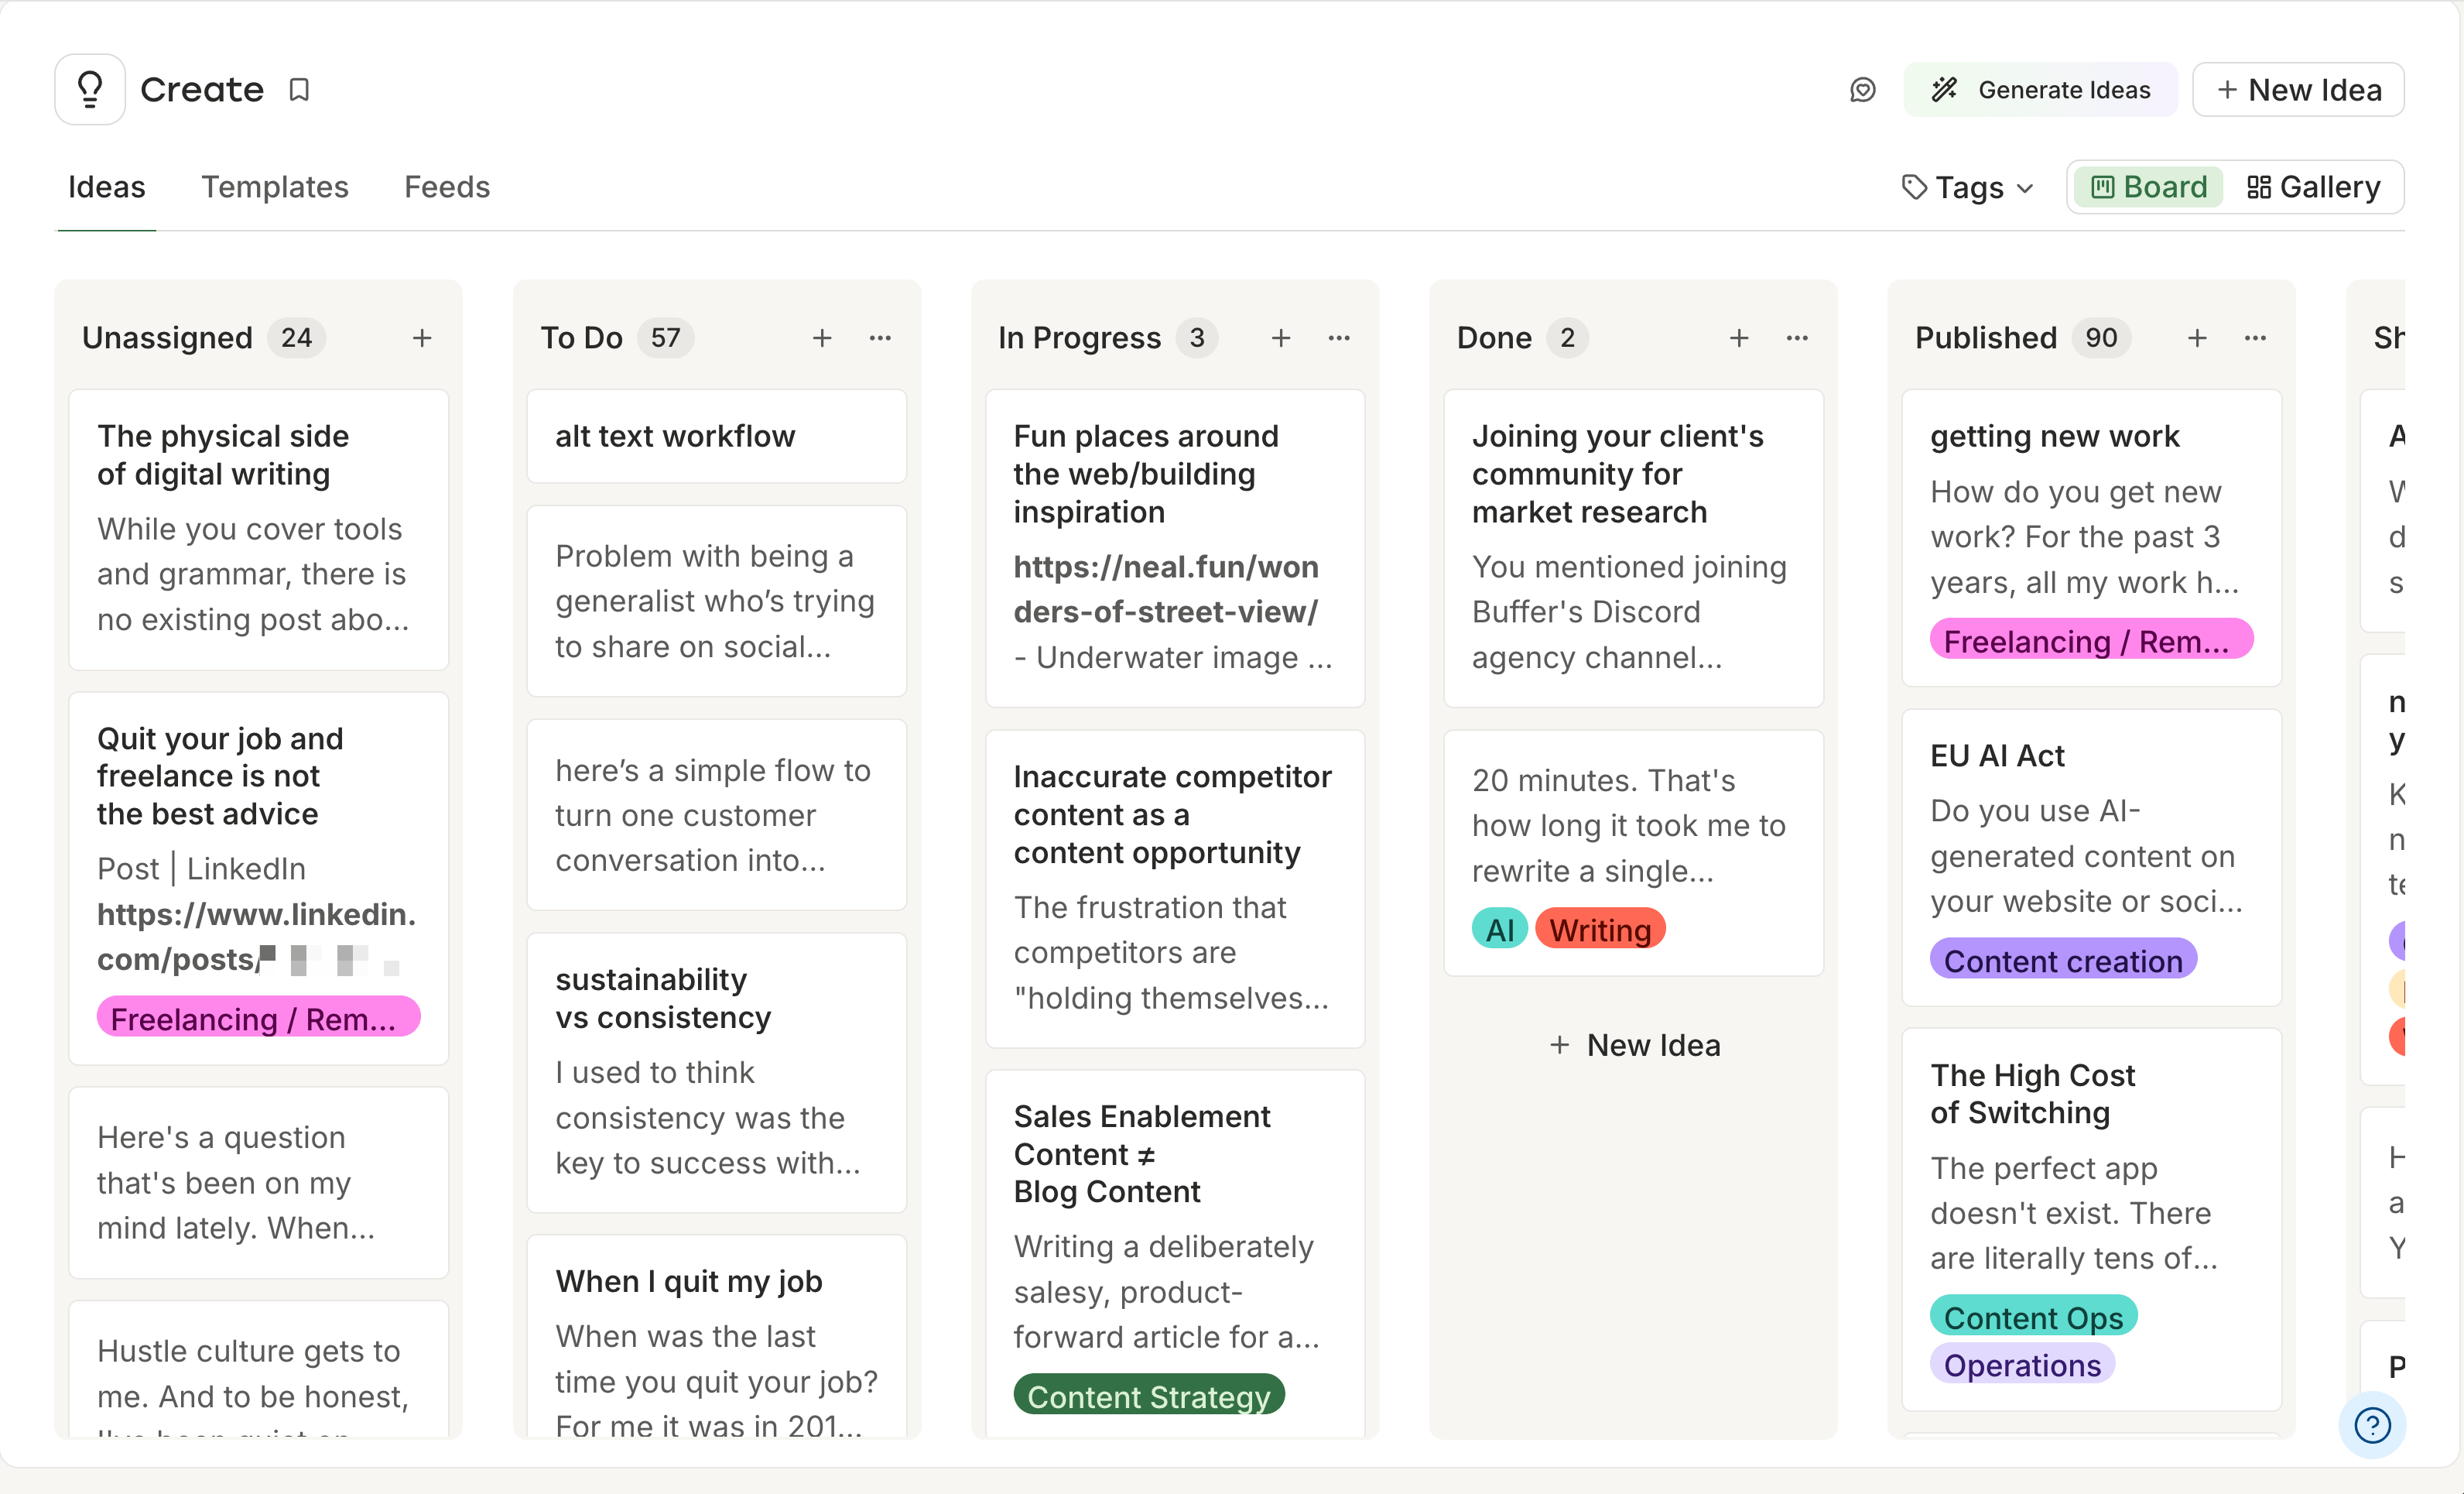
Each one is an idea for a new post to keep my content fresh and make sure I’m never wondering, “What should I post about next?” From here, I can develop an idea further before it’s ready to become a draft, then move it over to the composer and schedule it without leaving Buffer.
On Team plans, the whole team shares the Create space, so you can collaborate on ideas within Buffer itself. RecurPost has no equivalent — there's nowhere to hold work-in-progress or store ideas before you lose them.
RecurPost's scheduling system works differently in other ways too. You can schedule a post once and move on to the next, but that’s not what it’s designed around. Instead, you create a library, add recurring time slots by day of week or month, and posts cycle through and loop back automatically.
Two posts in a library alternate. Six posts rotate in order and then restart at the beginning. If you add an end date to a specific post, it drops out of the rotation from that date, and the rest continue.
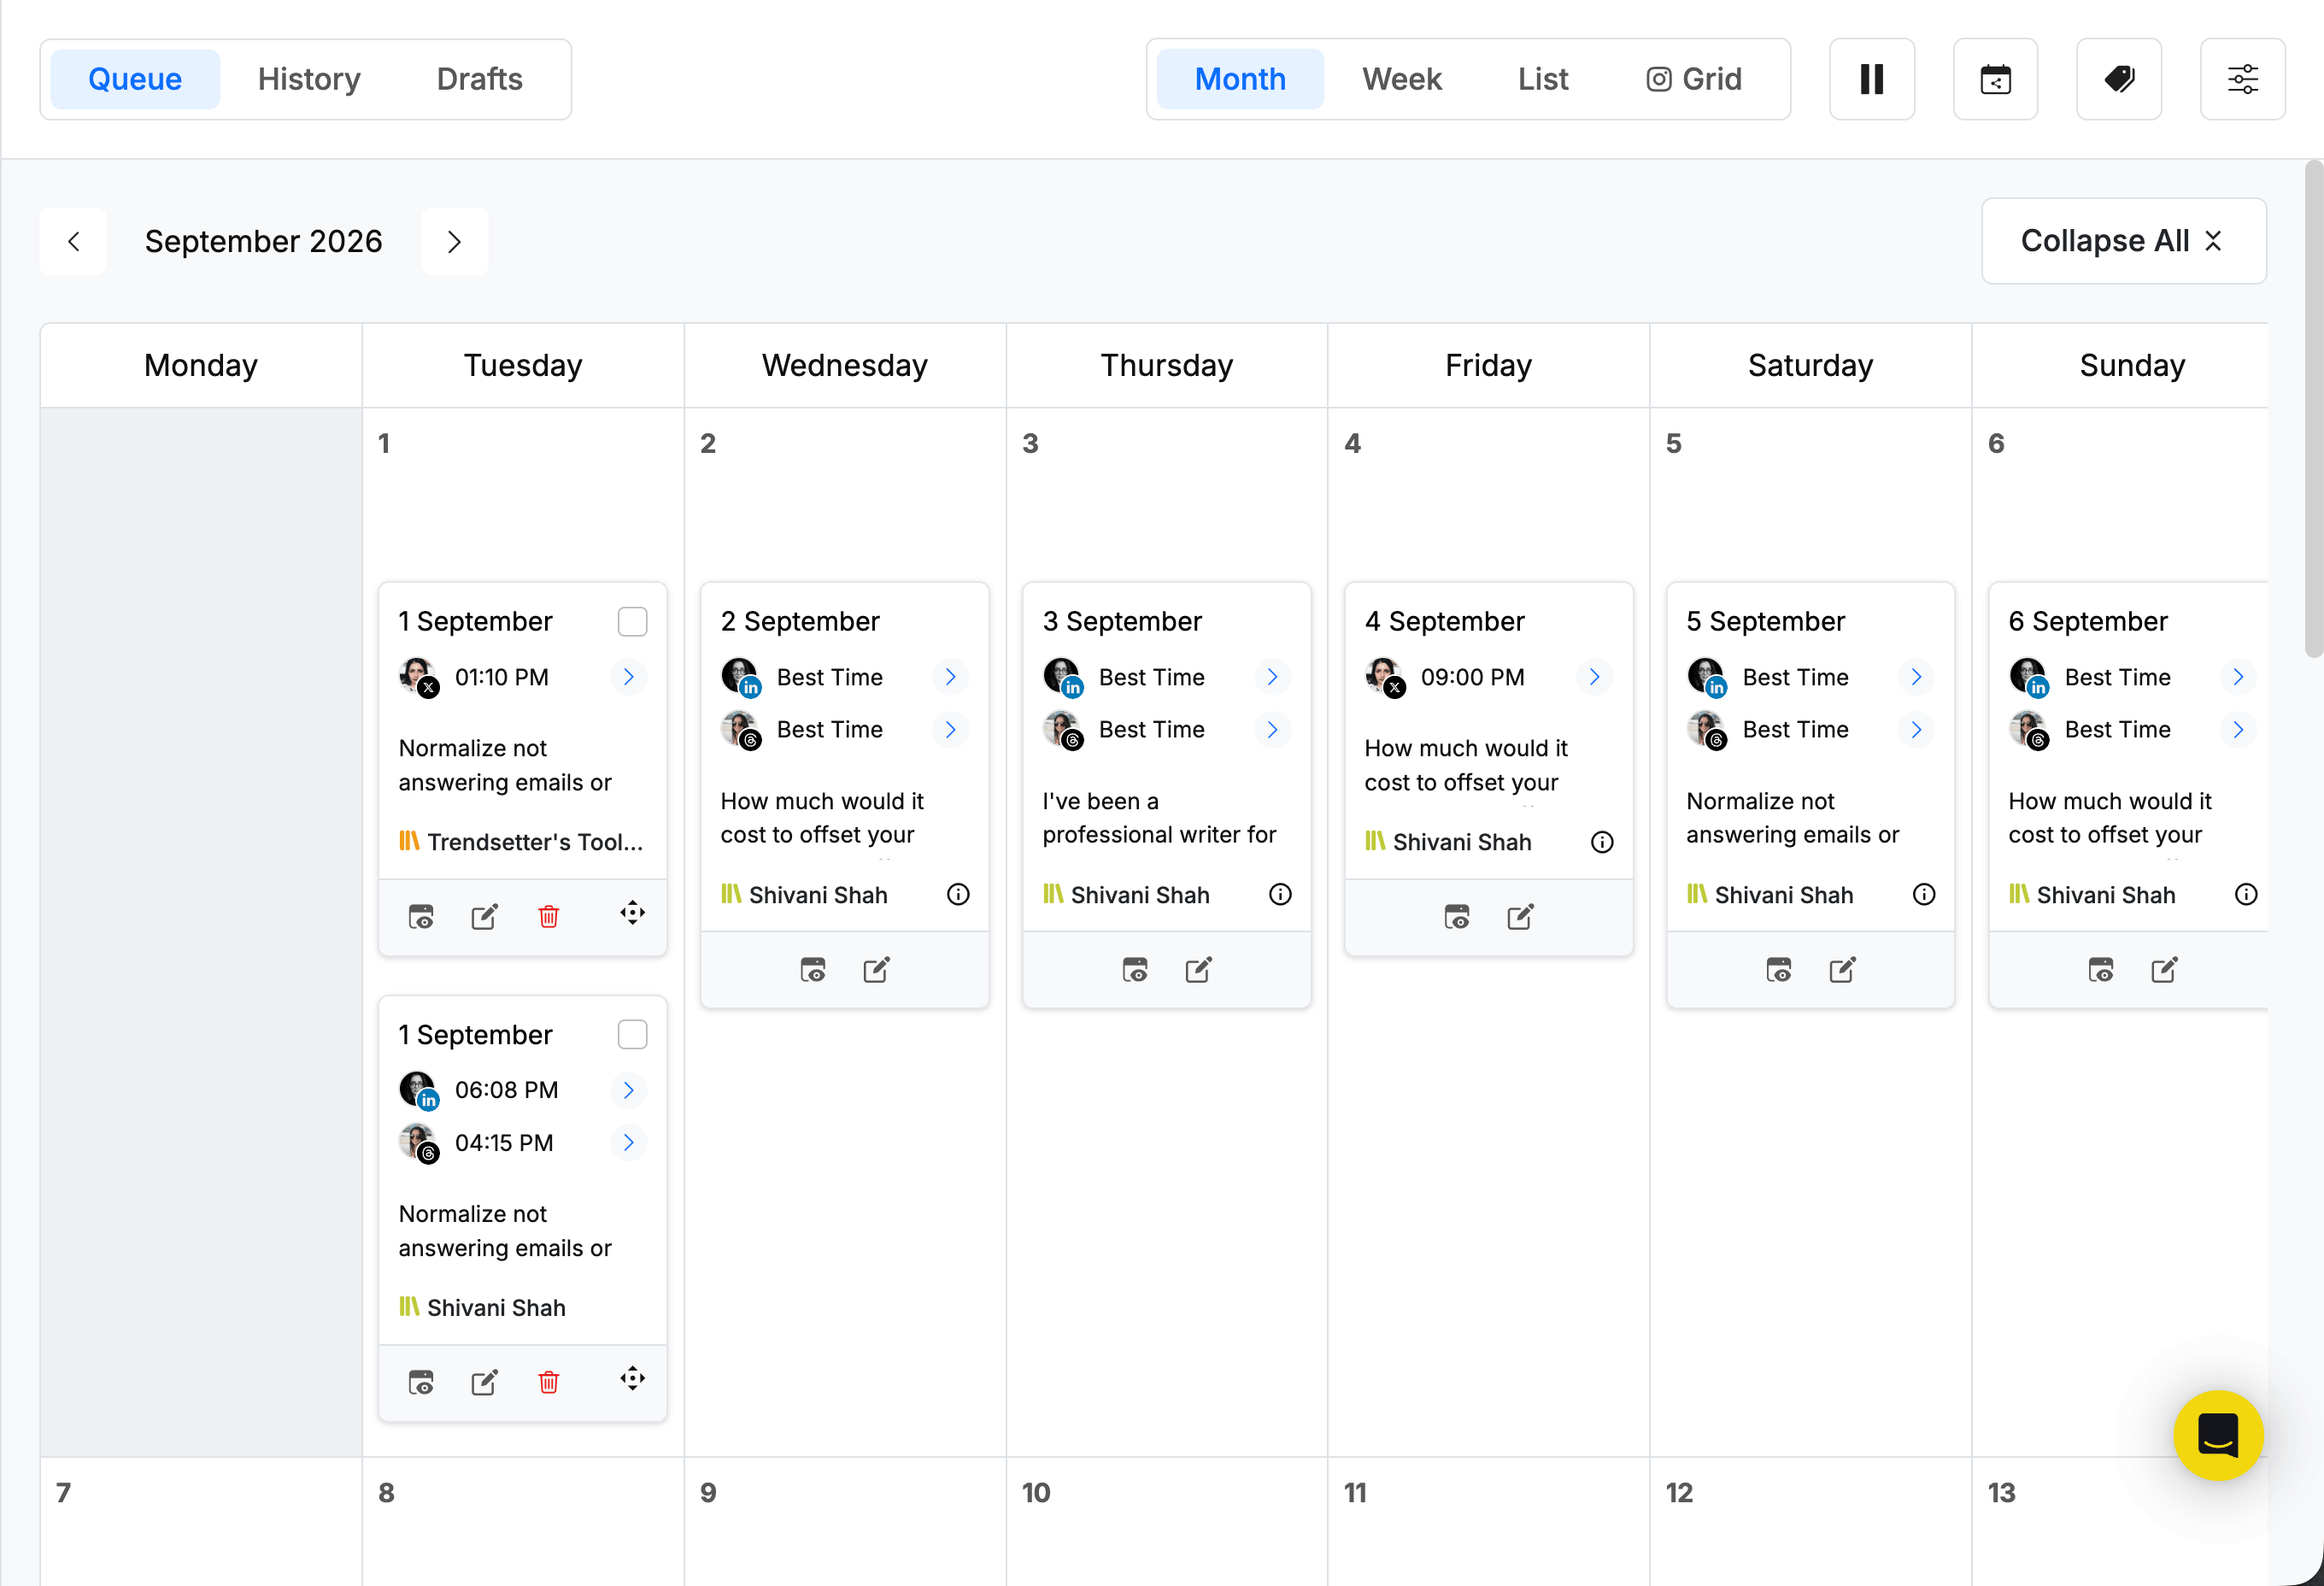
It was pretty fiddly to figure out at first, and I’ll admit I spent a few hours trying to wrap my head around setting it up. If your content is unique each time, this system is more complex than you need. But for content that's meant to repeat, RecurPost's library approach is strong.
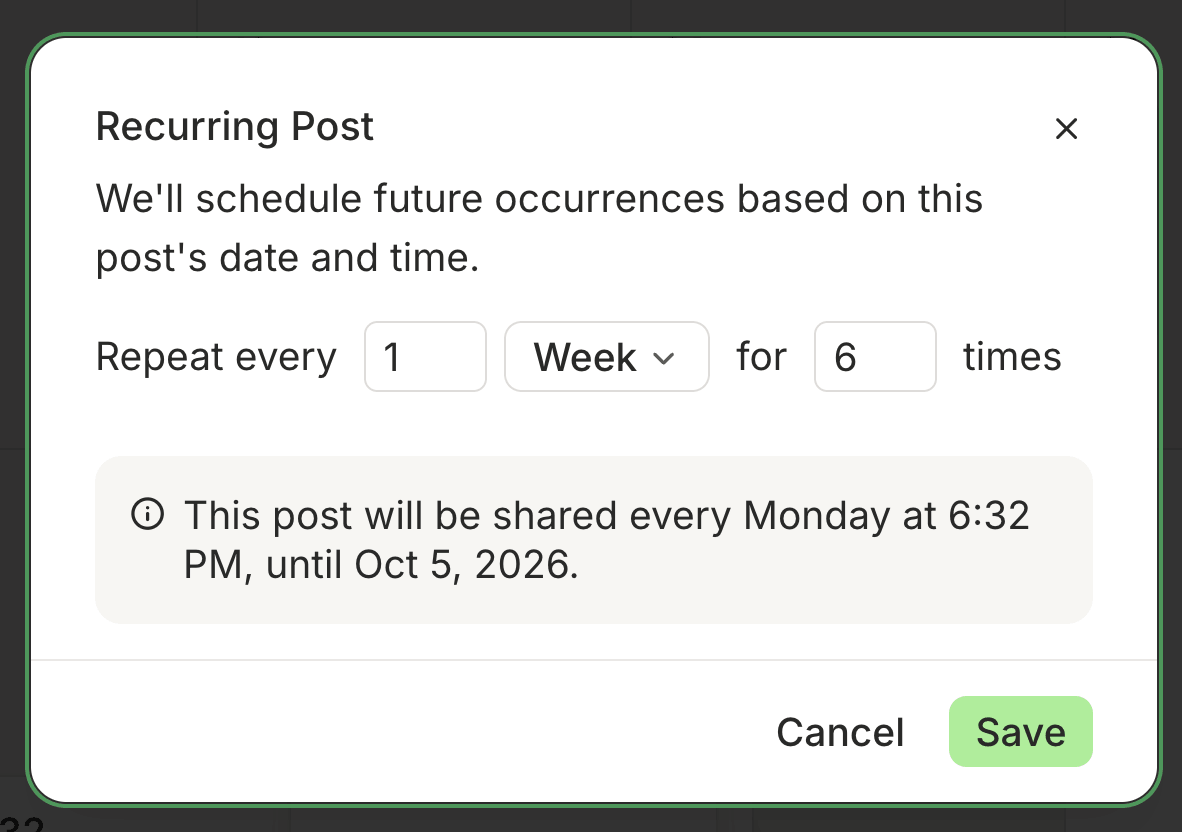
Buffer also has recurring posts (currently in beta), but it works differently — you can set one post at a time to repeat on a schedule rather than a rotating library of multiple posts cycling through automatically.
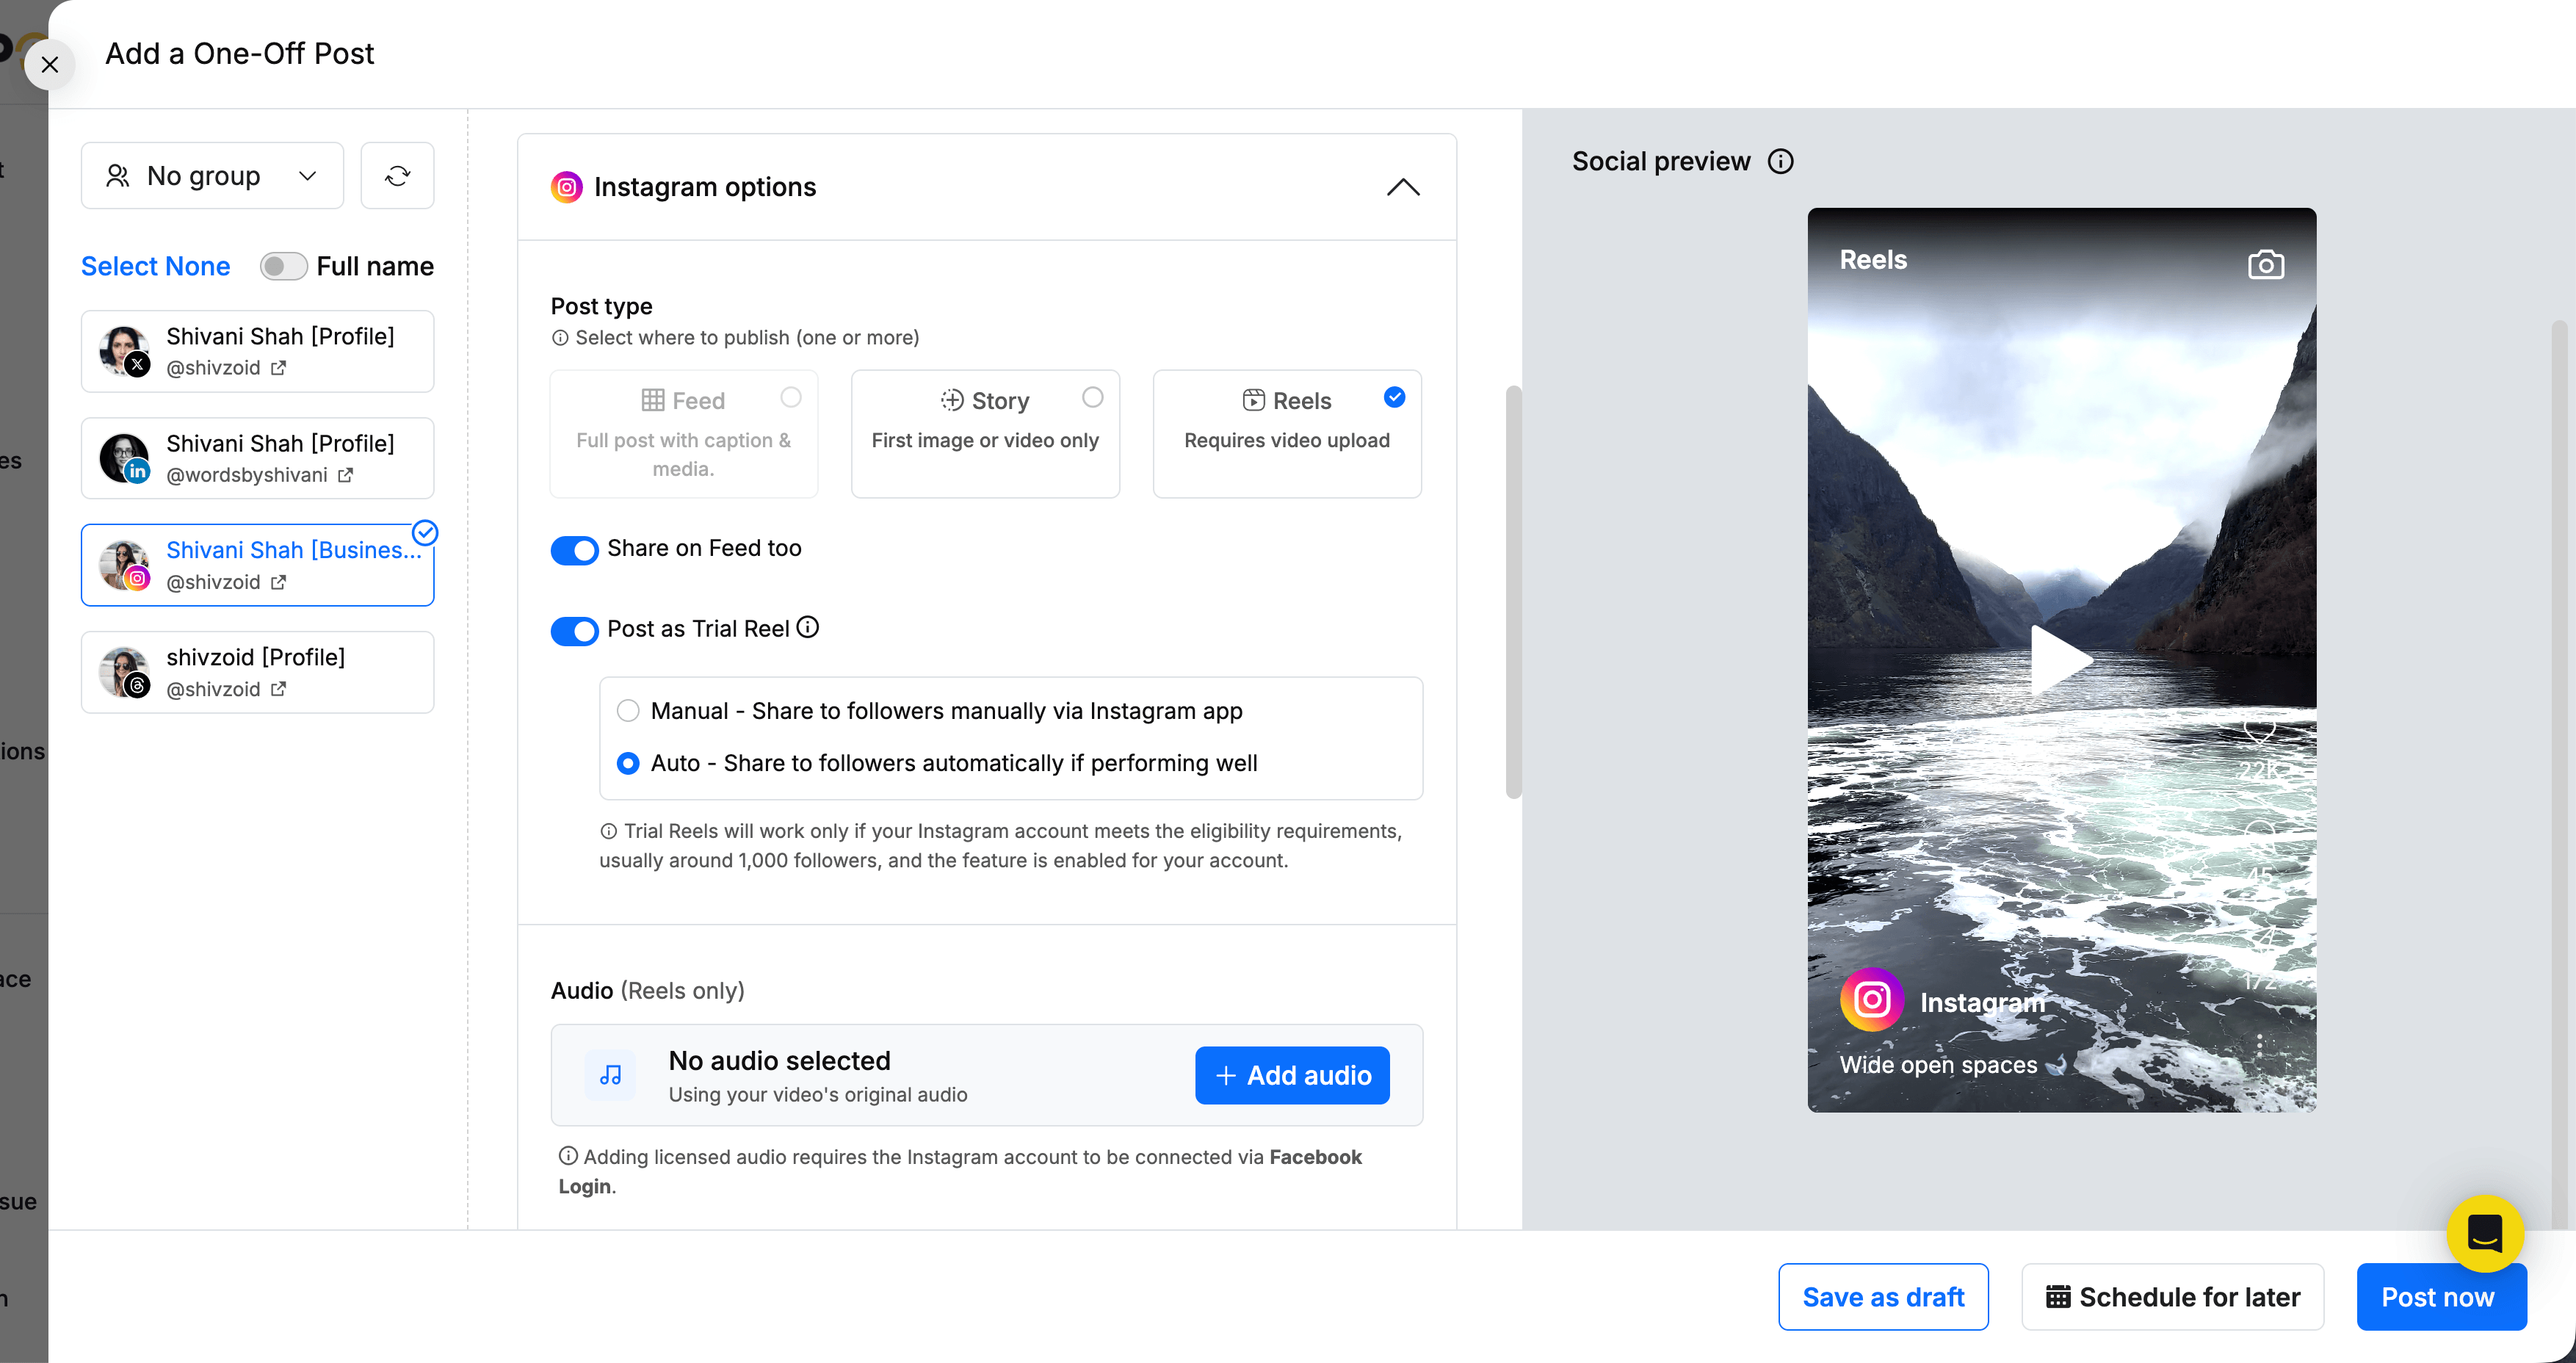
Where RecurPost goes the extra mile is in its Instagram-specific features. From within the composer itself, you can schedule a reel as a trial reel if your account supports it, add licensed audio via your Facebook connection, set up an automatic DM for a specific post, and tag people, products, and collaborators.
An additional $5 per month allows you to boost Instagram (and Facebook) posts from within RecurPost. You’ll need to connect your Meta Ads Manager account for this, and once set up, you can manage ads while scheduling posts. For Instagram-heavy workflows, this is a much richer toolkit than many schedulers offer.
If you share the same content across different platforms, keep in mind that you can customize the post for each platform only on the Personal plan and above. On the Starter plan, you’d have to schedule the post on each platform separately.
Inbox and engagement
Buffer's Community inbox covers a wide platform footprint. You can reply to comments and mentions on Facebook Pages, LinkedIn profiles and pages, Instagram professional accounts, Threads, Bluesky, X/Twitter, Google Business Profiles, TikTok, YouTube, and Mastodon.
If you’re spread out across different channels, you can engage with your audience and build relationships from within Buffer itself instead of hopping back and forth between them. AI reply suggestions are available on all platforms and give you a starting point for each comment if you need a nudge.
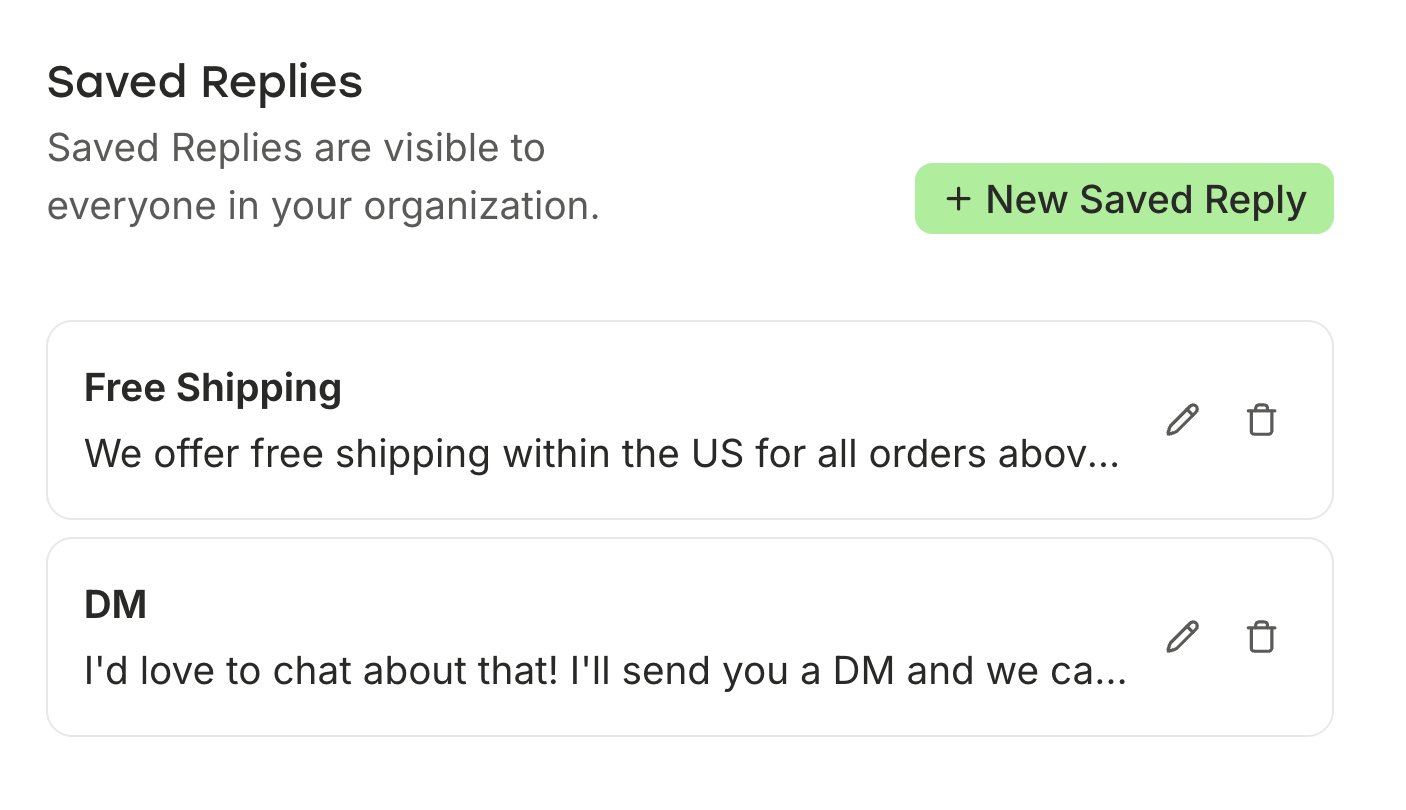
Every channel has its own Comment Score to track how quickly your team responds, and you can save responses to the most frequently asked questions. These are shared with your whole team, so everyone can drop the same answer to these questions so that commenters aren’t left waiting for too long.
RecurPost's inbox covers Instagram business profiles, Facebook Pages, LinkedIn Company Pages, and Google Business Profiles. It’s a narrower set of platforms, but it goes deeper by including Facebook and Instagram DMs.
The Instagram DM automation is one of RecurPost’s strongest features across the entire platform. You can set up lots of configurations: have it run on individual posts or reels (or across all of them), choose a specific keyword trigger or go on every comment, and decide whether to send a DM instantly or only after the person follows you first.
I tested it, and it worked beautifully. It’s exactly the kind of thing that's useful for those campaigns where you want to automatically send a link or a download to anyone who comments on your posts.
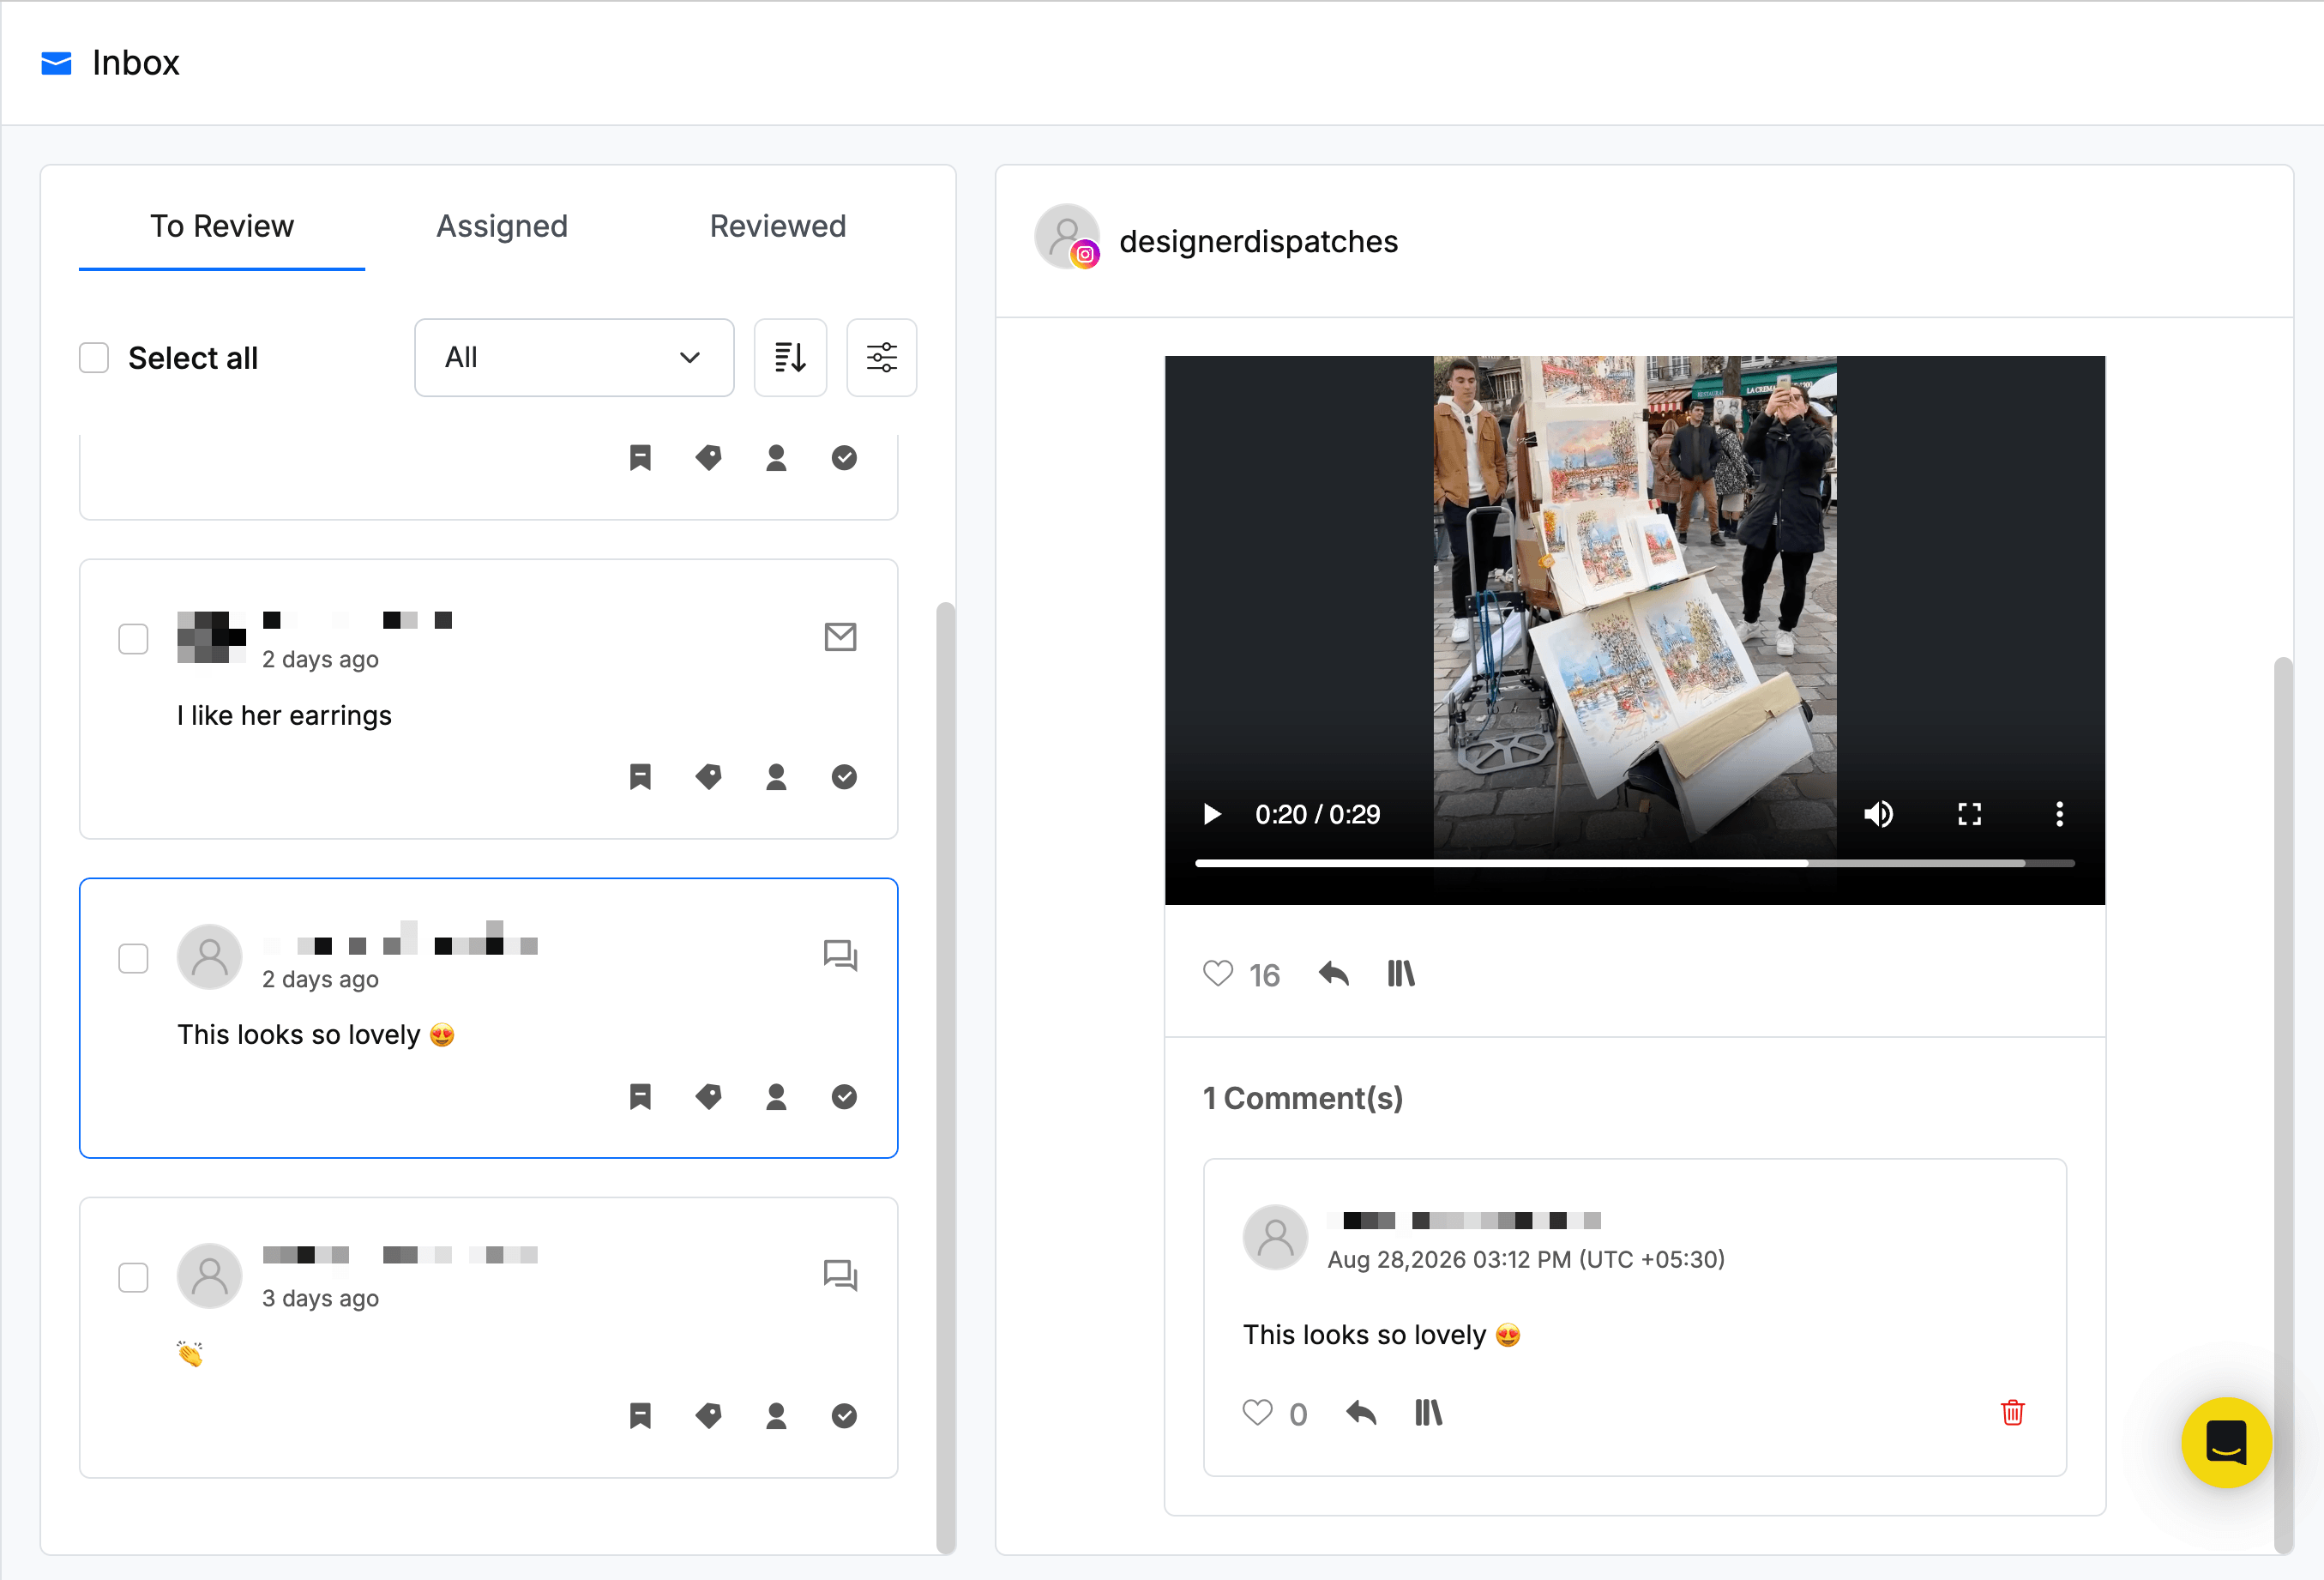
One thing to watch out for: comments that were auto-replied to by an automation still showed up in the inbox as pending (like the one in the screenshot below). This creates a real risk of a double response if a team member doesn't notice it was already handled.
Another gap is that RecurPost doesn’t have saved replies. On platforms that aren’t Instagram, your team has to manually write responses to repeated questions each time. This makes it slower to go through all the pending comments, and it risks miscommunication if there’s been a change in one of your policies and a teammate didn’t clock it before replying.
If your engagement work is primarily comment management across many platforms, Buffer is the right fit. If managing DMs for a smaller set of platforms matters, or you want to run automated Instagram DM campaigns, RecurPost is the stronger choice.
Analytics and reporting
Analytics on Buffer live in Insights and cover 10 platforms: Instagram, Facebook, X/Twitter, LinkedIn, TikTok, Pinterest, Threads, Bluesky, YouTube, and Mastodon. You get data for each individual channel and your entire social media presence rolled up in one. Use filters or channel groups to create a custom dashboard for two or more channels of your choosing.
You can even create dashboards for tags assigned to posts. I use tags to categorize posts by topic, so I can see how, for example, all posts on content creation or all posts on data privacy have performed.
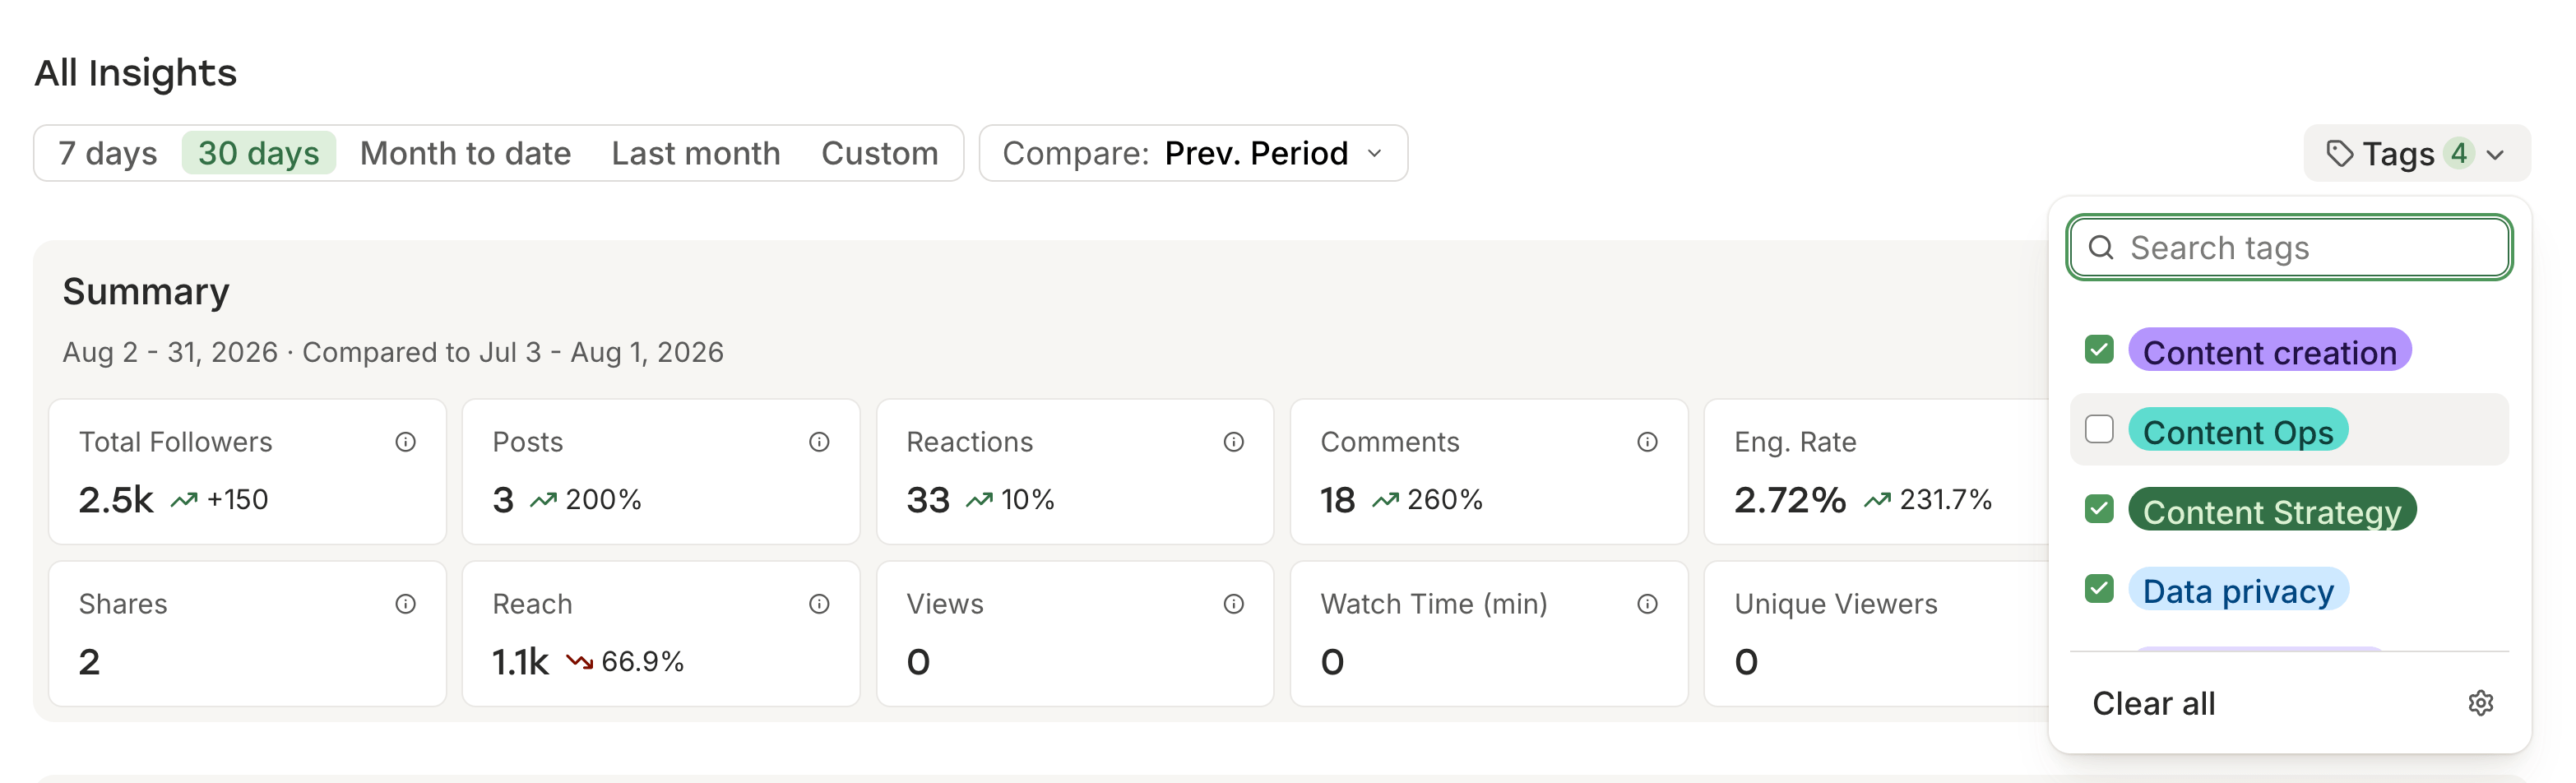
At the channel level, AI-powered weekly takeaways share tailored suggestions on what to do next. For creators and teams that want both the numbers and data-backed, built-in recommendations for how to grow their engagement and following, Buffer’s Insights offers it all in one place.
On paid plans, you can export your data in PDF format for reporting to clients or stakeholders, plus CSV or Markdown formats if you want to run a deeper analysis on a tool like ChatGPT or Claude.
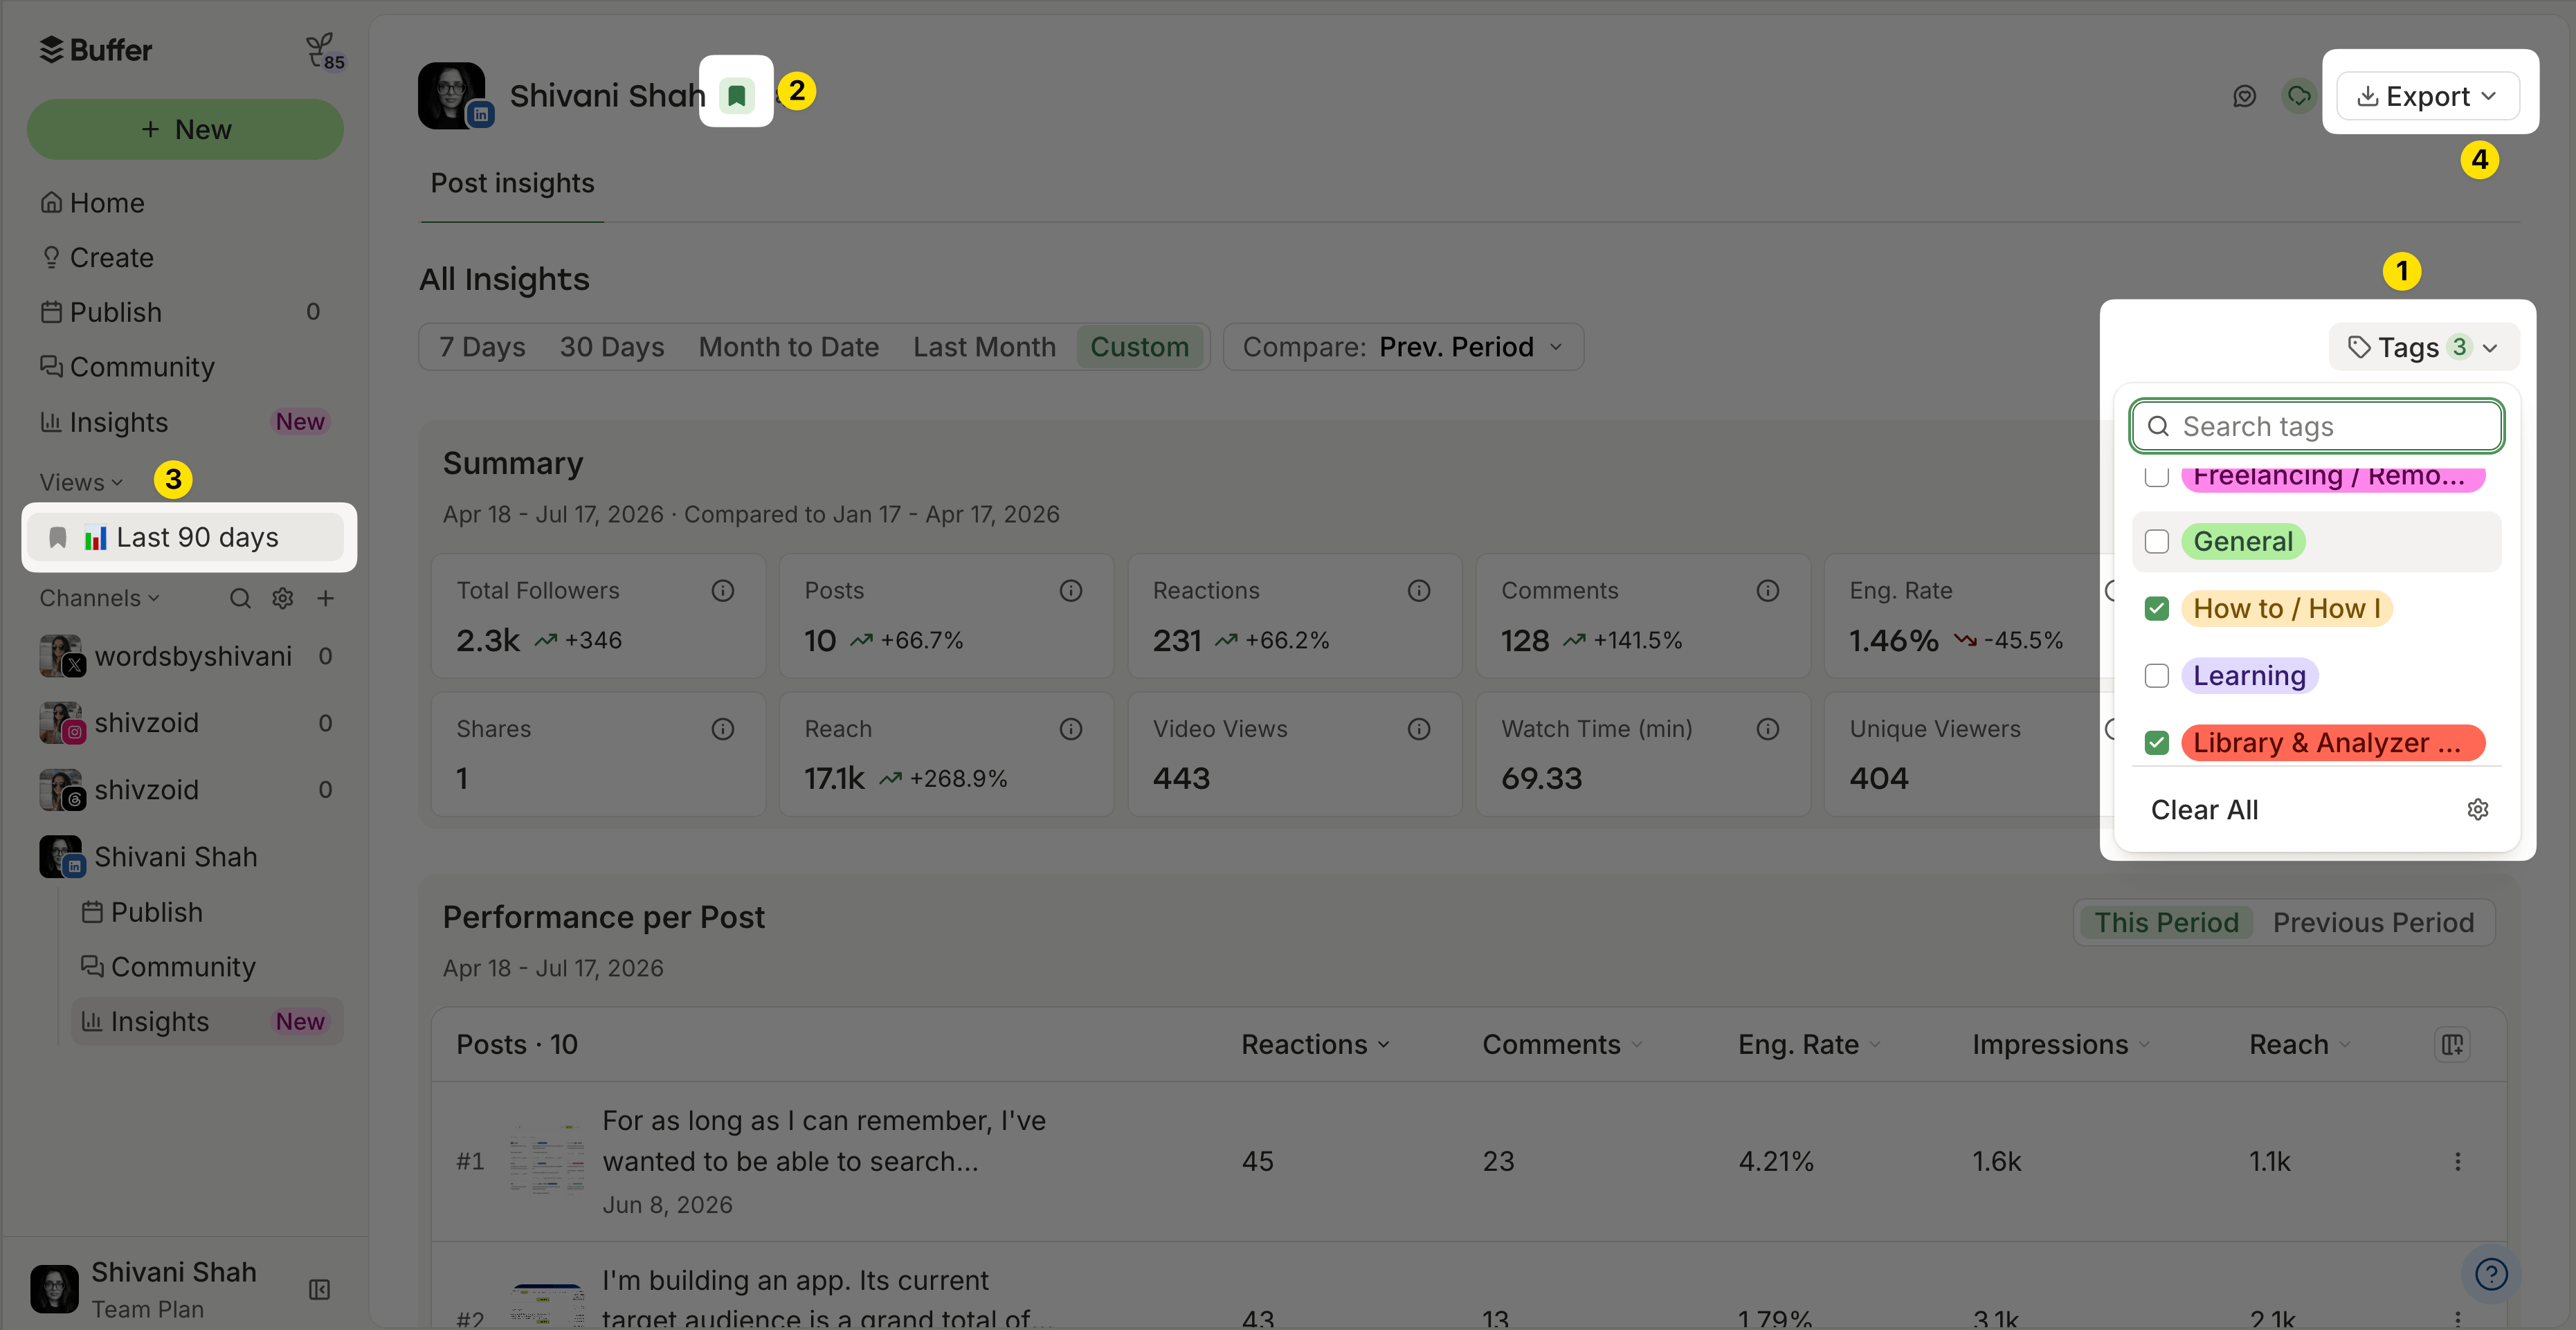
You can build custom reports using filters: by client, by channel or channel group, by tags, or a combination of these. Set a date range — the past 7 days, the past 30 days, the past quarter, something else entirely — and compare it against the same period before it or even the same date range in the previous year.
It’s a flexible way to create reports that show exactly what each client or campaign needs. Bookmark the custom view to return to it with one click for next month’s report.
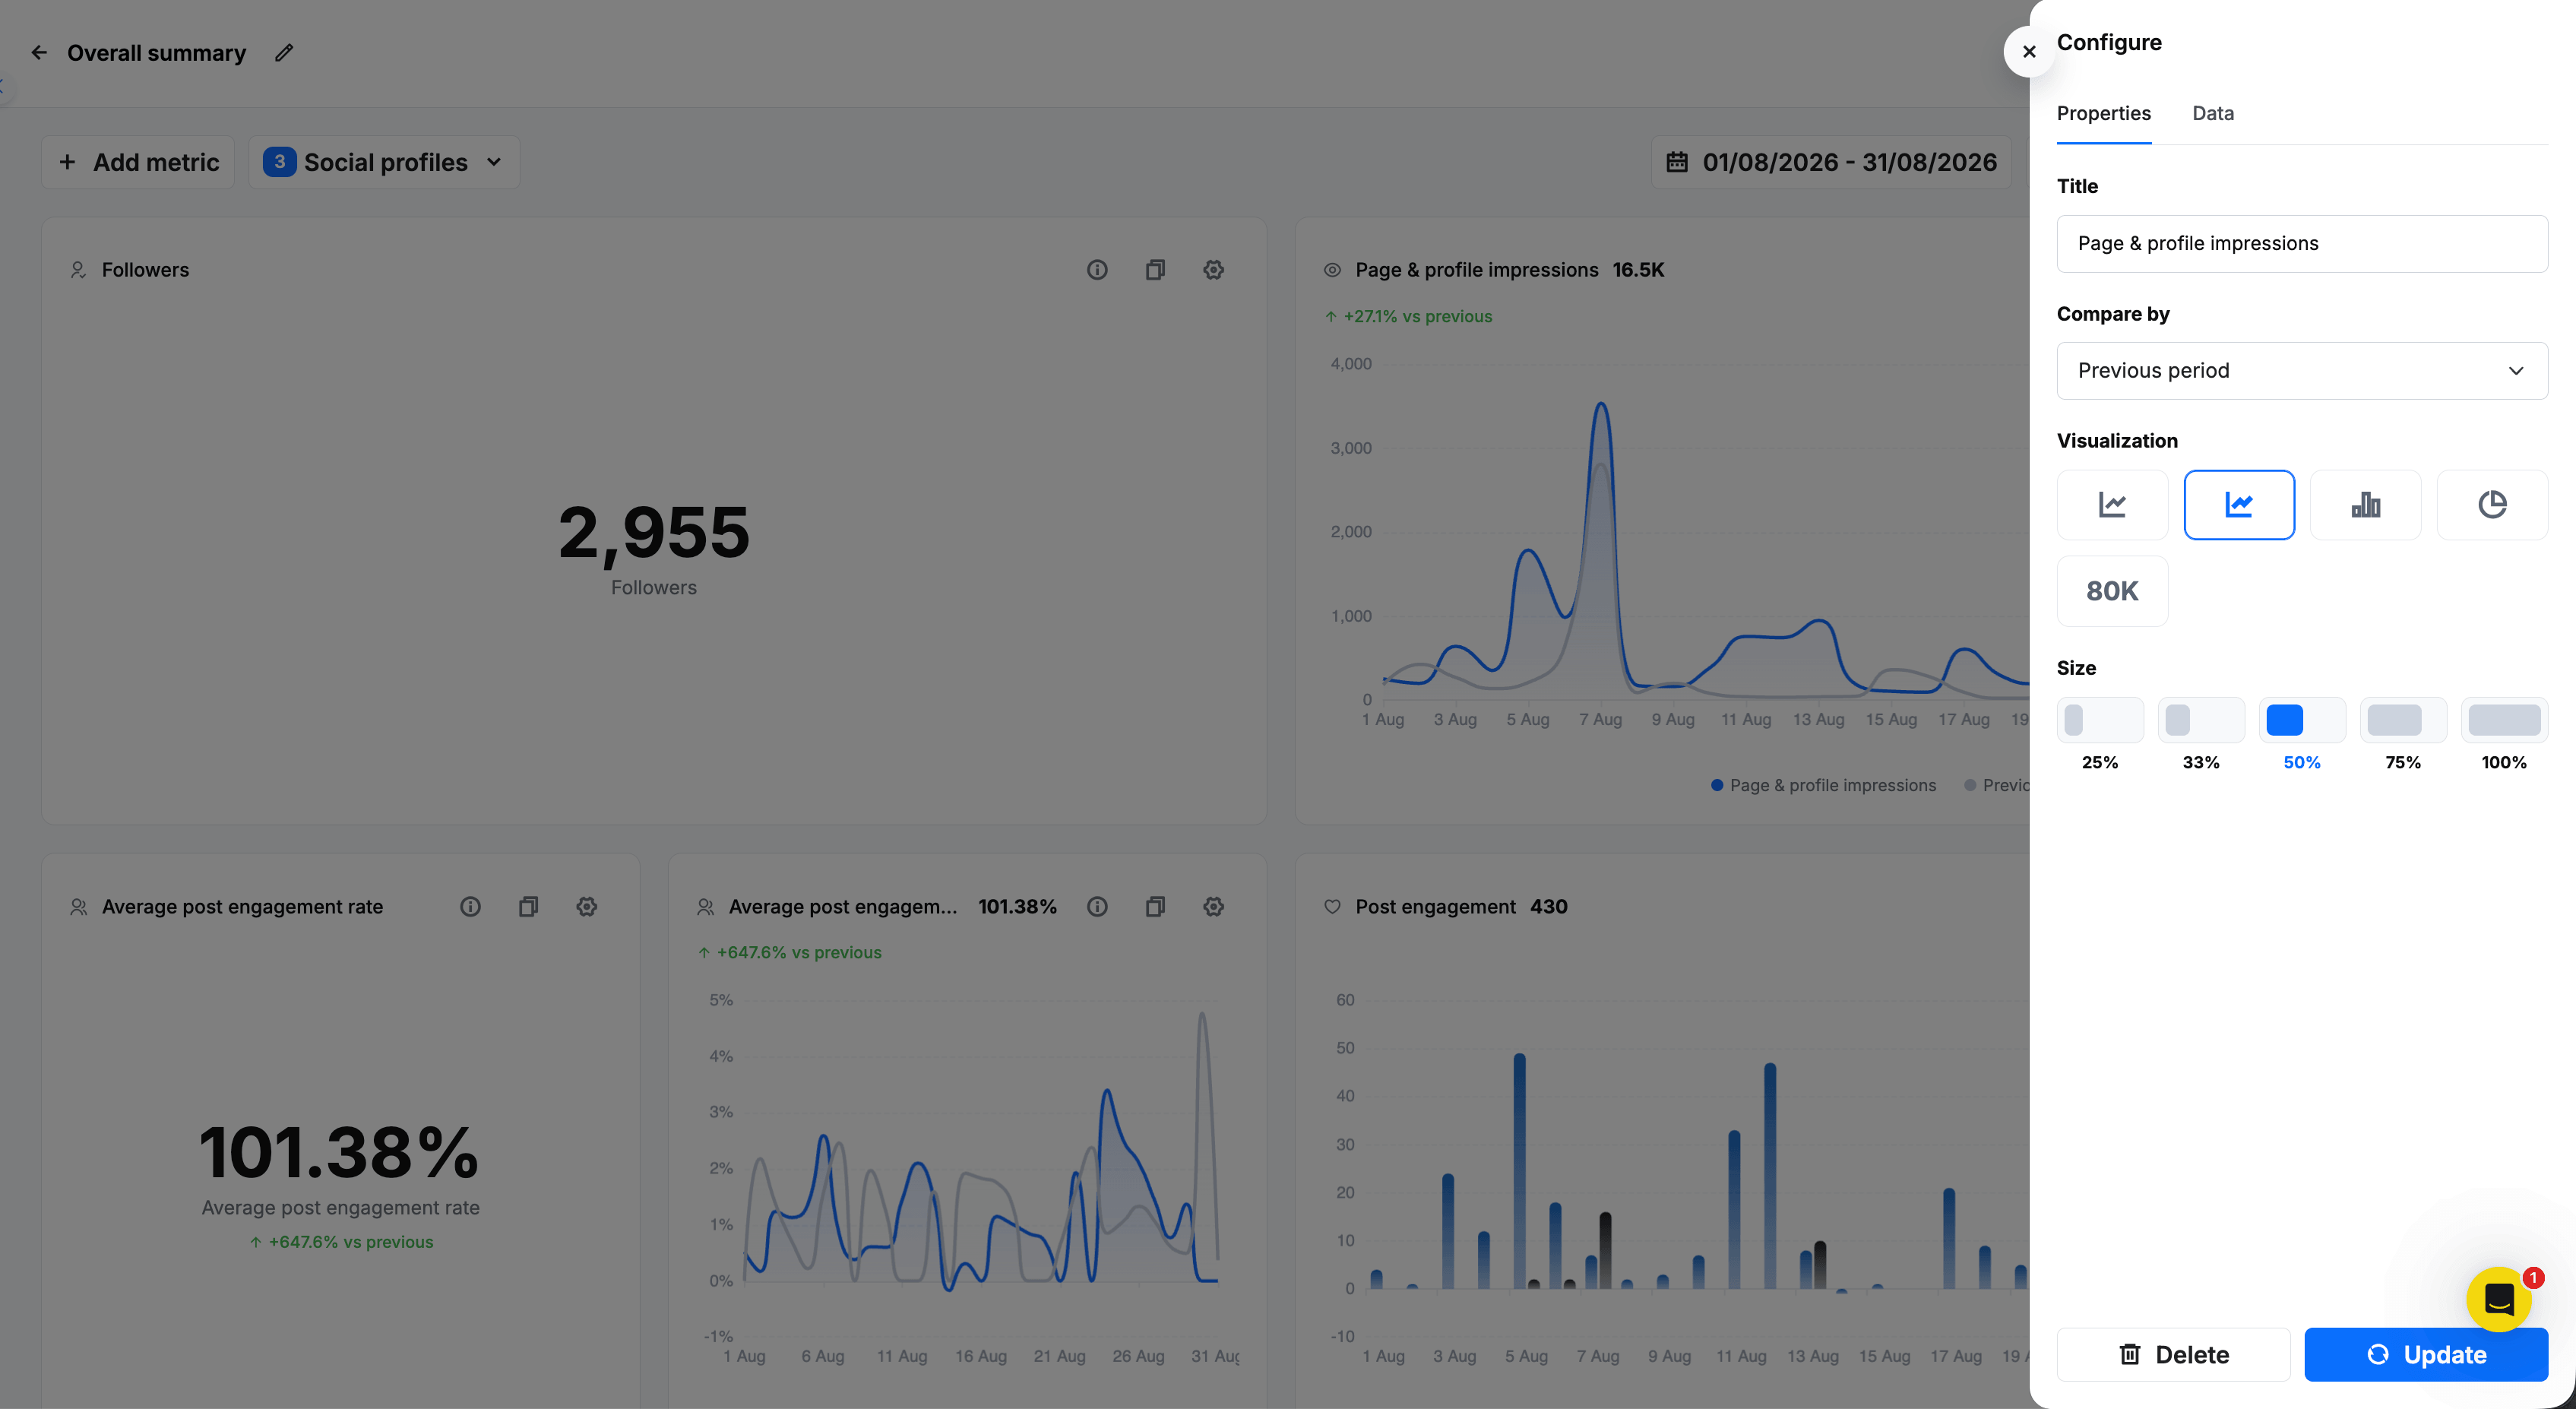
Where Buffer's Insights are designed to help you act on your data quickly, RecurPost's analytics are designed to give you everything you may ever need for a report. The dashboards are incredibly detailed: channel and post performance snapshots; audience demographics by age, gender, country and city; link click performance; and publishing cadence; to name just a few.
The custom report builder, available on Agency and above, lets you tailor reports down to how the data is presented — line chart, raw numbers, or others — remove metrics you don't need, and add ones the templates don't include by default. White-label PDF reports with agency branding and scheduled delivery to clients are available on Agency and above. For agency billing and client reporting, this is a strong foundation.
RecurPost’s AI feature for analytics has a chat interface where you can ask plain-language questions about your performance data. Where the data exists, it analyzes and responds. Where it doesn't, it generates a response that appears to be based on general best practices, which is worth knowing before you lean on it for client meetings.
X/Twitter analytics are available only as a paid-add on that’s priced per post. It’s an incredibly low amount — $0.006 per post — but worth flagging for agencies that need to report on hundreds of posts across multiple clients.
Team collaboration
Buffer’s Team plan includes unlimited team members at no additional cost. When you invite a new team member, you can give them the exact permissions they need for posting and inbox management for each social channel.
For posting, team members can have full access to publish without approval, require approval before publishing, or no access to the channel’s publishing. For the Community inbox, they can have full access to reply to any comments or mentions, view only so they can read but not reply, or no access to the channel’s inbox.
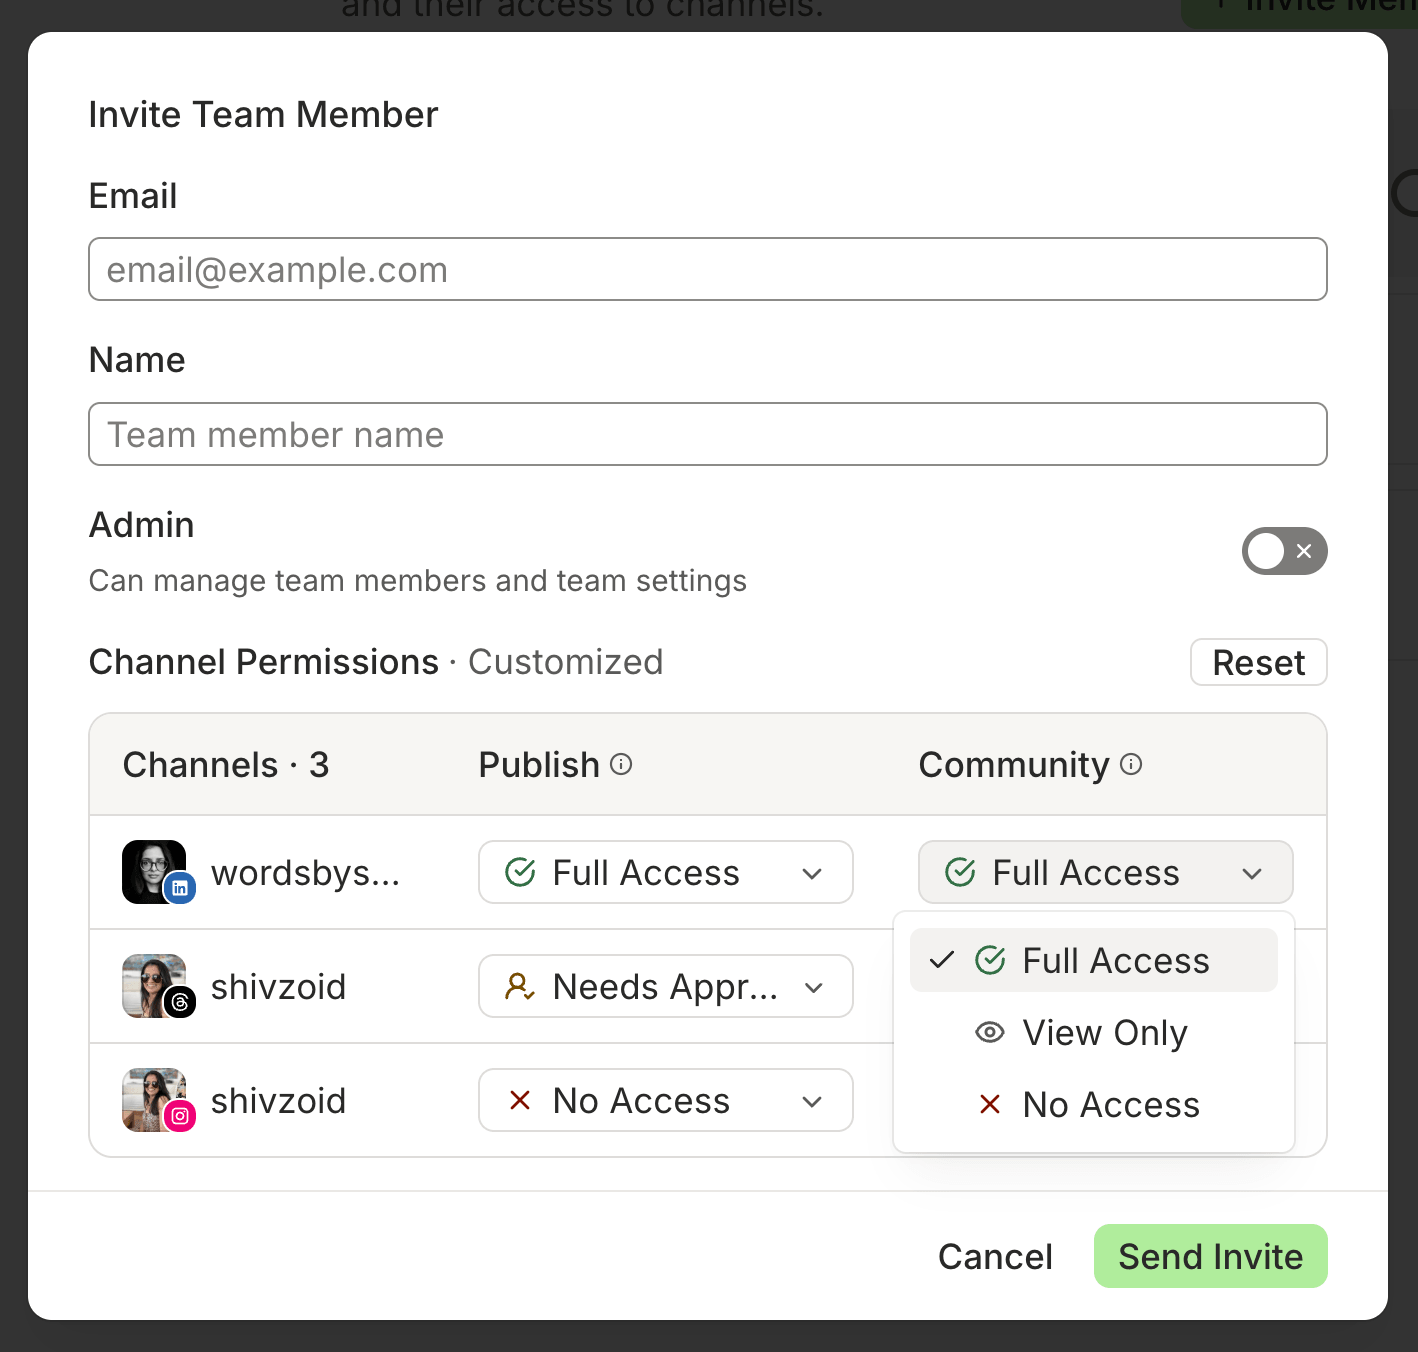
Permissions don’t have to be the same for one channel. A team member can have full access to post on Instagram and view only access to comments, while having no access to TikTok at all.
Since the plan includes unlimited team members, you can invite clients and give them access to only their channels without compromising on your own or other clients’ privacy. Brainstorming, drafting, and approvals can all happen with your team or clients directly inside Buffer.
In RecurPost, team collaboration takes place in workspaces. Your plan's channel limit is shared across all workspaces — on Agency, you're distributing the 20 included accounts across clients, not multiplying them per workspace.
Each workspace has its own connected social profiles, media library, team members, and reports. You can invite team members to specific workspaces only, so a contractor or teammate working on one client account can’t see what’s in any of the others. If they’re working on more than one account, invite them to all the relevant workspaces to give them access.
There’s one big limitation with team workflows: there’s no way to require approval from a team member. They can choose to send a post for approval when adding it to the library, but there's no access levels within a workspace like Buffer has. Anyone on the team can schedule a post or reply to messages without any oversight.
RecurPost’s Agency plan comes with three user seats in total, so if you need four or more, that’s a paid add-on at $20 per seat. You don’t need to add clients to your plan. The Agency plan comes with five shareable calendars — a maximum of one allowed per workspace — and you can get more via paid add-ons again. Clients can view a shareable calendar without logging in and comment on individual posts directly to share feedback.
For agencies where clean client separation matters most, RecurPost's workspace model is the right structure. For teams that need enforced approval workflows across all content, Buffer's permissions model is more reliable.
AI features
Buffer's AI Assistant is available on every plan including Free, with no cap on its use for publishing posts. You can use it in the Create space to spin up post ideas, and in the composer to draft the text, repurpose content across platforms, or just refine what you already have.
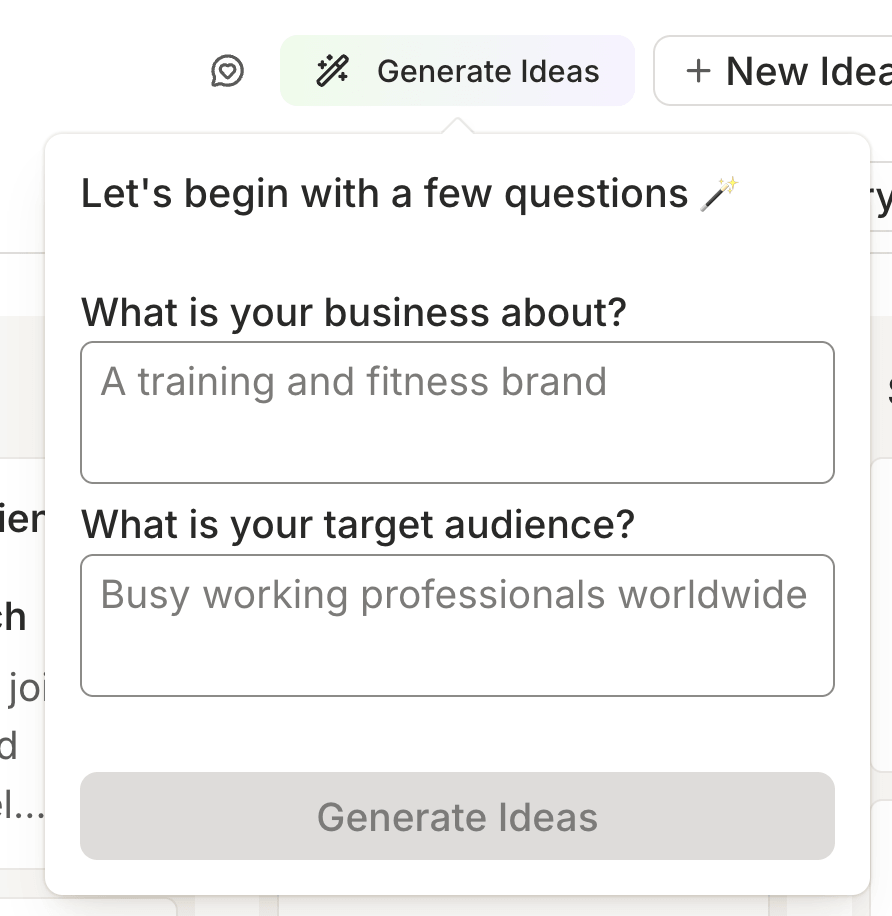
You can also generate alt text for any images you post to make them more accessible. If you rely on AI to get the words flowing, you can use it as often as you like without running into limits on any plan.
AI-powered takeaways in Insights work the same way: always on, no credits required. In the Community inbox, AI reply suggestions are unlimited on paid plans, and Free plans get five suggestions per week.
These are just the AI features inside Buffer. You can also connect your Buffer account to AI tools like Claude and ChatGPT and work on your social media content from inside the tools you’re already using (more on this below).
RecurPost also has AI reply suggestions for the inbox and an AI chat feature to analyze reports, but it’s the AI posting features that offer plenty of options. You can use it to generate a single post, plan a full week’s worth of content, create posts based on a template, and draft for holidays and observances like Halloween or Valentine's Day. I tested these out with a mixed bag of results.
Where it fared better was with AI-generated images to accompany the posts, which Buffer doesn’t offer. I generated with both a vague prompt and detailed instructions — including brand colors, angle, and illustration style — and was pleasantly surprised that I got two equally good graphics at first shot.
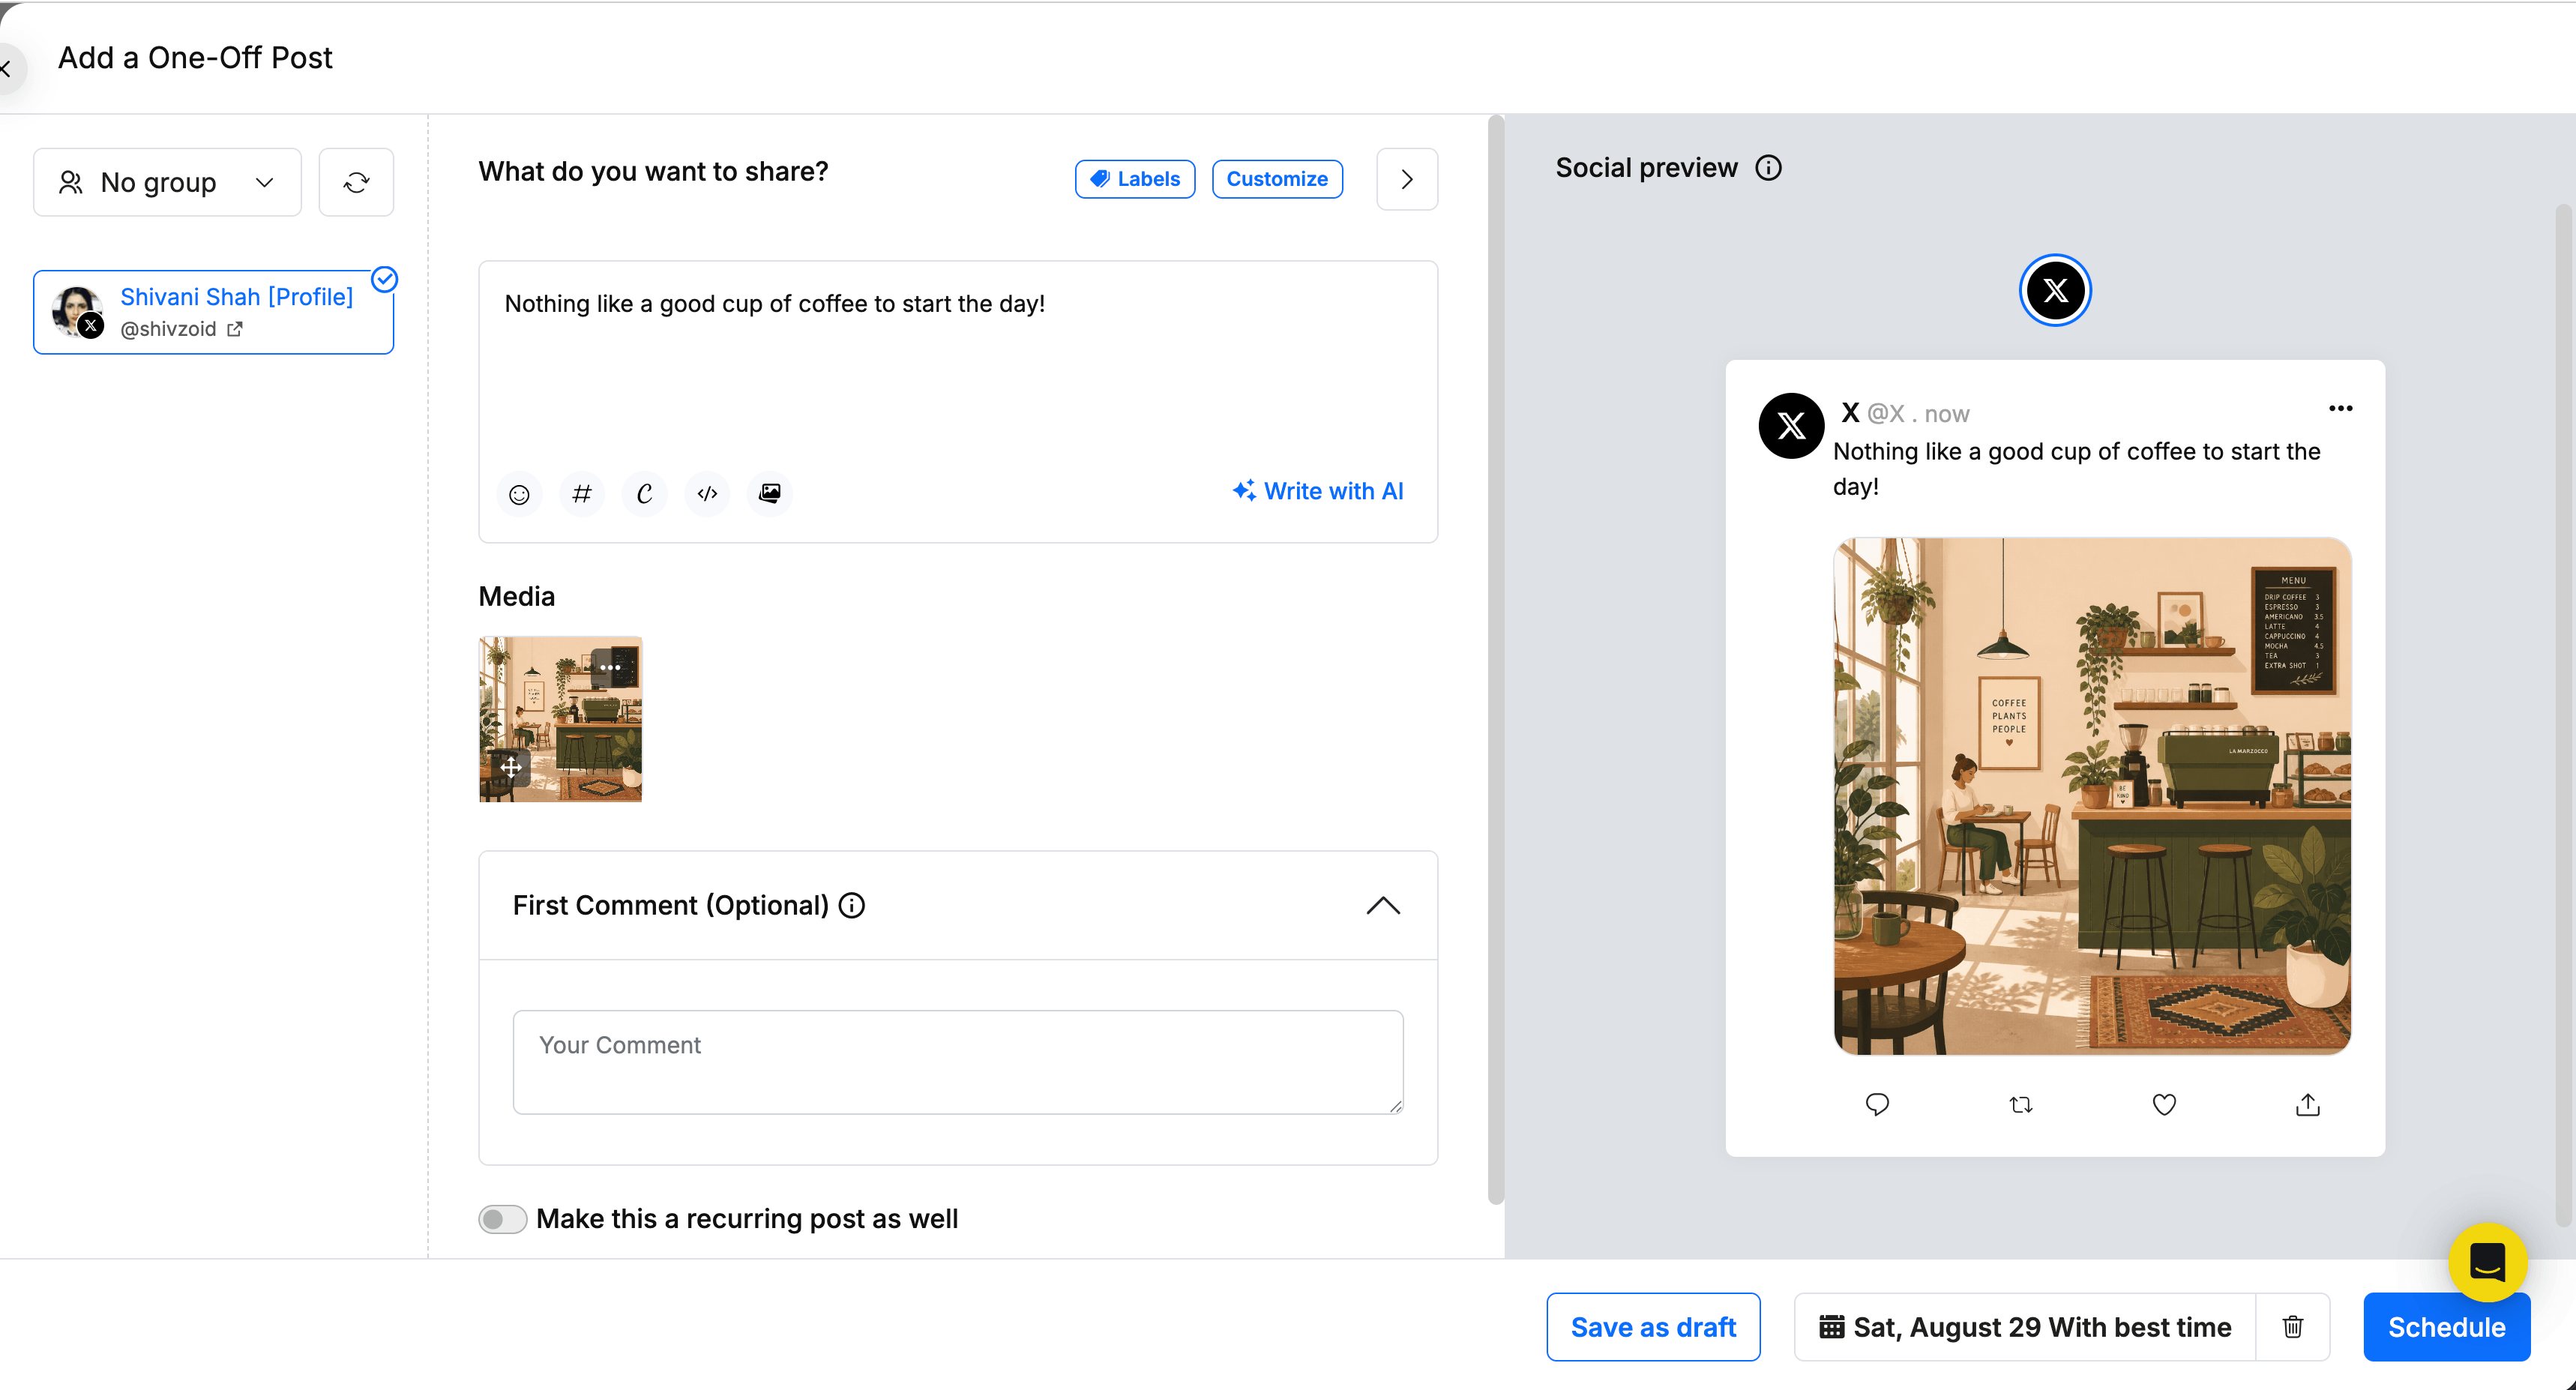
These AI features come with caps: 100 credits per month across all plans for post generation, and 10 for images, with add-ons available to buy if you need more.
One thing I couldn't find during testing: a visible, persistent credit counter anywhere. The in-session counter resets every time you close the chat, so after using the AI tools across a few different sessions, I had no way of knowing how many credits I had left overall.
For teams that want image generation, custom AI personas, weekly planning tools, and don't mind managing a monthly allowance, RecurPost's AI has more range. For daily use without credit management, Buffer's unlimited approach is simpler.
API and MCP
Both Buffer and RecurPost have public APIs and MCPs, but the experience surrounding them is poles apart.
Buffer's API is available on all plans including Free, and the number of calls and API keys depends on your plan.
It’s incredibly easy to use — I know, because I’ve built a bunch of tools and workflows despite being a non-technical user. Buffer users have spun up everything from a trend-based ideas engine to a workflow that turns questions in Slack into social media posts written in the author’s voice.
What makes all of this easier is the ecosystem around the API. You’ll find stories on the Buffer blog about what people have actually built so you can get inspiration, beginner-friendly guides and best practices in the developer docs, clear support documentation, active builder channels in the Discord community, and a full-time Developer Advocate on the Buffer team. If you're building something with Buffer, there's real support available for builders of all technical levels.
There’s also an MCP so you can use Buffer directly from inside ChatGPT, Perplexity, Cursor, Raycast, and others. Ask what's scheduled for the week, brainstorm and save ideas, draft and schedule posts directly from inside the tools you’re already using. Buffer also has an official Claude connector so you can get it up and running quickly.
RecurPost’s API works — I tested it with a lightweight Lovable app just to confirm. But while the technical foundation exists, there’s none of the surrounding support.
There isn’t even a mention of the API on the website or knowledge base, or indication of usage limits. I found the MCP listed, so I put on my finest detective hat and did a little digging to see if there was also a public API (it’s not a given that it would be available). I found it, but I couldn’t find anything close to Buffer's developer documentation depth or builder community. You can build with RecurPost’s API, but you’re on your own.
This may work for technical users, but it’s a real stumbling block for non-technical users. For anyone who doesn’t want to build custom workflows or tools, this distinction probably doesn't matter. For technical users or anyone who wants a custom integration, Buffer's developer ecosystem is a meaningful advantage.
Customer support
Buffer offers email support on all plans including Free, plus active coverage across social channels and a dedicated support channel in our Discord community. Our global team means someone is available 24/7, no matter what timezone you’re in. There's no live chat, but 24/7 email coverage means you're not waiting until Monday if something goes wrong on a Friday evening.
RecurPost's support model varies by plan. On the Starter plan, you get a knowledge base and self-serve guides only. If you have a problem or question, there’s no human on the other side to help you out. Email and live chat become available on Personal and above, 24/5 with no weekend coverage. Agency and Enterprise plans get faster responses and personalized onboarding help.
There’s also no coverage on Indian public holidays, which I learned when I opened the live chat widget on one such day — that also happened to be a Friday. The message confirmed that support is closed on weekends and any messages that came through would be answered on Monday in the order they arrived.
That gap in support coverage can be frustrating for different reasons. It could mean a missed opportunity to run a time-bound promotion for a small business, scrambling to fix problems with influencer marketing campaigns for a creator, and problems with client accounts for agencies. Buffer's 24/7 availability on every plan is a meaningful difference here.
Supported platforms
Both Buffer and RecurPost cover similar channels, with a few differences among them.
| Platform | Buffer | RecurPost |
|---|---|---|
| Instagram (Business, Creator, and Personal) | ✅ | ✅ |
| Facebook (Pages and Groups) | ✅ | ✅ |
| LinkedIn (Pages and Profiles) | ✅ | ✅ |
| X/Twitter | ✅ | ✅ Analytics and tweets with links require paid credits |
| TikTok | ✅ | ✅ |
| YouTube | ✅ Shorts only | ✅ Full videos and Shorts |
| ✅ | ✅ | |
| Google Business Profile | ✅ | ✅ |
| Threads | ✅ | ✅ |
| Bluesky | ✅ | ✅ |
| Mastodon | ✅ | ❌ |
| Total platforms supported | 11 | 10 |
There are two gaps that matter most for publishing: Buffer supports Mastodon, and RecurPost doesn't. RecurPost supports full YouTube video upload — title, category, thumbnail, the whole thing — while Buffer covers Shorts only. If either of these channels are part of your social media presence, you need the tool that supports it.
The other is the inbox. Buffer supports comments and mentions on a much wider range of channels, and RecurPost supports DMs for a select few.
Who should pick which tool
Creators and solopreneurs
Pick Buffer. If video is central to what you do, go with RecurPost. For everything else, Buffer is the stronger fit. Our Free plan is a real free plan — three channels, 10 scheduled posts per channel (refillable at any time), an AI Assistant, API access, analytics, and community inbox, with no credit card required. RecurPost has no free plan, and its $9 per month Starter plan limits you to knowledge base support. If you occasionally need content to repeat, Buffer’s recurring posts feature handles the basics. If evergreen libraries are central to your strategy, RecurPost Personal plan at $25 per month is the minimum to get the feature set that makes it worthwhile.
Small businesses and growing teams
It depends. If you publish fresh content consistently and need strict approval workflows that cover everything your team publishes, Buffer is the cleaner setup. Our permissions go to the channel level, with posting and inbox access configured independently for each user. And because Team includes unlimited team members, you're not paying per seat as your team grows. If you publish evergreen content on repeat, have fewer users, and don't need enforced posting approval workflows inside the tool, RecurPost's Agency plan is worth a serious look — just know that the fourth user and above are $20 per month each.
Video creators
Pick RecurPost. If you post primarily video content, RecurPost is hard to beat. Its Instagram toolkit goes further than most schedulers, it supports full YouTube video uploads as well as Shorts, and has TikTok-specific features like setting privacy levels per post, turning off comments, and enabling duets and stitches directly from the composer.
Agencies
Pick Buffer. Buffer’s Team plan starts at $12/channel per month and includes unlimited users. You can require approval on every post before it goes live, build flexible custom reports per client, support engagement on 10 channels, and get round-the-clock support. RecurPost goes deeper on analytics — but its Agency plan starts at $79/month, the cost grows with every user you add beyond three, there’s no way to enforce approvals, and the inbox supports only four channels.
Technical (and non-technical) users and builders
Pick Buffer. The API is available on every plan including Free, and the MCP connects directly to Claude, ChatGPT, Cursor, Raycast, and others. What makes it practical for non-technical users as much as developers is the ecosystem: builder stories, beginner-friendly guides, active builder channels in the Discord community, and a full-time Developer Advocate on staff. RecurPost has both an API and an MCP, but you'd be building without meaningful documentation, usage guidance, or community support.
To sum it up
RecurPost is the right call in specific situations: video-first creators who need all the bells and whistles for Instagram, YouTube, and TikTok, and teams running evergreen content libraries for clients with white-label delivery.
For everyone else — and for most teams that don't map neatly to one of those categories — I think Buffer is the stronger fit. The free plan is real, the data is designed to help you act, the scheduling is fast, and approval workflows cover everything your team publishes.
Buffer has a real free plan, and RecurPost has a 14-day free trial — the best way to know which is right for you is to try both and see which suits how you and your team work.
Sign up here to try Buffer’s Free plan — it’s free forever, no catch.
Frequently asked questions
Does RecurPost have a free plan?
No, RecurPost offers a 14-day free trial, but there's no ongoing free plan after that. The entry-level paid plan is Starter at $9 per month for two social accounts and one user, with support limited to a knowledge base. Buffer has a free-forever plan that includes three social channels, 10 scheduled posts per channel (refillable at any time), an AI Assistant, API access, and basic analytics, with no trial period or expiry date.
Is Buffer or RecurPost better for agencies?
Buffer is better for agencies. Buffer’s Team plan starts at $12/channel per month and includes unlimited users, enforced approval workflows, flexible custom reports, inbox features for up to 10 channels, and 24/7 customer support.
RecurPost’s analytics go deeper on the Agency plan and include white-label reports and password-free client approvals. But the plan starts at $79 per month, the cost grows $20 with every user you add beyond three, the inbox only supports four channels, and there’s no way to require approvals before publishing.
Which is cheaper, Buffer or RecurPost?
It depends on two things: how many channels you connect and how many users you have.
Buffer pricing is per channel — Essentials starts at $6 per channel per month, Team at $12 — with volume discounts as you scale. Team includes unlimited team members at no extra cost. There are no surprises: you know exactly what you'll pay each month regardless of how many people are on your team.
RecurPost uses fixed plans with room to grow without upgrading. You can add channels or users without moving up a plan, but each addition is an extra cost ($4 per channel and $20 per user). Layer on top of that the add-ons like Twitter analytics and tweet links, and additional AI credits beyond what's included in your plan. The base price may look lower at a small scale, but the total can climb depending on how you use it.
Does Buffer have content recycling like RecurPost?
Yes, but it's simpler. Buffer's recurring posts feature (in beta) lets you schedule a post and set it to repeat daily, weekly, monthly, or yearly. RecurPost's library system is more elaborate: you create a library, set recurring time slots by day, add multiple posts that cycle through and loop back automatically, and can set end dates on individual posts to pull them from rotation. For basic recurring content, Buffer works. For a full evergreen library strategy with multiple rotating posts and seasonal content, RecurPost's system is more capable.
Does RecurPost have an API?
Yes, RecurPost has both an API and an MCP, although neither is mentioned on RecurPost's pricing page, and there's no information about which plans include access or what the usage limits are. Buffer's API is available on all plans including Free, clearly documented with per-plan limits and supported by a developer community, beginner-friendly guides, and a full-time Developer Advocate.
Can I switch from RecurPost to Buffer?
Yes. Setup takes a few minutes: connect your channels, set a posting schedule, and start scheduling content. Buffer will pull in older posts and historical data for each channel based on what the platforms allow. There's no automated way to import scheduled posts from RecurPost, but you can start publishing through Buffer immediately. Buffer's free plan lets you test it with no time limit or credit card required.
]]>I currently author Buffer’s Substack, The Weekly Scroll, which has grown to 92K+ subscribers, and I’ve spent the past month publishing to Notes every day. That hands-on, day-to-day experience is why I revisited and reworked this guide.
Ever since we moved The Weekly Scroll, Buffer’s newsletter, over to Substack a few months ago, I’ve been learning the platform from the inside rather than writing about it as an outsider. A lot of the advice and learnings from my first pass at this guide held up, but some of it didn’t, especially since Substack has changed a fair bit since then.
So this reworked guide walks through everything from setting up your account to growing and monetizing your newsletter, with advice from the creators I interviewed and everything I’ve learned firsthand.
Let’s get into it.
Key takeaways
- Substack is a free newsletter platform with a social layer built in. You publish posts that go out by email, and Notes, Chat, and Live sit around them for discovery and community.
- Subscribers and followers are different groups. Subscribers get your emails; followers only see your Notes in the app. You want both, but subscribers are the ones who'll read your newsletter.
- Setting up properly takes about an hour: fill in your profile, set up the publication and its categories, rewrite the welcome email, connect Stripe, import any list you have, and publish a welcome post and a first Note before you start the regular issues.
- Pick a niche you can describe in a sentence and a schedule you can stick to. Fill in the SEO title and description on every post while you're at it, because Substack articles do rank on Google.
- Most growth happens inside Substack, through Recommendations and Notes, so switch those on before you spend time sharing links elsewhere.
- Substack is free until you turn on paid subscriptions, at which point it takes 10% plus Stripe's processing fees.
Jump to a section:
What is Substack (and how does it work)?
Substack is a publishing platform where you write posts and send them to subscribers by email, for free, with the option to charge for some or all of your work.
The platform is part social network and part newsletter tool, as every publisher gets a website, an archive, and a profile in the Substack app, where readers can find you through recommendations and the Notes feed.
The simplest way I've found to explain how it all fits together is in three parts: the content you publish, the audience that finds and follows it, and the money you can (but don't have to) make from it.
Content
There are four content surfaces you can use in Substack.
Posts
Posts are the main draw on the platform. They go to your subscribers' inboxes and live on your publication page, and they can be long-form writing, audio, video, or a mix of all three.
Substack’s audio and video capabilities have evolved a lot. You can run a podcast from Substack and it gives you an RSS feed you can submit to Apple Podcasts, Spotify, and the rest.
You can also publish video posts by uploading a file or recording directly in Substack's Recording Studio (which will look familiar if you’ve ever used Riverside).
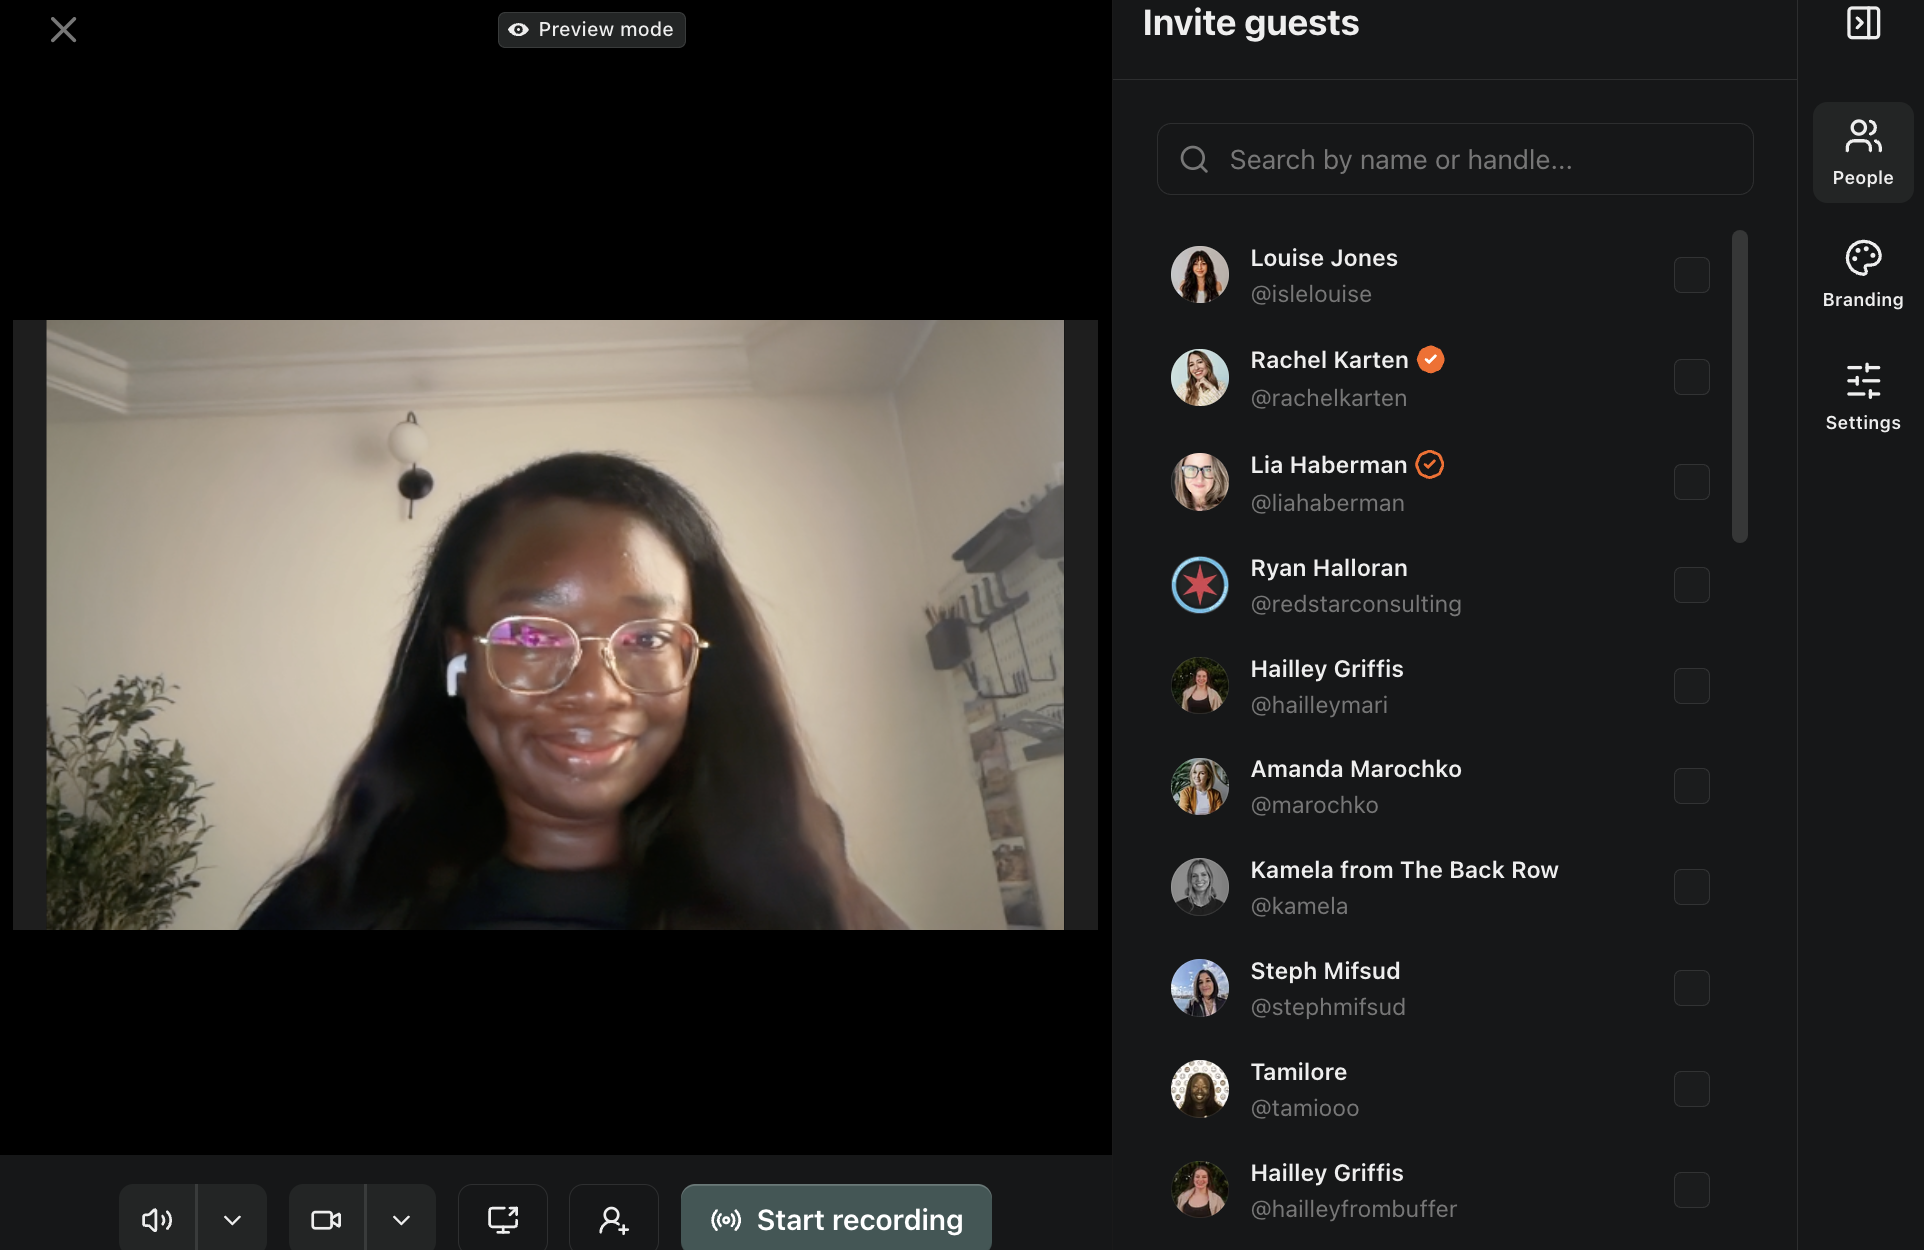
Every audio or video post gets a transcript, which you can edit or switch off. And if you connect your YouTube channel under Settings → Connected accounts, Substack will upload your video posts to YouTube when you publish them, along with up to two auto-generated clips as Shorts.
Notes
Notes is Substack's short-form content feed, which works a lot like X or Threads. Anyone on Substack can post Notes, whether or not they have a publication, and they're public, so people who don't follow you can still come across them.
A Note can be plain text, text with up to six images or GIFs, or a video up to five minutes long. There's also a restack button on every post and Note, which reposts it to your own feed with or without your added commentary. Video Notes and clips from your video posts also show up in the app's media tab, which is Substack's vertical, short-form video feed (it launched in early 2025 and works roughly like the TikTok or reels feed, but only for Substack content).
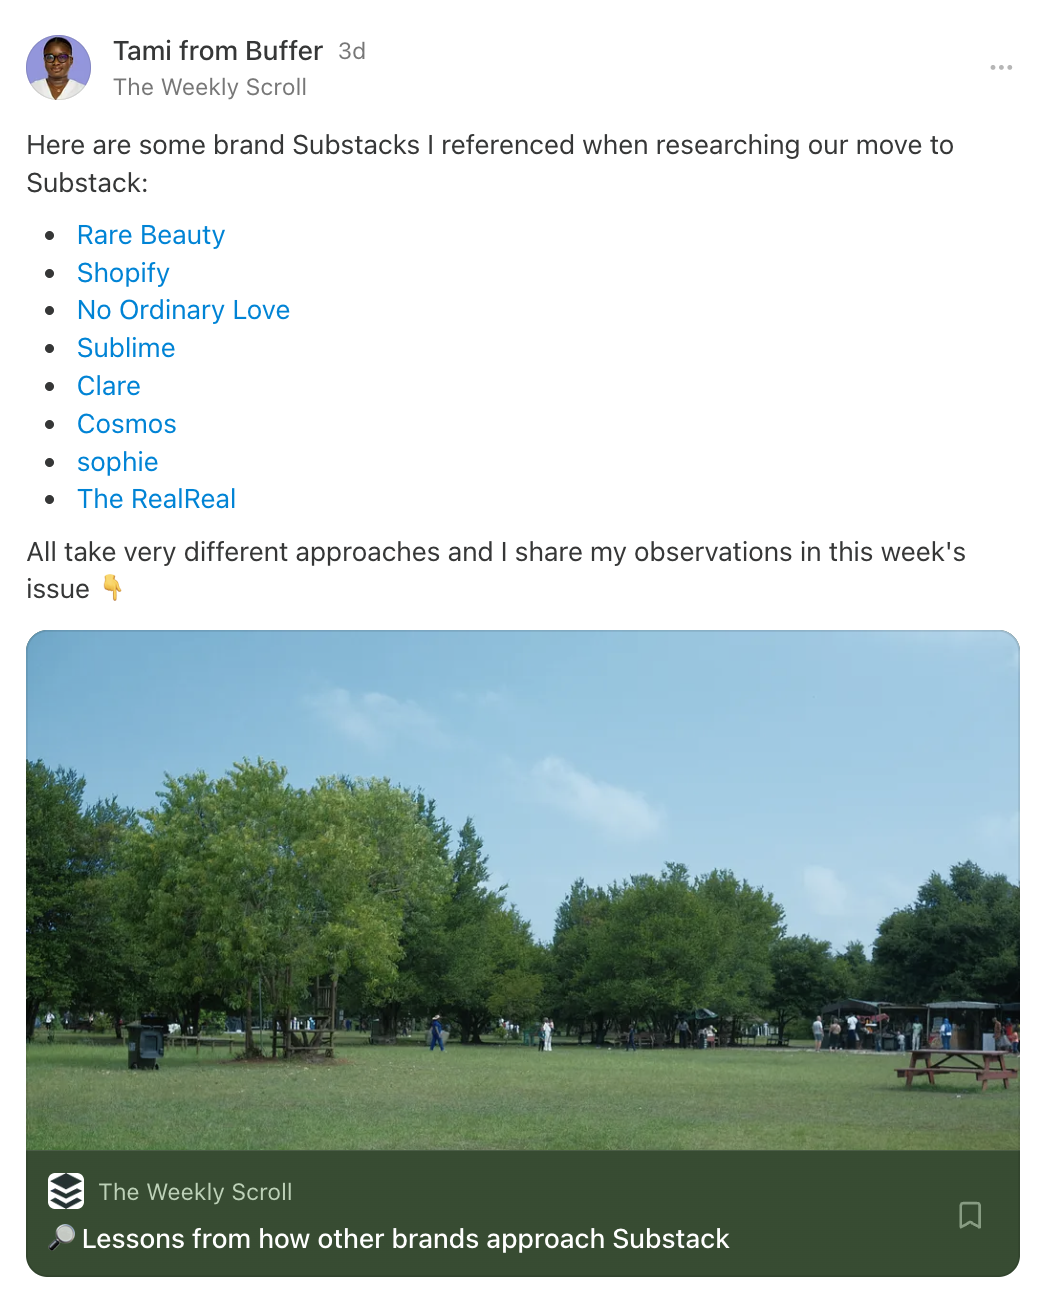
Chat
Chat is a space for conversations with your subscribers, and it only exists inside the app and on your publication page, not by email. Only your subscribers can see it. By default you start the threads, but you can let subscribers start them too, and threads can hold text, photos, image replies, and emoji reactions, so it works a bit like a group chat you host. Substack's direct messages live in the same tab, so this is also where one-to-one conversations with readers and other writers happen.
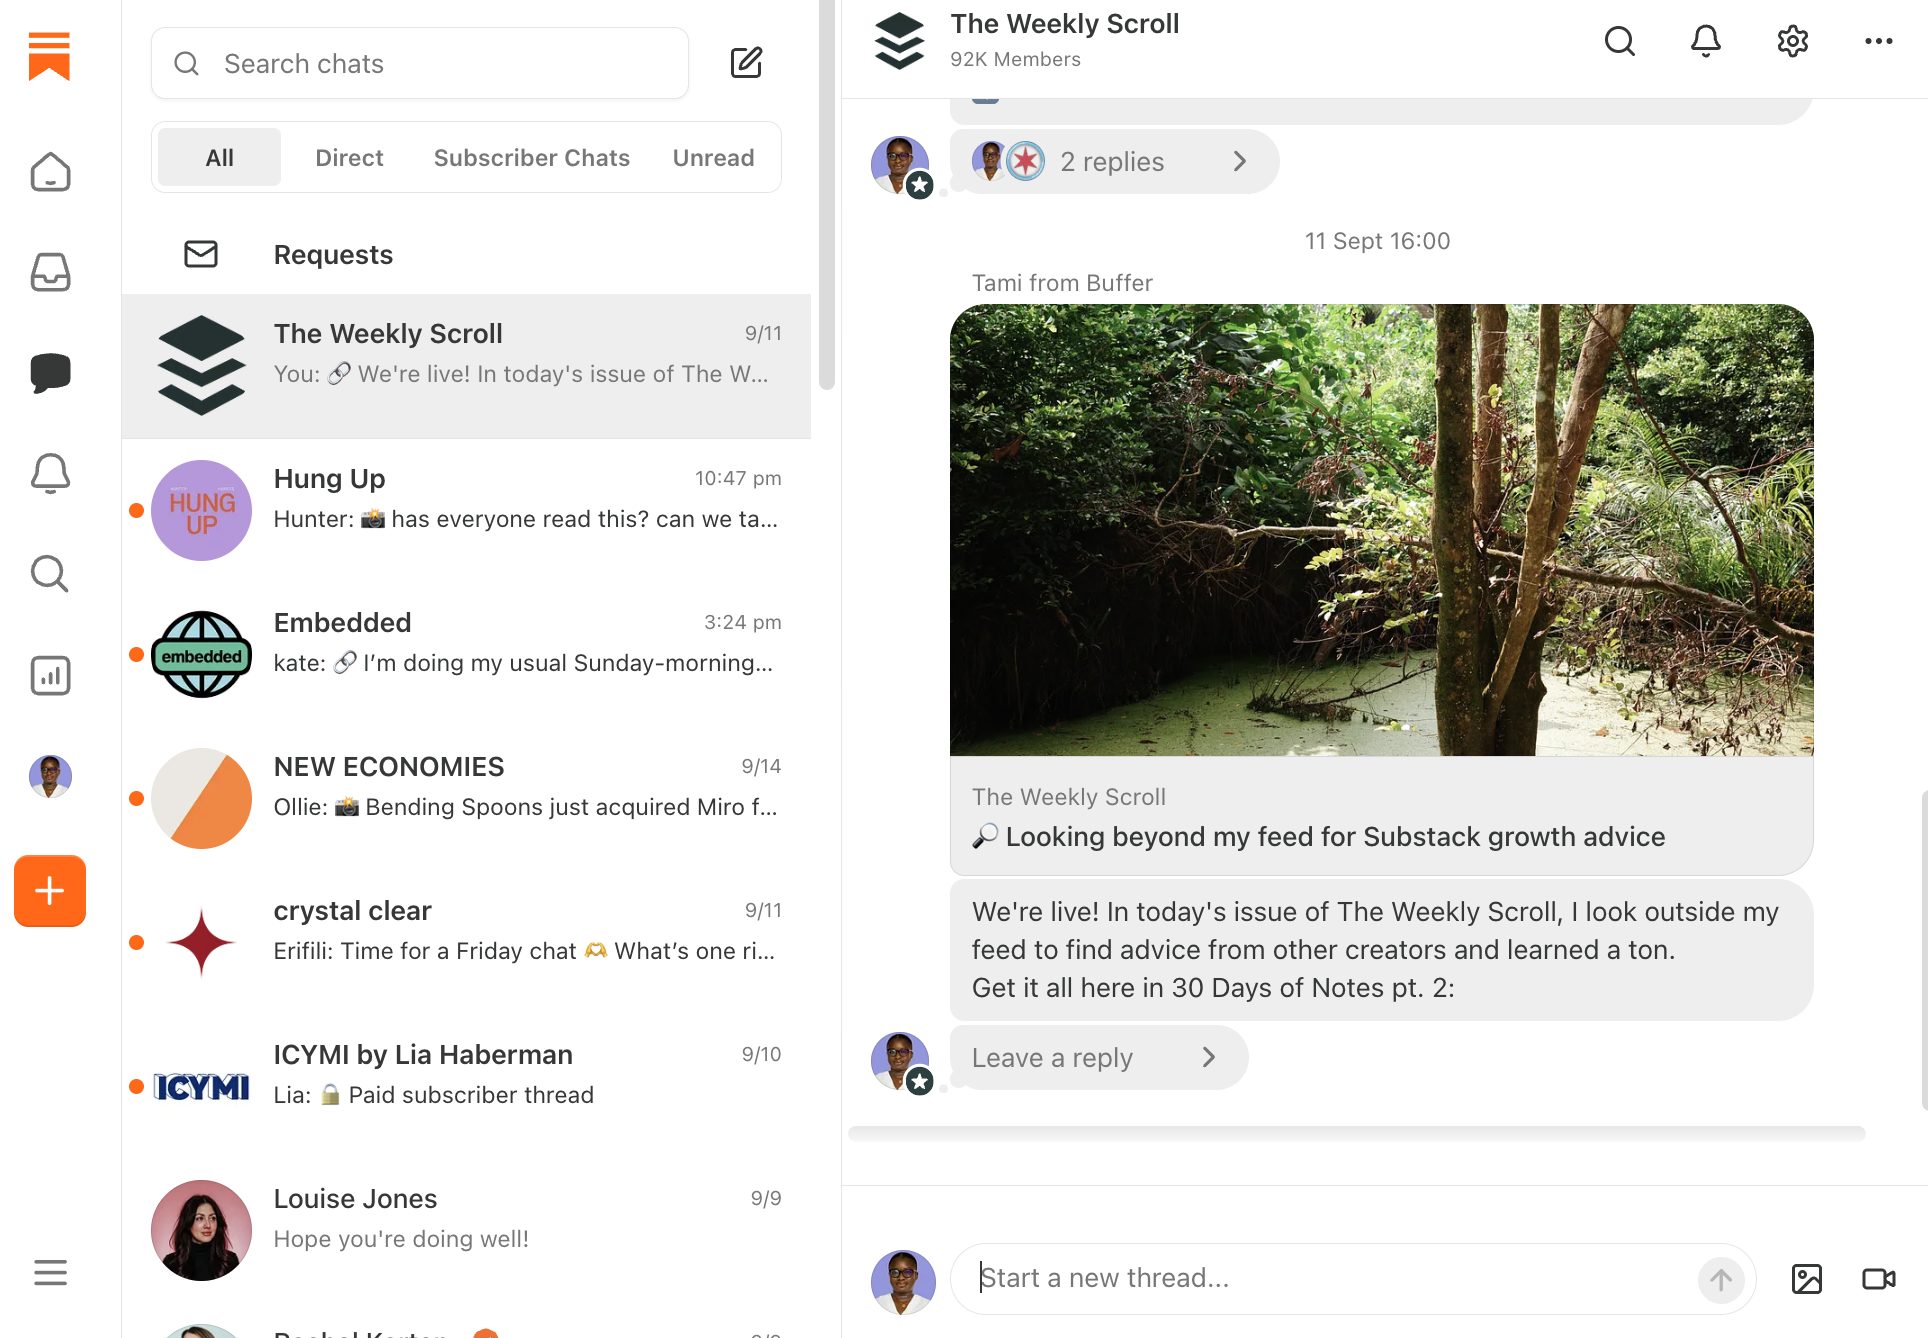
Live
Live lets you stream video to your audience from the Substack app or your computer. You pick who can watch (everyone on Substack, all your subscribers, or paid subscribers only), you can invite up to two other Substack writers to stream with you, and you can schedule a live in advance. When you go live, Substack notifies your subscribers and adds the stream to their queue.
Once you finish, the recording is saved as a draft post, so you can edit it and send it to the subscribers who didn't catch it live, or cut clips from it to share as Notes. If you already stream with something like OBS or Riverside, Substack supports RTMP, so you can send that feed in rather than using the app's camera.
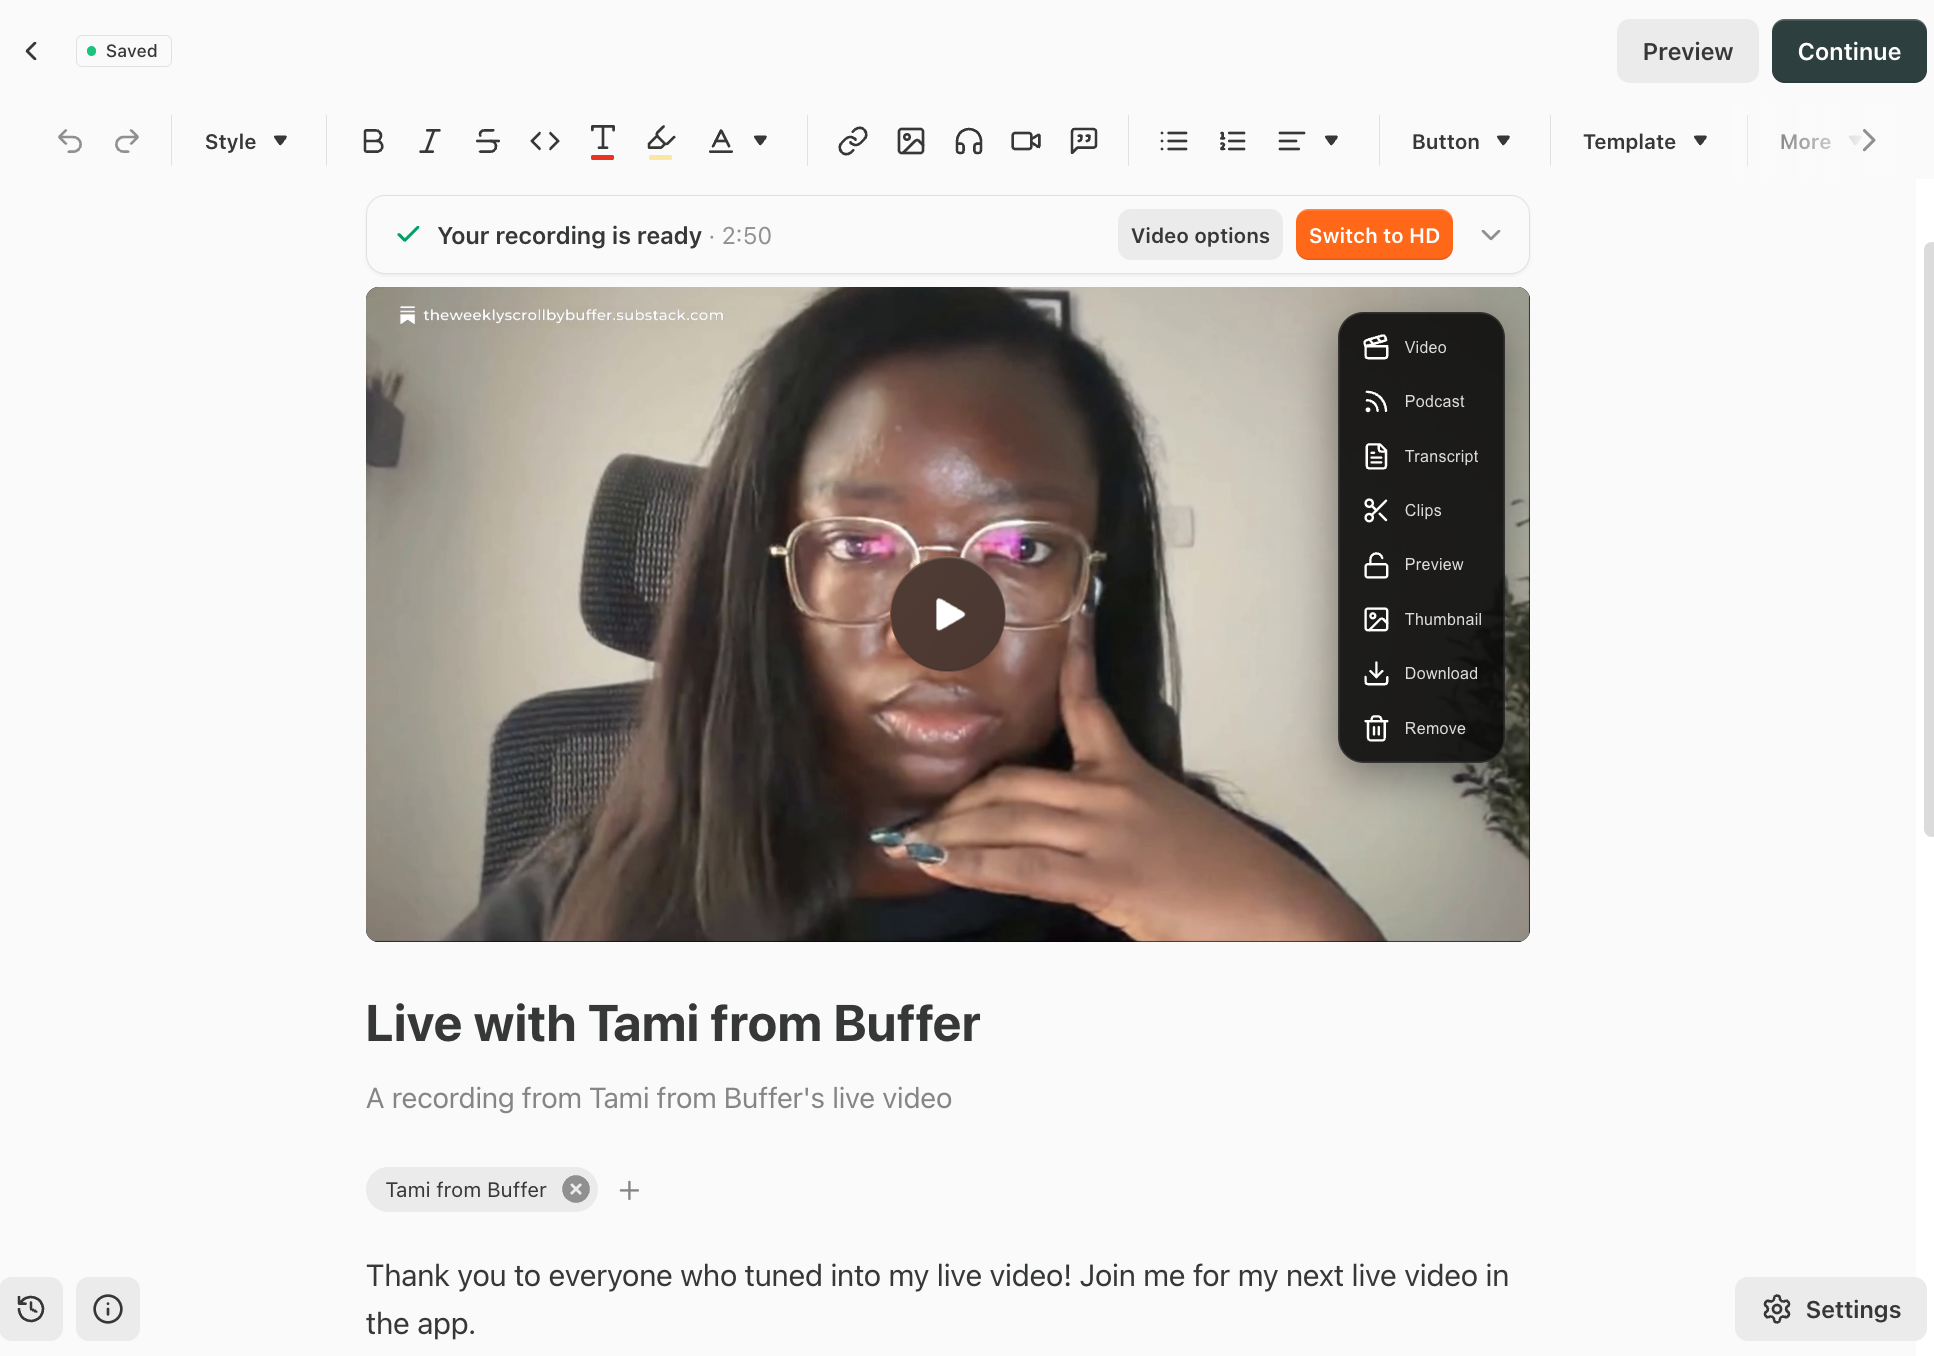
Audience
On Substack, subscribers and followers are not the same thing (which definitely confused me a bit at first!).
- Subscribing: When someone subscribes to your publication, they get your posts by email as well as all your other content.
- Following: When someone follows you, they only see your Notes and activity in their app feed, but they don't get any emails. Followers exist because Notes exist, so they're more like a social following than a newsletter audience.
This distinction is important because Substack shows you Notes from writers you don't follow and shows your Notes to people who don’t yet follow you. This way, your Notes can reach people who've never heard of you.
And of course, the goal with followers is to eventually turn them into subscribers, since you control and can export your subscriber list anytime and take it to another platform, but you can't export your followers.
Monetization
Substack is free for you and free for your readers unless you turn on paid subscriptions. When you do, you connect Stripe (an external payment platform), set your prices (monthly, annual, and an optional founding tier for readers who want to pay more), and choose what sits behind the paywall. That can be whole posts, part of a post with a free preview, paid-only Chat threads, or paid-only lives.
Substack takes 10% of that revenue, and Stripe takes its processing fees on top. I've broken the actual numbers down in the monetization section, along with when to start charging and what the creators I spoke to and researched put behind their paywalls.
How to use Substack: setting up your publication step by step
While you can technically publish your first Substack post within about five minutes of signing up, I'd hold off. Spending an hour on setup first means that when someone lands on your page from a Note or a recommendation, they see a real publication, not a blank profile with one post. Here's the order I'd do it in.
1. Create your account and fill in your profile
Head to substack.com, sign up, and go straight to Edit profile (click your profile picture, or go to substack.com/profile/edit) before you do anything else. Your profile is what shows up when someone taps your name in Notes, and it's the first thing a potential subscriber checks.
- Add a photo — we went with a face (mine), but a logo works too.
- This is also where you set your handle, which becomes your profile URL and what people use to tag you.
- Create a short bio, and add links to your other socials. The bio should say what you write about and who it's for, in the way you'd say it to someone. So instead of "I'm a marketing expert sharing my thoughts on digital trends," something like "Every week, I break down digital marketing trends into strategies you can actually use."
There's also a Branding section on the same page where you can add a header image and pick an accent color for your profile. It's optional, but it’ll only take a minute and makes the page look polished and personalized.
⚡Under Subscription Privacy, you can choose whether the publications you subscribe to show on your profile. I like to have this visible, along with the specific publications we love here at Buffer, because it helps amplify similar newsletters (recommendations are a big deal on Substack) and what you read says a lot about what you write.
2. Set up your publication
A profile lets you post Notes and follow people, but a publication is the actual newsletter, with its own name, URL, subscribe page, and settings.
Substack creates one for you automatically, and the first time you click the + button on your Home page or Create in your profile page and choose Article, you'll land on it.
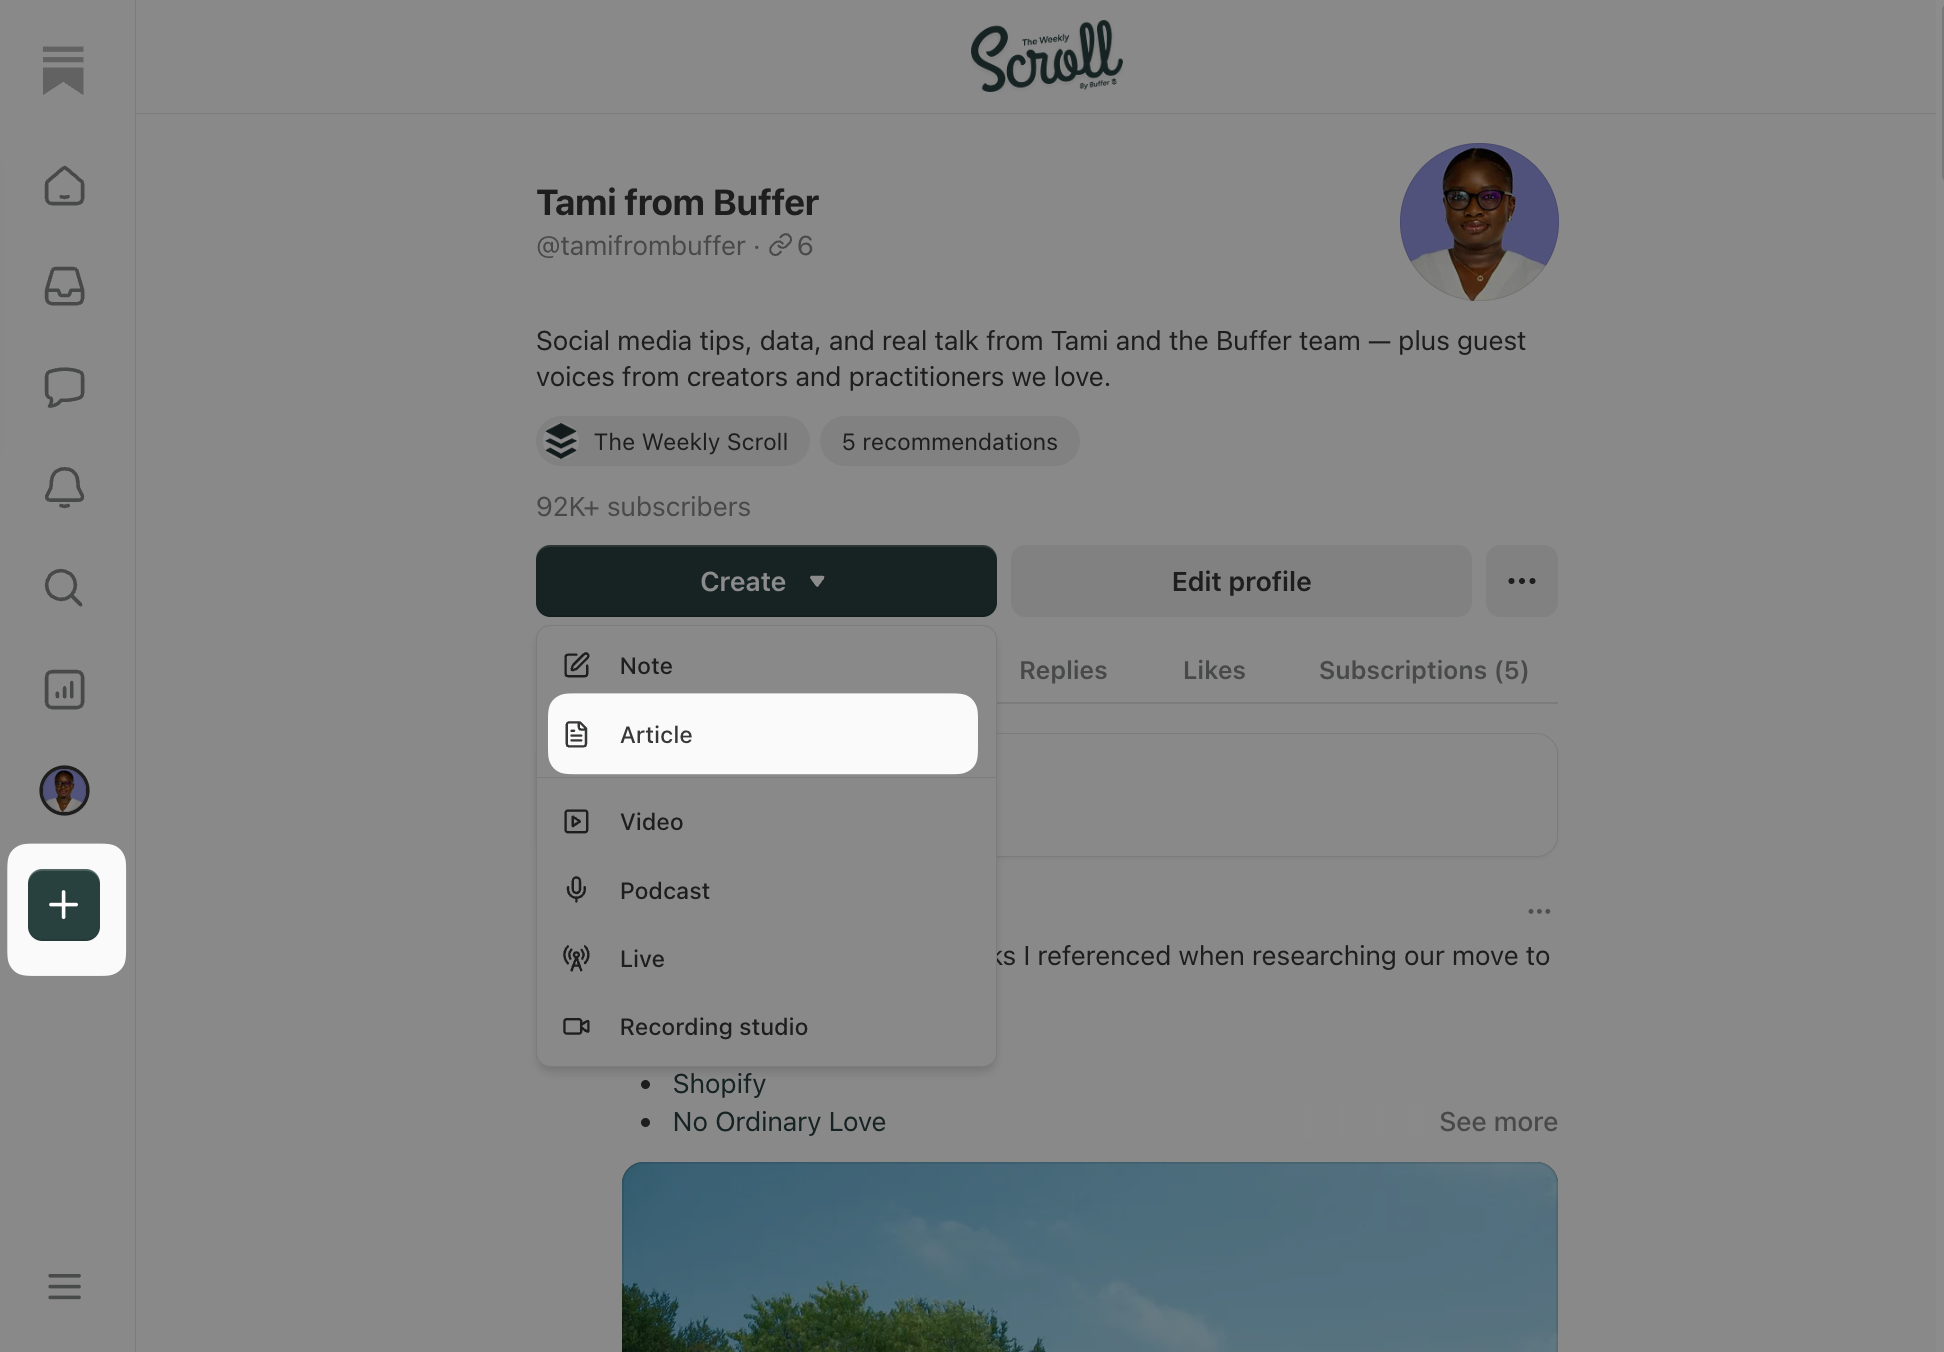
To make modifications to the publication, you’ll want to get to your Publisher dashboard, which you can access by selecting the graph icon on the left to take you straight there, or clicking the three dots on your profile, then selecting Publisher dashboard.
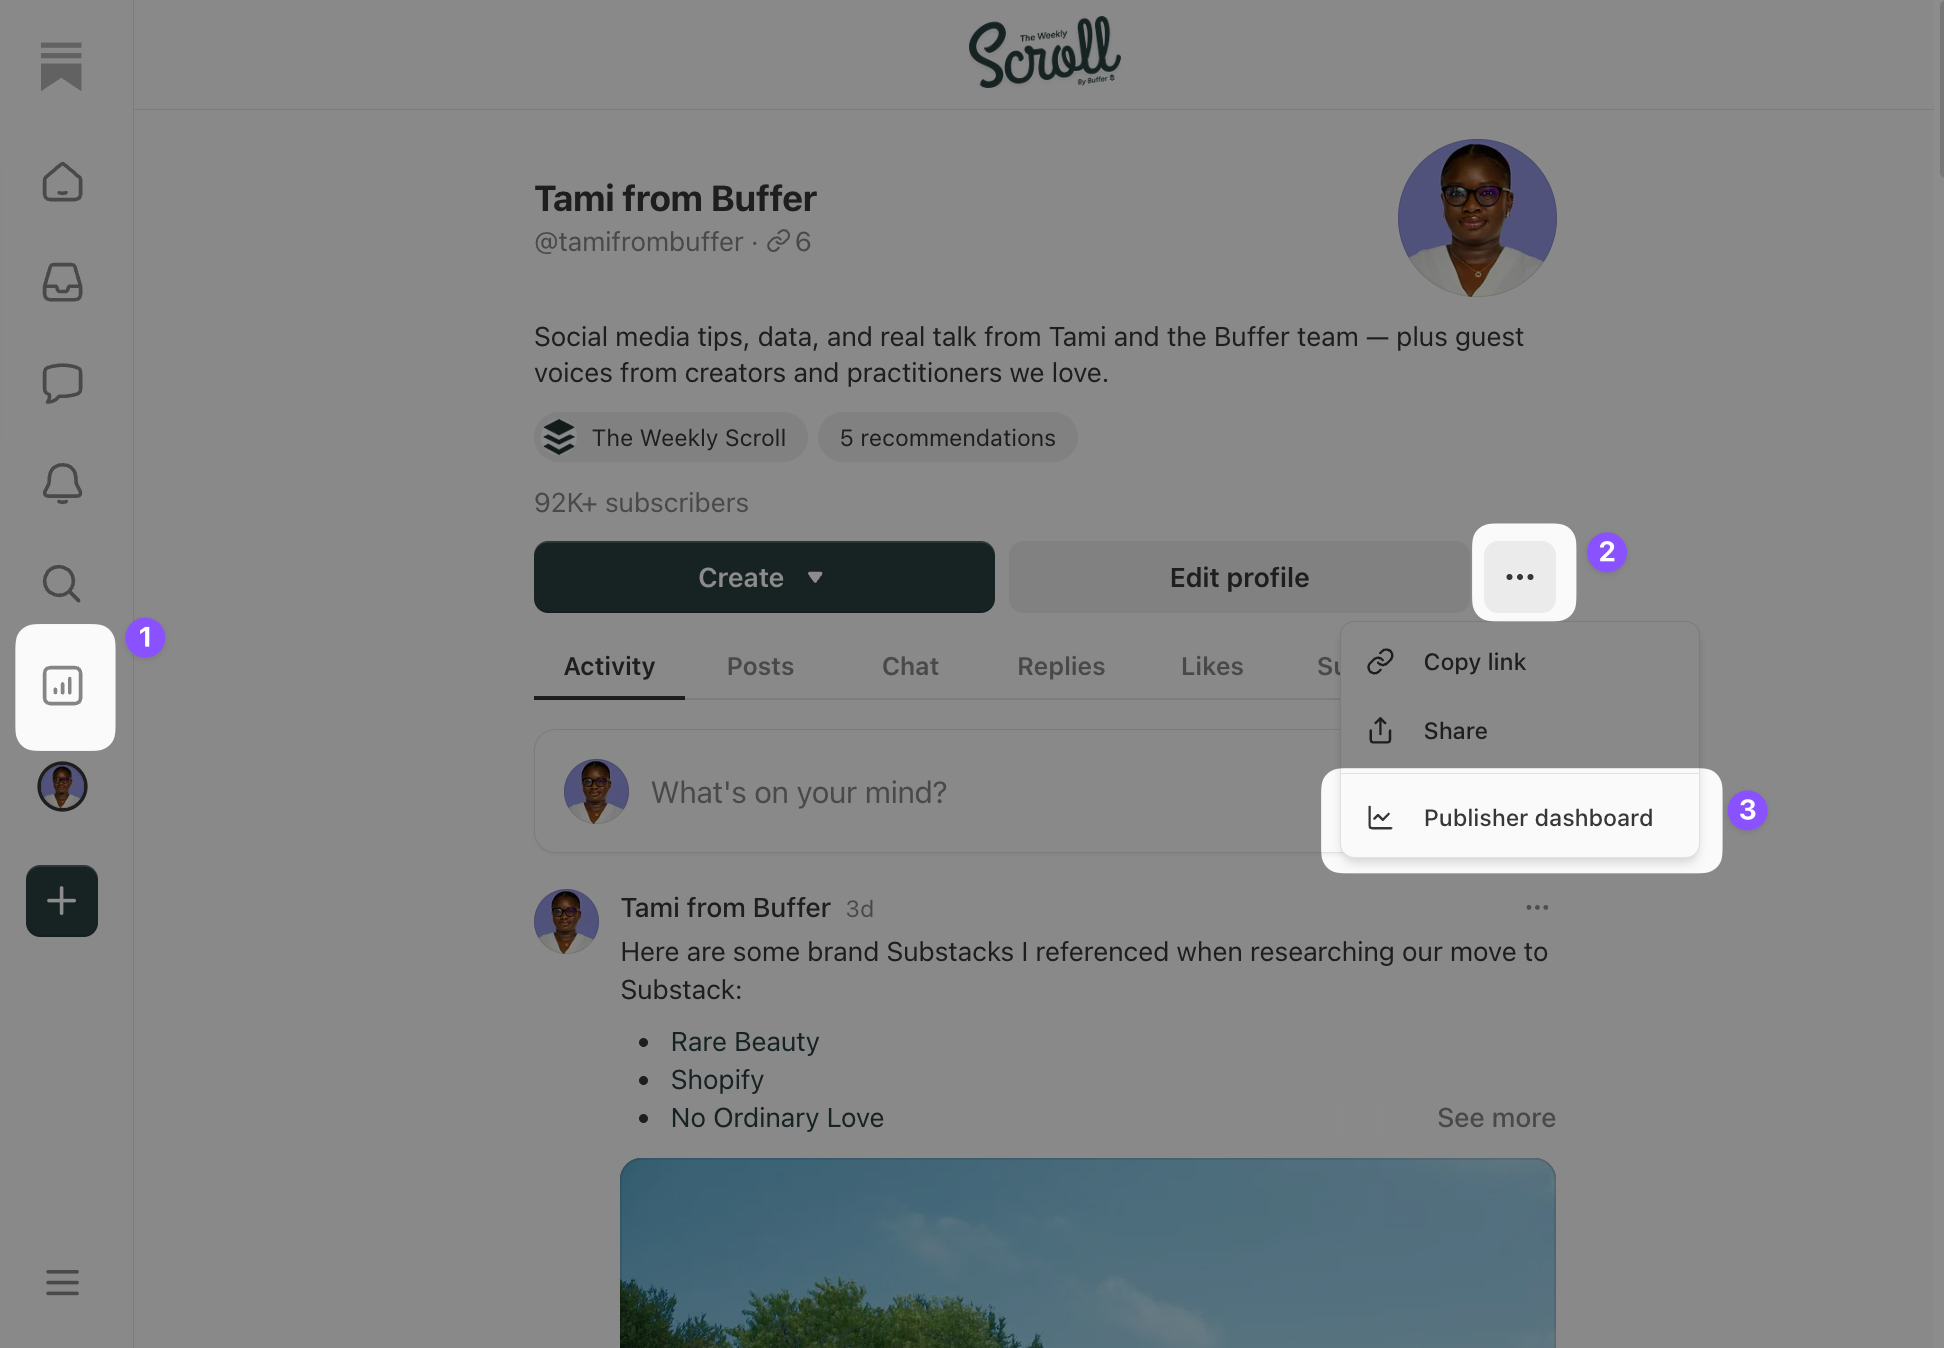
At the bottom left, you’ll see Settings, where you can modify all the details about your publication, from your name to payments.
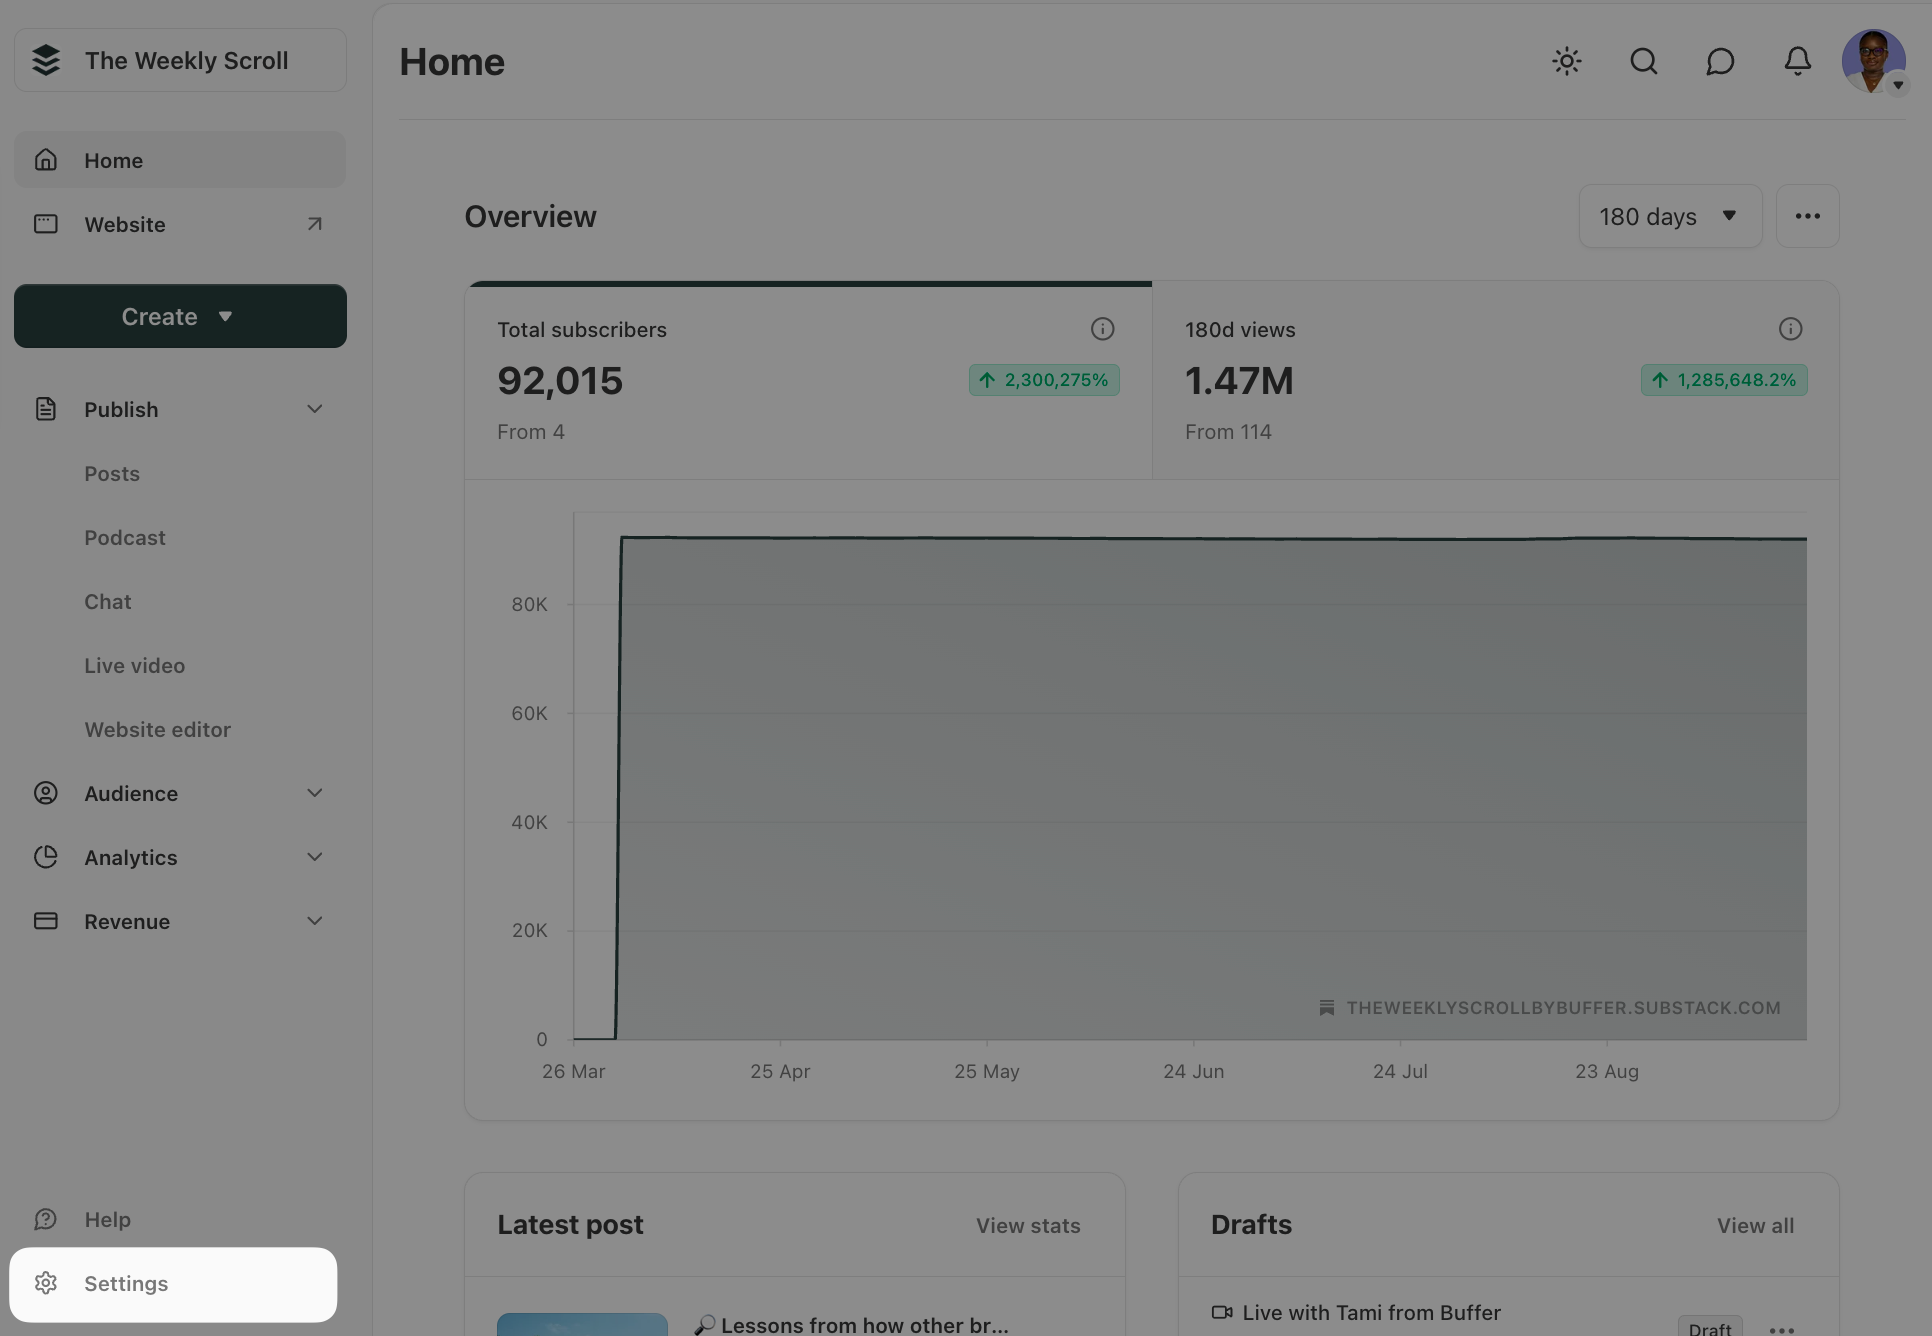
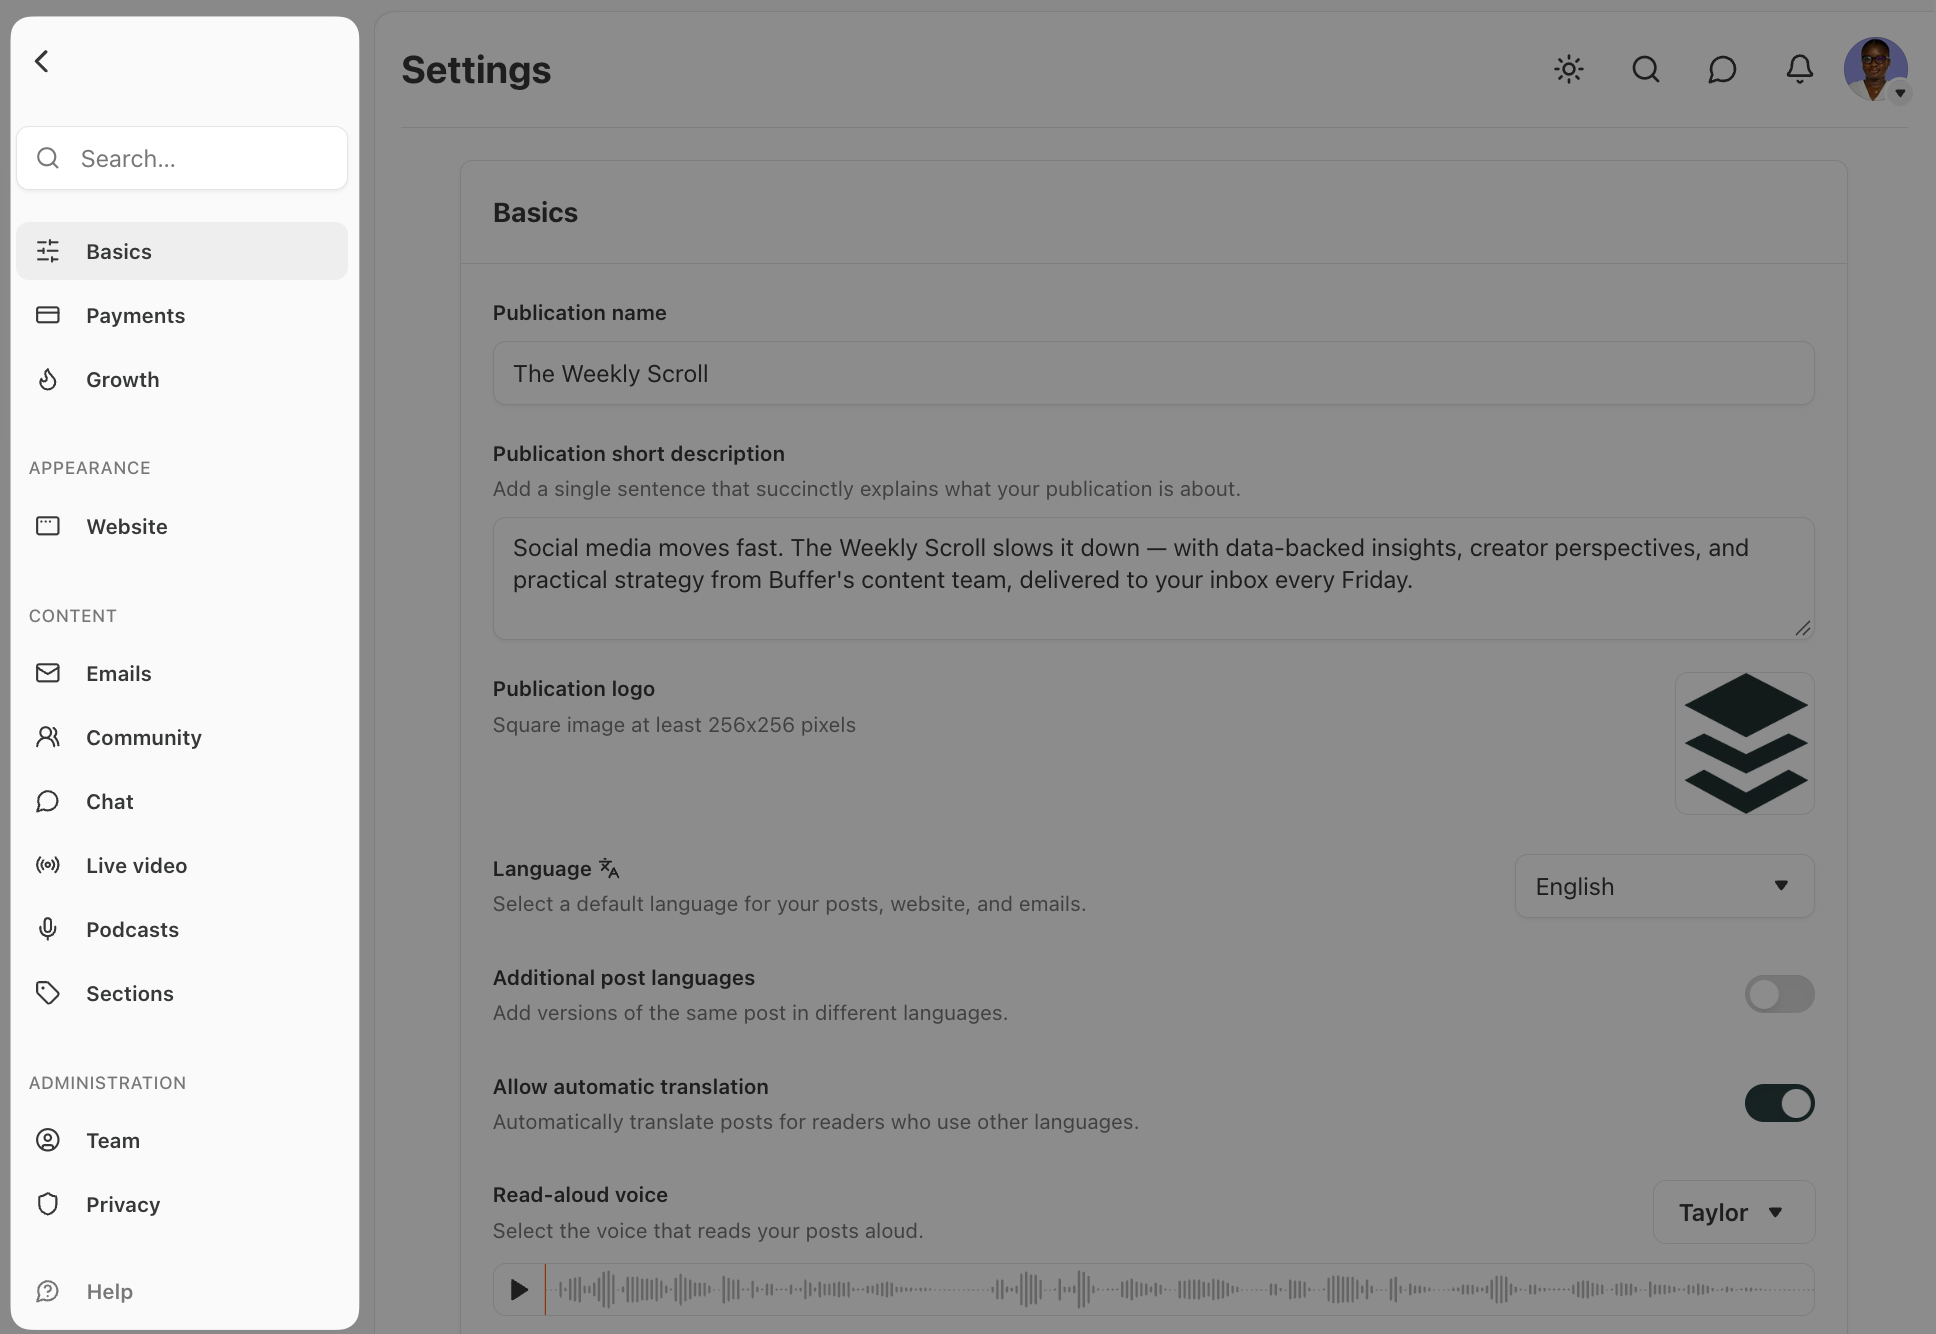
Some immediate things to do in your Settings:
- Pick a name and your URL. You can change both later, but that may confuse subscribers, and you can't set up a redirect (to my knowledge), so choose wisely. If you'd rather use your own domain, that's under Settings → Domain. It's a one-time $50 fee, and Substack needs a subdomain like www. rather than the bare domain (here's how).
- Pick a category or two from the drop-down. Substack uses them to surface your publication in search and discovery and to decide which leaderboard you show up on.
- Upload a logo and a cover image, and pick your homepage layout and colors.
- Write a one-line description. It shows up on your Welcome page (yourname.substack.com/welcome), which is what first-time visitors see before your homepage.
Substack also gives you a setup checklist in your dashboard, which is handy if you're doing this over a few sessions.
3. Write your welcome email
New subscribers get an automatic welcome email, and this is a great opportunity to give them a taste of what to expect from your content.
State who you are, what they'll get, how often, and ask them one question they can reply to. Replies boost deliverability and, more importantly, they're how you learn more about who’s opening and reading your emails.
You'll find them under Settings → Emails, and there are actually four types of you can create: one each for free, paid, imported, and founding subscribers. I recommend starting with the free one, although the imported one matters more if you're bringing a list over (more on that in step 5).
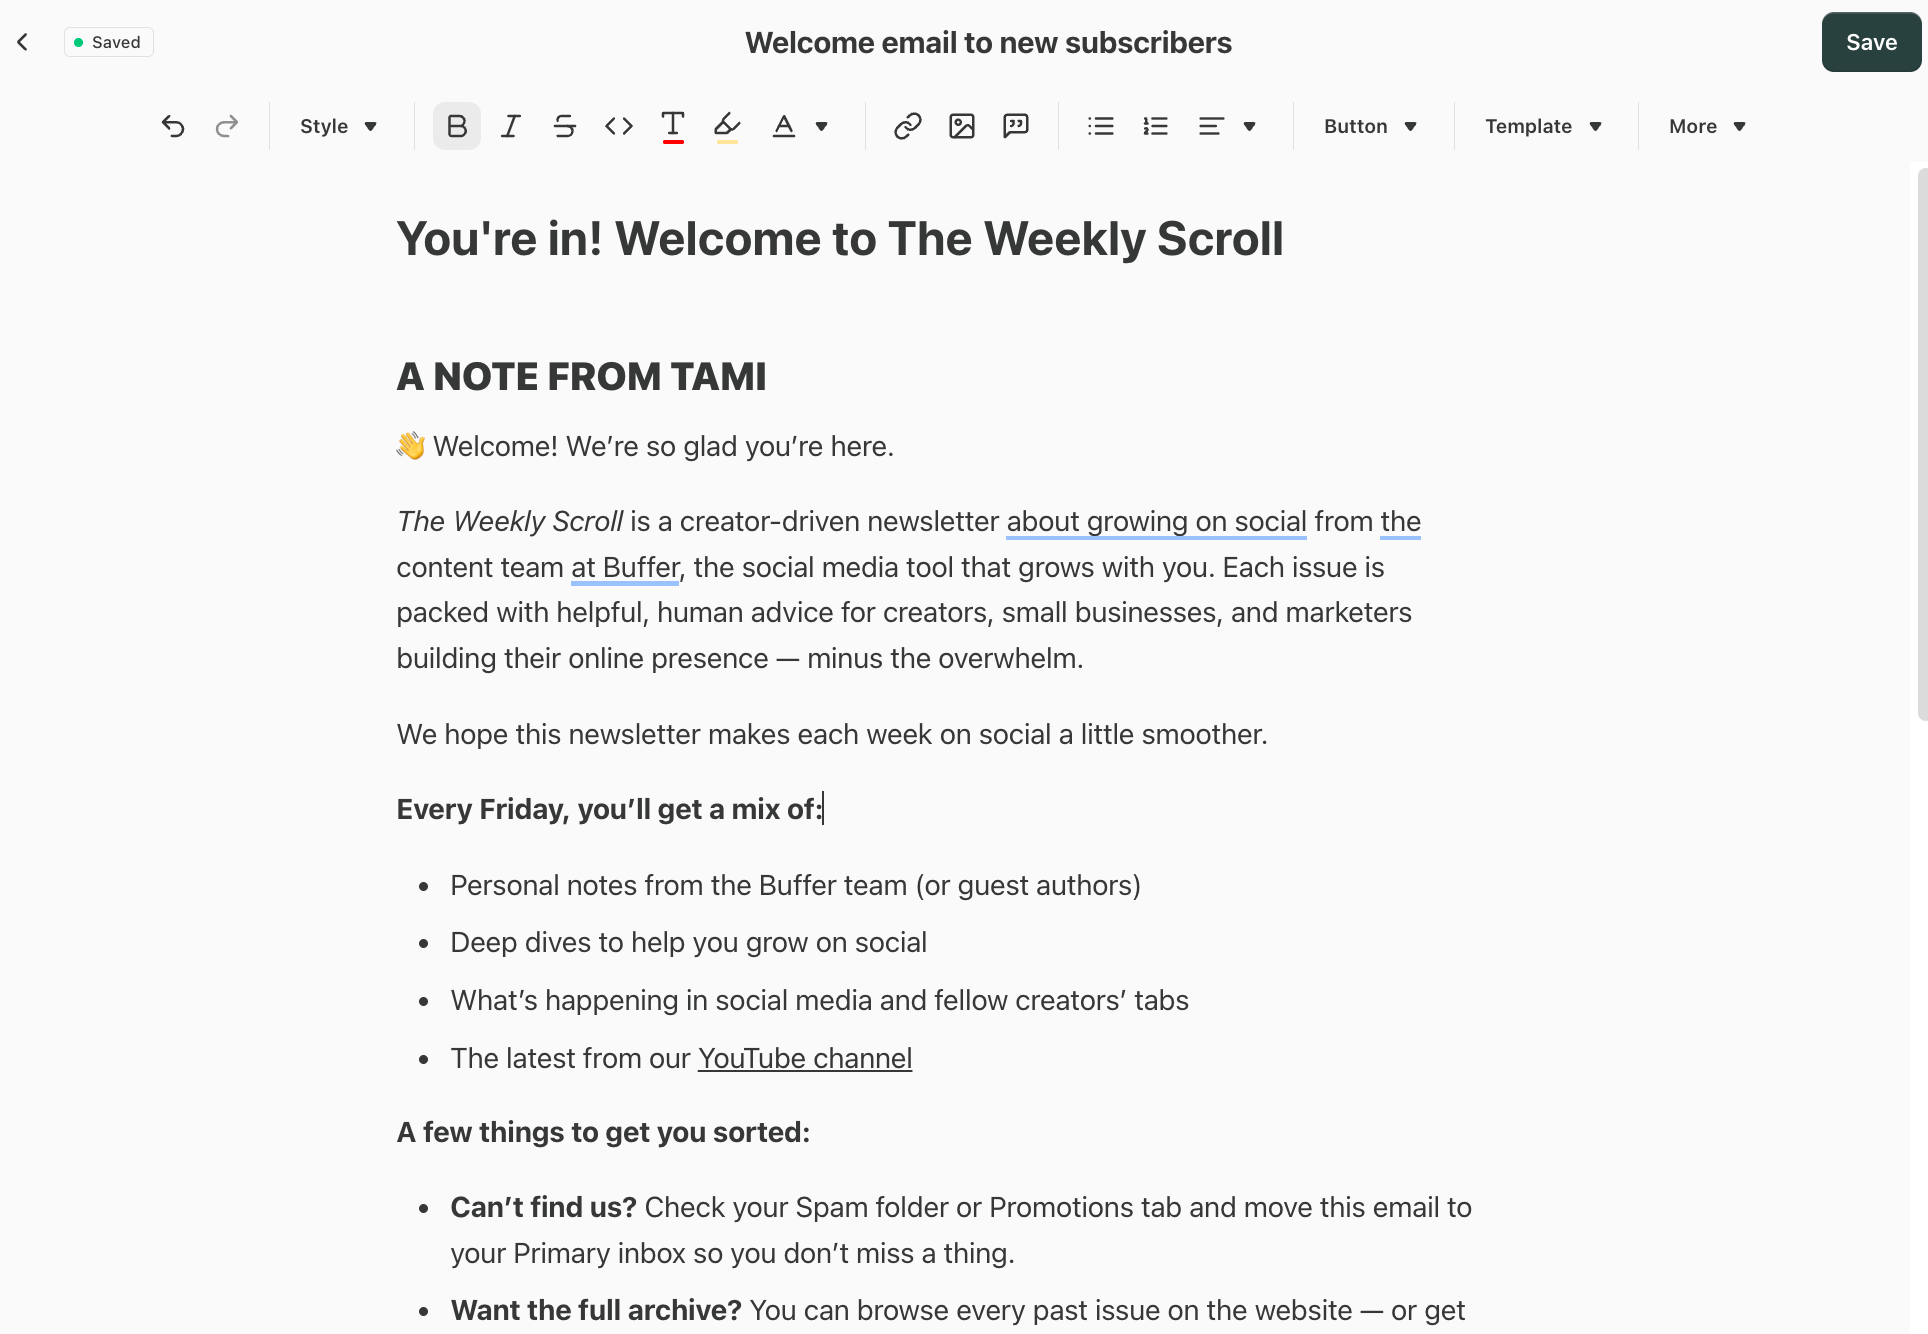
Substack has also been rolling out email automations to more publications since August 2026, so depending on when you read this, you might also be able to set up a short welcome sequence of emails rather than a single email. If you have it, definitely use it.
4. Connect Stripe (even if you're not charging yet)
You don't have to charge anything to sign up for or use Substack, but connecting Stripe is an easy step takes five minutes and means you can turn on paid subscriptions later without a scramble.
It's under Settings → Payments → Connect with Stripe.
Stripe will ask for a business address, your personal details, and a bank account, then send you back to Substack to set up your plans. If you're sure you'll never charge for your publication, feel free to skip this step.
⚡Note: Stripe isn't available everywhere. You can still set up a free publication, but Substack lists a handful of countries (India, Brazil, Indonesia, Mexico, Malaysia, and Thailand at the time of writing) where you can't turn on paid subscriptions, and Stripe's own supported countries list is the one to check for everywhere else.
5. Import an existing email list or previous content
If you have email subscribers elsewhere, import them.
Go to the Subscribers tab, choose Upload a CSV (.csv or .txt both work), and confirm those people gave you permission to email them.
This is what we did with the Weekly Scroll, and it's the biggest reason the move didn't feel like starting from scratch.
If you're also moving old posts over from Medium, Ghost, WordPress, Mailchimp, or beehiiv, that's under Settings → Import/Export.
Just know that everything imports as published, so you can't pick and choose beforehand. You delete what you don't want afterward.
If you don't have a list yet, grab your subscribe link from your publication page and add it to your social bios and website. Substack also gives you an embeddable subscribe form that you can add to your website.
6. Publish a welcome post
Before you start the regular newsletter, publish a post that introduces you and what you'll write about.
It might sound similar to a welcome email, but is more a way to keep your archive from looking empty. Keep it short, detailing who you are, why you're publishing, what to expect and how often, and an invitation to reply or share.
7. Post your first Note
Once your publication is live, write one Note. It doesn't need to be the most clever thing; it can literally be a Hello World post.
In other ideas, say what you've just launched and what it's about, and link to your welcome post. Notes is where most of your early discovery will come from, and it's much less intimidating to post there once you've done it once.
That's everything you need for the initial setup. Everything after this is about what you publish and how you get it in front of people.
What to publish on Substack
Once the publication is set up, the next question is the same one everyone has: what is this thing actually about? Along with, of course, a list of smaller questions like when should I share, or how do I promote?
I haven't found a single right answer, but the newsletters that seem to be doing really well by all publicly available metrics have a clear focus, a sustainable publishing rhythm, and a clear voice and point of view.
Here's how the creators I spoke to (and I) approached it.
Start with a niche, even a loose one
You don't need a hyper-specific niche on day one, but you do need a starting point, because a clear focus is what makes it obvious who should subscribe.
A few questions that help: What do you enjoy writing about, week after week? Who do you want reading it? And what do you know or notice that other people writing about the same thing don't?
That said, don't overthink it. Some of the best newsletters started as someone exploring an idea and figuring out the niche as they went. I'm still adjusting what the Weekly Scroll covers based on what people open and what gets responses, and I'd rather do that than wait for the perfect angle.
Pick a format you'll enjoy repeating
Once you have a topic, decide how you'll structure it. Essay-style deep dives, short weekly roundups, curated links with commentary, interviews, and practical how-tos are all common formats on Substack, and none of them is better than the others. The right one is the one you'll still want to be doing in six months.
You also don't have to pick a traditional format. Gabby Whiten, who writes Oh Eight, a lifestyle and fashion newsletter, builds an elaborate collage for every issue, and it's become the signal people know her for. If there's something only you would think to do, that's usually a good sign it’ll work on Substack.
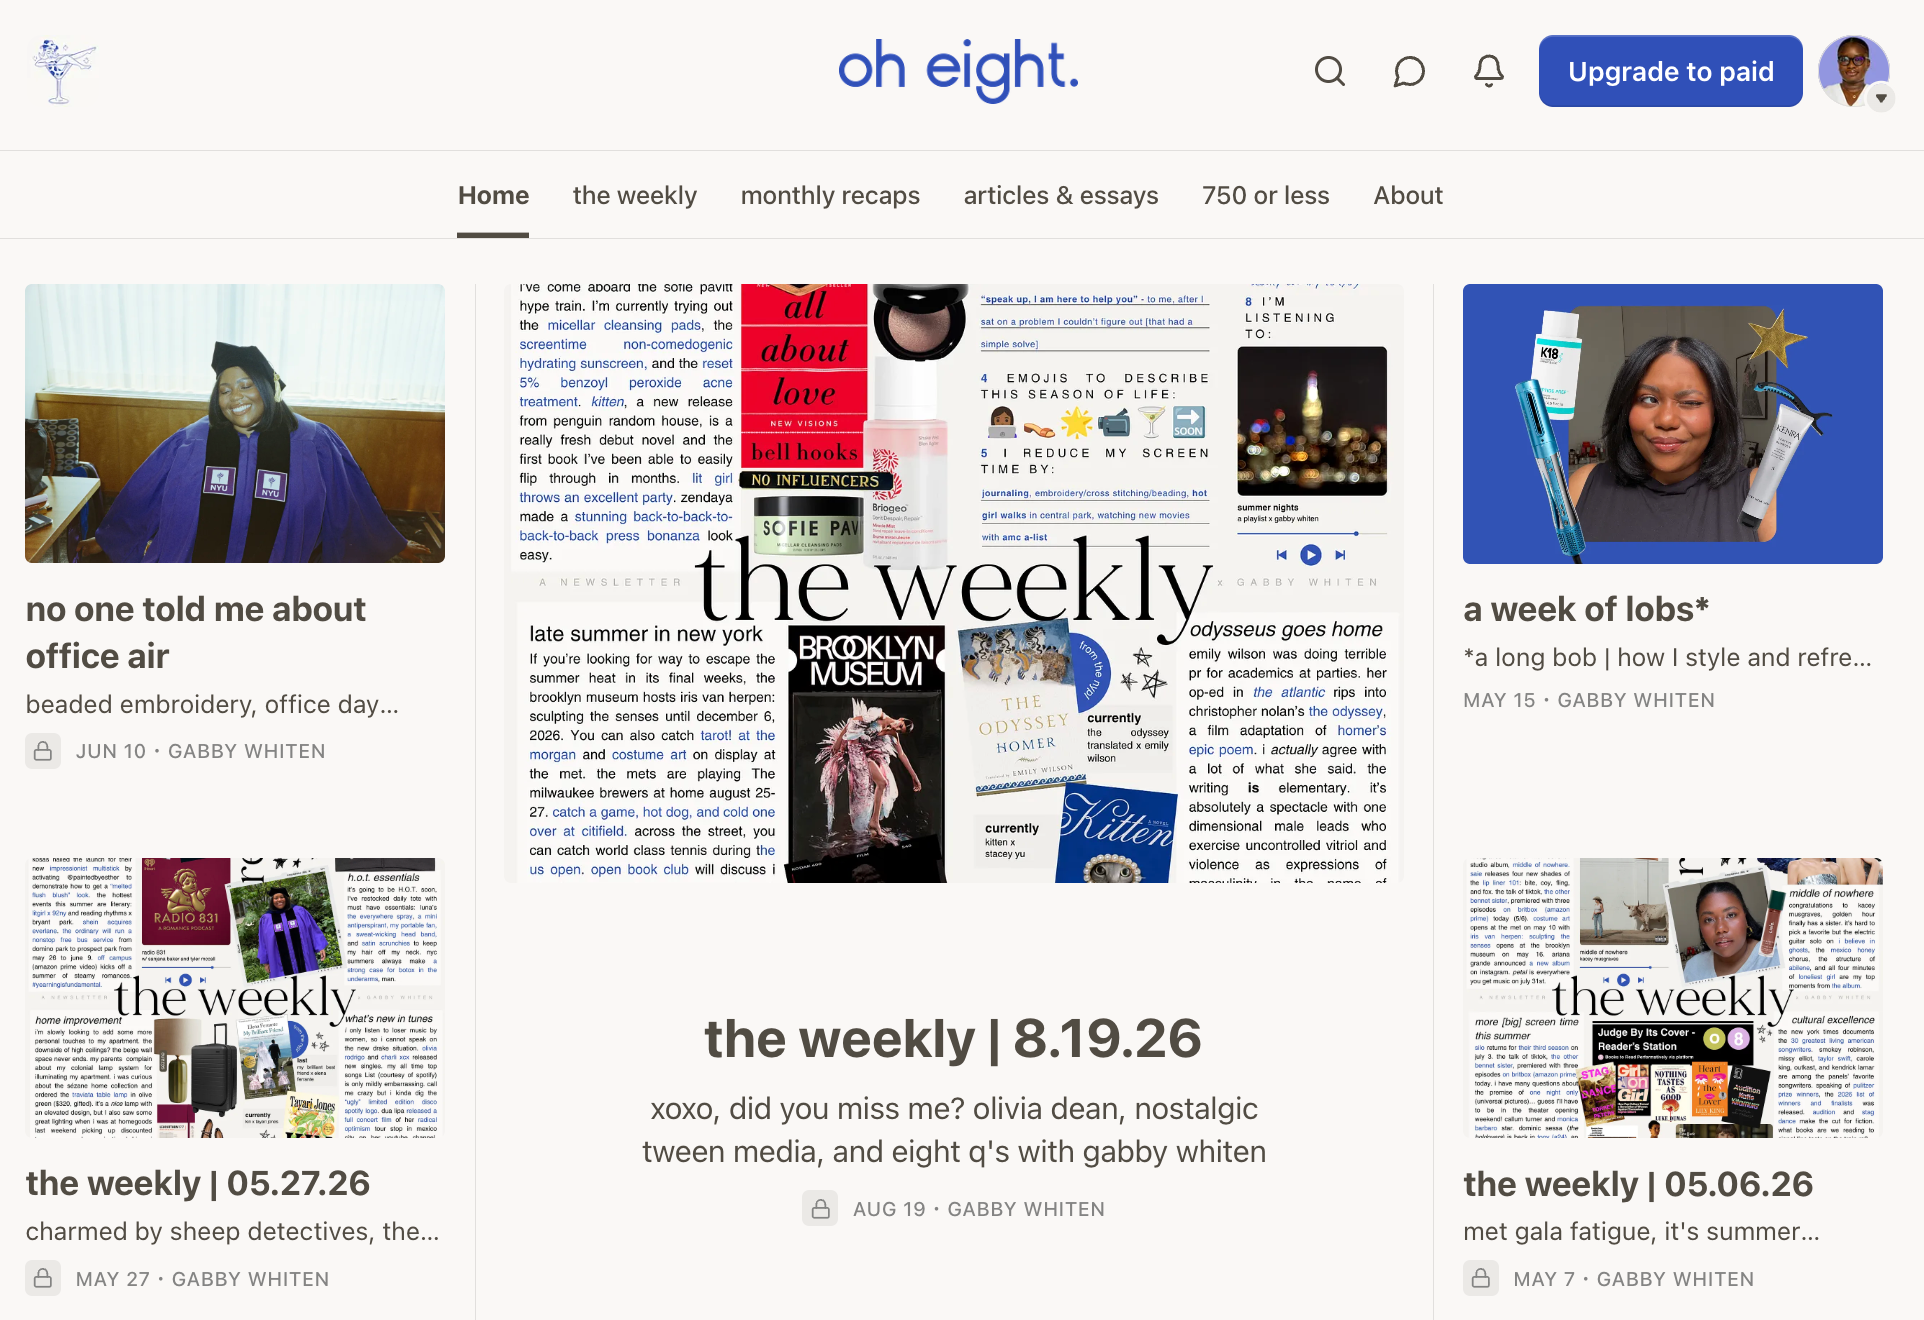
For The Weekly Scroll, we cycle through a few formats, from essay-style newsletters to interviews to keep things fresh.
Set a schedule you can actually keep
Consistency matters on Substack, partly because readers get used to a rhythm and partly because a predictable cadence makes Notes easier (you always have something new to point to). But consistency doesn't mean constant.
Once a week is the most common starting point for posting articles on Substack. Some people publish every two weeks, and a few send several times a week. But the best schedule is the one that doesn't burn you out.
If you're unsure, start slower than you think you can manage. It's much easier to add a second post a week later than to walk back from a daily commitment you can't keep.
Optimize your publication for SEO
Most people don't think about this until later, but it can really help with early growth.
Lade Falobi, who writes Marketing for Geeks about product marketing, told me: "I wish I'd known to optimize for search earlier. It's not just about writing great content. You have to make it easy for people to find you."
MillieAmelia, who writes Life Unscripted about travel and creator income, echoes this, with some advice. Two of the five things she'd tell someone starting with no audience are to set your publication categories (so Substack knows who to recommend you to) and to fill in the SEO title and description on every post, because Substack articles can and do rank on Google. Both take a minute, and almost nobody does them.
Choose quality over quantity, especially early on
Frequency gets people to subscribe. Quality is what keeps them from unsubscribing. If you have to choose between shipping something that’s below your standards but on schedule and skipping a week, I’d recommend skipping the week.
That said, Don’t Overthink It. One of my favorite Substackers, Kel Rakowski, shared a recent video advocating for thinking of it less like you’re a legacy publication and more like you’re a person sharing their thoughts in a longer form.
With the what and the how-often sorted, the next question is how to get it in front of people who haven't heard of you yet.
How to grow on Substack
Growth on Substack is slower than on social media, faster than on a standalone email list, and most of it happens inside Substack itself.
So the advice here is less about driving traffic from elsewhere and more about using the things Substack already gives you.
I've written a much more detailed guide on this (it'll be linked at the end of this section), but these are the basics that make the most difference in my experience.
- Turn on Recommendations, then give and ask for them. When you recommend another publication, it's offered to your new subscribers when they sign up, and vice versa when other writers recommend you. Several of the creators I interviewed named this as their biggest single source of new subscribers. Set yours up under Settings → Recommendations, add a handful of publications you actually read, and then ask writers in your space if they'd swap. A short, specific message has worked far better for me than a generic one.
- Post Notes consistently. Notes is where people who've never heard of you find you, because the feed shows people content from writers they don't follow. Short observations, a single useful idea, or a quote from your latest post tend to travel further than a link to it. Restacking other writers' Notes with a comment of your own helps too. Anna Burgess Yang started "restacking quotes from other Substack writers as a way to boost visibility," and found it noticeably increased engagement.
- Give followers a reason to subscribe. Someone who follows you from a Note sees your Notes but doesn't get your emails. So every so often, write a Note that points at the newsletter itself: a preview of this week's issue with a reminder to subscribe, a question you answered for subscribers, or a simple reintroduction to your newsletter.
- Cross-promote with other writers. Guest issues, newsletter swaps, and interviews all work, and Substack makes them easy because you can link straight to another publication's subscribe page. Start with writers at a similar size to you as they're more likely to say yes. You can also check Substack’s new Creator Match feature to find writers with audience overlap.
- Share where you already have an audience, and ask readers to share too. Many creators still grow partly through social media, and it works best when you share a takeaway or a story from the issue rather than just dropping a link. Also, reply to commenters; it's how casual readers turn into super fans.
📚 Related reading: I've gone much deeper on all of this, including what Substack's own founders say the feed rewards and what I learned posting a Note every day for a month, in How to Grow on Substack.
One last thing before you hit publish
If you've made it this far, you have everything you need to set up, publish, and grow a Substack. But if there’s one thing that I’d like to leave you with, it’s the part that's easiest to skip: talking to the people who subscribe.
I’ve always believed that newsletters aren't a one-way channel, and Substack reflects that sentiment.
Subscribers have invited you into their inbox, and every reply, comment, and Chat message is a chance to find out what they need or want from you. That’s why the writers who do best on Substack aren't necessarily the best writers, but make their readers feel like they’re part of something.
If you've been thinking about starting one, consider this your sign. Your first post likely won't be perfect, and your first 10 subscribers might be friends and family. But every newsletter you admire started the same way, with one post and one reader.
Frequently asked questions about using Substack
Is Substack free to use?
Yes. Creating an account, setting up a publication, and sending posts to any number of subscribers is free. Substack only makes money when you do: if you turn on paid subscriptions, it takes 10% of that revenue, and Stripe takes payment processing fees on top.
How much does Substack take from paid subscriptions?
Substack takes 10% of paid subscription revenue. Stripe, which handles payments, adds 2.9% plus $0.30 per transaction and a 0.7% billing fee for subscribers who signed up after July 2024. On an $8/month subscription, that leaves you with roughly $6.62.
What's the difference between subscribers and followers on Substack?
Subscribers get your posts by email (and access to Chat and any paid content). Followers only see your Notes and activity in their Substack app feed, and don't receive emails. Followers exist because Notes exists, so they behave more like a social following. Most growth advice on Substack comes down to turning followers into subscribers.
Do you need an audience to start a Substack?
No. Substack's Recommendations, Notes feed, and app are designed to help new publications get found without an existing following, which is one of the main reasons creators choose it over a standalone email tool. Growth is slow at first either way, and having an audience elsewhere helps, but it isn't a requirement.
Can you schedule posts and Notes on Substack?
You can schedule posts natively: set a date and time in the publish flow and Substack sends the email for you. You can also schedule Notes by clicking the calendar icon in the composer and setting your preferred date and time.
How often should you publish on Substack?
Once a week is the most common cadence for newsletters, and it's a sensible default. Notes is different: because the feed rewards consistency, daily or near-daily Notes tend to do more for discovery than weekly ones. Whatever you pick, choose a schedule you can sustain.
]]>“If you can’t measure it, you can’t manage it.”
If you're nerdy like me, I bet you’ve heard this one from Peter Drucker, one of the best-known thinkers and writers on the subject of management theory. And maybe that’s why you’re here: You know that growing on TikTok isn’t just about posting videos — you need to dig into the data to see what actually works.
But the first time you opened the TikTok analytics tab probably felt like staring at a spaceship dashboard. Numbers, charts, percentages … Where do you even start?
The good news is that you don’t need to measure everything; it’s more important to measure the right things based on your goals. That's where the real insight lives: focusing on the metrics that actually tell you something about your audience, your content, and your growth.
Key takeaways
- Choose metrics based on your goal: Focus on views for reach, watch time for retention, engagement for interaction, and follower growth for audience growth.
- Multi-platform access: Use the mobile app for quick checks and the desktop dashboard for more detailed data exports and deep-dive analysis.
- Audience insights: Use demographic data and "most active times" to schedule posts when they're most likely to reach people.
- Creative feedback loop: Use analytics to identify patterns in top-performing videos (length, hooks, and themes) to inform your future strategy.
Jump to a section:
What are TikTok analytics?
TikTok analytics is the data in your TikTok account that provides insights into how your content performs on the platform. Your analytics help you understand who your audience is, what content they engage with, and when they are most active.
When you have these numbers, you gain the knowledge to create even better content, get more eyes on it, grow your audience, and maybe even make some money.
How to access analytics on your TikTok account
Before you dive in, a quick note: The TikTok analytics dashboard is available to Creator and Business accounts. If you're still on a personal account, you can switch for free in Settings and privacy → Account → Switch to Business Account (or Creator). Also worth knowing: You'll need at least 100 followers to unlock some features, like the Followers tab.
On the mobile TikTok app
- Open the app and navigate to your TikTok profile (in the bottom right-hand corner).
- Right below your bio, click on the TikTok Studio button.
- Click on Analytics.
- Scroll through the tabs at the top to explore your stats.
On TikTok's desktop site
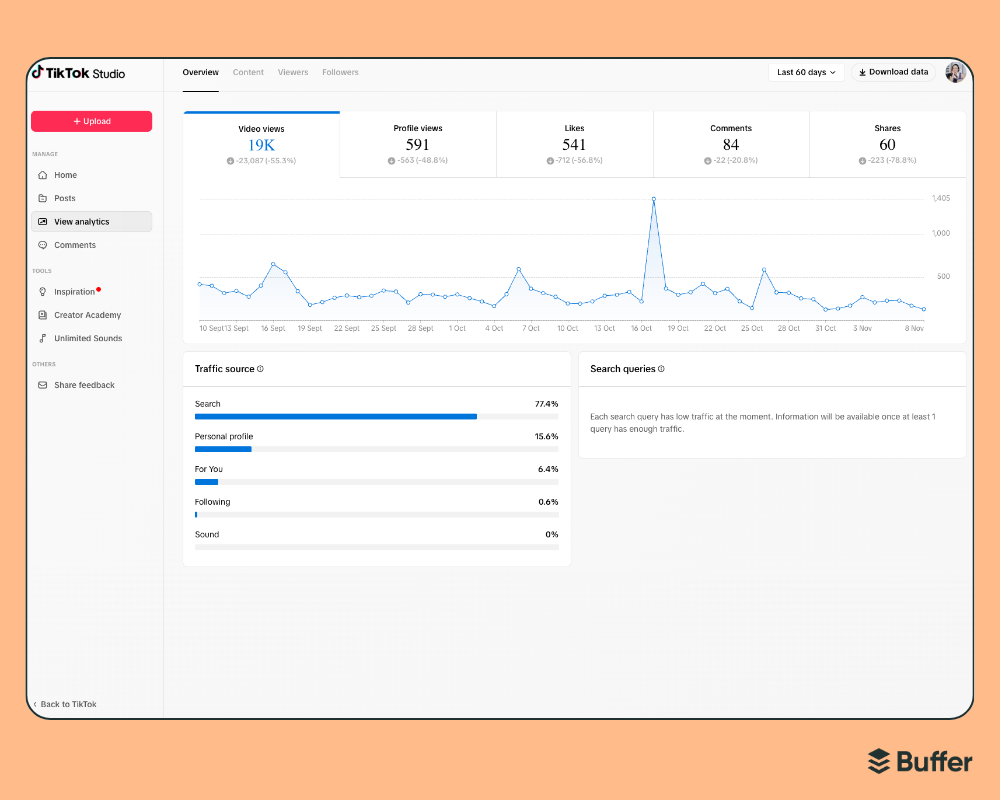
TikTok analytics on mobile vs. desktop
The stats you’ll see look a little different on each device. Here’s what you can expect:
Which platform should you use?
- Mobile: You want to check stats quickly, on the go, or keep tabs on trends while filming and posting content.
- Desktop: You want to dig into the numbers, export data, and plan content in more detail.
How to access TikTok analytics in Buffer
If you're managing your TikTok alongside other platforms, Buffer Insights gives you a clean, per-channel view of your performance (follower growth, engagement, impressions, and a Performance per Post breakdown), so you're not jumping between tabs trying to piece it all together. The AI-powered Takeaways are especially handy if you're short on time and just want to know what to do next.
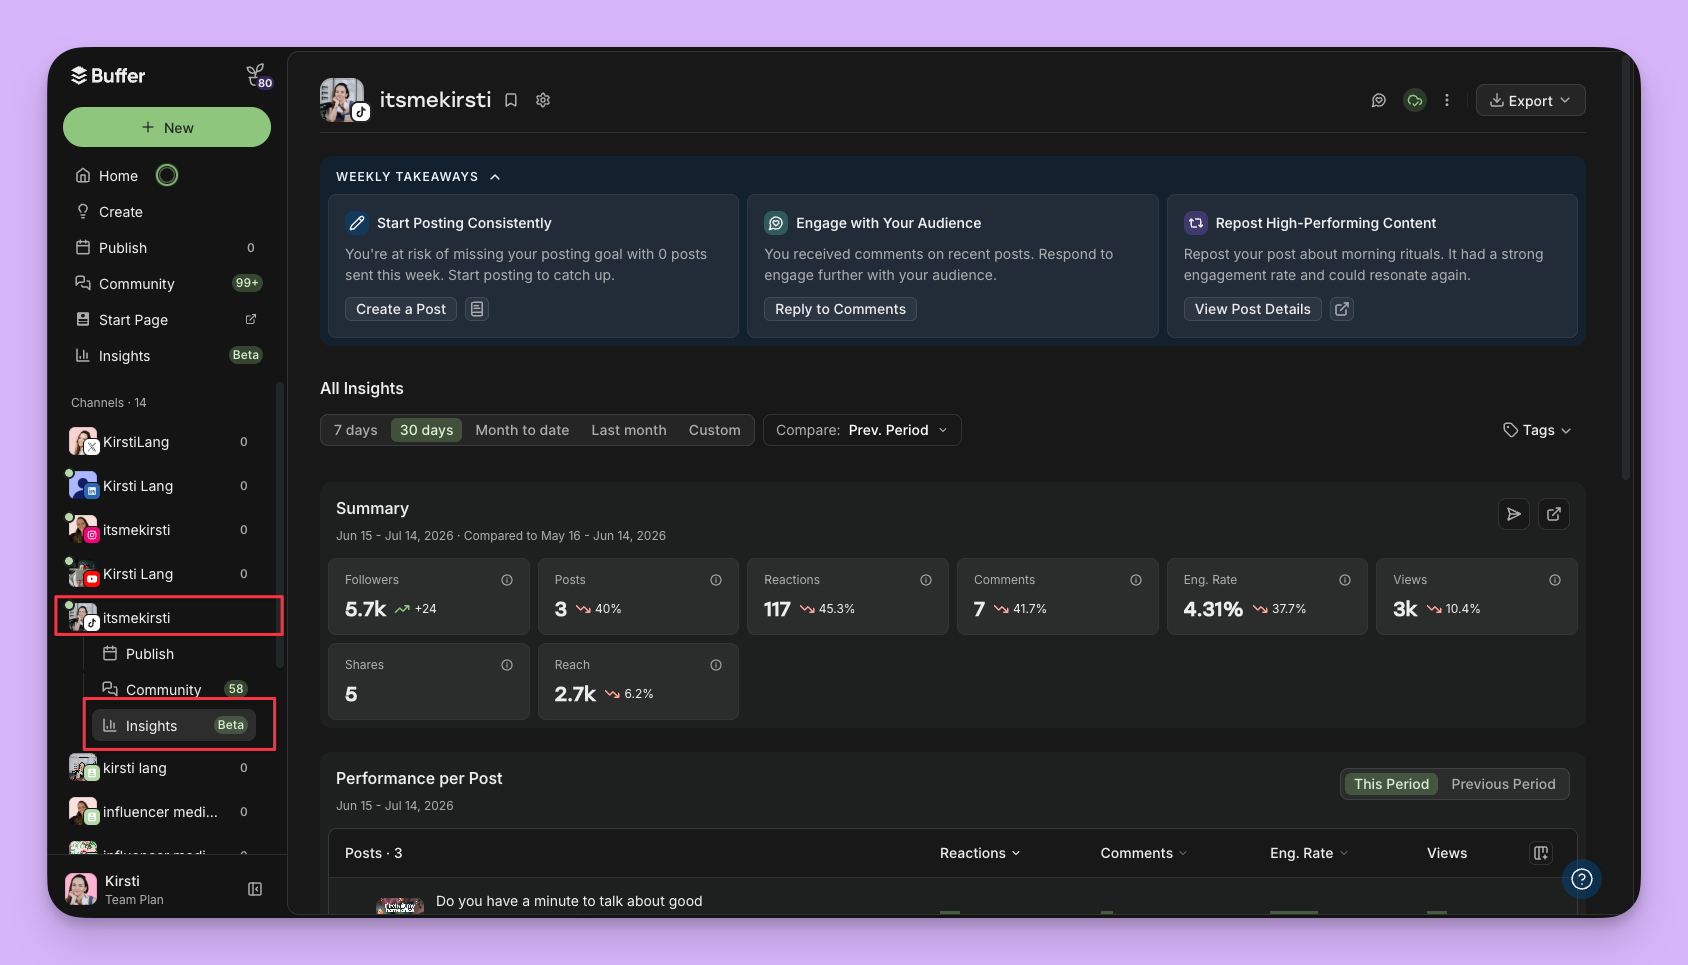
Here's how to find your Buffer Insights:
- Open your Buffer dashboard.
- In the left sidebar, select TikTok, then click Insights beneath the channel name.
- Use the date range and filters at the top to set the period you want to review.
The 4 main sections on your TikTok analytics dashboard
TikTok organizes its native analytics into four primary sections:
- Overview
- Content
- Followers
- LIVE
Note: Although the four sections remain the same, the depth and focus of the data can vary between Creator and Business TikTok accounts:
Overview
The overview is a high-level snapshot of how your TikTok account is doing.
- Video views: The total number of times your videos were watched in your selected time frame.
- Profile views: How many times users visited your profile, which is a good signal of interest beyond just viewing videos.
- Follower growth/loss: How many new followers versus unfollows in that period.
- Engagement counts: See your likes, comments, and shares.
🎯 How to use it
Think of the Overview as your dashboard for “how am I doing overall?” If you notice a big spike or drop here, it’s a signal to dig deeper.
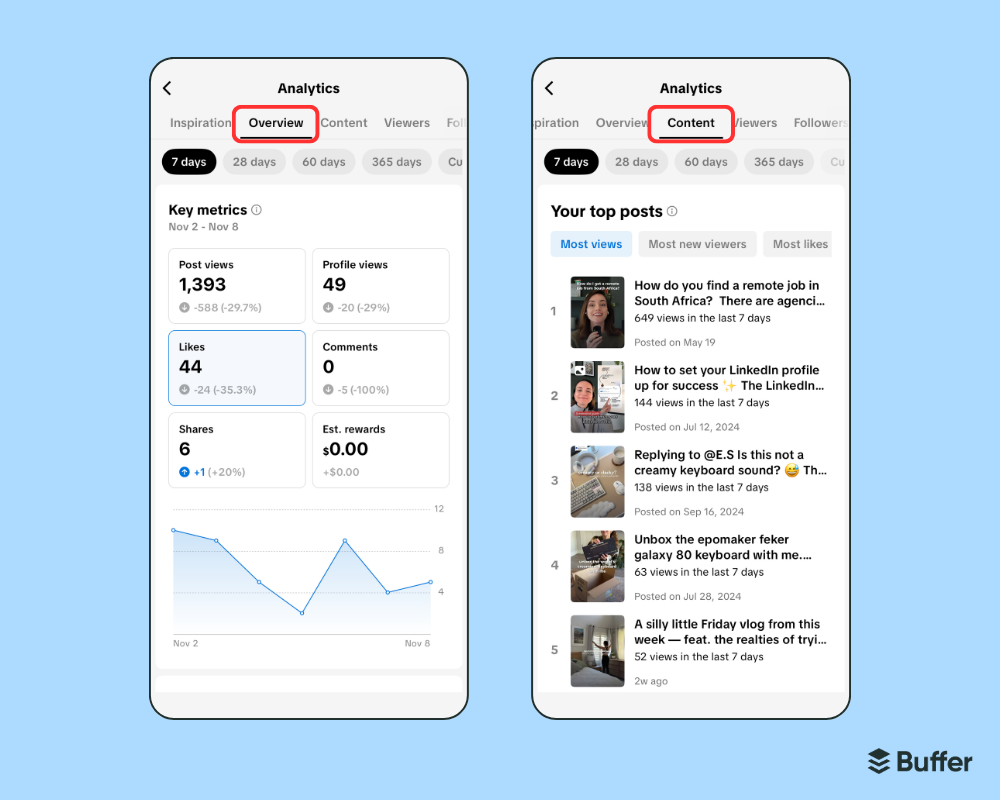
Content
This tab zooms in on how individual posts are performing. Key metrics to watch include:
- Average watch time: How long viewers stay watching your video on average. (If this is low, your hook or intro might need work.)
- Total play time: Total minutes/hours people spent watching your videos.
- Reached audience: How many unique users your video was shown to.
- Watched full video: The percentage of viewers who watched your video all the way through. A high completion rate can be a useful signal that viewers are finding the video engaging.
- Video views by section/source: Did people find your video via the For You page, via your profile, or somewhere else?
- Trending videos: The top videos with the fastest growth in views or engagement recently.
🎯 How to use it
You can use this tab to identify what kind of posts are working right now. For example, if videos with certain themes or hooks are trending, lean into them.
Heads up: Some of these individual post metrics are only available for the past seven days, so it's a good idea to check in regularly so you don't miss anything.
Followers
Here you can learn all about your audience — who they are, when they’re active, where they’re from, and more. (One thing to note: you'll need at least 100 followers before TikTok populates this tab with data.)
- Total followers and net followers: How many people currently follow you, and how many gained/lost in your selected period?
- Demographics: Age groups, gender breakdown, top countries/cities where your followers are based.
- Most active times: What hours/days are your followers most active on TikTok?
🎯 How to use it
Use follower data to guide your content strategy and posting schedule. For example, if you see many followers in a certain city/time zone, adjust your timing accordingly. If you have a strong age/gender segment, tailor visuals/language to them.
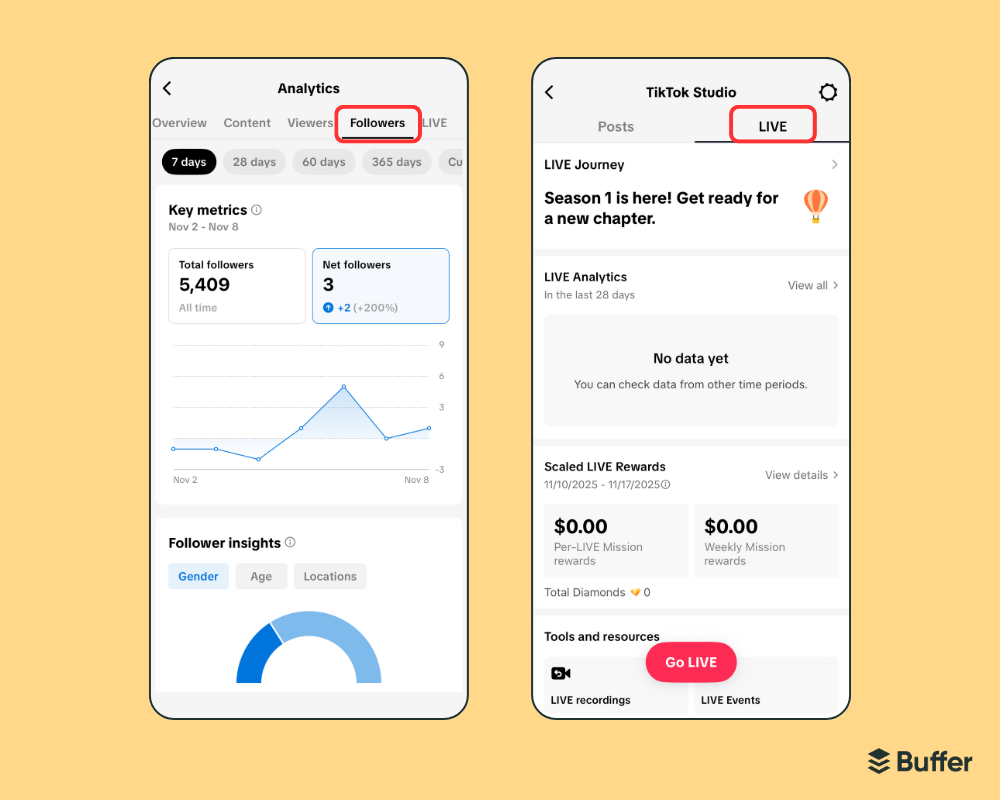
LIVE
The LIVE tab is for when you host live-stream sessions on TikTok. It gives you data specific to those live streams so you can understand how your live audience engages.
- Total views on your live sessions: How many people watched your live broadcast?
- Unique viewers: How many individual accounts watched (even if they drop in and out).
- New followers gained during live: Useful to gauge how effective the live session was at converting viewers to followers.
- Top viewer count: The highest number of concurrent viewers during the live.
- Diamonds / virtual gifts: If applicable in your region, this counts how many gifts you received.
🎯 How to use it
Treat your live metrics like feedback on your real-time event. If you notice a drop-off at a certain minute, maybe the format needs tightening. If many new followers came in during the live, consider replicating the hook or format.
5 key metrics to focus on
Here are my top five metrics and what to do with them:
1. Video views
👀 What to look at: How many people are watching your videos?
💡 Action tip: Notice which videos get the most views and make more like them.
2. Watch time
👀 What to look at: How long viewers are sticking around for your videos. Are they watching all the way through, dropping off early, or rewatching parts?
💡 Action tip: If watch time is low, experiment with hooking viewers in the first two to three seconds, tightening edits, or making your content more engaging.
3. Follower growth and followers per video
👀 What to look at: How your audience changes week by week.
💡 Action tip: Track patterns: What content makes people follow you? Do more of that.
4. Engagement
👀 What to look at: Which videos people interact with most.
💡 Action tip: Pay attention to shares as they show what content people want to spread.
5. Follower insights
👀 What to look at: Age, location, and when your followers are online.
💡 Action tip: Post when your audience is most active and tailor content to who they are.
How to use your TikTok analytics to improve your content strategy
Your analytics are a great place to understand what content is resonating with your audience and where you can improve.
For example, if you notice one video has a lot more shares and saves, dissect why. Does it share unique information that’s not readily available? Is it something people might want to reference later and share with their friends? What are the comments like? Can you create more content around the same topic?
When you treat your analytics as a creative feedback loop instead of a performance scorecard, you start to see patterns that help you grow faster (and smarter).
Here’s how to make the most of your TikTok analytics.
Define your TikTok goals
Analytics are only useful if you know why you're measuring them. Before you start digging into dashboards, get clear on what you're trying to achieve. Here are a few common TikTok goals and the metrics that map to each:
- Grow your audience: Track follower growth, profile views, and followers gained per video.
- Boost engagement: Focus on likes, comments, shares, and saves (especially shares, which signal that people want to spread your content).
- Improve content quality: Watch your average watch time and full-video completion rate to see if people are sticking around.
- Drive traffic or sales: Keep an eye on link clicks (if you have a link in bio) and video views by traffic source to see how people are finding you.
Once your goals are set, the right metrics become obvious.
See what works
Once your goals are set, you can dig into your analytics to find your best-performing content.
Look for:
- Top posts: Which videos have the most views, shares, or saves?
- Average watch time (a big one for the algorithm): Are people watching to the end or dropping off early?
- Engagement rate: Which posts spark conversation or get the most comments?
Pro tip: According to our latest data, videos between three and 10 minutes long now perform better than super short ones in terms of engagement and watch time. (That said, this advice only applies if videos of this length are relevant to your brand, context, and content.)
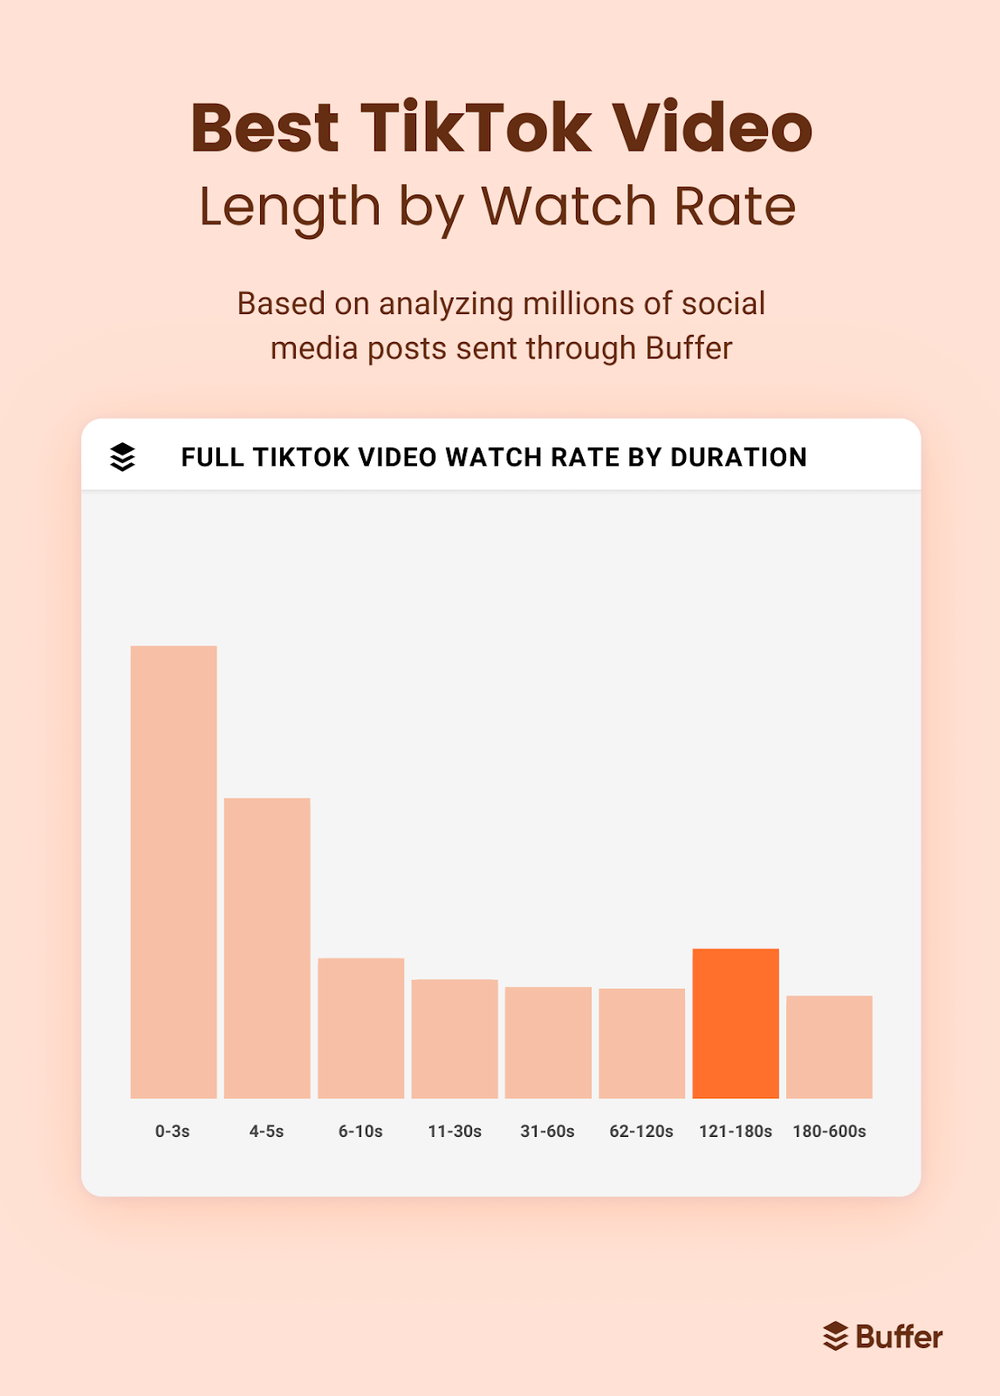
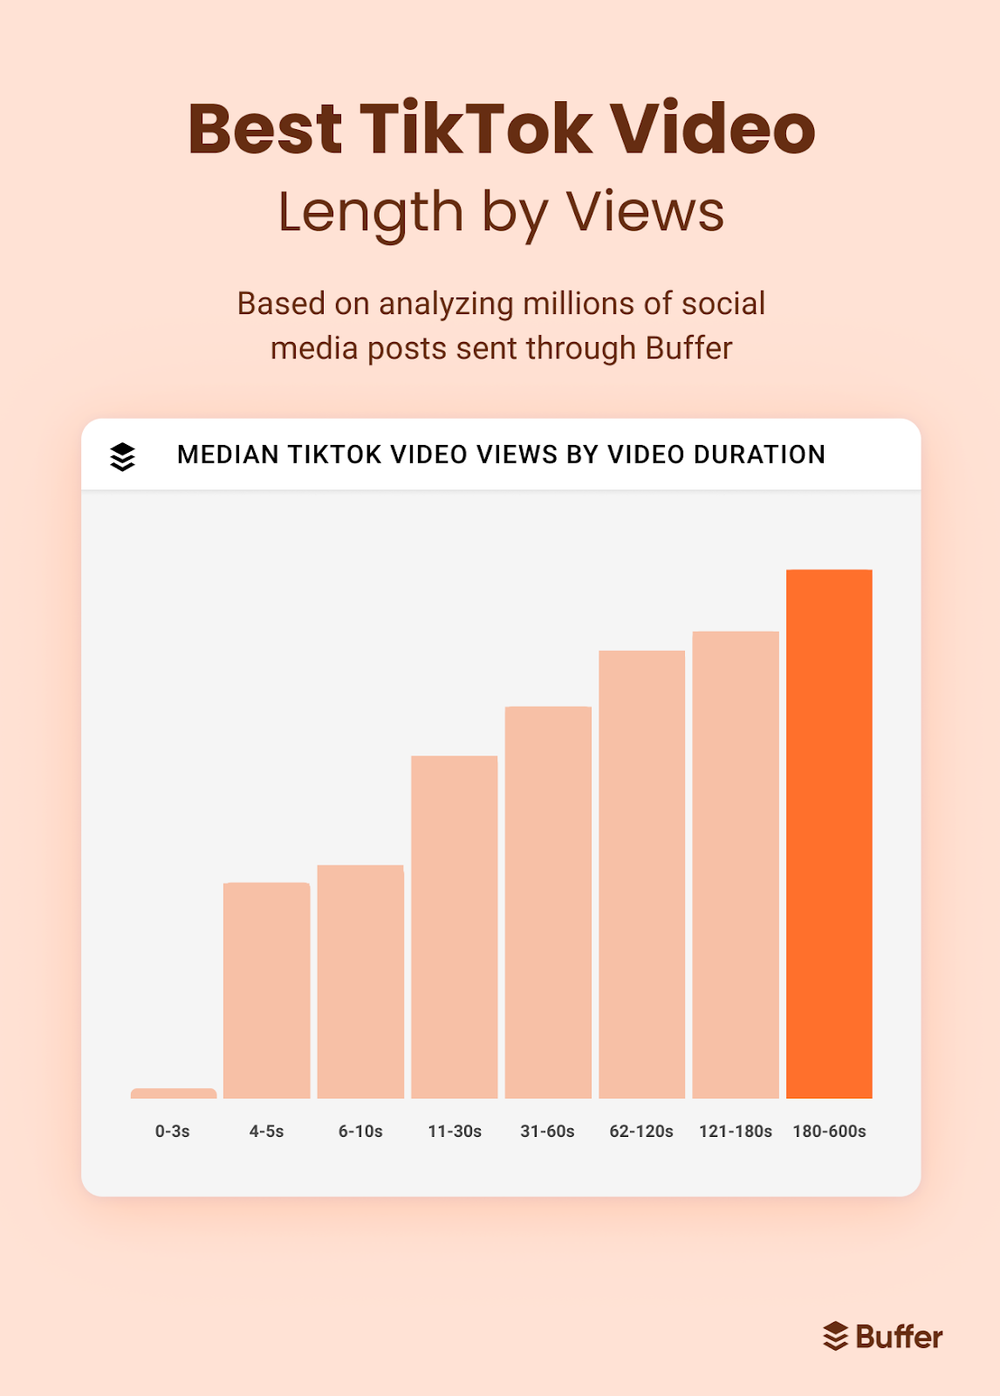
Understand your audience
Analytics tell you what’s working and who it’s working for. Use the dashboard to identify:
- Demographics: Age, gender, and top territories.
- Activity patterns: Specific hours and days when your followers are most active.
- Growth trends: Net follower changes over specific timeframes.
Pro tip: Our data shows that posting during evening hours (6 p.m.–11 p.m.) is best for engagement. Does that align with your stats? It might not, and that’s OK. The whole reason to look at your own analytics is to see what’s resonating with your specific audience.
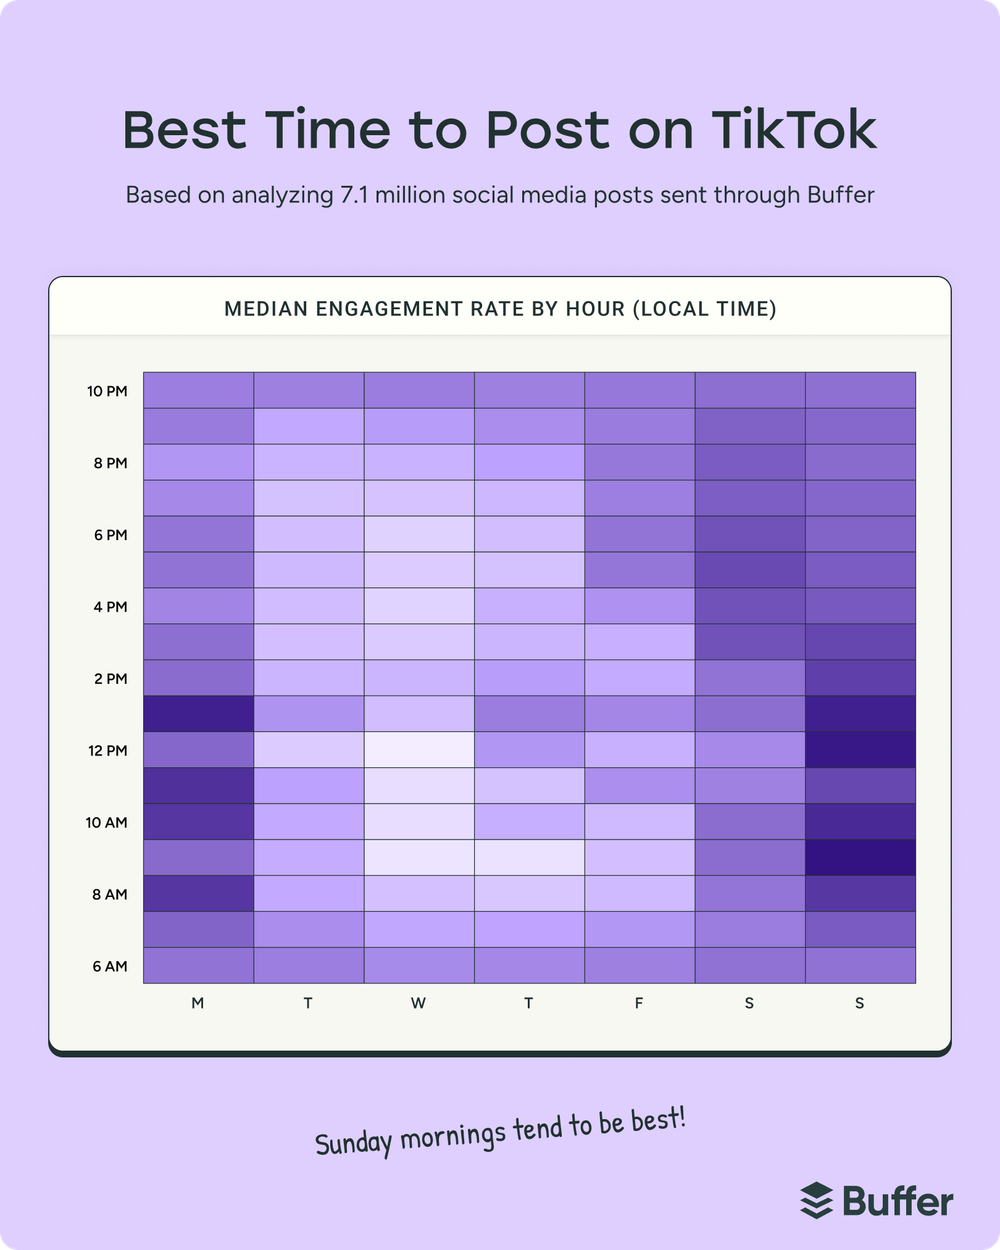
Spot patterns
It’s such a boost to see a video taking off, and you deserve every celebration. But often, the real optimization magic happens when you zoom out. Instead of solely focusing on individual posts, start noticing trends in your content.
- What themes, tones, or topics consistently perform well?
- Do certain posting times get better results?
- Are your strongest videos short, funny, educational, or emotional?
- Have there been any shifts in your audience demographic over time?
Test and learn
Stay curious and adapt to the changing algorithm by testing these variables:
- Hooks: Try different opening lines or visuals in the first three seconds.
- Formats: Alternate between educational, entertaining, and trending content.
- Timing: Shift posting times slightly to find your unique "sweet spot."
TikTok analytics made actionable
TikTok analytics help you understand what works, who’s watching, and how to improve your content. Now that you know where to look and what to look for, you’re in a much better position to make content that resonates and reaches the people you’re trying to connect with.
The key is to treat your analytics as an ongoing feedback loop, not a one-time check. Review your numbers regularly, spot the patterns, and let the data guide your next creative decision. If you'd like to keep all your TikTok metrics (and the rest of your social channels) in one place, Buffer Insights can help with that.
FAQ about TikTok analytics
How do I see my analytics on TikTok?
On mobile, go to your profile and tap the TikTok Studio button right below your bio, then tap Analytics. On desktop, head to tiktok.com/analytics.
What does "Other" mean on TikTok analytics?
If you see “Other” as a traffic source, it typically includes sources that don’t fit neatly into TikTok’s main categories. It could be viewers who found your video through shared links, embeds, or external sites.
How do I see TikTok follower analytics?
Head to the Followers tab within your analytics dashboard. There, you’ll see breakdowns of your audience’s gender, top territories, and when they’re most active. This is one of the best places to refine your posting schedule and ensure your content lands when your community is online.
How do I set up analytics on TikTok?
Analytics are available to all Creator and Business accounts. If you’'re using a personal account, just switch in Settings and privacy → Account → Switch to Business Account (or Creator). Once you've switched, you'll have access right away — though some features, like the Followers tab, require at least 100 followers before data starts showing up.
How do I turn analytics off on TikTok?
If you’d prefer not to track analytics, simply switch back to a personal account. Tap Settings and privacy → Account → Switch to personal account. Just note that you’ll lose access to insights and certain business tools, so only switch if you’re sure you don’t need them.
What time do TikTok analytics update?
Analytics data may take some time to update, so don't expect every metric to appear immediately after posting. You might notice a delay of several hours before new performance data (like views or engagement) fully updates. For the most accurate picture, check your analytics at the same time each day and give new posts at least 24 hours before analyzing performance.
Does TikTok analytics show who viewed your profile?
TikTok analytics shows your total profile views, but analytics itself doesn't provide a list of everyone who viewed your profile. TikTok also has a separate Profile view history feature with its own eligibility and privacy settings.
How many followers do you need to see TikTok analytics?
You don't need a minimum follower count to access TikTok analytics. It's available on all Creator and Business accounts from day one. That said, the Followers tab won't display detailed audience data until you have at least 100 followers.
Is 20K views on TikTok a lot?
It depends on your account size and niche. For a newer account, 20K views is a strong result. For a large, established account, it might be below your usual average.
Rather than comparing your numbers to other creators, use your own analytics to track view trends over time. Consistent growth in your own data is a much better signal that your content is on the right track.
More TikTok resources
- TikTok Marketing: The Complete Guide to Form Your Strategy (For Creators and Brands)
- Top 250 TikTok Hashtags + How to Use Them for Growth
- 14 Ways to Get More Followers on TikTok — Tried and Tested
- The 11 Best AI Video Editors for Creators and Marketers, Tried and Tested (+ Bonus AI Tool)
- The Best Time to Post on TikTok
If you want to stay consistent on social, you need a good home base to work from — which is why, in my humble opinion, the social media management tool you choose is a lot more important than you might think.
The right tool for you will be easy and flexible, without stretching your budget. And actually be a place that you want to hang out every day (trust me on that one!).
Buffer and Later are two names you’ll see often, each offering different ways to help you schedule posts, connect with your audience, and analyze performance.
If you’re weighing your options between Buffer and Later, I've got you! The key differences and similarities to look for between them are:
- Pricing structure: Buffer charges per channel, starting at $6/month. Later uses bundled “social sets” with plans starting at $25/month.
- Free plan: Buffer offers a free plan for up to three channels and includes publishing, inbox, and analytics. Later's free plan is limited to 12 posts per channel, a link-in-bio page, access to the media library, and creator marketplace. There's no inbox or analytics on the free plan.
- Platform support: Buffer connects to 11 platforms, including X/Twitter, Bluesky, Mastodon, and Google Business. Later supports eight, including Snapchat.
- Visual planning: Later leans into visual-first planning with a drag-and-drop calendar and grid preview. Buffer focuses on simplicity and flexibility across multiple channels.
- AI tools: Buffer includes unlimited AI-assisted content creation on all plans. Later offers AI credits on paid plans, with limits based on your tier.
- Extras: Later offers add-on products for social listening, influencer marketing, and commerce features like a Shopify-integrated link-in-bio with conversion tracking. Buffer keeps its focus on publishing, engagement, and insights.
- Team scaling: Buffer allows unlimited users on its Team plan, making it more cost-effective for growing agencies than Later’s per-seat model.
In this guide, we’ll compare the two platforms so you can decide which is the better fit for your brand.
Jump to a section
- Buffer vs. Later features overview
- Plans and pricing
- Social media scheduling and planning
- Capturing ideas and planning content
- Social media engagement
- Social media analytics and insights
- Link-in-bio tools
- Team collaboration features
- Influencer marketing features
- Which tool is right for you?
- FAQ on Buffer vs. Later
- More social media marketing resources
Buffer vs. Later features overview
Here's a look at the key features and costs for Buffer and Later at a glance.
| Buffer | Later | |
|---|---|---|
| Free plan | ✅ 3 social channels/social media accounts on any platform(s) | ✅ 8 social channels, only one account per platform |
| Paid plans | Start at $6/month | Start at $25/month |
| Supported social media channels | Instagram, Facebook, X/Twitter, LinkedIn, TikTok, Pinterest, Google Business, Mastodon, Start Page, YouTube Shorts, Threads, Bluesky | Instagram, Facebook, Threads, Pinterest, TikTok, LinkedIn, YouTube Shorts, Snapchat |
| Mobile apps | ✅ iOS, Android | ✅ iOS, Android (some countries only) |
| Planning hub | ✅ Available on all plans, including free | ✅ Paid plans only |
| Inbox and engagement | ✅ Available on all plans, including free | ✅ Team plans only |
| Analytics, Insights, Reporting | ✅ Basic analytics on the free plan, advanced analytics on paid plans | ✅ Paid plans only (link in bio analytics on all plans) |
| Team members | ✅ Paid plans only | ✅ Paid plans only |
| AI-assisted content generation | ✅ Available on all plans, unlimited use | ✅ Paid plans only, limited credits available, and additional tokens can be purchased |
| Social listening | ❌ | ✅ Available at an additional cost |
| Influencer marketing | ❌ | ✅ Available at an additional cost, separate from social media management plans |
| Website/link-in-bio tool | ✅ All plans | ✅ All plans |
Plans and pricing
Cost can be one of the biggest factors when choosing a social media management tool, with good reason. You need a tool that has the features you need at a price that makes sense for your brand or business.
Buffer pricing
- Free plan: $0 for up to three social media accounts/channels
- Essentials plan: $6 per channel per month (or $5 per channel paid annually) for one user account
- Team plan: $12 per channel per month (or $10 per channel paid annually) with unlimited team members
See Buffer’s full pricing guide here →
Buffer provides complete flexibility when choosing channels. You can select the exact channels you need and only pay for those channels, so you're only paying for what you actually use.
Later pricing
- Free plan: $0 for up to 8 social media channels, 1 per platform
- Starter plan: $25 per month for one user (or $18.75 per month paid annually) and one social set
- Growth plan: $50 per month for two users (or $37.50 per month paid annually) and two social sets
- Scale plan: $110 per month for four users (or $82.50 per month paid annually) and six social sets
See Later’s full pricing guide here →
Later’s listed prices are the minimum for each plan, and the final cost could go up depending on the number of users on your team and the social channels you connect.
Later requires paid users to purchase “social sets.” Each social set includes one account from each supported platform (Instagram, Facebook, Threads, Pinterest, TikTok, LinkedIn, YouTube, and Snapchat).
This bundled approach means you can't pick and choose individual channels. If you only want to connect a Facebook Page and a LinkedIn profile, you're still paying for a full set. And if you need multiple accounts on the same platform, say, two Instagram profiles, you'd need to buy additional social sets, which adds to the cost.
Number of users or seats included
Buffer and Later structure user accounts in different ways. For social media managers especially, it’s worth knowing what each plan includes so you can choose the setup that fits best.
Buffer user accounts
Buffer’s Free and Essentials plans each include one user account, and the Team plan includes unlimited users. This is one of the biggest reasons creators and small teams choose Buffer. Your costs stay predictable no matter how many people you bring in.
Later user accounts
Later’s Starter plan includes one user account. For teams, the Growth plan includes two user accounts, and the Scale plan includes four user accounts. If you need more user accounts, you can purchase additional seats at $5 per user per month ($3.75 per user billed annually) on the team plans.
What this means for you
Buffer and Later price things differently, and those differences can add up, especially as your team or the number of channels grows.
For creators
Later's free plan includes one social set, and you can publish up to 12 posts per channel. There's no basic analytics or inbox to engage with your audience.
If you need multiple accounts on the same platform (e.g., a LinkedIn profile for your personal brand and a LinkedIn page for your business), you’d need the Growth plan, which is priced at $50 per month.
Buffer has a free plan for up to three social media channels, and paid plans start at $6 per month per channel.
For teams
Later has a fixed number of users on its plans. If you have two social platforms and two users on your marketing team, Later would cost you $50 per month.
If you need a third channel on the same platform, you’d have to purchase additional social sets. If you need more users, you can upgrade to the next tier or purchase more seats.
Buffer’s pricing is based on channels. For two channels and unlimited users, Buffer would cost $24 monthly.
Free trials
If you're curious to see how these features stack up, both Buffer and Later offer free trials of their plans, letting you test everything out for yourself before you pay.
Buffer free trial: 14 days on Essentials and Teams Plans, and you can use up to three social media channels on the free plan.
Later free trial: 14 days on all plans.
Social media scheduling and planning
Both Buffer and Later offer plenty of features to easily schedule posts across multiple platforms from a single dashboard.
Let's look at them in more depth.
Available channels
Here's a breakdown of the various social media platforms Buffer and Later support.
| Buffer | Later | |
|---|---|---|
| ✅ Pages and Groups | ✅ Pages only | |
| ✅ Creator, Business, and Personal profiles | ✅ Business and Creator Profiles only | |
| TikTok | ✅ | ✅ |
| YouTube Shorts | ✅ | ✅ |
| ✅ | ✅ | |
| X/Twitter | ✅ | ❌ |
| Threads | ✅ | ✅ |
| ✅ | ✅ | |
| Bluesky | ✅ | ❌ |
| Mastodon | ✅ | ❌ |
| Google Business Profile | ✅ | ❌ |
| Snapchat | ❌ | ✅ |
| Total platforms supported | 11 | 8 |
Creating and scheduling posts
Both Buffer and Later make it easy to draft and schedule content to multiple social media accounts at the same time. You can customize captions or images for each network as you go, and both tools let you set up predefined time slots so you don't have to manually pick a posting time for every single post.
It's worth knowing that some platforms (Instagram in particular) have API-level limitations that can affect how posts are published. Depending on the post type and your account type (business, creator, or personal), you may occasionally need to use notification-based publishing instead of full auto-publish. This applies regardless of which scheduling tool you use.
Beyond these basics, there are some differences in how Buffer and Later work at this stage of your workflow.
Number of scheduled posts
Buffer supports scheduling 10 posts at a time per channel on the free plan and unlimited scheduling on all paid plans. You can have as many posts in your drafts as you'd like.
Later has limits on the number of posts you can schedule, even on paid plans. The Starter plan lets you schedule 30 posts per profile per month, and the Growth plan lets you schedule 180. Unlimited scheduling is available on the Scale plan.
Captions and hashtags
Later includes a feature that lets you save captions, which can be handy if you frequently reuse announcements, reminders, or hashtags. You can also get hashtag suggestions, which are generated based on the text of your post.
Buffer has a dedicated hashtag manager, where you can save and organize groups of hashtags to add to your posts quickly. There's also a free Instagram hashtag generator available to everyone, even if you don't have a Buffer account.
Bulk content posting
If you’re planning content at scale, Buffer supports bulk scheduling of up to 100 posts at a time from a CSV file on paid plans. If you plan content in spreadsheets or manage campaigns at scale, you can upload an entire content calendar in minutes rather than scheduling posts individually.
Later doesn’t support bulk scheduling via a CSV, so there’s more manual work involved to schedule larger campaigns.
Channel groups
Buffer's channel groups let you save frequently used combinations of social accounts and publish to them simultaneously. For example, you could create a "Company Accounts" group containing Facebook, LinkedIn, and Threads, then schedule to all three with one click.
Later offers channel grouping features through its social sets. Social sets group specific social profiles tied to a single brand or client, which allows you to schedule one post across multiple channels at the same time.
First comment scheduling
Buffer supports scheduling a first comment on Instagram, Facebook, and LinkedIn posts for paid plans. Later supports first comment scheduling only on Instagram.
Instagram-specific features
Later offers a visual planner you can use on all platforms, which helps you see your Instagram grid (and Pinterest) before you publish. You can drag images from the media library onto the calendar, then add captions directly from there.
Buffer has an Instagram grid preview feature on all plans as well, but there’s no drag and drop directly onto the calendar.
There are also some differences when it comes to posting on Instagram. Later doesn’t support publishing to personal profiles, and Instagram Stories can only be auto-published for business accounts.
If you have a creator profile, you’ll need to use notification publishing for stories. Later’s Android app isn’t available in all countries, so that could pose a challenge for some creators.
Buffer provides more options for Instagram publishing. It supports posting to personal profiles through notifications on the mobile app, and you can post automatically to both creator and business profiles.
AI features
Both Buffer and Later offer AI tools to speed up content creation, but the biggest difference is access. Buffer includes unlimited AI usage on every plan (including the free one), while Later ties its AI features to paid plans with a credit-based system.
Buffer
Buffer’s AI Assistant is available without limits on all plans, including the free one. You can generate fresh ideas whenever you need them, draft or refine posts or captions, and even repurpose content across multiple social media platforms without worrying about running out of credits.
For creators or teams posting regularly, this removes the risk of hitting a ceiling in the middle of a campaign.
Later
Later offers its AI-powered Ideas tool on paid plans, with a credit system that helps manage how many ideas you can create each month. The number of credits you get depends on your plan, and you spend one credit to generate a caption or three content ideas.
Once those credits are used up, you’ll need to wait until the next month or purchase additional credits.
Capturing ideas and planning content
A great idea for a post can strike at any time, and both Buffer and Later give you a dedicated space to save these ideas so they don't get lost.
Buffer
The Create Space is an ideas hub where you can collect and organize anything you might want to turn into a post later. Here's what you can do with it:
- Save and organize ideas: Collect notes, text snippets, links, and media, then tag and sort them on a flexible, Kanban-style board.
- Get started faster: Built-in template library and AI Assistant.
- Clip inspiration from the web: Browser extension for Chrome, Safari, Opera, Firefox, and Edge.
- Curate content with feeds: Automatically pulls content from RSS feeds, blogs, and YouTube channels into your workspace.
Later
Later’s idea space leans heavily on AI to get you going. You start by providing a description of your brand, and the AI will generate content pillars (which you can edit) and a few initial post ideas for you.
From that point, you can continue to use the AI to generate more ideas or add your own thoughts to these pillars.
This gives you a structured starting point, though it’s more narrowly focused on generating prompts than on capturing and organizing the wide variety of ideas and inspiration that might come your way.
Social media engagement
Both Buffer and Later let you manage comments and conversations from a single dashboard, but they differ in who gets access. Buffer's engagement features are available on all plans, including Free. Later's Social Inbox is available on Growth and Scale plans. Starter users can preview the feature but need to upgrade to manage comments and DMs.
Here's how each tool handles engagement.
Buffer
As the name suggests, the Community feature (available on all plans, including Free) helps you build an engaged social media community across multiple accounts. You can reply to comments and mentions quickly from the Community tab right within Buffer, and the AI Assistant even gives you suggestions to kick off the conversation.
You can also save responses to commonly asked questions. This lets you answer these FAQs quickly without rewriting the same message every time.
To help you see how you're doing, you get a comment score for each channel that tracks how fast and consistently you respond. This visibility helps you see where you’re engaging well and where conversations might be slipping.
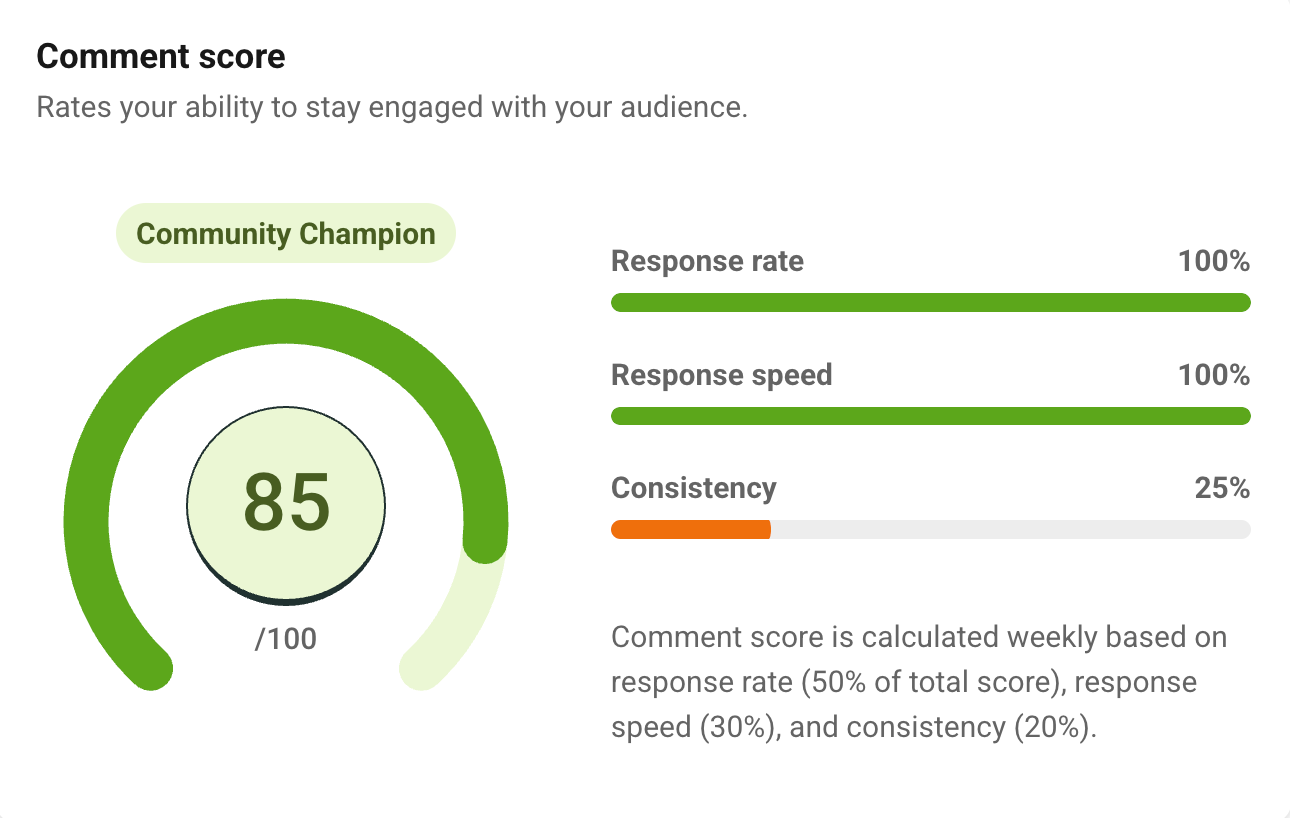
The Community inbox is available on Instagram business and creator accounts, Facebook Pages, Threads, Bluesky, LinkedIn profiles and pages, X/Twitter, Google Business Profiles, TikTok, YouTube, and Mastodon.
Later
The social inbox in Later gathers your Instagram and Facebook DMs and comments, along with TikTok comments, in one space. It has a useful feature that lets you hide comments directly from the inbox, which removes them from view on the original platform — handy when you’re dealing with spam or inappropriate replies.
The social inbox is only available on team plans. Solo users on the Free or Starter plans aren't able to use it to engage with their audience.
Later also offers a social listening tool to help you understand the sentiment around your brand. It finds brand mentions, highlights trending topics, and provides competitive benchmarking to see how you stack up against other brands in your industry.
Social listening is only available as a paid add-on for users on the Scale plan, and it comes at an additional cost that Later says depends on “each brand’s unique needs and goals.”
Social media analytics and insights
Social media analytics tools give you a clearer view of how your content performs, helping you understand what's working and where to adjust.
Buffer and Later both provide analytics, but they differ in two important ways: which plans include them, and which platforms they cover. Buffer offers meaningful insights on all plans (including free) and advanced analytics on paid plans. Later reserves most analytics for paid plans, though link-in-bio analytics are available on all tiers.
Buffer’s Insights features
Buffer's Insights gives you a clear picture of how your content is performing across all your connected social channels. Analytics and insights are available on every plan (including the free version), while paid plans unlock more historical data, custom date ranges, advanced reporting, and deeper analysis.
Buffer's Insights provides a unified view of your social performance with the following capabilities:
- Cross-channel dashboard: Compare performance across 10+ platforms (including Mastodon and Bluesky) in one view.
- Granular metrics: Track impressions, reach, engagement, and follower growth per channel.
- Channel grouping: Organize accounts by brand or client for streamlined reporting.
- AI takeaways: Automatically identify patterns and content opportunities without manual data analysis.
Where Insights really stands out is its AI-powered Takeaways. Rather than leaving you to interpret charts and graphs yourself, Takeaways analyze your content and highlight the patterns that matter, including what's working, what isn't, and what you should try next.
You can also generate polished reports for any channel or date range — whether you're sharing results with a client, a manager, or just keeping your own strategy on track.
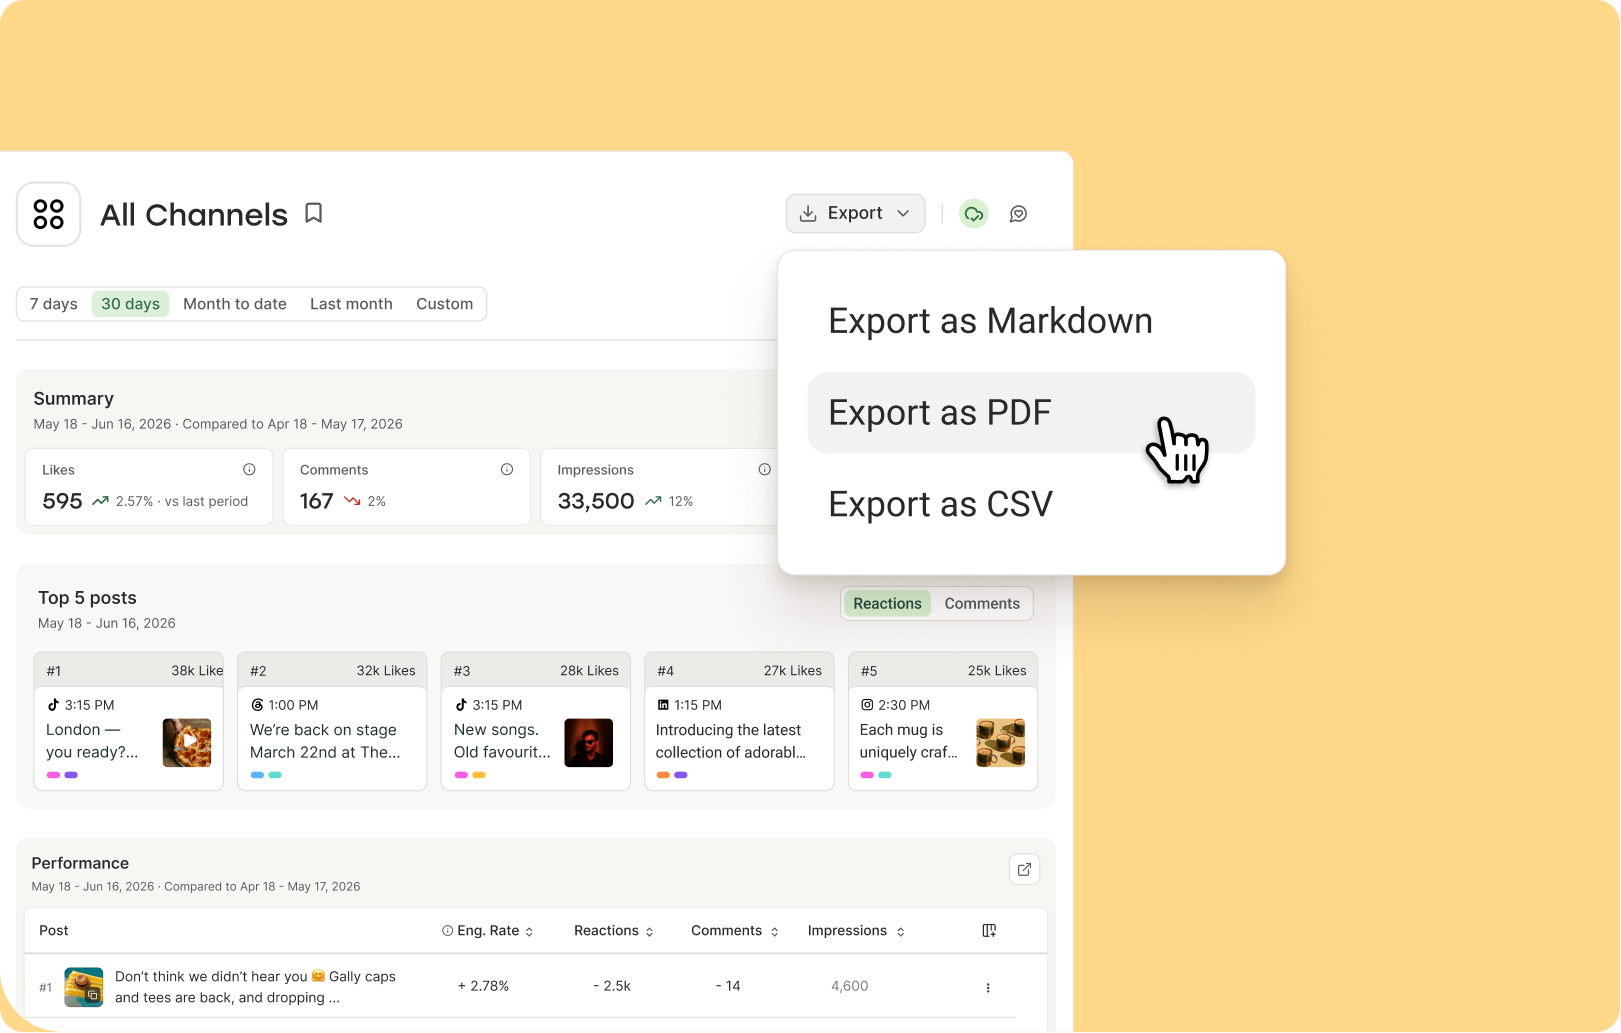
Later’s analytics features
Later’s analytics give you a deep dive into your performance on Instagram Business and Creator profiles, Facebook Pages, TikTok, Threads, and Pinterest accounts.
What you see depends on the platform, but you’ll usually get a channel overview, audience insights, and how your individual posts are doing.
Later gives you some really useful specifics, too. For Instagram, Facebook, TikTok, and Threads, Later breaks down your audience demographics for you — gender, location, and age. And if you're active on Instagram or TikTok, it will even pinpoint when your followers are online and most likely to engage with your content.
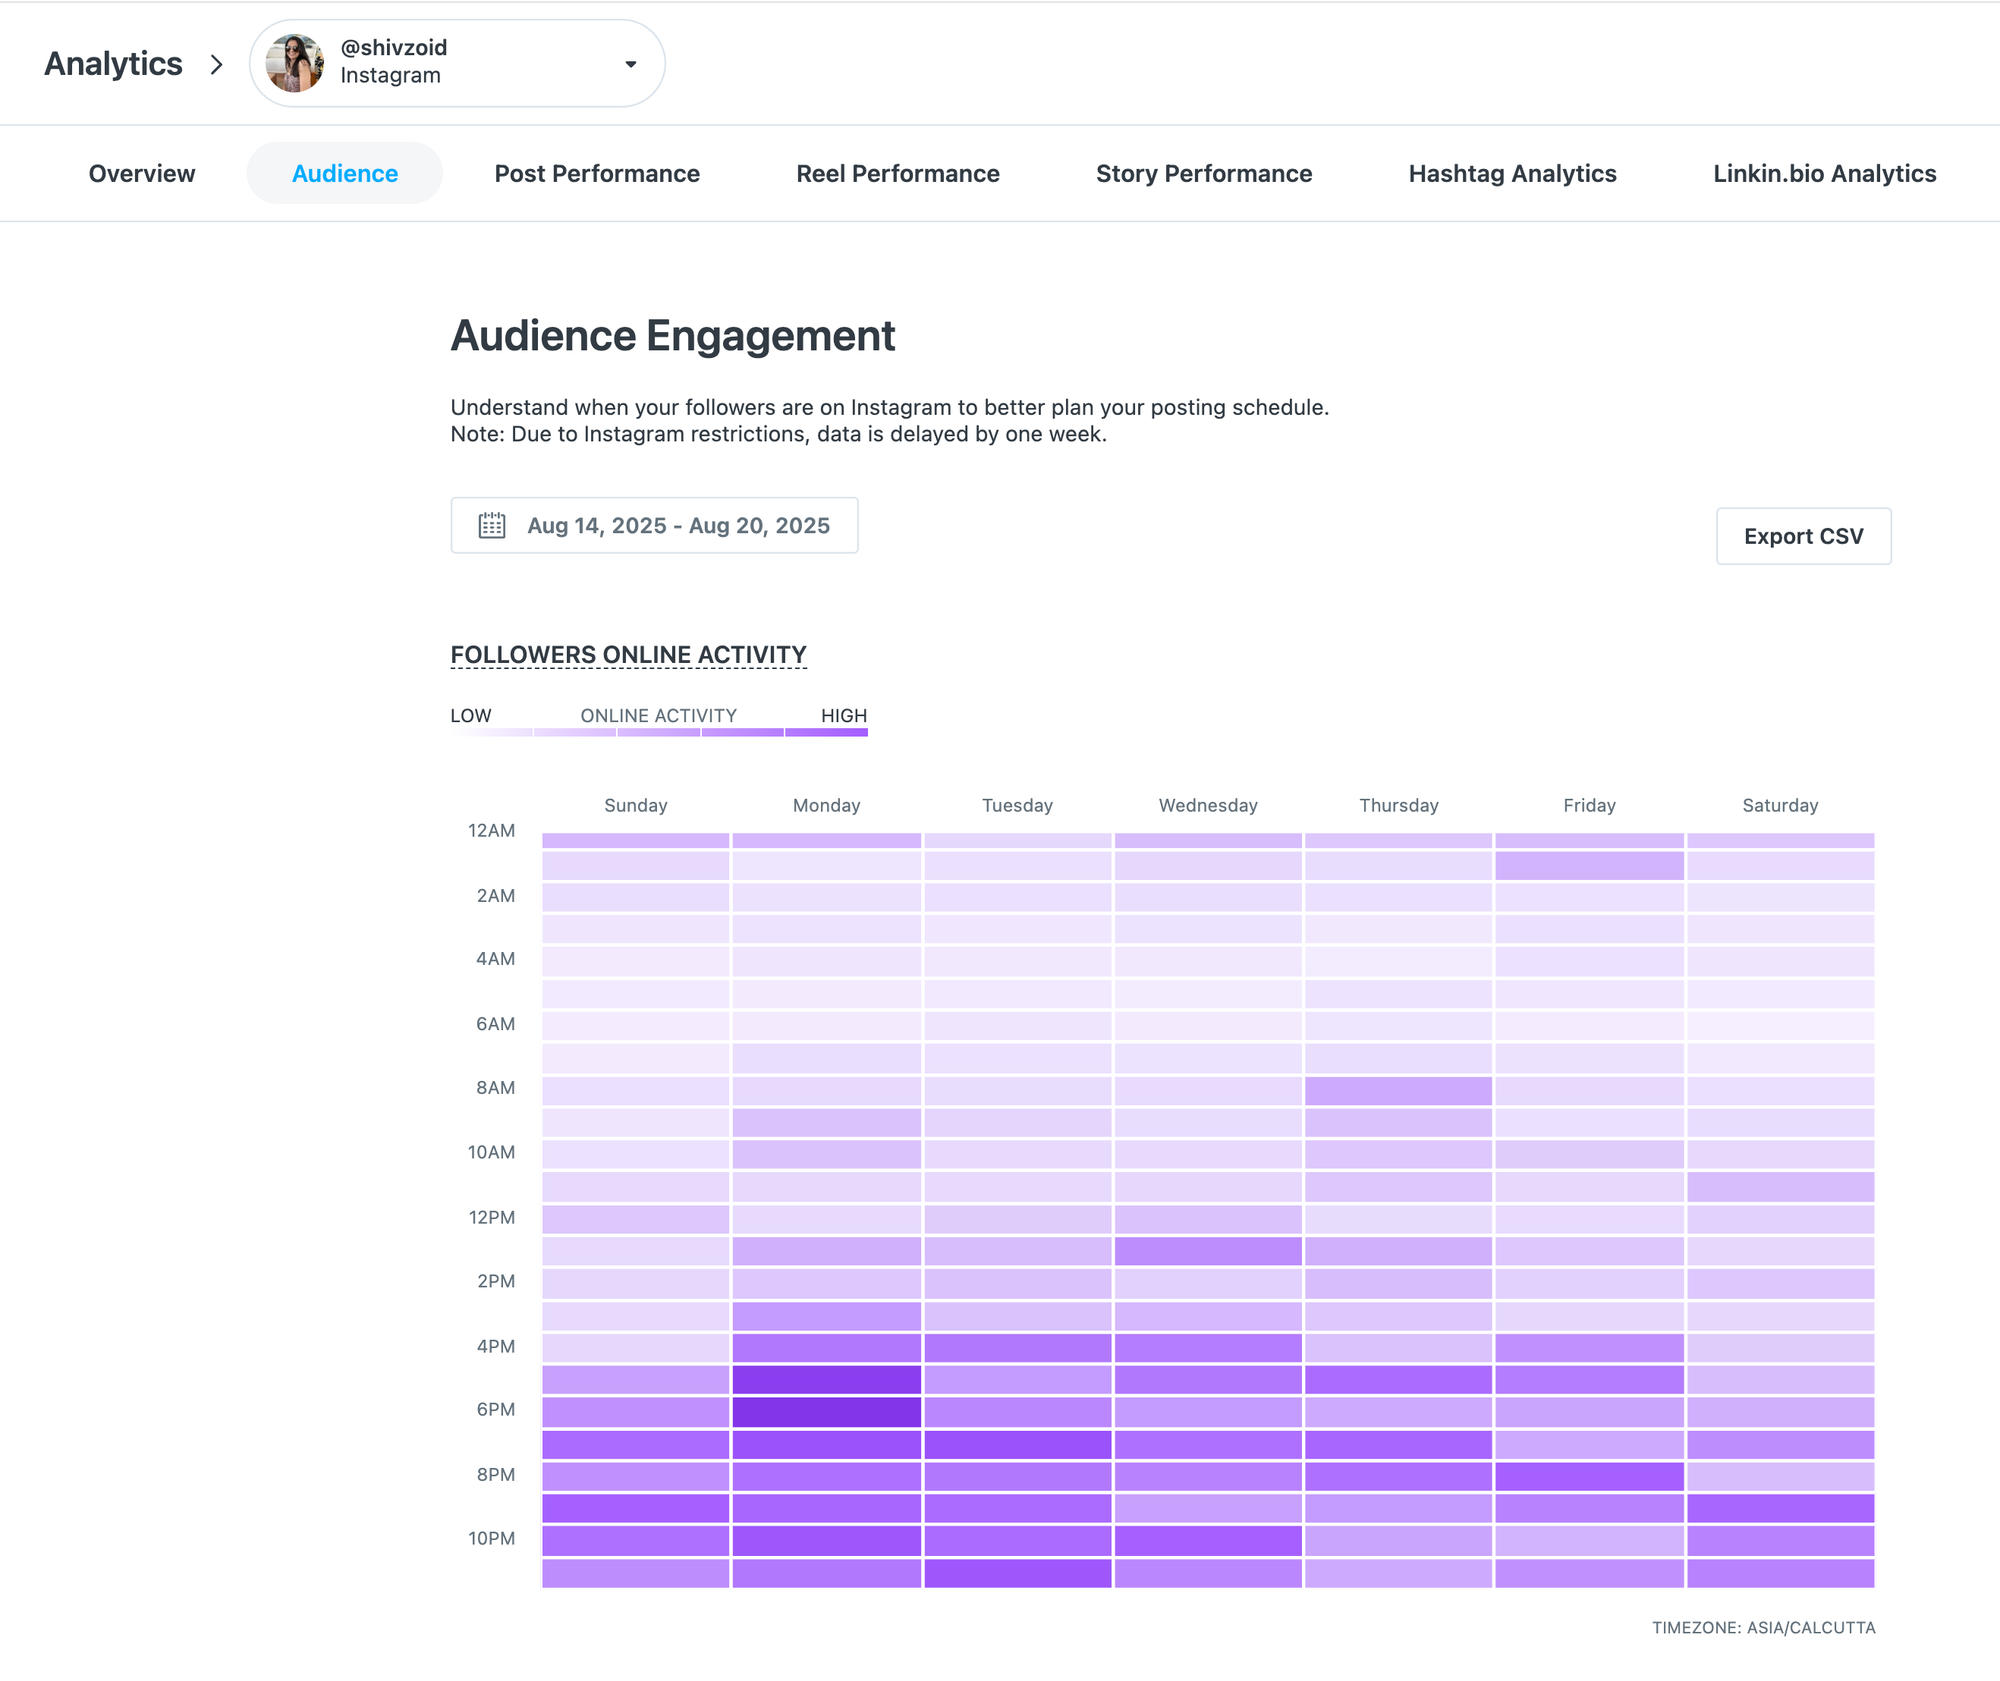
It’s a little trickier if you’d like to see analytics from multiple social media accounts in one view. The feature is available, but only on the highest-tier plan.
Reporting has some restrictions, too. While there’s no option to create and export PDFs directly, you can easily download the data as a CSV file.
For Instagram users, there’s also a neat option to generate a shareable performance report link for the past 90 days. It’s an in-depth analysis of your Instagram performance with metrics for profile growth and audience demographics, as well as post and story data.
Link-in-bio tools
Buffer and Later both offer link-in-bio tools you can share in your social media profile bios. Both let you add links to your social profiles, buttons with links, and an email signup form to build your email list.
Beyond those shared features, there are a few differences worth noting.
Buffer Start Page
There are plenty of ways you can use Buffer’s link-in-bio tool, known as Start Page:
- Share links to websites or pages you'd like to highlight
- Embed YouTube videos and Spotify tracks, playlists, or podcasts
- Add a custom image grid (with links)
- Schedule unique posts specifically for this page
Each of these content types works as a block, and you can add multiple blocks of the same type.
What does this mean? If you'd like to create two image grids — one to show off your latest products, and another to highlight brand collabs — there's no stopping you.
Later's Link in Bio page
Here's how you can use Later's link in bio tool:
- Embed featured media, such as a YouTube video, your latest TikTok or Instagram post, or a custom image
- Add a featured banner to promote your most important link
- Add an image banner with multiple linked items
- Embed posts from your Instagram or TikTok profile with custom links
The image banner works as a carousel, allowing you to display multiple images.
For every other content type, you can only use one at a time. So if you'd like to highlight a YouTube video, you won't be able to add a custom graphic as well.
Later's link-in-bio tool also leans into commerce. There's an integration with affiliate marketing platform Mavely, which lets you convert links into affiliate links right within the tool for supported brands. And if you sell products, Later's Linkin.bio connects with Shopify, so you can tie posts to products and track conversions — a helpful feature if driving sales from your bio is a priority.
You can also add affiliate links and earn a commission from Buffer's Start Page. You’ll just have to copy the link from your affiliate network and paste it into the block.
Team collaboration features
For social media managers, agencies juggling multiple clients, or creators working alongside a consultant, team collaboration tools can make a big difference in how smoothly things run.
Both Buffer and Later have collaboration features that help teams stay aligned and keep content moving without a lot of back-and-forth.
Managing teams in Buffer
You can add an unlimited number of users to the platform on Buffer's Team plan, and set different access and permissions.
You can give users:
- Full posting access: They can schedule posts to be published without another team member's approval.
- Approval required: All their scheduled social media content will need approval from someone with full posting access before it is published.
You can also restrict which accounts they have access to so they can schedule or post to only specific social media accounts. It’s a straightforward scheduling process with just two user roles.
We also offer a public API on all plans, so you can connect Buffer to your existing tools, automation workflows, and processes — and build exactly the setup that works for you.
Managing teams in Later
Later uses access groups to manage who can see and work with social profiles, media libraries, and calendars. This can be useful for teams and agencies working across multiple brands or clients.
That said, the setup can feel inflexible. Each access group is tied to a full social set, and each social set can only include one profile per platform.
So if you need two profiles on the same platform — like a LinkedIn profile and a LinkedIn Page — they can't live in the same social set. You'd have to assign them to separate sets, then assign both sets to the same Access Group. The catch? That locks other Access Groups out of those accounts.
To work around this, you'd need to purchase an additional social set, which adds to the overall cost.
You can add multiple users to an access group, and you can add users to multiple access groups. Like Buffer, you can set roles and permissions for scheduling:
- Reviewer: They can schedule and publish posts without another user's approval, and they can approve other users' posts.
- Member: They can schedule and publish, but they can't approve posts.
- Member (Restricted): All their scheduled content will need approval from someone with Reviewer permissions.
Since Later offers visual content planning, it has a useful shared media library for each Access Group. Users in the group can upload media to the library, and then set labels, make notes, or create alt text. This media can then be dragged and dropped into the calendar to easily schedule.
There’s no equivalent in Buffer, but you could use images saved in the Create Space as the starting point for a post.
Influencer marketing features
In addition to its social media management tools, Later also has a separate product built for influencer marketing. Brands and agencies can use it to run campaigns, find and manage influencer relationships, and measure results.
There are a few extras too, like a Shopify integration that makes it easy to send products to influencers, or the option to get creative support from Later’s team.
It’s separate from the social media management platform, and pricing isn’t listed upfront.
Creators using Later’s social media scheduling tools get access to a Creator hub. You can put together a media kit, apply to campaigns, and manage collaborations, all included in your existing plan.
At Buffer, we don't offer influencer marketing tools. Our focus is on helping creators, small businesses, and solopreneurs grow their presence in a way that's sustainable. Publishing, engagement, analytics, and insights are all built in, so you can stay focused on what matters: showing up consistently and building a real audience.
Which tool is right for you?
Buffer and Later both have plenty of features to help you manage your social media, so the right choice really comes down to what matters most to you.
They aren’t identical tools, and the main differences show up in pricing, flexibility, and the features included on each plan. Here's a quick guide to help you decide.
Buffer might be the better fit if you:
- Want a simple, flexible tool that's easy to get started with
- Manage multiple platforms and want to pay only for the channels you actually use
- Need support for platforms like X/Twitter, Bluesky, Mastodon, or Google Business
- Want unlimited AI-assisted content creation on every plan, including free
- Have a growing team and want unlimited users without per-seat pricing
Later might be the better fit if you:
- Focus primarily on visual platforms like Instagram and TikTok
- Want a drag-and-drop visual planner and Instagram grid preview
- Need social listening or influencer marketing tools (available as paid add-ons)
- Post to Snapchat and need scheduling support for it
If you’re on the fence (or you’ve decided to give Buffer a go) and have questions, our team is always happy to help. You can reach out to us at hello@buffer.com, and someone from our global team will be on hand to answer your questions.
Sign up today to use our free plan or to test Buffer’s paid plans for free.
FAQ on Buffer vs. Later
What are Buffer and Later?
Buffer and Later are social media management tools that let you schedule posts, track performance, and manage multiple accounts from one place.
Buffer offers flexible, channel-based scheduling across a wide range of platforms with a free plan that supports up to three social media channels. Later leans into visual content planning, with a drag-and-drop calendar and features built around Instagram and TikTok workflows.
What's the difference between Buffer and Later?
Buffer is built for simple, flexible cross-platform publishing, while Later is built around visual content planning with a focus on Instagram and TikTok.
In practice, that means Buffer offers channel-based pricing, support for more platforms (11 vs. eight), unlimited AI tools on every plan, and features like bulk scheduling and channel groups.
Later leans into visual-first workflows with a drag-and-drop calendar, Instagram grid preview, and optional add-ons for influencer marketing, social listening, and commerce.
What social media platforms do Buffer and Later support?
Buffer connects to 11 platforms: Instagram, Facebook, X/Twitter, LinkedIn, TikTok, Pinterest, Google Business, Mastodon, YouTube, Threads, and Bluesky.
Later supports eight: Instagram, Facebook, Threads, Pinterest, TikTok, LinkedIn, YouTube, and Snapchat.
The key differences: Buffer includes X/Twitter, Bluesky, Mastodon, and Google Business, none of which Later supports. Later includes Snapchat, which Buffer doesn't support.
Do Buffer and Later offer free trials?
Both tools offer a 14-day free trial on their paid plans. Buffer also has a permanent free plan that supports up to three social media channels, with 10 scheduled posts per channel and unlimited access to the AI Assistant.
More social media marketing resources
- The 11 Best Social Media Management Tools, Tried + Tested
- 9 Tools for Social Media Automation (+ Automation Pro Tips)
- The Best Social Media APIs for Developers + Vibe Coders
- 8 Best Free Hashtag Generators
- The Top 10 AI Writing Tools I Recommend as a Professional Writer
- The 21 Best Social Media Marketing Tools to Try
- The 11 Best Social Media Analytics + Reporting Tools
The first time I opened Meta Ads Manager, I closed it again within about 90 seconds. I consider myself a pretty tech-savvy person (love a new tool, I do), but even I found all the buttons and options overwhelming.
Good news, though: I figured it out, and you can too — promise. It isn't actually difficult once you know the correct order for things. Plus: running Facebook ads is seriously worth it, if that's where your audience hangs out. (With more than 3 billion users on the platform, it probably is.)
To run Facebook ads, you create a Meta Ads Manager account (you'll need a Facebook Page and a verified payment method), pick a buying type and a campaign objective, set your budget and schedule, choose who sees the ad and where it appears, build the creative, then publish it for review. Everything hangs off three layers — campaign, then ad set, then the ad itself.
OK, that might sound like a lot, but we got this. I'm going to walk you through it, step-by-step.
Key takeaways
- Massive reach: Facebook gives advertisers access to billions of people worldwide.
- Precision targeting: Advertisers can target users based on specific demographics, behaviors, and life events, or use Meta Advantage+ AI for automated targeting.
- Centralized management: All campaigns are managed through Meta Ads Manager, requiring a verified payment method and a Facebook Page.
- Flexible budgeting: You can set daily or lifetime budgets, with a minimum of $1 per day per ad set.
- Real-time tracking: Use the Meta Pixel and Conversions API to track website conversions and adjust campaigns based on live performance data.
Jump to a section:
Why advertise on Facebook?
Facebook advertising is worth the setup time for one reason: the targeting. You can reach people by life event, job history, or recent purchase behavior, which almost no other platform offers.
It also solves a problem that organic posting can't. The Facebook algorithm decides who sees your page content, and that decision isn't yours to make. But paid reach is another story entirely.
Target customers accurately
Facebook has tons of user data, and you can tap into it when targeting your audience.
When creating a Facebook ad, you can get specific with demographics about Facebook users, like gender, location, and age. Where Facebook differentiates itself from other platforms with ads, though, is through lifestyle-based targeting options, like:
- Interests
- Behaviors (like recent purchases)
- Education and job history
- Income (depending on location)
- Major life events
- Spoken languages
Don't want to build the audience yourself? Meta's Meta Advantage+ features help to "maximize performance by using AI to optimize campaigns in real time and match ads to the people most likely to take action."
Get powerful results
Meta Ads Manager takes a couple of sessions to get comfortable with, and most campaigns start delivering impressions within a few hours.
Reach billions across Facebook and Instagram
Because Meta owns both Facebook and Instagram, their platforms are easily integrated. This means that ads can be run simultaneously on both platforms, giving you access to even more social users, even if you aren't active on Instagram.
That's unusual. On most social media platforms, you're buying reach on one network at a time.
Track ad performance in real time
While Meta got rid of its full Facebook Analytics platform in 2021, it still has excellent resources for understanding ad performance, including reach, engagement, conversions, and more metrics. This data is updated in real time, so you can adjust your campaigns based on performance.
Another significant benefit of Facebook's current analytics is the ability to add the Meta Pixel to your website. Most content management platforms allow you to easily add this piece of code to your website and track the effectiveness of your Facebook ads. You can monitor user behavior and create specific target audiences for future Facebook advertising campaigns.
Define your advertising goals before you start
Decide what success looks like before you open Ads Manager, because the objective you pick in step 3 locks in what Facebook optimizes for.
If you want app downloads, pick a number. If it's leads you're after, decide what a useful email list actually looks like. That target is what makes the objective choice obvious when you get to it, and your ad objective should follow your wider social media strategy rather than the other way round.
How to run Facebook ads: step by step
All of Facebook's ad campaigns run through Meta Ads Manager, so learning how to run ads on Facebook means getting to grips with it. The good news is that once you get the hang of it, it's pretty straightforward to use.
Here's the shape of the whole process before we get into the detail:
| Stage | Steps | What you're deciding |
|---|---|---|
| Set up | 1–2 | Ad account access, buying type |
| Campaign | 3–8 | Objective, name, ad category, A/B test, budget optimization, performance goal |
| Ad set | 9–11 | Budget and schedule, audience, placements |
| Ad | 12–16 | Social accounts, format, media and copy, destination, publish |
We'll walk through the desktop version here, but don't worry, we'll cover mobile options later in this guide.
What you need before you start
When you sign up for Facebook, you're given a personal ad account ID by default. You can see this ID by going to Ads Manager and looking in the upper left-hand corner.
To use Meta Ads Manager, you need a verified payment method and:
- A Facebook Page or
- To be an admin, editor, or advertiser on someone else's page
If you do not have a page for your business, you can follow Facebook's steps to set one up. Any page you create will be automatically given an ad account.
If there is a page you wish to advertise for created by someone else, you need to ask the page admin to assign you an admin, editor, or advertiser role on the page.
If you already have an existing ad account for your page but want to start a new one, you'll need a Business Manager account. You can create a new ad account once you sign up for Business Manager.
Here's a time-saver: bookmark this direct link to Meta Ads Manager so you can jump right in whenever you need it. You will be brought directly into the Meta Ads Manager for your personal ad account. If you manage multiple ad accounts, use the account drop-down menu to pick the right account.
To navigate to Ads Manager right from your business page, head to the left sidebar and click on the Ad Center drop-down arrow of any Facebook Page, then choose All Ads from the drop-down. At the bottom of that page is an option to click Ads Manager.
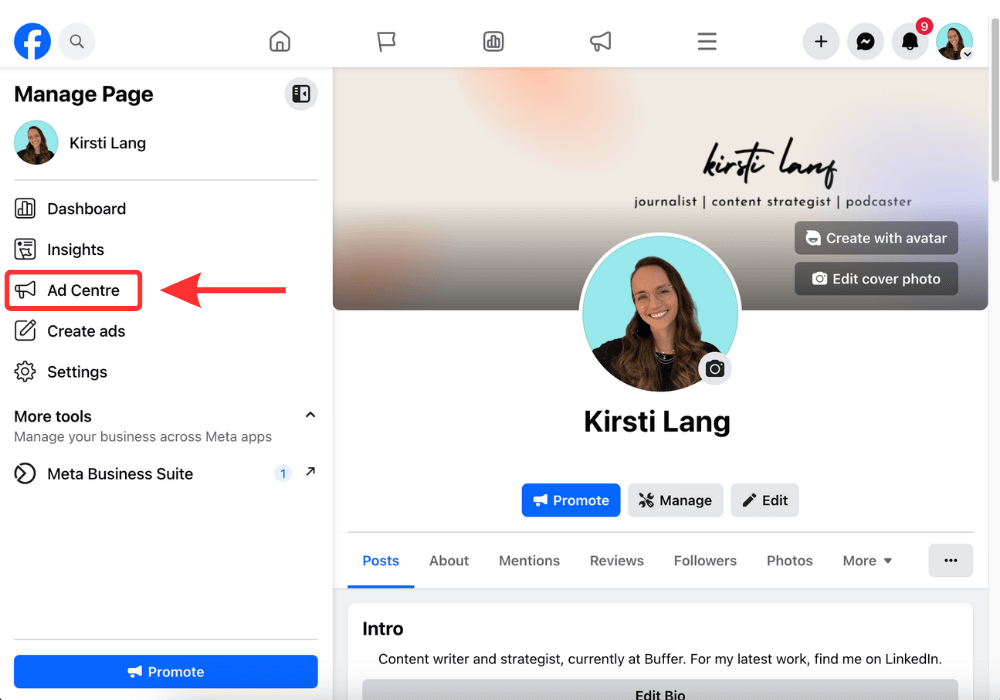
Click on Facebook's Ads Manager to get started. You will be brought to your Facebook Ad Accounts page, where there will be a quick overview of your ad account(s). If you have access to more than one ad account, select the account where you wish to run ads.
If you'd rather use a mobile device, a Meta Ads Manager app is available for Apple and Android.
1. Create ad
Click the green Create button to get started with your first ad.
Meta will take you to a page where you will be prompted to choose a buying type and campaign objective.
2. Choose your buying type
Meta's ads have two different buying types: Auction and Reservation. Here's how they compare:
| Control | Auction | Reservation |
|---|---|---|
| Control | More flexibility, less predictable results | Plan and buy in advance, predictable delivery |
| Objectives available | All six | Awareness and engagement only |
| Placements | Facebook, Messenger, Instagram, Meta Audience Network | Facebook and Instagram |
| Frequency control | Limited | Full control |
Not sure which one to pick? Meta's guidance here can help you figure out what works best for your needs.
3. Choose your campaign objective
Meta offers six campaign objectives. Pick the one that matches what you actually want the ad to achieve.
| Objective | Best for | Optimizes toward |
|---|---|---|
| Awareness | Being remembered by a broad audience | Reach, brand awareness, video views, store location awareness |
| Traffic | Sending people somewhere specific | Link clicks, landing page views, calls |
| Engagement | Conversations and interactions | Messages, likes, comments, video views, in-app purchases |
| Leads | Collecting contact details | Form submissions, conversions, calls |
| App promotion | New installs or re-engagement | App installs, app events |
| Sales | Purchases | Conversions, catalog sales, in-app sales |
In more detail:
- Awareness: Your ad will be shown to people most likely to remember it. According to Meta, this goal type is good for reach, brand awareness, video views, and store location awareness.
- Traffic: This ad type will send people to a specific destination, like your website, an event, or a download link. It's best for link clicks, landing page views, and calls.
- Engagement: This ad type will make you more likely to receive messages, in-app purchases, likes, and comments. It's also great for video views, conversions, and calls.
- Leads: Your ad may help you collect info from potential customers. It's good for forms, conversions, and calls.
- App promotion: Get more users for your app or encourage current users to keep using it.
- Sales: Find people who are likely to buy your product or service. This route is great for conversions and in-app sales.
4. Pick a name for your ad campaign
Once you've selected your marketing objective, you'll be asked to name your campaign. Be sure to make your campaign name recognizable to everyone working on the ads.
5. Declare your ad category
Different regions have different advertising rules, particularly when it comes to categories like credit, employment, housing, social issues, elections, or politics. If your ad falls into one of these buckets, it's worthwhile declaring it here to ensure it remains compliant with Facebook's and various countries' advertising standards.
6. Decide whether to turn on A/B testing
At this point in the process, you'll be able to turn on the A/B test feature, where you can try out different images, text, audiences, or placements to maximize your ad performance. The full setup for this will come later in the process — this toggle just turns it on.
7. Decide whether to use Advantage+ campaign budget
This option is available only if you chose Auction as your buying type. It means Facebook will automatically find the best available opportunities for results across your ad sets and distribute your campaign budget in real time to get those results.
Advantage+ campaign budget (formerly called campaign budget optimization) is best suited for campaigns with at least two ad sets.
8. Set your performance goal
Facebook now allows you to get specific about the ultimate goals of your ad. Each campaign goal mentioned in step 3 has a separate set of targets. For example, Awareness has everything from the broader 'Maximize reach' to the hyper-specific 'Maximize two-second continuous video views.'
If you're new to Facebook ads, it's worth trialing the broader options before zeroing in on targets that lend themselves to your goals and the content you share.
9. Define your ad spend and schedule
When you set an ad budget, it's important to remember that this figure represents the maximum amount of money you want to spend. You can set your budget per day or as a total amount for the campaign.
- Daily: A daily budget sets a limit on what you spend each day on your ads. Facebook will use your set criteria to find the right place and time to show your ad to your target audience. Once your budget is reached, the ads stop running for the day. The cycle starts again on the next day.
- Lifetime: A lifetime budget is the maximum you'll spend over the entire time you run your ad campaign. You give Facebook a number and an end date, and it will spend the money based on ad performance. Once your budget is reached, the campaign ends.
Hit the Next button to go to the next part of the setup.
10. Customize your target audience
Meta recently made some changes to its audience customization settings in Ads Manager, which is why things may look a little different nowadays if you're a regular user.
The main audience panel now shows three controls by default: location, age, and language. Detailed demographic, interest, and behavior targeting sits behind the Advantage+ audience settings rather than on the first screen.
It helps to know which of Meta's three audience types you're building:
- Saved audiences: Built from scratch using location, interests, behaviors, and demographics. Save one and you can reuse it across campaigns.
- Custom audiences: People who already know you: your customer list, people who've visited your website, people who've engaged with previous ads.
- Lookalike audiences: New people who resemble an existing custom audience. You give Facebook a source audience and it finds more like them.
If you want to get more specific than the default three controls, the Meta Advantage+ audience feature does the ad targeting for you.
Here's how it works:
Meta’s AI uses numerous pieces of information to find your audience, evolving constantly as it learns. For example:
- Past conversions
- Meta Pixel data
- Interactions with previous ads
Good news for the Meta Ads Manager veterans who know their target audiences inside out and want to reach them. As you can see, your custom audiences are still available in the ad creation wizard, and you can even switch back to the original audience options.
11. Choose your ad placements
Ad placement defines where your ad appears for your target audience. Meta has made similar changes to its placement tools, with the AI-powered Advantage+ placements to help maximize your ad reach.
However, you can still decide on ad placement yourself by selecting the Manual placements option in the screenshots above. When you do, you'll see the options below become available to you:
There are several options across the Meta suite of social platforms:
- Feeds: Get high visibility for your business with ads in feeds.
- Stories, status, and reels: Tell a rich, visual story with immersive, full-screen vertical ads
- In-stream: Quickly capture people's attention while they're watching videos.
- Search results: Get visibility for your business as people search.
- Messages: Send offers or updates to people already connected to your business.
- Apps and sites: Expand your reach with ads in external apps and websites
For more, check out Facebook's guide to ad placement.
12. Choose your social accounts
In the next window, you can choose which Meta social media profiles you want the ads to run on.
13. Choose your ad format
Under Ad setup, you'll be able to create a new ad, use an existing post, or use any mock-ups you have in Meta's Creative Hub.
Once you've made that selection, choose whether your ad will feature a single image or video, a carousel (multi-image or video post), or a collection (a group of products that becomes a full-screen experience on mobile).
14. Add your media and copy
Now you upload the files for the format you picked in step 13 — a single image or video, several images for a carousel, or a product set for a collection.
In this area, you can also switch up the ad copy and ad creative you use in each section of the Meta apps, if you want to tailor the experience for each platform.
Lower down in this section, you can choose music for the formats where this is applicable (check out our article on trending Instagram audio to help guide your choice).
You'll also be able to add your ad copy with the various text options in this section — don't forget to include an applicable call-to-action (CTA).
15. Choose your destination
There are four places you can send people when they click your ad: your website, an Instant Experience, a phone call, or a message thread.
Instant Experience is a fast-loading, mobile-optimized experience. These offer a way for Facebook to keep your audience in its app. In other words, they're a simple, dynamic landing page, form, or lookbook you can create with Facebook.
Of course, you can also choose your website link and even add your own UTM tracking parameter.
On top of that, you can send people directly to your inbox in Facebook Messenger, Instagram, or WhatsApp.
16. Publish your ad
To submit your ad, click the Publish button at the bottom right-hand corner of the page.
Once your ad is submitted, Facebook will hold your post so they can review it to make sure it fits the specs and doesn't violate their community guidelines. Expect it to be reviewed within 24 hours. You'll receive a confirmation email from Facebook once the ad is live.
How much does it cost to create a Facebook ad?
Facebook ads run on a budget you set, with a minimum of $1 per day per ad set. Across all industries, the average cost per click is $1.72, according to data from Wordstream.
What you get for that spend varies by industry, from $0.45 per click in apparel to $2.93 in personal services. Here's the full breakdown:
| Industry | Average CPC |
|---|---|
| Apparel | $0.45 |
| Auto | $2.24 |
| B2B | $2.52 |
| Beauty | $1.81 |
| Consumer Services | $3.08 |
| Education | $1.06 |
| Employment & Job Training | $2.72 |
| Finance & Insurance | $3.77 |
| Fitness | $1.90 |
| Home Improvement | $2.93 |
| Healthcare | $1.32 |
| Industrial Services | $2.14 |
| Legal | $1.32 |
| Real Estate | $1.81 |
| Retail | $0.70 |
| Technology | $1.27 |
| Travel & Hospitality | $0.63 |
Get strategic with your Facebook ads
Facebook's A/B split testing tools let you run two versions of an ad side by side and compare the results directly: different images, different copy, different audiences.
For each step above, pausing and thinking back to your goals is helpful. Make sure everything you define and create aligns with your own measure of success. Not sure what your audience wants to see? That's totally normal, and Facebook has tools to help you figure it out.
Two honest caveats before you spend anything. If your product needs a long explanation before anyone would consider buying, Facebook ads are a poor first channel, as the format rewards immediate comprehension. And if you're spending under about $5 a day, expect to gather direction rather than results; the learning phase alone needs more data than a small budget generates in a week.
From there, it's watch and adjust. Give any change three to seven days before you judge it. Looking at results on day one can be tempting, but early performance isn't always enough to tell you whether a campaign will work.
FAQ about advertising on Facebook
How much does it cost to advertise on Facebook?
Facebook ads work on a flexible budget. You can set a daily or lifetime budget and only spend what you’re comfortable with. On average, cost per click (CPC) varies by industry, but many traffic campaigns fall under $1 per click. Your total cost depends on your audience, competition, and goals.
Is $5 a day enough for Facebook ads?
A $5 daily budget can be enough to run a small test, but whether it generates useful results depends on your audience size, objective, conversion event, and cost per result. Give a campaign enough time and data to make a meaningful decision rather than judging it after the first day
Are Facebook ads worth it for small businesses?
They can be, especially if you need predictable reach. Organic posts don’t always reach your full audience, but paid ads let you target specific people based on interests, behaviors, and demographics.
What’s the difference between boosting a post and running a Facebook ad?
Boosting a post is a simplified way to promote existing content directly from your Facebook Page. Running a Facebook ad through Meta Ads Manager gives you more advanced targeting, budget control, placements, and performance tracking.
How long does it take for Facebook ads to work?
Most ads start delivering impressions within hours, but meaningful performance data typically takes a few days. Facebook’s system also goes through a learning phase, where it tests your ad with different users. For best results, allow at least 3–7 days before making major changes.
Do I need a business page to run Facebook ads?
Yes. To run ads through Meta Ads Manager, you need a Facebook Page and a verified payment method. If you’re managing ads for someone else, you’ll need admin, editor, or advertiser access to their page.
How do I target the right audience on Facebook?
You can target by location, age, and language, and use tools like custom audiences or Meta Advantage+ audience to refine delivery. The key is to start with a clear idea of who your ideal customer is, then test and refine based on performance data.
What is Meta Advantage+ in Facebook ads?
Meta Advantage+ uses AI to optimize your audience targeting, placements, and budget distribution automatically. Instead of manually narrowing your audience, Advantage+ analyzes performance data in real time to find people most likely to complete your goal.
How do I measure Facebook ad performance?
Use Meta Ads Manager to track metrics like reach, clicks, conversions, and cost per result. You can use the Meta Pixel and Conversions API to help measure actions people take on your website after interacting with your ads. Focus on metrics tied directly to your campaign goal.
How long does Facebook take to approve ads?
Most ads are reviewed within 24 hours. During this time, Facebook checks your ad for compliance with advertising policies and community standards. You’ll receive a notification once your ad is approved and live.
More Facebook resources
- Inside the Facebook Algorithm: All the Updates You Need to
- How to Get More Followers on Facebook for Free: 10 Tried-and-
- What Is a Good Facebook Engagement Rate? Data From 52 Million+ Posts
- 16 Facebook Statistics to Know
- Facebook Ad Specs + Image Sizes — Fully Updated
- How to Schedule Facebook Posts in 3 Easy Ways (+ Save Hours Every Week)
While it's always a good time to watch TikToks, figuring out the best time to post on TikTok is a little more complicated.
And yet, knowing when to post can make a real difference for content creators and small business owners alike. After all, creating TikToks is tough work (trust me, I know), so it makes sense to give your content the best possible shot when you hit publish.
That's why we analyzed Buffer's data of more than 7.1 million videos, carousels, photos, and text posts to pinpoint exactly when posts tend to get the most engagement on the platform. And we found some patterns.
In this guide, I'll unpack them all: the best times to post, the best day of the week, and which hours are best avoided. Plus, I'll help you find the best time to post on TikTok based on your target audience and goals. Hopefully, this takes some of the guesswork out of deciding when to post and gives your content a better shot at landing in front of the right people's For You Pages.
Key takeaways
- Peak posting time: The single best time to post is Sunday at 9 a.m., followed by Monday at 1 p.m. and Sunday at 1 p.m.
- Best day: Saturday is the top-performing day for TikTok engagement, with Monday and Sunday following close behind.
- Evening advantage: Engagement generally peaks during evening hours (6 p.m.–11 p.m.), with afternoons (12 p.m.–5 p.m.) showing the lowest engagement across most days.
- Personalize your data: Use TikTok Studio Analytics (Followers tab) to find when your specific audience is most active.
Let's dive into what the data shows about the best times to post on TikTok in 2026.
Jump to a section:
- Is there a best time to post on TikTok?
- The best times to post on TikTok
- The best time to post on TikTok at a glance
- The best time to post on TikTok on Monday
- The best time to post on TikTok on Tuesday
- The best time to post on TikTok on Wednesday
- The best time to post on TikTok on Thursday
- The best time to post on TikTok on Friday
- The best time to post on TikTok on Saturday
- The best time to post on TikTok on Sunday
- The best day of the week to post on TikTok
- Get the best times to post on TikTok right in Buffer
- Finding your best time to post on TikTok
- FAQ about the best time to post on TikTok
- More TikTok resources
Is there a best time to post on TikTok?
There isn't one "magic" best time to post on TikTok for every creator, but our study of 7.1 million posts shows clear standout times to try.
To put these numbers together, we looked at the median engagement rate across 7.1 million posts published through Buffer.
These numbers helped us pinpoint some pretty clear patterns in the times of TikTok posts that tend to perform well compared to those that don't.
Why does posting time matter on TikTok?
It comes down to how the TikTok algorithm works. When you publish a TikTok, the platform uses a range of signals to decide who may be interested in it and how widely to recommend it. User interactions (including whether people watch, like, share, comment on, or skip content) can influence those recommendations.
If that initial group engages — especially within the first hour or so — TikTok takes it as a signal that the content is worth pushing to a wider audience on the For You Page. If they don't, the video's reach stays limited.
Posting when your audience is active may give your content a better chance of earning engagement early on, though timing is only one of many factors that can influence performance. If your video lands when people are already scrolling, it's more likely to pick up that early engagement boost, which is what TikTok needs to show it to more people. On the flip side, if you post when your followers are asleep or inactive, your content can get buried before it ever has a chance to gain traction.
But before we get into the numbers, here's an honest note: there's no single best time that'll work for every account on TikTok.
Your ideal posting time depends on your target audience (their location, time zones, and online behaviors), which is why I'll walk you through analyzing your own TikTok data to figure out the best time to post on TikTok for your target audience later in this article.
That said, our data from 7.1 million posts does show clear patterns in when content tends to get more engagement. Our take? Timing isn't a magic bullet, but it can give your content a better starting position, especially when paired with a strong hook and content your audience actually wants to watch.
Experiment with these slots to help you maximize your content potential while growing your following. If you're not sure when to post your content, using our data is a great place to begin.
The best times to post on TikTok
According to our data, the best time to post on TikTok is Sunday at 9 a.m., followed by Monday at 1 p.m., and Sunday at 1 p.m.
Videos, carousels, and text TikTok posts shared during those times tended to get the most engagement of the week, though other slots weren't far behind.
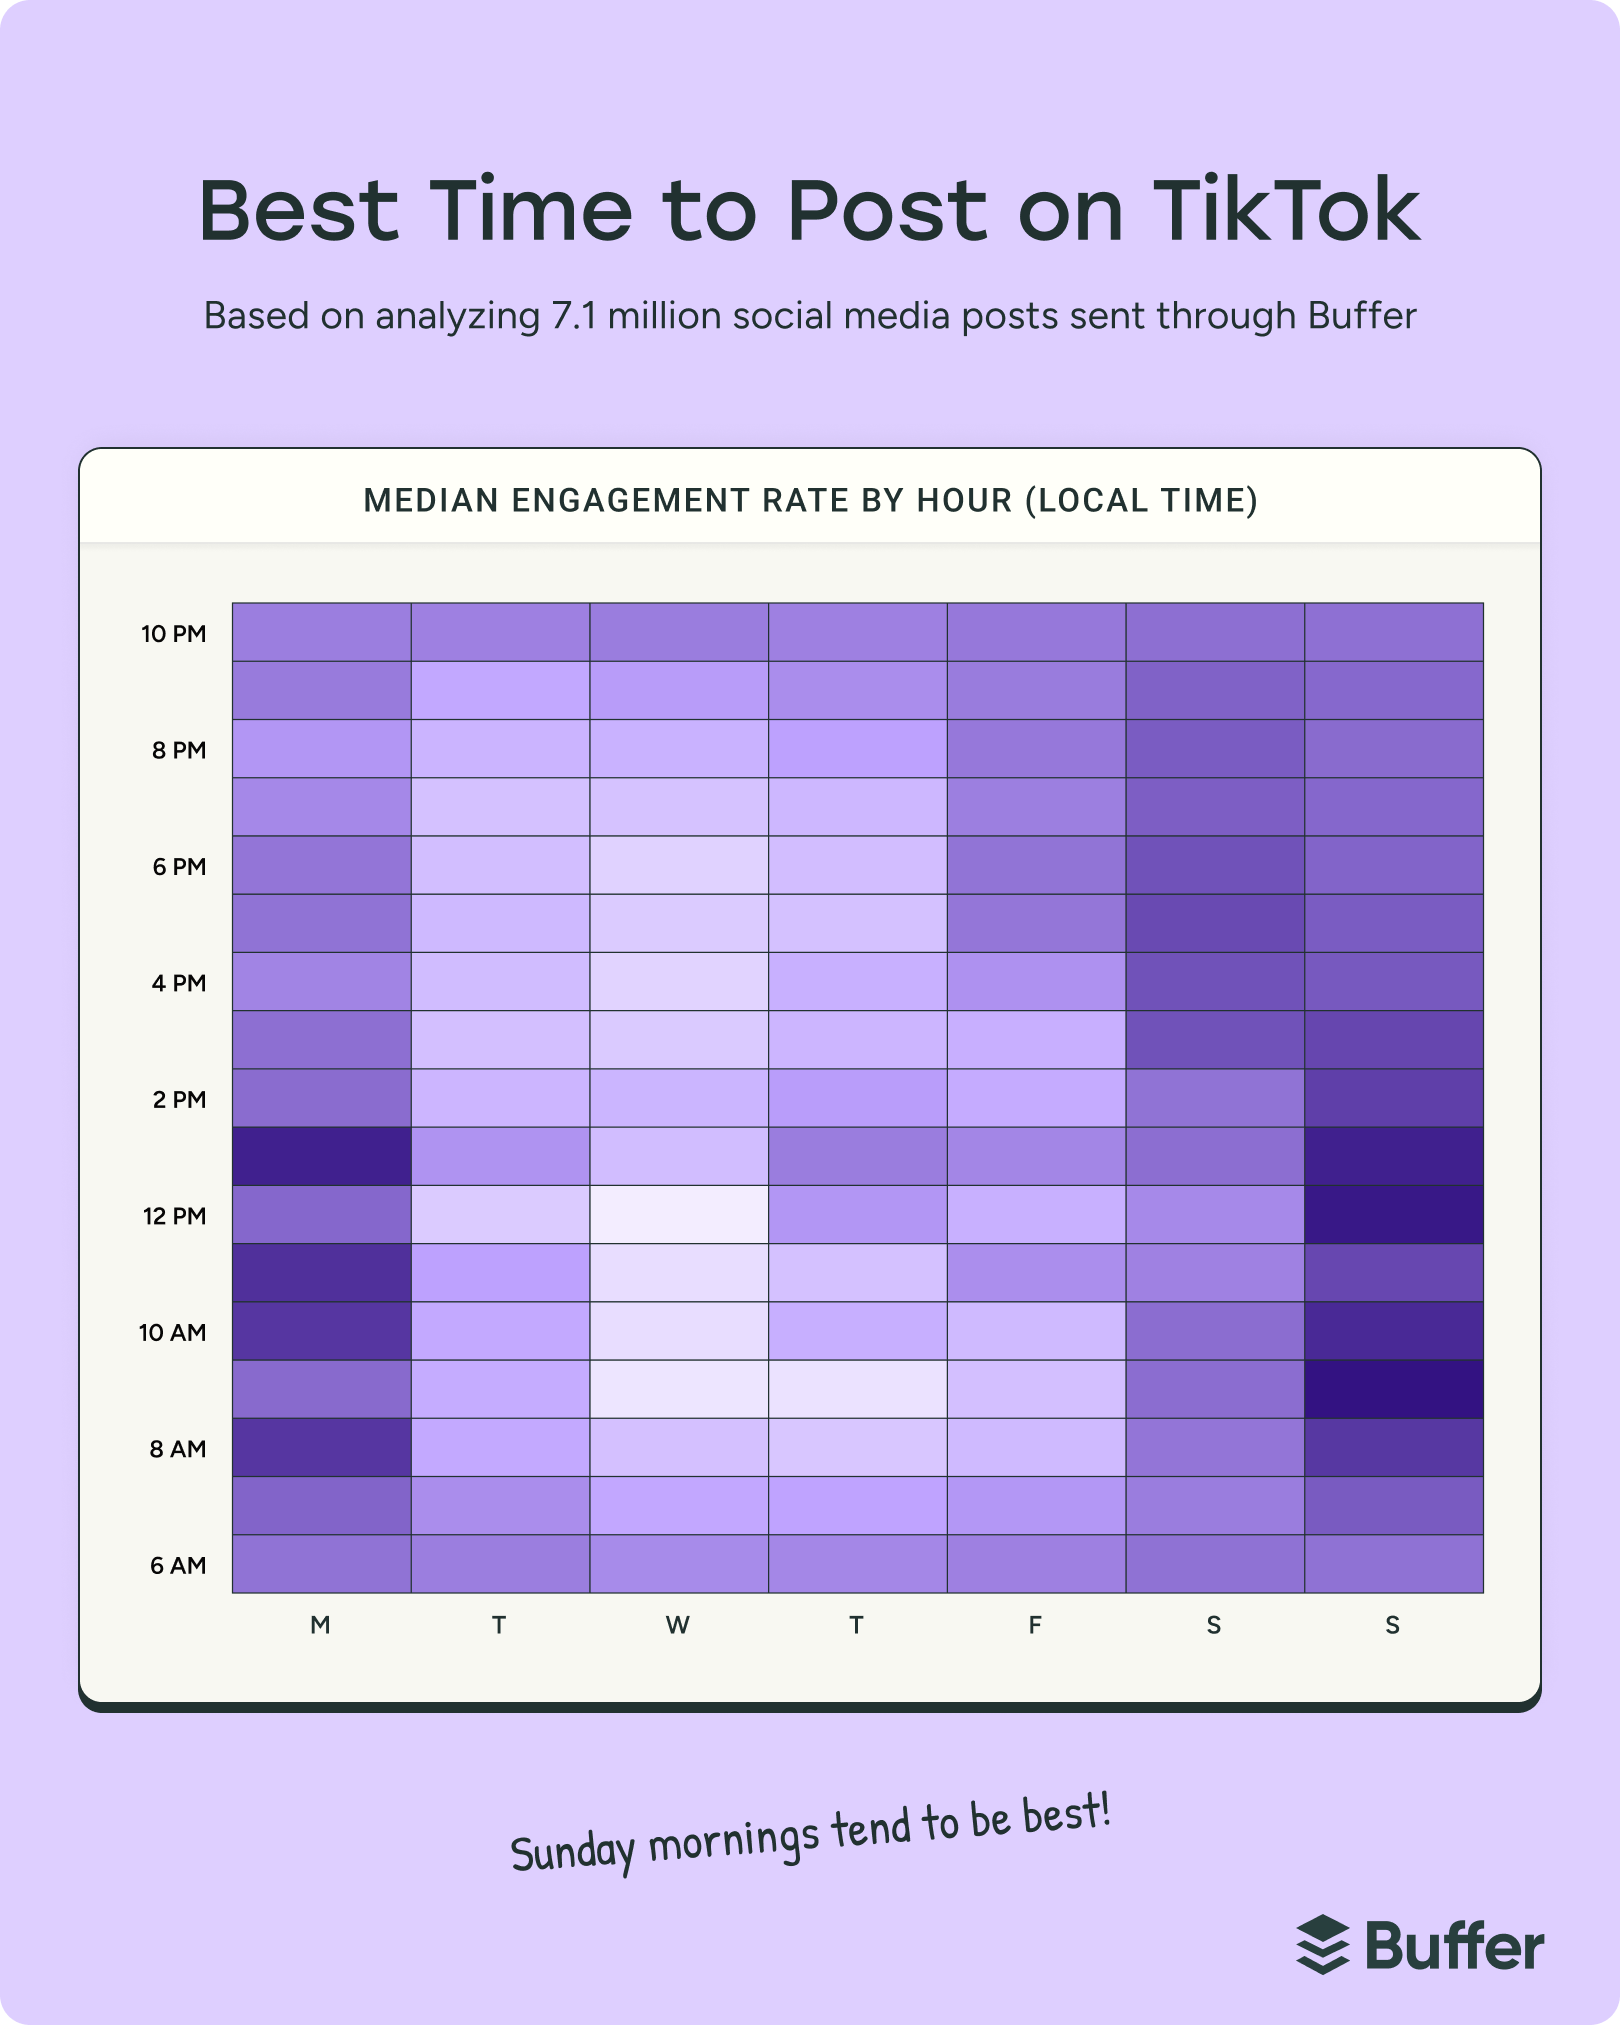
This heatmap shows patterns in the best time to post on TikTok by hour and day. The darkest blocks are the time slots with the most engagement (the best time to post), and the light to white blocks are the time slots with the lowest engagement (times that are probably best avoided).
🌙 Generally speaking, engagement tends to pick up in the evening hours, with peak time slots between 6 p.m. and 11 p.m. Afternoons (12 p.m.–5 p.m.) tend to see lower engagement across most days, though there are pockets of activity worth noting, particularly around lunchtime.
This makes sense when you think about how people consume TikTok. Unlike text-based platforms that you can quickly scan during a meeting, short-form video demands active, sound-on attention. That's something people are more likely to give during a lunch break, on their commute home, or while unwinding on the couch in the evening.
The best time to post on TikTok at a glance
In general, evenings and weekends tend to deliver the best results.
Here's a quick look at the best time to post on TikTok every day of the week. The posting times below are listed in order of performance (so the first time mentioned is the best time for that day, and so on).
| Day of the week | Best time (primary) | Secondary times |
|---|---|---|
| Monday | 1 p.m. | 11 a.m., 8 a.m. |
| Tuesday | 6 a.m. | 10 p.m., 7 a.m. |
| Wednesday | 10 p.m. | 6 a.m., 9 p.m. |
| Thursday | 1 p.m. | 10 p.m., 6 a.m. |
| Friday | 6 p.m. | 10 p.m., 8 p.m. |
| Saturday | 5 p.m. | 4 p.m., 3 p.m. |
| Sunday | 9 a.m. | 1 p.m., 12 p.m. |
The best time to post on TikTok on Monday
The best time to post on TikTok on Monday is 1 p.m., closely followed by 11 a.m., then 8 a.m., according to Buffer data. Monday is one of the strongest days of the week for TikTok engagement, making it a great option if Saturday doesn't work for your schedule.
⏰ When to post on TikTok on Monday: 1 p.m.
The best time to post on TikTok on Tuesday
The best time to post on TikTok on Tuesday is 6 a.m. Videos posted at 10 p.m. received the second-highest median engagement, followed by 7 a.m., so add those into your TikTok posting schedule, too.
⏰ When to post on TikTok on Tuesday: 6 a.m.
The best time to post on TikTok on Wednesday
On Wednesdays, the best time to post on TikTok is 10 p.m., closely followed by 6 a.m., then 9 p.m. Wednesday tends to be quieter overall, so if you're being selective about when you post, you're likely to see stronger results if you post on Saturday or Monday instead.
⏰ When to post on TikTok on Wednesday: 10 p.m.
The best time to post on TikTok on Thursday
The best time to post on TikTok on Thursday is 1 p.m. Videos posted at 10 p.m. received the second-highest median engagement, closely followed by 6 a.m. Like Wednesday, Thursday tends to see lower engagement overall.
⏰ When to post on TikTok on Thursday: 1 p.m.
The best time to post on TikTok on Friday
On Friday, the best time to post on TikTok is 6 p.m. There is another solid posting time at 10 p.m., then 8 p.m.
⏰ When to post on TikTok on Friday: 6 p.m.
The best time to post on TikTok on Saturday
Saturday is the strongest day on TikTok overall, with clear optimal times worth noting. The best time to post on TikTok on Saturday is 5 p.m., followed by 4 p.m., then 3 p.m. That afternoon-to-evening window makes Saturday a great day for batch-creating and scheduling content ahead of time.
⏰ When to post on TikTok on Saturday: 5 p.m.
The best time to post on TikTok on Sunday
The best time to post on TikTok on Sunday is 9 a.m., which is the single best time to post throughout the entire week, so it's worth adding this slot to your regular TikTok posting schedule. Other strong times to post on TikTok on Sunday are 1 p.m. and 12 p.m. This is a great time to use scheduling tools if you prefer to keep weekends free.
⏰ When to post on TikTok on Sunday: 9 a.m.
This is where social media scheduling tools like Buffer shine. Experiment by systematically going through the times on the list above, scheduling a TikTok, and tracking its performance to see what works best for your specific audience.
The best day of the week to post on TikTok
The best day of the week to post on TikTok is Saturday. Overall, videos, carousels, and text TikTok posts shared on Saturday tended to perform the best.
Monday comes in second place, followed closely by Sunday.
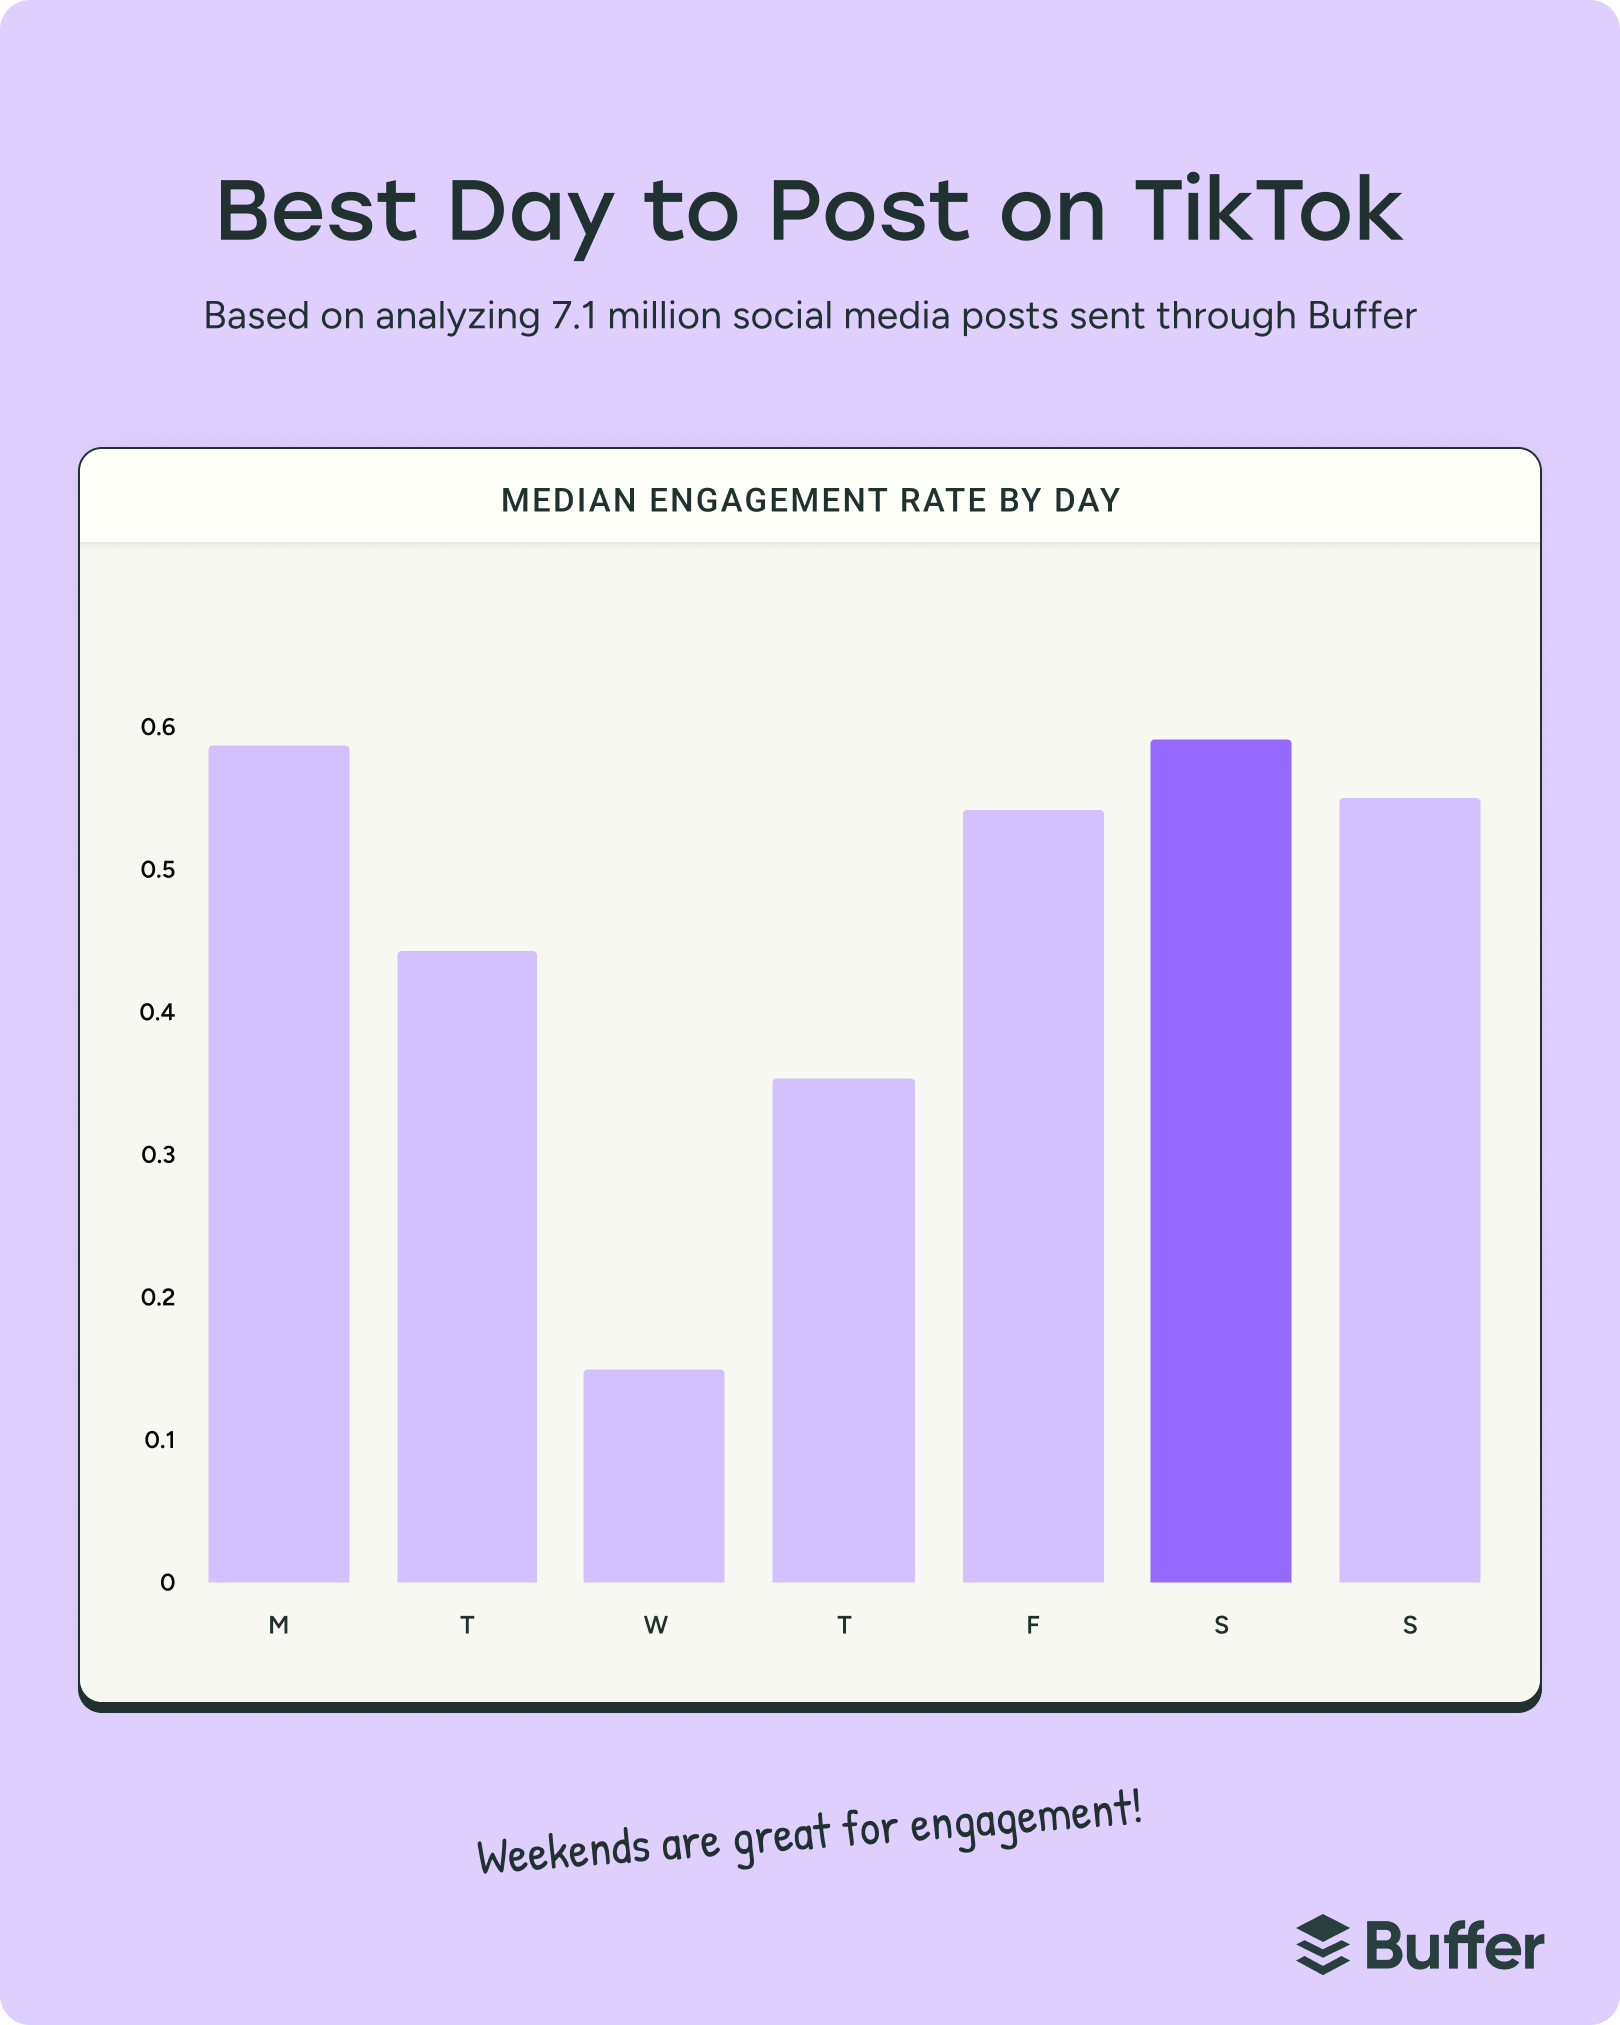
It's worth noting that not all studies agree on this. Other studies have found stronger engagement on different days, which highlights how much results can vary by audience, dataset, and methodology. Use our findings as a starting point, then compare them with your own analytics.
How to find your best time to post on TikTok
As always, these times are a starting point; your audience might behave a little differently.
1. See when your TikTok followers are most active
- Open your TikTok profile and tap TikTok Studio (just under your bio).
- Inside Studio, look for the Analytics card and tap View all.
- Choose the Followers tab, then scroll to Most active times.
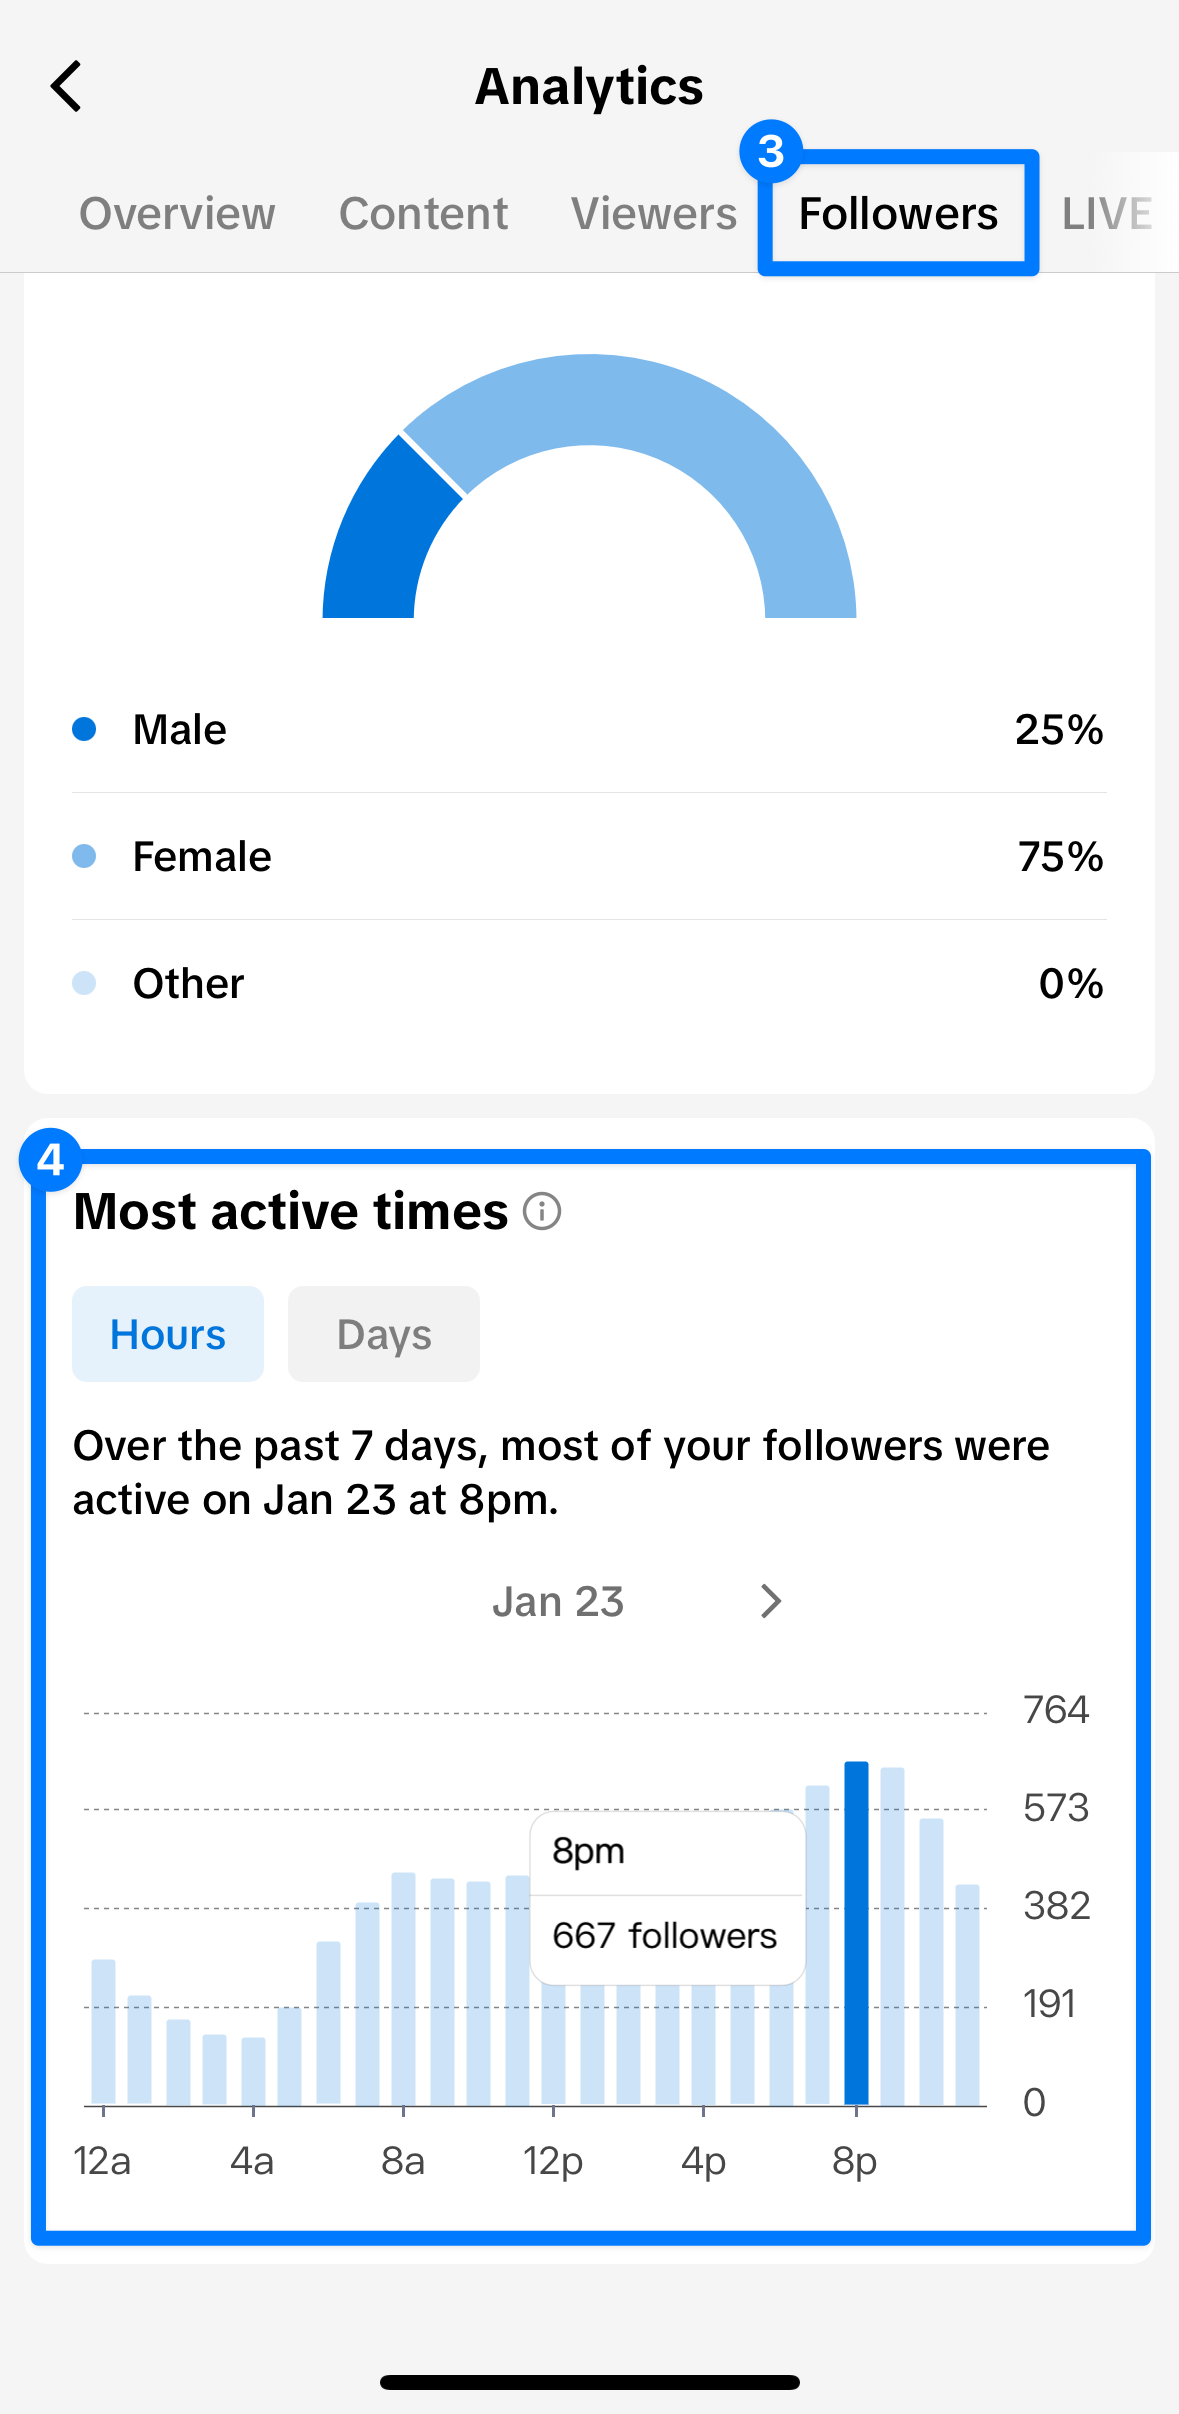
In this TikTok analytics section, you'll find a retrospective overview of when your TikTok account followers were most active on the app over the past week.
2. Look for patterns in your peak posting times
It's worthwhile spending some time noting down your audience's most active times over the past few days. Look for patterns.
⚡ Pro tip: I suggest posting slightly before your followers' most active times, particularly if it lines up with one of our recommended times above.
3. Consider your own posting schedule
A simple posting schedule or even a rough content calendar can take a lot of the mental overhead out of showing up consistently. When you're not scrambling to figure out what to post and when, it's much easier to actually do it.
4. Experiment with different times
Don't be afraid to mix things up. Try different posting times throughout the day and see what lands best for your audience.
Even small shifts, like posting at 6 p.m. instead of 3 p.m., can make a noticeable difference. Try a few different time slots over a couple of weeks and compare the results.
Keep in mind that your niche may influence what works, too. An educational creator might find that morning posts perform well when people are in a learning mindset, while an entertainment-focused account might see more traction in the evening or weekend when people are winding down. Let your content type guide your experiments, not just the clock.
5. Analyze your content performance
Stick to your planned posting schedule when you post on TikTok for a few weeks to give each posting time a fair trial. Use these numbers to help you find the best time to post on TikTok:
- Views: Total number of times your video was watched
- Likes: Total likes received
- Shares: Number of times your video was shared
- Comments: Total comments on your video
- Followers: New followers gained from the post
6. Post regularly, rinse, and repeat
Can't find any patterns that point to a best time to post on TikTok? That's OK. You could stick to your current schedule when you post on TikTok a little longer if your posts are generally performing well, to gather more data. If not, I'd suggest adjusting your schedule (and checking out these tips for creating great TikTok content, too.).
Either way, showing up regularly matters. When you post consistently at times your audience comes to expect, you start building trust and loyalty, which can lead to stronger long-term engagement even before you've cracked the perfect time slot.
If you've found some times that seem to be working? Be sure to share or schedule your posts during those times for the next few weeks.
But don't forget to add some new times to the mix. TikTok trends (and TikTok's algorithm) shift constantly, so testing new posting times every few weeks can help you stay ahead.
Get the best times to post on TikTok right in Buffer
Did you know you can access these recommended times right in Buffer? It's super handy, and really easy to set up, too.
You can automatically set these recommended times for TikTok and your other social media platforms. They'll appear as posting slots in your queue and calendar.
It'll take you less than a minute to set up:
- Select TikTok on your channels list on the left.
- Click on the settings (gear) icon above the calendar.
- Scroll to Posting Schedule and under Posting Slots, click the Generate New Posting Slots button
- Then Use Recommended Posting Times.
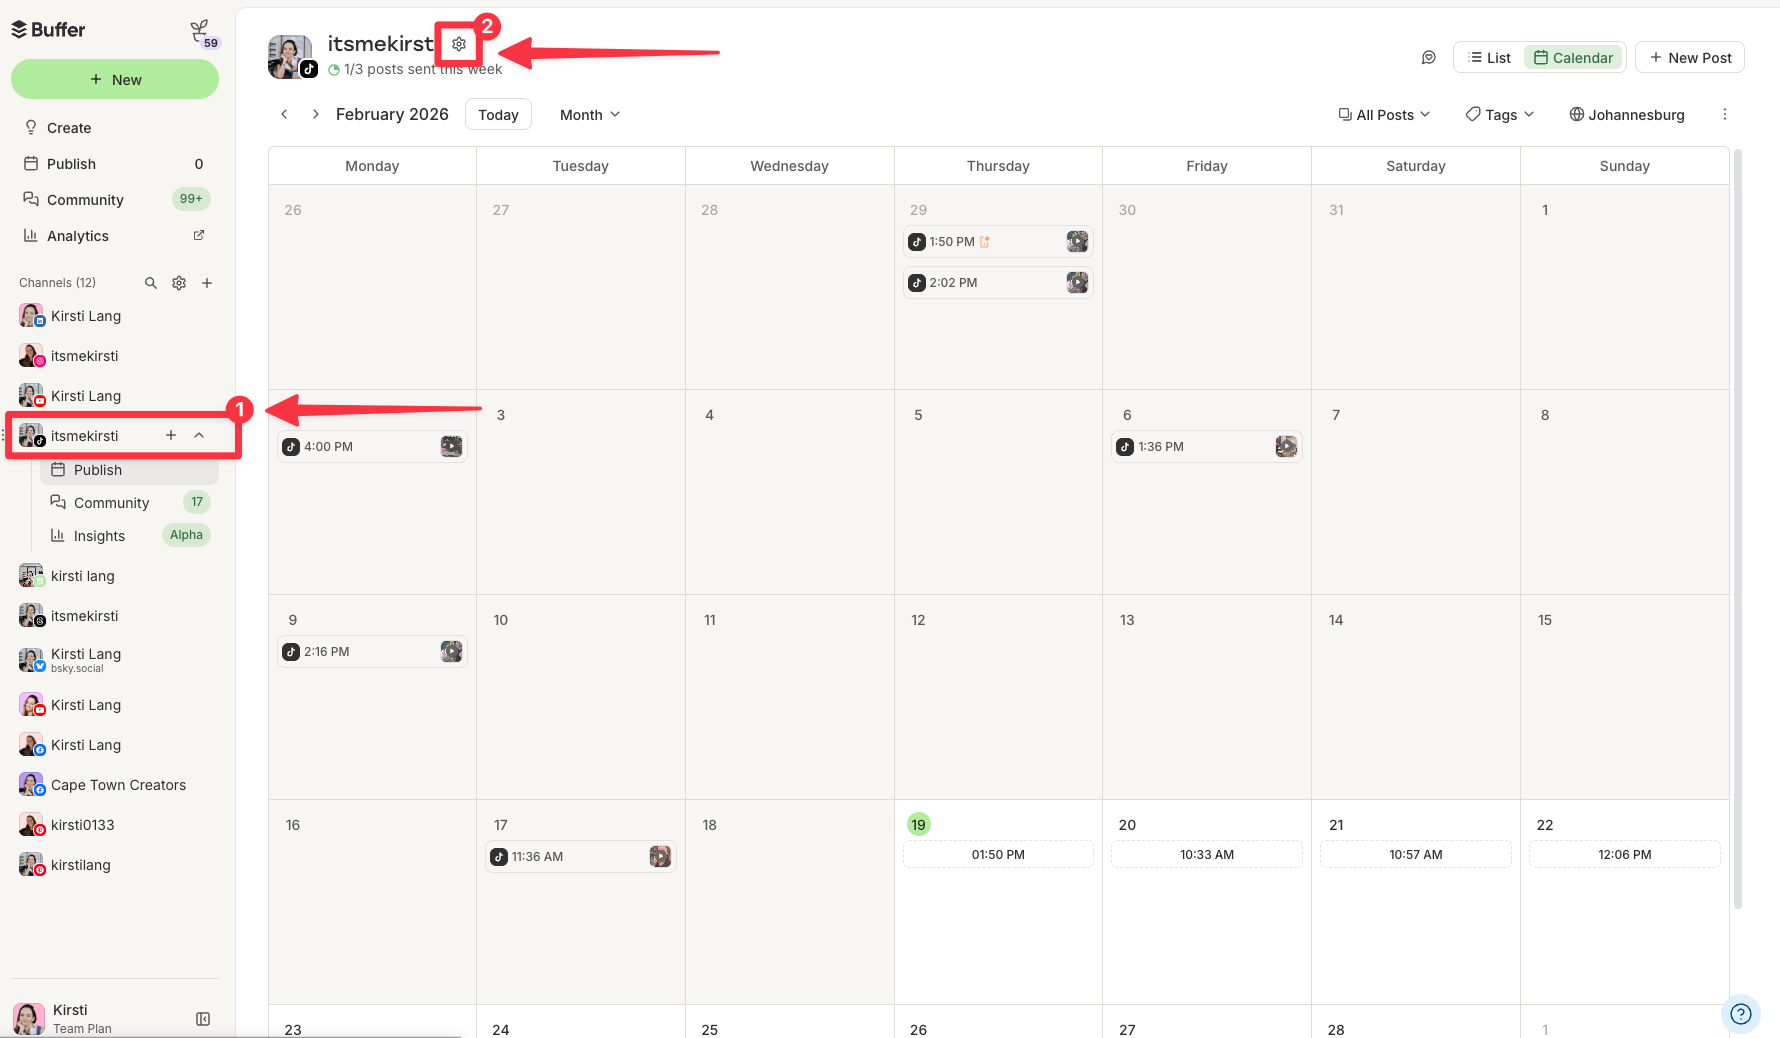
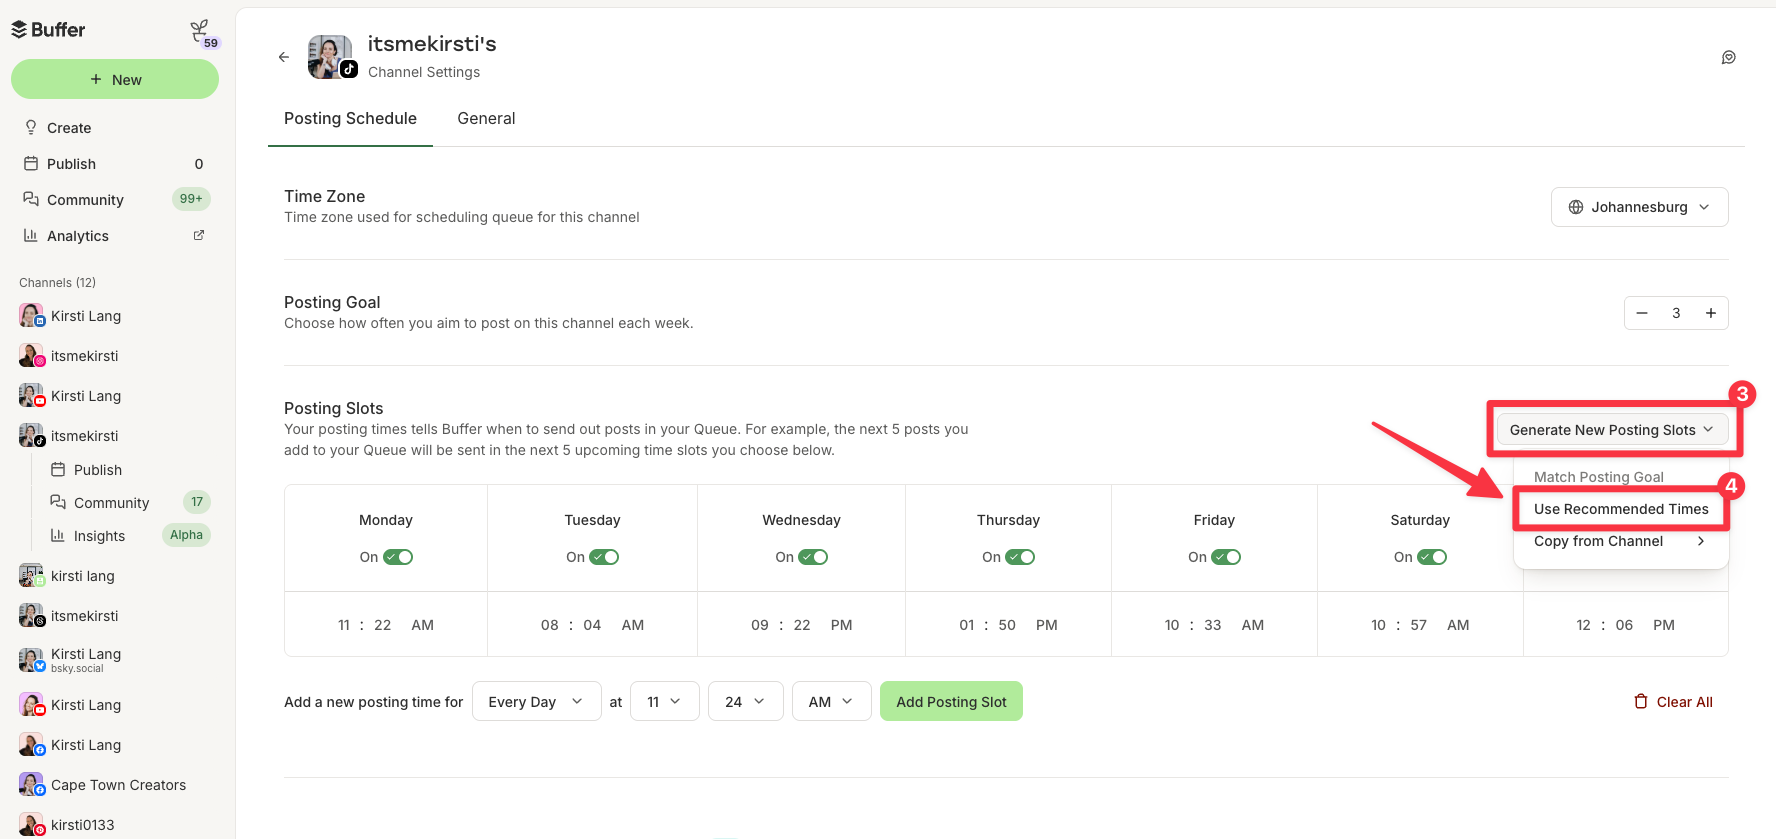
The schedule will automatically update to include the best posting times for the week, based on our latest analysis of millions of TikTok posts.
The next time you schedule a post, you can easily choose one of these high-engagement slots. No more guessing.
Finding your optimal times to post on TikTok
Hopefully, this guide gives you a solid starting point for finding your best time to post on TikTok and takes some of the guesswork out of the equation.
Here's a quick recap of what to do next:
- Start with the data-backed times above as your jumping-off point.
- Check your own TikTok Analytics (Followers tab → Most active times) to see when your specific audience is online.
- Experiment over a few weeks and track what sticks using views, watch time, and engagement metrics.
- Adjust and repeat — your best time may shift as your audience grows.
And if you'd rather not be glued to your phone at 9 a.m. on a Sunday, a scheduling tool like Buffer can help you show up at the right time without the hassle.
Here's to getting your content in front of more people and building a stronger online community while you're at it.
FAQ about the best time to post on TikTok
Is there really a "best" time to post on TikTok?
Technically, yes. Some posting times tend to perform better than others on TikTok. But there are two important caveats here. First, your ideal time depends on your audience. Second, even the best timing in the world can’t 'save' a weak post. The quality of your content will always be the most important factor.
That said, our analysis of 7.1 million posts shows clear engagement patterns, so while timing isn't everything, it can still give your content a helpful head start.
Do I need to adjust the posting times for my timezone?
You can use the times in this guide as a starting point regardless of where you live, as the data reflects patterns across a wide range of Buffer users around the world. If you're not sure where your followers are, check TikTok Studio Analytics to see when they're most active and which regions they're in, then plan your posting schedule around that.
Do I need to post every day at the best time?
Posting consistently matters more than posting every single day. Choose times that work for your audience and feel sustainable for you.
How do I know when my audience is most active?
Check TikTok Analytics → Followers tab → Most active times. This shows when your followers were online in the past week, which is a great clue for when to post next.
What is the peak hour for TikTok?
Based on our analysis of 7.1 million posts, TikTok engagement generally peaks between 6 p.m. and 11 p.m. on most days. The single best-performing time slot across the entire week is Sunday at 9 a.m., a notable exception to the evening trend.
Afternoons (roughly 12 p.m.–5 p.m.) tend to see the lowest engagement across most days, though lunchtime can still be worth testing depending on your audience. Evening hours consistently outperform the rest of the day, which makes sense: TikTok is active, sound-on viewing, and people are more likely to give it their full attention when they're winding down.
Does posting time matter if my content isn't getting views?
Timing can help, but it's rarely the main reason a video underperforms. If your content isn't getting views, look at watch time first. TikTok's algorithm uses it as a key signal to decide whether to push a video further.
Once your content is connecting with viewers, posting at a time when your audience is active gives it a better chance of gaining early momentum. Think of timing as a boost, not a fix.
If watch time is low, take a closer look at your hook, pacing, and whether the video delivers on what viewers expect.
What is the three-second rule on TikTok?
The “three-second rule” is a common creator rule of thumb: Hook viewers quickly before they scroll away. TikTok considers viewing behavior when recommending content, so giving people a reason to keep watching from the opening seconds can help.
How long should I test a posting time before deciding if it works?
TikTok performance can be unpredictable day-to-day. Give each time slot at least a few weeks so you can spot patterns instead of one-off spikes.
What if my followers live in different timezones?
Start by checking your TikTok Analytics → Followers tab → Most active times. This shows when your followers are actually online, regardless of where they live.
If your audience is spread across multiple regions, look for windows where activity peaks across groups. Early mornings and evenings (in the major timezone your audience sits in) tend to be the most reliable overlap points.
If your audience is fairly evenly split (say, between the US East Coast and the UK), try posting in the early afternoon EST, which lands in the early evening for UK viewers. It won't be perfect for everyone, but it covers a lot of ground.
⚡ Pro tip: If you post consistently, you’ll also gather more data about what resonates with your audience. So don’t overthink it: Post, track, and adjust.
Can I schedule TikTok posts?
Yes, Buffer lets you schedule or set up notification-based posting. It's a great way to show up at the right time without having to be glued to your phone.
What time are you most likely to go viral on TikTok?
No specific time guarantees a video will go viral, but timing can give your content a running start. When you post while your audience is active, your video picks up early engagement (views, watch time, shares). That early momentum is what tells TikTok the content is worth pushing to a wider audience on the For You Page.
The highest-performing times in our analysis are Sunday at 9 a.m., Monday at 1 p.m., and Saturday between 3 p.m. and 5 p.m. That said, timing is just one piece of the puzzle. A strong hook and high watch time will do more for your reach than any posting window.
More TikTok resources
- How to Schedule TikTok Posts (For Free): A Step-By-Step Guide
- 14 Ways to Get More Followers on TikTok — Tried and Tested
- How Often Should You Post on TikTok? Data From 11 Million+ Posts
- TikTok Algorithm Guide: Everything We Know About How Videos Are
- Top 250 TikTok Hashtags + How to Use Them for Growth
- How to Make Money on TikTok: 10 Ways to Earn (With or Without a Huge Following)
Updated September 2026
Big marketing dreams, but working with a tight budget? After more than a decade of marketing for bootstrapped brands, I've learned that you don't need to spend a fortune on fancy digital marketing tools to see results.
It's all about building a smart toolkit that punches above its weight. One that helps you work efficiently and get results without breaking the bank.
That's where this comprehensive list comes in: 28 digital marketing tools that help growing brands succeed. Many of these tools offer free or low-cost versions, so you can start small and scale up as you're ready for more features.
Consider this your guide to building a powerful marketing tech stack that works within your budget.
Key takeaways
- Cheapest complete starting stack: $0. Buffer's free plan, Canva's free plan, Google Analytics, and Google Search Console cover publishing, design, and measurement without a card.
- Best for social media on a small budget: Buffer's free plan, then $6/month per channel, so cost scales with channels rather than seats.
- Best email tool under $15/month: Mailchimp is free to 250 contacts, paid from $13/month.
- Best for ecommerce email and SMS: Klaviyo is free to 250 contacts and 500 sends, then $20/month for email or $35/month for email and SMS.
- Best free SEO tool: Google Search Console is the most direct way to understand how your site performs in Google Search.
- Best paid SEO tool under $50/month: Moz has paid plans from $49/month.
- Best AI images you can use commercially: Adobe Firefly is trained on licensed content, free with a watermark, $9.99/month without.
Here's every tool in this guide, what it's best at, and what it costs
| Tool | Best for | Free option | Paid from |
|---|---|---|---|
| Buffer | Social media planning, scheduling, and analytics | Free plan | $6/mo per channel |
| Mentionlytics | Social listening | No | $69/mo |
| Predis.ai | Social competitor analysis | Free plan | $32/mo |
| Quuu | Content curation for LinkedIn, X, and Facebook | 7-day trial | $19.79/mo per profile |
| Influencity | Influencer marketing management | 7-day trial | $398/mo |
| Buzzstream | PR and link-building outreach | 14-day trial | $49/mo |
| Mailchimp | Email and SMS for small businesses | Free email-only plan for up to 250 contacts | $13/mo |
| Klaviyo | Email and SMS for e-commerce | Free plan for up to 250 contacts and 500 monthly email sends | $20/mo for email |
| HubSpot | B2B email and lead management | Free plan | $10/user/mo |
| Kit | Email for solopreneurs selling digital products | Free plan for up to 10K subscribers | $39/mo |
| beehiiv | Newsletters for content creators | Free plan for up to 2,500 subscribers | $49/mo |
| Moz | Keyword research and rank tracking | Free trial available | $49/mo |
| Frase | Long-form content optimization | Free trial available | $49/mo |
| Google Search Console | Monitoring your actual Google performance | Free | Free |
| Canva | Graphic design | Free plan | $18/mo |
| Adobe Firefly | Commercial-friendly AI images | Free version with watermark | $9.99/mo |
| VEED | Simple video editing | Free version with watermark | $20/user/mo |
| Butter | E-commerce product video | Free plan | $25/mo |
| Claude | AI writing | Free version | $20/mo |
| VWO | A/B testing | Not stated in article | Schedule a demo |
| ConvertFlow | Website personalization and funnel building | Free plan | $29/mo |
| Aftersell | E-commerce revenue optimization | Not stated in article | $29.99/mo |
| WordStream | Google Ads account grading | Free | Free |
| Atria | Meta and TikTok ad optimization | Not stated in article | $159/mo |
| Google Analytics | Website analytics | Free | Free |
| Contentsquare | Website engagement analytics | Free plan available | $49/mo |
| Amplitude | Product and app analytics | Free plan for up to 2M events/month | $94/mo |
| Lifetimely | Shopify customer lifetime value analytics | Free plan for up to 50 orders/month | $49/mo |
Jump to a section:
Social media marketing tools
For most small businesses, Buffer (free plan; paid plans from $6/month per channel) is the best place to start, while Mentionlytics ($69/month) and Predis.ai (free plan) can add social listening and competitor insights.
These social media tools help you maintain a consistent social media presence and evaluate your content performance.
Buffer: Social media management for creators and small businesses

A social media management tool is central to any social strategy. It helps you manage your online presence so you can post consistently and on a schedule you choose, which can help improve engagement.
I've been a Buffer customer and fan for nine years, long before I started contributing to the blog. And, when I became more active in building my personal brand a year ago, Buffer was the natural choice.
Since this is the Buffer blog, we're naturally excited to share how Buffer can help with your social media management.
Key features:
- Capture and organize all your social media ideas in the Create space
- Track and respond to comments on Facebook, Instagram, LinkedIn, Threads, X/Twitter, and Bluesky in a streamlined dashboard.
- Schedule finished posts in your social queue.
- The AI assistant helps you generate ideas, repurpose content, and edit posts to perfection.
- Buffer's Insights shows you your cross-channel performance in easy-to-understand graphs
- Buffer's API, MCP, and connectors allow you to plug it into ChatGPT, Claude, or your AI tool of choice.
The Create space is one of my favorite features. I love how I can tag and organize everything by color, in Kanban columns.

I log all my half-baked ideas here and move them along in my custom Kanban board as they progress. I even have a prompts category for ideas in case I get stuck (many of which came from Buffer's Creator Camp) — but there's a nifty "generate ideas" button that can jumpstart your content creation.
From here, adding a finished post to my queue for publishing is super easy.
And with Buffer's pay-by-channel pricing model, I've been able to scale the services I pay for up and down based on what I need. For example, I used to be active on both LinkedIn and X, but now I'm only on LinkedIn. That flexibility is helpful since every dollar counts as I grow my freelance business.

Plus, if you're experimenting with newer platform options, Buffer quickly adds support for new social platforms (hello, Mastodon and Bluesky).
Buffer shines brightest for small businesses, solopreneurs, and creators looking to streamline their social media game without getting lost in complex features. It's the perfect balance of powerful and user-friendly — just what you need to make your social media presence pop without the headache.
Pricing: Free plan; paid plans start at $6/month/channel.
Mentionlytics: Social listening on a budget
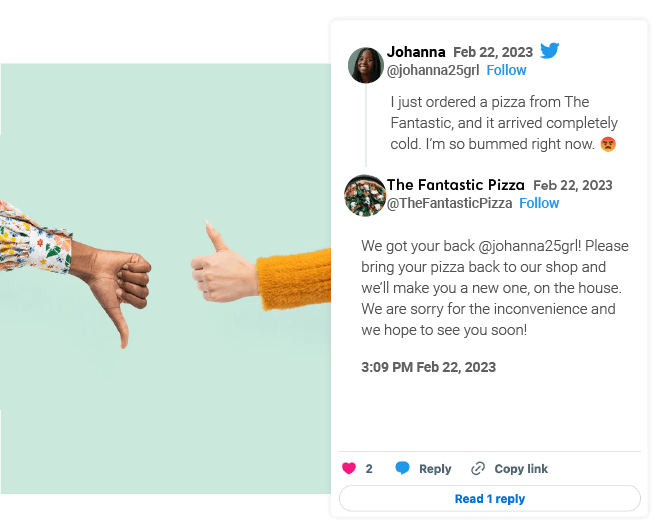
Have you ever wondered what people say about your brand when you're not looking? That's where social listening comes in. Mentionlytics makes it accessible even if you're working with a tight budget.
Many social listening tools cost hundreds or thousands of dollars, putting them out of reach for small businesses. But Mentionlytics brings these powerful capabilities to small businesses at a fraction of the cost.
Key features:
- Monitor mentions of your brand, competitors, or relevant keywords across social media, review sites, and the entire web.
- Gauge audience sentiment with AI-powered analysis.
- Stay on top of trends and conversations relevant to your industry.
The drag-and-drop report builder also lets you create custom reports to share insights with your team.
Whether you're looking to improve your customer service, gather product feedback, or keep tabs on your online reputation, Mentionlytics could be a valuable addition to your digital marketing toolkit.
Pricing: Starts at $69/month.
Predis.ai: Competitor analysis for social media
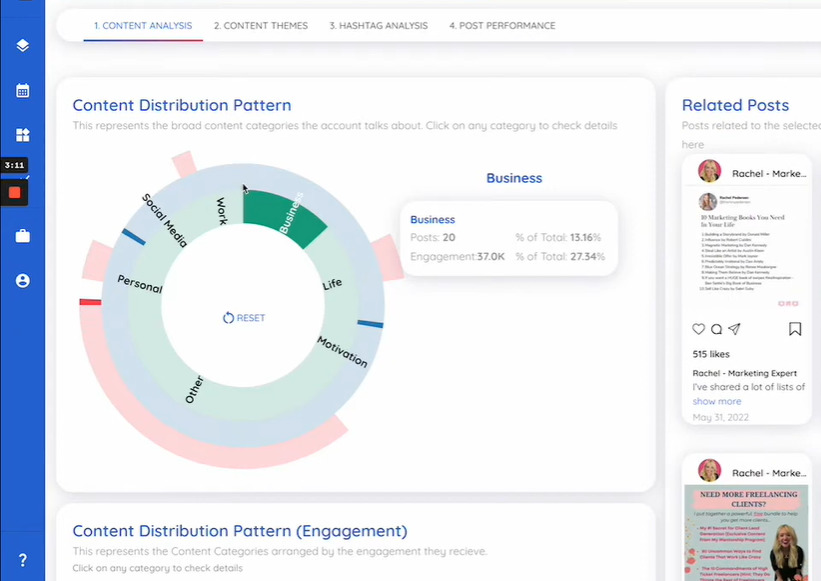
Ultimately, you'll want to differentiate your social media marketing strategy from your competitors', so you don't want to copy them. But checking out what they're doing with a competitive analysis tool can help you understand their strategy and inform your own.
Predis.ai surfaces these insights and can even help you generate content based on what's working in your industry.
Key features:
- Decode your competitors' social media strategies on select social platforms (they're building out support for more networks as we speak).
- Get the scoop on which posts are hitting home runs and which are striking out for your competition.
- Understand content distribution patterns to time your posts for maximum impact.
- Uncover the hashtag strategies your competitors are using to boost their reach.
- Generate AI-powered posts based on what's working in your niche.
All in all, Predis.ai is worth considering to learn from the wins and mistakes of your competitors so you don't have to learn them yourself the hard way.
Pricing: Free plan; paid plans start at $32/month.
Quuu: AI content curation for LinkedIn, X, and Facebook
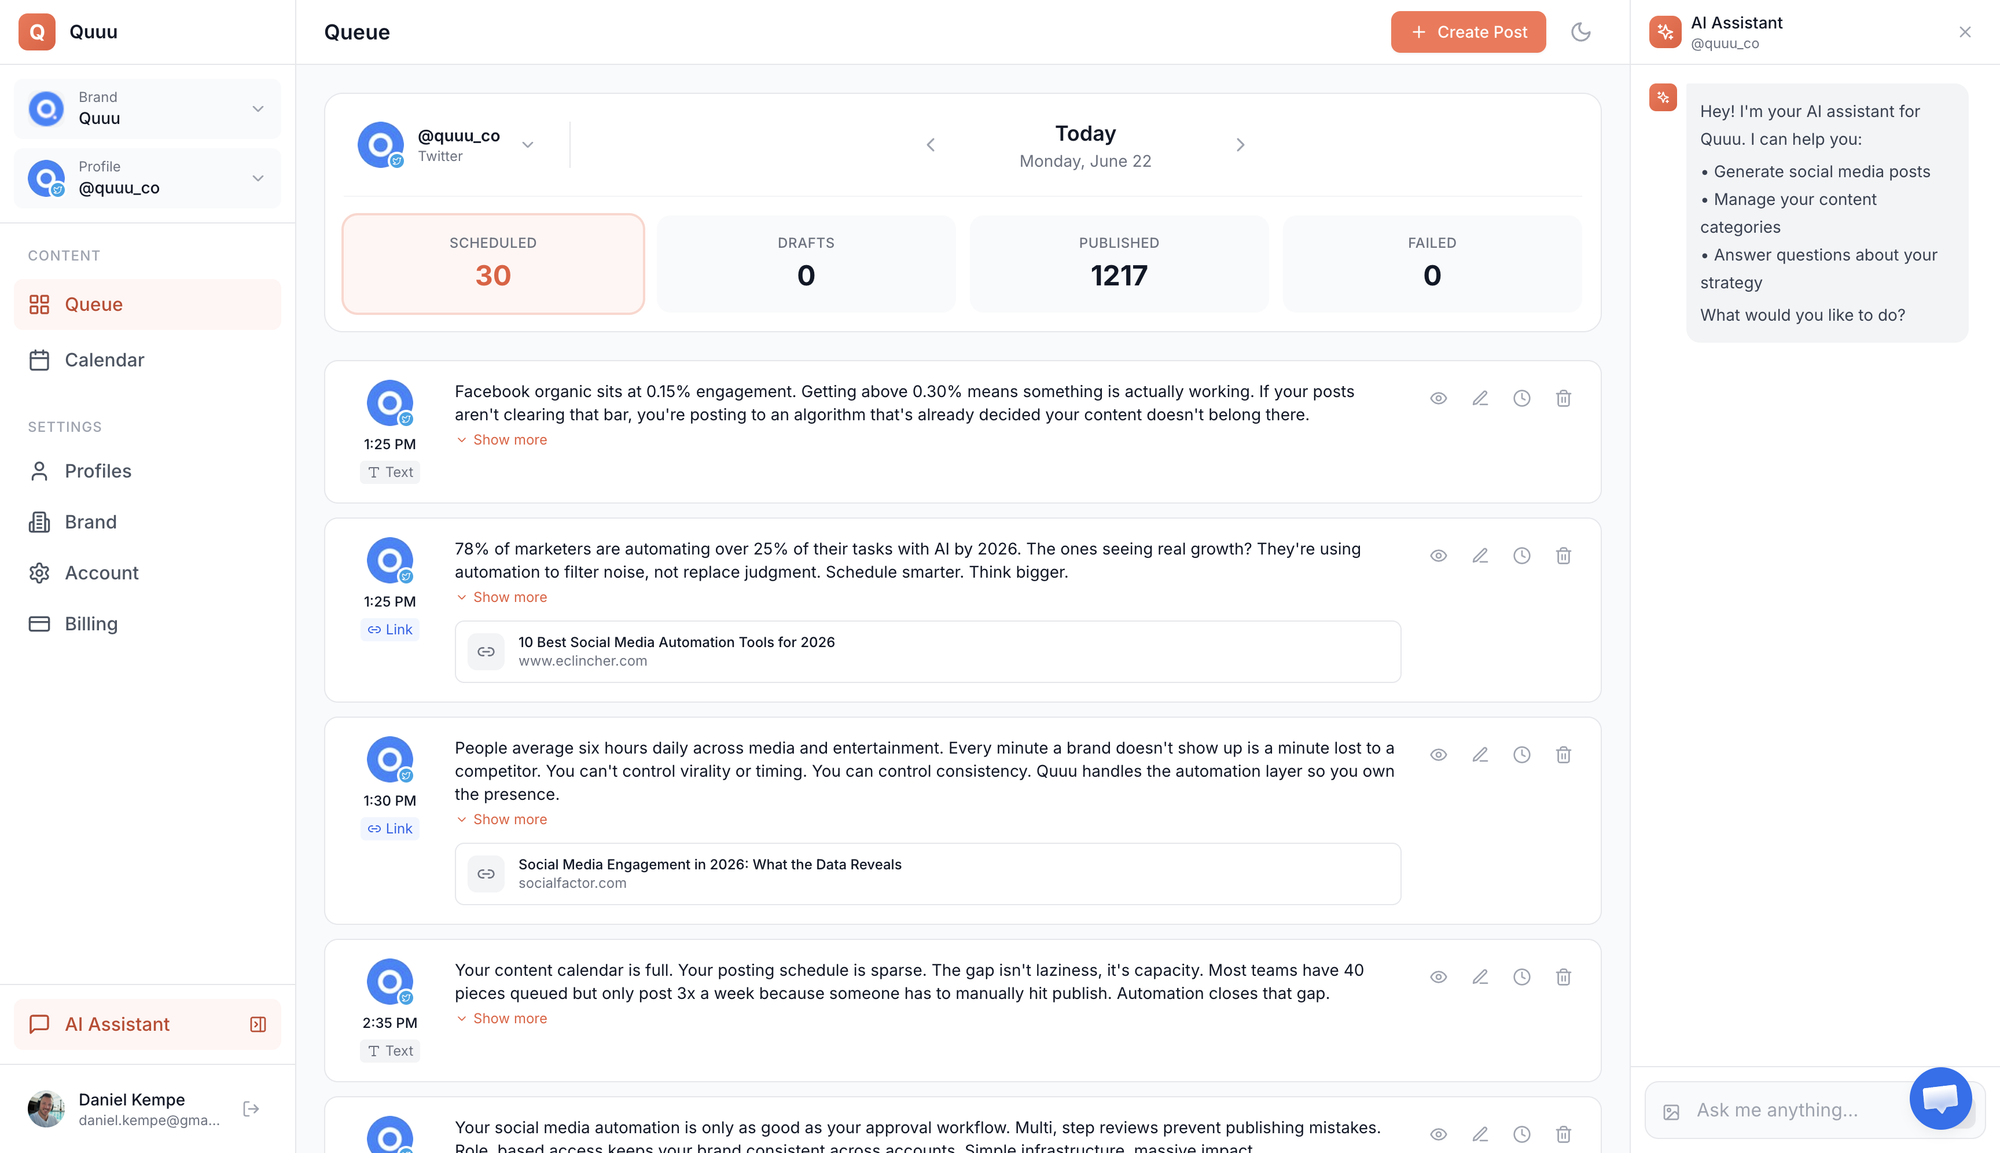
This next great digital marketing tool has been mentioned by several folks I respect who are growing their personal brands on social media.
If you ever find it hard to keep your social media queue full, Quuu can help curate content from around the web that interests your audience. Then, you can blend original posts with curated content that gets conversations going without manually searching for share-worthy content.
Quuu uses AI to curate content and draft posts suitable for your audience.
Key features:
- Discover and share high-quality, relevant content tailored to your niche and audience.
- Use AI to generate custom posts for LinkedIn, X, and Facebook that you can edit and personalize so they feel like you.
- Chat with Quuu's AI bot to brainstorm content ideas or get help crafting your post.
- Seamlessly integrate with popular scheduling tools (including Buffer) to maintain a consistent posting schedule.
- Optimize your posting times for maximum engagement.
Whether you're looking to establish thought leadership, keep your audience informed, or maintain a consistent posting schedule, Quuu can save time while keeping you up-to-date and relevant.
Pricing: 7-day free trial; paid plans start at $19.79/month per social media profile.
Partnership marketing tools
For affordable partnership management, Buzzstream ($49/month) is the better starting point for most small teams, while Influencity ($398/month) is built for brands managing more involved influencer campaigns.
Partnership marketing is great for businesses of all sizes. It enables you to expand your brand's reach through exposure to the audiences others have already built. These digital marketing tools can help you track relationships, streamline outreach, manage campaigns, and measure the impact of your collaborations.
Influencity: Influencer marketing management on a budget
Many influencer marketing tools are in the thousands per month. But Influencity makes influencer marketing management a lot more achievable for those with a modest budget.
Key features:
- Discover the perfect influencers for your brand without tedious manual searching.
- Manage your campaigns from start to finish, keeping all your influencer relationships organized in one place.
- Track your campaign performance easily by combining your brand's data with influencers' engagement stats for a clear picture of your ROI.
Influencity is perfect for brands looking to dip their toes into influencer marketing for the first time or those who don't have a large budget but want to level up from managing with spreadsheets.
Pricing: 7-day free trial; paid plans from $398 per month
Buzzstream: PR relationship management
In the five years I spent managing partnerships at Tortuga, I can't recommend using a CRM for partnerships enough. I used Buzzstream to track brand features and outreach of all kinds, including those with media, bloggers, product review sites, influencers, and affiliates.
Key features:
- Manage relationships with a wide range of partners all in one place.
- Track and automate your outreach campaigns so no important follow-up falls through the cracks.
- Monitor brand mentions across the web to stay on top of your brand awareness game and link-building efforts.
If you manage many partnerships for your brand, Buzzstream can help you keep all those plates spinning without dropping any.
Pricing: 14-day free trial; paid plans start at $49/month.
Email and SMS marketing tools
For most small businesses, Mailchimp (free plan; paid plans from $13/month) is a flexible starting point, while Klaviyo ($20/month) is better suited to e-commerce and HubSpot is a stronger fit for B2B SaaS.
After discovering new potential customers through other marketing channels, you'll want a way to stay in direct contact with your audience so you can build deeper relationships and gather first-party data for personalization. Email and SMS marketing can help you nurture leads, maintain existing customer relationships, and drive conversions through personalized, direct communication.
Mailchimp: Email and SMS for small businesses
When it comes to email marketing tools, Mailchimp is often the first to come to mind because it's versatile and approachable for new businesses.
Key features:
- It has a user-friendly email campaign builder.
- Customizable signup forms and landing pages help you grow your list.
- Automate emails and segment your list to personalize messages.
- Paid users have the option of adding SMS to their plans.
Content creator and relationship coach Mike Mantell has used Mailchimp for years to manage their email newsletter. "I find it pretty easy to make lists to distinguish where signups from different lead magnets came from," they share. "It has the basic functionality I need for email marketing."
They can even create multiple email sequences on the free plan, which sets Mailchimp apart from other options.
However, Mike notes that as your needs grow more complex, you might feel some growing pains: "If I have to edit any of my automations, it takes a long time for me to figure out how. It's a bit unintuitive in that way."
If that's the case for you, you may consider upgrading to a specialized tool focused on your niche.
Pricing: Free email-only plan for up to 250 contacts; paid plans start at $13/month.
Klaviyo: Email and SMS for e-commerce brands
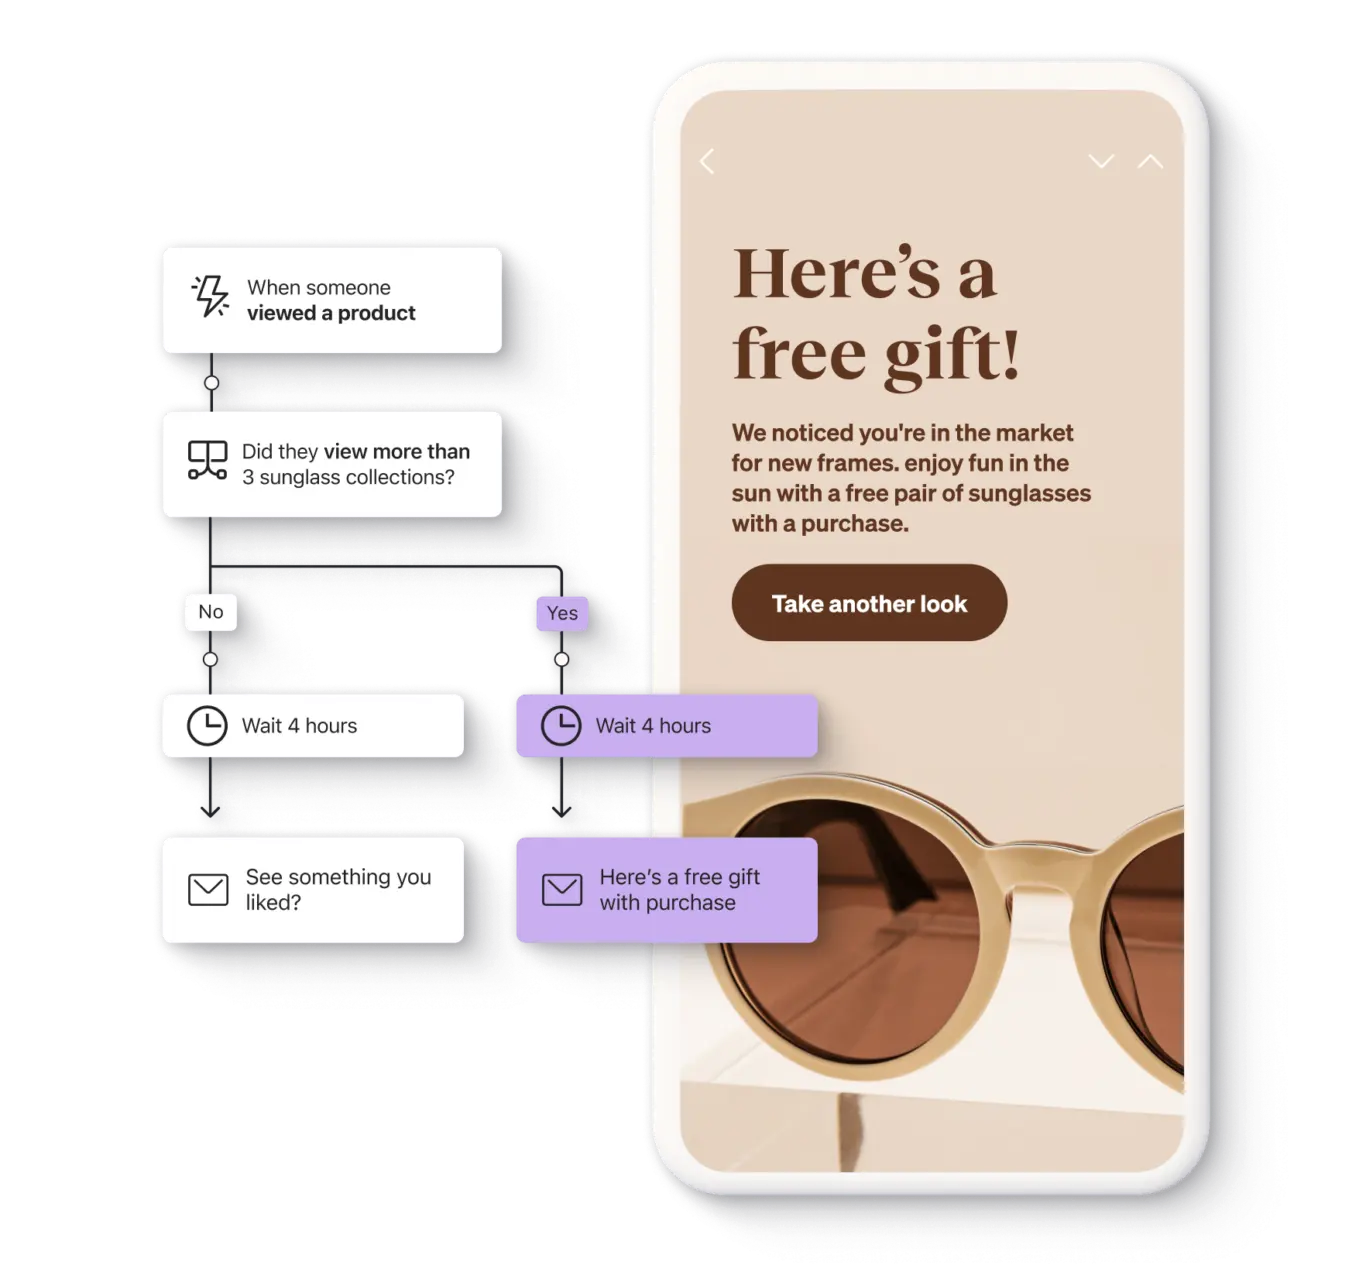
If you're running an e-commerce business, you know Klaviyo. It's been a go-to email marketing tool for online retail stores for years.
Key features:
- It's built for online shops and integrates with major e-commerce platforms.
- Advanced segmentation and automation features let you send emails, SMS messages, and push notifications based on shopper behavior.
- Robust analytics tie directly to revenue so you can see the impact of your program.
I've had hands-on experience with Klaviyo at multiple e-commerce brands, and having a provider focused on online retail makes a difference. Klaviyo makes it intuitive to create segments based on your history with a customer, set up automated flows, and track revenue impact.
While Klaviyo has been a frontrunner for over a decade, it's worth mentioning that alternatives like Privy and Omnisend offer similar features at comparable price points and are establishing a name for themselves as well.
For those with bigger budgets and more complex needs, solutions like Attentive are pushing the envelope with advanced features and top-tier service.
On the flip side, if you're a Shopify brand just starting out, Shopify Messaging has a generous free tier for up to 10k emails per month. While it offers fewer features than Klaviyo, it can be a good stepping stone for budding brands.
Pricing: Free plan for up to 250 contacts and 500 monthly email sends; paid plans start at $20/month for email alone.
HubSpot: Email marketing and lead management for B2B SaaS
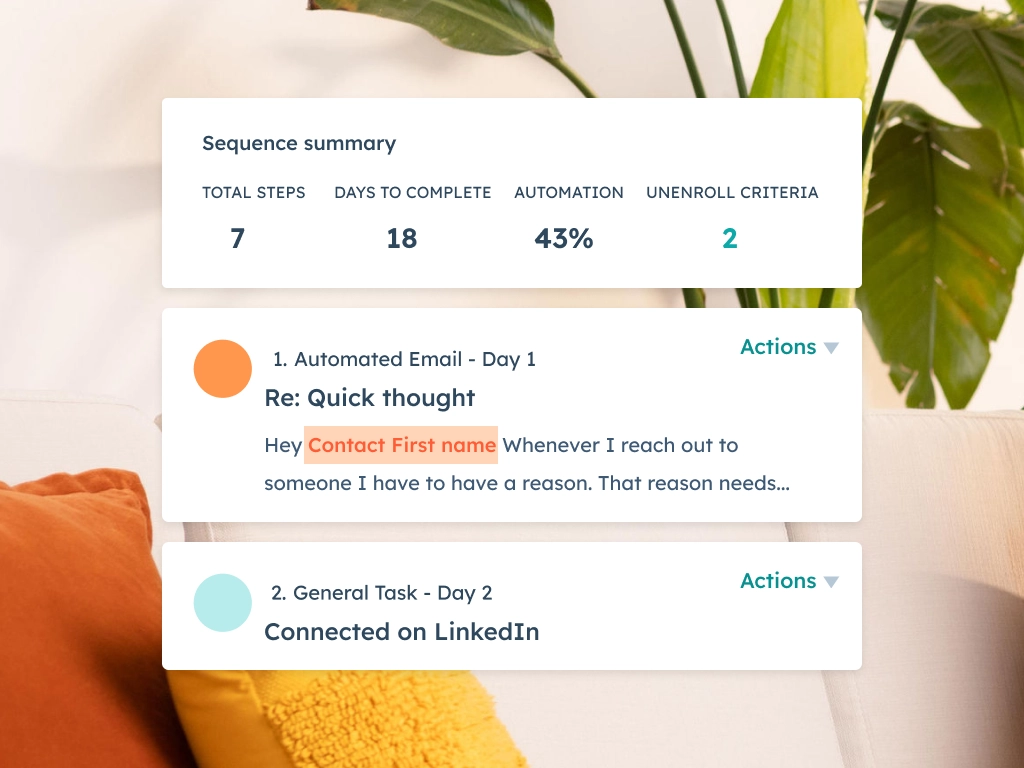
HubSpot is a powerhouse for B2B SaaS companies looking to manage their relationships with leads and customers alongside email marketing.
I've used it to manage email marketing for a small tech company, and it was so helpful to be able to peek at a customer's entire journey and history with our brand.
Key features:
- Combines customer relationship management (CRM) and email marketing capabilities for comprehensive lead management.
- Create and send email marketing campaigns for a seamless workflow.
- Track interactions, from website visits to email engagement, for a full picture of lead behavior.
- Automate email sequences based on lead actions and characteristics.
- Robust reporting features tie marketing efforts to sales outcomes.
The email builder is intuitive. It's also powerful to be able to segment your list based on any data point in your CRM. However, the learning curve can be steep if you're new to marketing automation platforms because HubSpot is packed to the brim with capabilities.
It's worth noting that while HubSpot is excellent for B2B, it'll be overkill for simpler email marketing needs. If you're not leveraging its full suite of tools, you might find better value elsewhere.
Pricing: Free plan available; paid Marketing Hub plans start at $10/user/month but can get pricey as you add more contacts and features.
Kit: Email marketing for solopreneurs selling digital courses and products
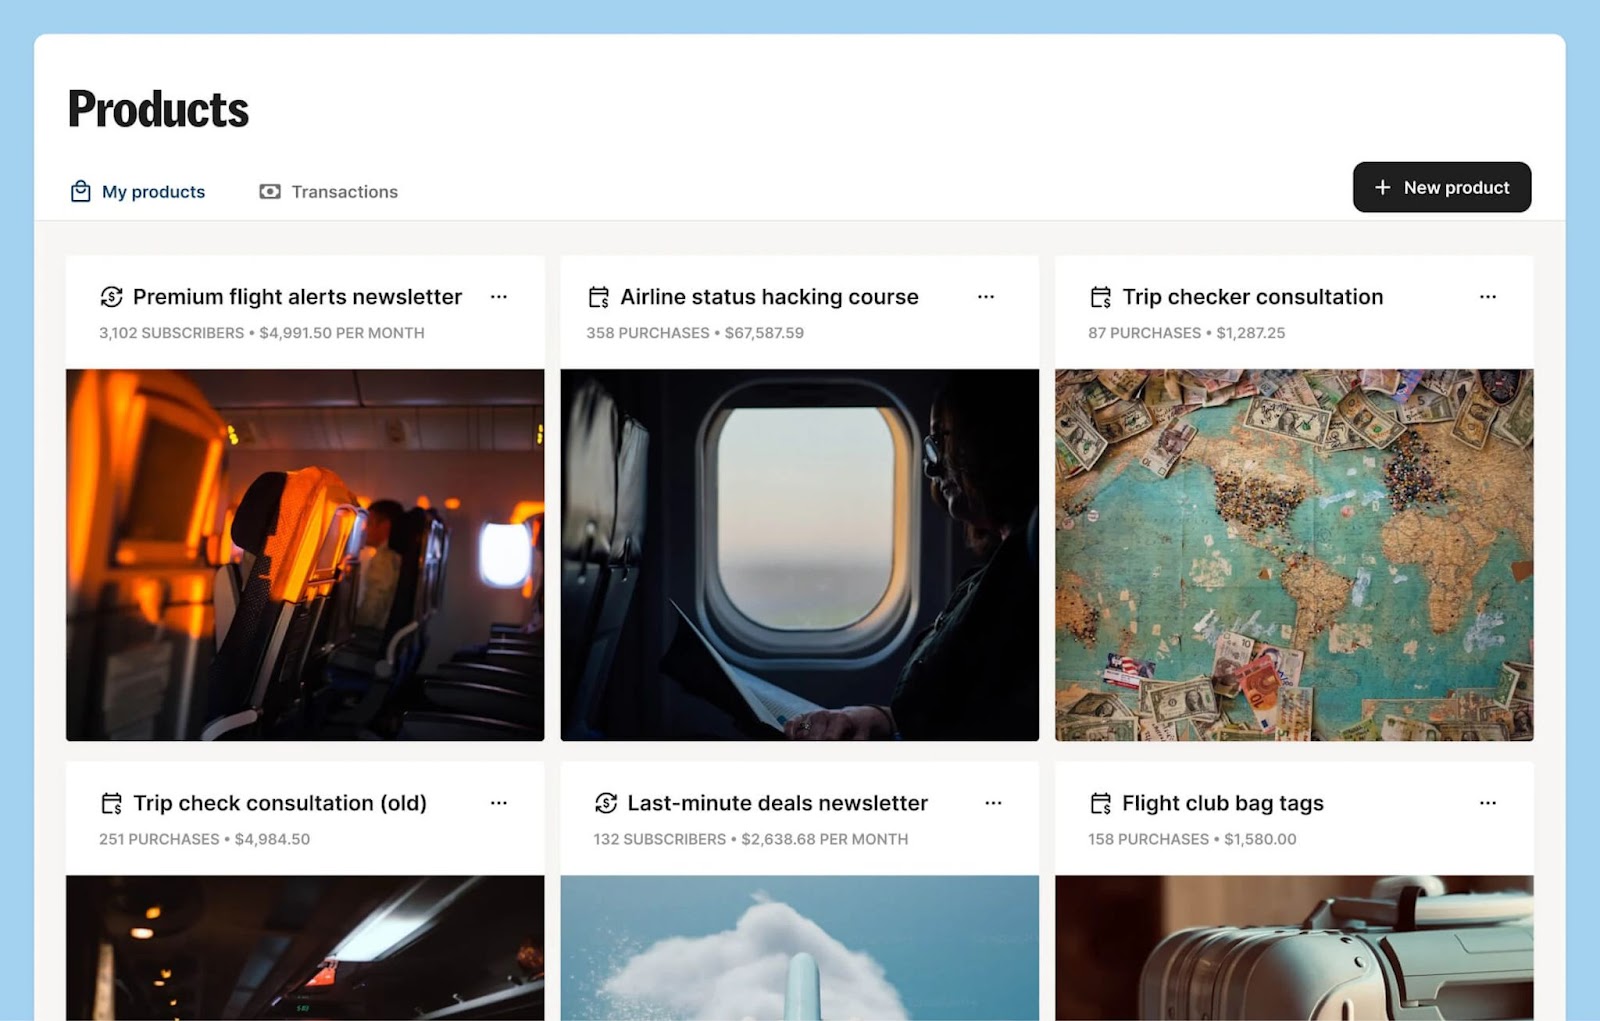
Kit is an email marketing platform designed for creators and solopreneurs who sell digital products like courses, ebooks, or coaching services. Kit sets itself apart through its monetization features.
Key features:
- Easy email sequence builder helps you nurture leads and sell products.
- Landing page builder lets you create lead magnets and pages to sell digital products directly.
- Tag-based segmentation allows for precise audience targeting.
Anna Burgess Yang, a freelance writer who helps fellow solopreneurs improve their workflows, swears by Kit's capabilities:
"I host a lot of webinars and create free downloads for my audience. Kit makes it easy for me to create landing pages and email sequences. I now have a well-oiled process for launching something new in Kit and segmenting the subscribers into different groups with tags based on what they signed up to receive."
Pricing: Free plan for up to 10K subscribers; paid plans start at $39/month.
beehiiv: Email newsletters for content creators
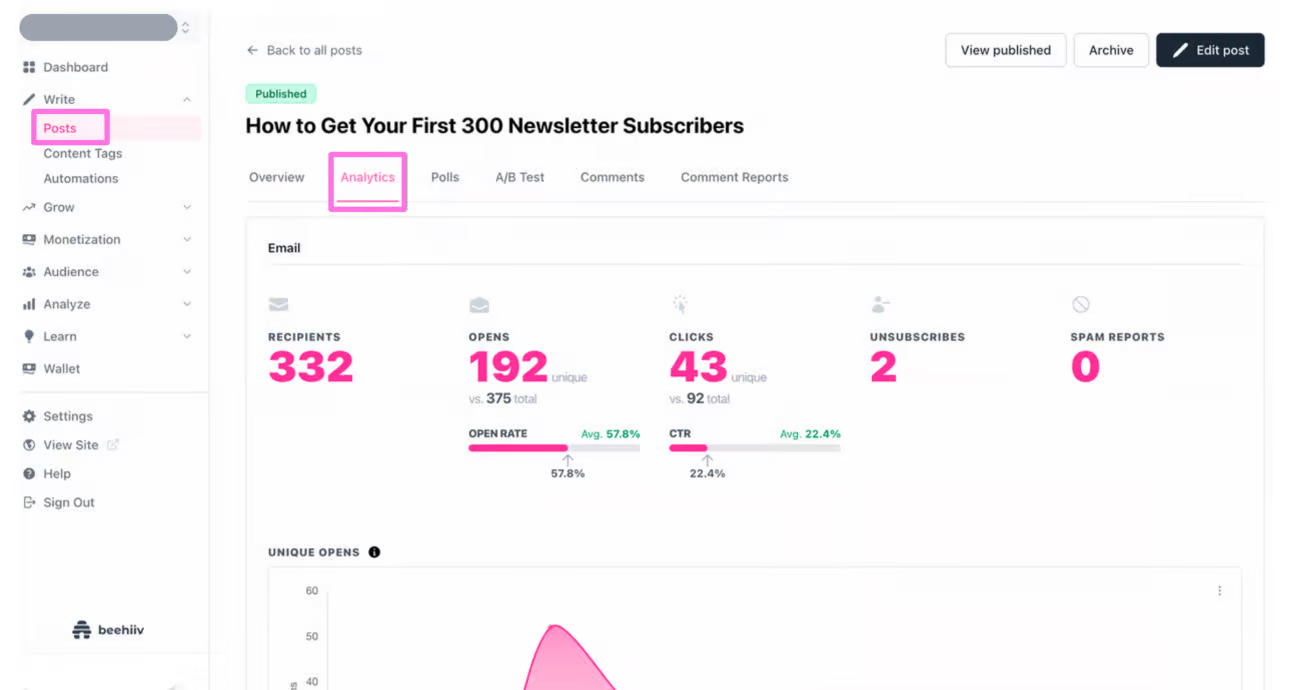
Several creators I follow have switched to beehiiv recently due to its specialized features. It's a platform designed for creators who see their newsletter as the main event, not just a marketing tool.
While platforms like Kit excel at selling digital products, beehiiv shines when the newsletter itself is the value you're offering. It's for those who want to turn their email list into a thriving community and potentially a revenue stream.
Key features:
- beehiiv has a sleek, modern email editor for crafting engaging newsletters.
- It has built-in monetization options, including paid subscriptions and an ad network.
- Custom websites host your content, creating a hub for your newsletter.
- Audience segmentation and automated workflows nurture your community.
- Send unlimited emails on all plans, perfect for prolific writers.
Buffer's own Senior Content Creator, Tamilore Oladipo, hosts her newsletter, Content-as-a-Career, on beehiiv. "I've tried many newsletter platforms and have found beehiiv to offer the most value for my usual needs," she says. It's also made it easy for Tami to monetize early on: "My favorite thing about the platform is the ability to connect to sponsors easily. I'm already monetizing with just over 1,000 subscribers."
As far as more advanced features, Tami shares, "I haven't had to implement anything too complex yet, so I can't say too much about its automation capabilities. But if you're looking to get an MVP (minimum viable product) of your newsletter off the ground, it's a great tool."
The platform also offers robust analytics, helping you understand what content resonates with your audience. This data-driven approach can be invaluable for creators looking to grow their readership and influence.
Pricing: Free plan for up to 2,500 subscribers; paid plans start at $49/month.
SEO (search engine optimization) tools
Google Search Console is free and should be your starting point for understanding your Google search performance; Moz ($49/month) adds keyword research, rank tracking, and technical SEO tools, while Frase ($49/month) is useful for optimizing long-form content.
SEO isn't just about pleasing search engines. It's about improving your visibility so you can connect with people searching for what you offer. The right SEO tools can help you decode the mystery of search engine rankings and determine where to focus your efforts.
Moz: Search performance optimization and monitoring
I've been using Moz on and off for nearly a decade. I keep coming back to it for its simple user interface and powerful features, some of which they even grant access to (at a small monthly volume) on the free plan.
Key features:
- Research keywords to find high-impact search terms to target.
- Track your site's keyword rankings.
- Audit your site to identify and fix technical SEO issues.
- Analyze backlinks to understand who's linking to you.
- Get on-page optimization suggestions for your content.
While Moz offers similar functionality to competitor Ahrefs, I find Ahrefs more robust and intuitive. However, Ahrefs' paid plans start at a higher price point, making Moz a more accessible option for many small businesses.
Moz also rocks in the educational content department. Their webinars and SEO guides are excellent resources if you're looking to expand your SEO knowledge. Clearscope co-founder Bernard Huang's episode on ranch-style content marketing is a personal favorite.
Pricing: Free trial available; paid plans start at $49/month.
Frase: Content optimization for long-form content
Frase is a content optimization tool that helps you create SEO-friendly long-form content that ranks well in search results.
As a freelance writer, I've used several content optimization tools, including SurferSEO and Clearscope. While they all offer similar core functionality for optimizing blog posts, Frase stands out for its affordability and flexibility.
Key features:
- Analyze the SERP to understand the features of articles currently ranking for your target keywords.
- Generate content briefs to outline your articles.
- Optimize content with relevant keywords.
What I appreciate most about Frase is its pricing model. As a freelancer, not all of my clients need search optimization, and some provide access to their own software. Frase's monthly subscription option allows me to pay only when I need it, which helps cut down costs compared to annual subscriptions for similar tools.
The intuitive interface makes it easy to analyze top-ranking content and ensure my article covers all the necessary topics.
Pricing: Free trial available, starts at $49/month.
Google Search Console: Monitor and improve Google search performance
Google Search Console is a free tool for understanding and improving your site's performance in Google search results.
Mike Mantell, the relationship coach and content creator we mentioned earlier, relies on Google Search Console to understand how well their blog posts rank and what search terms bring people to their site.
Key features:
- See which queries people use to find you.
- Identify which pages are performing well (and which aren't) in search results.
- Discover and fix technical issues that might be hurting your site's performance.
- Submit new content for indexing to get it in search results faster.
What does Mike love about Google Search Console? "It sends me a regular email to help me gauge my progress. It's cool to see my monthly clicks go up. And I find it helpful to see which pages are growing the fastest. It's gratifying to see my progress and to home in on what's working."
Pricing: Completely free.
Content and design tools for marketers
For most marketers, Canva (free plan; paid plans from $18/month) is the easiest place to start, while Adobe Firefly (free version) adds AI image generation, VEED (free version) handles quick video edits, and Claude (free version) can help with writing.
Creating professional, engaging content helps you capture your audience's attention and convey your message effectively. These tools can bridge the gap, turning your ideas into polished visual content and crafty copy, even without specialized skills.
Canva: User-friendly graphic design
Canva makes graphic design accessible to anyone. I've been using it for years, personally and professionally. It's my go-to tool for creating quick, polished visuals for social media posts, profile banners, and LinkedIn carousels.
Key features:
- The drag-and-drop interface makes creating designs intuitive and fast.
- An extensive template library of various formats (social posts, presentations, flyers, etc.) makes starting a new project a breeze.
- There's a huge selection of stock photos, illustrations, and fonts.
- The Brand Kit feature helps maintain consistent branding across designs.
What I love most about Canva is that you don't need to be an Adobe pro to create professional-looking graphics. The templates are a great starting point, and it's easy to customize them to fit your brand.
One standout feature is the ability to resize designs for different social media platforms in one click. This is a huge time-saver when you're creating content for multiple platforms or social media channels with their own size requirements.
Pricing: Free plan available; paid plans start at $18/month for one person.
Adobe Firefly: Commercial-friendly AI images
Adobe Firefly is Adobe's foray into the world of AI-generated images, and it's making waves for good reason.
It can help you produce high-quality visuals quickly, especially if you need images for commercial use.
Key features:
- Adobe says Firefly outputs can be used commercially, subject to its terms.
- The intuitive interface gives you granular control over image style and composition.
- Firefly integrates seamlessly with other Adobe products like Photoshop.
- Generate variations or edit images in Adobe Express to get the results you want.
Kirsti Lang, a senior content writer at Buffer, took it for a spin. Her opinion was that the free web version is surprisingly powerful. You can specify everything from aspect ratio and art style to depth of field and color tone.
One standout feature is the quality of human faces in AI-generated photos. Unlike some other tools, Firefly produces realistic faces without the unsettling "uncanny valley" effect. "My results with Firefly were consistently excellent," Kirsti says, "I found that playing around with the various art styles and effects pre-generated really helped me fine-tune my ask."
While the free version is great for experimenting, the watermark-free images in paid plans are worth considering for professional use.
Pricing: Free version available (with watermark); paid plans start at $9.99/month.
VEED: Simple video editing
VEED is a simple browser-based video editing tool designed to make video creation accessible to those without extensive editing experience.
As someone who's dabbled in more advanced tools like Final Cut Pro, I initially found VEED limiting. However, I appreciate its simplicity for quick edits.
Key features:
- It has a user-friendly, drag-and-drop interface.
- The auto-subtitling feature saves time when creating captions.
- Basic effects like green screen and filters let you customize your video.
- Stock footage library lets you add additional content to break up long stretches of video.
What stands out about VEED is its ease of use. While I sometimes wish for more control, that's exactly why it's great for small business owners or marketers who aren't video editing pros. It's hard to make big mistakes with VEED.
Pricing: Free version available (with watermark); paid plans start at $20/user/month.
Butter: Dynamic video creation for e-commerce
Butter is a specialized video creation tool designed with e-commerce brands in mind, offering a Canva-like experience for short-form product videos.
As someone who's worked with e-commerce brands, I appreciate tools that streamline the process of creating engaging product content. Butter does just that for video.
Key features:
- It lets you turn still product shots into dynamic videos.
- The intuitive drag-and-drop interface makes video creation easy.
- An extensive library of templates is tailored for e-commerce.
- Brand kit functionality helps you maintain a consistent visual identity.
Butter really sets itself apart in its focus on creating dynamic product videos from a combination of still shots and video footage. It lets your marketing team create eye-catching assets on the fly for your website, email, SMS, and social media campaigns.
It's a tool I wish I had when I was doing marketing for e-commerce brands. It lets you step up your video content without a huge learning curve or budget.
Pricing: Free plan available; paid plans start at $25/month.
Claude: AI writing chatbot that sounds more human
Everyone has their go-to AI writing assistant at this point. Claude is mine. It's a large language model, much like ChatGPT, that you can use to brainstorm ideas, generate and edit writing, and repurpose content, among other things.
I've experimented with numerous AI writing tools, including ChatGPT, Writer, Jasper, Lex, Copy.ai, and Reword. I've found Claude to be a standout option.
Key features:
- It has a chat-based interface for natural, conversational content creation.
- You can get assistance with writing, editing, brainstorming, and problem-solving.
- It generates human-like text for both creative and analytical tasks.
- I've found its outputs more natural and easier to edit than those from some other AI writing tools I've tried.
What I appreciate most about Claude is how human it sounds. The outputs feel more natural and require less editing than many other AI writing tools I've tried.
I've also been finding Claude's Projects feature useful lately. You can add resources and custom instructions to use across multiple chats. So you don't need to add the same files and instructions over and over again.
For example, I used Claude for an upcoming Buffer article to brainstorm a new outline that will be more skimmable, noting the resources I'd attached to the project:
Claude also offers limited use on its free plan. So when my workload is lighter, the free plan suffices, which has led to me only paying for Claude for four out of ten months so far this year.
While Claude is great for individual writing tasks, software like Narrato or Blaze might be worth exploring for teams managing large amounts of content. They offer additional features for collaboration, content repurposing, and publishing that I've found intriguing.
Pricing: Free version available; paid plans start at $20/month.
Conversion optimization tools
For affordable conversion optimization, ConvertFlow (free plan; paid plans from $29/month) is a strong choice for website personalization, while VWO is better if you specifically need A/B testing, and Aftersell ($29.99/month) is designed for e-commerce upsells.
Is your website getting traffic, but not enough visitors are taking action? That's where conversion optimization software comes in handy.
VWO: A/B testing to improve conversion rate
Let's talk about A/B testing (or split-testing) with our first conversion optimization software: VWO.
A/B testing is used to determine the best way to display different elements on your website that will lead to the most conversions. For example, you might test different colors or copy for your CTAs (calls-to-action) or timing on a popup.
Key features:
- VWO lets you split-test just about anything you can think of on your website or mobile app.
- Its user-friendly visual editor lets you create test variations without code.
- Use heatmaps and session recordings to understand visitor behavior.
- Identify drop-off points in your journey with funnel analysis
- Collect qualitative feedback from visitors with surveys.
VWO is a great option for small businesses due to its approachable pricing that scales with you as you grow.
Pricing: Schedule a demo for pricing.
ConvertFlow: Funnel builder to guide site visitors
Another important aspect of conversion optimization is personalizing your website — tailoring your visitors' experience depending on their actions.
For example, you might show an exit-intent popup if they're about to leave, or recommend products based on their purchase history and other first-party data you've collected.
This is where ConvertFlow comes in. Now, full disclosure: I used to work at ConvertFlow, so I'm a little biased. But I think it's a powerful tool for any business looking to personalize their website and guide their site visitors' experience.
Key features:
- Create engaging popups, forms, quizzes, and surveys to capture leads and gain essential customer data to personalize their experience.
- Design landing pages to continue the story from your marketing campaigns (ad, email, etc.) and guide shoppers toward a conversion.
- Personalize website content for different audience segments.
- Integrate with a wide range of other digital marketing tools to share and activate the customer data you gather.
- A/B test your campaigns to improve performance continually.
What sets ConvertFlow apart is the ability it gives you to create complex, multi-step campaigns without any coding. Its drag-and-drop builder lets anyone on your team create campaigns — something I wish I had at other brands when I had to rely on a designer for any requests.
Pricing: Free plan available; paid plans start at $29/month.
Aftersell: Revenue optimization for e-commerce
If you're running an online store, getting conversions is one piece of the revenue puzzle. But increasing cart values lets you boost your bottom line without acquiring new customers.
Key features:
- Create upsell and cross-sell offers for high-intent shoppers in the cart, at checkout, and post-purchase.
- Customize offers based on cart contents, customer history, and other factors.
- A/B test different offers to find what performs best.
Cody shared in a recent newsletter that he appreciates Aftersell because it has a great team and it's cheaper than similar options. "You can get post-purchase upsells, in-checkout blocks, and network offers in one tool with a capped pricing model," he says.
What's particularly clever about Aftersell is its focus on high-intent shoppers. People who already have items in their cart or have just purchased are already in a buying mood, so it's a great time to upsell or cross-sell items they might be interested in.
Pricing: Aftersell offers modular pricing, depending on which features you want, starting at $29.99/month.
Paid advertising tools
Start with WordStream's free Google Ads Performance Grader to find opportunities in your campaigns; if you need ongoing optimization for Meta and TikTok, Atria starts at $159/month.
It can be easy to burn through your paid ads budget without seeing results. That's where paid advertising tools come in handy. They help ensure you're maximizing your ROAS (return on ad spend) and targeting the right audiences.
WordStream: Google Ads Performance Grader

Wondering how your Google Ads campaigns are stacking up? WordStream's Google Ads Performance Grader lets you gain quick, actionable insights — and it's completely free.
Key features:
- Analyze your Google Ads account performance.
- Compare your metrics against industry benchmarks.
- Identify wasted ad spend and opportunities for savings.
- Get actionable recommendations for improvement.
It takes the complex data from your account and translates it into clear, actionable advice.
Pricing: Free.
Atria: Ad optimization for Meta and TikTok ads
If you've ever felt like you're walking in a dark room when it comes to your Facebook, Instagram, and TikTok ads, Atria is like flipping on the lights.
Key features:
- Manage Meta and TikTok ad campaigns in a unified dashboard.
- Generate engaging ad content with AI-powered assistance.
- Create high-converting ads from 500+ Canva templates.
- Automate budget allocation across best-performing ad sets.
- Analyze competitors to learn from their success.
- Refine your target audience with advanced optimization tools.
Atria is really leaning into its AI features to stand out from other options in this space. Its AI can analyze your best performers and use that data to generate new ad ideas, even providing a conversion score to help you pick the most effective copy.
Plus, curated "top picks" showcase winning ads from various industries, giving you a shortcut to what's working right now in paid advertising.
Pricing: Paid plans start at $159/month.
Marketing analytics tools
Google Analytics is free and enough for most small businesses; Contentsquare starts at $49/month for deeper website experience insights, while Amplitude and Lifetimely are better suited to digital product and Shopify teams.
Marketing analytics tools give you X-ray vision into your marketing efforts. They help you see what's working so you can amplify successful efforts and adjust anything that's falling flat.
Google Analytics: Free website analytics
As far as free tools go, Google Analytics is a powerhouse. I've used it at every company I've worked with for over a decade. It's got a surprising amount of depth and flexibility for a free analytics tool.
Key features:
- Track your website traffic, user behavior, and conversion rates.
- Set up custom conversion events to measure specific user actions relevant to your business.
- Monitor the revenue impact of your marketing efforts.
- Analyze traffic sources to understand where your visitors come from.
- Create custom reports to focus on the metrics that matter most to you.
- Integrate with other Google tools like Google Ads and Search Console.
What I appreciate most about Google Analytics is its ability to adapt to your specific business needs. The custom conversion events let you track anything from newsletter signups to product purchases, giving you a clear picture of how users interact with your site.
If you don't have the budget to invest in a more comprehensive or automated tool, Google Analytics will give you most of what you need. If you're not already using it, I recommend implementing it ASAP to build up your historical data.
There is a paid version (Google Analytics 360), but I've never used it, likely because its hefty starting price of $50k/year is out of reach for most small businesses.
Pricing: Free.
Contentsquare: Website engagement analytics
Contentsquare helps you understand how users experience your website and digital products.
Key features:
- Analyze user behavior with metrics such as clicks, scrolls, engagement, and conversion across your digital experiences.
- Visualize customer journeys to understand how users navigate your site and identify opportunities for improvement.
- Build funnels and journey analyses to identify where users drop off and understand what may be preventing conversion.
- Collect and analyze user feedback to add qualitative context to behavioral data and better understand customer needs.
What I love most about Contentsquare is that it brings different types of experience data together. You can see what users are doing, where they're struggling, and how those behaviors affect their journey, giving you a much clearer picture of where to focus your optimization efforts.
Pricing: Free plan available; paid plans start at $49/month.
Amplitude: App and digital product analytics
If you have a mobile app or web-based digital product, Amplitude's robust analytics platform provides valuable insights into user behavior, ultimately allowing you to improve retention.
Key features:
- Track user actions and create custom events to measure what matters most to your business.
- Build cohorts based on user behavior to understand different segments of your audience.
- Identify friction points in the customer journey.
- Create custom dashboards to keep your team aligned on key metrics.
- Leverage predictive analytics to forecast user behavior and prevent churn.
What sets Amplitude apart is its focus on behavioral cohorts. Instead of just looking at demographics, you can group users based on their actions. This can help you identify your power users and understand what features keep them coming back.
Pricing: Free plan for up to 2 million events/month; paid plans start at $94/month.
Lifetimely: E-commerce analytics for Shopify brands
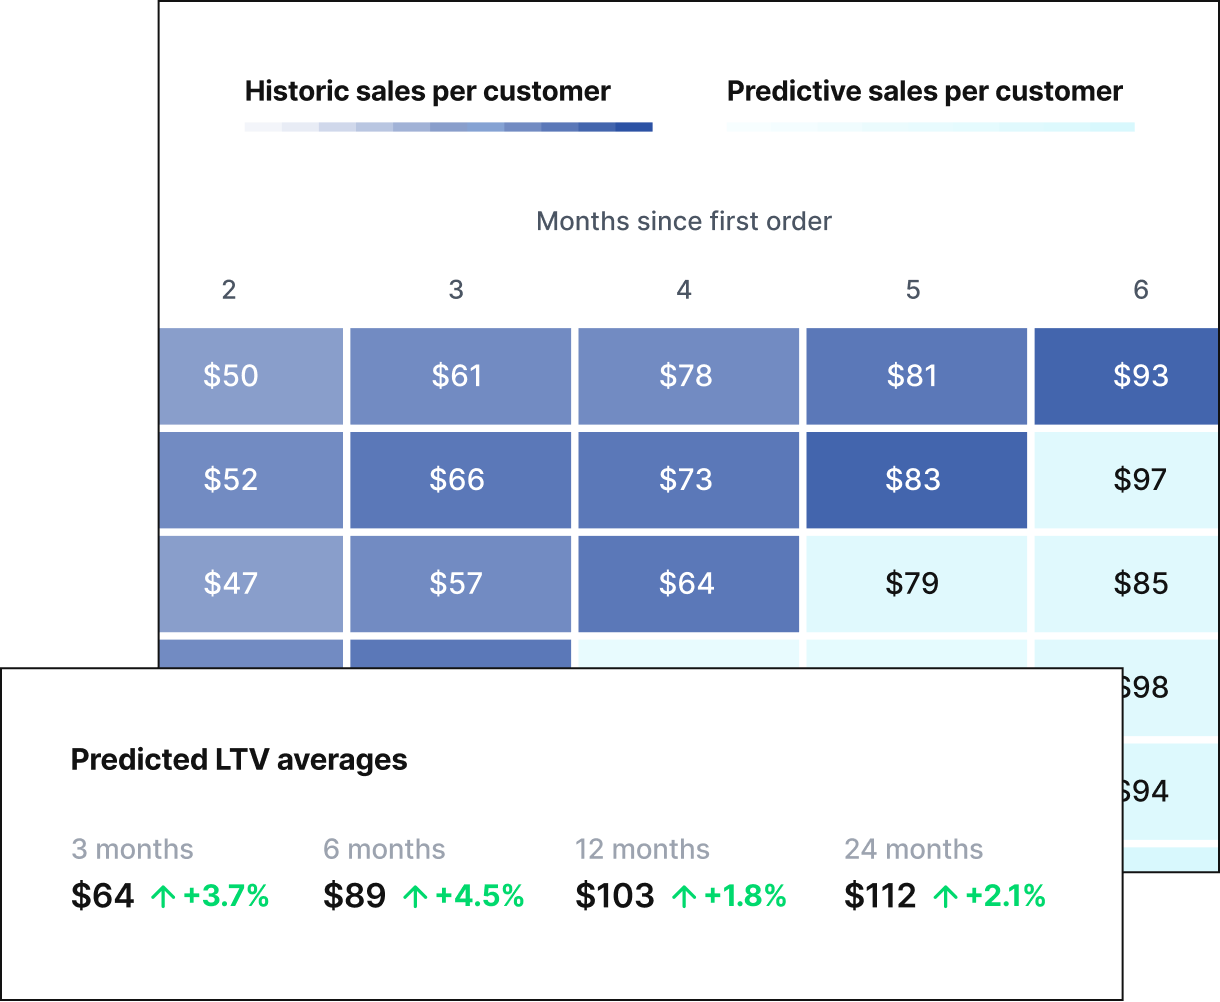
This is another tool I wish I had when I was working at e-commerce brands. For Shopify store owners, Lifetimely offers a crystal-clear view of customer behavior and lifetime value, helping you make data-driven decisions to boost profitability and grow your store strategically.
Key features:
- Track key metrics like customer lifetime value, retention rates, and repurchase probability.
- Forecast future revenue based on historical data and current trends.
- Segment customers based on their value and behavior to tailor your marketing.
- Compare your performance against industry benchmarks.
Plus, the ability to predict customer lifetime value. This insight lets you focus your marketing efforts on your most valuable customers and improve profitability.
Max Bidna, who goes by Marketing Max, reports on X that Lifetimely's Shopify charts "are second to none in terms of helping you understand the LTV from different customer segments and from different acquisition channels."
Plus, the ability to compare your store's performance against others in your industry gives you a clear picture of where you stand and where you can improve.
Bonus: All features are available on all plans, making it easy to grow your Shopify store.
Pricing: Free plan up to 50 orders per month; paid plans start at $49/month.
Build your digital marketing stack one tool at a time
Start with two tools, not twenty. Start by identifying your most pressing marketing challenges. Is it maintaining a consistent social media presence? Understanding your website visitors' behavior? Or maybe you're looking to get into influencer marketing for the first time?
Choose one or two areas to focus on initially and adopt the tools that address those needs. When you're ready to try a new channel or optimize an existing one, you can come back to explore your options and gradually expand your digital marketing toolkit.
FAQ about digital marketing tools
What are the main types of digital marketing?
SEO, content marketing, social media marketing, email and SMS marketing, paid search and social advertising, partnership marketing (affiliate and influencer), and analytics and conversion optimisation are some of the main types of digital marketing. This guide covers tools for all seven.
Which digital marketing tools are best for a small business?
For a small business, the five tools that cover a lot of ground are Buffer for social publishing, Mailchimp or Klaviyo for email, Canva for design, Google Analytics for measurement, and Google Search Console for search.
What marketing tools does a small business need?
A publishing tool, an email tool, a design tool, a web analytics tool, and a search monitoring tool are some of the most helpful digital marketing tools for small businesses. You can assemble all five for free: Buffer, Mailchimp, Canva, Google Analytics, and Google Search Console.
What are the most popular digital marketing tools?
The most widely used are Google Analytics and Google Search Console, Canva for design, Mailchimp and Klaviyo for email, HubSpot for B2B lead management, and Buffer for social media. Amplitude and Lifetimely can be excellent choices for businesses with more specialized product or e-commerce analytics needs.
How much should a small business spend on marketing tools?
You can run a complete stack for $0 using free tiers, and a solid paid stack for under $100 a month: roughly $6 per channel for Buffer, $13 for Mailchimp, $18 for Canva, and $49 for Moz. Tools priced above $150 a month, like Atria, Lifetimely, and VWO, generally need existing traffic or revenue to justify themselves.
How do I teach myself digital marketing?
Start with the free material published by the tools themselves. Moz's SEO guides and webinars are the strongest free SEO education available, Google offers free Analytics and Ads certifications through Skillshop, and HubSpot Academy covers email and inbound marketing at no cost.
More digital marketing tools and resources
]]>After digging into millions of posts sent through Buffer, we've pinpointed the best time to post on all major social platforms, LinkedIn included.
By "we," I mean Julian Winternheimer, our resident data scientist.
We've (OK, Julian has) been running these numbers for around two years now, and the 2026 LinkedIn findings surprised me a little: The best time to post on LinkedIn in 2026 is generally between 3 p.m. and 8 p.m. on weekdays, with Wednesday at 4 p.m. emerging as the strongest overall slot in our analysis of 4.8 million posts.
In 2025, peak engagement was almost entirely confined to working hours — things fell off pretty sharply once 5 p.m. hit. This year, we're seeing those peak windows shift later into the day, which mirrors what's been happening on Instagram and TikTok for a while now.
Late afternoon and evening hours are now pulling some of the strongest LinkedIn engagement numbers we've seen. People are still showing up for professional content; they're just doing it after they've closed their laptops for the day.
But I'm getting ahead of myself. Let's get into the data.
Key takeaways
- Peak hours: Late afternoon and evening hours (3 p.m.–8 p.m.) now drive the highest engagement on LinkedIn, although some days have high-performing slots later in the evening.
- Top slots: Wednesday at 4 p.m., Friday at 3 p.m., and Friday at 4 p.m. are the highest-performing times.
- Best day: Wednesday is the best day to post, closely followed by Thursday and Friday.
- Early-week dip: Monday and Tuesday see the lowest engagement; save your best content for mid-to-late week.
Jump to a section:
- Is there a best time to post on LinkedIn?
- The best time to post on LinkedIn for engagement
- The best times to post on LinkedIn for each day of the week
- The best time to post on LinkedIn on Monday
- The best time to post on LinkedIn on Tuesday
- The best time to post on LinkedIn on Wednesday
- The best time to post on LinkedIn on Thursday
- The best time to post on LinkedIn on Friday
- The best time to post on LinkedIn on Saturday
- The best time to post on LinkedIn on Sunday
- The best day to post on LinkedIn
- Get the best times to post on LinkedIn right in Buffer
- Best time to post on LinkedIn FAQs
Is there a best time to post on LinkedIn?
Yes, our data shows that when you post on LinkedIn can meaningfully impact how much engagement your content gets.
The best time to post on LinkedIn is generally 3 p.m. to 8 p.m. on weekdays. Wednesday at 4 p.m. is the strongest overall time in our analysis, followed by Friday at 3 p.m. and 4 p.m.
That said, as even LinkedIn's own marketing blog points out, timing research isn't a black-and-white science, and every audience is a little different.
After analyzing more than 4.8 million LinkedIn posts sent through Buffer, we were able to pinpoint some clear posting windows when content tended to get higher engagement than others.
Your LinkedIn content is more likely to get engagement in these windows, whether you're looking to grow a LinkedIn Page for a brand or your own personal brand with a LinkedIn profile.
Engagement is a particularly useful benchmark when it comes to identifying the best time to post on LinkedIn. The platform’s algorithm uses interactions (reactions, comments, and reposts) as signals to help it decide which posts are valuable and should be shown to more people.
In other words, the more engagement your post receives, the more people will see your post. That's a simplification, as loads of factors go into how posts are ranked, but it's a solid rule of thumb. Strong engagement doesn't automatically guarantee more reach, but the two definitely influence each other.
This is why we consider time slots in which posts got the highest engagement to be the best time to post on LinkedIn.
But here's the thing — every audience is a little different.
My recommendation? Treat these times as a starting point, experiment with your own posting schedule as part of your LinkedIn marketing strategy, and dig into your social media analytics to find what works best for your specific audience and make the most of the LinkedIn algorithm.
The best time to post on LinkedIn for engagement
The best time to post on LinkedIn for high engagement is generally during late afternoon and evening hours on weekdays. The top-performing slots include:
- Peak window: 3 p.m. – 8 p.m.
- Top slot 1: Wednesday at 4 p.m.
- Top slot 2: Friday at 3 p.m.
- Top slot 3: Friday at 4 p.m.
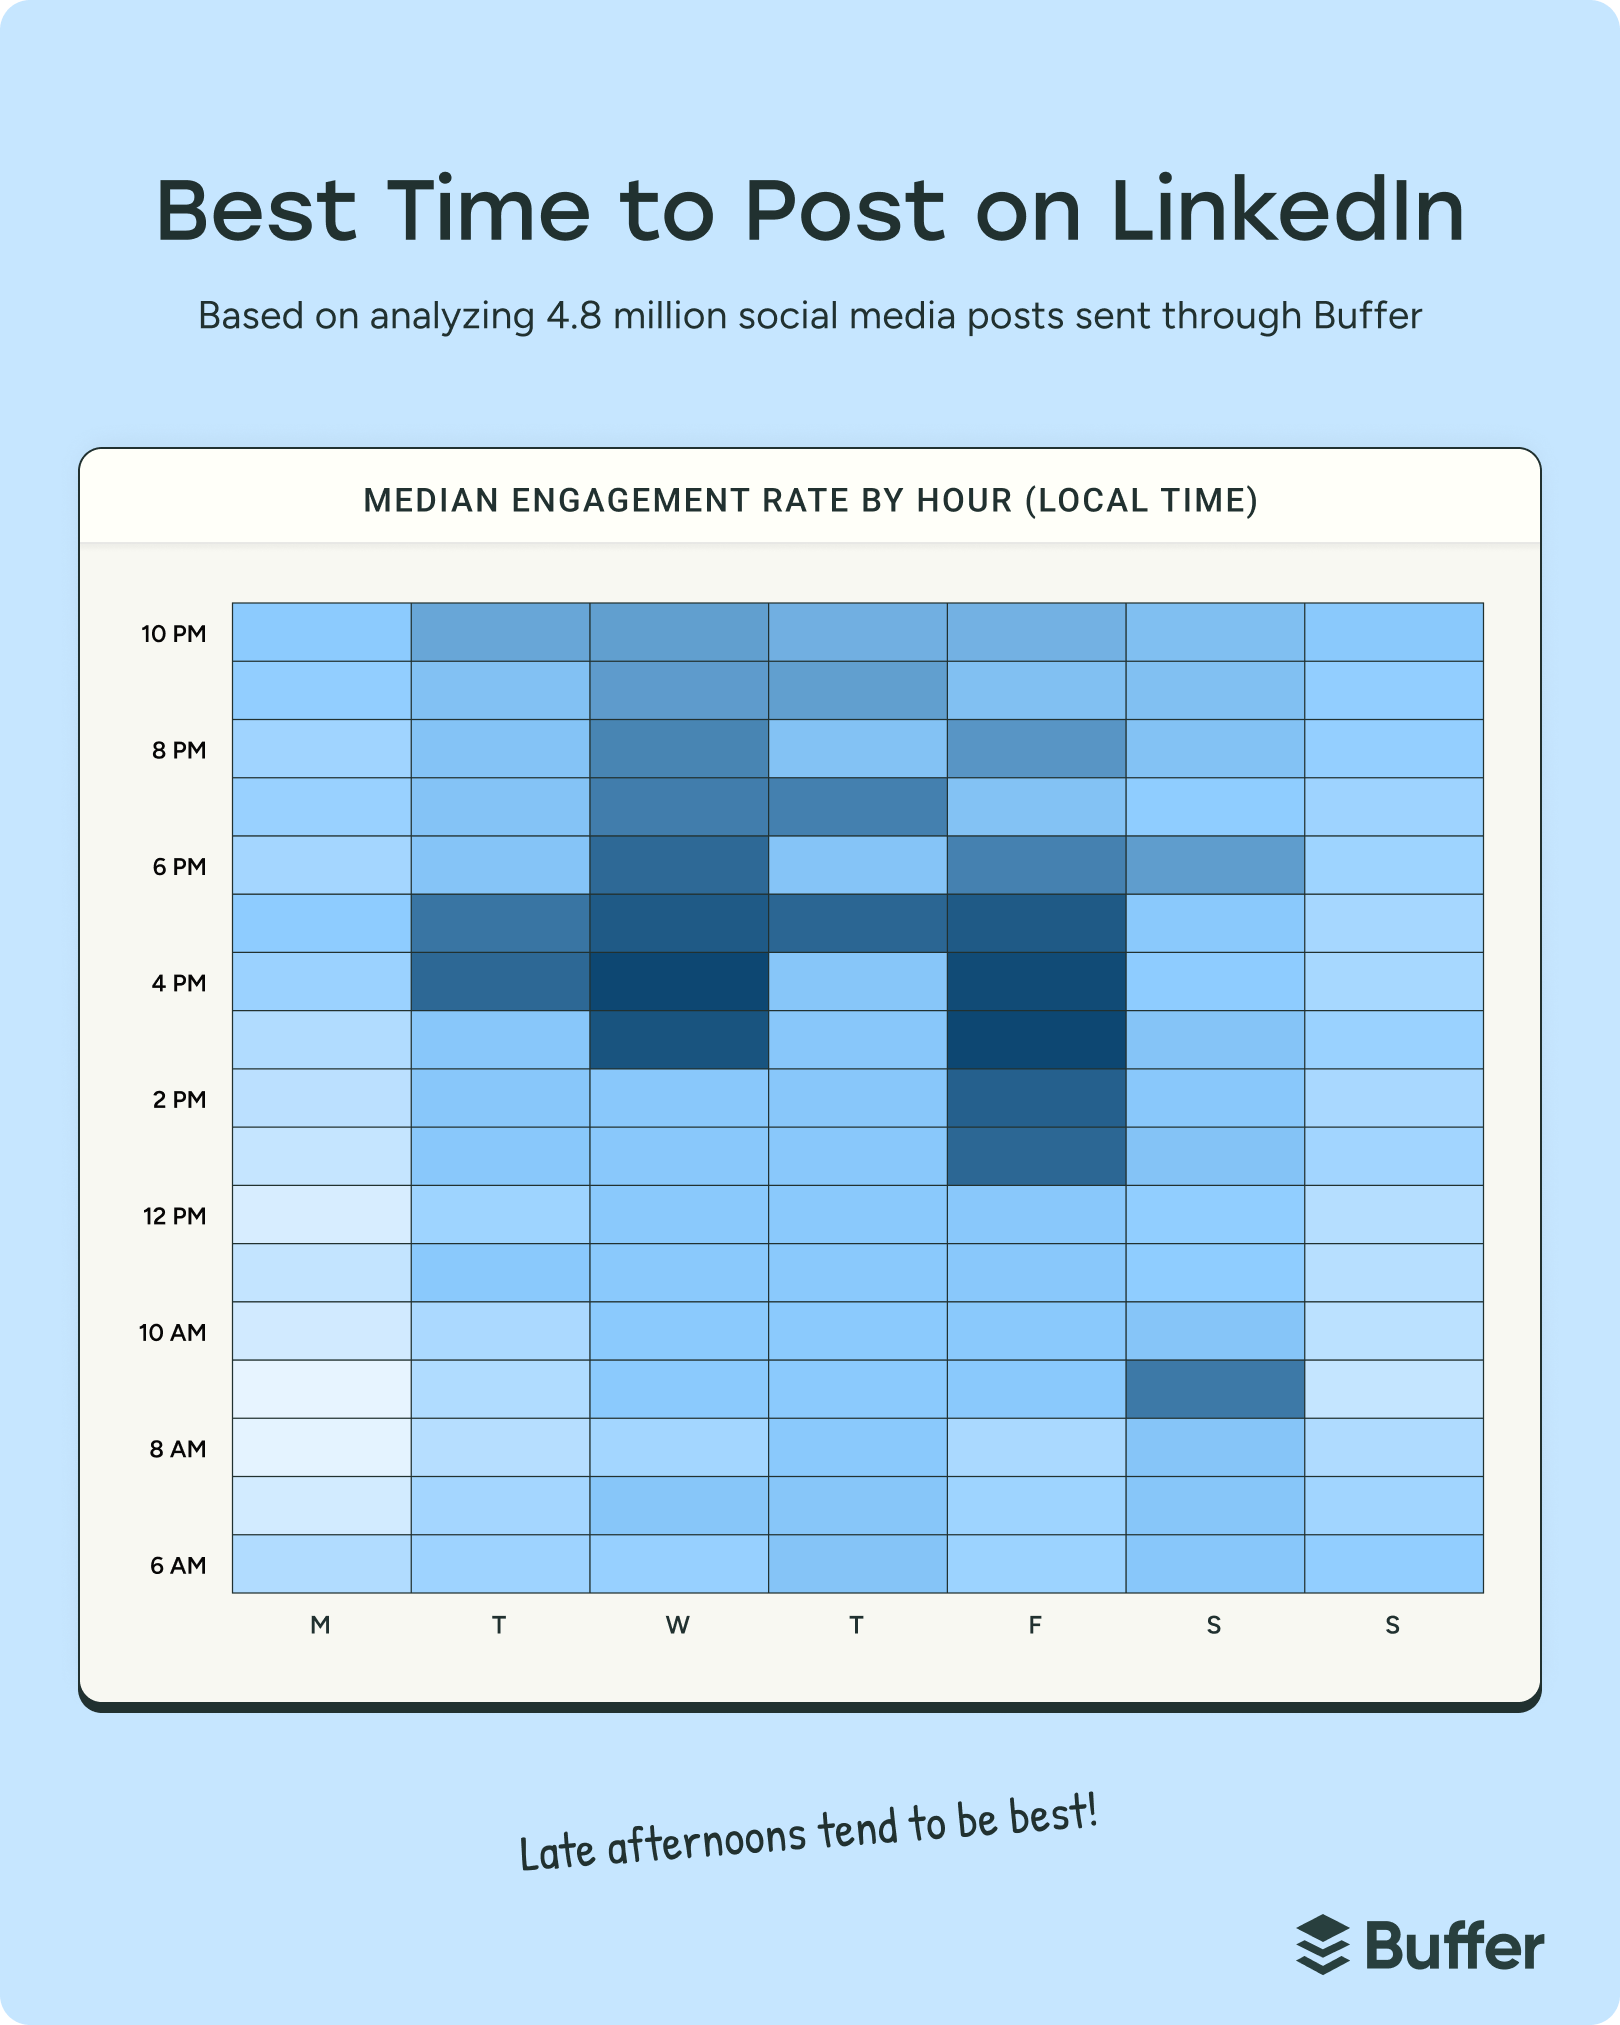
You can see it all pretty clearly in the graph above. It breaks down the week into hourly chunks, where the darkest blocks are the time slots with the highest engagement (and the best time to post on LinkedIn), and the light to white blocks are the time slots with the lowest engagement.
The shift toward evening engagement on LinkedIn looks a little different from what we saw in 2025, when the best posting times were exclusively within working hours. What's interesting is that this late-day activity doesn't seem to be passive scrolling. Professionals winding down their workday are often reading thought leadership, exploring solutions, and engaging with peers more intentionally — which could mean higher-quality interactions for your content, too.
That doesn't mean midday is a dead zone, though. LinkedIn's own marketing blog notes that pockets of the workday (like the lunch break or mid-afternoon) are still moments when professionals pause to scroll. In our data, those midday hours perform decently; they're just no longer the clear peak the way they were in 2025.
As you'll see from the graph above, engagement picks up in the afternoon and remains strong through the evening hours. Unlike other social platforms where evening slots have always performed well, this represents a notable shift in LinkedIn behavior.
Posts shared in the morning hours (6 a.m.–11 a.m.) now tend to see lower engagement than afternoon and evening slots. If your current posting schedule is built entirely around morning windows, it might be worth testing some later time slots to see if your audience has shifted, too.
The best times to post on LinkedIn by day
| Day | Best times |
|---|---|
| Monday | 10 p.m., 5 p.m., 9 p.m. |
| Tuesday | 4 p.m., 5 p.m., 10 p.m. |
| Wednesday | 4 p.m., 3 p.m., 5 p.m. |
| Thursday | 5 p.m., 7 p.m., 9 p.m. |
| Friday | 3 p.m., 4 p.m., 5 p.m. |
| Saturday | 9 a.m., 6 p.m., 10 p.m. |
| Sunday | 10 p.m., 9 p.m., 6 a.m. |
🌍 Wait, what time zone? To make this data easier to understand, our data scientist has normalized posting times by local time zone. So if the recommended time is 4 p.m., you can treat that as 4 p.m. in the time zone you’re targeting. There’s no need to convert from a single reference time zone.
The best time to post on LinkedIn on Monday
The best time to post on LinkedIn on Monday is 10 p.m., as professionals catch up on content after their workday. If you're looking for more Monday slots to add to your posting schedule, LinkedIn posts shared at 5 p.m. and 9 p.m. also saw higher engagement than the rest of the day.
Monday overall tends to see lower engagement compared to midweek, so consider saving your highest-priority content for Wednesday through Friday.
The best time to post on LinkedIn on Tuesday
The best time to post on LinkedIn on Tuesday is 4 p.m., as users begin wrapping up their workday and checking their feeds. If you need more posting times to choose from, 5 p.m. is not far off in terms of engagement, as is 10 p.m.
Like Monday, Tuesday sees slightly lower overall engagement, so test these times with your audience before locking in a regular Tuesday schedule.
The best time to post on LinkedIn on Wednesday
The best time to post on LinkedIn on Wednesday is 4 p.m. This is actually one of the highest-engagement time slots of the entire week. Other top posting times for Wednesday are 3 p.m. and 5 p.m., giving you a solid afternoon-to-early-evening window.
Wednesday is your best day overall for LinkedIn engagement, so this is a great day to share your most important content.
The best time to post on LinkedIn on Thursday
The best time to post on LinkedIn on Thursday is 5 p.m. Posts shared during the late afternoon and evening hours tend to perform well, so this time is definitely worth adding to your content calendar. If you need more times on Thursday, 7 p.m. is also strong, and 9 p.m. is worth considering for reaching users who engage later in the evening.
The best time to post on LinkedIn on Friday
The best time to post on LinkedIn on Friday is 3 p.m., right as professionals are starting to wind down their week. Other strong contenders for your posting schedule are 4 p.m. and 5 p.m.
Friday is one of your strongest days for engagement, and definitely worth keeping in your rotation.
The best time to post on LinkedIn on Saturday
The best time to post on LinkedIn on Saturday is 9 a.m. Posts shared on Saturday tend to see less engagement on the platform than most weekdays, so consider scheduling your content for a weekday instead. If you must post on Saturday, our data showed that 9 a.m. tends to get the highest engagement, followed by 6 p.m. and 10 p.m.
The best time to post on LinkedIn on Sunday
The best time to post on LinkedIn on Sunday is 10 p.m. Still, content shared on Sundays sees lower engagement compared to weekdays, and this slot is definitely not your best option if you're hoping to boost post interactions. If Sunday works better for your schedule, late evening is your best bet. Other times to consider are 9 p.m. and 6 a.m.
The best day to post on LinkedIn
The best day of the week to post on LinkedIn is Wednesday. We found that posts shared on Wednesday tended to get the most engagement, closely followed by Thursday, then Friday.
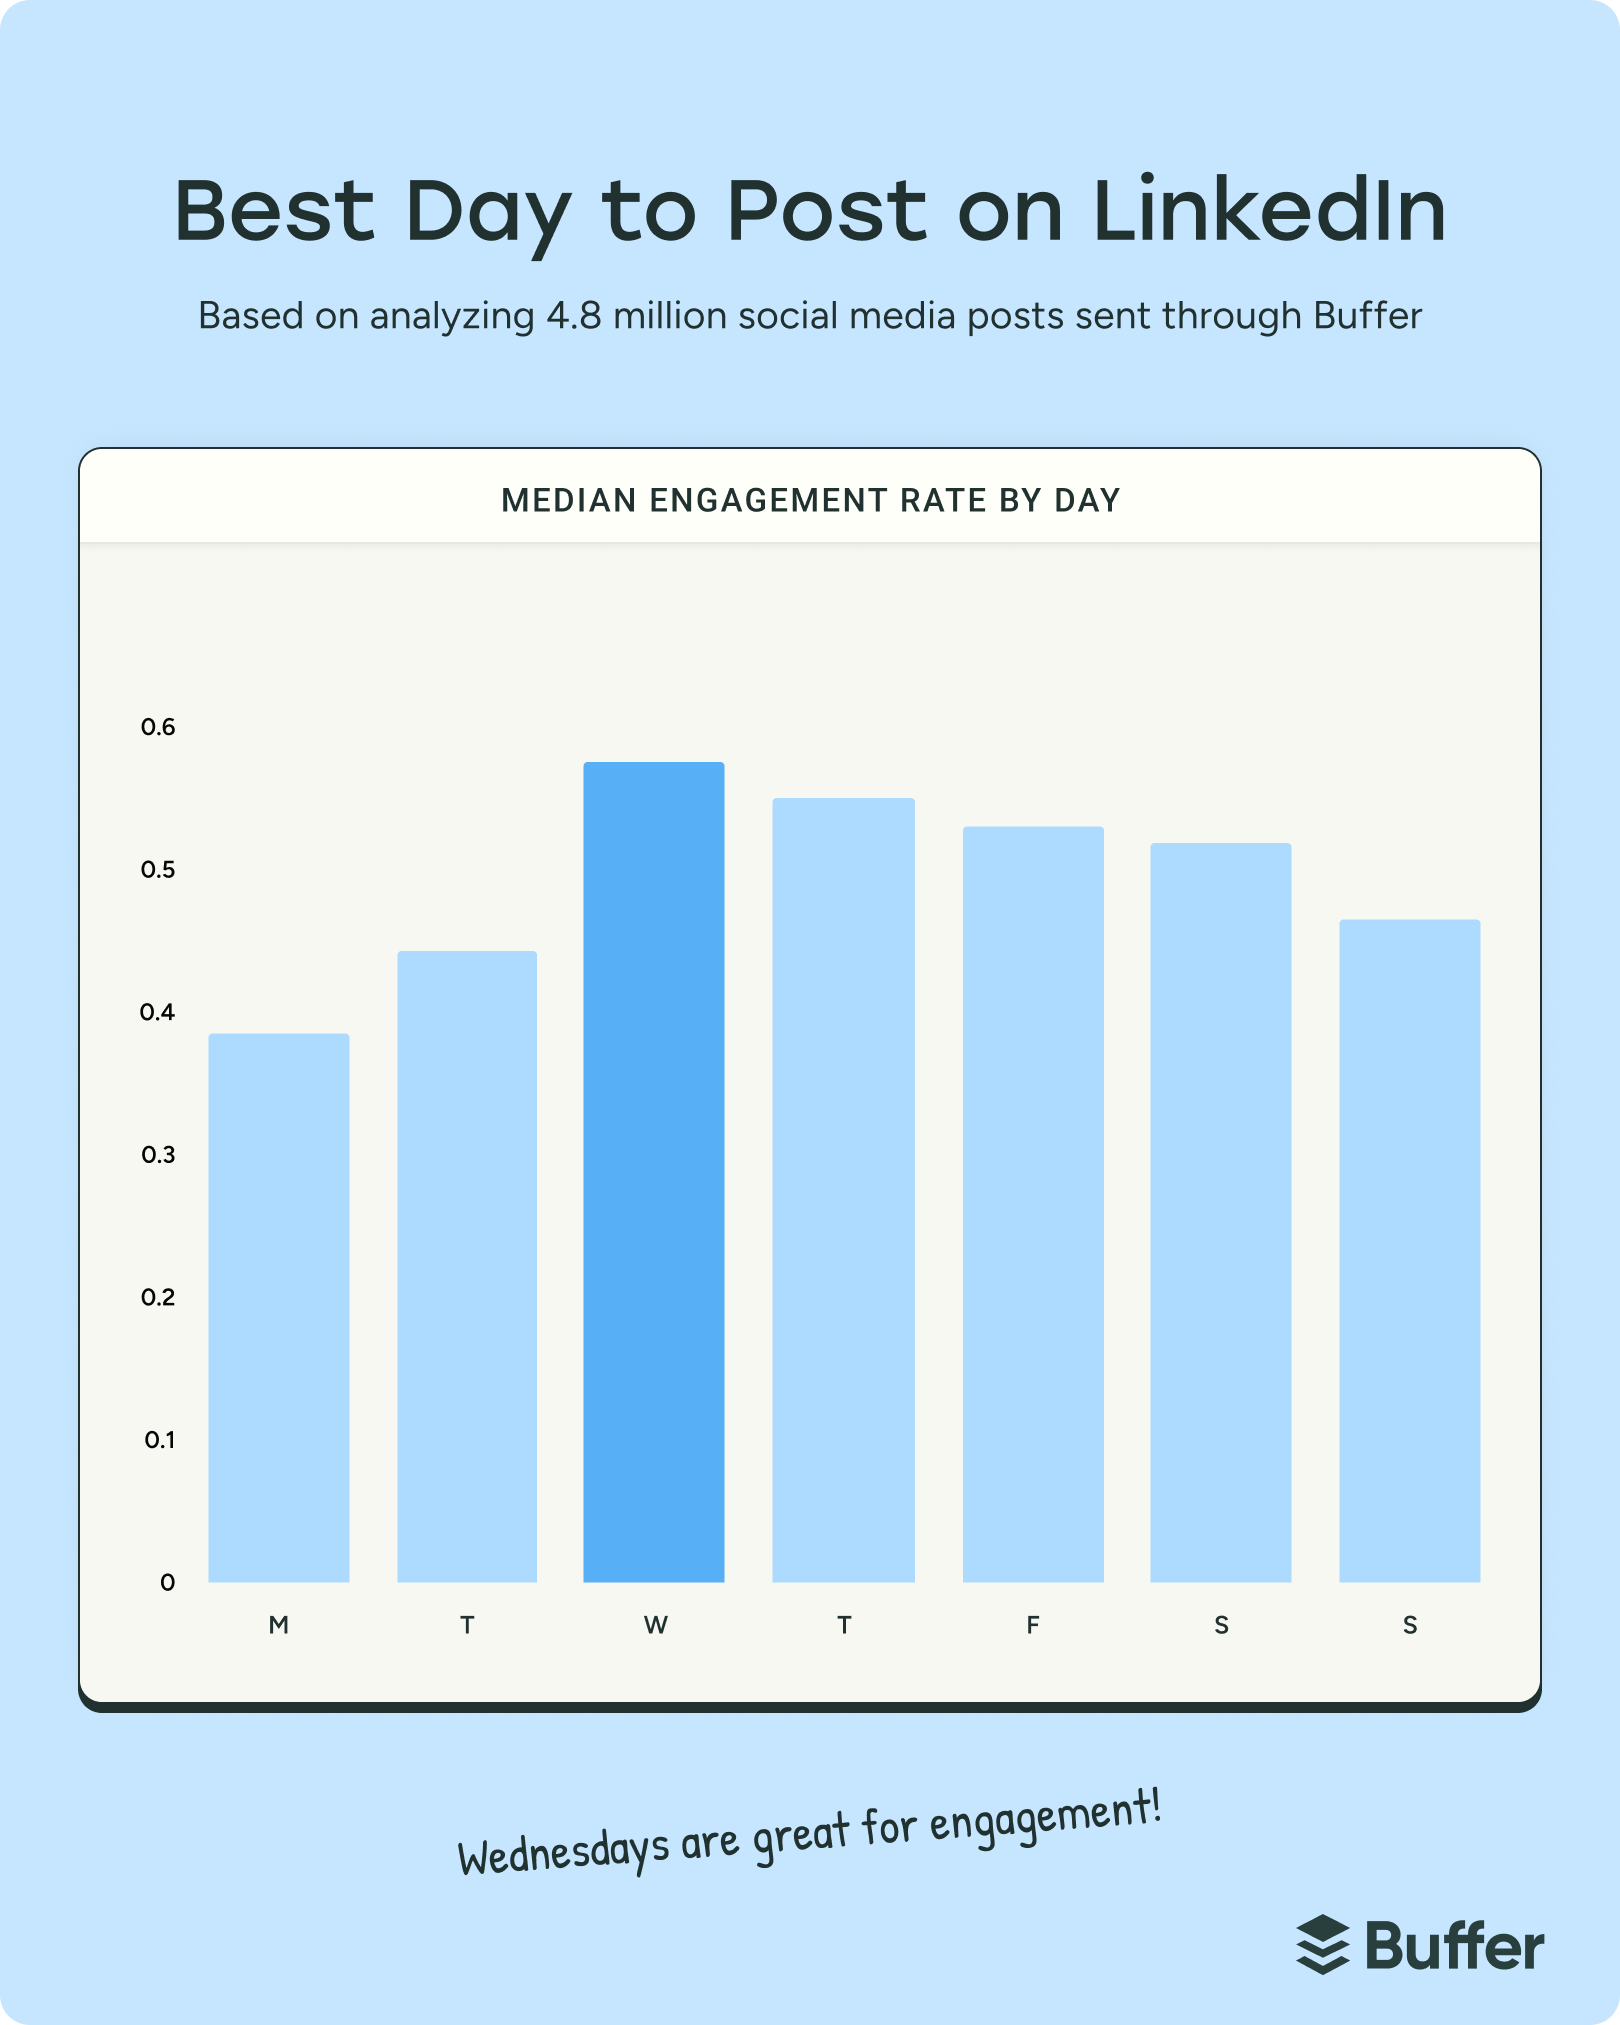
Anecdotally, this mid-to-late-week pattern makes sense. By Wednesday, most people are fully in the swing of the week — focused, open to learning, but not yet counting down to Friday.
Monday and Tuesday, on the other hand, showed the lowest engagement in our data. Monday sees the weakest numbers of the week, with Tuesday not far behind.
It's worth noting that not all research agrees here. LinkedIn's marketing blog highlights studies where Tuesday is actually one of the most active days on the platform. This is a good reminder that results can vary depending on the dataset, audience, and industry, so it's worth testing early-week posts with your own followers before writing those days off entirely.
The heads-down work theory still holds, though: if your audience tends to be deep in tasks on Monday and Tuesday, mid-to-late week is likely your better bet.
Get the best times to post on LinkedIn right in Buffer
With Buffer, you can have your posting schedule automatically set to the best times. That goes for all the other channels that Buffer supports, too. They'll appear as posting slots in your queue and calendar, making it super easy for you to schedule posts at the best times.
It'll take you less than a minute to set up:
- Select LinkedIn on your channels list on the left.
- Click on the settings (gear) icon above the calendar.
- Scroll to Posting Schedule and under Posting Slots, click the Generate New Posting Slots button.
- Then Use Recommended Posting Slots.
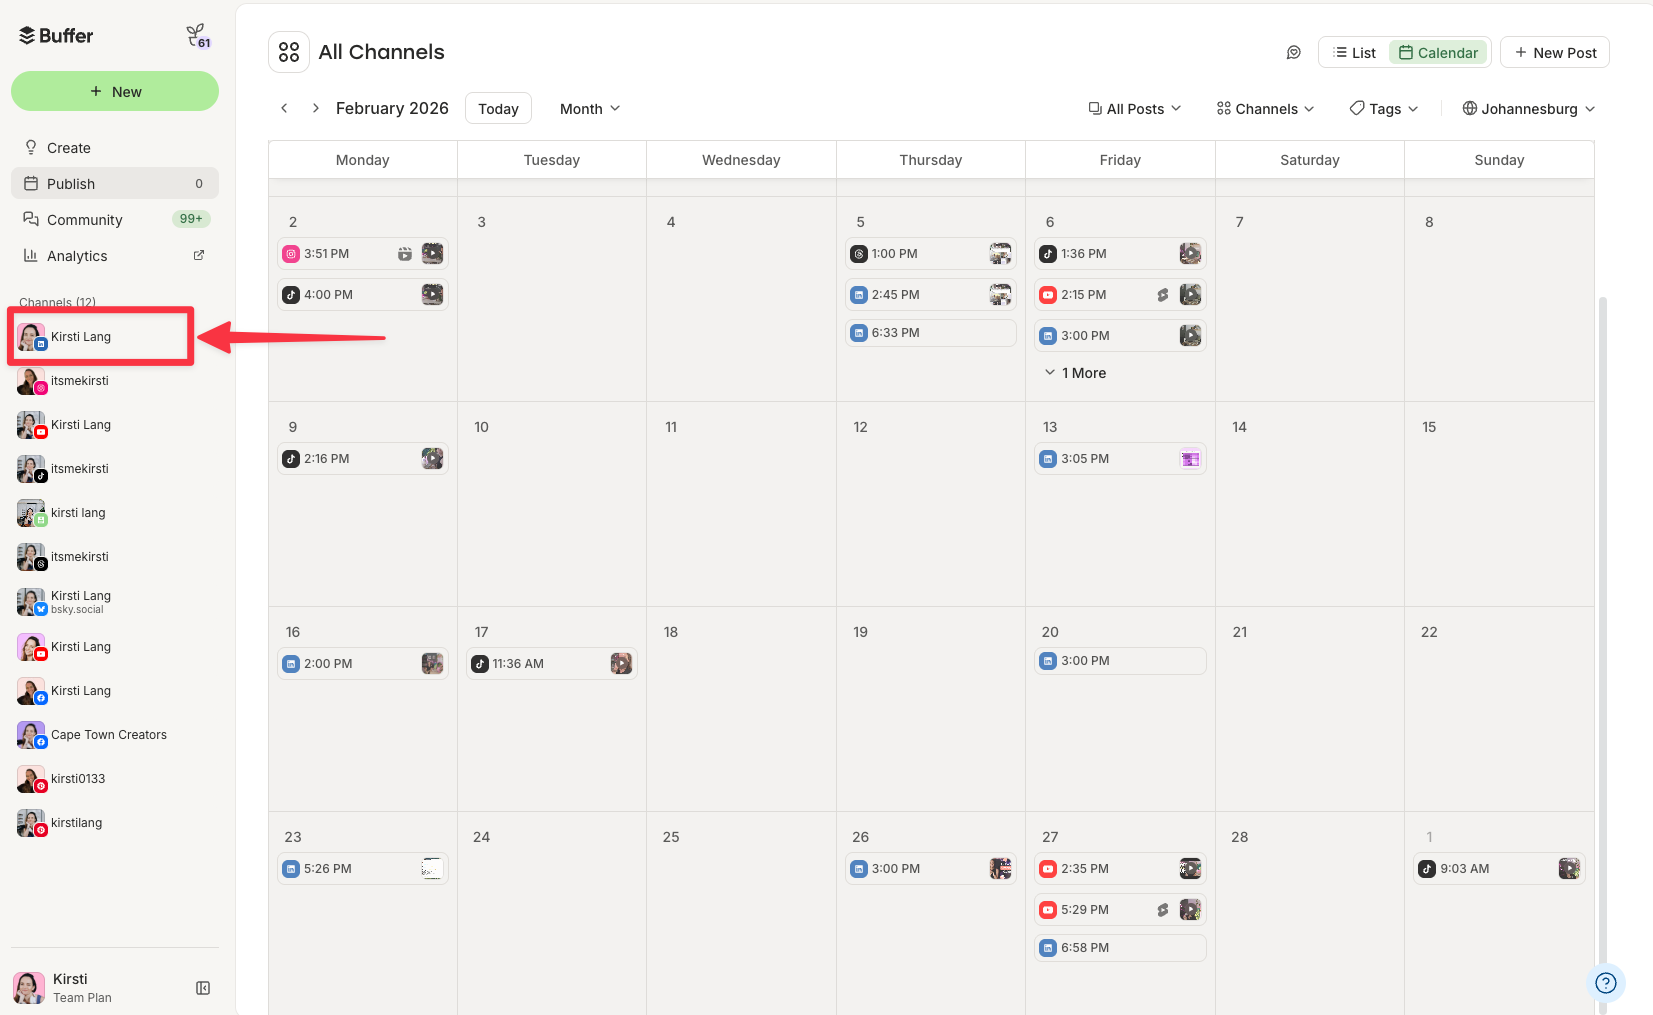
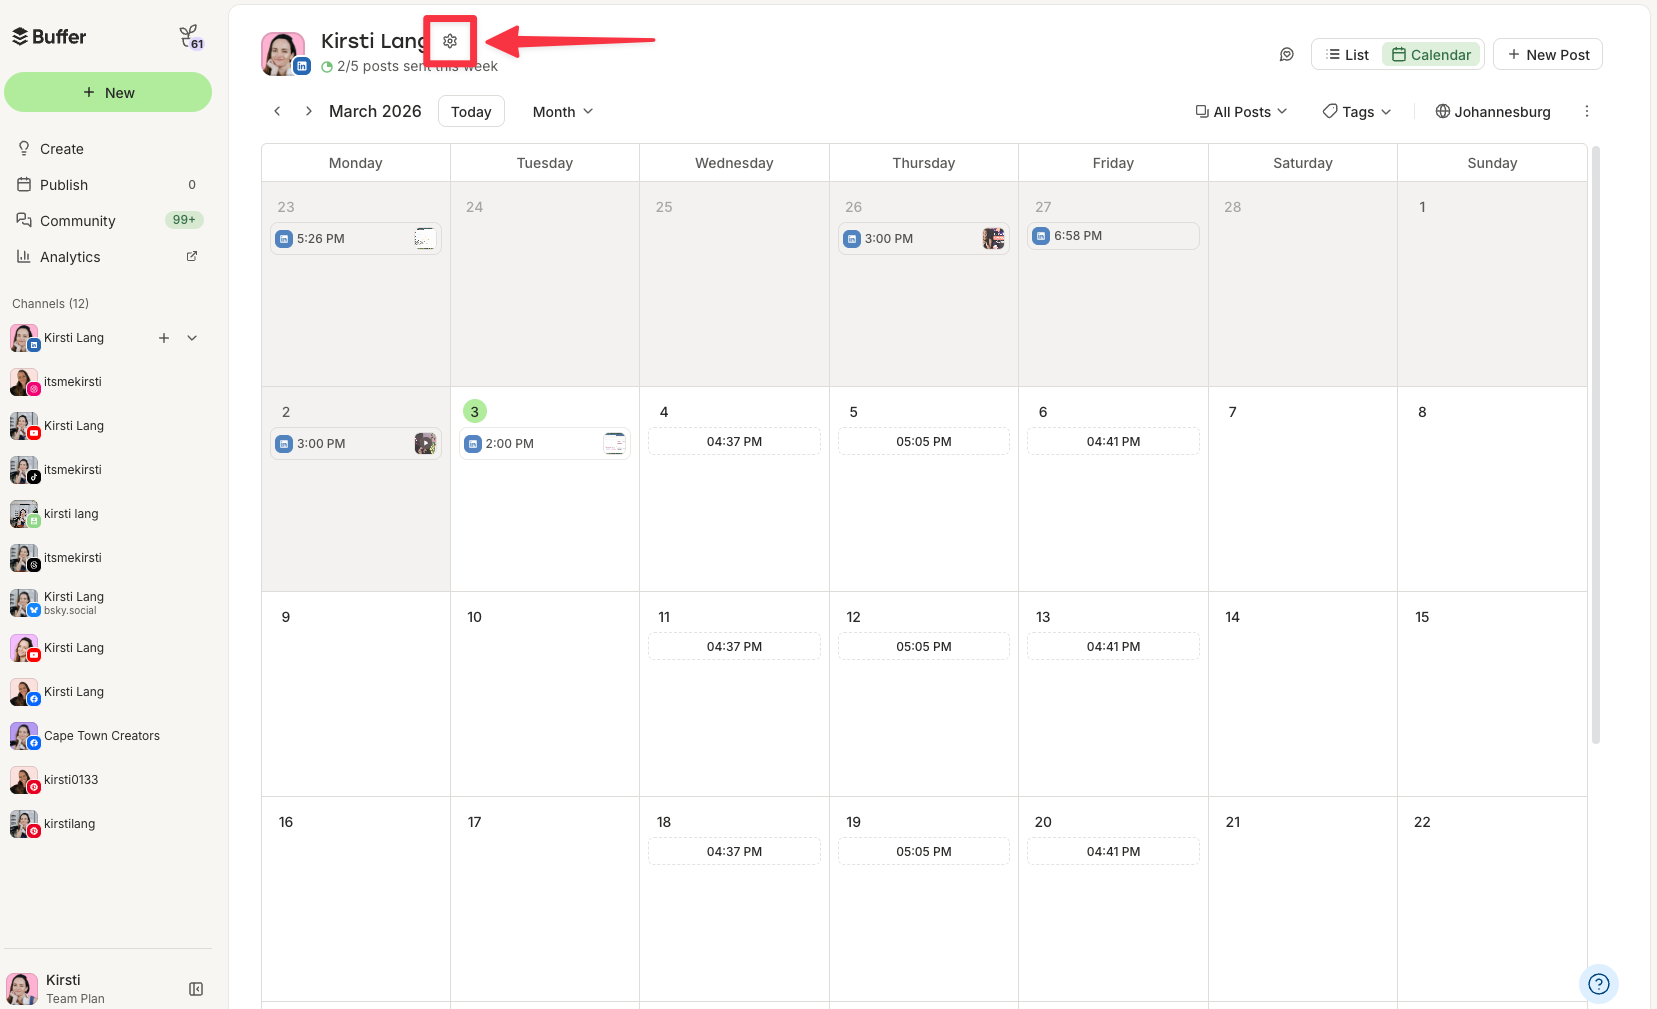
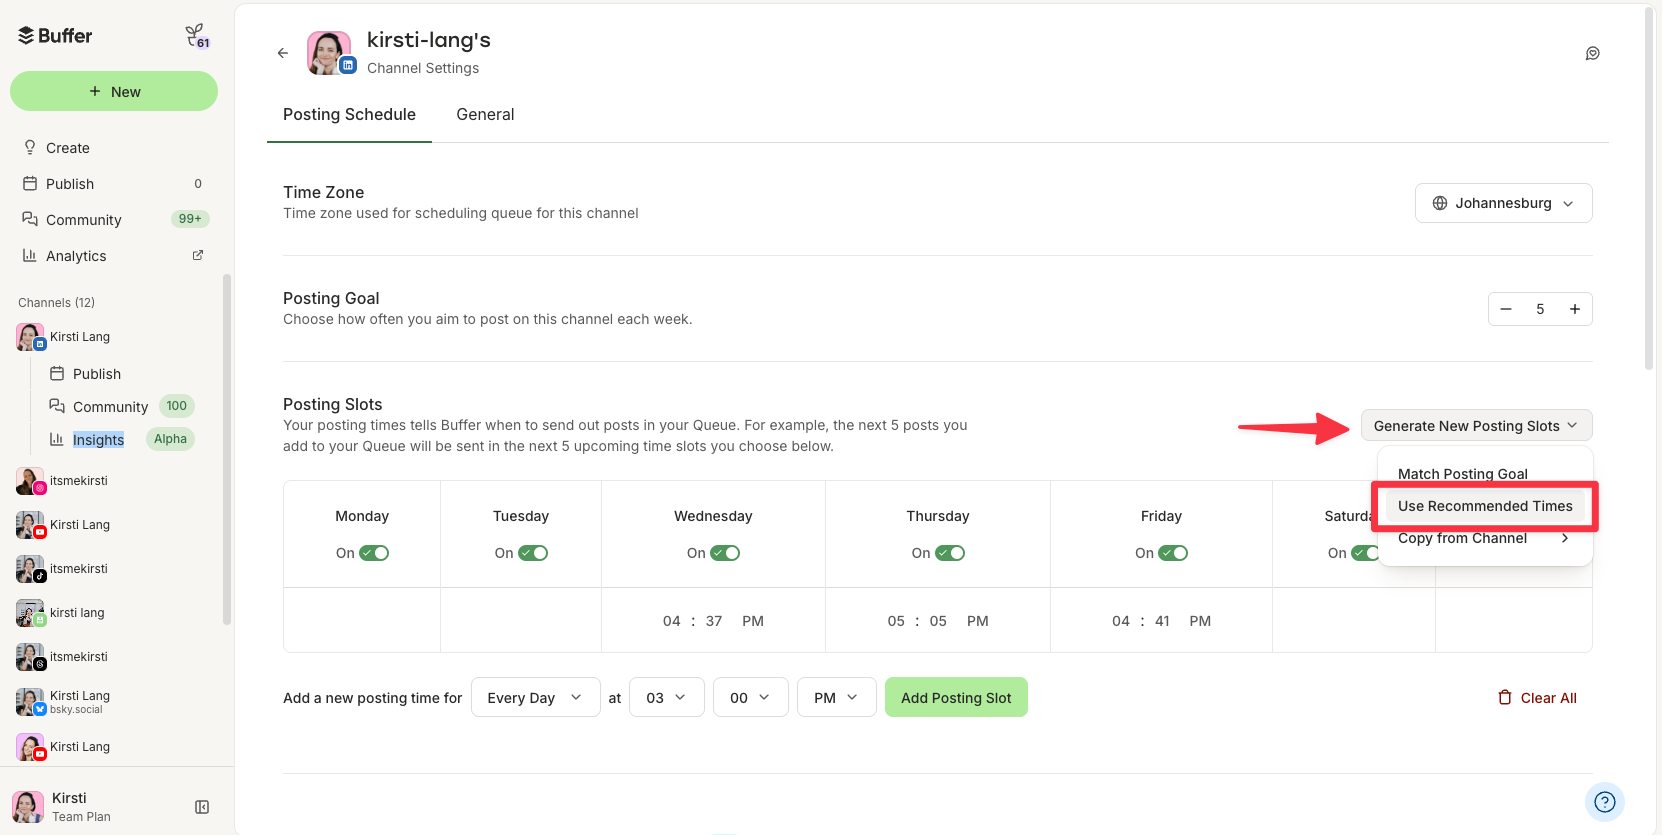
The schedule will automatically update to include the best posting times for the week, based on our latest analysis of millions of LinkedIn posts.
The next time you schedule a post, you can click one of these high-engagement slots in your calendar or list view, or just hit Next available to add it to the next available slot.
How to find the best time to post on LinkedIn for your audience
The best times above are a great starting point if you're still figuring out your LinkedIn strategy. Still, they're no substitute for figuring out your own best time to post.
LinkedIn's native analytics show your top-performing posts over a set period (for both pages and profiles) so you can start spotting patterns and figure out your personal best time to post on LinkedIn.
However, you'll need a record of exactly when you posted a specific piece of content (like a social media management tool or social media content calendar) to refer back to.
LinkedIn Analytics won't show you detailed timings on published content after the fact. The best the LinkedIn timestamp will tell you is "3h" or "2d" (to indicate you posted the content three hours or two days ago, etc.)
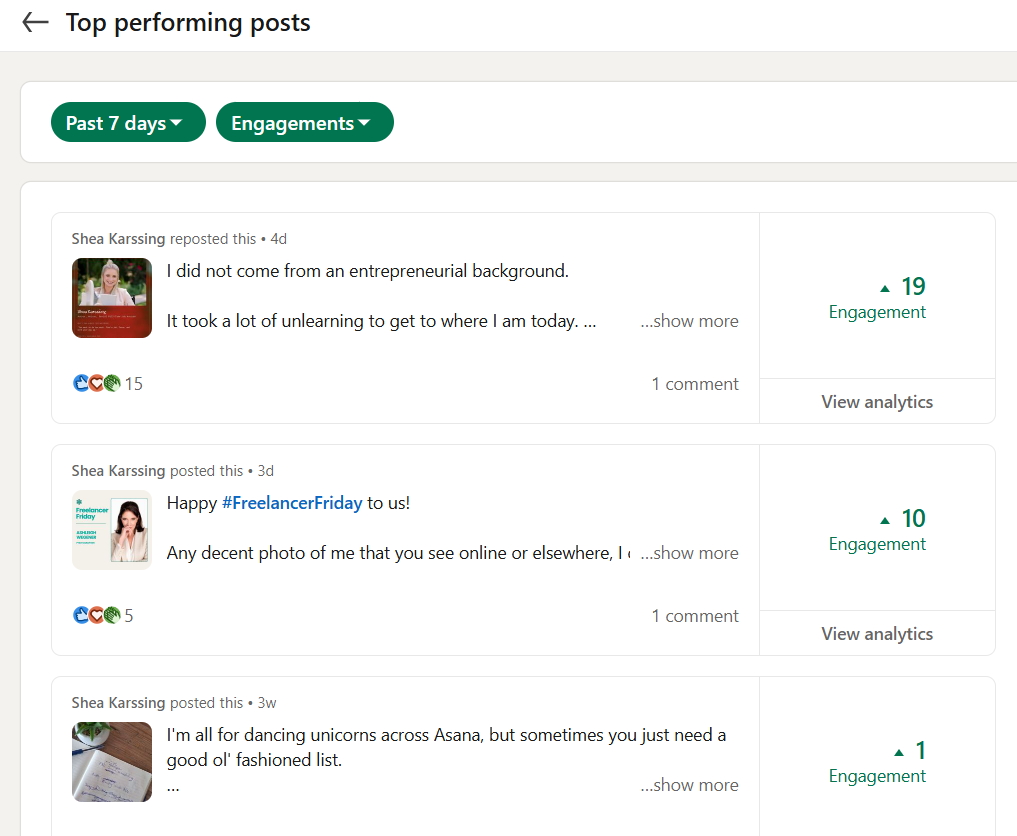
This is where a tool like Buffer can help. When you schedule and publish your LinkedIn posts through Buffer, you get a clear record of exactly when each post went live, plus analytics that show you how each one performed. Over time, you'll start to spot patterns that reveal your unique best posting windows.
It's also worth noting that timing isn't the only variable to experiment with. The type of content you post can also affect how your audience responds at different times of day. So as you test different time slots, try mixing up your content formats, too.
Best time to post on LinkedIn FAQs
Here are some of the most commonly asked questions about when to post on LinkedIn.
Does the time you post on LinkedIn actually matter?
Our data, based on over 4.8 million LinkedIn posts, shows that yes, timing does make a difference. Posts shared during high-engagement windows (particularly late afternoon and evening hours on weekdays) consistently outperformed those posted at off-peak times.
Remember, timing isn't a magic fix. Posting at 4 p.m. on a Wednesday won't rescue a post that isn't relevant or valuable to your audience. Think of the top posting times as a helpful boost on top of a solid content strategy, not a substitute for one.
The good news? Acting on timing data is easier than ever. LinkedIn now lets you schedule posts directly within the platform, and tools like Buffer can automate your posting schedule based on high-engagement time slots so you don't have to remember to hit publish at exactly 4 p.m.
When is the worst time to post on LinkedIn?
Based on our data, the lowest-engagement windows are early in the week. Monday and Tuesday tend to underperform compared to mid-to-late week. Morning hours (before noon) also see weaker engagement now that late afternoon and evening have shifted to the top of the heatmap.
Weekends are generally quiet too, though Saturday at 9 a.m. and late Sunday evening can still see some activity. If you have a post you really want to perform, don't bury it on a Monday morning; save it for Wednesday through Friday instead.
What is the "golden hour" for LinkedIn posts?
The "golden hour" refers to the period right after a LinkedIn post goes live, when early engagement may help signal value to the algorithm and push the post to more people. LinkedIn hasn't confirmed an official 60- or 90-minute window, so treat it as a general concept rather than a hard rule.
That said, many creators try to be available to respond to comments shortly after posting. Engaging with early replies can keep the conversation going and may help maintain momentum during that initial window.
Is LinkedIn engagement higher in the morning or evening?
Our latest data shows that evening hours now outperform mornings on LinkedIn. Posts shared between 3 p.m. and 8 p.m. on weekdays consistently see higher engagement than those shared in the morning — a notable shift from what we saw in previous years, when traditional work hours dominated.
The theory? Professionals are increasingly catching up on LinkedIn content after work, during their commute home, or while unwinding in the evening. Our data can’t tell us why the change is happening, though, only that later posting times performed particularly well in this analysis.
What's the best time to post on LinkedIn on weekends?
Weekend engagement on LinkedIn drops off significantly compared to weekdays, so if you have the flexibility to schedule your posts for a weekday instead, that's likely the better move. If you do need to post on a weekend, Saturday at 9 a.m. is your best bet. Sunday late evening (around 10 p.m.) also shows some activity.
Do these posting times apply to my time zone?
Yes, our data scientist has crunched the numbers so that the recommended times are universally applicable. You don't need to convert anything. Whether you're posting from New York, London, or Mumbai, 4 p.m. means 4 p.m. in your local time zone.
How often should I post on LinkedIn?
Posting two to five times per week is where most creators and brands start to see results. Based on our data, accounts that post more consistently tend to see stronger impressions per post over time, and posting six to 10 times per week can push those numbers further still.
That said, consistency matters more than volume. It's better to post three times a week every week than to post daily for two weeks and then go quiet. Start with a schedule you can actually sustain, then build from there.
What type of content performs best on LinkedIn?
According to our data, carousel (document) posts generate up to 596% more engagement than text-only posts, making them the standout format on the platform right now. Beyond format, content that offers genuine insight, professional value, or a unique perspective tends to do well on LinkedIn. For a deeper look at what's working, check out our guide to the LinkedIn algorithm.
More LinkedIn resources
- How to Schedule LinkedIn Posts in 2026 (2 Easy Methods + Tips)
- Connected Apps on LinkedIn: What They Are + How to Get Buffer Capabilities
- Replying to Your Comments on LinkedIn Boosts Engagement by 30%
- LinkedIn Marketing in 2026: The Complete Guide for Businesses and Creators
- Types of Social Media Content: 30+ Ideas for Your Next Post (With Examples)
- I Reached 20,000 Followers on LinkedIn and I Feel Weird About It
I won’t bore you with a lecture about why you need a social media content calendar.
You likely landed here because you’re looking for a content calendar template, a quick starting point for mapping out your content plan for the coming weeks or months.
I’ve worked as both a social media manager and content creator, and live by my social media content calendar.
My current favorite tool is (of course) Buffer, but there are loads of other options out there. If you’re looking for something lo-fi to get started, I've got you.
Here's a list of 11 calendar templates to help you be more efficient, plus how to build your own if none of them fit.
Key takeaways
- Choose the right tool: Select a format that fits your workflow, whether it's a spreadsheet (Google Sheets), a visual tool (Canva), or an automated scheduler (Buffer).
- Prioritize consistency: A sustainable posting cadence (e.g., three times per week) is more effective than random bouts of activity.
- Include essential data: Every calendar entry should track the posting date, platform, caption, media assets, and current status.
- Optimize timing: Use data-backed "best times to post" to get more eyes on your content.
- Centralize brainstorming: Use a dedicated space to separate your ideas from scheduled posts.
The quick version
A social media calendar template is a ready-made structure for planning what you'll post, where, and when, so you're not staring at a blank screen every week.
The fastest way to start: Pick a format that matches how you like to work (a spreadsheet like Google Sheets, a visual tool like Canva, a flexible workspace like Notion, or a scheduler like Buffer that also publishes for you), grab one of the 11 free templates below, and block 30 minutes to map out your next two weeks.
If you want to build one from scratch instead, skip to how to create a social media calendar.
11 free social media calendar templates
| # | Template | Format | Best for | Free? |
|---|---|---|---|---|
| 1 | Buffer social media calendar | Scheduling tool | Planning and auto-publishing in one place | ✅ |
| 2 | Best times to post calendar | Timing posts for reach | ✅ | |
| 3 | Simple weekly calendar | Mapping a single week | ✅ | |
| 4 | Simple monthly calendar | Big-picture month view | ✅ | |
| 5 | Canva calendars | Canva | Customizing the simple calendars visually | ✅ |
| 6 | Notion calendar | Notion | Storing captions + media in one place | ✅ |
| 7 | Google Sheets calendar | Google Sheets | Customizable, spreadsheet-based planning | ✅ |
| 8 | Simon's kanban calendar | Buffer | Organizing by content pillar | ✅ |
| 9 | Aiza's email × ChatGPT calendar | ChatGPT + email | Generating and scheduling ideas | ✅ |
| 10 | My TikTok consistency calendar | Buffer | Staying consistent on a single platform | ✅ |
| 11 | Kiran's personal-brand calendar | Notion | Building a personal brand | ✅ |
Jump to a section:
- 1. Buffer social media calendar
- 2. Social media calendar template with the best times to post
- 3. Simple weekly social media calendar template
- 4. Simple monthly social media calendar template
- 5. Canva social media calendar templates
- 6. Notion social media calendar template
- 7. Google Sheets social media calendar template
- 8. Simon Heaton’s kanban calendar
- 9. Aiza Coronado’s email x ChatGPT calendar
- 10. My simple calendar for TikTok consistency
- 11. Kiran Shahid’s calendar for personal brand-building
- How to create a social media calendar
- Social media success starts with a calendar
- Social media content calendar FAQs
- More social media marketing resources
1. Buffer social media calendar
This is not a downloadable template, per se, but Buffer is so easy to plug and play, it might as well be.
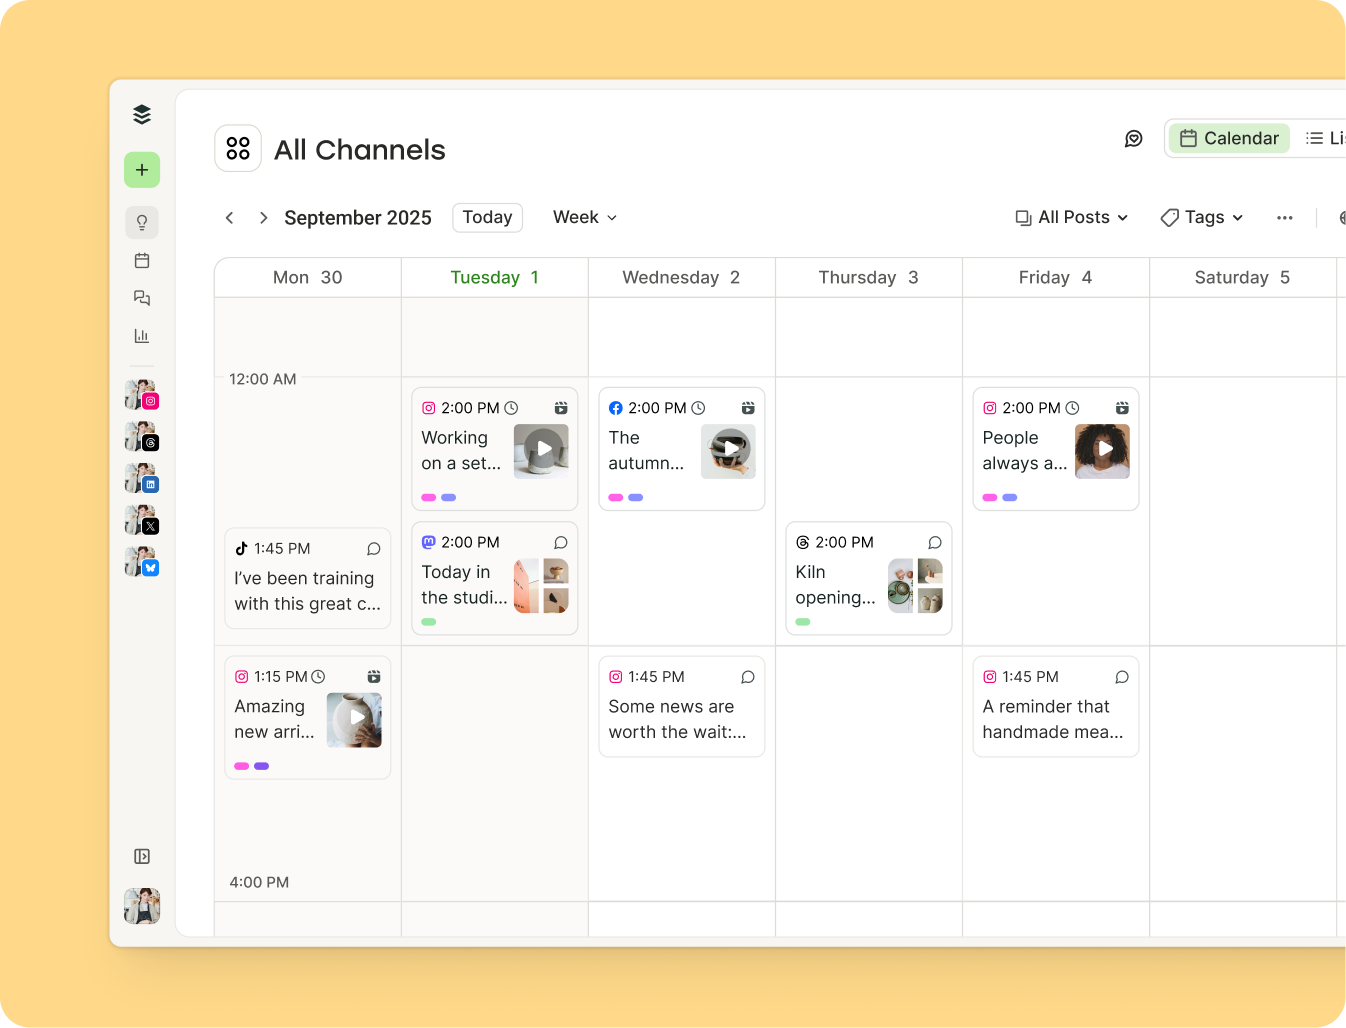
I'm definitely biased, but after trying just about every tool and template out there, Buffer's calendar is the one I keep coming back to — and honestly, I think you'll see why.
Let's start with the basics: Buffer’s content calendar features a weekly and monthly calendar view. You can drag and drop posts to easily change publish dates and times in real time.
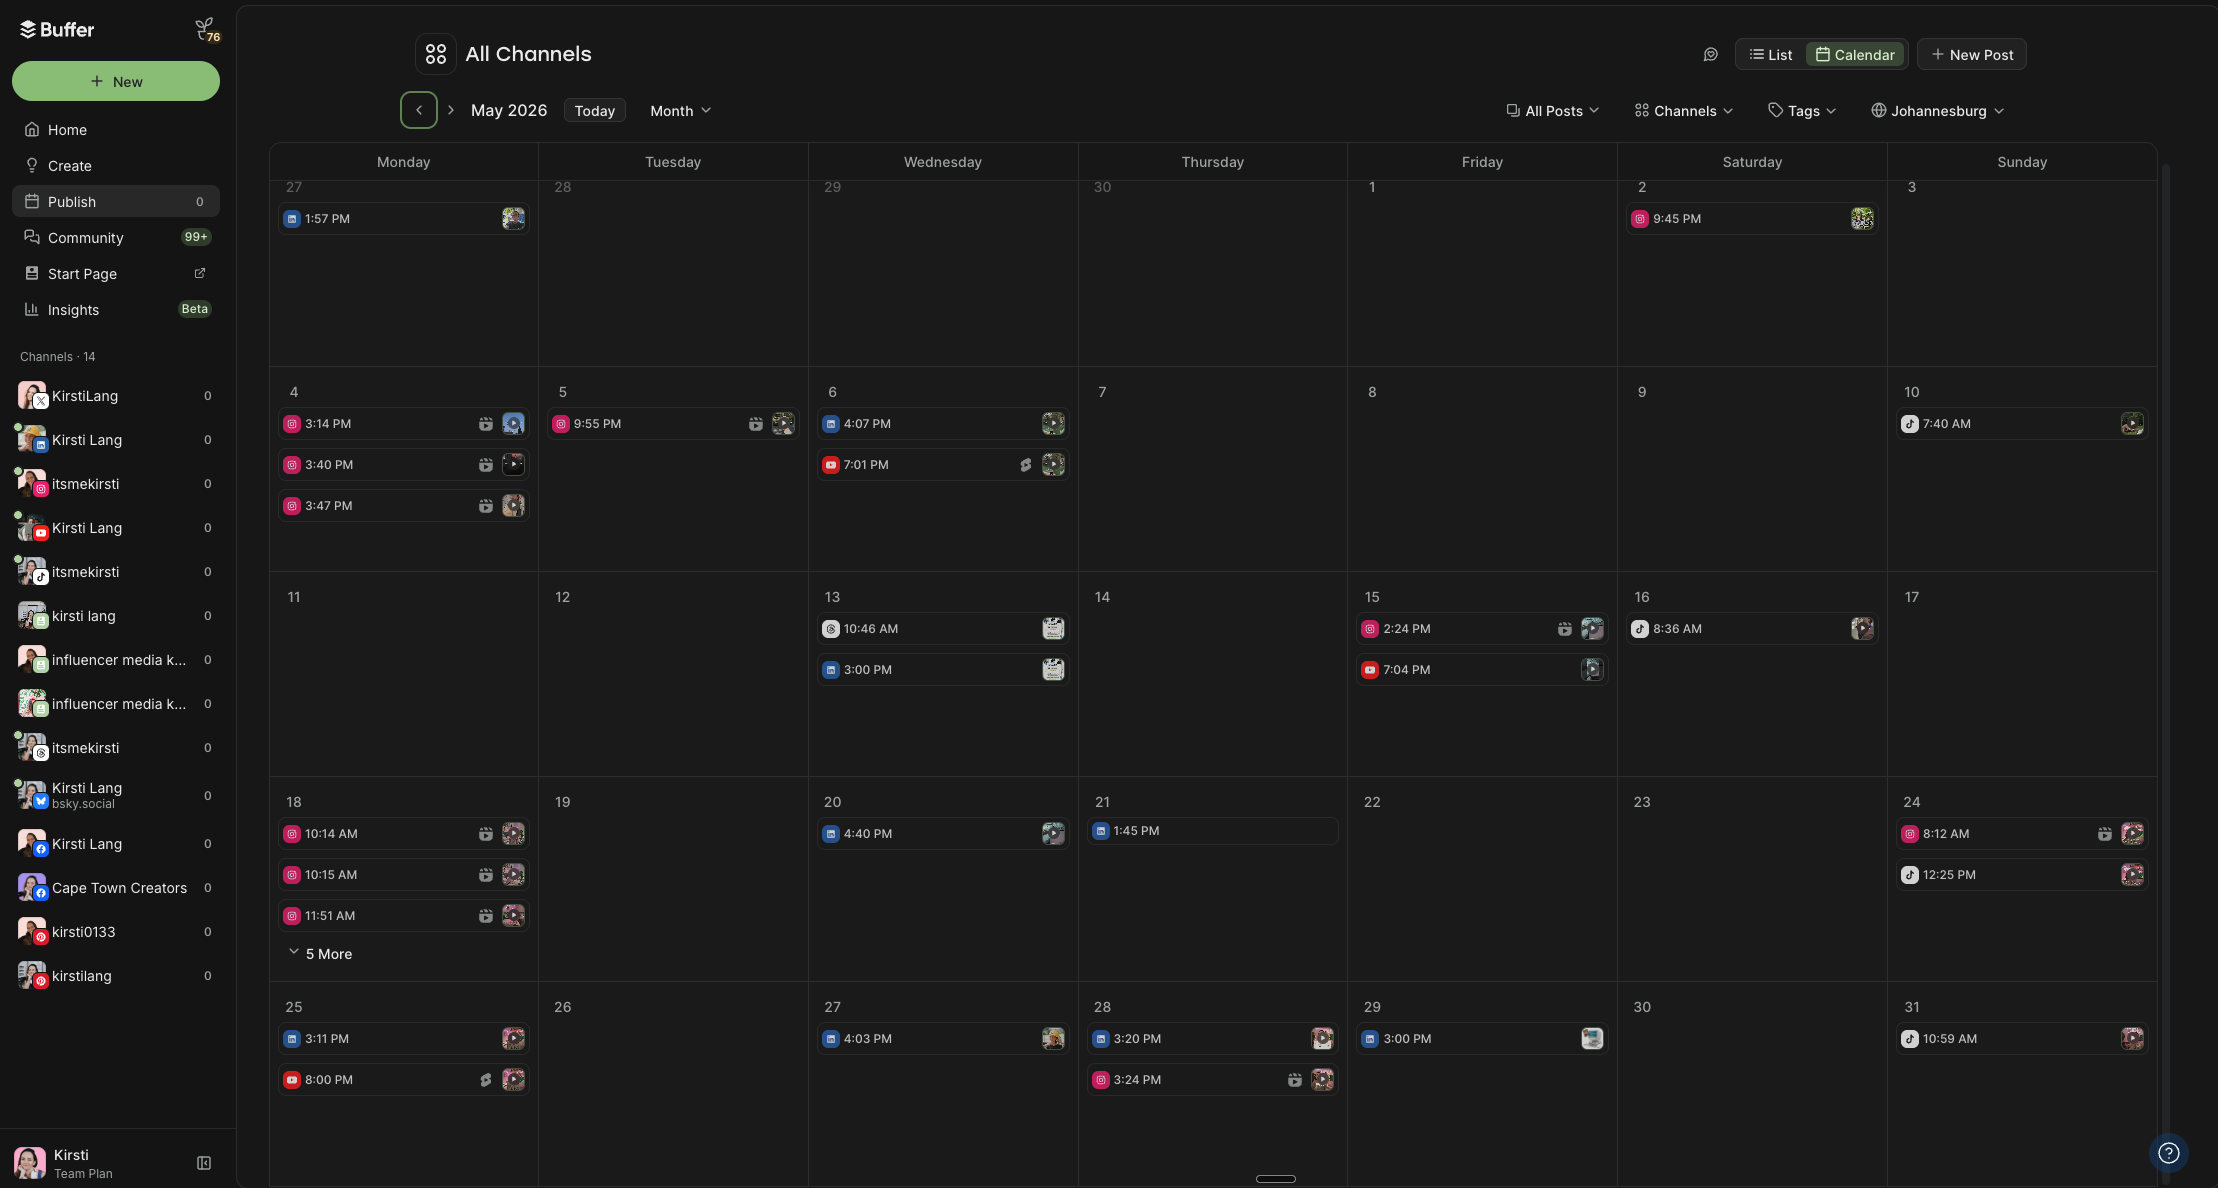
These views can be filtered by platform, so you can see all your posts in a list if you prefer. You can even optimize your posting schedule according to the best time to post on each platform (more on this below).
The Tags feature allows for custom social content categories and color coding (my personal favorite feature). You can organize your posts by status, content strategy pillars, target audience, marketing goals, or type of content, whatever works best for your content strategy.
The benefits of mapping out your content in Buffer go way beyond just planning. Buffer is a social media scheduling tool, not just a social media planning tool.
This calendar is the only one on this list that will publish the posts for you.
Buffer can automatically schedule your social media posts (whether they're text, photos, or videos) on all major platforms to go live at precisely the time you want them to. If you're juggling several accounts, it also makes it far easier to manage multiple social media accounts from one calendar.
It's an excellent option for both solo creators and social media teams, too, with handy collaboration features like approval workflows and smart permissions.
And here's the part that saves the most time: once your posts are in the calendar, Buffer takes care of the publishing for you. No jumping between platforms, no manual posting.
Buffer connects with Facebook, Instagram, TikTok, YouTube, LinkedIn, Twitter/X, Pinterest, Threads, Bluesky, Mastodon, Google Business, and more.
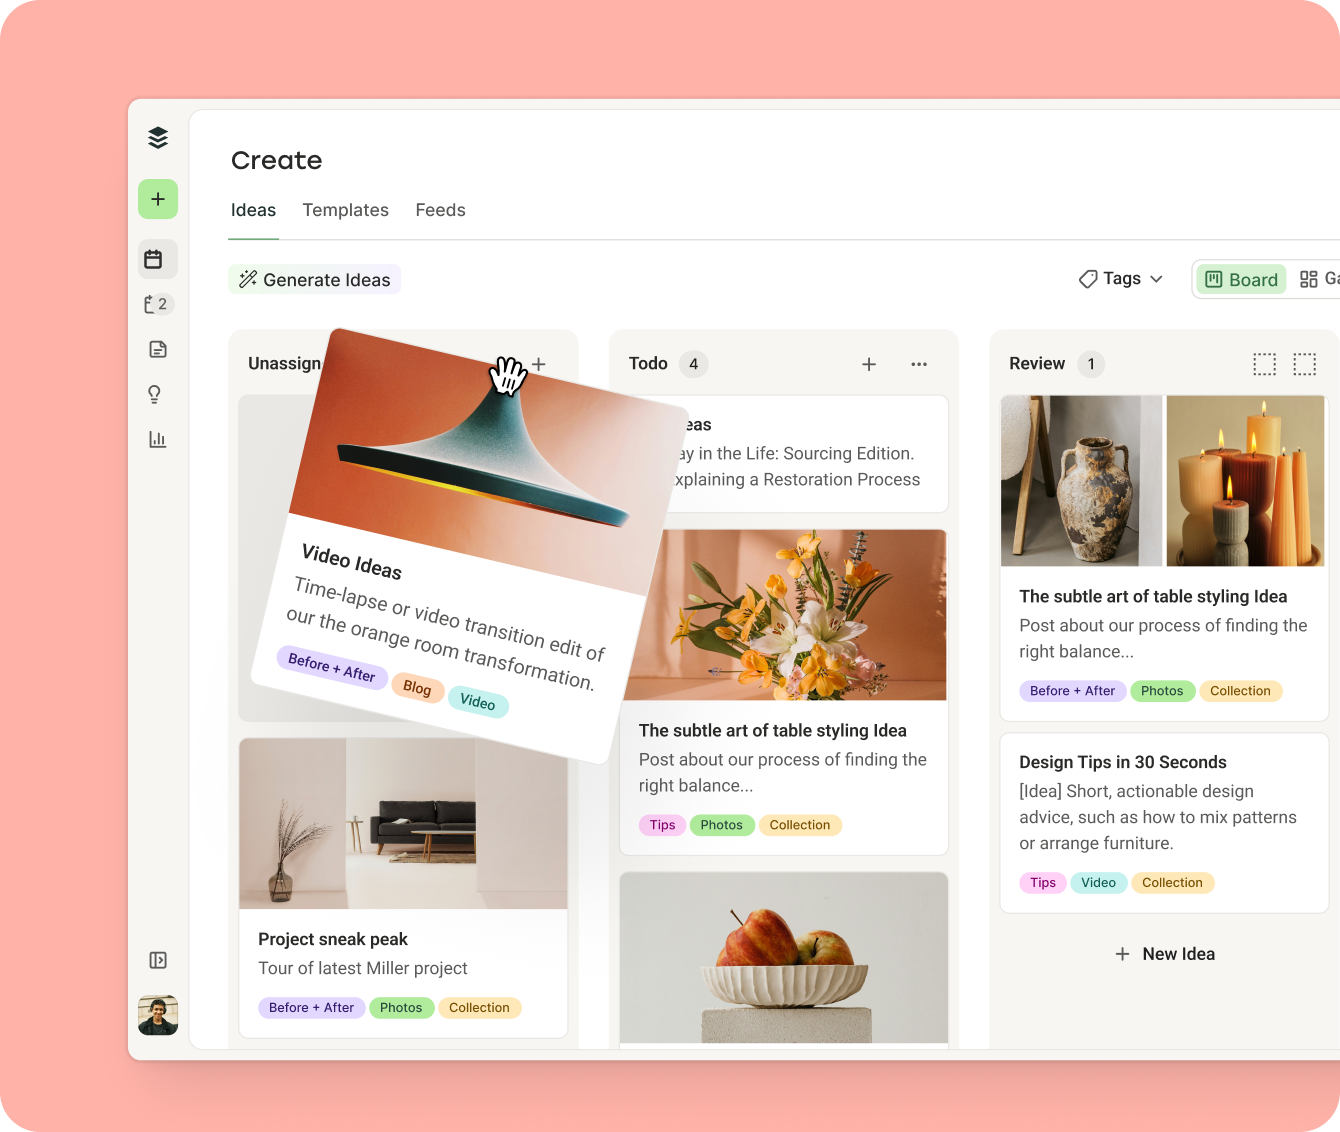
Outside the calendar, there’s the Create Space to help you brainstorm and organize your ideas, engagement tools to help you manage replies to comments, and Insights to check in on metrics at a glance.
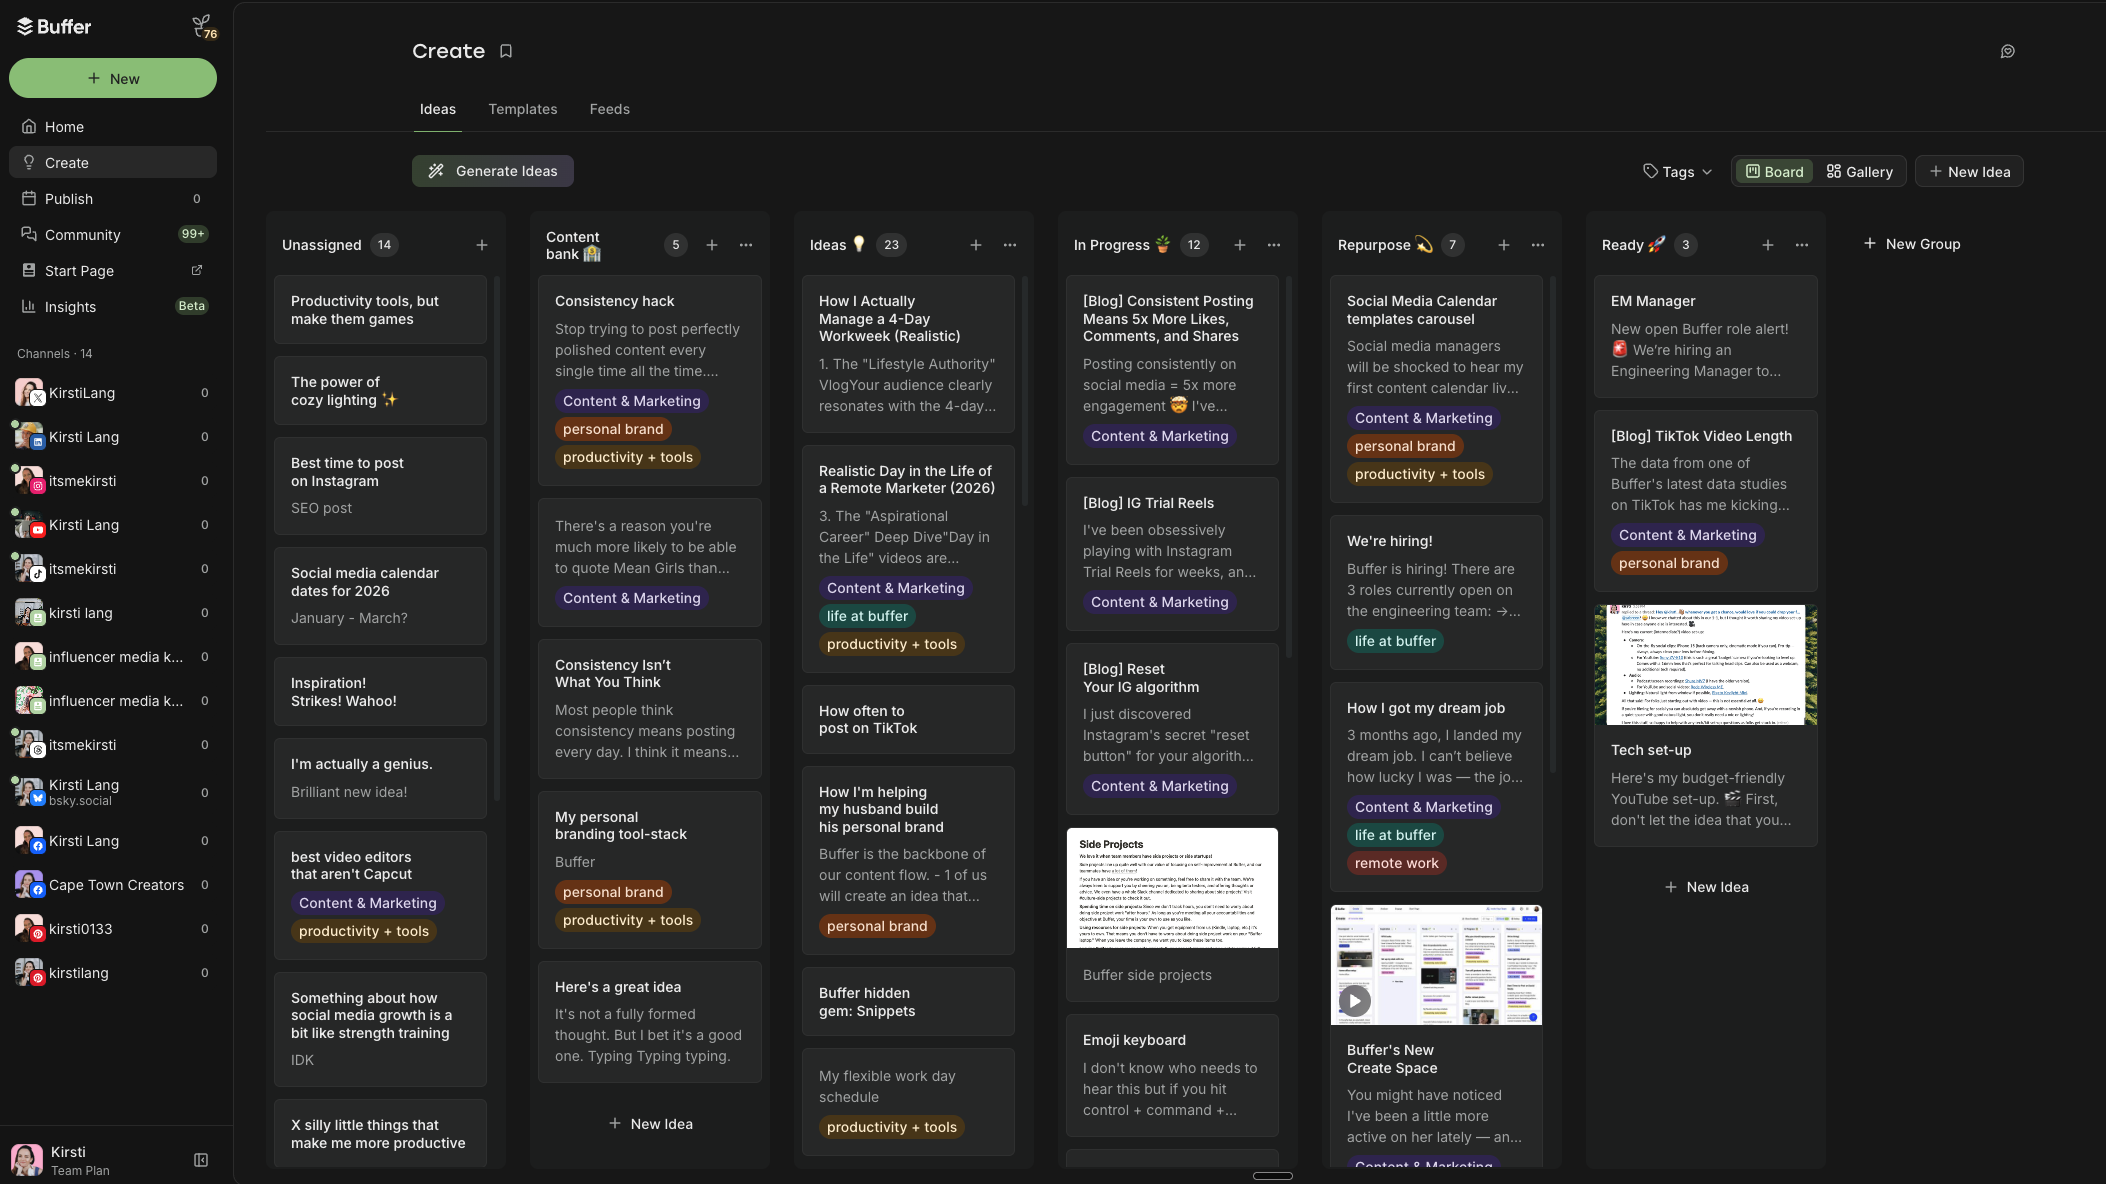
2. Social media calendar template with the best times to post
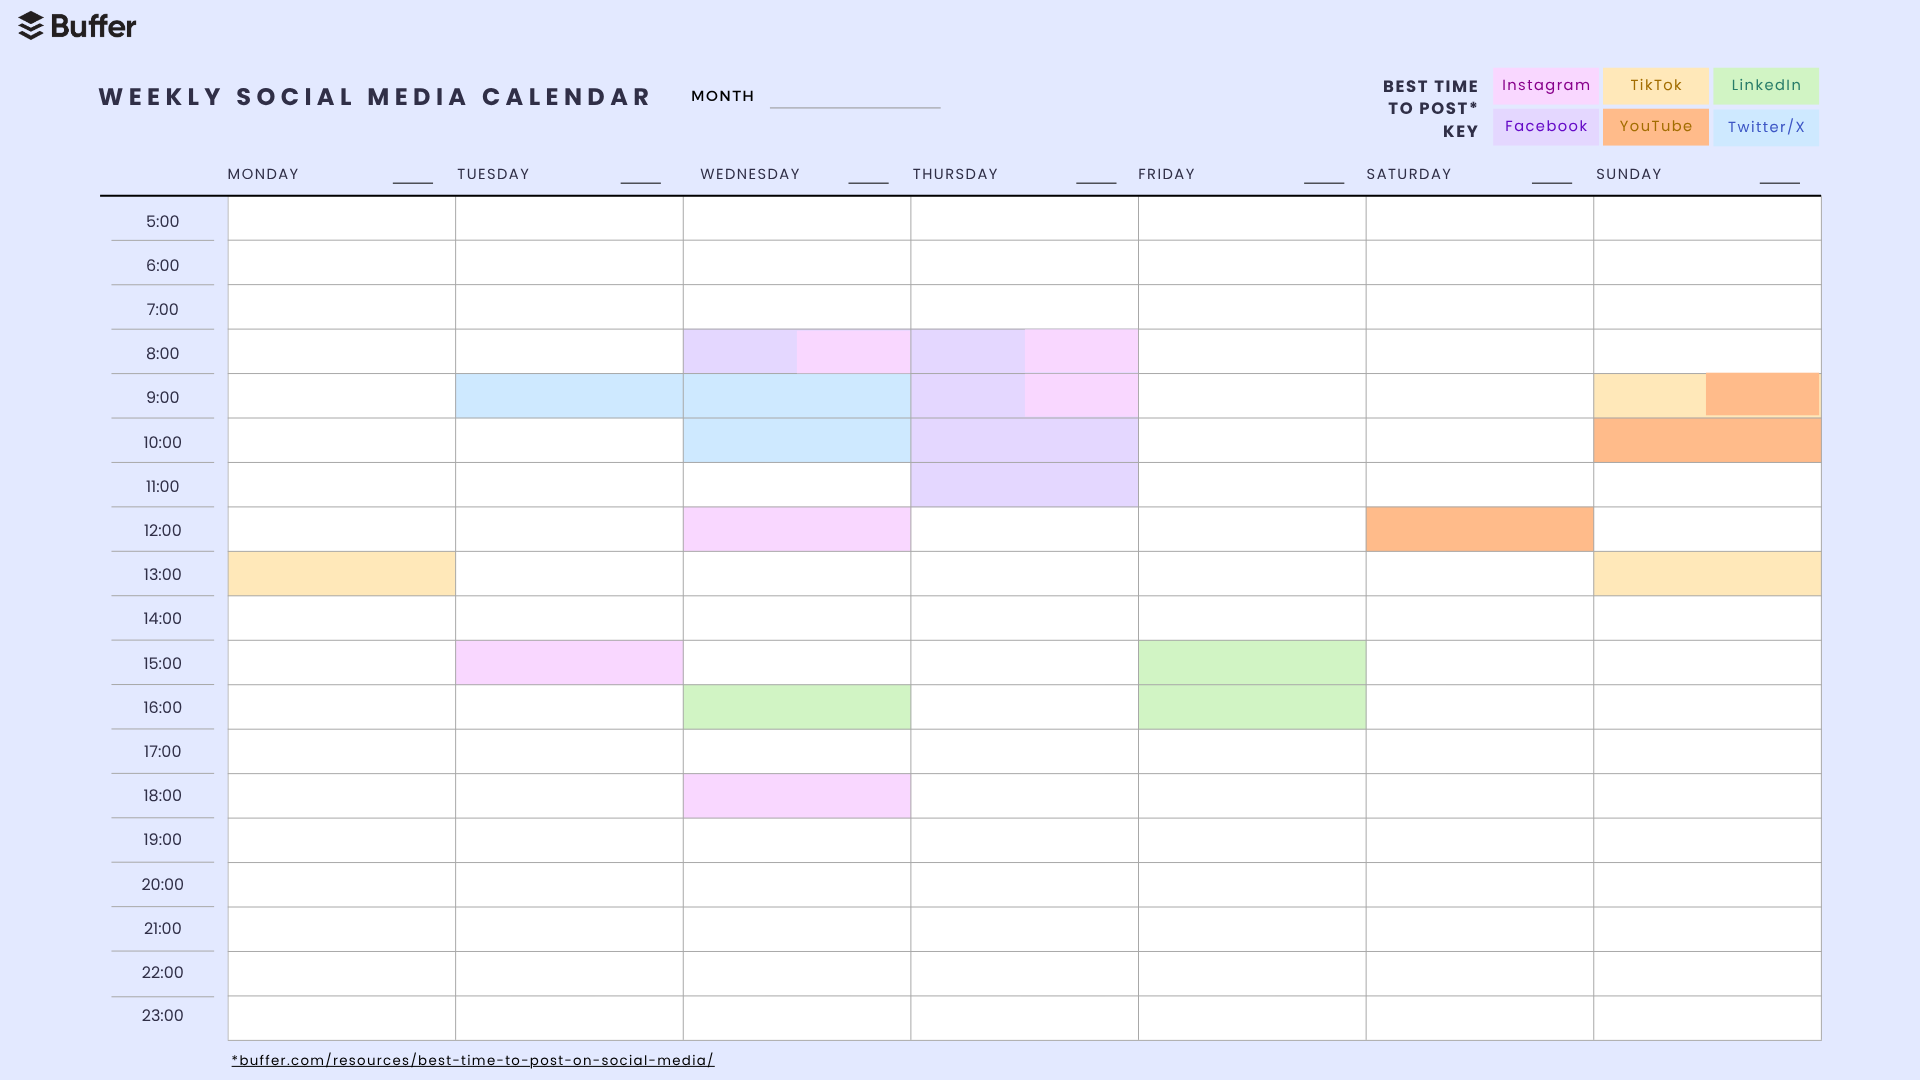
Posting at the right time can make a real difference for your reach and engagement, which is why we dug into data from millions of posts in Buffer to find those sweet spots for you.
Thanks to this analysis, we’ve pinpointed several posting times for each social media platform during which posts get more engagement or views. I’ve highlighted these times for Facebook, Instagram, TikTok, LinkedIn, YouTube, and Twitter/X in this downloadable PDF calendar.
How to use this calendar
- Download the ‘Best Time to Post’ calendar template.
- Once downloaded, right-click on the file and open it with Adobe Reader or another PDF reader.
- Click Fill & Sign.
- Click within the time slot you want to use to start typing.
- Alternatively, you can always print these pages and fill them out with a good old-fashioned pen and paper.
- The social media content calendar template is yours to edit as you see fit.
⏰ Get ‘Best Time to Post’ calendar template
There’s a whole lot more nuance in figuring out the best time to post for your audience. I’d recommend checking out these resources:
- The Best Time to Post on Facebook
- The Best Time to Post on Instagram
- The Best Time to Post on TikTok
- The Best Time to Post on LinkedIn
- The Best Time to Post on YouTube
- The Best Time to Post on Twitter/X
3. Simple weekly social media calendar template
This free content calendar template features the same layout as the one above, with publishing schedule time slots from 6 a.m. to 11 p.m., just without highlights for the best times to post on each platform.
How to use this calendar
- Get the simple weekly calendar.
- Open with Adobe Reader.
- Click Fill & Sign.
- Click within the time slot you want to use to start typing.
- Alternatively, you can always print these pages and use pen and paper to fill yours out.
- The social media content calendar template is yours to edit as you see fit.
🗓️ Get the simple weekly calendar
4. Simple monthly social media calendar template
If you want to map out an entire month at a glance, this content calendar template is for you. Think of this calendar as your big-picture view. It can be helpful to map out the month in broad strokes by publish date using a layout like this one to help you prioritize tasks.
How to use this calendar
- Get the simple monthly social media calendar.
- Open with Adobe Reader.
- Click Fill & Sign.
- Click within the time slot you want to use to start typing.
- Alternatively, you can always print these pages and use a good ol' pen and paper to fill yours out.
- The social media content calendar template is yours to edit as you see fit.
📅 Get the simple monthly social media calendar
5. Canva social media calendar templates
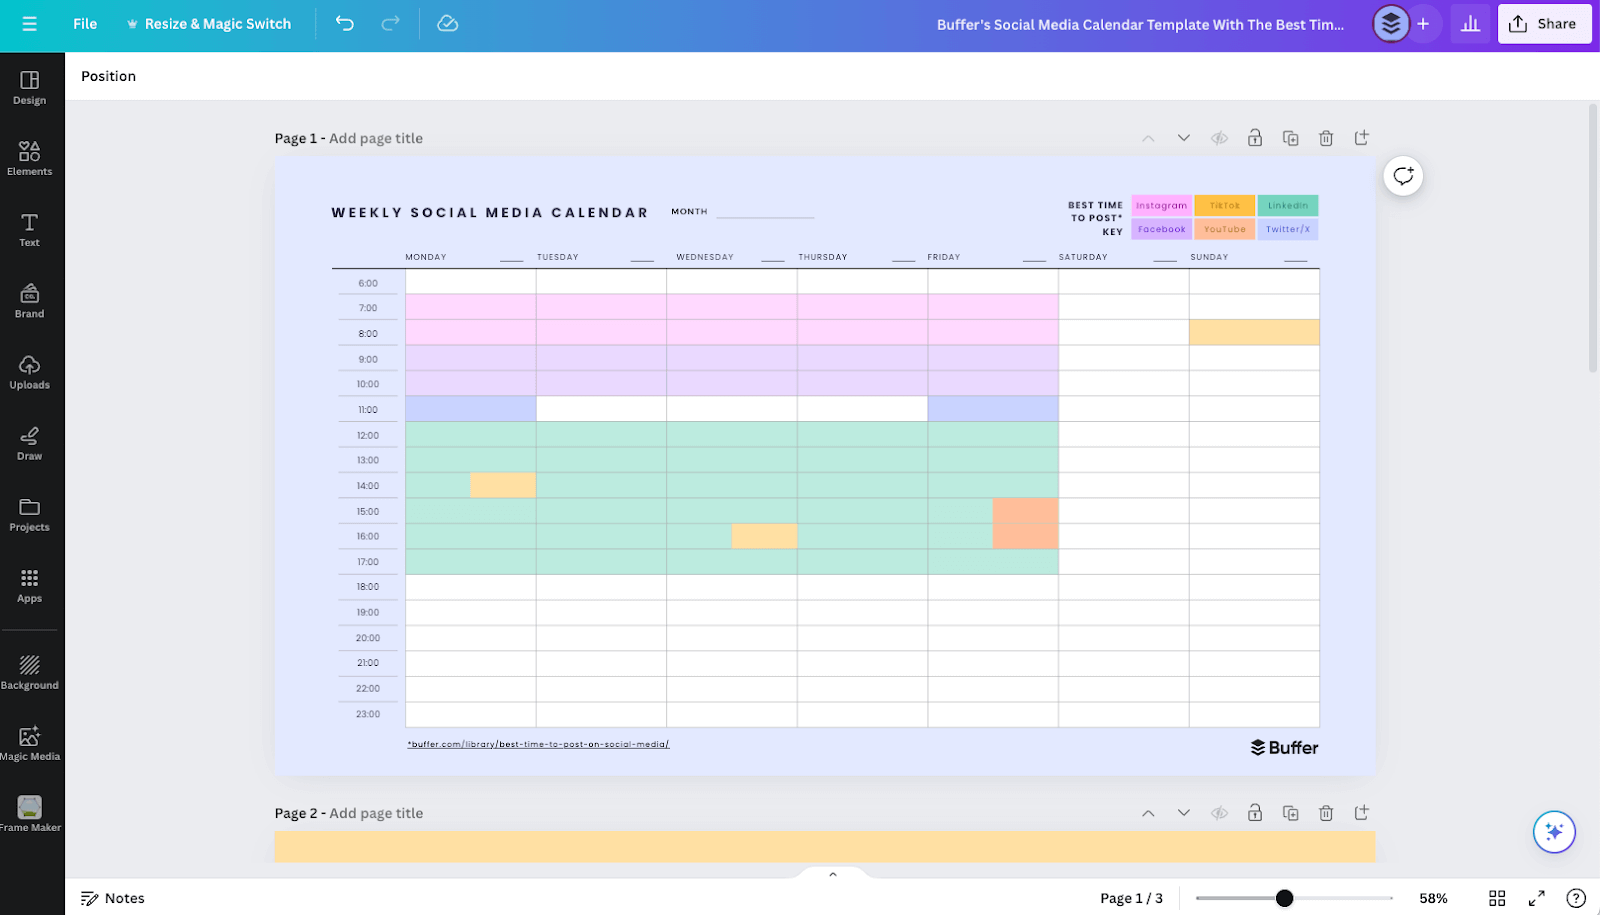
If you’d like to customize the simple calendars above to better suit you, here are the editable versions in Canva (links below). You’ll need a free Canva account to tweak them.
⏰ Get the best times to post calendar
🗓️ Get the simple weekly calendar
📅 Get the simple monthly calendar
6. Notion social media calendar template
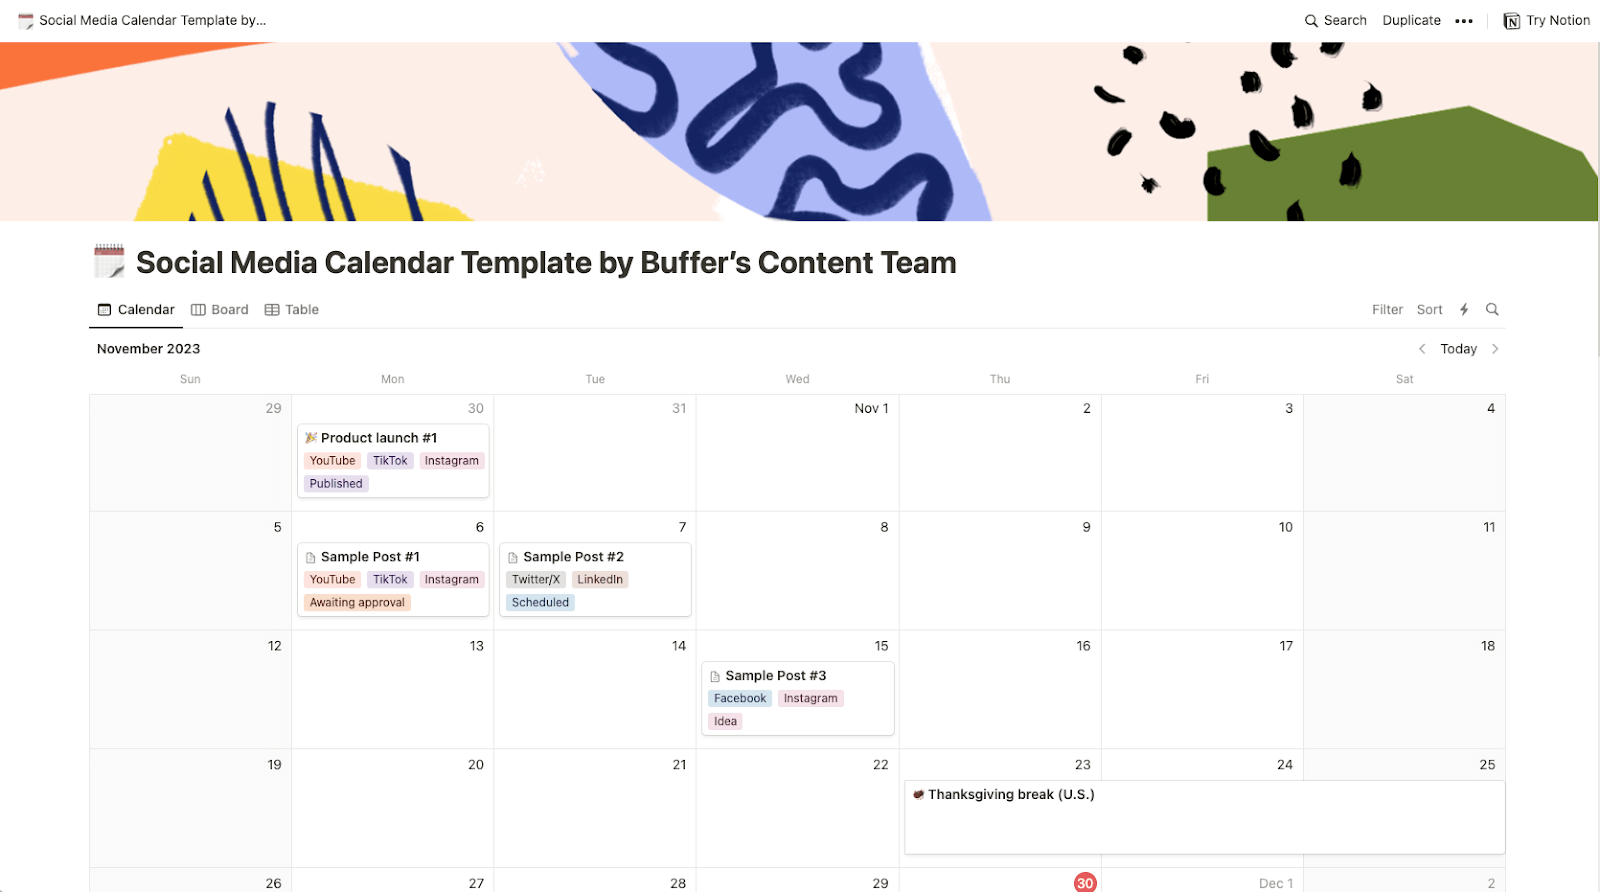
Notion is a flexible project management tool. Unlike some of the simple content calendar templates above, you can easily store the text, captions, and media you plan to use for each post in the calendar itself.
You can also view all your posts in different views, like a list, table, Kanban board, or Gantt chart, which can be useful in planning. It’s a great choice for a content marketing or editorial calendar template too, as you can map out newsletters, blog posts, and other digital marketing campaigns.
How to use this calendar
- Get the Notion template.
- Click on the Duplicate button (the juxtaposed squares icon) in the top right corner.
- Create a free Notion account if you don’t have one already.
- The social media content calendar template is yours to edit as you see fit.
7. Google Sheets social media calendar template
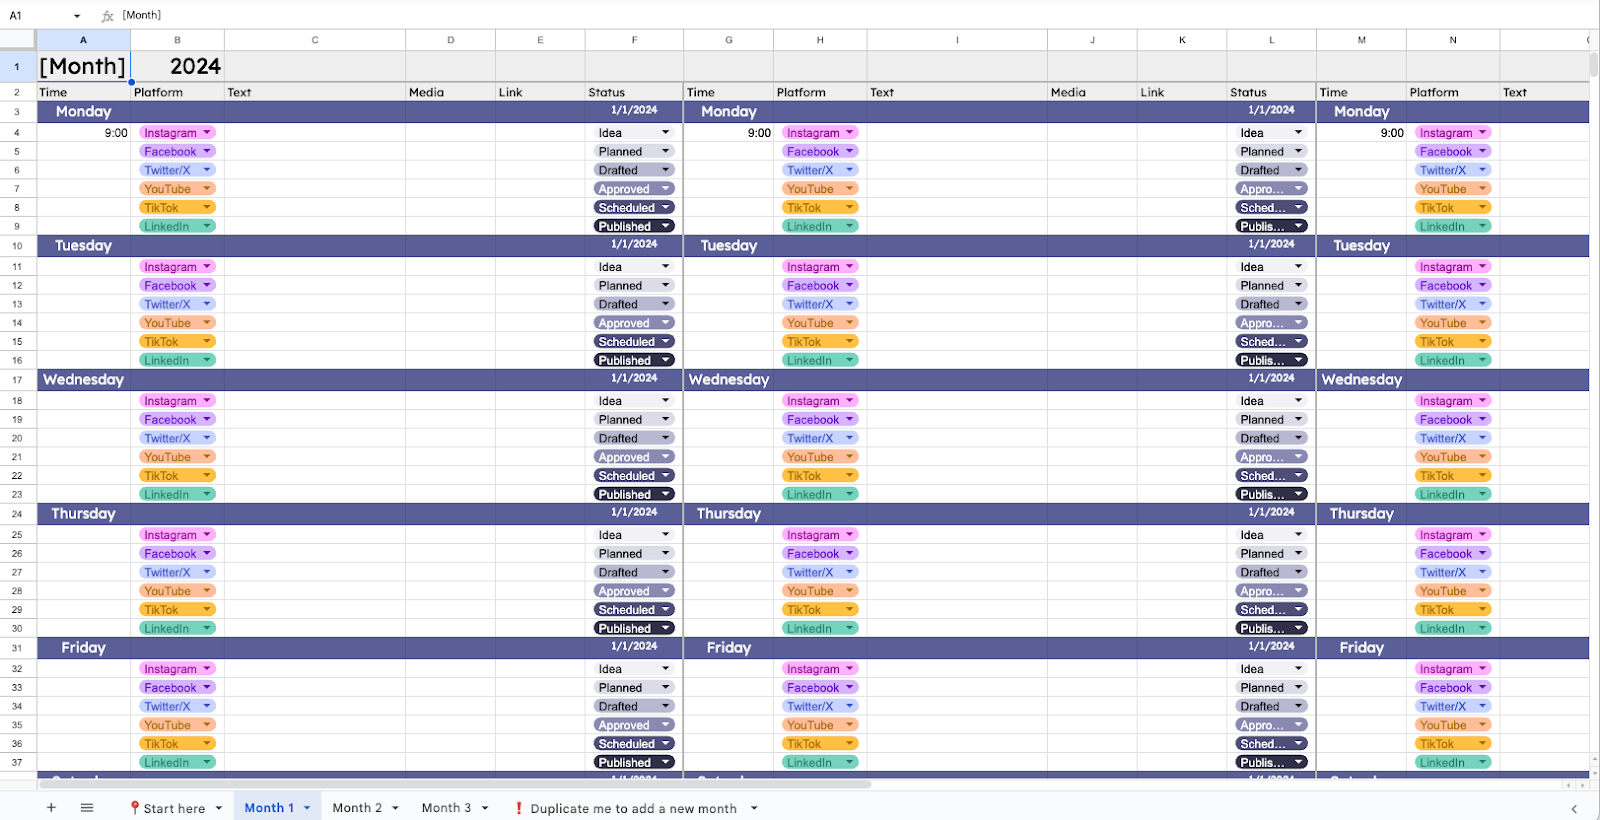
If a spreadsheet is your happy place, a Google Sheets social media calendar template is hard to beat — it's free, it lives in the cloud, and you can customize it endlessly without learning a new tool.
I particularly like how you’re able to use specific custom colors for the list options, too. I like my content calendars to be pretty.
This free content calendar template is, along with Buffer and Notion, one of the most customizable on this list. It's also suitable for storing entire posts and captions, rather than just making notes, as you would have done in the simple calendar templates above. If Microsoft Excel is more your speed, you can convert it in a couple of clicks (I've covered that in the steps below).
How to use this calendar
- Make a copy of the Google Sheets template.
- Read the instructions on the Start here sheet.
- The social media content calendar template is yours to edit as you see fit.
📊 Get the Google Sheets template
✨ Calendar templates from our community
Social media calendars are pretty personal, and what works for one marketer, creator, or entrepreneur might not work for another.
With that in mind, I turned to our community, which graciously shared their real-life calendars, or even turned them into templates that you can use and download.
8. Simon Heaton’s kanban calendar
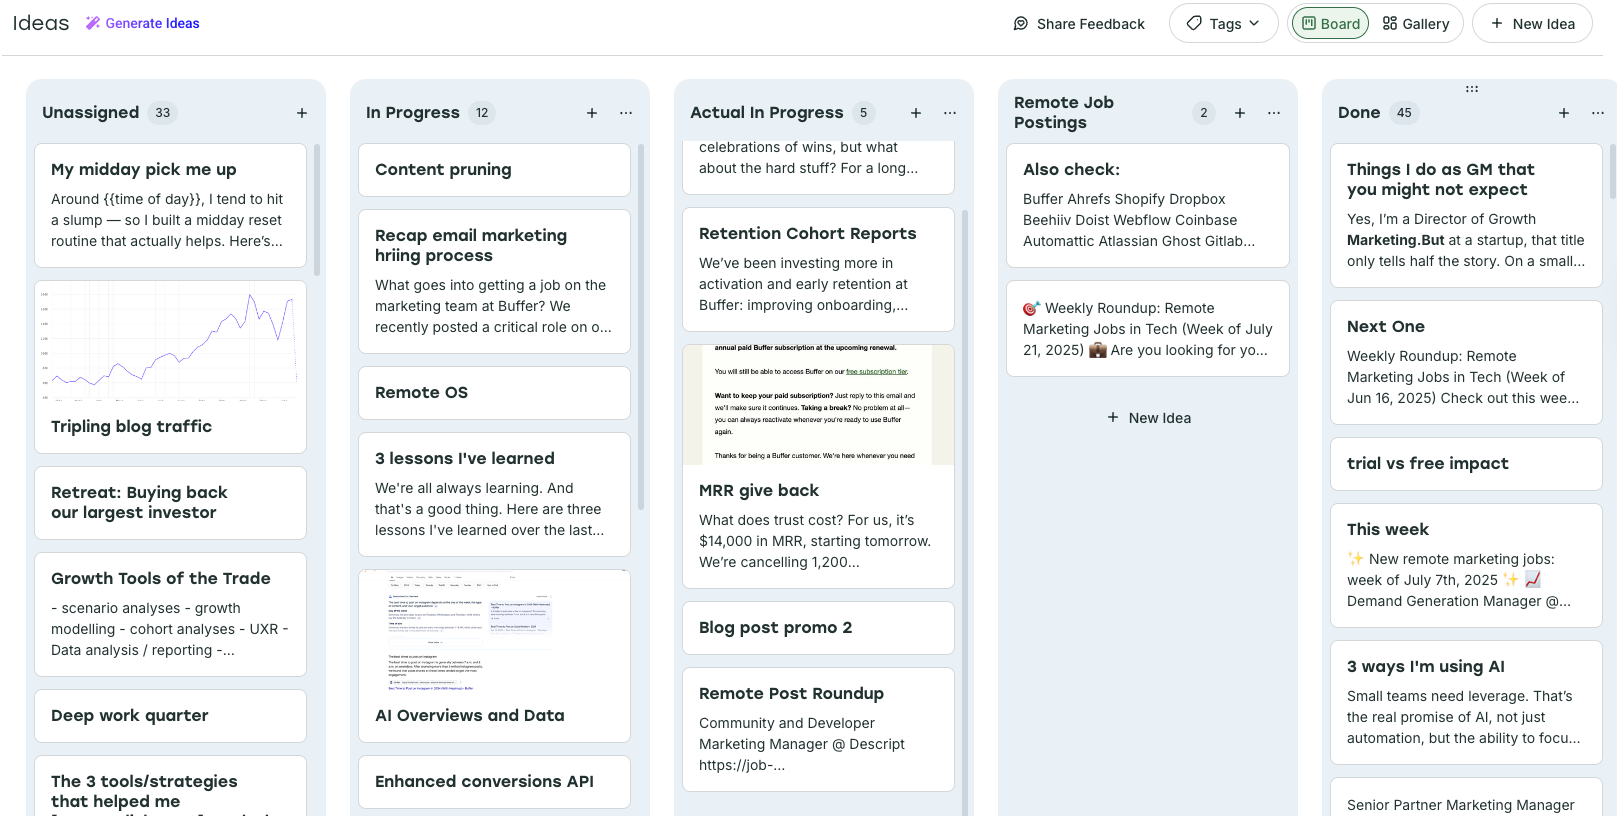
Buffer’s Director of Growth Marketing, Simon Heaton, leans on Buffer’s Create Space to plan his content and the calendar to schedule it. He’s organized the Create Space kanban columns by content status — things like To Do, In Progress, and Ready to Schedule.
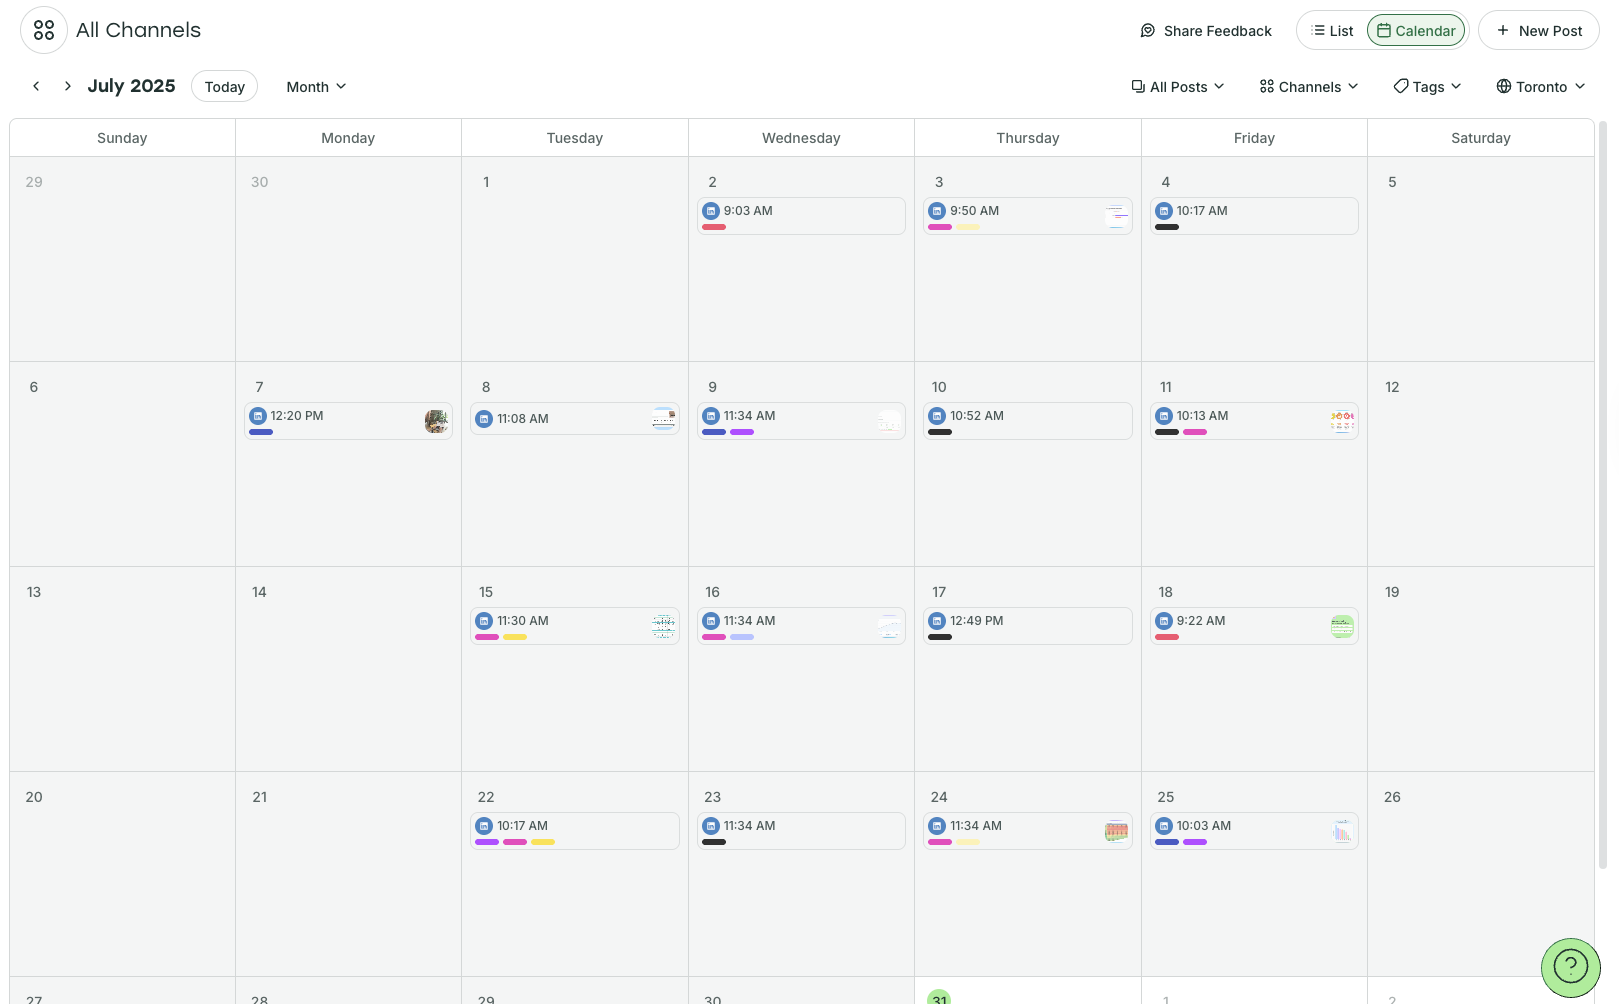
Simon used Tags as another layer of organization in his Buffer social media planning calendar, with each color-coded tag corresponding to one of his content pillars (note the colored bars on his publish calendar above).
How to set up your Buffer like Simon
- Click on the Get started with Buffer link.
- Create your Buffer account if you don’t already have one, and click Connect Channels (you can connect up to three for free). Choose the platform you want to start with and follow the steps.
- Click on Create on the menu at the top left to navigate to the Create Space.
- Toggle on ‘board view’ on the top right. Choose + New Group on the right to start a new column, and choose your desired column names.
- Click on Tags (also top right) and the settings cog symbol to create your tags.
9. Aiza Coronado’s email x ChatGPT calendar
Aiza Coronado, marketer and founder of The Glimmer Code, has a very unique approach to her social media content planner. She has it sent straight to her email. She prompted her AI tool of choice, ChatGPT, to generate ideas for her, then set up a ChatGPT task to have them sent straight to her email inbox.
Bonus: It doesn’t just help her plan when to share the content; it also helps her plan what the content will be.
“The prompt is super simple,” she says. “I used something like, 'From our past conversations, find and list email marketing insights, possible content ideas, and Substack topics I wanted to write about'.”
“The titles are cheesy, but it works as idea sparks,” she says. “I just need to remember what I did. And ask AI to uncover hidden insights I might have missed.”
How to create this system
- Once you’ve landed on an output you’re happy with, you can create a task in ChatGPT at a cadence that suits you. Prompt in the same chat: “Send me one of these content ideas every morning,” or similar. Here’s more info on how to create a task in ChatGPT.
- You’ll receive the tasks in your email inbox. Click on them to go back to ChatGPT and make changes before posting via the platform or social media scheduling tool.
I’ve created a more generic prompt you could use for the same purpose.
In ChatGPT, use a prompt like this one to start the conversation: “I’m a [job title/creator] who creates content about [X, Y, Z]. My target audience is [demographic]. I create [X] posts a week on [platform/s]. Find possible content ideas for me.”
10. My simple calendar for TikTok consistency
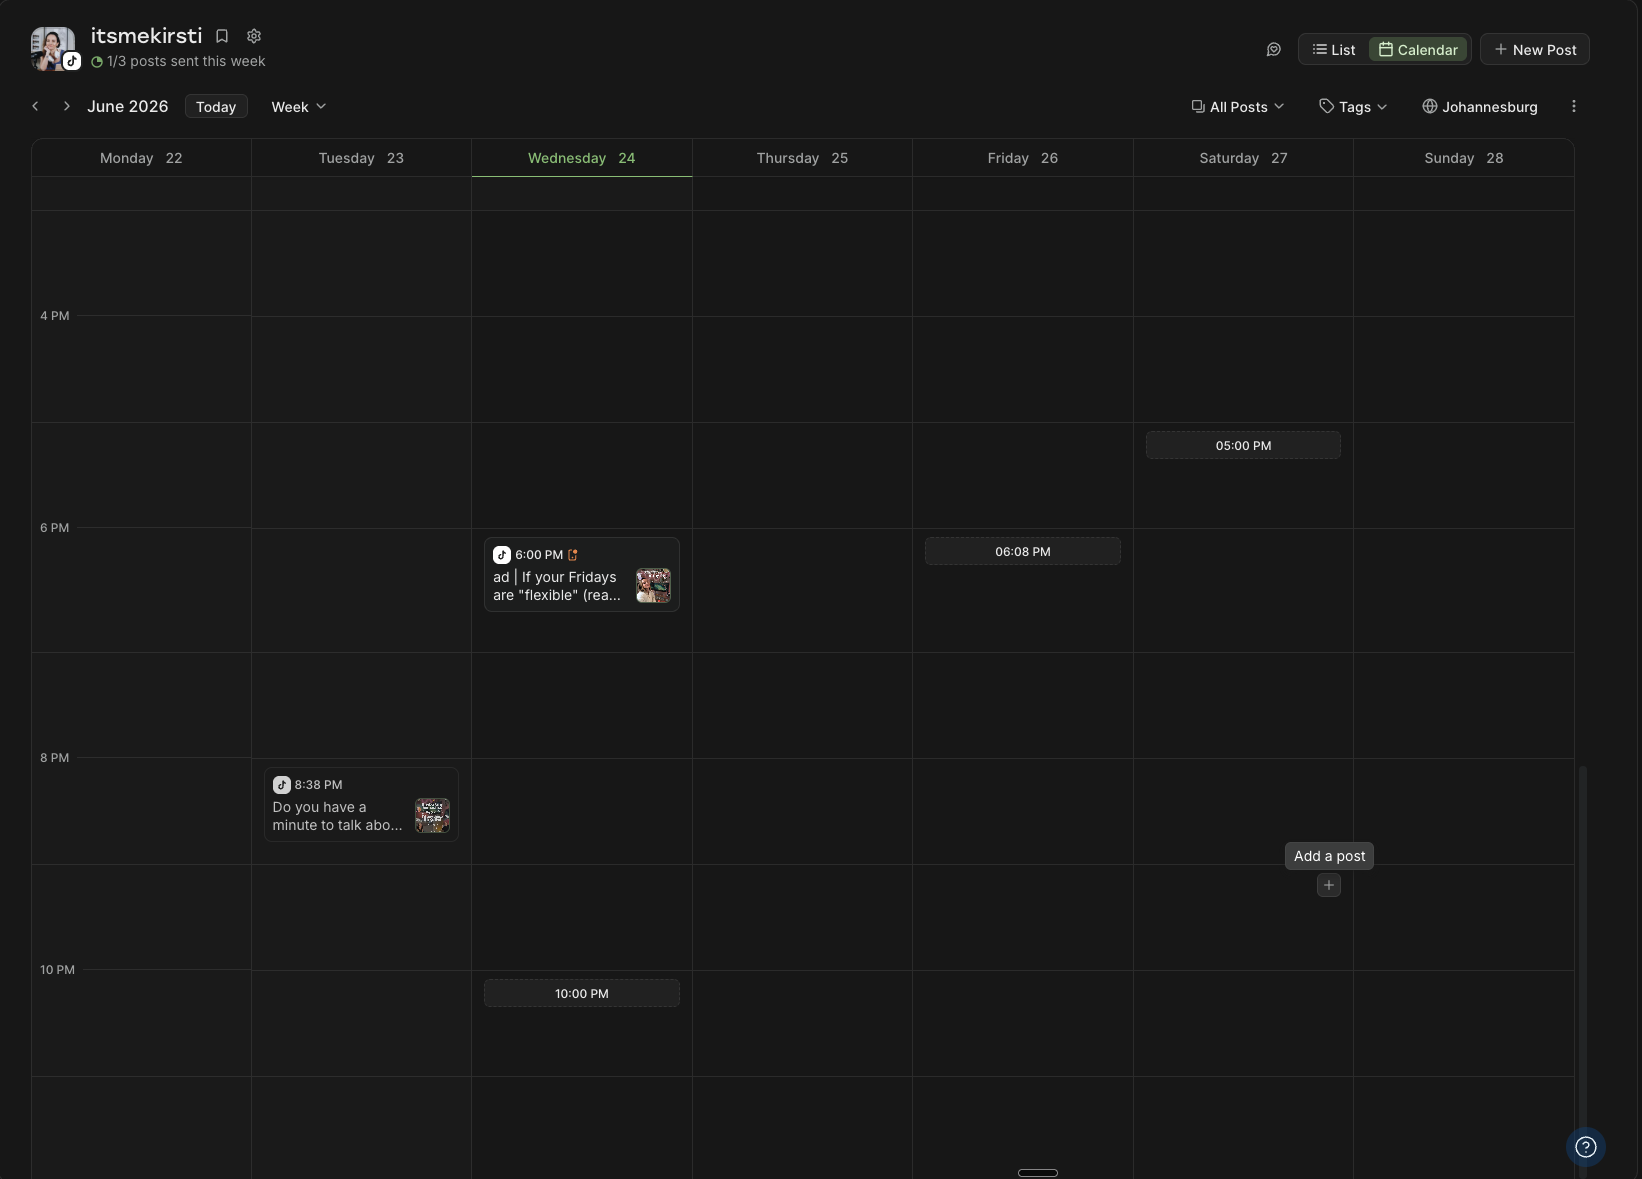
Using the info from our best time to post on TikTok study and analyzing my own video performance, I've pinpointed the best times for me to share a video on TikTok every day. I've set up my Buffer content calendar to reflect those high-performing timeslots.
Bonus: This works for any social channels, not just TikTok.
How to set up your Buffer like me
- Get started with Buffer
- Create your Buffer account if you don’t already have one, and click Connect Channels (you can connect up to three for free).
- Choose the platform you want to start with and follow the steps. When you connect a new channel, you’ll be prompted to create a posting goal.
- If you want to create a posting goal for a channel you have already connected, choose your channel from the channels list on the left-hand side, then click on + Set a posting goal right below the channel title.
- To set posting times to appear in your calendar, click on the cog icon next to the channel name (also visible in the image above). Scroll down to Posting slots to add or remove slots to your calendar.
11. Kiran Shahid’s calendar for personal brand-building
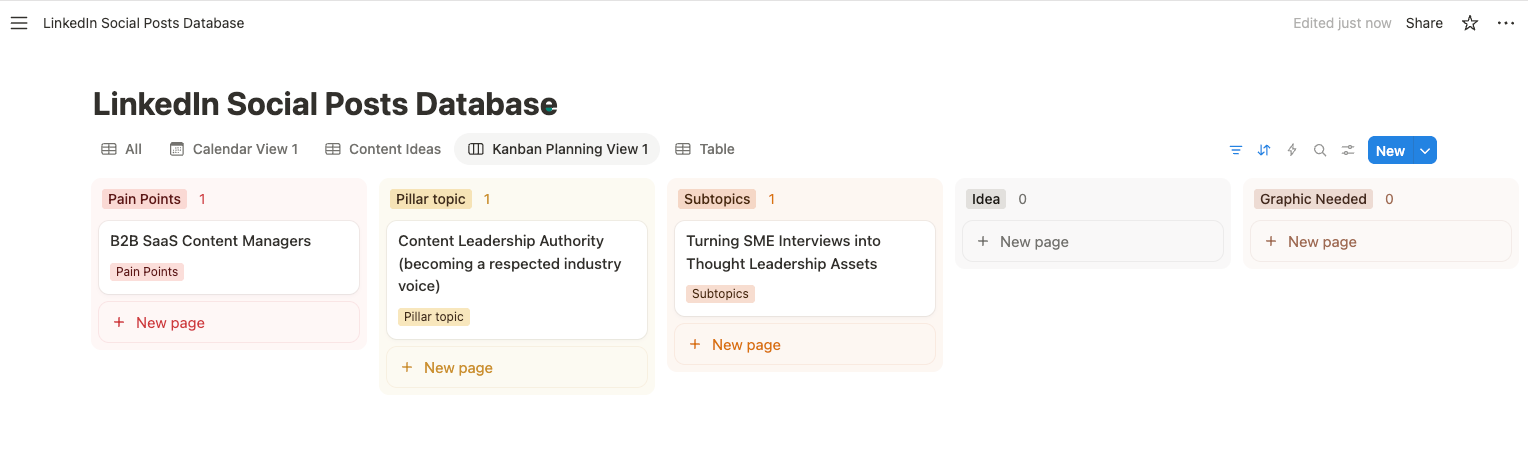
Kiran Shahid has built an impressive personal brand on LinkedIn. Thanks to the robust system she created on Notion while growing on LinkedIn, she’s finding her new Instagram project a whole lot smoother.
“I have these systems in place; I’m finding it so easy to start and have a content bank ready before I launch,” she explains. “If an idea pops into my head, I can note it down on Notion and develop it later when I sit down to plan my weekly content.”
The system is great for anyone who wants to be intentional about building a personal brand, she adds.
“Apart from making sure I never run out of ideas, having them all in one place makes repurposing a breeze, too. On days I’m feeling a bit lazy, I can simply copy-paste an old idea to make sure there isn’t a big gap in my scheduling.”
How to use this calendar
- Get the Notion template.
- Click on the Duplicate button (the juxtaposed squares icon) in the top right corner.
- Create a free Notion account if you don’t have one already.
- Kiran’s social media content calendar template is yours to edit as you see fit (use the tabs to see different sections and views).
How to create a social media calendar
Templates are the fast lane, but if none of them quite fit, building your own calendar from scratch isn't hard. At its core, a social media calendar maps out what you'll post, when you'll post it, and on which platforms so you can plan ahead instead of figuring it out on the fly. Here's the eight-step process I've used as both a social media manager and a creator.
1. Start with your strategy
Before you open any calendar tool, get clear on the basics: why you're posting, who you're trying to reach, and what you'll actually post about. Having clear goals, understanding your target audience, and defining your content pillars will make your marketing efforts much easier. It also helps to note any key dates, events, or campaigns on the horizon. Your calendar should support your overall goals, not just fill time slots.
2. Pick your tool and format
Choose the home for your calendar based on how you actually like to work. A spreadsheet like Google Sheets, a flexible workspace like Notion, or a publishing scheduler like Buffer are all solid starting points. The best system is the one you'll actually keep using, so try not to overthink it. You can always migrate later.
It would be remiss of me not to point out that there are a host of perks to housing your social media calendar in Buffer beyond the ability to plan and schedule in a single tool:
- A high-level monthly view for big-picture planning
- A more in-depth weekly view to see all the key details at a glance
- The ability to exclude certain channels from view for extra clarity and focus
- Thanks to Buffer’s mobile app, you can check or amend your calendar on the go
📲 Download the Buffer app for iOS here
📲 Download the Buffer app for Android here
3. Set your cadence
Decide how often you'll post on each platform, and be realistic. Three posts a week you can sustain beats seven you'll abandon by Thursday. Consistency is the one piece of advice that survives every algorithm update. As a general rule, try to plan at least two to four weeks ahead — far enough to stay organized, but with enough flexibility to swap things around when something timely comes up.
4. Build the skeleton
Map out your posting slots (the days and times you'll publish). At Buffer, we think of the posting schedule for every social media platform as a Queue — basically, set time slots every week for posting.
You don’t have to stick to this, of course, but it’s a really handy way to commit to the cadence you laid out in your social media strategy. As time goes on and you experiment with different timings and frequencies on all the platforms you’re using, you’ll be able to pinpoint the slots that work well for your target audience.
To set up your Queue, click on your chosen channel, then click on the cog icon next to your name and profile picture. Here you'll find the options for your posting slots, which you can edit according to your strategy.
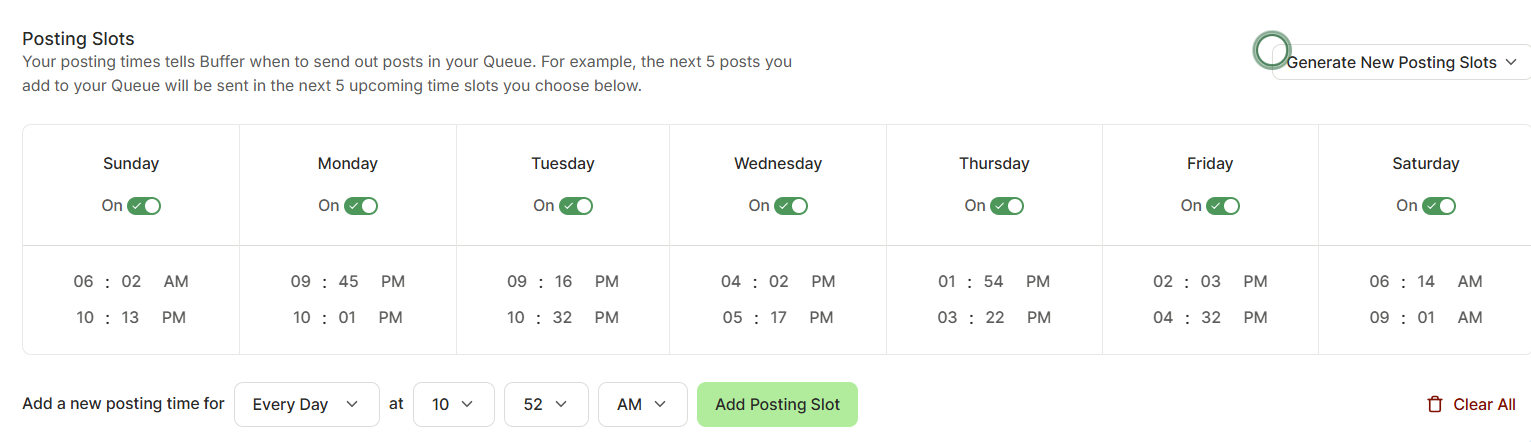
5. Get your content ideas down
Now, it’s time to roll up your sleeves and get to work on the actual content creation. This is where Buffer’s Create Space comes in. It’s a versatile system that you can use as a hub for all your ideas.
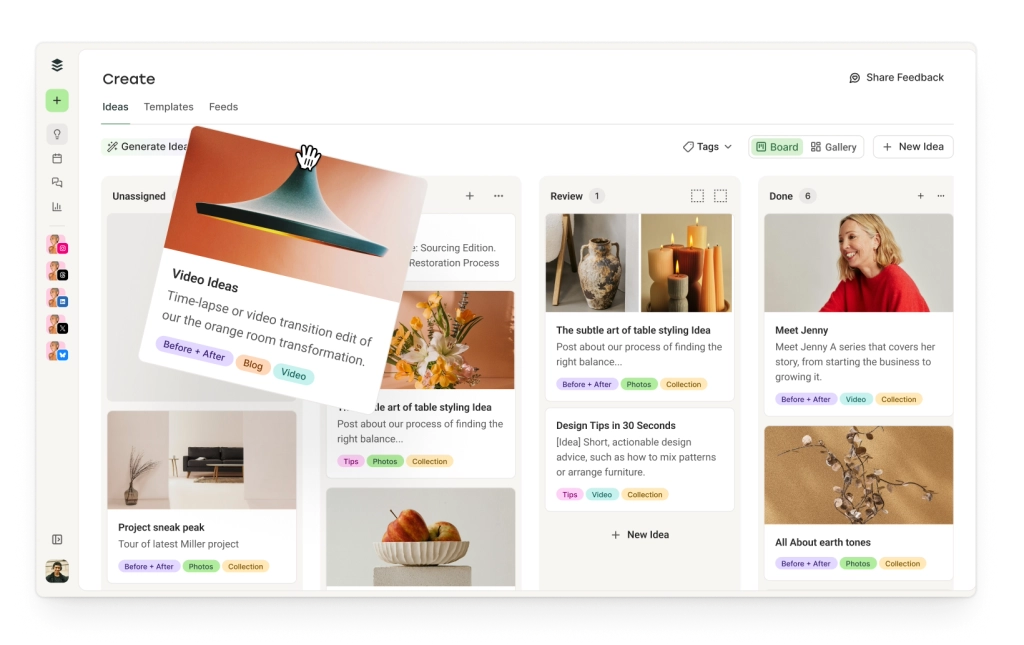
6. Organize in a way that makes sense to you
Color coding is my organizational love language (you should see my bookshelf). Color-coding or tagging by content pillar, status, or format makes a busy calendar legible at a glance. It also makes it far easier to spot gaps like three promo posts in a row, or a week with no video.
You could use Buffer's Tags to tag posts by content pillar, post status, format, and platform.
What’s really neat about Tags is that they translate over to the Insights section. You can filter your analytics by tag and measure the performance of one content pillar against another. This has been incredibly useful for me as I experiment with my content pillars to see which resonate the most with my audience.
Here's how to create and manage Tags on Buffer:
7. Start planning
Now comes the fun part: slot your ideas into the calendar. Select an idea that’s ready to go in Create, then click on the Create Post button. Tailor your post to each platform, then choose if you want to schedule, queue, or post immediately.
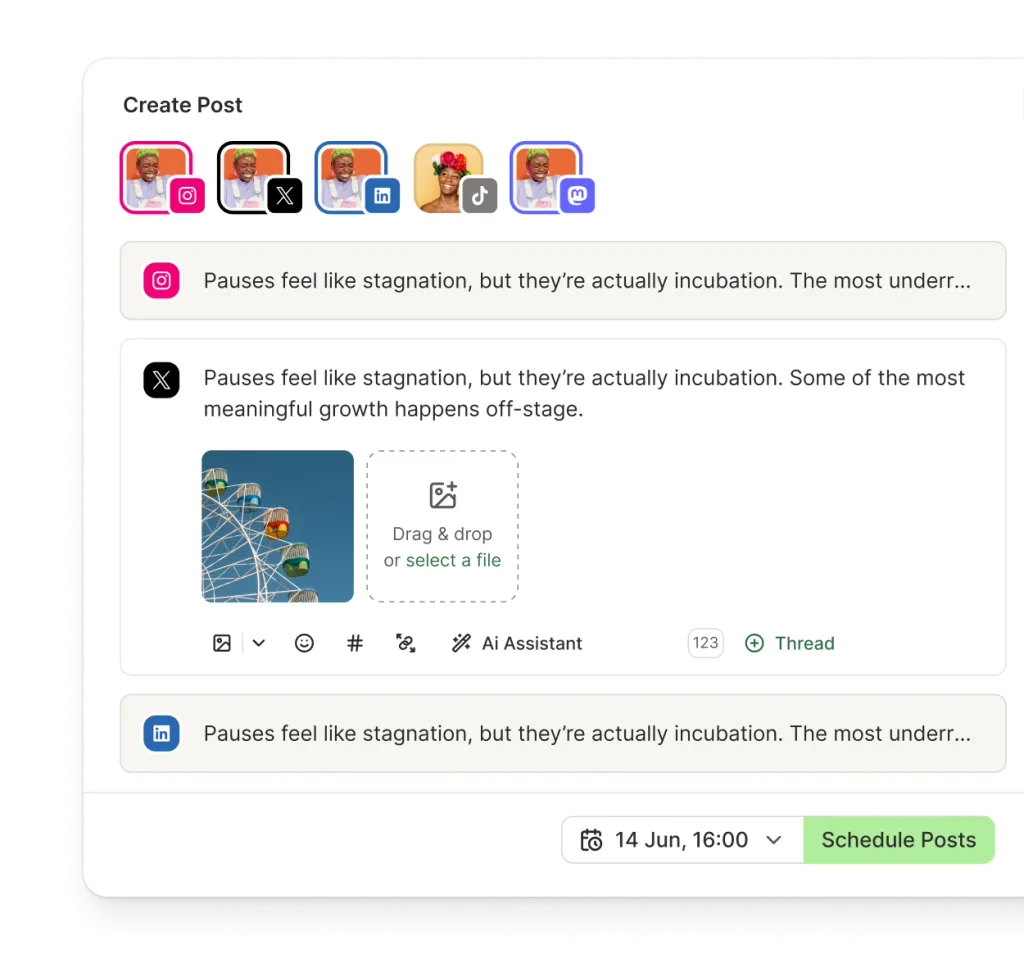
8. Review and adjust
A calendar isn't set in stone. Check in at the start of each week, move things around, and leave room for reactive posts. Over time, your own analytics will tell you what's working. Keep an eye on metrics like impressions, clicks, likes, and comments to spot patterns.
Buffer's Insights make this easy to do at a glance. As you learn what resonates, you'll start repurposing your best-performing posts and doubling down on what your audience loves.
Social media success starts with a calendar
While a lot of the guidance for social media success changes often, there’s one tip that always remains: be consistent. Whether you're a content creator, social media manager, or small business owner, showing up consistently matters more than posting constantly. Even two or three well-planned posts a week can build real momentum. And the best way to stay consistent? A social media content calendar.
Pick a template from the list above, or build your own — and if you want a calendar that also publishes for you, give Buffer's free plan a try.
Social media content calendar FAQs
If you're new to using social media calendar templates (or just creating a social media content planner in general), here's some handy guidance from someone who lives by them.
Why do I need to use a social media content calendar?
A social media calendar keeps your content organized and your posting consistent — two things that matter more than almost anything else on social media.
Here's what it actually helps with:
- Consistency. Regular posting keeps your audience engaged. A calendar means you're never scrambling for something to post at the last minute.
- Time savings. Batch your content creation in one focused session instead of switching context every day.
- Strategic planning. Map your posts around key dates, campaigns, and goals so your content works toward something, not just fills a slot.
- Content variety. See your mix at a glance and make sure you're not posting the same type of content on repeat.
- Team collaboration. If you work with others, a shared calendar keeps everyone aligned on what's going live and when.
What should I include in my social media calendar?
Your calendar doesn’t need to be fancy; it just needs to work for you. Here are a few things most calendars include:
- Posting dates and times
- Platform and post format (reel, story, text post, etc.)
- Captions and visuals (or at least notes)
- Content pillar or category
- Status (drafted, scheduled, published)
Some people go all in with hashtags, CTAs, social media campaign labels, audience segments, and all the necessary details on their marketing calendar, but if that feels overwhelming, start with a simple social media planner and build from there.
Is there a free template for a social media calendar?
Yes, this article includes 11 free templates in a range of formats:
- Buffer's calendar: plan and auto-publish posts in one place, no download needed
- PDF calendars: a simple weekly view, a monthly overview, and one pre-filled with the best times to post on each platform
- Google Sheets: a customizable spreadsheet you can share with a team
- Notion: flexible enough to store captions, links, and media alongside each post
- Canva: editable versions of the PDF calendars if you want to add your own colors and branding
Every template above is free. Scroll up to the full list to find the format that suits how you like to work.
How do I create a social media calendar?
Here's the short version: Start with your goals and content pillars, choose a tool, set a realistic posting cadence, collect your ideas, and schedule your posts. Then review your analytics regularly and adjust your calendar as you learn what works.
More social media marketing resources
- How to Create a Social Media Marketing Strategy — 7-Step Guide
- Buffer vs. Hootsuite: Which Social Media Management Tool Is Right For
- The Best Social Media Scheduling Tools (+ How to Find the Perfect Fit)
- The 11 Best Social Media Management Tools — Tried + Tested
- 9 Tools for Social Media Automation (+ Automation Pro Tips)
- The Best Social Media APIs for Developers + Vibe Coders
Choosing the right trending audio to accompany your latest Instagram post is an art, not a science. Still, opting for a trending sound or music clip could provide the boost you need to get your video on the Instagram Explore page or Instagram Reels feed.
While it used to be just for Instagram Reels, you can now also add trending audio to your carousels and single photo posts. This gives your posts a better chance of landing on the Explore page, and it makes carousels and photos eligible to appear on the reels feed, too. That opens up a new way to expand your reach.
But where can you find trending audio on Instagram? If you feel like you’re always chasing the tail-end of trending songs on the app, you’ve come to the right place.
Here are some of the most viral, versatile, trending songs and sounds on Instagram right now.
Jump to a section:
13 trending songs and audio on Instagram
Here's a quick summary of what is trending in September 2026.
Trending songs on Instagram in 2026
- 1. original audio by caitbcontent
- 2. Ring My Bell
- 3. Less than a lover
- 4. Mix by lisahoogendoorn
- 5. Mix by alchemysticwellness
- 6. Original audio by bananalace
- 7. Original audio by thefoundryavondale
- 8. Yummy Little Day
- 9. Original audio by olyabelakoneva
- 10. Original audio by cosrx
- 11. petal
- 12. Timber
- 13. Cherry on the Edge
1. original audio by caitbcontent
This original audio from caitbcontent is the soundtrack to the "whimsymaxxing" trend, where creators embrace Y2K-inspired maximalism. It's a great one for brands with a little sparkle. The trend also extends to everyday rituals, turning little touches like heart-shaped ice cubes or sprinkles in your coffee into opportunities to make life a little more fun. Rhinestones compulsory.
2. Ring My Bell
I nearly forgot about this song, but I'm glad it's back! Ring My Bell by Anita Ward may have been released back in 1979, but its disco energy is having another moment on Instagram. Creators are using it for outfit videos and other playful, feminine lifestyle content.
3. Less than a lover
Less Than a Lover by JENNIE was released in July 2026, but it's already been used in over 221K reels on Instagram. Creators are using the dreamy track as a backdrop for inspirational, aesthetic, and romantic content.
4. Mix by lisahoogendoorn
Using audio from @lisahoogendoorn, the "Two Best Friends" trend is the perfect excuse to show off what makes you and your bestie different. Replace your face with your contrasting preferences, and you have a sweet little montage of your contrasting vibes.
5. Mix by alchemysticwellness
This original audio from alchemysticwellness uses the can-can to put a playful spin on the "When you're a professional but you're also..." trend. It's a fun way for business owners and professionals to show the personality (and often a little chaos) behind the polished headshot.
6. Original audio by bananalace
This original audio from bananalace is behind the "Balance your expenses" trend, where creators take the concept of budgeting very literally, balancing everything from products to pets.
7. Original audio by thefoundryavondale
This trend is all about the moment someone finally gives you the little push you needed. Creators are taking it literally, showing themselves getting an actual shove into buying something, starting a new hobby, or trying something they've been putting off. It's a great fit for brands to convince people to take the first step.
8. Yummy Little Day
Yummy Little Day by emilogue is the soundtrack to wholesome “a yummy little day” content on Instagram. Creators are using the gentle audio for cutesy day-in-the-life clips, curated moments of cozy, and definitely plenty of crafting.
9. Original audio by olyabelakoneva
This original audio from olyabelakoneva is behind the “POV: your phone is ringing” trend, where creators unpack their very full bags to explain why they can't find their phone. Makeup, sunglasses, fragrances, and everything else they somehow carry around come tumbling out in the process.
10. Original audio by cosrx
This original audio from cosrx is behind the “Bad Dream” trend, where creators give products a hilariously dramatic nightmare sequence. The video starts with the product facing some kind of disaster before cutting to it tucked safely into bed and waking up from a bad dream. It's an easy format for brands to recreate with their own products.
11. petal
petal by Ariana Grande continues to bloom on Instagram (and everywhere, really). The song is dreamy and synth-heavy, lending itself to fashion, beauty, and even dance.
⚠️ Contains an expletive.
12. Timber
Timber by Pitbull feat. Kesha is having a throwback moment on Instagram, bringing plenty of good times energy back to reels. The big drop works particularly well for fast-cut edits, such as showing off a workout, a night out, or an adventure.
13. Cherry on the Edge
Cherry on the Edge by miss rany is giving girl power on Instagram. Creators are using it for everything from beauty and fashion to gym updates, outfit reveals, and travel vlogs. When you hear the vocals and vibe, you'll see why. *adds to Spotify playlist.
How to find trending audio on Instagram
Not loving any of the above options? No sweat: here’s a crash course on how to find trending sounds on Instagram Reels.
- Use Instagram’s trending audio list: Check Instagram’s built-in leaderboard for the top 50 trending songs updated every few days. Find it when creating a post, story, or reel on the Instagram mobile app by tapping the music icon, then selecting ‘Trending.’ Save tracks for later with the bookmark icon.
- Check the professional dashboard: If you have a professional account in the US, visit the Professional Dashboard on your profile, scroll to Tips and resources, and tap Trending audio for curated suggestions on Instagram Reels.
- Look for the arrow icon: As you scroll reels, watch for an upward arrow next to audio tracks—that’s Instagram’s indicator that a sound is trending.
- Follow Instagram’s Creators account: The @creators account shares regular updates on trending songs, editing tips for Instagram Reels, and feature announcements. Check out their IG Anthems highlight for more trending songs and trending sounds.
- Check TikTok or YouTube Shorts for early trends: Many trending Instagram Reels sounds originate on TikTok or YouTube Shorts. Browse trending sounds there, then search for those tracks on Instagram to get ahead of the curve.
Don't forget about original audio
As you can see from some of the audio we've mentioned on the list, many creators are making waves with their own clips, and jumping on a trending original track can give your content an extra boost and help it stand out in feeds.
💡Pro tip: You can find trending original audio on your professional dashboard under the Original audio tab.
Happy posting with these trending Instagram songs!
You're well-equipped to find the next great trending audio on Instagram for your reels, carousels, or single-photo posts — and you've got several great tracks to put in your back pocket if you get stuck!
If you’ve created an Instagram Reel with one of these trending songs, we’d love to see it. Tag @buffer on Instagram so we can find you!
]]>